Heavenly Homemakers

Encouraging women in homemaking, healthy eating and parenting

  • Home
    • About
    • FAQs
  • Recipes
    • Bread and Breakfast
    • Condiments
    • Dairy
    • Main Dishes
    • Side Dishes and Snacks
    • Desserts
    • Gluten Free
    • Instant Pot
    • Crock Pot
    • Heavenly Homemaker’s Weekly Menus
  • Homemaking
    • Real Food Sources
  • Store
  • Contact
    • Advertise
    • Disclosure
    • Privacy Policy
  • Simple Meals
  • Club Members!

Grinding Wheat into Flour: Getting Ahead

January 19, 2022 by Laura 2 Comments

This post may contain affiliate links which won’t change your price but will share some commission.

Using my time and energy for grinding wheat into flour has felt a little bit difficult lately. Here’s an idea I decided to try!

I love using freshly ground wheat in our baked goods. In fact, I haven’t bought flour at the store in a good long while. Years and years. Instead, I’ve bought hard wheat and soft wheat from Azure Standard. Then I grind the wheat into flour to use in baking.

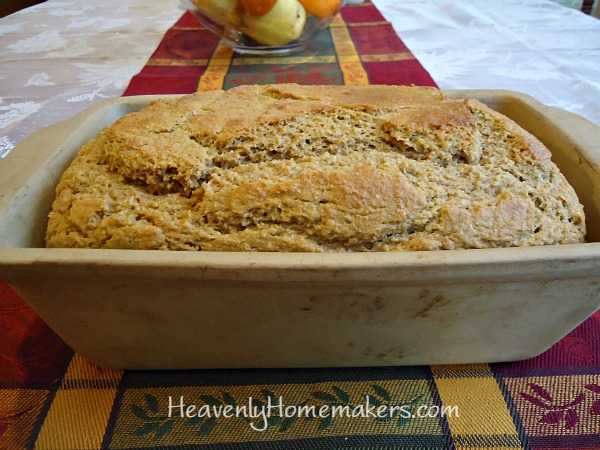
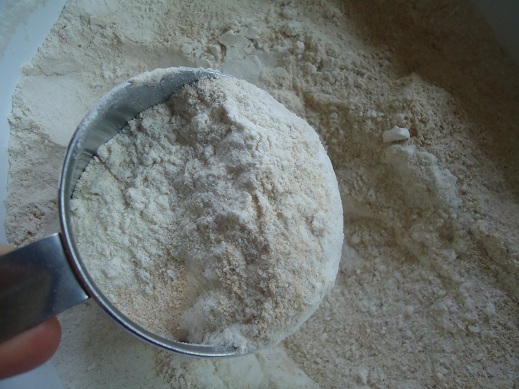
There’s no comparison! Freshly ground flour is incredible and delicious! Here’s how I do it —>

How to Grind Flour in a Grain Mill! #grainmill #grindflour #wholewheatflour

Meanwhile, God has added a wagonful of littles to our home.

These sweethearts keep me from baking much at all, much less grinding my wheat into flour for baking. Often, I would think about baking something if I had a spare 10-15 minutes, only to nix the idea simply because I didn’t want to have to first grind flour for the task.

Maybe this is a season for me to buy flour instead of wheat? Maybe. But I already had several pounds of wheat in storage. I didn’t want it taking up space or going to waste. So here’s what I did one morning when I had a friend over to help with all the kids!

Grinding Flour Into Wheat: Getting Ahead

I had a marathon wheat grinding morning.

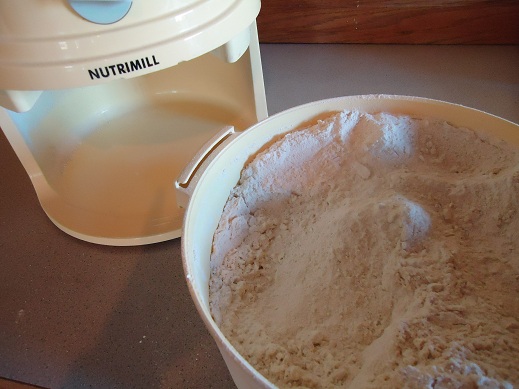
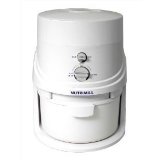
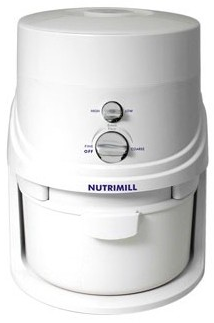
I don’t keep my Nutrimill on the countertop, so digging it out and cleaning up after myself never sounds fun during this crazy season of life. But getting my Nutrimill out to grind a bunch of flour all at once? Making ONE BIG MESS instead of many small messes? Let’s do this.

I labeled freezer bags with “Soft Wheat” and “Hard Wheat” (read more about this below), then I kept running batch after batch of wheat through the mill to grind into flour. I transferred the fresh flour to gallon-sized freezer bags, then put the bags into the freezer.

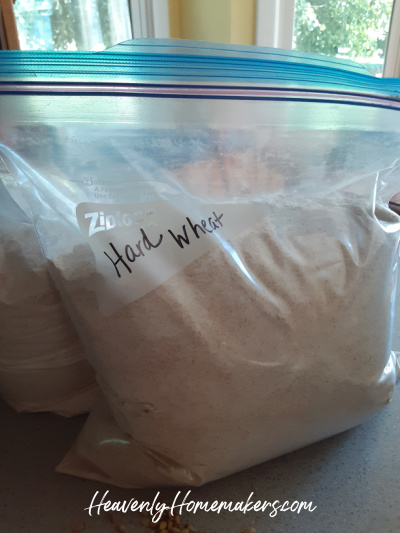
All said and done, I ended up with about 10 gallons of flour in my freezer! (And a big mess, but whatever. Better one mess than ten, right?)

So, now the flour isn’t fresh anymore?

Well, true. But since I’m keeping it in the freezer, it’ll stay good for a long time, and it will still taste great! Considering the fact I was going to buy flour from the store to get me by until I am able to grind flour again, I feel like this is still a better option: to grind my wheat into flour ahead of time and freeze it until I need it!

After this runs out, I’ll see how I’m doing. I may still feel the need to buy my flour already ground for a while. But as for now, I sure do love that I don’t have to pull out my mill for a while. When I need to bake something or make pancakes, I can just pull out the already-ground flour from my freezer!

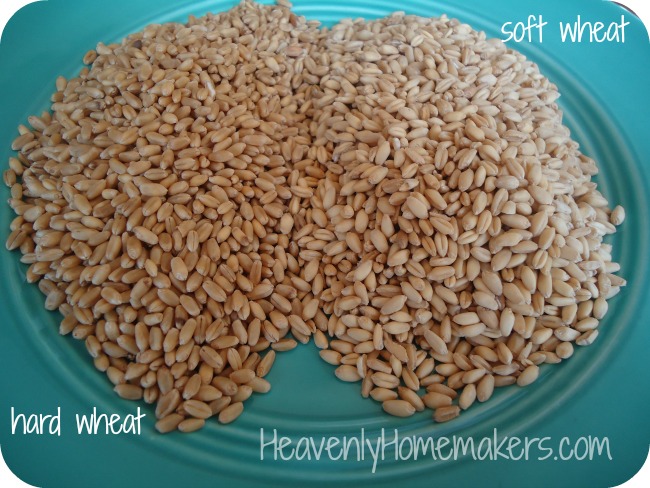
Hard Wheat vs. Soft Wheat

Both grains grind into whole wheat flour. I like having both on hand and here’s why:

  1. Use hard wheat to make yeast bread recipes.
  2. Use soft wheat to make non-yeast recipes like muffins and pancakes.

It is possible to use hard wheat for ALL recipes. But I like soft wheat because it makes such a nice pastry flour for fluffy muffins and such. Here are some of our favorite wheat recipes:

Favorite Hard Wheat Recipes
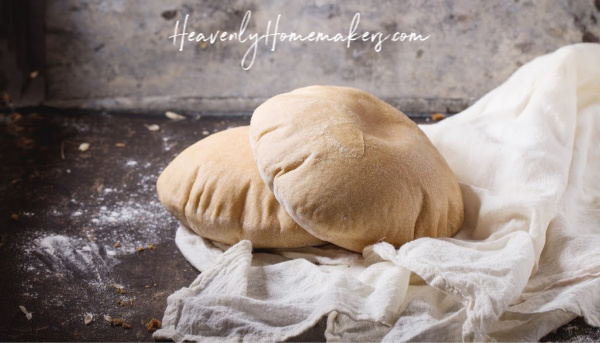
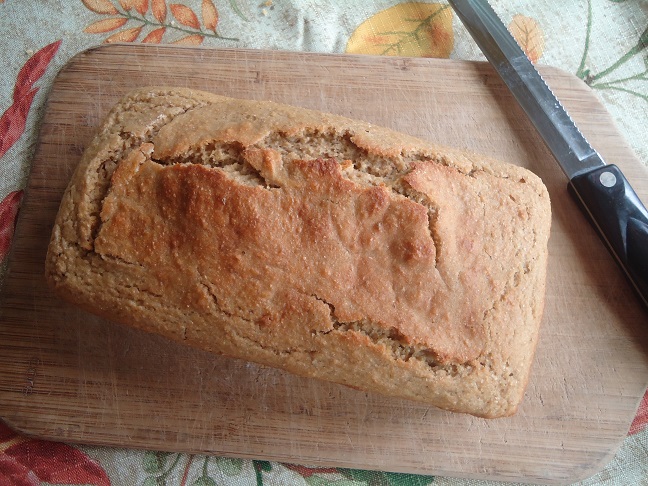
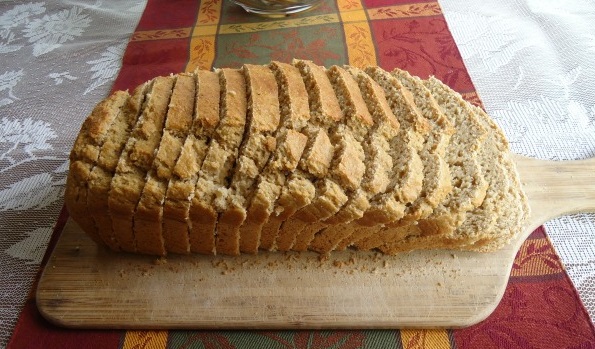
  • Stir-n-Pour Bread
  • Whole Wheat Butterhorns
  • Whole Wheat Cinnamon Rolls
  • One Hour Whole Wheat Yeast Rolls
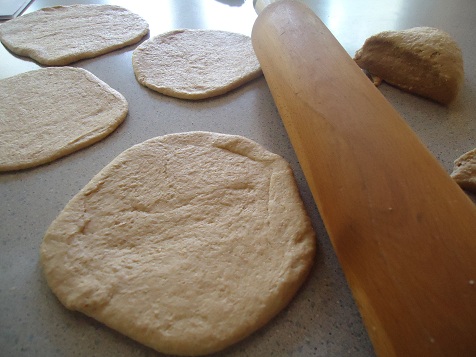
  • Homemade Soft Pretzels
  • Homemade Pizza Crust
  • Overnight Waffle Batter

Favorite Soft Wheat Recipes

  • Any of these 40+ Muffin Recipes
  • Raspberry Oatmeal Bars
  • Giant Breakfast Cookies
  • Peanut Butter Pancakes
  • Poptarts
  • Quick Baking Mix
  • Whole Wheat Waffles
  • Simple Whole Wheat Pancakes
Heavenly Homemaker's Club Members: Access your homepage and all your fantastic resources here! Not a member yet? Please join us!

Whole Grain Pumpkin Bundt Cake

November 13, 2019 by Laura Leave a Comment

This post may contain affiliate links which won’t change your price but will share some commission.

Don’t let the “whole grain” part of this Pumpkin Bundt Cake scare you. If you use the right kind of whole grain, no one is the wiser.

I prefer to use freshly ground soft white wheat when I make cakes like this. The flour is light and fluffy, acting much like all-purpose white flour. I love it! (Here are more posts sharing about grinding flour and choosing the right grain.)

You might notice that this recipe is quite similar to my Pumpkin Breakfast Cake recipe. See, the fun thing about recipes is that you can simply tweak them just a little, pour them into a different type of baking pan, and create a whole new treat!

Need a bundt pan? I have this one, and it sure makes holiday baking more fun!

Whole Grain Pumpkin Bundt CakeYum

Whole Grain Pumpkin Bundt Cake
 
Save Print
Author: Laura
Serves: 16
Ingredients
  • 3 cups whole wheat flour (I used freshly ground soft white wheat)
  • 1 cup sucanat or brown sugar
  • 1 teaspoon baking soda
  • 2 teaspoons baking powder
  • 1 teaspoon sea salt
  • 1 teaspoon cinnamon
  • 4 eggs
  • 2 cups pureed pumpkin (or one 16 ounce can)
  • 1 cup melted coconut oil (or butter)
Instructions
  1. Whisk all ingredients together until smooth.
  2. Pour into a well-buttered bundt cake pan.
  3. Bake in a 350 degree oven for 45-55 minutes or until a toothpick inserted in the middle of the cake comes out clean.
  4. Allow cake to cool for 15 minutes before removing it from the pan.
  5. Glaze with any of the tasty frosting recipe options below.
3.5.3229

Glaze or Frosting Recipes

Maple Cream Cheese Frosting

8 ounces softened cream cheese
¼ cup softened butter
3-4 Tablespoons real maple syrup
1 teaspoon vanilla extract

With a hand mixer (or in your blender), whip together all ingredients until smooth. Spread over cooled cake.

Stevia Sweetened Cream Cheese Frosting

8 ounces softened cream cheese
1 cup heavy whipping cream
1/2 teaspoon vanilla extract
Liquid stevia to taste (I use 2 droppers full)

Whip ingredients together until smooth. Spread over cooled Cake.

Orange Glaze

¼ cup orange juice
¼ cup honey
½ teaspoon vanilla extract
1 teaspoon almond extract

Whisk ingredients together until smooth. Drizzle over cooled cake.

Heavenly Homemaker's Club Members: Access your homepage and all your fantastic resources here! Not a member yet? Please join us!

How to Make EASY Pita Bread

October 20, 2019 by Laura 2 Comments

This post may contain affiliate links which won’t change your price but will share some commission.

I shared this Easy Pita Bread recipe here several years ago. But I decided that it’s worth sharing again as we head into fall baking season. Ready to watch some bread-making magic?

Don’t let the idea of making Homemade Pita Bread scare you! It’s as easy as:

  1. Mixing a few basic ingredients together.
  2. Rolling dough into little circles.
  3. Baking the little circles at high heat until they puff up and turn brown.

Also, filling them with delicious meat salads is quite fun too. Our favorites are:

  1. Chicken Salad
  2. Tuna Salad

Making Pita Bread will make you feel like a fancy cook, even though the work involved really isn’t at all complicated. Plus, watching the bread puff up in the oven is a lot of fun!

How to Make Easy Pita BreadYum

How to Make EASY Pita Bread
 
Save Print
Author: Laura
Serves: 16
Ingredients
  • 3 cups whole wheat flour (I use freshly ground whole wheat from hard white wheat)
  • 1½ teaspoons yeast
  • 1 teaspoon sea salt
  • 2 Tablespoons honey
  • 1 Tablespoon olive oil
  • 1 cup warm water
Instructions
  1. Stir together flour, yeast, and sea salt.
  2. Add honey, oil, and water, stirring until a nice dough forms.
  3. Knead the dough on a well floured surface for 4-5 minutes. (In other words: Mix dry ingredients. Add liquid ingredients. Stir well. Knead.) See? Easy.
  4. Place dough back into the bowl, cover, and allow dough to rest and rise for about an hour.
  5. Pull dough out of the bowl.
  6. Knead for about 30 seconds.
  7. Cut dough into eight equal parts.
  8. Roll each into a circle, about six or seven inches in diameter.
  9. Place circles directly onto a baking sheet after rolling.
  10. I baked mine on a well seasoned baking stone, so didn't find that I needed to grease my pan, but feel free to grease yours if you need to.
  11. Allow the dough circles to rest/rise on the baking sheet while you heat your oven to 500°.
  12. Place baking sheet of pita circles into hot oven.
  13. Bake for 5-8 minutes - just long enough for them to puff up and brown slightly.
  14. Allow pitas to cool, slice in half, and serve as desired.
3.5.3229

Have you ever tried making Pita Bread before? What are your best suggestions for Pita Bread filling?

Heavenly Homemaker's Club Members: Access your homepage and all your fantastic resources here! Not a member yet? Please join us!

Is it Worth the Money to Buy a Nutrimill?

August 15, 2019 by Laura 1 Comment

This post may contain affiliate links which won’t change your price but will share some commission.

I’ve had my Nutrimill for 14 years now. Have I used it much during those 14 years? Saved any dough (ha, see what I did there)? Have I found that it is worth the money to buy a Nutrimill?

Is it Worth the Money to Buy a Nutrimill?

Nutrimills cost around $249 $219 right now. That’s the cost of around 73 loaves of high quality 100% Whole Grain Bread from the store. So is it worth the money to buy a Nutrimill so we can make our bread instead of buying it?

Well, considering that our family can go through at least all 73 of those loaves of bread in just a few months, I’d say yes. Especially when I consider these reasons:

  • My Homemade Whole Grain Bread only costs around $1.50/loaf.
  • There are only 5 simple ingredients in my homemade bread, and I have those ingredients on hand all the time for ease.
  • I can make this Homemade Bread recipe with about 5 minutes of time and effort.
  • Bread made from freshly ground flour is the most amazing bread on the planet.

So grinding fresh flour in a Nutrimill actually makes our bread healthier, more delicious, and half the price of store-bought.

Is a Nutrimill a Must-Have?

Could I live without my Nutrimill? I guess. Does it save me time in the kitchen? Not really. But do I love having such a great appliance to help me grind fresh grain for our baked goods? Oh my goodness, YES!

I frequently grind hard and soft white wheat in my Nutrimill, which turns out the most delicious flour, which then turns out the most delicious breads, muffins, cakes, cookies, pancakes, and waffles. Now that I’m so used to baking with freshly ground flour, I’d have a hard time turning back. We’re pretty spoiled! ;)

Want more details about using flour ground in a Nutrimill:

    • The Difference Between Red and White Wheats
    • How to Grind Flour in a Nutrimill
    • What Kind of Flour is Best if You Don’t Grind Your Own?
    • What is Pastry Flour, Where Do I Get it, How Do I Use It?
    • All of Our Bread and Muffin Recipes
    • Whole Grain Recipes

Where do I get grain for my Nutrimill?

I order all of mine in bulk from Azure Standard. I keep a supply of Hard White Wheat (for yeast bread) and a supply of Soft White Wheat (for muffins, cookies, and cakes) on hand at all times. Then I grind it ahead and store it in an ice cream bucket in the freezer to pull out and use as needed.

I highly recommend checking to see if Azure Standard is an option near you. I’ve ordered from them for years and would have a hard time getting by without their monthly deliveries!

So is it worth the money to buy a Nutrimill? I say yes! What do you think?

Heavenly Homemaker's Club Members: Access your homepage and all your fantastic resources here! Not a member yet? Please join us!

My Top 3 Small Kitchen Appliances That Save Hours of Time and Energy

April 21, 2019 by Laura 4 Comments

This post may contain affiliate links which won’t change your price but will share some commission.

If my house started on fire, I would grab my family and my Blendtec and get out as fast as I could. Just kidding. I’m not that tied to material possessions. But I felt it was worth a post to share my top 3 small kitchen appliances I feel I can hardly live without.

I’m not exaggerating when I tell you that these gadgets save me hours of time and energy every week. As I’ve worked to simplify my real food kitchen, I have been amazed at how I’ve come to rely on 3 very important appliances.

Could I do without them? Well yes. Grandma survived all her many years of cooking for a large family without any one of the items I’m sharing with you today. But Grandma also didn’t have indoor plumbing for a good many years, and then welcomed it gladly when it became available. I’m pretty sure if she was raising her family now, she would very much enjoy the appliances I love having access to!

My Top 3 Small Kitchen Appliances

If you’ve been reading here long, you can probably guess my top three small kitchen appliances. Just for fun, I added two runners up in my “if I had to choose to keep only 3 small appliances, which ones would I keep?” contest. :)

1. Blendtec

Indeed. If I could only keep one appliance in my kitchen, it would be the Blendtec. I use this multiple times each week, and sometimes multiple times each day.

I mix batter in it, whip cream in it, make smoothies in it, whip mini cheesecake filling in it, the list goes on and on. From cakes to muffins to pancakes – the Blendtec takes away my need to stir and mix. Cream goes from liquid to perfectly whipped in less than 30 seconds. Recently I dumped in all the ingredients for these Mini Crustless Cheesecakes and had them in the oven within a grand total 5 minutes. Beautiful!

In so many ways, my Blendtec makes my cooking and baking effortless. It is extremely high powered, which is reflected in the price. A $25 blender gives only $25 of effort (and in my experience, lasts less than one year in my kitchen). The Blendtec, though much higher in price, comes with a warranty and is so high powered it turns frozen fruit into liquid in just seconds. Unbelievable!

I highly recommend saving up and investing in a Blendtec. Oh the time and energy you’ll save!

Recipes you’ll need for your Blendtec:

  • Crustless Cheesecake Cups
  • Chocolate Whipped Cream
  • Regular Whipped Cream
  • All the Muffins :)
  • Simple Whole Wheat Pancakes
  • Easy Guacamole
  • Cream Cheese Salsa Dip

2. Instant Pot

I stubbornly refused to get an Instant Pot for several years after they became popular (silly me), and now I am one of the biggest advocates for them! This gem saves so much time and keeps us eating healthy too!

I love that it makes wholesome, rich beef or chicken broth with so little effort on my part. I LOVE that I can cook 7 pounds of frozen hamburger meat in it in just 30 minutes!! And I love the many meals and side dishes I can make in it within just a few minutes.

If you can swing it, get yourself an Instant Pot. I have the 8-quart variety for my large family. Here’s the 6-quart Instant Pot if that fits your needs more!

Recipes you’ll need for your Instant Pot:

  • Bone Broth
  • Simple Creamy Chicken Soup
  • Simple 10-Minute Mac and Cheese
  • Simple One Dish Chicken Florentine
  • Mashed Potatoes
  • Beef Roast
  • Simple Chili Mac
  • Simple Lasagna Casserole
  • How to Cook 5 lbs of Frozen Hamburger Meat in 30 minutes
  • Simple Hashbrown Casserole

Psst: I highly recommend that you bookmark our Instant Pot Recipes page for easy access as we continue to update it!

3. Crock Pot(s)

Yes indeed. I have two large crock pots and I often use them both at the same time. My favorite is this 8-Quart Programmable Crock Pot, but I also have this Basic 7-Quart Crock Pot, which works great too!

I’ve learned many tricks through the years that help me throw VERY quick meals into the crock pot so that later in the day, our meal has cooked itself. (See recipe links below.) What a great way to continue putting real, delicious food on the table on busy days!

Recipes you’ll need for your Crock Pot:

  • Simple Crock Pot Chicken Soup with a Kick
  • Simple Creamy Chicken Stew in the Crock Pot
  • Simple Hawaiian Crock Pot Chicken
  • Simple Crock Pot BBQ Spareribs
  • Simple Overnight Saucy Crock Pot Chicken
  • Simple Overnight Melt-in-Your-Mouth Beef Roast
  • Simple 3-Cheese Crock Pot Pasta
  • Simple Crock Pot Shredded Ranch Chicken (for salad or tacos)
  • Simple Crock Pot Pizza Casserole
  • Simple Barbecue Beef Roast
  • Simple Crock Pot Taco Pasta
  • Simple Hawaiian Beef Roast
  • Simple Hashbrown Casserole
  • Simple Lasagna Casserole
  • The Simplest White Chicken Chili
  • Simple Crock Pot Applesauce BBQ Chicken
  • Simple Three Cheese Spaghetti
  • Simple Crock Pot Salsa Shredded Beef
  • Easiest Beef Roast in the Instant Pot
  • Simple One-Dish Chicken Florentine
  • Simple Creamy Layered Enchiladas
  • Simple Creamy Chicken Soup
  • Simple Cheesy Salsa Chicken

Top Small Kitchen Appliances, My 2 Runners Up

Just for fun, I thought it would be fun to add a couple others to my list of appliances I love and use often!

4. Nutrimill

Could I live without my Nutrimill? I guess. Does it save me time in the kitchen? Not really. But do I love having such a great appliance to help me grind fresh grain for our baked goods? Oh my goodness, YES!

I frequently grind hard and soft white wheat in my Nutrimill, which turns out the most delicious flour, which then turns out the most delicious breads, muffins, cakes, cookies, pancakes, and waffles. Now that I’m so used to baking with freshly ground flour, I’d have a hard time turning back. We’re pretty spoiled! ;)

Details about using flour ground in a Nutrimill:

  • The Difference Between Red and White Wheats
  • How to Grind Flour in a Nutrimill
  • What Kind of Flour is Best if You Don’t Grind Your Own?
  • What is Pastry Flour, Where Do I Get it, How Do I Use It?
  • All of Our Bread and Muffin Recipes
  • Whole Grain Recipes

5. Coffee Maker

Last Mother’s Day, at the recommendation of several who frequently drink coffee at our house and help with our babies, we treated our family to this Bunn coffee maker. It is amazing!!!!!! I’ll never go back.

Recipes to go with your coffee:

  • Low Sugar Coffee Milkshake
  • Peppermint Cream for your Coffee
  • How to make Iced Coffee for a Crowd
  • How to make Coffee Ice Cubes so you won’t water down your cold coffee
  • How to Cold Brew Coffee
  • How to set up an Iced Coffee Bar
  • Sweet Vanilla Coffee Creamer
  • Homemade Chocolate Frappe
  • Homemade Chocolate Caramel Creamer
  • Chocolate Whipped Cream for your Coffee

I’d love to hear what your favorite small kitchen appliances are. Which ones do you feel you can’t live without?

Heavenly Homemaker's Club Members: Access your homepage and all your fantastic resources here! Not a member yet? Please join us!

Easy Peaches and Cream Muffins Recipe

September 13, 2018 by Laura 2 Comments

This post may contain affiliate links which won’t change your price but will share some commission.

Once upon a time I had a box full of fabulous peaches. So I used a few juicy peaches to make these Peaches and Cream Muffins and the family declared them to be delicious. Good talk.

Allow me to share a few secrets to making the most deliciously moist muffins – even if you are baking with whole grain flour!

  1. Use whole grain pastry flour. I grind soft white wheat, which turns into a lovely, fine, fluffy flour. I love that it acts like white flour while actually being whole wheat! (Read more about whole wheat pastry flour here.)
  2. Stir in some sour cream. This makes the muffins moist instead of dry and crumbly. So yum!

One of my favorite, favorite tricks to making these Peaches and Cream muffins even easier to whip up is to use the Muffin Mix recipe in this Simple Mixes to Save the Day eBook. Use 4 cups of Muffin Mix in place of all the dry ingredients in the recipe, and you’ve just cut out much of the work involved in stirring together these muffins. I LOVE having all those homemade mixes on hand!

This recipe is quite versatile! Sub out peaches for berries or apples. Stir in some cinnamon. This recipe is fun to play with!

Easy Peaches and Cream Muffins

Easy Peaches and Cream Muffins Recipe
 
Save Print
Author: Laura
Serves: 18-24
Ingredients
  • 3 cups whole grain flour (I use freshly ground soft white wheat)
  • ½ cup sugar (sucanat, brown, white, or raw)
  • 1 teaspoon baking powder
  • 1 teaspoon sea salt (Or use 4 cups of Muffin Mix from Simple Mixes to Save the Day eBook instead of these dry ingredients!)
  • 1 cup sour cream
  • ¾ cup milk
  • 2 eggs
  • ½ cup melted coconut oil
  • 3 fresh peaches, pealed and diced
Instructions
  1. Stir together dry ingredients in a mixing bowl.
  2. Add sour cream, milk, eggs, and melted coconut oil and stir until just combined (do not over-stir).
  3. Fold in diced peaches.
  4. Scoop batter into 18-24 prepared muffin tins.
  5. Bake in a 400 degree oven for 18-25 minutes or until muffins are golden brown.
3.5.3229

Be sure to check out Simple Mixes that Save the Day. They truly do save my day – many days a week!

Heavenly Homemaker's Club Members: Access your homepage and all your fantastic resources here! Not a member yet? Please join us!

The Simplest Bread Recipe in the World (And Enter to Win a Nutrimill Worth $264!)

November 1, 2016 by Laura 220 Comments

This post may contain affiliate links which won’t change your price but will share some commission.

The first time I had bread made by my friend Anne, I didn’t believe her when she said it was 100% whole wheat.

no-knead bread 3

I mean, I believed her, because why would she lie? But the bread looked and tasted so much like my grandma’s bread that was most definitely not whole wheat. And the only whole wheat breads I’d had before that were very dense and strong flavored. Anne’s whole wheat bread was light (both in color and in density) and had a most delicious flavor!

She told me that the “secret” to her delicious whole wheat bread was two things:

  1. She used white wheat instead of traditional red wheat flour. The white wheat gave the bread a milder flavor and light golden color. (Up until this conversation, I never even knew that there were different kinds of wheat. So what that I grew up in Kansas?)
  2. She bought wheat as a whole grain and ground it into flour herself. That made the flour much more delicious and healthy.

Well, blow me over. I’d never heard of such things. But I guarantee you right then and there that I wanted to buy some of that grain she was talking about and grind my own flour too.

I started saving up for a grain mill. (Anne recommended a Nutrimill.) When I finally had enough, I bought this beauty:

nutrimill 2

Since then, we’ve gone through thousands of pounds of wheat and made many wonderful whole grain baked goods. I prefer Hard White Wheat for yeast breads and Soft White Wheat for everything else. Everything tastes so much better with freshly ground flour! (Read more information about varieties of wheat and my preferences here.)

I grind more than wheat. My Nutrimill grinds corn, kamut, spelt, hulled buckwheat, oat groats, hully barley, triticalae (though I have no idea what that is!), rye, brown rice, wild rice, popcorn, sorghum, soybeans, split peas, and dried beans. Now that’s one amazing machine!

When I started making my own Whole Wheat Bread consistently, I used this recipe. It’s easy enough, but requires that I block out a few hours for mixing, kneading, rising, kneading, shaping, and baking. No biggie. It’s homemade bread. It’s delicious and worth the effort.

But then last year I discovered Stir-and-Pour Bread. I’m at a time in my life that if there’s a way to make anything simpler (without compromising flavor and health), I absolutely jump on it. The Stir-and-Pour Bread tastes just the same as my old Whole Wheat Bread recipe, but it’s practically effortless to make.

stir and pour sandwich 3

I’ll stick with the Stir-and-Pour Bread, loving the fact that all I have to do is stir the ingredients, let the dough rest, then pour it in a pan to bake. It takes very little time and practically no energy. Talk about SIMPLE!

This Stir-and-Pour Bread is a perfect compliment to the Simple Recipes I’ve shared lately and without a doubt, is wonderful to serve with most of our Simple Meals options!

Go get the Stir-and-Pour Bread Recipe!!

But first…how would you like a chance to win your very own Nutrimill? It’s worth $264 (but is on sale right now for just $219, so take note of that!). This appliance has saved us hundreds of dollars in the years we’ve had it (actually, probably  more like thousands at this point), so it is well worth the investment. Put it on your list. Ask for one for Christmas. And do me a favor. Buy it from Paula’s Bread.

Paula is a dear lady, running a small but thriving online business. I’ve been working with her for years and years. Her price is just as good (if not better) than her bigger competition, and what she offers in customer service can’t be matched. You will love working with Paula!

Let’s all give Paula a round of applause because she’s the one giving away a Nutrimill this week. Told you you’d love her!

So let’s review.

Stir and Pour Bread is amazingly simple and tasty (and did I mention that it’s so easy a 3-year old can make it?). This bread is a perfect supplement to many of our Simple Meals, and you definitely want to join all of us who are enjoying Simple Meals! Finally, Paula is giving away a Nutrimill. You will LOVE baking with freshly ground flour!

Enter to win a Nutrimill in the rafflecopter below! I’ll draw a random winner on Wednesday, November 9.

a Rafflecopter giveaway

Heavenly Homemaker's Club Members: Access your homepage and all your fantastic resources here! Not a member yet? Please join us!

The Secret to Fluffy and Delicious Whole Wheat Baked Goods

March 13, 2016 by Laura 32 Comments

This post may contain affiliate links which won’t change your price but will share some commission.

Dear Gluten Free Friends: This post is very whole wheaty and not at all helpful to your gluten free life. I’ve got your back though because as you know, many of the recipes here on my site are naturally gluten free. After all, while I do love freshly ground whole wheat flour, I also love variety and breadless recipes. So just for you: 100+ Gluten Free Recipes. Click on over and have at it. Love ya much!

wheat_fields_2

See the difference in grains?
We took this picture while traveling through Kansas a few years ago. 

As a newly-wed I remember visiting someone’s house where they served homemade rolls made exclusively with whole wheat flour. I tried to like the rolls, but I was used to white rolls made with all-purpose flour, and these rolls just weren’t the same. I decided that I simply didn’t like whole wheat flour, and really, I didn’t like anything considered to be a “health food.” (I thought eating healthy meant I had to eat rice cakes and bean sprouts for every meal.) I continued on my merry way where I ate very few fruits and veggies, drank about a liter of Pepsi every day, and made oodles of delicious cookies and cakes with white flour.

Many years (and way too many gallons of Pepsi) later, one of my friends started selling her homemade bread at our local Farmer’s Market. She had some leftover one night, so she sent a loaf home with me. We ate it for breakfast the next day, and we loved it down to the last crumb. I complimented her up and down next time I saw her, asking what kind it was. “It’s just my regular whole wheat bread recipe.” What?! That bread was whole wheat? Like, whole wheat and white flour mixed, right?! “Nope. 100% whole grain. I grind it myself.”

That is the moment I learned about the different varieties of wheat and the deliciousness of grinding grain into flour. (I never actually knew people did that. Grind your own flour? Seriously?!) I was intrigued. I researched. I asked questions. I saved up for a Nutrimill, stocked up on hard white wheat, and the rest is history.

white_wheat_flour

Red Wheat, White Wheat, Hard Wheat, Soft Wheat

Oh how many wheat you meet. Look at me. I’m Dr. Seuss. 

There is a big difference between red wheat and white wheat. Both produce whole wheat flour -but they bake up differently, creating different textures and flavors. I’ve covered this in detail in several other posts, which I’ll point you to now:

  • The Difference Between Red and White Wheats
  • How to Grind Flour in a Nutrimill
  • What Kind of Flour is Best if You Don’t Grind Your Own?
  • What is Pastry Flour, Where Do I Get it, How Do I Use It?

hard wheat soft wheat

It’s hard to see the difference in the picture.
Hard is more pointy. Soft is more round. There. Does that help?

The Secret to Fluffy and Delicious Whole Grain Baked Goods

Let’s talk about how you can make the most amazing whole grain cookies, cakes, muffins, pancakes, waffles, and pastries.

When I first started grinding flour to make all of our baked goods healthier and tastier, I used hard white wheat for everything. It did this because:

  • Hard white wheat flour works for any recipe, whether it is a yeast bread or a non-yeast product. (Soft wheat only works for non-yeast products.)
  • Grinding just one kind of flour made life easier.

Finally, after the recommendation from many of you, I gave soft white wheat a try. This is the variety of wheat that, when ground, produces whole grain pastry flour. I used it first for pancakes, then I used it for muffins, then I decided that I had waited way too long to try this. Pastry flour makes a huge difference in the density of baked goods!

Whole Wheat Pastry Flour (ground from soft white grain) is almost like using white all-purpose flour. It is light and fluffy and baked goods I make with it turn out really delicious.

muffins

Simple as that, freshly ground Soft White Wheat is the secret to turning out amazing baked goods.

Remember though, if you’re making a yeast bread, you still have to use Hard White (or red) Wheat. I now love both hard and soft white varieties and keep them both on hand at all times for all our baking needs.

no-knead bread 3

If you’re afraid of baking yeast bread, or simply want to make life much easier –
you have to try this easy Stir-and-Pour Bread. Because of this recipe, I will never knead bread again.
(This bread requires hard wheat, not soft, because it is a yeast bread.)

So let’s review:

  1. Use hard wheat for yeast breads.
  2. Use soft wheat for everything else.
  3. Or use hard wheat for everything – but I’m telling you, soft wheat (which produces whole wheat pastry flour) is wonderful to work with!

The SECRET to Fluffy and Delicious Whole Wheat Baked Goods! You have to read this! #bakedgoods #wholewheat

Some of our favorite recipes which use Whole Grain Pastry Flour:

Most don’t even realize they are eating whole grains when they eat any of these goodies! For that matter, the recipes that are low in sugar don’t seem to phase people either. Who knew eating healthier could taste so good?!

  • Homemade Donuts
  • Easy Pancake Muffins
  • Low-Sugar Sunshine Cake
  • Low-Sugar Super Moist Chocolate Cake
  • Low-Sugar Peanut Butter Cake with Peanut Butter Cream Frosting
  • Low-Sugar Carrot Cake With Maple Cream Frosting
  • Cranberry White Chocolate Chip Breakfast Cookies
  • Chocolate Chocolate Chip Muffins
  • Blueberry Streusel Muffins
  • Breakfast Cake
  • Flaky Cream Cheese Pastry
  • Oatmeal Breakfast Bars
  • Peanut Butter Chocolate Chip Muffins
  • Peanut Butter Pancakes
  • Zucchini Carrot Bread
  • Banana Bread and Muffins
  • Bacon Cheese Muffins

Let me hear from you!

  • Do you grind your own flour?
  • What is your flour preference?
  • Have you tried soft wheat (pastry flour) or do you stick with hard wheat for every recipe?

Looking for a great Grain Mill?

I have and highly recommend a Nutrimill!

Heavenly Homemaker's Club Members: Access your homepage and all your fantastic resources here! Not a member yet? Please join us!

My Favorite Things Christmas Giveaway!

December 7, 2015 by Laura 784 Comments

This post may contain affiliate links which won’t change your price but will share some commission.

Giveaway

We did this last year and it was crazy fun – so let’s do it again! 14 bloggers are giving away their favorite things. I’m joining. It’s like a Christmas party in our pjs.

Favorite Christmas Things

Thriving Home // 2. Happy Home Fairy // 3. Intoxicated on Life // 4. Mommy Hates Cooking // 5. Nourishing Joy // 6. Kitchen Stewardship // 7. Tried and Tasty // 8. Heavenly Homemakers // 9. Living the Nourished Life // 10. Brilliant Business Moms // 11. Gwen’s Nest // 12. Keeper of the Home // 13. The Nourishing Home // 14. Take Them a Meal

You’ll want to click over to visit all the giveaways to enter for a chance to win! And now….

Heavenly Homemakers Favorite Things Giveaway

If I had one minute to pull some of my favorite things off the shelf and gift them to you – what would I choose? What are some of the things I use at my house daily?

Out of my original list of about 40 things, I narrowed this giveaway down to 6. I mean, you can’t have my Bible, I already drank your coffee, and our cat is staying where she is. But guess what I did decide to include in this giveaway??

  • A Snowflake Flexi-Clip courtesy of Paula at Lilla Rose
  • A Set of BeeSilk Products from Renee at Madeon
  • A 32-ounce jar of Organic Gold Label Coconut Oil from Tropical Traditions
  • A gallon bucket of Palm Shortening from Tropical Traditions
  • A set of three Coconut Oil Soaps from Tropical Traditions
  • A (drum roll please!) Nutrimill grain mill from Paula’s Bread

My Favorite Things Christmas Giveaway

Isn’t that list gorgeous?! I love all of these items and use them constantly at my house. I mean, while wearing a Flexi-Clip in my hair I will grind flour in my Nutrimill, use that very flour along with either Coconut Oil or Palm Shortening to make something delicious, then wash my hands with Coconut Oil Soap and rub on some BeeSilk. As you can see, not only do I use these products daily, sometimes I use them all at the same time within a thirty-minute time period!

One of you who leaves a comment on this post will have a chance to win a big package of all these products.

That really is all it takes to sign up for this giveaway. Leave a comment. I like to keep things simple around here. :) I’ll draw one random winner for this giveaway on Monday, December 14.

Something for Everyone!

I want to take a minute to welcome everyone who has clicked over here from another blog in this fun giveaway party. New to Heavenly Homemakers? Hi! We want to get to know you better. We want you to stick around. We want to give you free stuff. :)

You’ll soon learn that around here, we like to laugh while eating butter. I mean, there’s more to it than that, but that pretty much covers the basics. Please get your butter sticks and plan to come visit again and again.

We’re handing out these freebies to everyone who signs up for our free newsletter!

breakfast_e-book cover_sm

Free Gift to Subscribers

Get these freebies by subscribing to our free Daily Newsletter here.

OR get these freebies by subscribing to our free Once-a-Week Newsletter here.

More about the bloggers

Be sure to go enter all the giveaways in this blog hop! Allow me to introduce you…

thriving-home-logo-FINAL-WEBAt Thriving Home, Polly and Rachel strive to encourage moms to thrive in every area of home life. They try to keep it real when it comes to sharing about healthy recipes, raising little people, growing in their faith, freezer cooking and various other topics that motherhood and life may bring their way.


MHCLogoMommy Hates Cooking is a national cooking and lifestyle website that encourages families to take back the dinner table. Through her easy-to-prepare (yet looks like you spent all day in the kitchen) meals and her knack for breaking down meal planning, Kristy has become the busy-mom’s resource for the modern family.

header march 2015The Nourished Life is all about approaching health and wellness from a place of balance. Getting healthy should not be another source of stress in your life! We tackle everything from metabolism to body image to emotional wellness to DIY beauty. If you’re ready to break up with stress and body hate, and embrace a healthier approach to, well, being healthy, then our community might be the perfect fit for you.

TakeThemAMeal.comTakeThemAMeal.com is a free online tool designed to coordinate the delivery of meals to loved ones in times of illness, new birth, loss of a loved one, etc. Meals are a tangible, meaningful way to show support and our website simplifies the process of coordinating so your time and energy can be spent caring for loved ones.

tnt-square-logo1_1024

TriedandTasty.com is a recipe website where fun, conversational writing is paired with top notch food photography. Join Yvonne as she warmly welcomes you into her kitchen and shows you how to wow your tastebuds!

logoLaura Coppinger and her husband have four sons ages 10-18. HeavenlyHomemakers.com is dedicated to inspiring women daily with healthy (and easy!) recipes, homemaking tips, spiritual encouragement, and good ol’ clean fun.

gn_square_logo_nobkgGwen is a busy Mama, a foodie who wants to be healthy, a southern girl, and an artist at heart who blogs at Gwen’s Nest. She shares recipes that taste amazing and also happen to be healthy, her research and experience with home remedies and herbs, ideas and tips on staying creative at home, and insights into life from her nest. Pop over and say hello!

NourishingJoyLogo - intentionalNourishing Joy is dedicated to real food and natural living. We’re on a mission to equip and inspire parents like you with the tools to make intentional, thoughtful decisions – that work for YOUR family – easy. Or at least easier.

Kitchen Stewardship header for newsletterKatie Kimball is on a mission to make real food and natural living possible for everyone. Kitchen Stewardship strives to present healthy living in bite-sized baby steps, challenging people to make positive changes in their kitchens without being overwhelmed, and providing tools to balance a family’s health, budget, time and the environment.

IOL_Header_DesignIntoxicated on Life is about raising strong families—body, mind, and soul. Rich and readable, Intoxicated On Life offers parents timely advice about how to have a healthy family in a world full of unhealthy choices, including books and articles about nutrition, natural remedies, wholesome parenting, and home education.

brilliantbusinessmomspodcastheader300by300Brilliant Business Moms: Sarah Korhnak and Beth Anne Schwamberger are sisters, podcasters, and big dreamers! They interview Mamapreneurs each week who are growing a business while spending time with their families. They’re the authors of Time Management Mama, the creators of the Brilliant Business Planner, and your biggest cheerleaders when it comes to growing an online business.

TNH Grab buttonThe Nourishing Home provides family-friendly GF recipes, free weekly whole food meal plans, helpful cooking tips and techniques, and lots of encouragement to help you in your journey to live a more nourished life.

KOTH-logo (1)Keeper of the Home is a community of women in all seasons of life… newly married, young mama’s with babies, teens all the way up to young adulthood and beyond. We are passionate about being diligent and intentional “keepers of our home”. Enthusiastic about natural and healthy living, we are stewarding our health and the earth, as well as our homes, our times, and our families. In doing this we believe we Honor the Lord. We hope you will join us. Pull up a chair, a warm mug of something delicious, and share this journey with us.

happyhomefairy-facebook-page

Happy Home Fairy

Julie Brasington is the creator of Happy Home Fairy, a popular blog focusing on encouraging and equipping moms to choose joy on the parenting journey. She shares easy craft ideas, FREE printables, simple recipes, corny jokes, holiday fun, thoughts on raising her 2 boys, and honest, heartfelt messages to uplift the weary mama.

Leave a comment here for a chance to win this Nutrimill, Flexi-Clip, BeeSilk, Tropical Traditions giveaway!

Heavenly Homemaker's Club Members: Access your homepage and all your fantastic resources here! Not a member yet? Please join us!

Switching to Whole Wheat Flour – making the transitions easier

July 16, 2015 by Laura 111 Comments

This post may contain affiliate links which won’t change your price but will share some commission.

This post was originally published in February, 2011.

simplesteps

I want to take some time to address some of the many whole wheat flour questions I receive from those of you making the switch from white to brown. So many of you email me to say “I wish we liked whole wheat flour…we just don’t. What ideas do you have?” or “When I bake with whole wheat flour, my food often feels and tastes heavy and grainy. My kids won’t eat it.” or “Laura, you look really good with flour in your hair, what’s your secret for getting it right there on your bangs?” Just kidding about that last statement. Thankfully.

My suggestion (and hear me out on this, because I think I know all of your arguments) is…okay actually I have two suggestions.

Switch to Whole Wheat Flour

  1. Use a Grain Mill to grind fresh flour.
  2. Use Hard WHITE Wheat.

Here’s the deal:  I have NEVER liked store-bought whole wheat flour. Still don’t like it very much. The idea of switching to whole wheat flour to me was NOT appealing and I DIDN’T want to.

Until I had a piece of my friend’s bread made with freshly ground hard white wheat flour. That was all the evidence I needed.

I really didn’t believe her when she said that the bread was 100% whole wheat. It didn’t taste whole wheat. It didn’t look whole wheat. It didn’t feel whole wheat. Oh, but did it ever smell and taste good.

It was at that moment (after she answered more of my questions and after I talked it over with Matt of course) that I decided that I would save any extra money we had toward getting my own grain mill. The problem was…we had NO extra money to save toward a grain mill.

What I Did:

I started buying Hard White Wheat and letting my friend grind it for me. She was so sweet to do this, and it worked, but it certainly wasn’t convenient. I then began making these soft pretzels to sell at our local farmer’s market to save for my Nutrimill. It took just a few weeks before I had enough money saved. I ordered my Nutrimill right away! That was five years ago, and I’ve gotta say that saving up for and buying my Nutrimill was SUCH a great investment. My whole family thinks so.

Why Freshly Ground Flour Made from Hard White Wheat is Different (and tastes so good):

Well, fresh flour is…fresh. It’s amazing the difference in taste you’ll notice when you eat bread and other goodies made from flour that has been freshly ground. The whole wheat flour from the store is a little on the old side and is likely even to be rancid. It is usually often made from RED wheat.

Which leads me to my second point about why freshly ground flour from hard white wheat is different and tastes so good:  White wheat is lighter in texture and color than red wheat. Whole wheat flour made from Hard White Wheat produces lovely bread, tortillas, pizza crust, muffins…everything you need flour for.

The Question of the Hour:

But Laura, doesn’t white wheat turn into white flour?

Ah, I didn’t get that at first either. But NO, it absolutely doesn’t. Hard White Winter Wheat is simply a different variety of grain.  Hard Spring Red Wheat has the same nutritional value as Hard White Winter Wheat…but white wheat makes (in  my opinion) a nicer and more palatable whole wheat flour.

I think you’ll notice a big difference.

(White flour that you buy at the store, by the way, is flour made by sifting out the bran and germ after the grain has been ground. This was originally done to give it a longer shelf life. Now, unless otherwise noted, the white flour is bleached to make it whiter. Yum.)

What Do I Suggest?

See if you can find someone who has a grain mill and will let you try out freshly ground flour made from hard white wheat. Hey, if you come over to my place, I’ll let you try some of mine! (I may even share my secret of getting flour in my hair.)

If you like it (the freshly ground flour…not the flour in my hair), I recommend doing a little something to save up for a grain mill. I love my Nutrimill!!! Here’s a video of me showing how to use the Nutrimill. I love Paula’s Bread as your go-to source for purchasing a Nutrimill. She offers great prices and offers wonderful customer service.

And…you may want to look into this online Bread Class offered by Lori. She teaches you to use freshly ground flour to make a perfect loaf of bread…and other great baked goods too! It’s a very helpful class!

Lastly…I will recommend that if you just aren’t able to grind fresh flour right now, try to find store bought whole wheat flour made from white wheat, labeled, White Whole Wheat. King Arthur has a nice variety. It’s not quite the same (because it isn’t fresh), but it’s the best store-bought flour I’ve used.

Those of you who’ve been grinding your own flour…share what you love about it! How were you able to make the investment to get a grain mill? Which is your favorite grain mill and wheat to grind?

(You’ll find more posts I’ve written about grinding grain, where I recommend getting grain, which grain I recommend and ALL kinds of grainy questions answered in this section!)

Disclaimer:  No one here is going to force you to grind your own flour, eat white wheat or get flour in your hair. If you like flour make with red wheat, enjoy! If you can’t afford a grain mill, this is not a guilt trip. I’m just answering many readers’ questions. Hopefully you all found it helpful. And hopefully you are much cleaner bakers than I am. Not only is there flour in my hair, it is also on my kitchen floor and counter tops.  I need to go clean my kitchen. 

Heavenly Homemaker's Club Members: Access your homepage and all your fantastic resources here! Not a member yet? Please join us!
Next Page »

Join Our Community!

 Facebook Twitter RSS E-mail Instagram Pinterest

Popular Posts

~ Will All of the Real Moms Please Stand Up?
~ Easy! Stir-and-Pour Whole Wheat Bread
~ How to Make Gatorade
~ 31 Real Food Breakfast Ideas
~ Dear Teenage Girls...
~ When Mom Takes a Step Back
~ The Inexpensive Health Insurance We Love!
~ Let's Talk Real Food Grocery Budgets

Check out our latest posts!

  • Easy Chili Cheese Dip
  • How to Make 5 Meals with 1 Pork Roast
  • Easy Make-Ahead Breakfast Sandwich Ideas
  • Parmesan Chicken and Rice Recipe – $1.00/person!
  • How to Beat Inflation at the Grocery Store
Home  ~  Simple Meals  ~  Club Membership  ~  Shop  ~  Privacy Policy  ~  Disclosure  ~ Contact

Copyright © 2023 · Beautiful Pro Theme on Genesis Framework · WordPress · Log in