Heavenly Homemakers

Encouraging women in homemaking, healthy eating and parenting

  • Home
    • About
    • FAQs
  • Recipes
    • Bread and Breakfast
    • Condiments
    • Dairy
    • Main Dishes
    • Side Dishes and Snacks
    • Desserts
    • Gluten Free
    • Instant Pot
    • Crock Pot
    • Heavenly Homemaker’s Weekly Menus
  • Homemaking
    • Real Food Sources
  • Store
  • Contact
    • Advertise
    • Disclosure
    • Privacy Policy
  • Simple Meals
  • Club Members!

How to Make Fresh Butter

March 12, 2009 by Laura 128 Comments

This post may contain affiliate links. For more information, please see our disclosure policy.

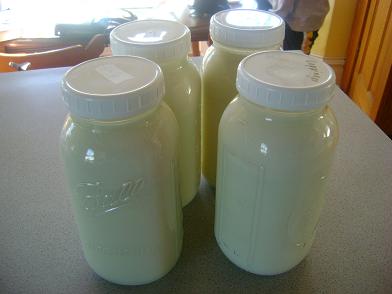
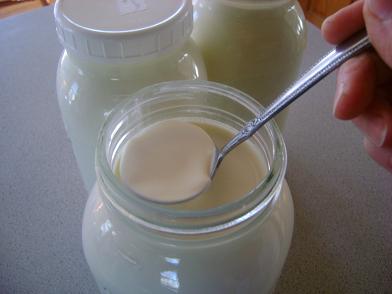
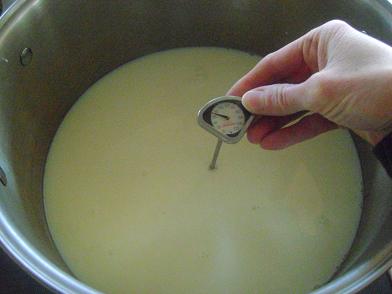
If you recall, last week when I showed you how to make mozzarella cheese, I mentioned that if you’re making it from raw milk, you skim off the cream and save it to make butter. HERE is one way to make butter!

butter1sm.JPG

Yum

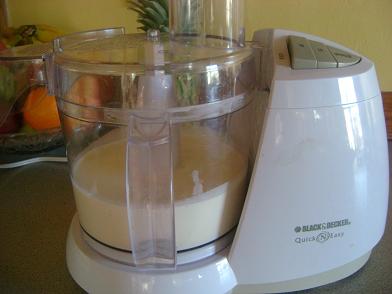
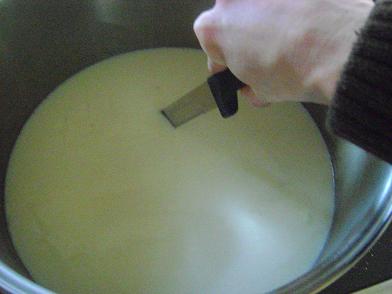
Fill your food processor 1/3 full of heavy cream. Be sure not to fill it more than 1/3 full…it will probably not turn into butter if there’s too much in the container.

butter3sm.JPG
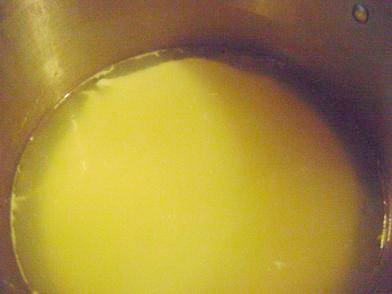
Turn your food processor on high…and then flee the room. (It’s really loud and annoying!)  The food processor will whip and whip and whip the cream until it turns it into butter. It should take somewhere between 8-15 minutes.

butter4sm.JPG
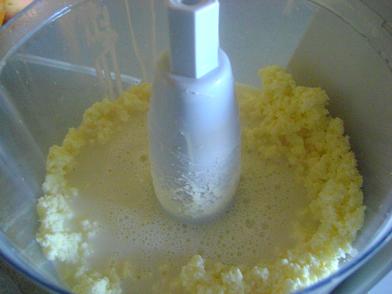
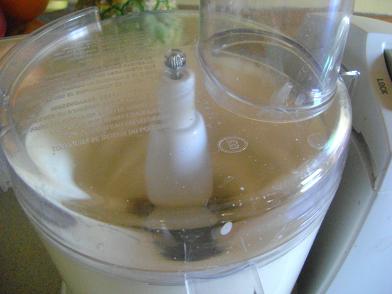
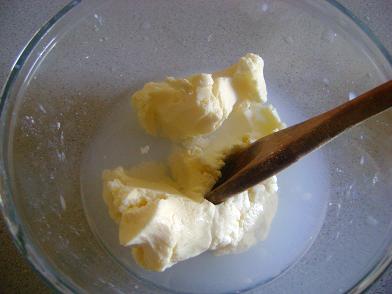
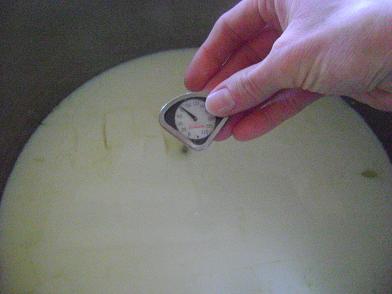
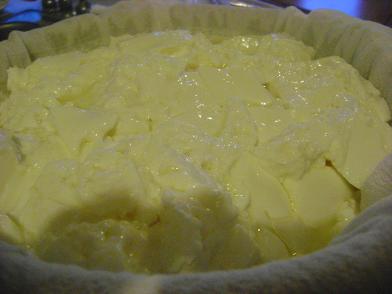
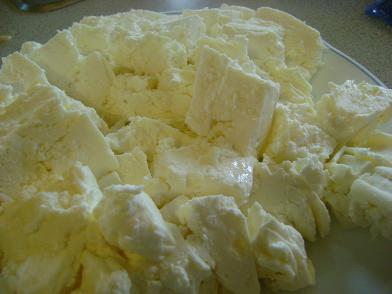
Once the fat has been “pulled out” of the cream, it should look something like this…and you can turn off the food processor.

butter5sm.JPG
Pull all the solid pieces and squish them together. 
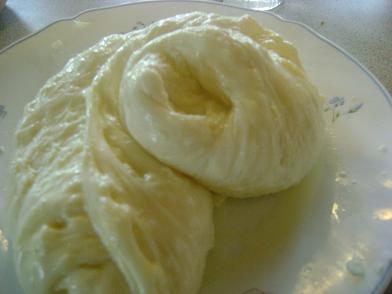
Place the solids in to a clean bowl.

butter6sm.JPG
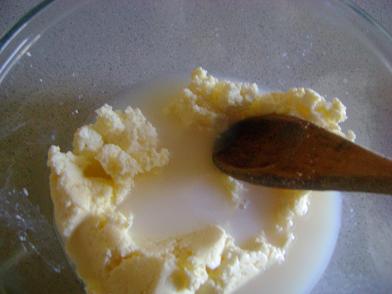
 Run some clean COLD water into it.

butter7sm.JPG
Clean the butter with the cold water by squishing it with a wooden spoon until all the liquid comes out of it. Repace the cold water 2-3 times as you clean it.

butter8sm.JPG
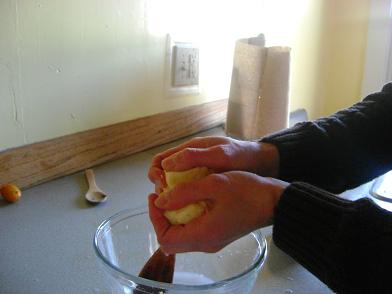
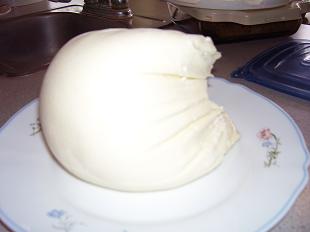
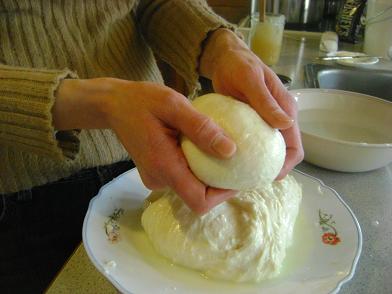
Squeeze the excess water out of the butter and shape it with your hands.

butter9sm.JPG
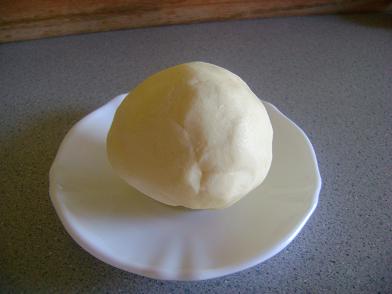
Ah, look…a lovely little butter ball.

You can add salt to the cream if you want salted butter…this will also be a preservative, making the butter last longer.

OR…if you don’t have a food processor and want to have a little family fun…put your cream into a jar and shake it like crazy. Pass the jar around, and take turns shaking it. (I’ve tried shaking it all by myself once when no one was around to help…and I thought my head and arms would fall off from shaking the jar so much all by myself. I don’t think I ever got butter out of that jar.)

Have you ever made butter before?  Isn’t it COOL to see the butter form out of the cream!? 

I LOVE how with just one little gift from a cow (or goat or whatever) you can make SO MANY great yummy things!

P.S. Even if you don’t have fresh cream…go buy some heavy whipping cream at the store and try making butter. It’s just…cool.

Next week…RICOTTA CHEESE! :)

(Join us Saturday for the little Green Project!)
——————————————-

This post is linked to Frugal Fridays.

Heavenly Homemaker's Club Members: Access your homepage and all your fantastic resources here! Not a member yet? Please join us!

How to Make Mozzarella Cheese

March 5, 2009 by Laura 222 Comments

This post may contain affiliate links. For more information, please see our disclosure policy.

Want to know what makes me excited (besides little plastic drawers)? The fact that with only two gallons of  milk…I can squeeze out THREE great dairy products. With the two gallons of raw milk you see pictured below, I was able to make three eight ounce balls of mozzarella cheese…a half pound of butter…and about a cup of ricotta cheese. 

Talk about milking something for all it’s worth! (Whoa…very cheesy joke.)  (Which I feel is appropriate because this post is about making…cheese. Cheesy-ness abounds.)  Anyway…

Even if you don’t think you’ll ever make your own mozzarella cheese…you may still have fun reading about how it’s made!

mozzarella10sm.JPG

Yum

To make Mozzarella Cheese you will need:

  • Two gallons of milk (I use raw, organic) (As far as I understand, you can use pasteurized and homogenized milk too…although you won’t get the butter and ricotta out of it since the cream doesn’t rise to the top.)
  • 2 teaspoons citric acid dissolved in 1/4 cup water
  • 1 cup cultured buttermilk
  • 30 drops vegetable rennet mixed with 1/4 cup water (I get my rennet from Azure Standard or Wilderness Family Naturals.)
  • 1 gallon water
  • 1/2 cup sea salt
  • Large stock pot
  • Long knife
  • Food thermometer
  • Strainer
  • Tea towels

Okay, ready to make cheese? You’ll need to block out about two and a half to three hours of time…but most of that time is wait time, not work time!

mozzarella11sm.JPG
First, if you’re using raw milk…skim off the cream. You know I’m usually big on leaving in the fat…but the fat separates itself out of the cheese while you’re making it for some reason. So, skim it off, put it into another jar and save it for making butter!

mozzarella13sm1.JPG
Pour the milk into a large pot (I use my big stock pot). Stir in the buttermilk and citric acid mixed with water. Heat to 91 degrees. Remove from heat, put the lid on and let it sit for one hour. 

mozzarella14sm.JPG
Add the rennet mixed with water to the milk. Allow it to sit for at least 15 minutes, or until the milk solidifies slightly and it able to be “sliced”.

mozzarella15sm.JPG
Use a long knife to “cut the curd” into one inch squares. 
Let the curd sit about five minutes.

mozzarella16sm.JPG
Heat the curd to 91 degrees. Remove from heat, place the lid on the pot and allow it to sit for one hour. After one hour, the curd and the whey should have separated.

mozzarella17sm.JPG
Place a strainer into another large pot and cover it with a tea towel.

mozzarella19sm.JPG
Pour the curds into the strainer/tea towel…straining out as much whey as you can. Save the whey!!

mozzarella20sm.JPG
Rig up something fancy like this to hang your curds, making sure you have a bowl underneath to catch more whey that will drip out. I usually leave mine overnight as it takes several hours for all of the whey to be removed.

mozzarella3sm.JPG
In the morning…remove the tea towel. Wow, a big hunk of cheese! Now…the fun part begins!

In your large pot…heat one gallon of water mixed with 1/2 cup salt. (Hint:  I use Redmonds Real Sea Salt and it can be too chunky if I don’t try to dissolve some of it first. Therefore, I put my water and salt into a jar and shake it well, then pour it into the pot. The residue from the salt remains in the jar, leaving only salty water…without chunks!

Heat the salt water to 170 degrees. Meanwhile… 

mozzarella5sm.JPG
Cut the cheese (oh, my boys think it’s SO FUNNY when I say that…) into 1-2 inch squares.

mozzarella6sm.JPG
Once your water reaches 170 degrees, remove it from the heat and dump in your cheese. Kind of stir it around for a minute or two until the cheese softens and begins sticking together.

mozzcheese1sm.JPG
Use a big wooden spoon to catch the cheese from the water. It should start sticking together and forming a blob on your spoon. Stretch the cheese.  This part is SO COOL!! Dip it down into the hot water every once in a while to reheat the cheese so that it will continue to stretch, but try not to keep it in the water too long. Keep on stretching and dipping the cheese until it is shiny. This stretching process will take about 8 minutes. (Every once in a while I get a batch of cheese that just won’t stretch. It’s a bummer. The cheese still tastes fine…it just doesn’t look as pretty, shred as well, or melt as nicely. We eat it anyway!)

mozzarella7sm.JPG
After you’ve stretched your cheese and it has formed a big long shiny wad, take it out and put it onto a plate. 

mozzarella8sm.JPG
I divide my cheese into three blobs. Squeeze out the excess water and shape the cheese into nice balls. 

mozzarella9sm.JPG
Place the balls into a bowl of cold water. This will take out the heat and help them hold their shape.

mozzcheese2sm.JPG
Tada!!! Mozzarella Cheese! 

I’ll take time during my next two Frugal Friday posts to share how I make butter with the leftover cream…and ricotta cheese with the leftover whey!

So…have you ever made cheese before? Do you think this process looks like something you could do? You wanna come over and make cheese with me some time? (Then we can say “cut the cheese” together and laugh like we’re really funny.)

———————————————-


Heavenly Homemaker's Club Members: Access your homepage and all your fantastic resources here! Not a member yet? Please join us!

Feeding the Family: Breaking Down our 2009 Food Budget

January 22, 2009 by Laura 39 Comments

This post may contain affiliate links. For more information, please see our disclosure policy.

I just had a break through moment. Don’t ask me why I didn’t think through our food budget more specifically before. Really…I think this is so cool. Keep reading.

I’ve mentioned that we don’t skimp on our food budget. I’ve told you how important we think it is to “invest in our bodies” and eat whole, healthy foods.

And I’ve told you that we’ve been spending about $500 a month for our family of six. Looking at our new 2009 budget…we are seriously not sure how we can keep it under $500 per month…and not really sure where we can pull another $50-$100 a month (go without shoes, perhaps? turn off the furnace in the winter, maybe?).

Anyway…when I look at that figure in our budget…and maybe when you look at this figure in my budget…$500 to $600 each month on food…that may seem like A LOT OF MONEY.

So, one night at dinner last week…I decided to break it down a little. In between bites of soup…I had the boys do some division (because doing division during dinner is wonderful for your digestion). :)

We went with the $550 figure. Here’s what we came up with and what I found remarkable. I really don’t know why I didn’t break this down sooner:

$550 divided by 6 people in our family = $92 per person for food each month

$92 per person each month divided by an average 30 day month = about $3.00 per day per person

$3.00 per day per person = $1.00 per meal per person

That’s it??? Our family eats a healthy, wholesome meal for $1.00 per person on average? How is that even possible? (btw, I’m sure breakfast is less and dinner is more…and Malachi is less and Matt is more…it’s just an average.)

Here are some ways we figured out that we are able to do this:

  • We have a big garden so I can and freeze a lot of food. We also mooch accept all kinds of extra produce others are trying to give away in the fall that I can and freeze.
  • We get a free deer each year from a hunting friend.
  • The raw milk and free range eggs we get from friends are insanely inexpensively priced. $4 a gallon for organic raw milk from a grass fed cow…that’s amazing. (The cost will soon be going up to $5 a gallon…which is STILL amazing!) And, $1.50 for a dozen free range organic eggs? Amazing. We’re very spoiled.
  • I make almost every thing we eat from scratch. Organic processed foods with more wholesome ingredients are so, so expensive…and not always that much better for you. Making our food from scratch is healthier and much less expensive.
  • We almost never eat cereal.
  • I go easy on the cheese. Cheese can be expensive…especially the raw, organic cheese we prefer. I sprinkle it lightly on pizza and casseroles…and you can’t even tell. I also know how to make my own mozzarella, so that saves money. (Oh my goodness…I’ve been promising forever to tell you how to do that, huh? I really, really will. Really.)

Here is a bit of our food budget break down for you for 2009:

Last year we bought a half of a cow…and I don’t know how it’s happened, because we haven’t been skimping, but we still have a bunch of steak and roast left. (I think it’s something like Elijah and the widow and how God made the widow’s little bit of oil and flour never run out! 1 Kings 17:7-24) Because of the extra steak and roast…I don’t think we’ll need to buy an entire half cow this year. At this point, I think we’ll just be ordering ground beef and stew meat from a farm about an hour away. They raise their cows on grass and organic hay. It is SUCH good meat! We also get our free range chickens from this same farm.

Our meat cost per month for beef and whole chicken should be about $70.00
Milk, 24 gallons/month: $96
Eggs, 12 dozen/month: $18
———————————–
Cost for milk, eggs and meat $184

That leaves $366 a month for everything else I need either from my food co-ops, my granaries, my online sources, the farmer’s market, and occasionally the grocery store or Wal-mart.

And for that, all six of us eat VERY WELL for about $1 per meal. God does provide, doesn’t he?! :)

I’m SO thankful that I took the time to break down our food budget further to examine how much it costs to feed our family good, wholesome meals. If you care to share…how much is your monthly food budget? Break it down and see how much it costs for each person to eat a meal! The number may surprise you! How do you feel about the quality of the food you are eating on your budget?

Now, I’ll start taking you shopping with me! I plan to take you to some farms, to my Azure Standard co-op pick up, to some online stores, to the grocery store. Aren’t field trips fun?! (You may want to pack a lunch.) :)

~~~~~~~~~~~~~~~~~~~~~~~~~~~~~~~~~~~

Read about our 2015, houseful of teenage boys, grocery budget here (if you dare). :)

~~~~~~~~~~~~~~~~~~~~~~~~~~~~~~~~~~~

I’m finding the BIGGEST grocery savings while following our Simple Meals plans. I love this so much. You must check it out!!

facebook_cover_photo

Heavenly Homemaker's Club Members: Access your homepage and all your fantastic resources here! Not a member yet? Please join us!

Feeding the Family: The Kitchen Tour

January 15, 2009 by Laura 51 Comments

This post may contain affiliate links. For more information, please see our disclosure policy.

Wow, what a great and exciting response to this post, where I promised to take you shopping with me and share more about how I buy food and feed my family a good, wholesome diet on a tight budget!

Over the weekend, I sat down for a couple of hours and put together a list of all the subjects you mentioned either in the comments or by email that you would like to have me cover about Feeding the Family. Here’s a list of the questions from you that I came up with:

  • Where/how do you shop?
  • Where do you buy household products and what do you use?
  • How do you buy in bulk…where/how do you store it/…what about people who have little to no storage space?
  • How did you find a food co-op? What are the options?
  • What is your food budget? How do I figure out which products to buy organically? How do I find good prices for good foods?
  • Share some inexpensive recipe ideas! How about inexpensive healthy snack ideas?
  • Where do you buy your grains? How do you store them? Do you use a variety of grains?
  • Share how you make different kinds of breads.
  • How do you cook to please everyone in my family?
  • How do you go about finding good, local meat, milk, etc.?
  • What are the benefits of organic and/or raw milk?
  • How did you get your husband on board with healthy eating AND spending the extra money for good quality foods?
  • Are you in the kitchen all the time? How do you get all of this done? Is it possible for women who work outside the home to feed their families this way?
  • Tell me more about gardening. What if I only have a small garden space?
  • Where in the world do I begin when I want to make changes toward eating healthier?
  • And…last but not least….I DO want to see your OATS. All 50 pounds of them! What all do you do with them?!

So…those are some of the topics we’ll be covering here over the next few weeks (months?). Far be it from me to keep my bag of oats all to myself.  And…I can’t wait to take my camera over to shoot footage of the cow! 

Before I tell you all kinds of information about how I feed my family I thought I’d take you on a little tour through my kitchen. I figured it might help you understand all the ins and outs of the way I cook if you could first see the kitchen I work in! 

Malachi (my 4 year old) came in during part of the filming of this which makes it SO much more fun to watch than simply hearing my voice and looking at my jars of beans. Also, at one point you’ll hear a big bang in the background where Malachi drops his “kintar” (guitar). 

Now that you’ve been through my kitchen, I can more easily explain the ways we shop, store, cook and eat our food! If you have anything else you would like to see added to the above list…let me know. 

ALSO…so many of you mentioned wanting to know more of my frugal, healthy recipes. I’d love to share more of my recipes with you…but help me out by letting me know what YOUR idea of a frugal amount is? What do you feel like is a reasonable cost PER PERSON per meal?

Heavenly Homemaker's Club Members: Access your homepage and all your fantastic resources here! Not a member yet? Please join us!

Feeding the Family

January 8, 2009 by Laura 44 Comments

This post may contain affiliate links. For more information, please see our disclosure policy.

As Matt and I were working on our 2009 budget…we were looking at all the ways we could try to cut corners…yet there were really no more corners to cut. Yes, our budget has rounded edges. 

And yet…we’re always fine. We always have way more than enough of everything we need. God is so good!!!

If there were more ways to skimp on our budget, we would. But we really do like our kids to be wearing socks without holes and well…running water is such a nice luxury.

There are all kinds of things we choose not to spend our money on. You can read about them here and here.

There is one area of our budget we refuse to skimp:  FOOD. (And yes I know I wrote about this already several months ago…but I keep hearing about people who are chopping their food budgets way down in 2009. I just hope people are cutting it because they spend too much on processed foods and want to buy better food for their buck.)

I used to be a Coupon Queen and a big time food skimper. I compromised the quality of food we ate because I wanted to save money. In the past 3 1/2 years I’ve done a complete turn around and I AM SO THANKFUL. I wrote about it here…please read it if you haven’t already…but it basically says that we NEED to take care of our bodies by eating GOOD NUTRITIOUS FOOD. I wish I could emphasize this more. (You might want to read my whole Getting Real with Food series to learn more about how we eat.)

AND ALSO…can I emphasize how YUMMY wholesome, real food is compared to all of the free or next to free “foods” I was getting with coupons? Not to mention how much better our bodies feel when we eat good food.

I get emails and comments all the time from readers wanting to know how and where I shop and how I am able to afford to feed our family of six so well.   Besides just simply stating that God provides…I came up with an idea that I hope will be fun!

For the next few weeks (or so…until you get bored, and sick of going places with me)…I’m going to take you shopping with me. I’ll take you to the farms where we get our milk and eggs…I’ll introduce you to my cow. (Okay, I don’t have a cow, but there is a particular cow I’m very fond of.)…I’ll take you to my food co-op drop off. I’d take you to the farmer’s market and to my garden…but I can’t because it’s WINTER. :) 

I’ll document for you how much I spend on everything and how we make our food budget work. I’ll share with you how I buy in bulk and how I store my food. 

I’m curious to know how some of you feel about cutting corners in your food budget? While I’m doing this series, what are some specific things you’d like to hear about?  (Like, would you like for me to take a nice picture of my 50 pound bag of oats and do an entire blog post about eating and storing oats? Kidding.)
————————————-

More frugal tips at Biblical Womanhood.

Heavenly Homemaker's Club Members: Access your homepage and all your fantastic resources here! Not a member yet? Please join us!

Inexpensive Gifts to Make and Give, Pt. 2

December 4, 2008 by Laura 10 Comments

This post may contain affiliate links. For more information, please see our disclosure policy.

Today I’m excited to show you ideas OTHERS have come up with!! I love all of these great gift ideas!! If you missed part one of this series you’ll find it here.

Donna posted here about making Simmering Jars. I bet these smell great! What a fun gift idea! I love that you can reuse the contents of this jar over and over!

donnasjars.jpg

Each jar contains approximately:

1/2 a lemon, cut in slices
1/2 a lime, cut in slices
1/2 an orange, cut in slices
1 t whole cloves
2 or 3 cinnamon sticks (you may need to break them for smaller jars)
1 or 2 sprigs of rosemary (or other of choice or home-grown! …or to keep it more frugal, sprinkle in some dry herbs)

Then cover with water and if you like, make a label with instructions to simmer, add more water, and return to jar and refrigerate until next use! The amounts could vary based on jar size.

My friend Summer has a new blog and she’s got several really cool gift ideas!

Here’s an idea Summer shares for making scarves.

summersscarves.jpg

These velvet belts Summer is making are super cute.

summersbelts.jpg

And THESE SUEDE PILLOWS? Summer, no pressure or anything…but those would look great in my living room in say…earth tones. I think they are SO cool. You know where I live. Just drop one off anytime and put it under my tree. :)  (Right now Summer is rolling her eyes at me and saying, “Make your OWN pillow, girl!”)

summerspillow.jpg

In case you’ve been curious, here are some of the simple gifts the boys and I have been making for cousins and grandparents. (If your name happens to be Aunt Kari or Grandma Coppinger…you are NOT allowed to click here to see these gifts!! Not even a peek.)  :)

I’ll continue to share more ideas in this Inexpensive Gifts to Make and Give Series. Here’s what’s in the works right now…

Gifts of Food
Treats for Teachers, Coworkers and Classmates
Wrapping it All Up

If you have ideas to share in any of those categories (or others), please email or leave a comment! 

Between all these ideas to share and all the cookie recipes and other Christmas ideas…I’m not sure there’s enough time before Christmas!! How many days before Christmas anyway?!
—————————————-

More Frugal Fridays here.

Heavenly Homemaker's Club Members: Access your homepage and all your fantastic resources here! Not a member yet? Please join us!

SUPER Inexpensive Gifts to Make and Give, Pt. 1

November 20, 2008 by Laura 15 Comments

This post may contain affiliate links. For more information, please see our disclosure policy.

The boys and I are having SO much fun making Christmas gifts this year! I told you about the quilt I’m making for my nephew…and I mentioned that the boys are learning to sew (although I can’t tell you what they’re making because a couple of aunts and a Grandma are reading this right now  :) ).

I love how excited the boys are to be making their gifts this year! They keep saying, “Can we make one for ______ too!?” Yay, they’re learning the joy of GIVING!!

As we come up with ideas, I’ll try to share them with you. There are SO many gifts you can make that don’t cost much money. (Does it sound like I’m being cheap? ‘Cause I’m not trying to be cheap…just trying to not spend much money while I focus on teaching my kids to lovingly give…and about what’s really important during Christmas time.)

Here are a few kid gift ideas to start off this series:

Homemade Bubble Bath

This was a great hit when I made this for Elias. It costs…pennies to make. 

eliasbubblebathsm.JPG
Learn how to make Homemade Bubble Bath here.

I Spy Bottles

GREAT for a road trip!

ispybottlessm.JPG
Find directions to make these here.

Thank You Card Packs

I just created these “Thank You Cards” to put in my kids’ stockings…and thought you might like to have them too. They aren’t fancy, just simple…but I’m hoping my kids (and yours) will have fun with them. There are six different cards (just cut along the line and fold the card over). Print them in black and white if you think your kids will enjoy coloring them.

thankyoucard1sm.JPG
Download cards here.

thankyoucard3sm1.JPG
Download cards here.

thankyoucard2sm1.JPG
Download cards here.

For my littler guys, I’ll also print this on the back to make their writing easier (and so that the people they are written to will actually be able to read them).

thankyoucardhelper_page0_page0.jpg
Download Thank You Card Helper here.

Stay tuned for more fun inexpensive gift ideas…and of course for some fun holiday treat recipes! Also, if you have any great ideas to share or have blogged about it on your site, tell us about it in the comments or email me (laura @ heavenly homemakers dot com)! Share the love!
—————————————–

Heavenly Homemaker's Club Members: Access your homepage and all your fantastic resources here! Not a member yet? Please join us!

Hey. I Can Have a Post about Something Girly If I Want To…

October 2, 2008 by Laura 7 Comments

This post may contain affiliate links. For more information, please see our disclosure policy.

 …even though I only have boys in my life. 

I’m very okay with my lot in life because I think my four little boys (and their daddy) are THE BEST. I wouldn’t trade in all of my sons’ frog catching, noise making, light saber fighting, tooting loudly at the table and laughing because it must have broken the world’s record for something tooty boyness for all the pink and lace in the world.

But sometimes…it’s fun to hear about what it’s like to live with all girls. My friend Tonya has four little girls…all very close in age to my boys. We find it fun to compare notes on life. When I heard her talking about the birthday party she was planning for her oldest daughter Bailey, I thought it sounded like SUCH a fun party, and I wanted to hear more. So she agreed to write a guest post for me so that you could all enjoy hearing about this exciting event that I will never, ever be able to participate in with one of my sons: 

A Shopping Mall Scavenger Hunt Birthday Party

Here’s Tonya describing her fun party for Bailey:

Bailey wanted a birthday party that she could invite a lot of friends to. I of course, waited till the very last minute to come up with an idea. I have always wanted to try and do something at the mall and my sister-in-law had done a mall birthday party when her daughter was younger too. She told me about a scavenger hunt that she did. I also just googled scavenger hunts online and there happen to be a mall one online as well. So I took what I learned from both sources and made one that worked for me.

First, we made the guest list. Bailey had 15 friends that she wanted to invite. For some people this would not be an issue but since we live an hour away from the mall, that meant that I would need to search for enough car space and I would need to allow for enough drive time both ways. I really didn’t think I would have too much of a problem with the whole car space thing because I thought that it would be unlikely for all of the girls who were invited to be able to come. (By the way, they all came.)  

 I made the invitations myself. I just typed them up on the computer. I used a cute font and color and printed them off. I folded them in a trifold and sealed them with a sticker that I just had on hand. The invitation explained that it would be a scavenger hunt, I would provide dinner and bring money in case we had time to shop.

I prepared a list of things to “hunt”. I decided to do mostly pictures. Some of the things they had to take pictures of were the entire team wearing hats and posing in their best gangster look, entire team modeling formal attire, one team member kissing a manequin, entire team modeling sunglasses, purses, one team member posing in a window like a mannequin and entire team posing in childrens’ ride, to name a few. I also gave each team $5 to buy an accessory from a store of their choice and they had to think about what the birthday girl would like (the item ended up being a gift for Bailey).

We left about 3pm on a Saturday. We decorated three vehicles with paint for the windows. It said stuff like, “Honk it is my birthday” and  “Honk it is Bailey’s 12th Birthday!” I had snacks and water bottles in each of the cars since it would be an hour drive and we were going to do the scavenger hunt first. The girls really talked non stop the whole way. I had thought about some games we could do on the drive but it was not necessary. Go figure!

When we got to the mall, I divided the girls up into three teams. I did give a few rules like, don’t run, listen to a store associate if he asks you not to take pictures, make sure that all team members get turns in the photographs and if the entire team needs to be in the picture, then have someone else take the picture. I handed them their lists and a digital camera along with a $5 bill and off they went. This is the part that was really fun and surprisingly, relaxing. My husband Tim and I, along with two of my friends who were helping me with the party and driving, walked and shopped through the mall for the next hour while the girls were scavenging. It was great. We would run into them once in awhile and they appeared to be having a great time.

We met back at the food court. I had them leave their cameras with me. I gave each girl a five dollar bill to go and get their supper while I downloaded the pictures to my lap top. As the girls ate, they watched a slide show of the “hunt”. They went off for a bit to do some shopping and then we met back at the food court to eat big birthday cookies that I had made earlier that day (cookies the size of a pizza pan) and for the opening of the presents. After a little more shopping (boy those girls could shop!), we left for home.

We were gone for a total of 5 hours (remember that is about 2 hours of driving time). We had a wonderful time. The guests went on and on about what a great time they had. The parents have commented on how much their girls loved it too. It was a huge success!

To top the party off, I used my Windows Movie Maker to make a video of the pictures I had put on my computer. I used some of Bailey’s favorite songs in it and at the end I put a “Thank you for coming to my party” page. I put the movie on DVDs and made envelopes out of cardstock so that Bailey could give those to her friends for thank you notes.
—————————————————
Thanks Tonya, for letting me live vicariously through you just this once! Doesn’t that party sound like so much fun? 

The amount of money it took to feed the girls dinner did add up (fifteen girls, Bailey?)  :)  But aside from that, I thought that the scavenger hunt at the mall was a great idea for an inexpensive birthday party that included a lot of kids. And that’s why I wanted to share it for Frugal Friday. 

Now, if you’d like to read about the kind of birthday parties we get to have with our family you can read about them here and here. They include absolutely nothing about shopping, or accessories, or cute invitations with sticker seals. They do however include things about toots and stink. Read them at your own risk…

Heavenly Homemaker's Club Members: Access your homepage and all your fantastic resources here! Not a member yet? Please join us!

Canning Tomato Juice and Tomato Sauce

September 11, 2008 by Laura 165 Comments

This post may contain affiliate links. For more information, please see our disclosure policy.

Okay, we’ve covered the basics of canning…freezing corn…freezing green beans…canning and freezing peaches…making and canning applesauce…

Now lets talk about tomatoes!

Last year, I planted 40…yes FORTY tomato plants. On purpose. Because I’m crazy.

I ended up having SO MANY tomatoes, that by the end of the summer, I had canned almost two years worth of tomato sauce, tomato juice and tomato soup. And, I still had tomatoes! I was begging people to please come pick my tomatoes and take them far, far away from my house. 

While canning that many tomatoes was a wonderful thing…I still hadn’t fully recovered from it when it came time to plant tomatoes this year. Therefore, I only planted 20 tomato plants this spring. *cough*

The good thing is…I never have to buy any tomato juice, sauce or soup. Ever. And the home-canned stuff is SO GOOD!!!

Here’s the way I make tomato juice and tomato sauce…

tomatosauce1sm.JPG
First, you start with bunches and bunches of pretty tomatoes, like these. You can take the skins off and the seeds out if you want to…I pretty much just WASH them. I leave the skin on and and the seeds in…mostly because I’m just too lazy to do otherwise. My family doesn’t know the difference, and you can’t really even tell that the seeds and skin are still there. At all. 

tomatosauce3sm.JPG
Next, I cut the tomatoes into fourths and put them into my blender.

tomatosauce2sm.JPG
The tomatoes are then blended up until they are liquid. 
(Mmm, tomato smoothie anyone?)

tomatosauce4sm.JPG
After I blend up my tomatoes, they go into a big pot. Obviously this pot was not quite big enough! Filling your pot this full will just about guarantee that your pot will boil over and spill all over your stovetop creating a cooked on tomato mess. (Picture of the boiled over mess not available…because I scooped some out before it boiled over, thank you very much.)

tomatosauce5sm.JPG
Next, I boil my tomatoes, uncovered, stirring occasionally. After a while it begins to look like this. Once that bubbly froth is just about all gone from the top (about an hour and a half or so after beginning the boiling process), you have made tomato juice, and you’re able to go ahead with the hot water bath process of canning tomato juice. 

tomatosauce6sm.JPG
But, if you want tomato sauce, continue to let it boil for another hour or so. You’ll know your tomato sauce is done “saucing” when most of the watery liquid has evaporated. If you continue to cook it at this point, you will have tomato paste…which is fine…if you want tomato paste.

Can your tomato sauce for 25-30 minutes following the hot water bath instructions here.

Then, you will have tomato juice for yummy veggie soups and such…and tomato sauce for sloppy joes, pizza sauce, spaghetti sauce, enchilada sauce…and whatever else you use tomato sauce for. (If you want to, you can add your herbs and spices into the sauce while your making it so that you’ve got your spaghetti and pizza sauce already put together in your jars!)

I have a wonderful recipe for tomato soup that I’ll be sure to share soon! 
Yumm-eeee!

Heavenly Homemaker's Club Members: Access your homepage and all your fantastic resources here! Not a member yet? Please join us!

How to Make and Can Applesauce

September 5, 2008 by Laura 75 Comments

This post may contain affiliate links. For more information, please see our disclosure policy.

***UPDATE***

I no longer peel my apples, nor do I slice them. I simply wash them, core them, cook them as described below, then run them through my Blendtec Blender. It is much healthier and saves so much time to do it this way! And the applesauce is delicious. That’s always nice. :)

~~~~~~~~~~~~~~~~~~~~~~~~~~~~~

One of the best “fall smells” I can think of is applesauce cooking on the stove. It is SO YUMMY!!!

Here’s a step by step of the easiest way I’ve found to make applesauce. (But be sure to read Canning 101 first if you’re unfamiliar with the basic steps of canning safely!)

applesauce1sm.JPG
I slice my apples like this, then peel each slice.
I find this to be much easier than peeling the whole apple first and then slicing it.

applesauce2sm.JPG
As I slice and peel, I put my apples into a big pot. At the bottom of my pot is 5 cups of water and 3 teaspoons of ascorbic acid (powdered vitamin C).

applesauce3sm.JPG
As I continue to add apples, I stir them into the water/ascorbic acid frequently so that the apples are all coated with the mixture and are much less likely to turn brown.

applesauce4sm.JPG
Once I have my pot 3/4 full of apples, I put it on the stove…

applesauce5sm.JPG
and bring it to a boil, then simmer it (uncovered)
for about 30 minutes or until the apples are tender.

applesauce8sm.JPG
Then, I spoon the tender apples with some of the liquid into my blender (I highly recommend the Blendtec now)
and blend it all up until it is smooth.

applesauce9sm.JPG
Isn’t it pretty!!! Next, I pour the applesauce
into sterilized jars with a wide mouth funnel.

applesauce13sm.JPG
I hot water bath my jars for about 25 minutes.

applesauce11sm.JPG

And like always, after I pull them out of the hot water, I set them on my counter for several hours (or days) so that I can admire them and feel happy about my applesauce. Ahh…..beautiful!

This post contains affiliate links.

Heavenly Homemaker's Club Members: Access your homepage and all your fantastic resources here! Not a member yet? Please join us!
« Previous Page
Next Page »

Join Our Community!

 Facebook Twitter E-mail Instagram Pinterest

Popular Posts

~ Will All of the Real Moms Please Stand Up?
~ Easy! Stir-and-Pour Whole Wheat Bread
~ How to Make Gatorade
~ 31 Real Food Breakfast Ideas
~ Dear Teenage Girls...
~ When Mom Takes a Step Back
~ The Inexpensive Health Insurance We Love!
~ Let's Talk Real Food Grocery Budgets

Check out our latest posts!

  • Help Your Kids Become Independent in the Kitchen!
  • Big Family Food and Fun: April 26-May 2, 2026
  • Big Family Food and Fun: April 19-25, 2026
  • Big Family Food and Fun: April 12-18, 2026
  • Big Family Food and Fun: April 5-11, 2026
Home  ~  Simple Meals  ~  Club Membership  ~  Shop  ~  Privacy Policy  ~  Disclosure  ~ Contact

Copyright © 2026 · Beautiful Pro Theme on Genesis Framework · WordPress · Log in