1 cup butter, melted (2 sticks) Cream butter and sugar. Add baking soda, milk, eggs, vanilla and salt. Stir well. Mix in flour until all combined (you may have to knead this to mix it together thoroughly. Chill for at least two hours. Roll portions of the chilled dough to ¼ inch thickness on a floured surface. Use cookie cutters to create the shapes you would like. Bake on a cookie sheet for 10 minutes at 350 degrees. Allow cookies to cool for a minute or two before removing them from the cookie sheet. Frosting 3 T. butter, melted Mix butter, milk and vanilla together. Slowly stir in powdered sugar with a hand mixer until completely mixed. If frosting is too runny, add more powdered sugar until it is the consistency you like. Decorate cookies however you choose: with sprinkles, coconut flakes, nuts, etc. Some helpful tips on decorating cookies with kids: *I have found that making these cookies in stages is the easiest. I usually mix up my cookie dough the night before we want to make the mess (um, I mean, make the cookies). Then, we roll out the cookies and bake them the next day. *Sometimes I freeze the unfrosted cookies until we are ready to frost and take them somewhere. It seems so easy to make the cookies this way, since the rolling and cutting out part (and clean up for that) is already done. *If we frost and decorate the cookies the same day we bake them, I never do it one step right after the other. We’ll usually roll, cut and bake in the morning, clean up, take a break, then lay out all the decorating stuff in the afternoon or evening. *I have found that allowing one or two children at a time in to the kitchen to help is a little easier. This way, they get all the cookie cutters or frosting/toppings options all to themselves and I don’t have 8 hands reaching for things all at the same time. And I get to have special time with each of my kids this way too! |
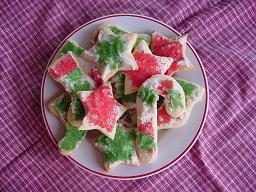
Frosted Sugar Cookies
 Heavenly Homemaker's Club Members: Access your homepage and all your fantastic resources here! Not a member yet? Please join us!