Heavenly Homemakers

Encouraging women in homemaking, healthy eating and parenting

  • Home
    • About
    • FAQs
  • Recipes
    • Bread and Breakfast
    • Condiments
    • Dairy
    • Main Dishes
    • Side Dishes and Snacks
    • Desserts
    • Gluten Free
    • Instant Pot
    • Crock Pot
    • Heavenly Homemaker’s Weekly Menus
  • Homemaking
    • Real Food Sources
  • Store
  • Contact
    • Advertise
    • Disclosure
    • Privacy Policy
  • Simple Meals
  • Club Members!

Low Sugar Granookie: Granola Cookie

October 25, 2020 by Tasha Hackett Leave a Comment

This post may contain affiliate links which won’t change your price but will share some commission.

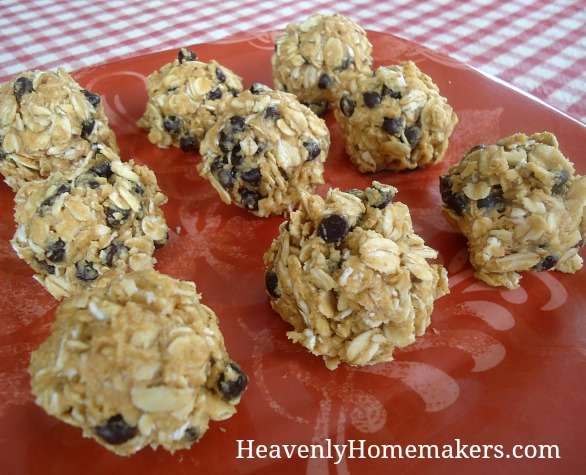
Tasha brought these Granookies to our family along with a meal when our newborn moved in with us in September. They are SO GOOD and I felt great letting our toddlers eat them along with the rest of us! (Bonus peek at “Baby Sister”—>)


Low Sugar Granookie: Granola Cookie

by Tasha Hackett

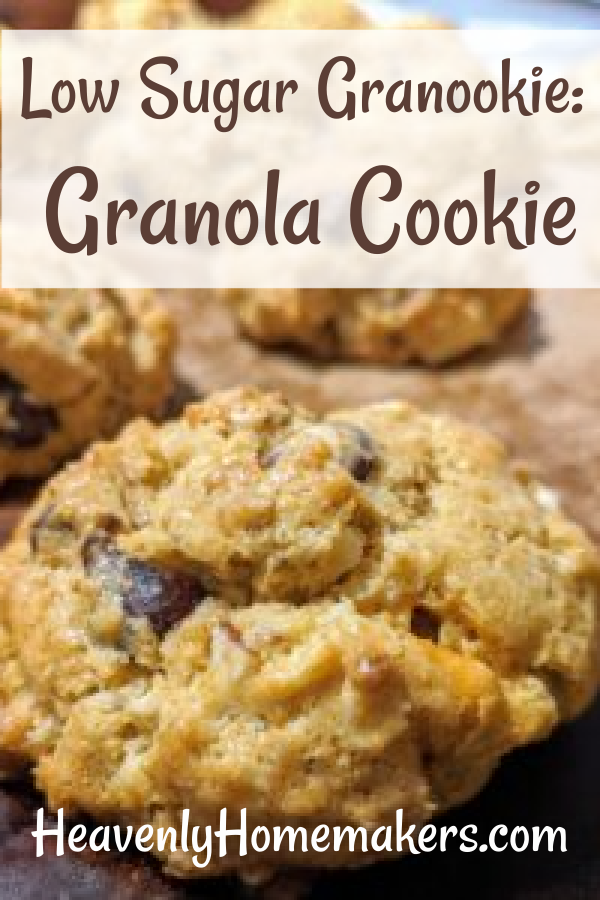
When you want a cookie, but you’re actually starving and what you need is a hearty snack or breakfast? Never fear, granookie is here! Granookie is a granola cookie and is the next best thing to stir-and-pour bread. (Go ahead and add Granookie to your dictionary.

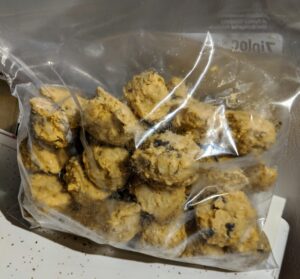
No, it’s not spelled wrong, your computer just isn’t up with the times.) It’s not simple, being that it has about a thousand ingredients and then there’s the whole stirring and making into cookie balls and baking. . . okay, it’s still pretty simple. Especially so because this recipe makes 5-6 dozen cookies. I bake one pan for eating right away, and I freeze the rest into premade cookie balls for a fresh granookie snack or breakfast or dessert for later. Tip: Freeze on a flat pan and then transfer to a bag once frozen.

bagged granola cookie

Yum

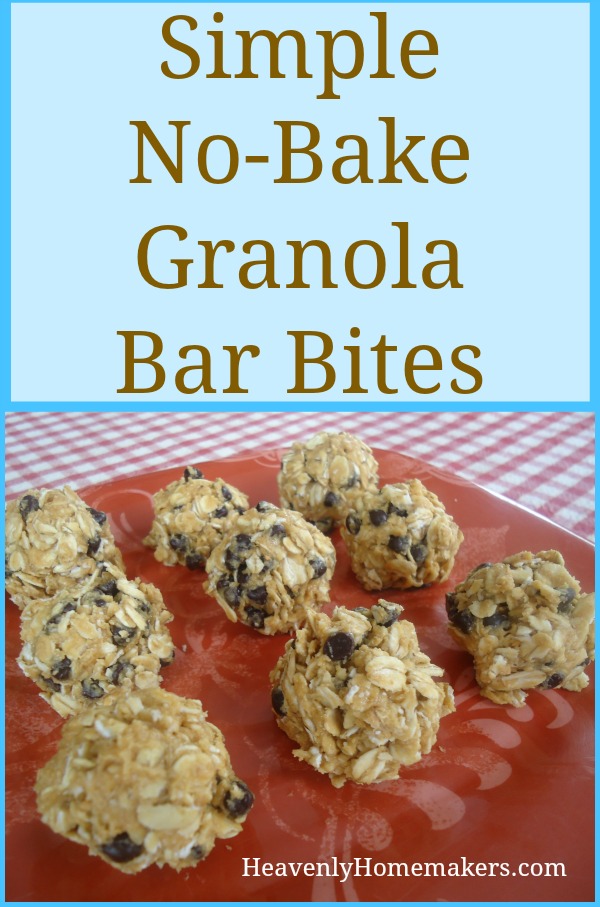
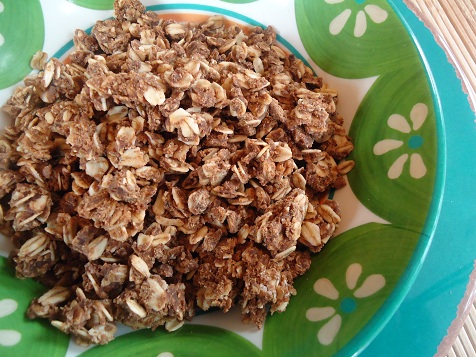
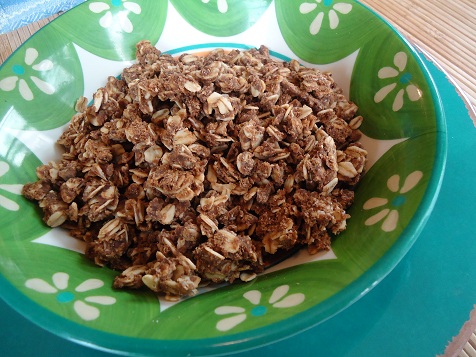
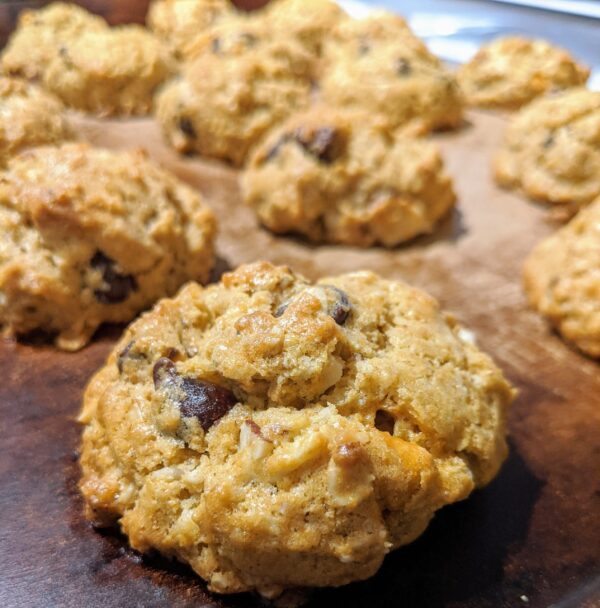
Granola Cookie: Granookie

Before you skim straight to the recipe for the granookie, you may want to take a few things into account. These are low-sugar and mildly sweet, but not nearly as sweet as cookies, nor even as sweet as traditional granola. In addition, there is a hearty mix of nuts and seeds that makes them deliciously healthy, along with the whole grain addition to stock you up on healthy carbs, fiber, and an exorbitant amount of vitamins and minerals. However, can we cut the healthy talk and just be amazed at how delicious these are and hand them out guilt free? 

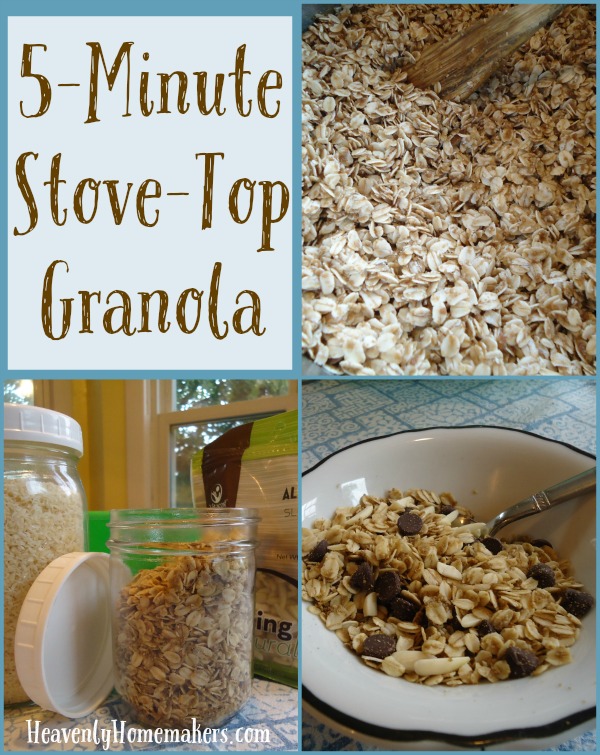
Whole grain for the win!

I always use fresh-ground flour when baking these. Either soft or hard wheat will work, though I use soft white wheat as it is marginally cheaper than hard wheat. If you’re using store-bought flour, you may need a touch less in your recipe. But it’s a fairly forgiving recipe. 

I developed over the past year after much frustration of my granola crumbling everywhere. I’ll sheepishly tell you that I changed it every time because I didn’t follow the recipe… but people kept asking me how to made these granola cookies (and I’d correct them, “It’s called a granookie.”) so I was determined to write down legit measurements and this is the winner! 

Granola Cookie

Enjoy!


homeschool momTasha Hackett is a friend of Laura and a bedroom closet jalapeno Cheeto eater. She lives in the great Midwest where the winter whisks your breath away and the summer smothers. Laura is still here, but likes to take a shower every now and then and let Tasha play on the blog. In other news, Tasha’s debut novel, a historical fiction romance, is currently being evaluated by a publisher. She’s been lost in the 1800’s for decades, dreaming of ways to bring her heroes to a happily ever after.


Low Sugar Granookie: Granola Cookie

Low Sugar Granookie: Granola Cookie
 
Save Print
Prep time
15 mins
Cook time
10 mins
Total time
25 mins
 
Author: Tasha
Recipe type: cookie
Serves: 60
Ingredients
  • 2 Cups of Butter
  • ¾ Cup Brown Sugar
  • 5 Eggs
  • 1 tsp Caramel Flavoring (I use this one.)
  • 1 Tbs Vanilla Extract
  • 1½ tsp baking soda
  • 1½ tsp baking powder
  • 1 tsp salt
  • 3 Cups Flour
  • 3 Cups Thick Rolled Oats
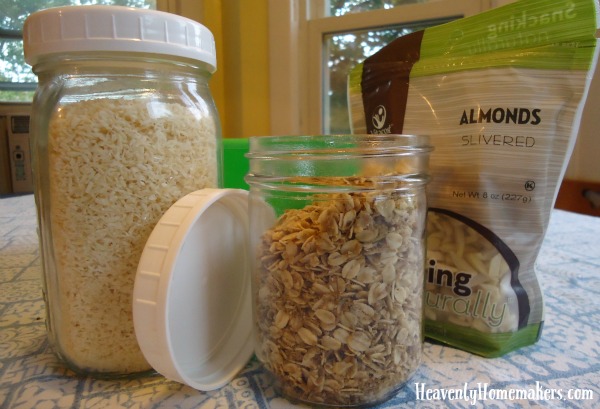
  • 1 Cup Unsweetened Shredded Coconut
  • 1 Cup Slivered Almonds
  • ½ Cup Pumpkin Seeds
  • ⅓ Cup Sunflower Seeds
  • 1 Cup Chocolate Chips
  • ½ Cup Butterscotch Chips
Instructions
  1. Whip the butter and sugar until fluffy, add the eggs, flavoring, and dry ingredients. Add the nuts and seeds and chips. Dough will be quite firm.
  2. Form into cookie sized balls and bake at 375* for 8-10 minutes (until golden brown). They do not flatten much.
3.5.3251
Heavenly Homemaker's Club Members: Access your homepage and all your fantastic resources here! Not a member yet? Please join us!

Simple No-Bake Granola Bar Bites

January 27, 2016 by Laura 8 Comments

This post may contain affiliate links which won’t change your price but will share some commission.

No-Bake Granola Bites
This is a non-recipe recipe. This means that you can sub out ingredient for ingredient as you have preferences, allergies, and stock piles. Love flax seeds? Throw ’em in. Can’t have peanut butter? Use the nut butter you like. Prefer maple syrup? Use it instead of honey. Running low on raisins? Oh well. Don’t like chocolate chips?

Wait. Who doesn’t like chocolate chips??

Here’s how this non-recipe works:

  1. Plop 1/2 cup peanut butter (or whatever butter) and 1/4 cup honey (or maple syrup) into a bowl. I really do mean plop. Just eye-ball it. An exact 1/2 cup of peanut butter is not necessary here.
  2. Stir in 1 1/3 cups total of whatever dry ingredients you want. Oats, flax, sunflower seeds, sesame seeds, raisins, chocolate chips, anything else you like.
  3. Scoop the mixture into balls and enjoy.
  4. Store them in the refrigerator.

Here’s the printable version:

Simple No-Bake Granola Bar Bites

5.0 from 2 reviews
Simple No-Bake Granola Bar Bites
 
Save Print
Author: Laura
Serves: 16
Ingredients
  • ½ cup peanut butter (or any nut butter)
  • ¼ cup honey (or maple syrup)
  • 1⅓ cups total dry ingredients of your choice (oats, flax, seeds, raisins, chocolate chips)
Instructions
  1. Plop ½ cup peanut butter (or whatever butter) and ¼ cup honey (or maple syrup) into a bowl.
  2. Stir in 1⅓ total cups of whatever dry ingredients you want. Oats, flax, sunflower seeds, sesame seeds, raisins, chocolate chips, anything else you want.
  3. Scoop the mixture into balls and enjoy.
  4. Store them in the refrigerator.
3.4.3177

Simple No-Bake Granola Bar Bites

As you can see, these Granola Bites are easy to put together in just a few minutes. They are great to take on the road or pack in a lunch. Of course, if you just want to sit right down at your kitchen table and eat them, that’s okay too. You could even make them at night and eat them for breakfast the next morning. Basically, this is one of the most versatile recipes in your whole wide kitchen. Everyone wins!

Heavenly Homemaker's Club Members: Access your homepage and all your fantastic resources here! Not a member yet? Please join us!

5-Minute Stove-top Granola Recipe – It is Too Easy!

October 12, 2015 by Laura 26 Comments

This post may contain affiliate links which won’t change your price but will share some commission.

Stove-Top Granola

Once upon a time, I spent five minutes stirring together melted coconut oil, sucanat, and oats in order to top an Apple Crisp. (I was making it dairy free for a friend.) While making it, I didn’t measure my ingredients (surprise, surprise) so when it came time to top my apples, I had too much topping. Oh well. I’d store them for later. Into a jar they went (surprise, surprise).

Later, my 13-year old came into the kitchen and saw the jar of apple crisp topping, about which he said, “Ooh, what kind of granola is this?” It was at that moment that I realized that all we had to do was stir in coconut flakes, almonds, dried fruit – whatever we wanted – and we’d have granola.

It was in the next moment that I decided that I might make granola like this every single time because it only took five minutes and it was too easy.

Friends, I present to you:

5-Minute Stove-Top GranolaYum

Make it on the fly. Make it ahead of time. Serve it with add-in options. It will be one of the easiest breakfast or snack options ever.

4.7 from 3 reviews
5-Minute Stove-top Granola
 
Save Print
Prep time
5 mins
Total time
5 mins
 
Author: Laura
Serves: 6 servings
Ingredients
  • 4 cups whole oats
  • ¼ cup sucanat
  • 1 cup coconut oil
Instructions
  1. Melt coconut oil in a medium-sized pan on the stove.
  2. Remove from heat and stir in oats and sucanat.
  3. Serve immediately, or allow it to sit a while to dry somewhat. We like it both ways.
Notes
Add-in options:

Nuts like almonds, pecans, or walnuts
Coconut flakes
Dried fruit like cranberries, raisins, or blueberries
Chocolate Chips
3.4.3177

When you make granola this way, you can set it out with a variety of add-in options and have a Granola Bar. (Like my play on words there?) This is wonderful for people with food allergies or simply to appease people’s taste preferences.

5-Minute Stove-Top Granola

I’d love to hear your ideas for Granola Add-In options!

Heavenly Homemaker's Club Members: Access your homepage and all your fantastic resources here! Not a member yet? Please join us!

Peanut Butter Chocolate Granola

May 8, 2013 by Laura 13 Comments

This post may contain affiliate links which won’t change your price but will share some commission.

pb_choc_granola_3

I’m guessing that many of the greatest recipe “inventions” have happened by accident. Asa (our 15 year old) really didn’t mean to create this wonderful Peanut Butter Chocolate Granola. His real intent was to make No-Bake Cookies for a mission trip fund-raising meal last Sunday. But somehow the liquid ingredients got slightly overcooked, the oats made the mixture way too dry, and no way no how was a cookie going to be formed once it was all said and done. I told him to press his mixture into a 9×13 inch pan and that we’d try cutting them into bars later. While that was a brilliant idea, it didn’t work any better than forming the mixture into cookies. We ended up with peanut butter chocolate oat crumbles instead. Peanut butter chocolate oat crumbles that tasted really, really good. :)

And so – we all just grabbed a bowl and a spoon and had at it. (While planning a different dessert to take to the fund-raising meal.)

I’m calling this “granola” because that’s what it looks and feels like. But I do have a hard time calling this a healthy breakfast or snack. While it is made with real food ingredients, it is still more dessert-like, for sure. In an effort to make this a little less sugary, and a bit more diverse for “stir-in” options, I’ve tweaked the ingredients from the original cookie recipe Asa used. I’m pretty sure it will still taste awesome with less sugar than originally called for in the cookie recipe!

By the way – depending on how you make this, it can be completely dairy free if you wish. :)

Peanut Butter Chocolate GranolaYum

1/2 cup butter or coconut oil
1/2 cup milk or coconut milk
1/2 cup natural peanut butter (we use homemade peanut butter)
1 cup sucanat or 1/2 cup honey
4 Tablespoons cocoa powder
1 teaspoon vanilla extract
3 cups rolled oats
1/2 cup coconut flakes (optional)

Put butter, milk, peanut butter, sucanat, and cocoa into a medium sized saucepan. Cook over medium heat until butter is melted and mixture is smooth. Bring to a boil, stirring constantly. Allow the mixture to boil for one minute. Remove from heat. Add vanila, oats, and coconut flakes. If the mixture is too liquidy add a few more oats or coconut flakes until you reach desired consistency.

pb_choc_granola_2

Or shucks. If you “mess up” this recipe and the mixture turns out to be nice and smooth instead of crumbly – go ahead and spoon it onto wax paper and make No-Bake Cookies. ;)

 UPDATE:  If you do find your mixture too wet:  Add a few extra oats to soak up the liquid. Then put it on a parchment paper lined cookie sheet and baked it at 250° for one hour, stirring occasionally. The granola should get nice and crispy!

Heavenly Homemaker's Club Members: Access your homepage and all your fantastic resources here! Not a member yet? Please join us!

Cranberry Pecan Granola {Gifts in a Jar ~ Day Ten}

December 6, 2012 by Laura 6 Comments

This post may contain affiliate links which won’t change your price but will share some commission.

Tweaking my Easy Homemade Granola recipe just a little bit, you can create a yummy Gift in a Jar that is perfect for the season. Shoot, what am I talking about? Cranberries and pecans are great during any season. ;)

Cranberry Pecan Granola

4 cups rolled oats
1 cup shredded, unsweetened coconut
1 cup chopped pecans
1 cup sunflower nuts
1 cup dried cranberries
1 cup coconut oil
3/4 cup honey

In a small sauce pan, melt together coconut oil and honey. Stir all remaining ingredients together in a large bowl. Drizzle on the honey/coconut oil mixture and stir well. Pour mixture onto a large, parchment paper lined baking sheet. Bake at 300° for 35 minutes, stirring after the first 20 minutes. Store granola in an air tight container.

This makes 4 pint sized jars of granola, so you can make lots of gifts…or have several servings of granola on hand for busy mornings. :)

Want a fun tag to use for your gift? Download Your Free Gifts In A Jar Tags Here!

Heavenly Homemaker's Club Members: Access your homepage and all your fantastic resources here! Not a member yet? Please join us!

Easy Homemade Granola

February 15, 2012 by Laura 50 Comments

This post may contain affiliate links which won’t change your price but will share some commission.

I didn’t really plan it this way, but what better way to follow up a post about not soaking grains than by giving you a recipe which includes unsoaked grains. Do with this what you wish. :)

This recipe works great as a snack or for a quick breakfast, especially if you’ve made it ahead of time. We like to put it in a bowl and add dried fruit and milk or cream. A friend of mine even adds applesauce to this granola for a sort of “apple crisp” taste. Her kids love it that way!

Easy Homemade GranolaYum

4 cups rolled oats
1 cup shredded, unsweetened coconut
1 cup slivered almonds
1 cup sunflower nuts
1/2 cup sesame seeds
3/4 cup honey
1 cup coconut oil

In a small sauce pan, melt together coconut oil and honey. Stir all remaining ingredients together in a large bowl. Drizzle on the honey/coconut oil mixture and stir well. Pour mixture onto a large, parchment paper lined baking sheet. Bake at 300° for 35 minutes, stirring after the first 20 minutes. Store granola in an air tight container.

granola_2

Are you granola eaters at your house?

Heavenly Homemaker's Club Members: Access your homepage and all your fantastic resources here! Not a member yet? Please join us!

Excalibur Food Dehydrator

August 31, 2010 by Laura 28 Comments

This post may contain affiliate links which won’t change your price but will share some commission.

My friend Anne told me last summer that if I was going to invest in a good food dehydrator, to get an Excalibur Food Dehydrator because they were the best!

Much to my loudly squealing delight, a few weeks ago Cultures for Health sent me a Excalibur Food Dehydrator free of charge, in exchange for telling you all about it here on my blog! Wow, wow, wow.  I love every package delivered to my door, but this big ol’ box may have made me jump a just little higher (poor UPS man).

My husband and I are having such a fun time giving our Excalibur Food Dehydrator a work-out! This is the perfect time of year for us to give the dehydrator a whirl as we have all kinds of fresh produce needing to be preserved.

See the pretty peach fruit leather?

peach_fruit_leather

Matt cut up a bunch of our red jalapeno peppers and dehydrated them. Here they are before they went into the dehydrator…

dehydrating_peppers

And then just a few hours later… 

dehydrating_peppers_2

We then ground them up to put on pizza and in chili. SO easy!!

Beyond fruits and vegetables, I’ve used the dehydrator to quickly dry homemade pasta! Note to self:  Don’t cut the pasta too short when planning to put it in your dehydrator. Or, for Pete’s sake, make good use of your Paraflex Sheets!

homemade_noodles_16

The noodles still turned out great even if they were “bent out of shape”. I’ll be sharing the recipe soon!

Our dehydrator has five drying trays, which makes it possible to preserve a lot of food all at one time. LOVE that! The best part about anExcalibur Food Dehydrator is that all of the food drys evenly so that we don’t have to rotate the trays or be frustrated because one is done and the others aren’t yet. Oh, and if we only need two trays at once, we only put two trays in. There are several different “heat settings” so that you can keep some of your food raw if you want or even make yogurt!

We are LOVING our Excalibur Food Dehydrator and appreciate that Cultures for Health was kind enough to send it to us. We can’t wait to see what we can dehydrate next!!!

I’m sure you’d enjoy looking over the Cultures for Health site. They have wonderful products to make cultured dairy products and cheese and sprouted grain and more…not to mention the awesome Excalibur Food Dehydrator!!

Heavenly Homemaker's Club Members: Access your homepage and all your fantastic resources here! Not a member yet? Please join us!

Join Our Community!

 Facebook Twitter RSS E-mail Instagram Pinterest

Popular Posts

~ Will All of the Real Moms Please Stand Up?
~ Easy! Stir-and-Pour Whole Wheat Bread
~ How to Make Gatorade
~ 31 Real Food Breakfast Ideas
~ Dear Teenage Girls...
~ When Mom Takes a Step Back
~ The Inexpensive Health Insurance We Love!
~ Let's Talk Real Food Grocery Budgets

Check out our latest posts!

  • How to Drink Your Salad (and love it!)
  • Can Mom Have More Fun?
  • 7 Ideas to Make Your Home Extra Cozy
  • Who Even Cares Anymore About Free Range Chicken?
  • Ready to Get Organized? (Exciting news for you!)
Home  ~  Simple Meals  ~  Club Membership  ~  Shop  ~  Privacy Policy  ~  Disclosure  ~ Contact

Copyright © 2021 · Beautiful Pro Theme on Genesis Framework · WordPress · Log in