Heavenly Homemakers

Encouraging women in homemaking, healthy eating and parenting

  • Home
    • About
    • FAQs
  • Recipes
    • Bread and Breakfast
    • Condiments
    • Dairy
    • Main Dishes
    • Side Dishes and Snacks
    • Desserts
    • Gluten Free
    • Instant Pot
    • Crock Pot
    • Heavenly Homemaker’s Weekly Menus
  • Homemaking
    • Real Food Sources
  • Store
  • Contact
    • Advertise
    • Disclosure
    • Privacy Policy
  • Simple Meals
  • Club Members!

Switching to Whole Food Sweeteners Without Breaking the Bank

November 2, 2014 by Laura 16 Comments

This post may contain affiliate links which won’t change your price but will share some commission.

Money Saving Monday Banner

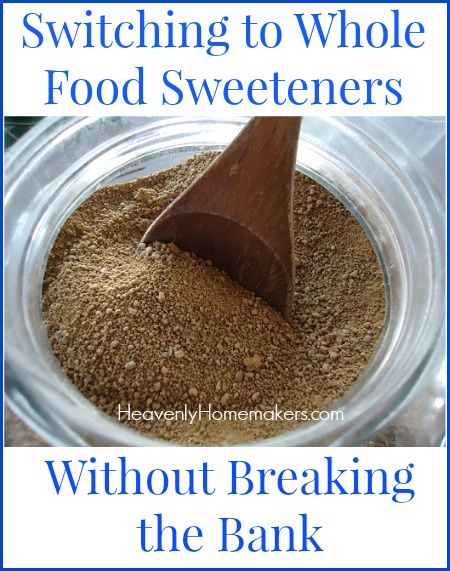
While switching from processed food to nourishing food doesn’t have to be terribly expensive, there’s no way around this one:  White and brown sugar are cheap. Sucanat, real maple syrup, muscovado, honey, and stevia are not cheap. I can get a 2-pound bag of brown sugar at the store for $1.78. Sucanat, on the other hand, is usually $5.00 for 1.5 pounds. Ouch! It’s worth it to buy the good stuff, but it isn’t fun to pay for.

While I don’t have any earth shattering advice about finding fantastic deals on these wholesome sweeteners, I do have some suggestions based on what works for me.

Switching to Whole Food Sweeteners Without Breaking the Bank

1. Stop eating so many sugary desserts.

I know. You’re rolling your eyes. I feel your pain on this one because I’m a recovering sugar addict. Pray about this and let God’s power be your will-power. You don’t have to cut out desserts altogether (unless you feel called to). You simply need to keep sugary foods a treat instead of pouring on the sugar like it’s a food group. You’ll be amazed at how much money you save on sucanat, honey, and maple syrup when you stop eating so much.

2. Cut the sugar in half.

When baking muffins, quick breads, and breakfast bars, I find that half the sugar called for in many recipes (even mine!) works just fine. The baked goods are still sweet and tasty. This saves quite a bit of money on wholesome sugars!

3. Drizzle your syrup.

Dousing your pancakes or waffles in real maple syrup? That’s an expensive breakfast! A little drizzle of rich, flavorful maple syrup goes a long way. It’s also fun to pour a tiny quarter-sized bit of syrup onto your plate, then dip the corner of each bite to sweeten it just a touch.

4. Pull out the cheap stuff when feeding a crowd.

If I’m feeding 40 teenagers, I leave my sucanat in the pantry and pull out the cheap brown sugar. There’s no need to use $6 worth of sucanat when I can use $1.50 worth of brown sugar for a big group of kids who really don’t care about whether or not the brownies were made with organic sugar or not. I certainly don’t mind sharing “the good stuff” with company occasionally, but it just really isn’t worth spending extra money when three pans of dessert are going to be devoured in two minutes. I never compromise on using real butter (instead of margarine), and I always use my freshly ground flour (no one can even tell) – but compromising on sugar? At least it’s actual sugar instead of artificial sugar or high fructose corn syrup. Which leads me to…

At the end of the day…

It’s all sugar.  Sucanat is healthier because it’s processed very little and still contains nutrients. Real maple syrup is straight from the tree. Honey is made by bees and is as natural as it comes. But to our bodies? It’s all sugar. Read this post about Breaking Free of Sugar Addiction for more of my thoughts on this.

This means you may decide that switching to sucanat (and paying the higher price tag) is just not worth it.

I believe the bigger focus needs to be on cutting back on sugar (in all its forms). Focus on filling up on fruits and vegetables instead. You’ll be amazed at how sweet your fruits and vegetables taste when your palate isn’t coated with a cookie.

I’d love to hear your thoughts on this. Which sugars do you choose to purchase and use for your family?

Heavenly Homemaker's Club Members: Access your homepage and all your fantastic resources here! Not a member yet? Please join us!

Make Homemade Broth ~ Money Saving Monday

October 26, 2014 by Laura 13 Comments

This post may contain affiliate links which won’t change your price but will share some commission.


Money Saving Monday Banner

Welcome to our very first Money Saving Monday tip! I have to start with talk about making broth. Why? Here’s the back story…

Once upon a time (otherwise known as two weeks ago), we were having a houseful of company for the weekend. I had the meals planned, and worked to get as much cooking done ahead of time as possible so that I could enjoy my guests once they arrived.

The only task left on my list was “make broth for soup” which kept getting pushed down because of everything else that kept getting added to my list – you know how it is. I decided, “Fine, I’ll just buy the broth. No need to kill myself and be exhausted before guests arrive.” So I checked “make broth for soup” off my to-do list and added “broth for soup” to my grocery list. (This has got to be the most intriguing story you’ve ever read…)

Fast-forward to the part where I was standing at the store in the aisle of broth. I saw the tiny little box of broth along with its price tag. Out loud to the shelf, the broth, the price tag, and likely to a few other shoppers passing by, I said, “Ugh. $2 – for this??” I cringed as I put three boxes in my cart. I cringed even more when I poured the watery broth into my soup pot. When I make broth, it’s thick and rich, full of vegetables, fat, and gel from the bones.

Purchasing broth that day really was a life saver. But a money saver it was not. Plus, what I make at home is much more nutrient packed. So Money Saving Monday tip for today:

Make Your Own Nutrient-Packed Broth

For the price of three boxes of store-bought (watery) broth, I can make 2 gallons of homemade, nourishing broth. I pack it full of veggies. I cook it slow and low until the good fat and nutrients seep out of the bones. You haven’t had broth until you’ve had homemade bone broth. This is incredibly delicious, and so very good for you!

Even better, beef bones are very inexpensive to purchase. I purchase beef bones from a local farmer who raises grass-fed beef. You can also check butcher shops and your grocery store meat department to see about getting a good deal on beef bones.

I personally love how easy beef bone broth is to make. In addition, I often make Chicken Broth, which is also incredibly nourishing and rich. But it does take a little more effort if you are starting with whole chickens. Making broth from beef bones requires very little effort – and very little money – just to restate one of our main points today!

Below you’ll find links to our Beef Broth and Chicken Broth instructions:

How to Make Beef Broth

Homemade Beef Broth

How to Make Chicken Broth

How to Make Chicken Broth

So, three cheers for homemade bone broth! It’s one of the most inexpensive ways to get loads of nourishment into your family.

What to do with Beef Bone Broth or Chicken Broth:

  • Cook brown rice in it (instead of water) for delicious flavor and added nutrients
  • Drink it as-is
  • Make Beefy Vegetable Soup
  • Make Cheeseburger Soup
  • Make Chicken Noodle Soup (or use the same idea for Beef and Noodle Soup)
  • Cook rice in it for Cheesy Beef and Rice
  • Use it in Chicken Pot Pie
  • Make Chicken Tortilla Soup
  • Cook rice in it for Creamy Chicken and Rice Casserole
  • Make Pizza Soup
  • Make Potato Soup

In case you lost count, that’s 12 amazing ways to fill yourself and your family with nourishment in a very inexpensive way. Homemade Beef and Chicken broth are amazing!

Make it Ahead

Beef and Chicken Broth can easily be made ahead and frozen for future use. This means you are not only saving money, you’re saving time! To freeze broth, be sure it has completely cooled. Pour it into jars, leaving 2-3 inches of space at the top of the jar to allow for the broth to expand as it freezes. You can also freeze the broth in freezer bags. Just be sure the bags are sealed well before putting them in the freezer. Otherwise, they will spill and leak, creating broth-sicles all over the freezer – ask me how I know. :(

What are your favorite ways to make and use beef or chicken broth?

Heavenly Homemaker's Club Members: Access your homepage and all your fantastic resources here! Not a member yet? Please join us!

Join Our Community!

 Facebook Twitter RSS E-mail Instagram Pinterest

Popular Posts

~ Will All of the Real Moms Please Stand Up?
~ Easy! Stir-and-Pour Whole Wheat Bread
~ How to Make Gatorade
~ 31 Real Food Breakfast Ideas
~ Dear Teenage Girls...
~ When Mom Takes a Step Back
~ The Inexpensive Health Insurance We Love!
~ Let's Talk Real Food Grocery Budgets

Check out our latest posts!

  • Big Family Food and Fun: Meals and Photos from Last Week (May 17-27, 2023)
  • The Coppinger Castle
  • How Our Youngest Became Oldest of 9
  • May 1- 17, 2023 Groceries and Meals We Ate (Big Family Food!)
  • The Coppingers Have Decided to Move
Home  ~  Simple Meals  ~  Club Membership  ~  Shop  ~  Privacy Policy  ~  Disclosure  ~ Contact

Copyright © 2023 · Beautiful Pro Theme on Genesis Framework · WordPress · Log in