Heavenly Homemakers

Encouraging women in homemaking, healthy eating and parenting

  • Home
    • About
    • FAQs
  • Recipes
    • Bread and Breakfast
    • Condiments
    • Dairy
    • Main Dishes
    • Side Dishes and Snacks
    • Desserts
    • Gluten Free
    • Instant Pot
    • Crock Pot
    • Heavenly Homemaker’s Weekly Menus
  • Homemaking
    • Real Food Sources
  • Store
  • Contact
    • Advertise
    • Disclosure
    • Privacy Policy
  • Simple Meals
  • Club Members!

Oh Beautiful Jars!! Stocked and Ready For Gawking

August 1, 2012 by Laura 28 Comments

This post may contain affiliate links which won’t change your price but will share some commission.

One of the jobs on my “To Do” List was to refill all of the jars in my pantry so that I’d have easy access to all of the staple ingredients I reach for so often. Since I typically purchase these ingredients in 25-50 pound quantities, I store them big buckets, and pour a smaller portion into easy-access jars in my kitchen, refilling as needed. (Read more here about where I purchase most of my food, and scroll through these posts to learn more about my bulk shopping and storage.)

My favorite part of this system, besides the fact, of course, that this just makes my life easier and saves us money while we strive to eat a whole foods diet is this:  I love staring at my jars full of pretty food.
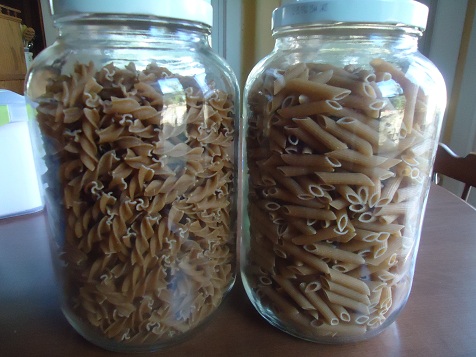
It’s a slight obsession. A major obsession? Yeah, probably something like that.

Well, after just a few minutes of going back and forth from storage room to kitchen, lugging buckets and bags of dry goods (a great upper arm work-out!), all of my jars are re-stocked and ready to go. Pasta, sucanat, wheat, salt, beans, corn, and rice. Oh so beautiful.

 This is the part of my pantry I stare at when I most need a fix:
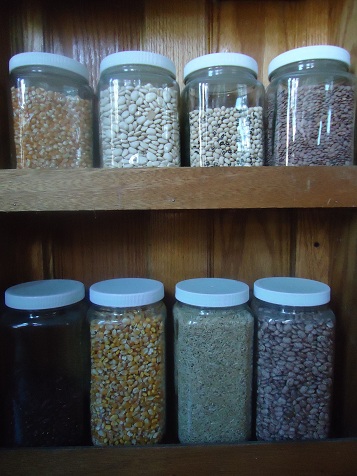
Hey, it’s much healthier than my former Pepsi addiction, right? :)


Heavenly Homemaker's Club Members: Access your homepage and all your fantastic resources here! Not a member yet? Please join us!

Healthy Crock Pot Recipe: Italian Cream Cheese Chicken

November 9, 2011 by Laura 79 Comments

This post may contain affiliate links which won’t change your price but will share some commission.

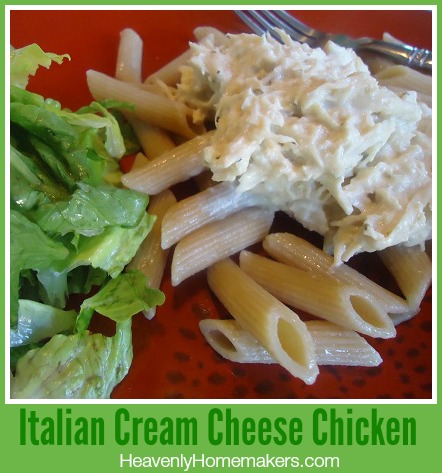
You’re about to learn about my amazing Italian Cream Cheese Chicken recipe – one of my family’s favorite meals!

If you didn’t know it already, after reading this recipe it will be very clear to you that I am not afraid to cook with, serve my family, or eat high fat foods. Welcome to a recipe that includes butter, cream and cream cheese. Oh yes, that’s why it tastes so good.

If you are afraid of fats, I’d love to assure you of how healthy it is to eat these whole, natural foods. There’s a big difference in the fat you consume at McGreasies and fat which is whole and natural. Our bodies, skin and hair need healthy fats in order to thrive. Here is a post I wrote a while ago regarding butter and cream – and if you’d like to read through my entire series of Getting Real with Food posts, you can do that here.

Ah, and I have to laugh at myself because while this recipe calls for butter, cream and cream cheese – it also calls for boneless, skinless chicken breasts, which always makes me think of low-fat cooking. I’m not afraid of the fat in the skin of a chicken, nor am I afraid of cooking a chicken with bones – but I don’t really prefer pieces of bone or skin in my pasta dishes. Therefore, I find that boneless, skinless chicken works best in this recipe. ;)

Italian Cream Cheese ChickenYum

Healthy Crock Pot Recipe: Italian Cream Cheese Chicken
 
Save Print
Author: Laura
Serves: 6-8
Ingredients
  • 4 boneless, skinless chicken breasts
  • 2 Tablespoons dry Italian Dressing Mix
  • ½ cup butter
  • 1½ cups cream
  • 8 ounces cream cheese, softened
Instructions
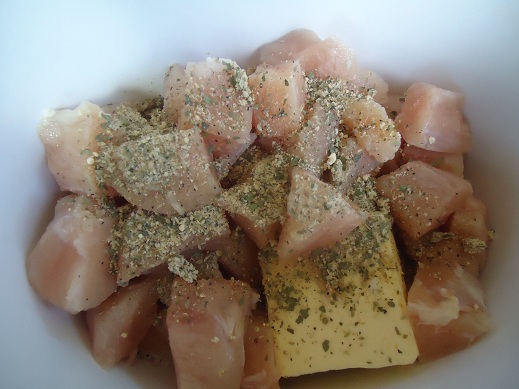
  1. Place chicken, dressing mix and butter in a crock pot. (I used my homemade Italian Dressing Mix to make this dish.)
  2. Cook for 6 hours on low or 4 hours on high.
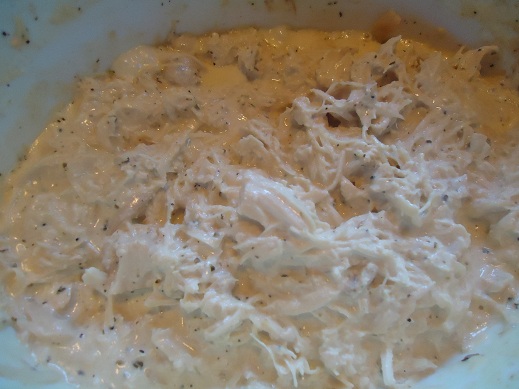
  3. Shred chicken with a knife and fork. Add cream and cream cheese to the chicken and stir.
  4. Cook for ½ hour longer on low.
  5. Serve with whole grain noodles or brown rice.
3.4.3177

Italian Cream Cheese ChickenWhat are the fats you include in your healthy diet?

Heavenly Homemaker's Club Members: Access your homepage and all your fantastic resources here! Not a member yet? Please join us!

Easy Alfredo Sauce

November 11, 2010 by Laura 92 Comments

This post may contain affiliate links which won’t change your price but will share some commission.

High Five Recipes 2

I love a good alfredo sauce. Want to know why this recipe is so good and rich? It’s full of butter and cream. Indeed, this recipe is neither fat free nor dairy free. I am very much not afraid of real and healthy fat. For those of you who need to eat a dairy free diet, I’ll try to come up with something a little less “cow” next time. ;)

Easy Alfredo SauceYum

Easy Alfredo Sauce
 
Save Print
Author: Laura
Serves: 6 servings
Ingredients
  • ½ cup butter
  • One pint of cream (2 cups)
  • 1-3 garlic cloves
  • 2 Tablespoons cream cheese
  • ½ cup grated parmesan cheese
Instructions
  1. Bring the butter, cream, garlic and cream cheese to a boil.
  2. Turn down the heat, simmer and stir for about two minutes.
  3. Add the grated cheese and stir until melted.
  4. Simmer the sauce for 15-20 minutes until it becomes "thick and saucy", stirring occasionally.
3.4.3177

And now, a few alfredo pictures:

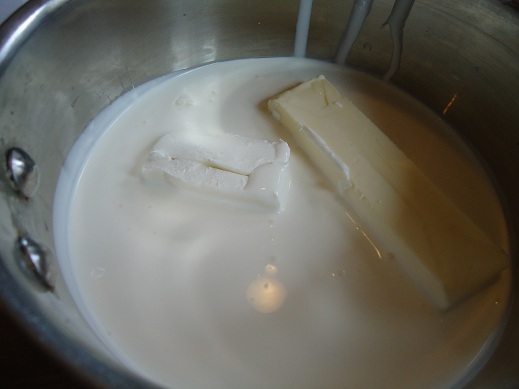
Into the pot go the butter, cream, cream cheese and garlic…

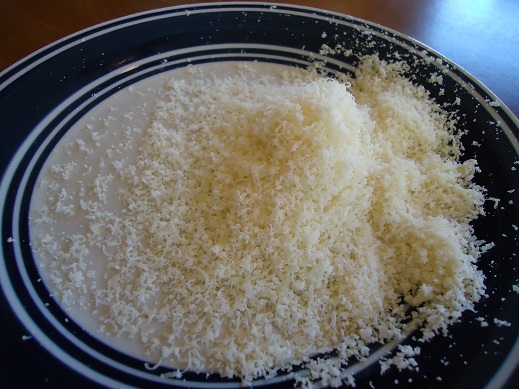
The parmesan cheese is shredded and ready to add once we’ve boiled the other ingredients for a couple of minutes.

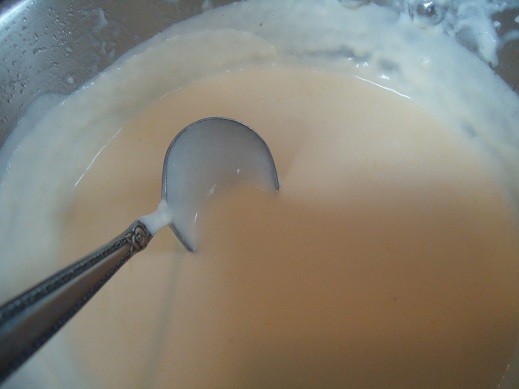
Here’s our sauce, simmered and ready to serve…

OH. YUM.

pasta alfredo

Are you wondering about the pasta I served with our Easy Alfredo Sauce? It looks like WHITE pasta, doesn’t it? Ah, but it isn’t!! I’m very excited to tell you that this was Gluten Free Corn Pasta  from OliveNation. My OliveNation friends told me that their GF pasta tasted awesome and wow they were right!!! It’s great stuff! AND, if you recall, just like with vanilla beans, OliveNation offers Heavenly Homemakers readers a 10% discount (use the code home).

Now, you can of course add chicken to this dish if you like. Just saute a little chicken in some olive oil and toss it into the sauce. For that matter, that steamed broccoli I served on the side tasted great stirrred right into the sauce and noodles on our plate!

Are you a red sauce or a white sauce kind of pasta lover? Or does it depend on the day?

Take a peek at all of our High Five Recipes –
High Quality Recipes…Five Ingredients or Less!

Heavenly Homemaker's Club Members: Access your homepage and all your fantastic resources here! Not a member yet? Please join us!

Homemade Whole Wheat Pasta

September 1, 2010 by Laura 92 Comments

This post may contain affiliate links which won’t change your price but will share some commission.

I’ve been making homemade pasta for several years. It is SO easy and everyone loves it. I mostly use the noodles for Chicken and Noodle Soup or Beef and Noodles. Or, sometimes I roll the recipe into Lasagna Noodles (I’ll share how I do that soon).

By the way…I can’t decide whether to call this pasta or noodles. Is there a difference? If it’s okay with you, I’ll just keep using the words interchangeably since I apparently can’t make a decision about which one to use. Hopefully I won’t accidentally combine the two and call it poodles because that’s a different thing entirely and poodles can neither be mixed in a bowl nor rolled out on a well floured surface.

I think most people assume it’s hard to make your own noodles. If you are one of those people, please try mixing these up really quickly and find out how EASY they are to make!! Here…I’ll show you…

Whole Wheat PastaYum

2 1/3 cups whole wheat flour (I use freshly ground flour)
1/2 teaspoon sea salt
2 beaten eggs
1/3 cup water
1 teaspoon olive oil

Grain Soaking Instructions (so that the grain will be more easily digested):

Use the same ingredients, substituting the water with a cultured dairy product like buttermilk or plain yogurt. Mix then cover with a towel and let it sit for 12-24 hours.

First mix the flour and salt together in a bowl and make a little”pit”  in the middle.

homemade_noodles_1

Beat your eggs in a separate bowl, then pour them into the flour mixture.
Add the water (or buttermilk) and olive oil.

homemade_noodles_2

Stir well until the ingredients are mostly combined.

homemade_noodles_4

Dump it out onto a floured surface and knead it a little bit to get the ingredients combined well.
(If you are planning to soak the grain, you would begin at this point.
Put the “blob of dough” back into your bowl, cover and let it sit for 12-24 hours.)

homemade_noodles_7

Make sure your surface has a LOT of flour all over it so that your noodles won’t stick when you roll out the dough. Sticky noodles are not fun. (I would imagine that sticky poodles are not fun either, but I don’t have any experience in this area.)

homemade_noodles_6

Use a well floured rolling pin and roll and roll and roll until your noodle dough is almost hanging off the side of your counter top. Or at least until it is very thin, about 1/8 inch in thickness. You may need to keep tossing some flour under the dough as you roll to keep it from sticking.

homemade_noodles_8

I use a pizza cutter to cut long strips in my noodle dough.
That’s what Grandma used to do after all.

homemade_noodles_10

Ooh, isn’t it purty?

homemade_noodles_11

Cut your noodles any length you want.

homemade_noodles_13

In case you’re wondering…I made a double batch. Yeah…that’s a lot of noodles.

homemade_noodles_14

 Once you’ve cut your noodles you can either use them right away, or you can let them dry so that you can store them and have them ready for when you need them.

I used my new dehydrator to dry the noodles, but you can just leave them on the countertop to dry if you want. It will take a while…like several hours or even an entire day. You may also need to turn the noodles over after a few hours so that the under side can dry.

Once the noodles are completely dry, store them in an air tight container in your pantry. They will stay good for up to a month. They can also be frozen….just let them thaw a little before you cook them.

homemade_noodles_17

To cook your noodles:

Bring six cups of chicken, beef or vegetable broth to a boil. (I like to include cooked meat and veggies in my broth too when I add noodles.)  Stir in the noodles, making sure they don’t stick to each other. Salt well. Cover and simmer for 20-25 minutes or until the noodles are fat and tender.

Heavenly Homemaker's Club Members: Access your homepage and all your fantastic resources here! Not a member yet? Please join us!

Excalibur Food Dehydrator

August 31, 2010 by Laura 28 Comments

This post may contain affiliate links which won’t change your price but will share some commission.

My friend Anne told me last summer that if I was going to invest in a good food dehydrator, to get an Excalibur Food Dehydrator because they were the best!

Much to my loudly squealing delight, a few weeks ago Cultures for Health sent me a Excalibur Food Dehydrator free of charge, in exchange for telling you all about it here on my blog! Wow, wow, wow.  I love every package delivered to my door, but this big ol’ box may have made me jump a just little higher (poor UPS man).

My husband and I are having such a fun time giving our Excalibur Food Dehydrator a work-out! This is the perfect time of year for us to give the dehydrator a whirl as we have all kinds of fresh produce needing to be preserved.

See the pretty peach fruit leather?

peach_fruit_leather

Matt cut up a bunch of our red jalapeno peppers and dehydrated them. Here they are before they went into the dehydrator…

dehydrating_peppers

And then just a few hours later… 

dehydrating_peppers_2

We then ground them up to put on pizza and in chili. SO easy!!

Beyond fruits and vegetables, I’ve used the dehydrator to quickly dry homemade pasta! Note to self:  Don’t cut the pasta too short when planning to put it in your dehydrator. Or, for Pete’s sake, make good use of your Paraflex Sheets!

homemade_noodles_16

The noodles still turned out great even if they were “bent out of shape”. I’ll be sharing the recipe soon!

Our dehydrator has five drying trays, which makes it possible to preserve a lot of food all at one time. LOVE that! The best part about anExcalibur Food Dehydrator is that all of the food drys evenly so that we don’t have to rotate the trays or be frustrated because one is done and the others aren’t yet. Oh, and if we only need two trays at once, we only put two trays in. There are several different “heat settings” so that you can keep some of your food raw if you want or even make yogurt!

We are LOVING our Excalibur Food Dehydrator and appreciate that Cultures for Health was kind enough to send it to us. We can’t wait to see what we can dehydrate next!!!

I’m sure you’d enjoy looking over the Cultures for Health site. They have wonderful products to make cultured dairy products and cheese and sprouted grain and more…not to mention the awesome Excalibur Food Dehydrator!!

Heavenly Homemaker's Club Members: Access your homepage and all your fantastic resources here! Not a member yet? Please join us!

Join Our Community!

 Facebook Twitter RSS E-mail Instagram Pinterest

Popular Posts

~ Will All of the Real Moms Please Stand Up?
~ Easy! Stir-and-Pour Whole Wheat Bread
~ How to Make Gatorade
~ 31 Real Food Breakfast Ideas
~ Dear Teenage Girls...
~ When Mom Takes a Step Back
~ The Inexpensive Health Insurance We Love!
~ Let's Talk Real Food Grocery Budgets

Check out our latest posts!

  • Easy Meatballs with Sweet Sauce (Freezer Friendly)
  • How to Make Uncrustables
  • The Easiest No-Bake Cheescake
  • Do I Still Buy Organic Food?
  • How I Shop and Budget for Our Large Family
Home  ~  Simple Meals  ~  Club Membership  ~  Shop  ~  Privacy Policy  ~  Disclosure  ~ Contact

Copyright © 2023 · Beautiful Pro Theme on Genesis Framework · WordPress · Log in