Heavenly Homemakers

Encouraging women in homemaking, healthy eating and parenting

  • Home
    • About
    • FAQs
  • Recipes
    • Bread and Breakfast
    • Condiments
    • Dairy
    • Main Dishes
    • Side Dishes and Snacks
    • Desserts
    • Gluten Free
    • Instant Pot
    • Crock Pot
    • Heavenly Homemaker’s Weekly Menus
  • Homemaking
    • Real Food Sources
  • Store
  • Contact
    • Advertise
    • Disclosure
    • Privacy Policy
  • Simple Meals
  • Club Members!

Mini Crustless Breakfast Quiches

April 12, 2011 by Laura 160 Comments

This post may contain affiliate links. For more information, please see our disclosure policy.

crustless_quiche
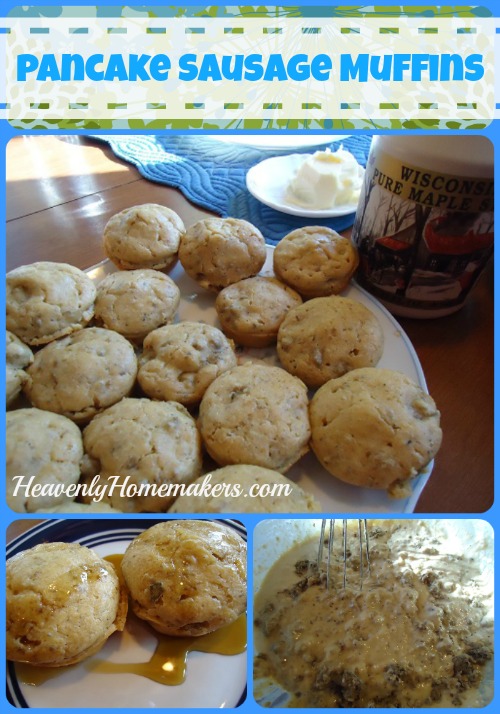
You know how I mentioned that we go through a lot of eggs at our house? Six dozen last week to be exact.  This week I was able to get my hands on 11 dozen farm fresh eggs and I am so very excited. It’s obviously the simple things in life that make me happy…proven by the fact that having 11 dozen eggs available this week for my cooking pleasure has made me almost giddy.

What do we do with all those eggs you ask?  Well, there are six of us, five are male and four of those five male people can’t seem to get enough food right now. We also have extra people eating at our house quite often, so our six turns into eight or more on just about any given day. I bake a lot, so I stir them into whatever I’m baking. We easily go through an entire dozen for breakfast if I’m making scrambled eggs or a casserole, and more than a dozen if I make crepes. These Coconut Flour Muffins are incredible…and they take up quite a few eggs. And, I often put eggs in our smoothies or “milkshakes” for added protein and nutrients. (Again, let me reinforce that we ONLY eat them raw if they are organic, free range, farm fresh…otherwise I’m afraid of them.)

If I have lots of eggs available to me, I go for it and I don’t hold back! Eggs are brain food.  I pay between $2.00 and $2.50 for a dozen farm fresh eggs, depending on my source. For the quality of eggs I’m getting, I consider this to be a great price. So even though we go through a lot of eggs…what an economical source of nutrition!!! How else can I feed my family an entire meal for just over $2.00??? (Okay, yes, they eat fruit and stuff with their eggs…you see my point though, right?)

If you haven’t tried our Easy Breakfast Casserole, please go get yourself some eggs and try it. It’s the simplest little breakfast casserole I’ve ever made and my family eatsthe whole pan. Actually…they don’t eat the pan. Hungry boys though they are, they do have their limits.

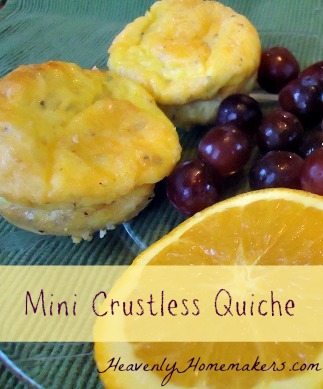
I  have now adapted the Easy Breakfast Casserole recipe to become an easy, make-ahead Mini Crustless Breakfast Quiche recipe. You can make these and serve them fresh, or you can bake them the night before and re-warm them in the oven the next morning for breakfast. You can even bake them and freeze them to have available for future grab and go meals. You can make them for lunch or brunch. These little quiches are super versatile!

Mini Crustless Breakfast QuicheYum

12 eggs
3/4 cup heavy cream
1/4 teaspoon sea salt
1  cup shredded cheese (I use white cheddar, but you can use whatever cheese you want!)

Begin your quiches by whisking together the eggs, cream, salt and cheese in a large mixing bowl. Sprinkle in any “add in” ingredients you wish (a total of 1 cup of add-ins). Stir them around with a fork. Scoop mixture into 24 well buttered regular sized muffin tins. Bake in a 350° oven for 20-30 minutes, or until the middle of each quiche doesn’t jiggle.

Add In Ideas:

Cooked sausage (I have a wonderful recipe for turkey sausage here.)
Chopped ham
Chopped and cooked bacon
Leftover baked potatoes, cut into chunks or shredded into hashbrowns
Sauteed veggies
Raw spinach
Cooked chicken
Taco seasoned meat

Obviously, you can cut this recipe in half to make 12 regular sized muffins sized quiches!

Mini_Quiches_2

I’m curious, just because I’m fairly certain some of you might be shocked about our egg consumption…how many eggs does your family go through in a week?

Heavenly Homemaker's Club Members: Access your homepage and all your fantastic resources here! Not a member yet? Please join us!

Gluten Free – Dairy Free Muffins

April 5, 2011 by Laura 216 Comments

This post may contain affiliate links. For more information, please see our disclosure policy.

I think this is the recipe I’m most excited about from all my gluten free recipe experimenting last week!!! Cher left this recipe in the comments section in my Gluten Free Experiment post and since I had all the ingredients on hand, I gave them a try. (Cher, I’d like to give you a BIG hug!!!)

Coconut_Flour_Muffin

Upon first glance, it seems that there would be too much liquid in these, making for a really runny batter. But nope…it’s just right. I mixed them up, baked them, then held my breath:  Would my kids like them? They smelled good…they looked good…but would they taste good?

Oh. My. Muffin.

EVERY boy in my house scarfed these up…my pickiest son exclaiming, “Mom! These taste like CAKE!”

It’s only been a week, but I think I’ve made three batches of these already. We all love them.

Gluten Free – Dairy Free MuffinsYum

Gluten Free - Dairy Free Muffins
 
Save Print
Author: Laura
Serves: 12
Ingredients
  • 6 eggs
  • 4 Tablespoons Coconut Oil
  • ½ cup honey
  • ¼ teaspoon salt
  • ½ cup Coconut Flour
  • ½ teaspoon baking powder
  • Add-In Ideas:
  • ¼ cup chocolate chips
  • ½ cup fresh berries
  • ¼ cup chopped, dried fruit
Instructions
  1. Mix all ingredients together, throw in an add-in if you'd like, then pour batter into a well greased muffin pan.
  2. Bake at 350 for 15-17 min.
3.4.3177

By themselves, these muffins are awesome…but with chocolate chips. Oh my!

With both Coconut Oil and Coconut Flour in these, you would think they would have an overpowering coconut flavor. You can taste a bit of coconuty-goodness, but it’s not strong. Read this post explaining about the differences in coconut oils – try expeller pressed coconut oil if you don’t like the taste of coconut!

So where can you get Coconut Flour? I usually get mine from Tropical Traditions, but just saw this great pack of Coconut Flour at Amazon and decided to snatch it up. I think we’ll be making a lot of these muffins in the future…whether we remain gluten free or not. What an EXCELLENT little healthy muffin!!!

Have you ever baked with Coconut Flour? I’m hoping to figure out more Coconut Flour recipes. It’s super good for you! What add-in ideas can you think of for these muffins?

Heavenly Homemaker's Club Members: Access your homepage and all your fantastic resources here! Not a member yet? Please join us!

Vanilla Muffins with Cinnamon Crumb Topping

December 21, 2010 by Laura 227 Comments

This post may contain affiliate links. For more information, please see our disclosure policy.

I wanted something cinnamony for our Christmas Brunch (the invented word is pronounced:  sin-uh-money;  not to worry, cinnamony has nothing to do with sin or money, it’s all about the smell and taste of Christmas). I also wanted to use my homemade vanilla. So I played just a little bit and came up with Vanilla Muffins with Cinnamon Crumb Topping. I made mine with a mini muffin tin, but you can use a regular sized muffin tin instead if you prefer.

These muffins are very simple to throw together and will make your house smell just like Christmas while they’re baking. That’s because they’re cinnamony. :)

Vanilla Muffins Yum

1 1/2 cups whole wheat flour
1/2 cup sucanat (you can use brown sugar if you want)
1 teaspoon baking powder
1/2 teaspoon sea salt
1 egg
1 teaspoon vanilla extract
1/4 cup melted butter or coconut oil
3/4 cup milk

Cinnamon Crumb Topping

6 T. sucanat/rapadura (dehydrated cane sugar juice) or brown sugar
1 teaspoon ground cinnamon
2 T. butter, softened

Stir together flour, sucanat, baking powder and sea salt. Add egg, vanilla, butter and milk. Mix until ingredients are combined. Scoop into paper lined muffin tins. (24 mini muffins or 12 regular sized muffins)  Mix together Cinnamon Crumb Topping ingredients and sprinkle on top of each muffin. Bake in a 400° oven for 15 minutes (mini muffins) or 20 minutes (regular sized muffins).

Vanilla Muffins with Cinnamon Crumb Topping

These Vanilla Muffins with Cinnamon Crumb Topping go perfectly with Easy Breakfast Casserole. I also think the cinnamony-ness would taste great with Warm Vanilla Soother.

Up next during our Christmas Brunch:  a great giveaway from Tropical Traditions. Then, to add to our cinnamony pleasure…Gingerbread Cookies. Not only are they cinnamony…they’re gingerlicious. And full of molassessness.

You never knew our Christmas Brunch would be so full of new vocabulary words did you?

(Be sure to leave a comment again on this post for another chance to win one of our great Christmas Brunch Presents!)

Heavenly Homemaker's Club Members: Access your homepage and all your fantastic resources here! Not a member yet? Please join us!

Easy Breakfast Casserole

December 19, 2010 by Laura 320 Comments

This post may contain affiliate links. For more information, please see our disclosure policy.

I used to think that making a Breakfast Casserole was a big deal, difficult, complicated and tricky. It seems that the recipes I found called for ingredients I never had and they always overwhelmed me.

One day a few weeks ago, I had an abundance of eggs and a few leftover ingredients from other meals so I decided to experiment. What do you know? You can build an egg casserole with just about anything. Quickly. Inexpensively. Without difficulty. I am very excited.

Here’s the beauty of this recipe:  You can build your breakfast casserole however you want.  This recipe has a few “base ingredients”, then you stir in whatever “add ins” you want…then you top it with cheese…then you bake it. It doesn’t get much easier than that! (And did I mention that this recipe is naturally Gluten Free?!)

Care to take a peek at how easy it is to put together this casserole? Here’s a quick video my son helped me make!

Easy Breakfast CasseroleYum

5.0 from 1 reviews
Easy Breakfast Casserole
 
Save Print
Author: Laura
Serves: 6-8
Ingredients
  • 8 eggs
  • ½ cup heavy cream
  • ¼ teaspoon sea salt
  • 1 cup shredded cheese (I use white cheddar, but you can use whatever cheese you want!)
Instructions
  1. Begin your casserole by whisking together the eggs, cream and salt.
  2. Pour the ingredients into a 9x13 inch casserole dish.
  3. Sprinkle in any "add in" ingredients you wish.
  4. Stir them around with a fork.
  5. Top casserole with cheese.
  6. Bake in a 350° oven for 30-40 minutes, or until the middle doesn't jiggle.
3.4.3177

Add In options:

Cooked sausage (I have a wonderful recipe for turkey sausage here.)
Chopped ham
Chopped and cooked bacon
Leftover baked potatoes, cut into chunks or shredded into hashbrowns
Sauteed veggies

Add anywhere from 1/2 cup to 2 cups of any of these “add ins”. You can use a different sized casserole dish, you’ll just need to adjust the bake time. The thicker your casserole, the longer it will take to bake.

breakfast_casserole[1]

Want to make this ahead of time and freeze it? I do it all the time, making for a super easy breakfast!

Prepare the casserole as directed, then freeze unbaked. Place frozen casserole in the fridge overnight. Bake the following morning as directed, adding a few additional minutes if necessary.

Join Simple Meals!

728x90

Want all the work of menu planning to be done for you? We invite you to subscribe to Simple Meals! We equip you – every single week – to put great money and time saving meals on the table – every single night!

Heavenly Homemaker's Club Members: Access your homepage and all your fantastic resources here! Not a member yet? Please join us!

Homemade Healthy Poptarts

November 16, 2010 by Laura 422 Comments

This post may contain affiliate links. For more information, please see our disclosure policy.

Yay…the promised homemade poptart recipe!!

Homemade Poptarts

I truly don’t like boxed poptarts…blech. But these I DO  like…which is why I hesitate to even call them poptarts. Can we call them Delightful Little Jelly Pastries? Maybe we could call them Flaky Fruity Melty Yumminess?

At our house, I suppose I’d have to call them “Gone“. Or “The Empty Plate“. They don’t last long. :)

For the crust, I found that using the same recipe I use for my Homemade Pizza Pockets and Mini Apple Pies works the best. Buttery and flaky…and oh so easy.

Homemade Healthy PoptartsYum

5.0 from 1 reviews
Homemade Healthy Poptarts
 
Save Print
Author: Laura
Serves: 15-20
Ingredients
  • 3½ cups whole wheat flour
  • 1 teaspoon sea salt
  • 1 cup melted butter
  • 1 cup plain yogurt
  • About 5 ounces of 100% fruit jelly or jam - any flavor you like!
Instructions
  1. Begin by mixing the flour, salt, butter, and yogurt.
  2. Knead the dough just a little bit to make it nice and workable.
  3. Roll out the dough on a large, well floured surface.
  4. Use a knife to cut the dough into the desired poptart size you would like.
  5. Place about a ½ teaspoon of jelly on ½ of the dough rectangles (squares?).
  6. Spread the jelly around, leaving the edges free.
  7. Find a second square or rectangle or thingamajigger that matches closely with each jellied one.
  8. Place it on top and use a fork to seal the edges.
  9. Lay each poptart in a single layer on a baking sheet.
  10. Bake in a 350° oven for about 25 minutes or until the crust is lightly browned.
3.4.3177

This recipe makes around 15-20 poptarts, depending on how big you make them.

I have found that making them ahead of time and then putting them in our toaster oven to re-heat makes for a very fast and popular breakfast! These CAN be frozen as well. Bake them first, let them cool and the freeze until you’re ready to re-heat and eat!

Is it just me, or is it more than a little bit tempting to reach through the screen to lick the jelly oozing out of that poptart?

Edited to add:  Many of you who are new to this site are commenting that while this is a healthier poptart, this isn’t necessarily a healthy breakfast. Sure, good point. I totally hear what you’re saying. This was a reader requested recipe. Many are taking baby steps toward better nutrition and working their way “out of the box” when it comes to feeding their families. If you’re looking for a healthier variety of Poptart…this is your recipe. If you’re looking for a special treat for your family…here you go. If you’re looking for a well balanced diet…don’t eat these Poptarts for every meal. :)

Want to see my menu plans to know how I feed my family regularly? I’d love for you to click over and take a peek!! Maybe you’ll even find more recipes you’re interested in!!

Heavenly Homemaker's Club Members: Access your homepage and all your fantastic resources here! Not a member yet? Please join us!

Whole Wheat Hot Dog Buns

October 17, 2010 by Laura 71 Comments

This post may contain affiliate links. For more information, please see our disclosure policy.

I’ve admitted it here before: I love me a good beef hot dog. Do I love them because they are so very good for us and so highly nutritious? I wish.  But, at least I’ve been able to find some from our local meat farmers that are better than regular dogs from the store. I also often buy Shelton Turkey Franks from Azure Standard.

I had perfected my whole wheat hamburger bun recipe, but never took the time to make the dough into hot dog buns. In the past when I’d tried to make hot dog buns (from other recipes), they turned out as big as a baseball bat and about that heavy. (We’ve already talked about how none of us want our buns to be heavy.)  This time, when I tried to make hot dog buns, I focused on making the buns small. The smaller the buns, the better…right? :)

Using this whole wheat hamburger bun recipe, I rolled out the dough to about 1/4 inch thickness and cut the dough into circles using a wide mouth jar. A wide mouth jar isn’t going to make a very big circle, and you might think that the bun isn’t going to be big enough…but keep in mind that these rolls will rise and we do not want a bready bun. No indeed.

hotdog_buns_1

Yum

Take each circle and roll it up gently…

hot_dog_buns_3

Almost finished…

hot_dog_buns_5

And…done. Look at the cute little unbaked hot dog bun. Kinda makes you wish you were a hot dog so you could lay down in there and take a nap, doesn’t it?

hot_dog_buns_2

Put all the cute little rolled buns in a baking dish. Allow them to rise for about 20 minutes.

hot_dog_buns_6

Bake the buns for about 25 minutes at 350°. If they aren’t golden brown, leave them in there just a little bit longer. I kinda think it would be fun to bake the hotdog right into the bun, but I haven’t tried it yet. And just for the record, I don’t really wish I was a hot dog, no matter how inviting these buns look.

hotdog_buns_7

Carefully slit the buns open at the top with a knife and pop in a cooked hotdog.

hotdog_buns_1

Add all your fixin’s and you’ve got a tasty hotdog on a bun that has just a little more substance than the airy ones we find at the store, but they aren’t so bready you feel like you’re eating all bun and no dog.

So what do ya think? Should I try baking the hot dog right into the bun to make a sort of “pig in a blanket”? I think my kids would enjoy that surprise. Although since these hot dogs are made from beef or turkey, can we still call it a “pig in a blanket”? Sometimes life just throws us these difficult questions, ya know?

So humor me will ya? Are you a hot dog lover or not? Am I the only weird one who really appreciates eating real, whole foods…but still likes the occasional hot dog?  :)

Heavenly Homemaker's Club Members: Access your homepage and all your fantastic resources here! Not a member yet? Please join us!

Pancake and Sausage Muffins

October 3, 2010 by Laura 96 Comments

This post may contain affiliate links. For more information, please see our disclosure policy.

Pancake_Sausage_Muffins

Here’s what you need to know if you ever send me a recipe request:  I do get around to it eventually.  I don’t even remember WHO emailed this idea to me, but I do know that it was MONTHS ago. It went on my list…the long, long list of reader recipe requests, post ideas, questions to be answered. But see, lookie…here it is! I finally got a round tuit!

The original suggestion (from the reader who shall remain nameless, not in an effort to protect her privacy, but because I have misplaced the note with her name) was to use this Corn Dog Muffin idea, but do a breakfast Pancake – Sausage Muffin instead. Brilliant!!! After experimenting and making these last week and watching my family devour them in about five minutes, I did have to ask myself why I took so long trying this idea.

Now, we don’t do much pork at our house, but I do have this killer turkey sausage recipe . I make it up in big quadrupal (or more!) batches, cook  it up, then freeze it until we’re ready to eat it. Having cooked turkey sausage on hand for recipes like this one is a huge life saver!! So easy! If you choose, you could use sausage links instead, making the muffins like these Corn Dog Muffins. Instead, I just stirred cooked turkey sausage right into the batter:

Pancake-Sausage MuffinsYum

2 cups whole wheat flour
1 teaspoon baking powder
1/2 teaspoon sea salt
1 1/2 cups milk or buttermilk
2 eggs
1/3 cup melted butter
1/2 pound cooked turkey sausage (or nine sausage links, cut in half)
Real grade B maple syrup

Mix dry ingredients together. Add milk or buttermilk, eggs and melted butter. Stir in browned turkey sausage.

Pour batter into 18 buttered muffin tins. (I don’t recommend paper muffin liners for this as it will stick.)  Bake at 350° for 15-20 minutes or until the muffins are lightly browned. Serve with a lovely drizzle of maple syrup!

This is a great recipe to bake up ahead of time, freeze, then pull out and rewarm in the oven or toaster oven at breakfast time!

Now, don’t wait months to try this like I did. This recipe is SO easy and my whole family LOVED them!! You can never have too many easy breakfast recipes!

Heavenly Homemaker's Club Members: Access your homepage and all your fantastic resources here! Not a member yet? Please join us!

Whole Wheat Banana Bread and Muffins

May 19, 2010 by Laura 107 Comments

This post may contain affiliate links. For more information, please see our disclosure policy.

banana_bread

Did I ever tell you about the time I almost forgot to put the bananas into my banana bread?

I have these finer moments in my kitchen from time to time. They mostly happen while I’m trying to cook and talk simultaneously. If I’m talking on the phone while mixing up a recipe, I tend to leave out key ingredients. Or add the same ingredient twice.  It’s ridiculous.  I think it’s crazy that I can usually multi-task quite well…but I can barely have a conversation with someone while I cook. Duh. Just be glad I type these posts after I’m finished cooking. Otherwise, these recipes would just be plain scary.

And so, because I care too much not to share, here’s a handy baking tip:  When making Banana Bread or Muffins, be sure to add the bananas. The final product tastes much better this way. I’m nothing if not helpful.

Whole Wheat Banana Bread and MuffinsYum

1 3/4 cups whole wheat flour (I use freshly ground flour from hard white wheat)
1 teaspoon baking powder
1/2 teaspoon baking soda
1/4 teaspoon sea salt
1 cup mashed over-ripe bananas (about 2-3 bananas)
1/3 cup honey
1/4 cup melted butter
2 eggs

Stir together flour, baking powder, baking soda and salt. In a separate bowl, mash bananas, or puree them in a blender. Mix mashed bananas, honey, melted butter and eggs into flour mixture.

For Bread:  Spread batter into a well buttered bread pan. Bake in a 350° oven for 50-60 minutes or until a toothpick inserted into the middle comes out clean.

For Muffins:  Spoon batter into 12 buttered or paper lined muffin tins. Bake in a 400° oven for 20 minutes.

Speaking of finer moments in my kitchen…did I ever tell you about the time I made a lovely lasagna ahead of time so that I would be all ready for my company that night? Because, you see, it’s great to be prepared when you’re having company. Oh, and it also helps to get the lasagna out of the fridge and BAKE IT at dinner time. Being prepared doesn’t help at all if you don’t actually bake your lasagna. Yeah, dinner was a little late that night.

Heavenly Homemaker's Club Members: Access your homepage and all your fantastic resources here! Not a member yet? Please join us!

Chocolate Chocolate Chip Muffins

April 15, 2010 by Laura 118 Comments

This post may contain affiliate links. For more information, please see our disclosure policy.

I’m not sure if you are a chocolate lover like I am, but any recipe that has the words chocolate and chocolate written side by side makes me very happy and excited.

Chocolate_Chocolate_Chip_Muffins

My biggest hint on this recipe is to use sour cream instead of milk. (The recipe lists either one.) Sour cream makes these super moist.

This recipe is a definite family favorite. They taste amazing with a glass of milk or a cup of coffee!

Chocolate Chocolate Chip MuffinsYum

1 1/2 cups whole wheat flour
1/3 cup sucanat
1/4 cup cocoa powder
1/2 teaspoon sea salt
1/2 teaspoon baking powder
1/4 cup melted coconut oil or butter
2/3 cup milk or sour cream
1 egg
1/4 cup chocolate chips (I recommend these organic chips without soy lecithin)

Stir together dry ingredients. Mix in coconut oil, milk and egg. Fold in chocolate chips. Scoop into 9-12 paper lined muffin tins. Bake at 400° for 20  minutes. Makes about 9 muffins. (I double the recipe for my family of six.)

5.0 from 1 reviews
Chocolate Chocolate Chip Muffins
 
Save Print
Prep time
10 mins
Cook time
20 mins
Total time
30 mins
 
Author: Laura
Serves: 9 muffins
Ingredients
  • 1½ cups whole wheat flour
  • ⅓ cup sucanat
  • ¼ cup cocoa powder
  • ½ teaspoon sea salt
  • ½ teaspoon baking powder
  • ¼ cup melted coconut oil or butter
  • ⅔ cup milk or sour cream
  • 1 egg
  • ¼ cup chocolate chips
Instructions
  1. Stir together dry ingredients.
  2. Mix in coconut oil, milk and egg.
  3. Fold in chocolate chips.
  4. Scoop into 9-12 paper lined muffin tins.
  5. Bake at 400° for 20 minutes.
3.4.3177

If you have some good quality coconut oil, I highly recommend using it in this recipe. The coconut flavor with the chocolate is SO GOOD.

How about Chocolate Chip Bread?

Don’t mind if I do. Indeed, you can also make this recipe into a quick bread instead of muffins. Just spread the batter into a buttered loaf pan and bake at 350° for 50 minutes! Get all the details here.

chocolate_pumpkin_bread_2


Heavenly Homemaker's Club Members: Access your homepage and all your fantastic resources here! Not a member yet? Please join us!

Healthy Homemade Breakfast Burritos

February 27, 2010 by Laura 41 Comments

This post may contain affiliate links. For more information, please see our disclosure policy.

Well, I made the kids mad at lunch today. I stood there making 20 breakfast burritos and wouldn’t even let them eat one.

Instead, they had to eat tuna.   I was heartless enough to actually make them wait until next week to eat the Breakfast Burritos. Hey, I’m just trying to get ahead here. Someday when they become the parent, they too might have a Breakfast Burrito agenda and make their children settle for tuna. And then they’ll come back to me and tell me how sorry they are for being mad about the 2010 Withholding of the Breakfast Burritos.

Someday.

breakfast_burritos_2

Homemade Breakfast BurritosYum

1 pound turkey sausage, browned
12 eggs, scrambled
1 1/2 cups shredded cheddar cheese (I use Landmark Raw White Cheddar)
2 cup salsa (more or less to taste)
20 whole wheat tortillas*

*Tortilla Hint:  If you’re making your own tortillas (and if you aren’t, you really should be, because YUM)…try this tip to make burrito forming so much easier! As you roll your tortillas, cook them on just one side, leaving the other side softer and more flexible.  Also, I find it works best to form the burritos within two or three hours of making the tortillas…before the tortillas have been refrigerated.

To put together the burritos:

Stir together scrambled eggs, cooked sausage, cheese and salsa. (I leave out the salsa at first and make up some salsa-less burritos for a couple of boys in my life who don’t like salsa. Then I add salsa to the remainder of the mix and make a few with salsa for the rest of us!)

breakfastburritos2sm
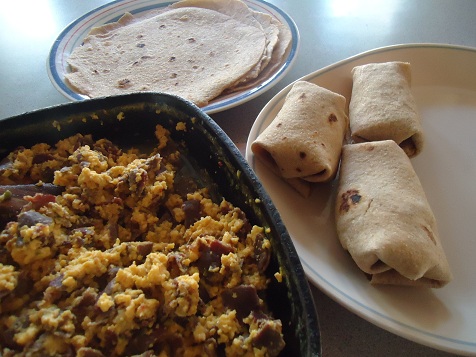
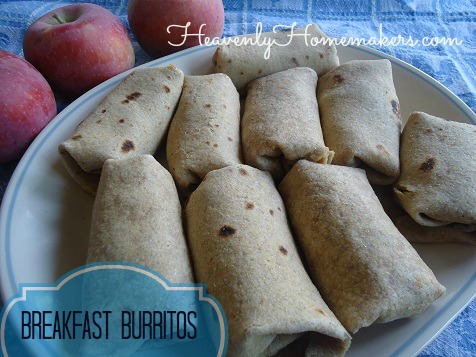
Place a nice spoonful of burrito mixture onto a tortilla.

breakfastburritos3smFold in the ends.

breakfastburritos4smFold up one side, and then the other.

breakfast_burritos

Place burritos in a freezer bag and store in the freezer for up to three months.

To reheat:  Place desired number of thawed or frozen burritos on a baking sheet. Heat in a 350° oven for 10-20 mintues until heated through.

P.S. The children weren’t mad for long. They really like tuna…but just temporarily forgot that fact when they smelled the sausage cooking. They happily ate their tuna and will ever so much more happily eat their Breakfast Burritos some morning next week when I have yet another agenda:  the-hurry-up-and-eat-breakfast-so-that-you-can-start-your-handwriting-and-math…agenda.

Heavenly Homemaker's Club Members: Access your homepage and all your fantastic resources here! Not a member yet? Please join us!
« Previous Page
Next Page »

Join Our Community!

 Facebook Twitter E-mail Instagram Pinterest

Popular Posts

~ Will All of the Real Moms Please Stand Up?
~ Easy! Stir-and-Pour Whole Wheat Bread
~ How to Make Gatorade
~ 31 Real Food Breakfast Ideas
~ Dear Teenage Girls...
~ When Mom Takes a Step Back
~ The Inexpensive Health Insurance We Love!
~ Let's Talk Real Food Grocery Budgets

Check out our latest posts!

  • Big Family Food and Fun: May 24-30, 2026
  • Free 7-Day Summer Menu Plan
  • Big Family Food and Fun: May 17-23, 2026
  • Easy Side Dishes for Summer
  • Big Family Food and Fun: May 10-16, 2026
Home  ~  Simple Meals  ~  Club Membership  ~  Shop  ~  Privacy Policy  ~  Disclosure  ~ Contact

Copyright © 2026 · Beautiful Pro Theme on Genesis Framework · WordPress · Log in