In the past few years as our family is working to learn more about eating healthier…I’ve tried to come up with a healthy, homemade whole wheat hamburger bun.
I think I have finally figured out how to make a good bun.
(I must say…blogging about my buns feels a little….strange. But just in case you’ve had trouble with your buns…I thought this was worth sharing.)
Many burger bun attempts failed…as usually they were too bready…or too heavy. And we all know that NOBODY wants their buns to be too heavy…
So last week…I tried again and tweaked one of my other recipes and turned out a great batch of buns! Here’s how I did it:
Homemade Whole Wheat Hamburger Buns
5 cups (+) whole wheat flour
1 1/2 cups warm water
2 pkgs regular or active dry yeast (4 1/2 t.)
2 T. honey
1/4 cup water
1/2 cup milk
2 T. butter
2 t. sea salt
In a large mixing bowl, stir together 3 cups of whole wheat flour and 1 1/2 cups warm water. Set aside to let rest for 30 minutes. In the meantime, mix together 1/4 cup water, yeast and honey. Allow this to sit for at least 10 minutes to activate the yeast.
Melt butter, milk and salt in a small saucepan on the stove. Do not allow the mixture to get above 120 degrees.
Pour yeast mixture and milk mixture into flour mixture. Add remaining two cups of flour (more if needed).
Knead for about 10 minutes until dough begins to look “shiny”. Put dough back into the bowl, cover and let rise for at least an hour…or until it has doubled.
Pull dough onto a clean countertop and knead for a couple of minutes to get any air bubbles out. Roll dough on a lightly floured surface until about 1/2 inch thick.
Cut circles from the dough with a large drinking glass or wide mouth jar. Place circles on in a well buttered baking dish about an inch apart.
Allow to rise for about 30 minutes. Bake for 20-25 minutes in a 350 degree oven. Makes about 18 buns.
Now….I really hope you like these as much as we do!!
But really…do be careful when you share this recipe and talk with others about them. Because…
“Don’t you just LOVE Laura’s buns?!” might just not sound quite right… ;)

Laura-
It might sound worse to say “Laura has the best buns ever!” I can’t wait to try these.
Toni
Do you have one for whole wheat bread?
Do you think you could just go ahead and soak the flour, and continue on with the recipe?
Do you freeze the extras? I’d love to make buns, but I don’t think the two of us could tackle 18 at a time!
Your recipes look great, thanks! :)
Yah! I have not had much success on buns yet…going to give yours a try! Have you used the same for hot dog buns at all?
Thank you, thank you for posting this! I made these tonight just exactly like you posted. They are absolutely perfect in every way. We used them for our black bean burgers and I’ll be using this recipe monthly, guaranteed. :)
These buns were absolutely fabulous. A hit with my husband and family! Thanks a bunch.
Great recipe! I just made them and they’re great. Thanks for sharing.
How much yeast is in one package.
By the way, can you soak the flour over night in the warm water and then go on with the hamburger bun recipe?
Your sight is really inspiring to me.
My husband and I are trying to avoid processed foods.
Oh wow your buns look perfect :) but mine turned out to be hockey pucks! Yikes I dont know what I did… I am new to baking maybe I over worked the dough???
Can you make these in a bread machine? Just the dough. How would I do it? Thank you.
Pat
Yes, please, can I make these in my bread machine–because mine would turn out like the previous reader’s hockey pucks if I go by past experiences.
I made these tonight and we all loved the flavor, but they were a bit on the crumbly side. could it be that I added too much flour or over baked? I can’t think of anything else. I followed your recipe to the T, the only difference is I used whole wheat pastry flour. Any thoughts would be appriciated.
HI Laura, Can I soak the flour overnight? Or does it need to be made without soaking the grains? Thanks So much!!! I love your site. My husband and I are missionaries and we try to eat as healthy as possible. You really help me out with your wonderful recipes. Thanks so much. Lori
too bad she never came back to answer and/or thank.
I’m going to try the recipe though
Sophie…sorry about that. I usually answer questions by email. BUT, that doesn’t help those of you who want to know the same answers. Here…I’ll answer these questions now:
*I don’t usually soak these, but I don’t know why you couldn’t exchange the water with buttermilk and soak them first! I really SHOULD be doing that!
*Yes, I absolutely freeze the extras.
*I’ve never tried them for hot dog buns. I’m sure they would work…we just don’t eat very many hotdogs.
*One package of yeast equals 2 1/4 teaspoons.
*I’m sorry I don’t have a bread machine…so I don’t know anything about one. SURELY you could use one though? Aren’t those things magic or something?
*If you use pastry flour..that won’t work as well for these. Pastry flour is best for use with cookies and muffins….not yeast breads. For yeast breads, I use hard white wheat ground into flour. Pastry flour is made from SOFT wheat.
I happened on this site when looking for a whole wheat bun recipe. These are great. I soaked the flour in buttermilk instead of water and then made half the dough into hoagie buns for subs and brats. We all loved them even my picky eater.
Thanks for the great recipes.
I made these, following the recipe to the letter. Unfortunately, they wouldn’t rise. I used fresh yeast and a thermometer. It seems that whole wheat flour is too heavy, so what is the answer?
All I can think of is that I used freshly ground flour from hard white wheat. That may have made a difference, especially if you used flour made from hard red wheat, which seems to be heavier. If you have access to whole wheat flour made with white wheat, you may want to try that. :)
Thanks so much for posting this. We had them tonight and they were great. Some of the buns rose really high and some did not but, they were ALL great and I’m going to freeze the rest. Can’t thank you enough for the recipe!
Terrific! I just pulled these babies out of the oven and had to cut into one (with my 3 year old) to give it a try before serving them up at dinner tonight. DELICIOUS! They felt really heavy when I pulled the tray out of the oven and I was worried – but once cut into they are actually quite airy and light – whew.
Great recipe – easy to put together and turned out great for me. I made the buns about half the size of a regular hamburger buns as I wanted them as dinner rolls to accompany our rotisserie chicken.
I just used whole wheat flour bought at the regular supermarket – so milling your own is really necessary for those without the time, know how or tools.
I’ll be freezing our leftovers for quick grabs for lunches and sides. THANKS!
Oh, I am so glad you have a post about this!! I tried to make some hamburger buns from another recipe but they came out terribly. When I try your recipes they always come out so I am going to give it a shot.! Thanks.
Wow! These just came out of the oven. (It’s a baking day of sorts here)
How soft and fluffy and wonderful! I’m excited for dinner (sloppy joes) tonight!
WOW!!!! That’s all I can say. Better than anything you can buy at the store. I made mine vegan by using soy milk and Earth Balance spread. I’m going to use this for every kind of roll I can think of. Dinner rolls, bread sticks, pizza crust (not a roll but I think I can make it work)…FANTASTIC! Laura, I love your buns…er…I love this recipe.
Love this recipe.
Empty tuna cans make great cutters for hamburger buns too! I have one in my drawer always.
I made these and they were fantastic the night I made them. I froze some after cooking them and before letting them rise for the second time just to see which would be better for us. The cooked and frozen ones are long gone and were yummy. My first batch of uncooked frozen ones I let set too long wanting them to rise more and they were yucky. I learned to just let them thaw and rise a little. I think about 3 hours would have been adequate and I let them set for 4-5. We were pleasantly surprised by the texture.
Oh wow, these were AMAZING.
fluffy and delicious.
usually recipes I have room for improvement, but there were flawless.
thanks!
I have been wanting to make these for days now and was so excited to give it a try, they seemed like they would be so easy! And they were, but I must have done something wrong, they didn’t rise as much as I thought they would. Some rose nicely, but others just sat there. I’m not sure what I did wrong, but I baked them anyway. They taste great, just look a little flat. :) Maybe my water was too warm for the yeast? Or not warm enough? I’m new to using yeast!
I made these yesterday for my family using a bread machine and they turned out perfectly. I used 5 cups of the flour and used the dough setting. I only got 16 buns, but I’m sure my buns are much bigger. :)
just wanted to thank you for a great recipe. I made these last night for BLTs. They were a big hit with my family! thanks again!
Laura, I just love your recipe. Today is my second time and I did some changes: I used 1/2 c of warm water; 2 TB oil instead of butter and 1/4 c of milk. The dough is unreal.
Thanks so much for this delicious recipe.
I’m giving these another try today, they are already rising better than the last batch, so I’m happy! I might just get this “baking with yeast” thing yet!
Thank you so much for your blog, I can’t tell you what a blessing it’s been to me and my family!
Just tried this recipe…WOW!!!! Great one. We will use this one from now on. Thanks!
These would be wonderful for mini-pizzas, as I usually don’t need burger buns.
Hello Laura!
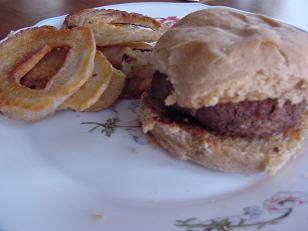
I just found your recipe for hommade hamburger buns and am making them right now. Thanks! I know you put this recipe on in 2008, but on the photo of the finished product you had a side dish–what is it? It looks really interesting, and I’d love to try a new side with my burgers.
Thanks so much-
Janna
It’s homemade onion rings: https://www.heavenlyhomemakers.com/eat-more-fruits-and-veggies-the-best-way-to-eat-an-onion
Onion rings.
I thought the side was dried apple slices.
I have a silly question… what does the milk do? The recipe is the same as your bread recipe plus milk. (and you doubled the yeast) What does the milk do that makes it better in the buns and not in the bread? Or could you leave the milk out or add the milk to the bread recipe?
Hi there, saw your comment, and since I bake lots of bread thought I would offer my two-cents
Milk enriches the bread and makes it softer (as does any fat). You could could probably sub milk in the bread recipe without any harm (though you might need just touch more), but taking it our of the buns would negativeily affect the desired texture.
Laura – This recipe looks great. I’ll be trying it out tommorrow, and will post my results.
I am always looking for whole wheat recipes. This is the Best recipe I have found for WW Hamburger Buns,I made then today and they turned out great.
Thank You so Much.
I tried to make these and they turned out super heavy,,, do you have any idea what could have went wrong?
Me too. They were like little hockey pucks. Tasted good though.
That happened to me too! I was wondering if the water added to the yeast also needed to be warm? I don’t think the recipe said warm water, I think it just said add 1/4c water, yeast and honey. I also read online that your need 1/4 cup water per pack of yeast, so that would mean we would need 1/2 c for this recipe, right? I’m so confused!! Any ideas Laura?
I wish I was better at trouble shooting other peoples bread dough!! Everyone will have different climate and ingredient variations, making recipes like this one difficult to be consistent with.
I use freshly ground hard white wheat…so that might be a difference. Also, it could be that the dough should have been kneaded longer? Yikes…sorry I can’t help more!
I have been baking my family’s bread for a long time…but I have a question: is this dough supposed to be *really sticky when you’re done kneading? I added an additional 1/2 c. of flour while kneading, but it’s still REALLY sticky – should I add more flour?? TIA!
Just had to stop back here and let you know that I figured it out! Yes, the dough was REALLY sticky – but this recipe has turned out the lightest, most delicious hamburger buns I have EVER tried – and I’ve been trying different hamburger bun recipes for a LONG time! THANK YOU SO MUCH!!!!!
Just curious, how do you shape your buns to get an even size? Are you a pro or do you cut them out with a circle cutter? Help! :)
PS- I’m not asking because my buns are lopsided, I’m asking because I want my buns to be in good shape lol j/k
Glad you have nice buns. ;)
I use a glass jar to cut them into a nice round shape.
I finally made these tonight and promptly ate 4 out of the oven. I think they will taste good with hamburgers…Some turned out fluffier than others…
My son’s eczema keeps us from cooking with dairy–it severely aggrivates his skin and intestines. [Your story about Malachi helped me push through and figure out, on my own, what was causing his reactions.]
I’ve tried substituting rice milk and think it doesn’t do the same job as 1% milk. Any suggestions?
Oh boy, I’m not sure. Substitutions for milk are not my specialty. Could you try it even with just water and see if it works? Coconut milk?
What is the purpose of mixing the 1 1/2 cups of water and 3 cups of flour and letting it sit at the beginning of the recipe?
It just breaks down the gluten a little bit and makes the bread easier to work with.
Hi Laura, these look fabulous! One question, do you grind your own flour or buy it that way?
I grind my own flour: https://www.heavenlyhomemakers.com/category/grains-and-grain-mills
Just wondering if anyone did try this with the bread machine and if so with what results? Thanks for a great recipe!
Fabulous recipe. I just kneaded well in my bosch and let it rise plenty both times. They turned out great!
I just finished making these and am so happy with the results. I love that they have a nice chewy outside texture. For the past couple weeks I’ve been working on different bread recipes, incorporating as much wheat as possible. They have been dense, short, messes. I’m going to check out your other recipes. It was a blessing to read that you are a homeschool mom as well. Thanks again for sharing!
I just made this recipe today! The one thing I will add is I believe the baking time could be to long. I cooked these for 18 minutes and they came out perfect had I done 20-25 they would have been hard as rocks. I tried one right away and was impressed with the flavor. I look forward to using them for sandwiches.
Also when your talking about bread machines. Any recipe can be used in one. You would want to warm the milk and melt the butter. You then would put the wet ingredients and then add the flour and salt. As always put the yeast in last. Then use your dough settings. Your going to then need to take the dough out and roll it. Make the buns and then let them rise before cooking so I don’t see the advantage of a bread machine for this recipe though it would work I am sure. :)
I noticed how you said knead until it “looks shiny” I have made these several times and haven’t gotten that look…is the dough supposed to be sticky or do we add flour just till it’s not sticky anymore?
You’re probably doing it just right, and it won’t look particulary shiny if you continue to add flour to keep it from sticking. Shiny” was the best word I could come up with to describe the look or texture of the dough when it’s been kneaded long enough.
Laura,
Can’t I just put the hamburger buns on parchment paper?
I am making them right now. I am looking forward to having great buns!
Thanks, Jill
Sure, that would work!
I did make them and they were very good – and cute.
I think I might roll them a bit thicker for a higher bun,
but they were very good. Thanks!
Perfect dough! I made a half recipe and it filled an entire baking tray (10 buns). The suggested times were right on.
For your half recipe, did you just cut all of the ingredient amounts
in half or did you scale it in another way?
YES!!! This was my very first SUCCESSFUL dough in a LONG time. I’ve been in a rut and this worked out! they are cooking in the oven right now… so I suppose it matters if I pull them out on time and not burned for them to turn out.
I am going to try these soon. But I am curious, what are they served with on your plate up there? Fried onion rings? :-)
Thanks!
Kori
Yes, they are onion rings! https://www.heavenlyhomemakers.com/eat-more-fruits-and-veggies-the-best-way-to-eat-an-onion
Hello again, Laura!
This has been my first week to soak my beans, soak my pancakes, & whole wheat rolls like you’ve suggested. I’ve had some things turn out good,others not so good. The beans tasted “normal”; however, your soaked pancakes recipe turned out
really doughy for me in the middle after I had
followed the recipe exactly. For my 2nd attempt
I used kefir instead of lemon juice & water &
they also turned out flat & doughy in the middle.
Ahhhhhhhhhh ;o0 The kefir
pancakes definitely had a “sour” taste that my
kids aren’t used to yet & I wonder if it’s more
so than buttermilk would be? Hmmmmm
They were also flat (not like how yours turn out) ;o( Do you cook them on medium heat? What’s the dial number on the stove? Hmmm I tried experimenting with that, too without
much success. However, I’m not giving up yet!
Also, the same “sour” taste showed up in the
homemade wheat rolls that I made. The consistency for the rolls turned out like normal
though, so I was relieved! ;o) Also, with
the pancakes (both attempts), I kept trying to
add milk, then flour to achieve fluffy good
pancakes, but only came up with the same
flat & doughy…….and sometimes on the burnt
side…………sooooooo frusterating as it was
quite time consuming!!! I’m the only one eating them up
now~~~~~~~sigh Any suggestions?
Also, in the above recipe, you didn’t mention
“soaking” the flour first, but I’m assuming
you do? Do you “soak” the whole wheat flour
in this recipe with the amount of water mentioned
in the recipe along with lemon juice? Hmmmmmm I’m really hoping
to get this all figured out, but it’s been
rather stressful so far as my family isn’t
crazy about my “new experiments”! sigh
Thanks for any input that you might offer!
I hope your voice is back to normal, soon!! ;o)
I actually don’t soak these, I haven’t figured out a great method for that yet. Yes, your soaked items are going to tastea bit sour…the soaking process kind of turns them into “sourdough”. It’s very slight and I’ve found that my family has gotten used to the taste.
I’m not sure the deal on the pancakes??? Others have had this same issue. :(
Wow! I followed your recipe yesterday and they turned out fantastic! We had an expected extra four people, so it was a good thing that I didn’t notice the “makes 18 buns” thing until it was too late!
re the 18 minute suggestion, I did bake them for about 22 minutes and they came out just perfect. I preheated the oven a bit and left my pizza stones in there as I pretty much always do.
I was kind of worried that it might not be possible to make a light and fluffy bun (or anything) with 100% whole wheat flour, but clearly it can be done. Thanks so much for posting this recipe!
Laura,
I made these today and though they taste fine they are a little heavier than I’d like for sanwich buns. We are still gonna use them but I was wondering what I need to do differently to get them fluffier next time? Do I need to maybe knead them longer? Let the flour/water mix set longer? Or maybe did I knead them too much? What’s your trick for a fluffier bun? Thanks!
It could be that you kneaded them too much? Hard for me to know. I use freshly ground hard white flour…not sure which you used or if that might be what made the difference.
Laura,
I made these in my bread maker, using the dough cycle. I would suggest making half a batch, as a whole batch was overflowing my 2lb bread pan. As for the baking time, I rolled my a little thinner (who doesn’t want thinner buns), so I adjusted the baking time to 16 min and got 28 buns. The kids and I thought they tasted great. We ate them right out of the oven. :)
Tried following this recipe and to my surprise they came out wonderful.. thanks to laura!! they are awesome. ‘m waiting for my husband and have those hamburger buns for dinner tonight
I just made your WW Hamburger and Hotdog buns tonight… Yippee! Now I have nice buns like you! :) Thanks so much for all of your hard work and dedication~I really appreciate you!
How did you shape your hotdog buns? I tried without much success!
Here is my post describing how I make hot dog buns: https://www.heavenlyhomemakers.com/whole-wheat-hot-dog-buns
Laura,
I just tried these and they turned out a little flat! I thought they’d be perfect because the rose so well…actually they more than doubled in a 1/2 an hour on the first rising. Perhaps that’s the problem? Suggestions welcome. Thanks!
It could be that they needed a very SHORT rising time the second time since the yeast was so “activated”? If they rose too much after being shaped, they may have fallen in the oven. That’s my only guess????
They smell and look great. Can’t wait to see what they taste like during dinner tonight! I’ll need to find a bigger cutter because our burgers are going to hang over the edge of these despite using my largest Ateco circle cutter. Thanks for sharing Laura!
I will note that even after adding 6 cups of flour (half whole wheat, half bread) my dough was sticky very sticky to the touch. I ended up leaving it that way, hoping it meant it would create a fluffier bun. We shall see.
Just finished making these and they look great! I used a breadmaker for the dough as my house is inevitably cool enough that rise times at least double (sigh).
Thanks so much for sharing! I’ll be back to look around here more….
I made these for the first time over the weekend and OH MY GOODNESS, what a wonderful recipe! I tweaked it a little for high altitude (we live at 8500 feet) and they turned out perfectly. Here are the high altitude changes in case anyone’s interested:
5 1/4 c. whole wheat flour
1 2/3 c. tepid (barely warm) water
1 T. yeast
1/4 c. water
1/2 c. milk
2 T. butter
2 1/2 tsp. sea salt
Follow steps as given except decrease proofing time to 5 minutes, and then watch the dough closely when rising in the bowl (doubling time will be less than an hour.)
Thanks for a great recipe, Laura!
Abby,
Thank you so much for sharing. I’m at a much lower altitude, but live in the mountains. I look forward to trying your edits.
Hurray! Something I did turned out right!!! Hot from the oven sooooooo yummy slathered in butter! Thank you for this recipe! I’m new at this and I was able to turn out some really hot buns…=) !!!
How would I freeze the left overs and use them later without them getting soggy?
If you wait until the buns have completely cooled, then place them in a freezer bag, they should do fine without getting soggy.
I froze most of mine with chopped chicken and some marinade/sauce. Yum! And yay for quick, healthy fast food!
Hi Laura. I’m lazy, or smart, depends how you look at it! Ha. Anyway, I’d like to double your recipe so I can freeze a bunch of them. I may add a little vital wheat gluten to make them a little softer. First, what do you think of gluten? Second, if you think it’s okay, at point in the process would I add it? Thanks!
I’ve not every tried baking with gluten, so I’m really not sure!
Loved them Laura. Thanks. I added one tablespoon of gluten and they are nice and soft.
I made these for dinner tonight. I used spelt flour instead of wheat. They didn’t rise as much as yours, but spelt never does. They were delicious and my picky daughter who doesn’t even like hamburgers ate the whole thing! Thank you for sharing your recipes!
If you want a little sourdough flavor, make the yeast part of the reciepe ‘sponge’in the morning let set until afternoon then make the reciepe, you will develope a nice not to sour taste. Graham flour is also a nice addition just sub 1/2 c for wheat. I added soft goat cheese and fresh basil, rolled them into small balls, put into cupcake pan, let rise, nice dinner rolls.
made these this morning for lunch today. amazing! your buns are, by far, the best i’ve seen. :) kidding aside, they had a great rise and were very light and fluffy. my husband freaked over them. i shaped them into hoagie rolls and we had them as a french dip. crockpot roast, au jus, grilled onions, peppers and mushrooms. yummmmmm.
this is my new go-to bun recipe. thanks!
Hi Laura! I just wanted to let you know that I like simplicity and so I decided to try this recipe for other things as well and I think I have made the BEST of the following with this recipe. Even better than other recipes or even your recipes for the same things (no offense haha).
cinnamon rolls
pizza dough
baguette crackers
and the most pliable soft tortillas I’ve made yet!
the rising time varies with each item and so does the cooking time. I just adapted it as I went.
it has been so nice being able to triple this recipe and make several things out of it. I couldn’t believe how well the tortillas turned out! So THANKS for this universal recipe.
I would love to know what you did to make the tortillas! Thanks:)
I would love to know about the tortillas also :)
Just found this recipe and am going to make it. Will report
my success, fingers crossed. :)
Made these today…they smell great! We’ll be trying them tonight with our pulled-pork. Question…..do you have trouble getting them to rise? My yeast is fine, as we’ve been using it with other things. Does it have anything to do with using only whole wheat flour? Should I use part whole wheat, part white?
I’m not sure – I always use all whole wheat (freshly ground from hard white wheat). Mine don’t raise up to be big and fluffy, but I don’t really want them to be too bready so I’ve been okay with that. They may have needed to be kneaded a little bit more?? Just a guess. :)
You crack me up. “Pull dough onto a clean countertop…” Thanks for the reminder to clean my counter first! :)
hi laura,could u pl unravel this mystery!i followed ur recipe exactly half!(i halved the recipe exactly)n did just as u mentioned but while cutting the dough into crcle shapes with a bottle lid,i felt as if the fizz just went out of thedough,it suddenly seemed to deflate(?)n after baking it was flat not a centimeter rose!u cud play golf with it though!i have tried baking whole wheat bread too several times n the first rise is good, the second always rises lesser n after shaping the loaf n putting it to rise for the third time in the pan, it refuses to rise,(no matter which recipe i follow)n after baking the loaf is as flat as i wish my buns should be!could u enlighten me,por favor,what the hell am idoing wrong?!!!!!!!
quite-fed-up-with-yeast-geet,
Did the dough rise the first time (in the bowl)? Did they then rise in the pan after you cut them into circles?
thanks for ur reply laura.n its not u, its me ,totally!im a not good enough cook in the first place,so pl bear with me,yes,the dough did rise in the bowl,n the second rising was ok too,it did not double but it had improved ,n while rolling i was quite gentle ,although my 4 year old did “”help”” me with the glass i used to cut circles ,n while we were doing the circle shapes i felt like as though the fizz was going out,if u will excuse me repeating myself,n then the dough did not rise at all in baking maybe my whole wheat flour over rose the first n second times n so collapsed?although if u see the rising in ur videos my dough has certainly not reached anywhere near such reisings!my kids are really very excited about “”helping mama “” make these buns, but the final product sort of,scared me, n im worried that if we dont get good results i wont be able to cajole them into further such “”helping mama”” events!thanks in advance,
Hi Laura, I have only recently been trying to make my own bread and love this recipe. We are missionaries in Brazil and I look forward to many more recipes with you. Thanks!
This is the second time I have attempted these buns and both times i could not get them to rise enough to look like your picture. they still taste good but they are only about an inch tall. I let them rise the second time for about 1 1/2 hours just trying to make them bigger and still nothing. what could I be doing wrong? Thanks!
Did they rise well during the first rising (before you shaped them)? If so, I’m not sure why they wouldn’t rise the second time?
So I was really excited when I found this recipe. I usually have great luck trying recipes the first time…..
I did the math and did 1/3 of the recipe (there are only two of us, plus my almost 1 yr old son, so I really didn’t need 18 buns….lol)…. I ended up having to do this twice, because my dough didn’t rise at all the first time. I think it might have been the yeast, so i opened up a new package and tested it. Twice. I think the honey I used didn’t have enough sugar, bc my first test didn’t do anything, and the second test i added sugar with the honey and THEN the yeast did something. so i added that to the dough. i kneaded it. it rose a little, but not enough. i was only able to get 2 buns out of it! how big are the buns you make? i wanted big buns, bc i was making some ridiculous hamburgers from the Cheese and Burger Society website, and i wanted the buns to withstand the messiness of the burger. DH thought the buns were great bc they were thick and bready and didnt crumble when he took a bite, but i would still like to know what i did wrong since the dough didn’t rise properly….(i did put a little rye flour in it, maybe that was the issue…or perhaps my yeast still wasn’t good enough….or maybe bc i 1/3 the recipe instead of just 1/2 there wasnt enough yeast to react???? I am not sure, but there are left over burgers, so I will be trying this again tomorrow…lol
my dough rose this time! used fresh yeast instead!
waiting for the buns to rise so i can bake them! SO excited!
I have been working with whole wheat flours and I have found that warming the milk makes a big difference in almost any recipe. It made a huge difference in my english muffins. Thanks so much, the hamburger and hot dog buns will impress my guests at my annual Tacky Tiki pool party Sunday.
I can’t wait to try this recipe with olive oil. I’ve very recently gone vegan and I’m trying out various recipes that will help me fascilitate my newest adventure. I’ll let you know how they turn out. I really enjoyed reading all of the replies. Thank you!
Just had to find this post and comment.
If you’d told me a few years ago that I’d be making my own hamburger buns, I’d have called you crazy! ;) I tried this recipe today and the buns were perfect!
My husband, who is sometimes skeptical of my “experiments” thought they were great when I served them as sandwiches for supper with pulled beef, topped with a slice of cheese. Both of my daughters ate them up as well!
I did use a white wheat flour and found them fluffy and not too heavy, which was a relief. I had tried wheat buns from the store, but the wheat taste was too overpowering. It’s so exciting to know exactly what went into these hamburger buns and to enjoy how delicious they taste! Thanks for another great recipe!
So I am unintentionally making these today =] I was making a few batches of your whole wheat bread and then one of my batches decided to not rise super well, so I just rolled them out and cut them =] I don’t like super huge buns either lol. can’t wait for sloppy joes tonight! I didn’t even know what I was going to make for dinner so this is probably my best goof every!
OOPS!
Well, everything started out well enough. I used the whole wheat flour for the first part of the recipe, using all the flour in my storage container. Busy doing other stuff, remembered I had a bag of wheat flour and used that for the second part of the recipe. Um, it wasnt wheat flour. It was pastry flour!! They are in the oven now, so I’ll have to write an update later on how they turn out! :)
Wow! These were GREAT! My kids even asked to take them to school for lunch the next day, with nothing but butter on them! Thanks!
These are delicious :) I’ve never made a good ww bun that I was completely satisfied with before, but these were perfect. I made 16 buns and they were the perfect size for us. We had them on sloppy joes tonight and my husband kept going on about how good the buns were :)
Have any tips for adapting these for sourdough?
I’m not sure, but this is a great resource: http://gnowfglins.com/ecourse/249-45-3-49.html
i made it today , the dough rose perfectly for first time, second time it rose but not much and after baking they were flat not fluffier like yours , what could be the reason please guide.
I’m not sure. Mind typically don’t rise much the second time either though and don’t get super fluffy, just a little bit. It could be that you kneaded the dough a little too much before shaping the buns? Just a guess though. :)
These are absolutely delicious! I put the excess in the freezer so if that works well, I will never buy commercial buns again!
Love these! I tend to roll mine a little flat but they still work great! Plus we cut them in half and use them like English muffins for breakfast with cinnamon butter or a jam. We love using them for mini pizzas! We even make fruit pizzas with them with either jam as the sauce or cream cheese. These are so versatile! These an making your soft pretzels into garlic sticks are probably our favorites!
O. M. G. LOVE!!! I have a love-hate relationship with whole wheat….I love the idea of it but I hate how dense the end result can be. But these are WONDERFUL! Fluffy and delicious! Only thing I did differently was to brush them with an egg wash and sprinkle with sesame seeds (my 2 year old loved helping with that!) before baking. Thanks so much for sharing! My only concern is that these are sooooo yummy it may be dangerous for the size of MY buns! Ha! ;-)
I am going to give this recipe a try. I’ve been thinking about making my own hamburger buns for a while. I sent my husband into our local grocery store for some hamburger buns and he came out with enriched white flour buns. When I asked him why he didn’t get whole wheat like we normally do, he said that the store was selling them for $4.99 a pack (6 buns I think) and it was so much cheaper to go with the non-whole grain ones. So no more excuses, I am making whole wheat darn it!
Laura,
This goes way back to an early comment on this recipe, but instead of “shiny” to describe the appearance of properly kneaded dough, how about “satiny”?
I’ve been making bread since I could reach the knobs on my mother’s old gas stove so I just *know* how it looks and feels; it is difficult to describe. But there is something special about that nicely kneaded ball of dough as you fold it over on itself and you’re presented with that smooth surface as the dough stretches out like fine satin being folded for storage.
I made these for last night’s burger and coleslaw dinner. They turned out to be the best homemade buns I’ve ever done. Light and delicious. Make to the recipe exactly. Thanks so much for this recipe!
Hi Laura! I just put my dough to the first rise, and am excited after reading all of the comments. I have a question about freezing. I am single, and only use one or two buns at a time. When I get storebought, I usually wind up putting most of them out for the birds or using them for bread crumbs. I do not like the taste of bread items after they have been frozen, so I would like to shape the dough, then freeze it. My question is, after shaping, should I freeze them before or after I let them rise? Thanks for your advice! Linda
I’d freeze them after shaping but before letting them rise the second time. :)
TY :)
Linda,
Why not bake them into Brown & Serve rolls?
Bake at 275°F for about 20 minutes, or until rolls just start to change color. Cool in pans or on sheets 20 minutes (This allows the centers to continue baking.) Remove from pans or sheets and finish cooling on wire racks (This prevents rolls from becoming soggy.) Place cooled rolls in resealable plastic bags and refrigerate up to 1 week OR freeze.
Before serving, preheat oven to 400°F and place rolls on ungreased baking sheet. (Note: if rolls have been frozen, thaw before baking). Bake for 10 to 12 minutes, or until golden brown.
THanks Jim, I have not been able to try it yet, but hope to later this week. I will let you know how it all works out!
Maybe a dumb question, but do you slice them in half after baking? Or are we making tops and bottoms “the same”? Hoping for a quick answer, as I want to make these this morning, but I realize I might be on my own this time!
I slice them in half. :)
Do you wait until they are completely cooled down before slicing? And do you just use a regular serrated bread knife to slice them?
I think mine look a lot like biscuits. I used a 3 1/16 inch biscuit cutter. I have 2 larger ones, and will try the largest one next time. These will certainly do, just not quite as large as I think my family will want. My first set I cut out look about the right height, but I can see I got progressively shorter with each reworking of the dough. I also didn’t see the 18 buns until AFTER the fact, and made 21 with a nubbin too. It’s all good though. :)
I wait until they are completely cooled and I use a serrated bread knife. :)
Laura,
What is pictured with your hamburger and hamburger bun? Dried apple slices? Just curious. Your recipe for buns sounds great and I plan to make some tonight.
Ah, that’s onion rings! https://www.heavenlyhomemakers.com/eat-more-fruits-and-veggies-the-best-way-to-eat-an-onion
i grind my own wheat to make bread. do you think it would turn out the same i would use gluten in the recipe
It should turn out great!
We had a snow storm today so i made these (half recipe) with the kiddos and they turned out GREAT! Im thinking i may make these each week for sandwiches instead of a loaf of bread. Thanks for a great recipe.
I forgot to mention… I made half of them on a cookie sheet and half on a pizza stone and i gotta say the ones on the pizza stone turned out better…
Can’t wait to try this recipe out! Thank you for sharing. Has anyone tried freezing the unbaked buns? If so, did they bake well after being thawed?
I think they would do well that way!
I found that they froze better when baked. When I tried to bake the dough after thawing, they never rose quite right… But the baked ones came out of the freezer and were great!
Thank you for your awesome site! I’ve been a peruser for years but just finally started cooking all your wonderful treats. That said, I’m a major novice! Do you knead this like bread, where it isn’t sticking to hands? I would love any help:-)
Blessings!!
Btw my gluten/wheat senstivities are not aggravated by Home fresh ground wheat!!
Praise God for His awesomeness!!
Yes, although you don’t knead it for as long as you would bread loaves. :)
Courtney~~~ thank you for your comment about gluten allergies. I have suspected that to be the case. Using non GMO organic home ground wheat is what we should ALL be eating! The pesticides that are engineered into our food are IMO the cause of these intolerances. Blessings. (so happy to hear you are not bothered by the home ground wheat.
Laura your buns are incredible! Lol!
Did anybody ever tell you what nice buns you have? LOL! I am so thrilled to find your blog! This is my project for this afternoon–thanks!
Haw many calories average a bun do you think? from what calculations it’s about 130, but I not the best at figuring calories out. I was looking for a bun that has not animal products, I would try replacing the milk with almond milk. If I can get them to be about 130 cals that would be so fantastic!
I’m sorry that I really have no idea on the calories. :)
Hi, I am not great at cooking but I love this website and have started teaching myself to cook with these recipes. Since this makes 18 how do I make just 1/2 (9)? Do I just cut everything in 1/2? Like use 2 1/2 cups flour
1 active yeast
1 tablespoon of honey
1/8 cup water
1/4 cup milk
1 tablespoon butter
Any help would be great! Thanks
Yes! Just cut all the ingredients by half! It will still turn out fine.
Thank you for the recipe. We have tried to find a good recipe for hamburger buns. I think this is it! I made them tonight to go with chick-fil-a copy cat sandwiches, we even used whole wheat flour for the chicken coating and omitted the powdered sugar that the recipe called for.
Mine didn’t rise but this was my first time attemping to make anything from scratch. Any one have any Idea what I may have done wrong?
My best guess is that maybe the liquid was too hot and it killed the yeast? Good job making these for your first “from scratch” recipe! Yeast breads can be tough!
They turned out like a wheat flat roll had a good taste, I use them for my sandwiches. And I put some in the freezer. I am not giving up.
just made these for the first time…they are still in the oven. im new to using whole wheat flour. these didn’t really seem to rise much (my yeastwas good).. nothing ive made with the whole wheat does. is this normal or I doing something wrong. followed the recipe exactly.
Whole wheat it trickier to use, for sure! I use freshly ground whole wheat flour, made from white wheat. If you can get your hands on whole wheat flour made from hard white wheat (Montana Gold is a great brand!) that may help. :)
I made this recipe today and got 12 hamburger buns and 8 hotdog buns and ran out of room on my baking sheets so I made a pie dish of 8 cinnamon rolls! I was worried they wouldn’t rise good cause I only had white whole wheat pastry flour but they still rose beautifully. My house smells amazing! I think my hotdog rolls are a bit on the small side but a great improvement from my last attempt at hotdog rolls. Thank you for another good recipe!
I made these buns today using half spelt flour and half fresh ground whole wheat flour, they were awesome!!! Kids and hubby loved them with the sloppy joes I made as well. In addition, made up 7 different sized pizza crusts from your recipe as well, my 4yr old daughter walked in the kitchen and asked if we were having bread for supper, as the kitchen was full of breads of different shapes cooling on racks. I assured her that we were having other dishes to go with the bread. :) Love your site, thank you so much for sharing with the rest of us.
Can I substitute olive oil for the butter? I have all of the ingredients except the butter. I have sea salt but it is the coarse variety. Can I use kosher salt or regular table salt instead?
Yes, olive oil should work just fine, as would either of the salt varieties you mentioned! :)
Thanks!!!! They are going into the oven soon. So far so good. They look and smell amazing! Thanks for sharing your recipe. I just added your recipe to my pintrest as well so I can use it again. The dough rose nicely. I usually do not have this sort of luck when I work with whole wheat flour.
Hi Laura,
I am wondering if you roll out the left over dough a second time after cutting out the first round of buns. There is so much left, it seems a waste to throw it out. Have you experimented with the leftovers at all and had success?
Thanks,
Ali
Oh yes, that’s what I always do! Smoosh and roll that extra dough out again and keep at it until all the dough is used up. :)
Had three batches rising on the counter and water broke so we had to leave for the hospital. Tossed rolls in the refrigerator without baking. Are they still salvageable?
Wow! Well, it would be worth a shot to take them out and let them defrost and rise. It should be ok, but it might rise slowly. Congrats on the baby!!!
This is probably a silly question…I rolled out the dough and cut the rounds. When they have baked, do you cut each one in half or do you use one round for the top and one round for the bottom? I’m waiting for them to rise before baking them. Thanks!
I typically cut them each in half. :)
I’m making these tomorrow so if you’re able to reply that would be great! The 1/4 cup water you mix with the yeast, is that just room temp or should that be warm too? Thanks!
Warm will work best, just warm enough that it isn’t too hot to the touch.
Do you need to punch down this dough before the 2nd knead?
No, you can just pull it out of the bowl and begin working with it. :)
I am Kosher and I was wondering if there is any way to substitute something else for the milk. After all, I was planning on using these with meat! Thanks.
I believe water should work just fine, but I can’t say that for sure since I haven’t tried it. :)