Heavenly Homemakers

Encouraging women in homemaking, healthy eating and parenting

  • Home
    • About
    • FAQs
  • Recipes
    • Bread and Breakfast
    • Condiments
    • Dairy
    • Main Dishes
    • Side Dishes and Snacks
    • Desserts
    • Gluten Free
    • Instant Pot
    • Crock Pot
    • Heavenly Homemaker’s Weekly Menus
  • Homemaking
    • Real Food Sources
  • Store
  • Contact
    • Advertise
    • Disclosure
    • Privacy Policy
  • Simple Meals
  • Club Members!

The Easiest Way to Make Buttermilk

March 11, 2018 by Laura 16 Comments

This post may contain affiliate links which won’t change your price but will share some commission.

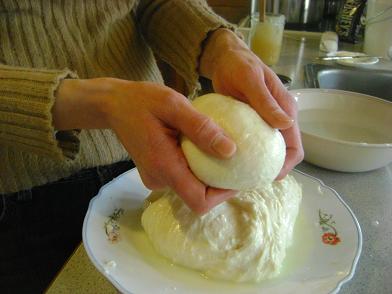
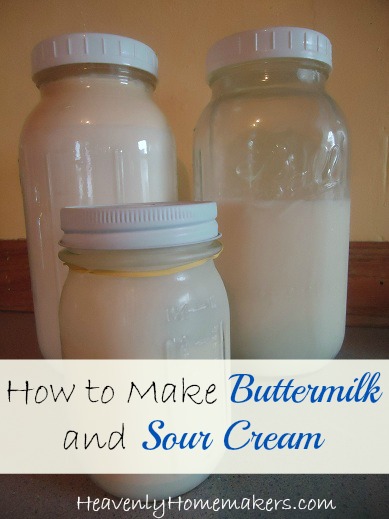
It’s great fun to make buttermilk! Wait until you see how easy it is!

buttermilk11

See, this is one of those things you can tell people that will thoroughly impress them, “Oh yes. I make buttermilk. No big deal.” The people will be shocked and amazed, but then you’ll have to admit, “Ok, fine. My two year old actually made the buttermilk. It really is that easy. Still please be impressed.”

Why would you want to make buttermilk?

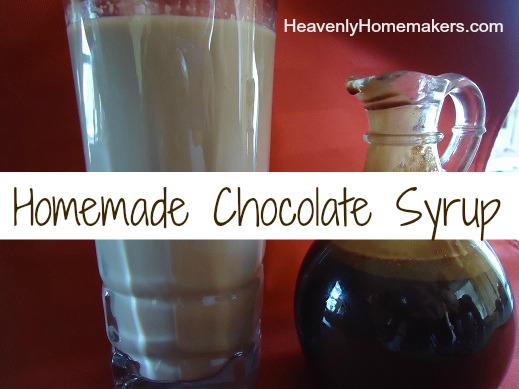
Well, many recipes call for buttermilk, but as for me, I mostly keep it on hand so I can make this Simple Ranch Dressing. We go through gallons of this dressing as it is our family’s favorite. Seeing as we try to eat salad every day, we must have the ranch dressing in the fridge at all times. Buttermilk is a key, delicious ingredient in this dressing. And since buttermilk is a cultured dairy product, this makes our salad dressing even more nutritious!

The main reason I make buttermilk instead of buying it is because I want to use my farm fresh, raw milk. Raw milk contains nutrients and digestive enzymes that help us break down and absorb those nutrients. So this in and of itself is a win! Then when you add culture to this raw milk, it creates probiotic bacteria that is even more fabulous for our gut health!

So homemade raw cultured buttermilk? This is absolutely filled with great nourishment and digestive benefits!

buttermilk23

I guess it goes without saying, then, that when I use this Homemade Buttermilk in our Homemade Ranch Dressing, then we pour this wonderful dressing all over our mixed greens, we’ve got ourselves an incredibly nourishing side dish (or main dish, if we add more substance to our salad!).

salad_makings_2

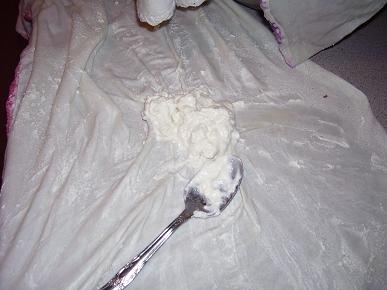
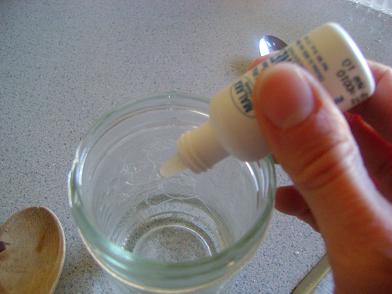
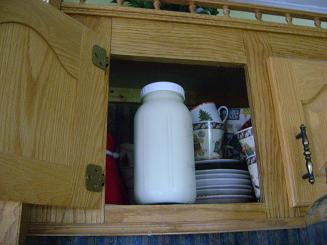
I used to buy packaged culture to start a batch of buttermilk. (Here’s an idea of what that looks like.) That’s a more pure way to start a batch, so yay for that! But it’s quite a bit more expensive. Plus it takes a couple extra steps.

So at this point in my blessed, full-scheduled life, I have chosen the easier route. (Simple specifics below.)

The Best News about Making Buttermilk

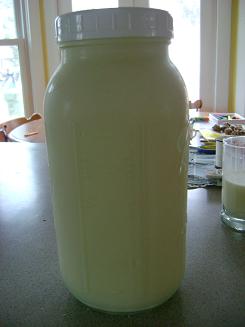
Once you have made one batch, you can save the last cup to start a new batch. Then you can continue making batches of buttermilk from your previous batch, over and over again. Isn’t that cool?

The Easiest Way to Make Buttermilk

5.0 from 1 reviews
The Easiest Way to Make Buttermilk
 
Save Print
Author: Laura
Serves: ½ gallon
Ingredients
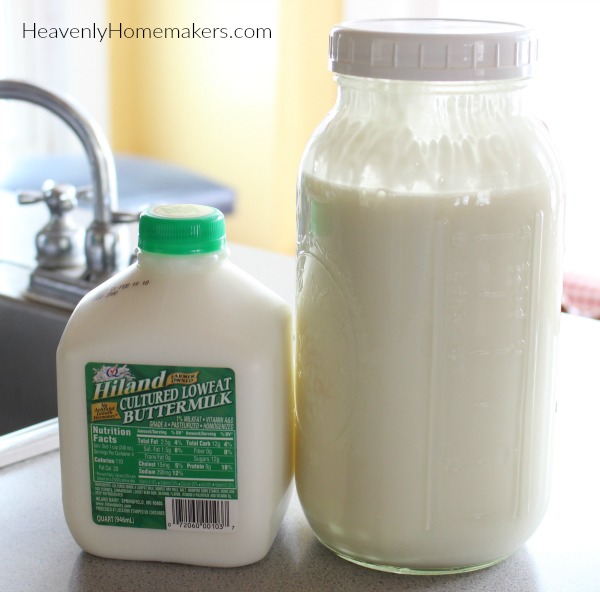
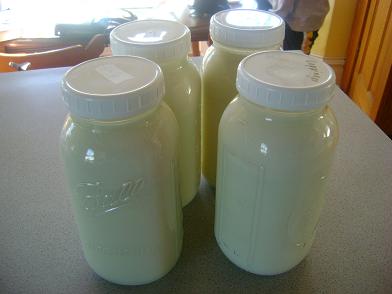
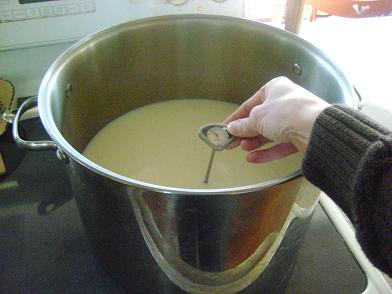
  • Just under ½ gallon of milk
  • 1 cup buttermilk
Instructions
  1. Add buttermilk to regular milk.
  2. Shake well.
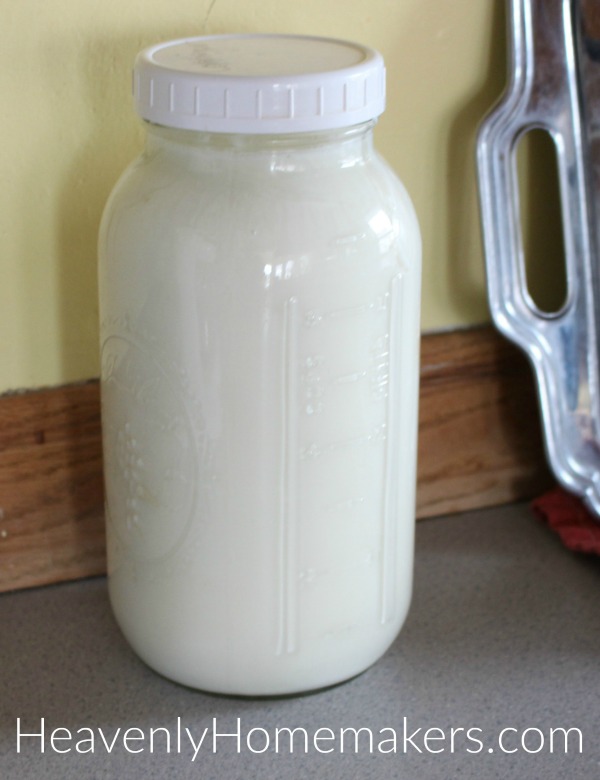
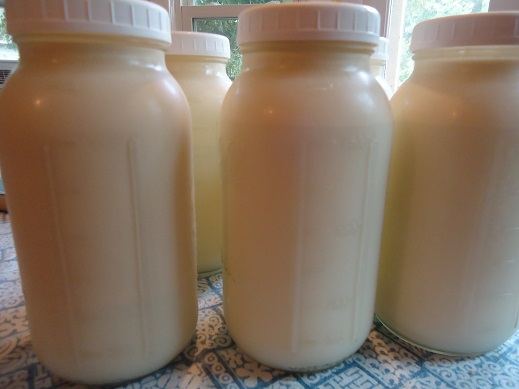
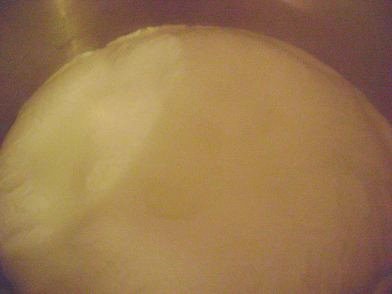
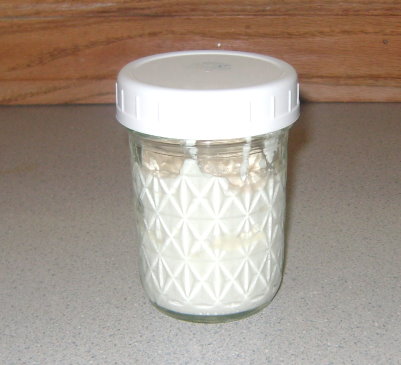
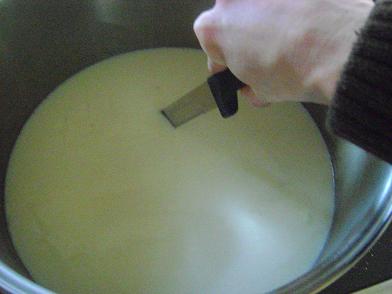
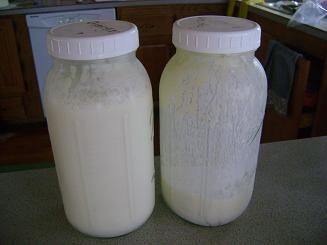
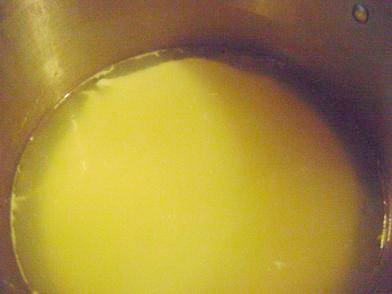
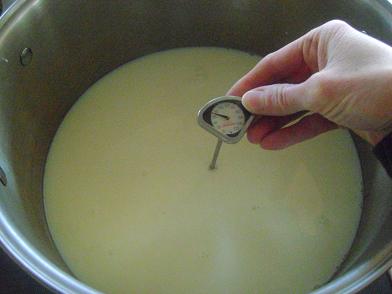
  3. Allow milk/buttermilk mixture to sit on the kitchen countertop for 12-36 hours or until the milk has become cultured.
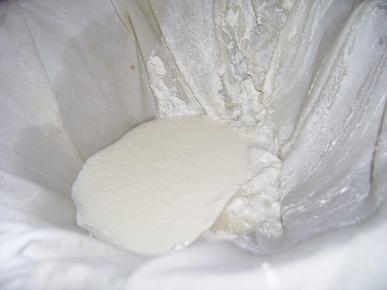
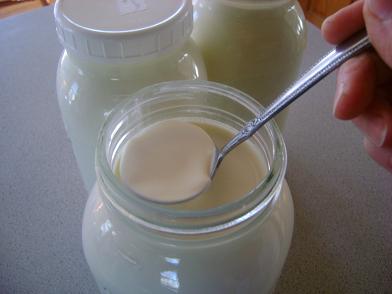
  4. You will be able to see that the new batch has turned into buttermilk by tilting the jar. If the contents of the jar have thickened and "plop" over when you tilt the jar, your buttermilk has formed! If the mixture is still runny like milk, continue to let the jar sit on the countertop.
  5. Once the buttermilk has formed, transfer the jar to the fridge, using as needed.
  6. Save one cup of buttermilk to use in subsequent batches, following the directions above for additional jars of buttermilk.
3.4.3177

The Easiest Way to Make Buttermilk

Do not be afraid to leave this at room temperature for several hours! This is how the milk naturally ferments and cultures. Not only is this practice safe, I am quite confident that the probiotic bacteria formed during this process makes for an even safer-to-consume dairy product!

Can you make buttermilk with store-bought, pasteurized milk?

Yes. While I’ve not tried this, research tells me that this method works with pasteurized milk also. Though apparently, using ultra-pasteurized milk will produce inconsistent results. If you’ve had experience with making buttermilk with store-bought milk, I’d love to hear how it has worked for you!

Recipes that use Buttermilk

Here are the recipes I’ve shared here that call for buttermilk:

  • Ranch Salad Dressing
  • Buttermilk Chocolate Cake
  • Pumpkin Donuts
  • Giant Breakfast Cookies
  • Low Sugar Banana Cake
  • Low Sugar Peanut Butter Cake
  • Homemade Grapenuts Cereal
  • Breakfast Cake Muffins
  • Red(less) Velvet Cake

Seems our family enjoys cake made with buttermilk. I mean salad dressing. We eat lots and lots of salad, with dressing that I make with buttermilk. And also cake.

Do you make buttermilk? What do you use buttermilk for at your house?

Heavenly Homemaker's Club Members: Access your homepage and all your fantastic resources here! Not a member yet? Please join us!

The Best Way to Add Flavor to Plain Yogurt

March 6, 2018 by Laura 3 Comments

This post may contain affiliate links which won’t change your price but will share some commission.

If you’ve struggled to know how to doctor up plain yogurt and keep it healthy, you will love this tip from Bethany as much as I do!

The Best Way to Add Flavor to Plain Yogurt

From Bethany:

We’ve really been enjoying our Javita here, and it really helped a lot over our recent vacation! I wanted to share with you a little fun thing. We have struggled with yogurt since cutting sugar. The flavored ones are loaded with so much sugar (and often other junk), but the pain is so…. plain, and my kids have disliked every flavoring I’ve tried to add. Until today! I had the idea to mix a packet of Defend into a tiny bit of milk and then mix that into a container of plain yogurt. Everyone loved it, even my pickiest kids! Hooray! Now we can eat yogurt again!

I LOVE this! We’ve always added fresh or frozen fruit to flavor our plain yogurt. Then we add some kind of sweetener, usually real maple syrup. This is great, but what I love about Bethany’s idea to stir in a Defend is that not only does it flavor and sweeten the yogurt (with stevia), it provides our bodies with all the immune system benefits of drinking a Defend.

Why I Trust Defend:

My family has been drinking Defend all winter to help us fight sicknesses that have been going around. I personally find that Defend mixed with Flex is a perfect combo as the Flex adds anti-inflammatory help with keeps my asthma in check along with Defend’s immunity boost.

So consider all the benefits of yogurt to keep our guts healthy, then add Defend and we’ve got a winning, delicious combination!

Thank you, Bethany, for sharing this fun information you discovered!

How to Add Defend to Plain Yogurt

The Best Way to Add Flavor to Plain Yogurt
 
Save Print
Author: Laura
Serves: 2 cups
Ingredients
  • 1 Packet of Defend
  • 3 Tablespoons milk
  • 16-ounces plain yogurt (more or less to taste)
Instructions
  1. Empty one packet of Defend into the milk and whisk until dissolved.
  2. Stir mixture into plain yogurt and serve.
3.5.3229


Read more about Javita products here and why I love them so much.

May our yogurt be delicious, our digestive systems working like they should, and our immune systems kicked in full gear!

Heavenly Homemaker's Club Members: Access your homepage and all your fantastic resources here! Not a member yet? Please join us!

We Get Milk Again – I Can Finally Make Buttermilk!

October 10, 2013 by Laura 16 Comments

This post may contain affiliate links which won’t change your price but will share some commission.

It’s been sort of a crazy few months around where cows are concerned.

You’re picturing it, aren’t you? With that one little statement, you have now conjured up in your mind a scene in which the local cows are behaving in strange ways, perhaps showing up on people’s doorsteps, speaking in full sentences, or maybe climbing onto billboards to paint a message. (Is anybody else now hungry for Chick-fil-A?)

What I’m really trying to say is that our regular milk sources have had unfortunate issues with their milk cows, leaving us without a source for raw milk. Boy have we ever been spoiled for the past few years.

Thankfully, as of last week, we were able to find another source for this liquid gold. What did I do just as soon as we picked up our milk? Well, I took a picture, of course. Then, I shook up a jar of milk and had a glass. And then I made buttermilk. And yogurt. And kefir.

milk (1)

Yum

Besides drinking it, making homemade dairy products is what I’ve missed the most about having raw milk. (Here’s what we did in the meantime, in case you’re wondering.)

Doesn’t it take a long time and a lot of work to make buttermilk, yogurt, and kefir? Only if you consider five minutes a lot of time and shaking a jar a lot of work. Seriously, making homemade, cultured dairy products is so easy – and think of the money it saves!

So there you have it. My fridge is now full of great milk, fresh cream, and all the cultured dairy products I need for baking and making smoothies. You’ll find all the links and instructions for making these products here.

Do you make any homemade cultured dairy products? If so, which ones are your favorites?

Heavenly Homemaker's Club Members: Access your homepage and all your fantastic resources here! Not a member yet? Please join us!

Five Minutes to Cultured Dairy

April 27, 2011 by Laura 43 Comments

This post may contain affiliate links which won’t change your price but will share some commission.

I’m out to prove that making your own cultured dairy products is neither intimidating nor difficult. Just yesterday, I made Buttermilk , Kefir and Sour Cream. This took me a total of five minutes. I did not break a sweat, not even when I was putting lids on jars.

Yum

I then started a batch of Yogurt . Yes, it was a big dairy day in my kitchen. Or rather, a big dairy eight minutes. Because that’s really how long it took to do all of this.

As soon as they are done culturing (which these products do all by themselves while I sleep, type, trip on legos or cut my fingernails), I’ll put them into the fridge.

Now, all of you stop thinking that you can’t make your own cultured dairy products and get started on this fun and healthy habit!! :)

Here’s a little Cultured Dairy question and answer time:

Is making your own cultured dairy products hard to do?  Did I or did I not just tell you that this isn’t hard? Okay then.

Can I use regular milk from the store to make these products?  Yep. I recommend drinking and using raw, organic, grass fed cow (or goat) milk to make these, but if that isn’t available to you, you can definitely use milk that you purchase from the store.

Do I have to trip on legos while my products are culturing?  No, in fact I recommend that you step over all legos and call your children in to pick them up before your feet get holes in them. I was just saying that to be funny, or something like that – and to prove that you don’t have to babysit your dairy products while they are culturing.

Why is there a rubber band on your sour cream jar?  I put a rubber band around my sour cream jar so that I’ll know at one quick glance into my fridge which jar is sour cream and which is regular cream. It’s quite helpful to know the difference. You’re welcome to use whatever color of rubber band you prefer. If you really think that sour cream deserves a red rubber band instead of a yellow one, knock yourself out.

What do you mean “knock yourself out”?  That is an expression that really just means “go for it”. To take that expression literally would just seem as though I were a big bully. Please, do not literally “knock yourself out”. Goodness.

Will I really have cultured dairy products in just five minutes like your title suggests?  The five minutes I was referring to was the time it takes for YOU to do any kind of work. It does take several hours for the dairy to become cultured after you’ve done your five minutes of work. Read the specific directions for each of the dairy products to know how long each item takes to become cultured. Here are the quick links:  Buttermilk , Kefir, Yogurt and Sour Cream.

Do you make your own cultured dairy products? Which ones are your favorite?

It’s here! Check out our amazing Simple Meals program!

728x90

Heavenly Homemaker's Club Members: Access your homepage and all your fantastic resources here! Not a member yet? Please join us!

Natural Help for a Yeast Infection

March 30, 2011 by Laura 59 Comments

This post may contain affiliate links which won’t change your price but will share some commission.

Hello, and welcome to a very personal post. I don’t usually write about these sorts of topics, not because I’m afraid of getting personal, but because I’ll never claim to be someone who knows much about natural healing. I leave that up to Michele at Frugal Granola. She’s brilliant, well studied in these matters and even wrote an ebook to help all of us.

Of course, I do know that if I cut hot peppers without gloves on and then touch my eye, my face will appear to be on fire and I will run frantically about the house until I can get some milk splashed into my eyeball. And through trial and error, we’ve found some things to help ease our son’s eczema symptoms naturally. But in general, you won’t come to Heavenly Homemakers and learn that in order to help your pet cat who is experiencing hair loss, you need to rub together the petals of four and a half tulips, mix them with yesterday’s shredded newspaper in a large pot of tepid coffee, stir in equal measures of garlic and plucked eyebrows, then soak your cat in the mixture for 2.7 hours per day*. That’s just not where my specialty lies.

However, I do have a thing or two to say about helping a yeast infection. This information doesn’t take the place of what your doctor might say, but of course you know from reading the above cat hair remedy that this goes without saying. I’m just going to share with you what I have learned from what I have read and what I have experienced.

I don’t suffer from yeast infections often (thankfully), and I know there are different varieties of yeast issues (like thrush). But the kind I’m talking about today is the kind that effects women in a very unpleasant and personal way. Yeast is a fungus and none of us wants an over-growth of fungus down there. Not only is a yeast infection itchy, it’s extremely itchy and it burns and it also itches very badly. 

Here are the best natural remedies I’ve found to make an uncomfortable yeast infection go away:

  • Take a probiotic – It’s really a good idea to take a probiotic on a regular basis if you can, but especially if you have a yeast infection. I suggest talking to your chiropractor or local natural doctor to see which kind he/she recommends.
  • Stop eating sugar – I mean completely stop eating sugar while you’re having a yeast infection. Sugar feeds yeast and just makes your infection worse. Try to go easy on all carbs if possible, as carbs turn to sugar. Don’t worry, there will still be brownies in the world for you to eat later after you’re all better.
  • Eat cultured products like yogurt. Drink cultured products like kefir or kombucha. (Someday, I plan to share with you how to make kombucha.)
  • Better yet (and this is where the very personal part of this post comes in)…apply plain, cultured products directly to the infected area. 

Yes, this means that you take a little jar of plain kefir or yogurt into the bathroom with you…wash yourself gently…then put kefir or yogurt on and around and in the area that is feeling miserable.

Yum

I have found that this is a huge help. It doesn’t cure the problem instantly…but it does offer some temporary relief…as well as help with the overall healing process, as the good, living bacteria in the cultured dairy goes to work. It’s actually quite soothing.

But be sure the cultured products are PLAIN. Most commercial yogurts and kefirs have some sort of sugar in them and YOWZA you do not want to be smearing sugar in there to feed the yeast and turn it into a monster!

I recommend, if you can, to make your own homemade cultured dairy products. All the instructions are found through links on this page and they are SO easy!! There’s even a Heavenly Homemakers discount from Cultures for Health to help get you started. Look for it on the Cultured Dairy Instruction Pages.

I’m also going to put a plug in here again for always and forever avoiding regular Kotex and/or other typical store-bought brands of monthly “punctuation” products as these can cause all kinds of miserable  issues. Read this post again if you don’t know what I’m talking about. I really can’t emphasize this enough.

I’d love for you to share any other natural remedies you’ve discovered to help with yeast infections. And also for cat hair loss.

*The above described remedy for Cat Hair Loss was completely fictitious information written simply to cause me to sound ridiculous. I do not recommend soaking your cat in the previously described way, ever. Not enough studies have been done to prove its effectiveness, and trying this remedy may result in a very angry cat.

Heavenly Homemaker's Club Members: Access your homepage and all your fantastic resources here! Not a member yet? Please join us!

Homemade (Healthier) Chocolate Milk

February 27, 2011 by Laura 75 Comments

This post may contain affiliate links which won’t change your price but will share some commission.

I have not one, but two recipes to share with you today in regard to making a healthier variety of chocolate milk. If at all possible, I encourage you to stay away from commercial chocolate syrup, as it is full of high fructose corn syrup and corn syrup. (You can’t tell, but I’m making a “blechy” face right now and it isn’t pretty.)

This first recipe for Chocolate Syrup is from a friend of mine right here in town. {hi, Nancy!}  It’s the easiest recipe ever, making it a perfect solution for those of you who really want your chocolate syrup but want to avoid HFCS.

Homemade Chocolate SyrupYum

1 cup sucanat
1/2 cup cocoa
dash of sea salt
1 cup water
1 teaspoon vanilla extract

Mix sucanat, cocoa, sea salt and water in a medium sauce pan. Whisk ingredients together and cook on medium-high heat until the mixture begins to boil. Boil for one minute. Remove from heat. Allow mixture to cool for just a few minutes. Stir in vanilla extract.

Add Homemade Chocolate Syrup to your glass of milk to taste. Store syrup in the refrigerator.

If you look real close, you can see a reflection of me with my camera
in the round part of this cute little pour bottle.
Try to focus on the chocolate syrup. I wasn’t having a good hair day.

Homemade Chocolate Syrup

The boys have declared this Chocolate Syrup to be quite delicious.
It will be a special treat every once in a while at our house!

Now for recipe number two.  This is how I’ve been making chocolate milk for the past several years. (Makes you wonder why it took me so long to share this, huh? I have lots of excuses.)

Now don’t freak out or anything, but I often add a few raw, farm fresh eggs into the blender when I’m mixing these up. I don’t worry one bit about getting sick from raw eggs that come straight from my friend’s farm. Their chickens are allowed to roam free all day long and eat all the healthiest chicken feed and you know…bugs. Healthy chickens means healthy eggs, and we eat them free of fear. Raw eggs are great brain food.

Okay, this post is not about the safety of raw eggs. But I did just want to let you know that if you want to add farm fresh, free ranged eggs to this Quick Blender Chocolate Milk recipe, you’ll find that the nutrition level goes WAY up, as does the creamy-richness of this chocolate milk! (I really don’t recommend putting raw eggs into this – or into anything – if the eggs are not organic, free range, farm fresh eggs. Please do your own research about this to determine what you feel is safe.)

Quick Blender Chocolate Milk

6 cups of milk
3 Tablespoons cocoa
4 Tablespoons real grade b maple syrup (give or take, depending on your taste)
1/2 teaspoon vanilla extract

Put all ingredients into your blender and mix well.

Chocolate Milkshakes

Malachi LOVES the job of serving the Chocolate Milk out of our fun blender.

So there you go. Many of you were screaming for a healthier chocolate milk recipe, so now you have not one, but two to choose from!

And now, the Heavenly Homemakers Recipe Challenge continues. I’m in the process of figuring out a healthier Onion Soup Mix recipe and have played a little bit with Angel Food Cake. The Angel Food Cake I tried first completely sank and went from four inches tall to 2 inches tall. I’m still working on it. I guess that’s why this is called a “challenge”, huh? :)

Heavenly Homemaker's Club Members: Access your homepage and all your fantastic resources here! Not a member yet? Please join us!

How to Make Ricotta Cheese

March 19, 2009 by Laura 37 Comments

This post may contain affiliate links which won’t change your price but will share some commission.

Here is the final post in my mini series “What I Can Squeeze out of Two Gallons of Milk”. If you recall…with two gallons of raw milk, I was able to make mozzarella cheese…fresh butter…and now…ricotta cheese! 

Ricotta cheese is made with the leftover whey from your cheese making process. It is SO easy. I am so amazed that after I’ve finished making mozzarella cheese…there’s still ricotta cheese lurking in the whey! (What smart person discovered that…I want to know?)

To make Ricotta Cheese:

Pour all of the whey left from making your mozzarella cheese into a large stock pot. Heat it to 170°. Try to keep it right around that tempurature for a minute or so…then remove it from the heat. It looks something like this:

ricotta3sm.JPG

Yum

I apologize for the quality of this picture. It’s…yucky looking. That’s what happens when you stick your camera inside a pot of almost boiling whey. Look closely to TRY to see that the whey is bubbly with a thick layer of white froth on the top. Can you see it? Ah well…thanks for trying.

ricotta2sm.JPG
Pour your bubbling whey into a strainer lined with a tea towel. (You will put something under your strainer to catch the liquid, right?)  Allow the liquid to strain through the tea towel. This takes a little manuevering because the ricotta starts to line the bottom of the tea towel and doesn’t allow the liquid to go through as easily.

ricotta1sm.JPG
Use a spoon and scrape all the ricotta off of the tea towel.

ricotta4sm.jpg
Place your ricotta cheese into a jar for storage. Stuffed Manicotti anyone?

So, what do you think? Not too hard, huh? 

What recipes do you like making with ricotta cheese?
——————————————-

Here’s what I need you to do now. Tell me what you’d like for me to talk about next in the Feeding the Family series! Thanks!
—————————————-

This post is linked to Frugal Fridays.

Heavenly Homemaker's Club Members: Access your homepage and all your fantastic resources here! Not a member yet? Please join us!

How to Make Fresh Butter

March 12, 2009 by Laura 128 Comments

This post may contain affiliate links which won’t change your price but will share some commission.

If you recall, last week when I showed you how to make mozzarella cheese, I mentioned that if you’re making it from raw milk, you skim off the cream and save it to make butter. HERE is one way to make butter!

butter1sm.JPG

Yum

Fill your food processor 1/3 full of heavy cream. Be sure not to fill it more than 1/3 full…it will probably not turn into butter if there’s too much in the container.

butter3sm.JPG
Turn your food processor on high…and then flee the room. (It’s really loud and annoying!)  The food processor will whip and whip and whip the cream until it turns it into butter. It should take somewhere between 8-15 minutes.

butter4sm.JPG
Once the fat has been “pulled out” of the cream, it should look something like this…and you can turn off the food processor.

butter5sm.JPG
Pull all the solid pieces and squish them together. 
Place the solids in to a clean bowl.

butter6sm.JPG
 Run some clean COLD water into it.

butter7sm.JPG
Clean the butter with the cold water by squishing it with a wooden spoon until all the liquid comes out of it. Repace the cold water 2-3 times as you clean it.

butter8sm.JPG
Squeeze the excess water out of the butter and shape it with your hands.

butter9sm.JPG
Ah, look…a lovely little butter ball.

You can add salt to the cream if you want salted butter…this will also be a preservative, making the butter last longer.

OR…if you don’t have a food processor and want to have a little family fun…put your cream into a jar and shake it like crazy. Pass the jar around, and take turns shaking it. (I’ve tried shaking it all by myself once when no one was around to help…and I thought my head and arms would fall off from shaking the jar so much all by myself. I don’t think I ever got butter out of that jar.)

Have you ever made butter before?  Isn’t it COOL to see the butter form out of the cream!? 

I LOVE how with just one little gift from a cow (or goat or whatever) you can make SO MANY great yummy things!

P.S. Even if you don’t have fresh cream…go buy some heavy whipping cream at the store and try making butter. It’s just…cool.

Next week…RICOTTA CHEESE! :)

(Join us Saturday for the little Green Project!)
——————————————-

This post is linked to Frugal Fridays.

Heavenly Homemaker's Club Members: Access your homepage and all your fantastic resources here! Not a member yet? Please join us!

How to Make Mozzarella Cheese

March 5, 2009 by Laura 222 Comments

This post may contain affiliate links which won’t change your price but will share some commission.

Want to know what makes me excited (besides little plastic drawers)? The fact that with only two gallons of  milk…I can squeeze out THREE great dairy products. With the two gallons of raw milk you see pictured below, I was able to make three eight ounce balls of mozzarella cheese…a half pound of butter…and about a cup of ricotta cheese. 

Talk about milking something for all it’s worth! (Whoa…very cheesy joke.)  (Which I feel is appropriate because this post is about making…cheese. Cheesy-ness abounds.)  Anyway…

Even if you don’t think you’ll ever make your own mozzarella cheese…you may still have fun reading about how it’s made!

mozzarella10sm.JPG

Yum

To make Mozzarella Cheese you will need:

  • Two gallons of milk (I use raw, organic) (As far as I understand, you can use pasteurized and homogenized milk too…although you won’t get the butter and ricotta out of it since the cream doesn’t rise to the top.)
  • 2 teaspoons citric acid dissolved in 1/4 cup water
  • 1 cup cultured buttermilk
  • 30 drops vegetable rennet mixed with 1/4 cup water (I get my rennet from Azure Standard or Wilderness Family Naturals.)
  • 1 gallon water
  • 1/2 cup sea salt
  • Large stock pot
  • Long knife
  • Food thermometer
  • Strainer
  • Tea towels

Okay, ready to make cheese? You’ll need to block out about two and a half to three hours of time…but most of that time is wait time, not work time!

mozzarella11sm.JPG
First, if you’re using raw milk…skim off the cream. You know I’m usually big on leaving in the fat…but the fat separates itself out of the cheese while you’re making it for some reason. So, skim it off, put it into another jar and save it for making butter!

mozzarella13sm1.JPG
Pour the milk into a large pot (I use my big stock pot). Stir in the buttermilk and citric acid mixed with water. Heat to 91 degrees. Remove from heat, put the lid on and let it sit for one hour. 

mozzarella14sm.JPG
Add the rennet mixed with water to the milk. Allow it to sit for at least 15 minutes, or until the milk solidifies slightly and it able to be “sliced”.

mozzarella15sm.JPG
Use a long knife to “cut the curd” into one inch squares. 
Let the curd sit about five minutes.

mozzarella16sm.JPG
Heat the curd to 91 degrees. Remove from heat, place the lid on the pot and allow it to sit for one hour. After one hour, the curd and the whey should have separated.

mozzarella17sm.JPG
Place a strainer into another large pot and cover it with a tea towel.

mozzarella19sm.JPG
Pour the curds into the strainer/tea towel…straining out as much whey as you can. Save the whey!!

mozzarella20sm.JPG
Rig up something fancy like this to hang your curds, making sure you have a bowl underneath to catch more whey that will drip out. I usually leave mine overnight as it takes several hours for all of the whey to be removed.

mozzarella3sm.JPG
In the morning…remove the tea towel. Wow, a big hunk of cheese! Now…the fun part begins!

In your large pot…heat one gallon of water mixed with 1/2 cup salt. (Hint:  I use Redmonds Real Sea Salt and it can be too chunky if I don’t try to dissolve some of it first. Therefore, I put my water and salt into a jar and shake it well, then pour it into the pot. The residue from the salt remains in the jar, leaving only salty water…without chunks!

Heat the salt water to 170 degrees. Meanwhile… 

mozzarella5sm.JPG
Cut the cheese (oh, my boys think it’s SO FUNNY when I say that…) into 1-2 inch squares.

mozzarella6sm.JPG
Once your water reaches 170 degrees, remove it from the heat and dump in your cheese. Kind of stir it around for a minute or two until the cheese softens and begins sticking together.

mozzcheese1sm.JPG
Use a big wooden spoon to catch the cheese from the water. It should start sticking together and forming a blob on your spoon. Stretch the cheese.  This part is SO COOL!! Dip it down into the hot water every once in a while to reheat the cheese so that it will continue to stretch, but try not to keep it in the water too long. Keep on stretching and dipping the cheese until it is shiny. This stretching process will take about 8 minutes. (Every once in a while I get a batch of cheese that just won’t stretch. It’s a bummer. The cheese still tastes fine…it just doesn’t look as pretty, shred as well, or melt as nicely. We eat it anyway!)

mozzarella7sm.JPG
After you’ve stretched your cheese and it has formed a big long shiny wad, take it out and put it onto a plate. 

mozzarella8sm.JPG
I divide my cheese into three blobs. Squeeze out the excess water and shape the cheese into nice balls. 

mozzarella9sm.JPG
Place the balls into a bowl of cold water. This will take out the heat and help them hold their shape.

mozzcheese2sm.JPG
Tada!!! Mozzarella Cheese! 

I’ll take time during my next two Frugal Friday posts to share how I make butter with the leftover cream…and ricotta cheese with the leftover whey!

So…have you ever made cheese before? Do you think this process looks like something you could do? You wanna come over and make cheese with me some time? (Then we can say “cut the cheese” together and laugh like we’re really funny.)

———————————————-


Heavenly Homemaker's Club Members: Access your homepage and all your fantastic resources here! Not a member yet? Please join us!

Making Cultured Buttermilk, Kefir and Sour Cream

November 14, 2008 by Laura 189 Comments

This post may contain affiliate links which won’t change your price but will share some commission.

Wanna know how EASY it is to make cultured buttermilk, kefir and sour cream? Yeah, it takes about 30 seconds of your time. (Don’t tell anyone that though…they think it’s impressive when you make your own.)  :)

The beauty of making your own cultured dairy products is that once you make one batch, you can save the last cup or two to start a new batch. It saves a lot of money to do this, and it is so easy!

I buy my buttermilk, kefir, and sour cream (also known as kreme fresh) starter online. Here are some great starter packet options:

  • Buttermilk and Sour Cream Starter Culture (yep, you can use the same one for both products)
  • Kefir Starter Culture

To Make Kefir:

How to Make Kefir

Yum

I begin with just under a half gallon of raw milk in a glass jar. (You can make this with pasturized milk too as far as I know.)  I pour the packet of kefir starter into the milk, shake it up, and put a lid on it. Then, I set the jar in the cabinet above my refrigerator for about 24 hours (in the winter, it takes a little longer in my COLD kitchen!). You’ll know it is done “culturing” when it is thick and has some bubbly looking bubbles all through it. And when you tip your jar over, it kind of…glops. (see how helpful I am?)

To Make Buttermilk:

How to Make Buttermilk and Sour Cream

Follow the same instructions as for the Kefir, only use the Buttermilk Culture Starter.

To Make Sour Cream (aka kreme fresh):

Use the Buttermilk Culture Starter with one pint of cream. Follow the same directions as above.

Now, to make more batches of each of these…

Save about a cup each of kefir or buttermilk (or about a third cup of sour cream) from your initial batch.

Use this remaining kefir, buttermilk or sour cream to shake into more raw milk or cream (1/2 gallon of milk…or 1 pint of cream) to begin a fresh batch. Just put it in, shake it up, and let it sit out for 24 hours or so. (Until you’ve got the glop thing going on.)  You can do this up to eight times before you need to begin with a new starter package. (I’ve continued it more than eight times when I’m feeling rebellious. It still works.)

buttermilk1sm.JPG
Here’s the tail end of one jar of buttermilk,
ready to be poured into a fresh 1/2 gallon jar of milk.


buttermilk2sm.JPG
Here’s a jar of milk with a cup of buttermilk shaken into it,
ready to begin the culturing process.
(Yes, I know it looks like a plain ol’ jar of milk.
You’ll have to humor me and act like you can tell .
Nod and say, oh…very nice.)

buttermilk4sm.JPG
And here is my milk turning into buttermilk in the cabinet above my fridge. (With my Chrismas dishes.)
I’ve been advised that this spot is the best one in my kitchen to culture things because it has a fairly consistent temperature.

Oh, and when I do put my culturing dairy products in this cabinet, I LEAVE THE CABINET DOOR OPEN so that I can see it. It’s a bad idea to forget you have buttermilk or kefir or sour cream culturing in a cabinet. A bad, bad idea.

Now you have really, really healthy kefir for smoothies, and really, really healthy sour cream for your tacos, etc, and really, really healthy buttermilk for drinking or for making Creamy Orange Cooler.

See how easy it is?! :)

Heavenly Homemaker's Club Members: Access your homepage and all your fantastic resources here! Not a member yet? Please join us!
Next Page »

Join Our Community!

 Facebook Twitter RSS E-mail Instagram Pinterest

Popular Posts

~ Will All of the Real Moms Please Stand Up?
~ Easy! Stir-and-Pour Whole Wheat Bread
~ How to Make Gatorade
~ 31 Real Food Breakfast Ideas
~ Dear Teenage Girls...
~ When Mom Takes a Step Back
~ The Inexpensive Health Insurance We Love!
~ Let's Talk Real Food Grocery Budgets

Check out our latest posts!

  • Easy Chili Cheese Dip
  • How to Make 5 Meals with 1 Pork Roast
  • Easy Make-Ahead Breakfast Sandwich Ideas
  • Parmesan Chicken and Rice Recipe – $1.00/person!
  • How to Beat Inflation at the Grocery Store
Home  ~  Simple Meals  ~  Club Membership  ~  Shop  ~  Privacy Policy  ~  Disclosure  ~ Contact

Copyright © 2023 · Beautiful Pro Theme on Genesis Framework · WordPress · Log in