Heavenly Homemakers

Encouraging women in homemaking, healthy eating and parenting

  • Home
    • About
    • FAQs
  • Recipes
    • Bread and Breakfast
    • Condiments
    • Dairy
    • Main Dishes
    • Side Dishes and Snacks
    • Desserts
    • Gluten Free
    • Instant Pot
    • Crock Pot
    • Heavenly Homemaker’s Weekly Menus
  • Homemaking
    • Real Food Sources
  • Store
  • Contact
    • Advertise
    • Disclosure
    • Privacy Policy
  • Simple Meals
  • Club Members!

What to Look for At Garage Sales if You’re Planning to Preserve Food!

July 9, 2009 by Laura 20 Comments

This post may contain affiliate links. For more information, please see our disclosure policy.

Freezing and canning your fruits and vegetables for the winter saves a LOT of money…but getting started can COST a lot of money too. There are some supplies that you just have to have. Almost all of the supplies you need are “one time only” purchases, so if you have to pay full price, you will get your money back on it eventually if you continue to preserve food through the years.

But…if you plan on going to garage sales or auctions this summer…here are a few things to keep your eye out for so that you can try to get a better deal:

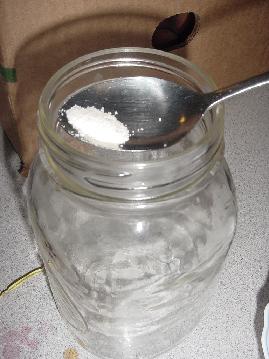
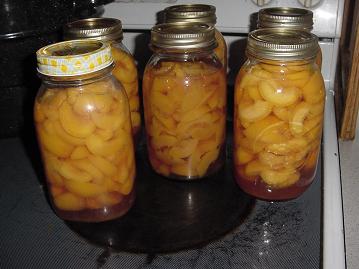
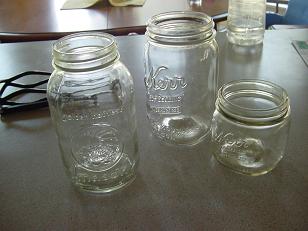
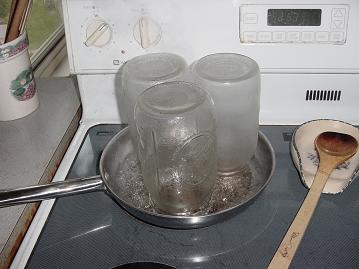
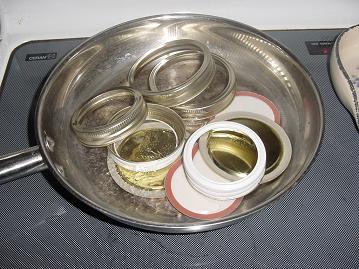
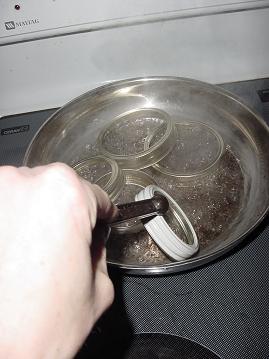
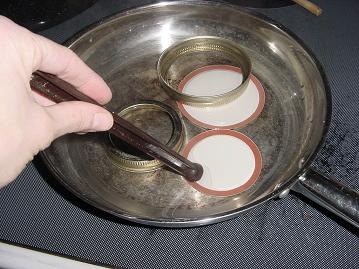
Jars. Jars…jars…and more jars.

31gAKlWjRBL._SL160_
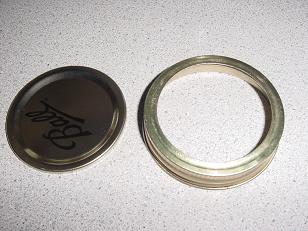
Ball® 16oz. Wide Mouth Jars with Lids

Jars are a must if you plan on doing any canning. Not a lot of people do much canning anymore, so they are ready to get rid of their jars. I’ve seen big boxes of them for super cheap at garage sales. I buy all I can get my hands on anytime I see them for a good price. I don’t even need anymore jars (I have over 300!), but I have friends who need them so I still grab them when I see them at a sale!

My favorites are the “wide mouth” jars, which tend to cost more at the store. I consider it to be a big score if I find wide mouth jars at a garage sale.

And…here’s a little tip I learned from a friend of mine (who likes jars almost as much as I do):  If you see a box of jars at a garage sale…ask the owner if they have any more jars anywhere they’d like to get rid of. When my friend did this…the lady hosting the sale went down to her basement and brought up bunches of boxes of jars she was happy to part with! It NEVER hurts to ask!!!
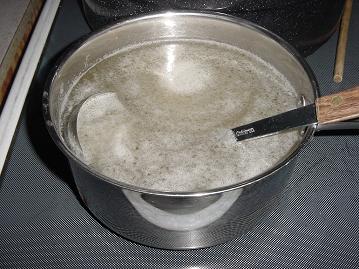
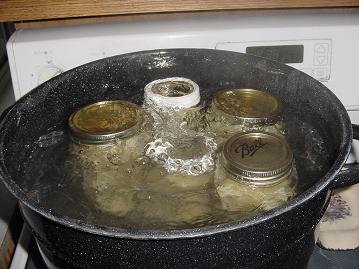
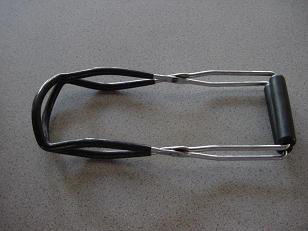
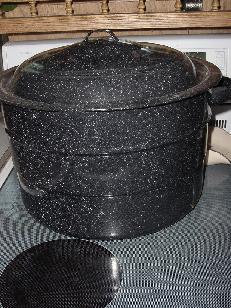
Hot Water Bath Pot

51-kKM45zjL._SL160_
Granite Ware 21-Quart Covered Preserving Canner with Rack

If you’re just going to be canning in small pint sized jars, you can use a big soup pot. (The water has to be high enough to cover your jars as you process them.)  But, if you’re canning in quart sized jars you’ll need a Hot Water Bath Pot. It’s just the right size to hold seven quart sized jars.

My dad found two of them for me at an auction once for about a dollar. At that time, I hadn’t even learned to can yet…but that was motivation for me to learn!!
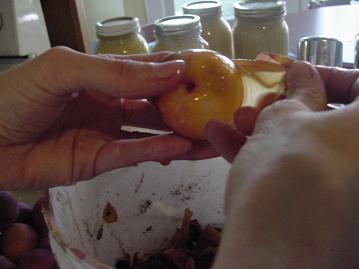
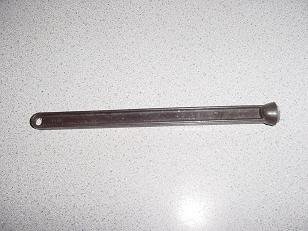
Cherry Pitter

31P5T3D6SPL._SL160_

Norpro Deluxe Cherry Stoner/Pitter

If you have a cherry tree or know someone who does…it saves a lot of time (and broken teeth) if you take out the pits with a cherry pitter. Mine is probably an antique, but it works great and saves me a lot of time!
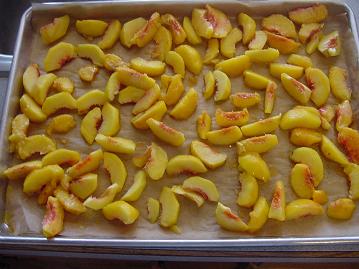
Food Mill

41o4fVdzuEL._SL160_
Mirro 50024 2-quart FOLEY Food Mill, Stainless Steel

I usually make my applesauce in a blender, but if you prefer to leave your peelings on your apples…cook them down, then run them through a food mill like this one. I have one and while it takes quite a bit of muscle to get a big batch of applesauce made, it’s yummy!
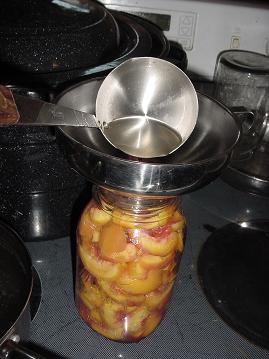
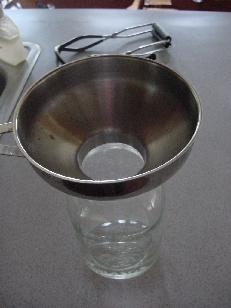
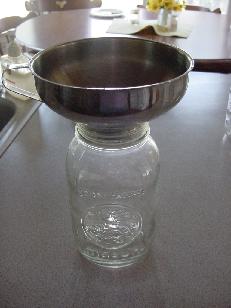
Funnel

41H8B03T3PL._SL160_
Norpro Stainless Steel Wide-Mouth Funnel

In my opinion, a wide mouth funnel is a must-have for canning. I use mine ALL THE TIME. I paid full price for mine through Azure Standard and it was well worth it. But, I wouldn’t mind a second (or third) one, so I’m keeping my eye out for them at garage sales.

Ziplock bags

21psqXknDfL._SL160_
Ziploc® Double Zipper Plastic Freezer Bags, Gallon (94604ZIP) Category: Plastic Ziplock Bags

Okay, you probably won’t find these at garage sales, but while we’re on the subject of saving money while you preserve food, I recommend stocking up on quart and gallon sized freezer bags when they’re on sale and when you have coupons. Two tips:  Only use freezer bags for freezing produce. Regular storage bags won’t cut it. And…stick with name brand Ziplock bags for produce. I won’t tell you about the time I made real apple cider and froze it in generic freezer bags. Let’s just say everything in my freezer was sticky for six months and I lost a lot of my apple cider. :(

Have you found any great deals at garage sales and auctions for canning jars and etcetera? What else am I forgetting to mention that we should be looking out for at garage sales?
————————————————–

This post is linked to Frugal Fridays.

Heavenly Homemaker's Club Members: Access your homepage and all your fantastic resources here! Not a member yet? Please join us!

Slow Down Already

April 20, 2009 by Laura 16 Comments

This post may contain affiliate links. For more information, please see our disclosure policy.

This is what I have to tell myself too often:  “Laura…Slow Down!” (Yes, I talk to myself.)

Especially when I get in the kitchen. What can I say? I like to be efficient. I don’t measure ingredients. I often don’t close cabinet doors. I usually stir together three recipes at one time. 

All of this is fine…but it can get me into trouble. Sometimes slowing down and taking the extra two seconds to close a cabinet door (so that my tall husband doesn’t crack his head on it when he walks by) is a good thing.

So here’s what I did last week. I’m only telling you this out of the kindness of my heart and so that you can be sure and avoid the same trouble. Really…I’m not telling you this so that I will feel ridiculous all over the internet. Why in the world would I do that to myself?

Anyway….last week I was making breakfast cake. I had been a good mama and soaked the grains overnight. I was getting an early start in the morning so that I could have the cake ready for Matt to eat before he needed to leave for work. I was doing everything right.

I put all of the ingredients into my food processor, because I find it so much easier for my food processor to stir together my soaked grain recipes. Otherwise my arm muscles rebel against all the stirring.

Yet that particular morning, even my food processor was having a hard time breaking up all the big clumps of soaked flour and oats. “I’ll just push some of it down with a wooden spoon,” I thought to myself.

Yeah, you know where this is going don’t you?

Instead of turning off the food processor like a good girl…I “efficiently” poked the wooden spoon down into the thing while it was running. Hey, I was being careful. I know what can happen to wooden spoons when they meet up with a fast moving blade.

And then what I knew could happen…did happen. Duh.

brokenspoonsm.JPG

Ooh, I was so mad at myself. I broke my favorite wooden spoon. AND…I had to throw out the entire batch of breakfast cake. Do you know how many wasted ingredients that is? Butter…raw honey….farm fresh eggs…organic grains… sob

Oh, and then I had no breakfast for my family. sob

However, I figured I’d prefer to have no breakfast for my family rather than having to rush a little boy to the emergency room with a splinter in his esophagus. At least I made that decision correctly that morning.

So, my kitchen tip for you today is this:  Don’t put wooden spoons into a running food processor. 

Oh, thank you, Laura.

You’re very welcome.
—————————————————–

This post is linked to Kitchen Tip Tuesdays.

Heavenly Homemaker's Club Members: Access your homepage and all your fantastic resources here! Not a member yet? Please join us!

Which Mop?

March 31, 2009 by Laura 74 Comments

This post may contain affiliate links. For more information, please see our disclosure policy.

I need a little help in the mopping arena.

kitchentablesm.JPG

I won’t show pictures of all the mops that haven’t worked for me…but if I were to do that, there would be a parade of them.

They either work one time and then stop working…or the little top spongy things gets crusty and gross after I’ve mopped with it twice. Or the head falls off after a few uses.

Maybe it’s because I’m buying cheap mops?

Spending lots of money on a mop doesn’t really make me feel joy or excitement.

Wonder what kind of mop June Cleaver used?  Maybe I should wear my high heels when I mop? (I don’t own any high heels.) 

We’ve now chucked all of our mops and begun using a bucket of warm water (sometimes with Basic H) and an old wash rag on our hands and knees. It beats anything else we’ve ever tried.

Except for the “maybe we just won’t clean our floors” idea. That doesn’t seem to work either.

What kind of mop do YOU use? Have you found one that really works for you?! WILL YOU COME OVER AND DEMONSTRATE IT FOR ME on all the levels of my house (every Tuesday)? 

P.S. Most of my house is has hard wood floor if that makes any kind of difference in your advice. Thanks!
————————————————-

More backwards Works for me Wednesday here.

Heavenly Homemaker's Club Members: Access your homepage and all your fantastic resources here! Not a member yet? Please join us!

The Best Reason to Make Donuts

March 10, 2009 by Laura 11 Comments

This post may contain affiliate links. For more information, please see our disclosure policy.


chocolatedonuts4sm.JPG
Check out that hand snitching a donut!!

One of my favorite things to do with the boys is read. We’ve discovered so many great books…mostly through the Sonlight curriculum guide. And…even though our boys are so very interested in doing anything BUT sitting down and being still…they love listening to me read good books. I’m amazed that after sitting still and listening for an entire long chapter of a book…they’ll sometimes ask me to keep reading!

Monday we started reading Homer Price. Have you read Homer Price? If you have daughters, I think they’ll like it. If you have sons….they will LOVE it! Our boys can’t get enough of this book. We’ve almost finished it already!

There’s a great chapter in the book about Homer making donuts with his uncle’s donut machine…SUCH a fun chapter! The donuts got out of control!! Of course, what do you think we had to do after reading it, but make a big batch of donuts for an afternoon treat!

chocolatedonuts3sm.JPG

I love how books not only make you lose yourself in adventure…they also inspire you to want to create adventures of your own. In this case…our adventure was in Chocolate Donuts! (If only all of our life’s adventures included chocolate…)

We made our donuts using this Whole Wheat Donut recipe…then drizzled some leftover chocolate frosting I had in the fridge. Here’s the frosting recipe:

Simple Fudge Frosting

2 1/2 cups powdered sugar
¼ cup cocoa
¼ cup butter
¼ cup water
½ t. vanilla

Stir powdered sugar and cocoa together in a bowl. In a small saucepan, melt butter. Add water and bring to a boil. Pour boiling water and butter into powdered sugar and cocoa. Add vanilla. Beat with hand mixer until frosting is combined.

Since I had some leftover in the fridge already, I added a little water, heated it on the stove…and drizzled it over the hot donuts. YUM!!!!

chocolatedonuts5sm.JPG

chocolatedonuts2sm.JPG

Do ya like Malachi’s little Tarzan costume?! Seems like he was having another kind of creative adventure before we even started making donuts!

Heavenly Homemaker's Club Members: Access your homepage and all your fantastic resources here! Not a member yet? Please join us!

Look at What You Did!!

March 3, 2009 by Laura 18 Comments

This post may contain affiliate links. For more information, please see our disclosure policy.

Last Monday, at the beginning of the day, our house was a mess. I don’t know how that happened because usually we clean on the weekends so we can start our week off right. But somehow this particular Monday came upon us with messes everywhere.

SO, we got busy. Along with teaching the boys school and feeding everyone…and doing all the other normal things I usually do during the day…the boys and I also spent a lot of time tackling the upstairs bedrooms.

We swept, vacuumed, dusted, rearranged beds, washed sheets, remade beds with clean sheets and put away books and toys. By dinner time, the upstairs looked great! 

After tucking the boys in that night, I came down to the living room and plopped down on the couch…exhausted. I leaned my head back to relax and looked up at the ceiling.

Do you know what was on my ceiling? 

Cobwebs.

The nerve.

I immediately began to feel discouraged about keeping up with everything…or rather with the fact that it is SO HARD to keep up with everything.

Then I was reminded of something my sister-in-law Kari and I visited about a couple of months ago.

Instead of focusing at the end of the day on all the things you didn’t get done…think instead of all the things you DID get done.

As long as you were working hard and being productive all day…there is nothing to feel bad about.

If the laundry isn’t done…but you worked hard and loved on your family, then your priorities are in the right place.

After you get a good night’s sleep you can start to tackle the rest of your undone list tomorrow.

For tonight…rest well knowing you did a good job today. 

So…what DID you get done today?!  (I bet it was a lot!)
————————————-

Read more Works For Me Wednesday posts here!

Heavenly Homemaker's Club Members: Access your homepage and all your fantastic resources here! Not a member yet? Please join us!

Butter-fingers

February 3, 2009 by Laura 27 Comments

This post may contain affiliate links. For more information, please see our disclosure policy.

You all know how weird I am right? And, you all know how much I love butter right? It’s such good stuff!

Well, I’m pretty sure I’ve never told you one of my favorite uses for butter.

Lotion.

Uh-huh…after I butter my bread pans I just rub all the extra buttery mess all over my hands. And sometimes, when my hands feel like they might fall off from being so dry…I just walk into the kitchen, swipe a slab of butter and rub it all over my fingers and cracked knuckles. Ah, it feels so good. It rubs right in and doesn’t feel greasy afterward. (Psst…olive oil works well too!)

The good qualities in butter are actually good for your skin. Go butter.

It’s the best lotion I’ve ever…eaten on toast.

I keep on proving how weird I am, huh?

Yeah well…

I could be boring and tell you that I also buy this lotion when it’s on sale bogo and when they offer free shipping…but that’s just not as much fun is it?

What’s your favorite lotion? You’re welcome to also share your weirdest use for butter if you think you can outdo mine.
———————————-

More Works for me Wednesday tips here.

Heavenly Homemaker's Club Members: Access your homepage and all your fantastic resources here! Not a member yet? Please join us!

One Room at a Time

January 6, 2009 by Laura 39 Comments

This post may contain affiliate links. For more information, please see our disclosure policy.

I mentioned finding my living room again. Now I’m busy at work cleaning out and organizing every room because oh my goodness does my house ever need it.

What IS it about a new year that inspires so many of us to re-organize…re-group…re- re- realize that we have too much stuff hanging out of our drawers and THAT is why they won’t close?!

Here’s a room cleaning organizational tip that my sister-in-law Kari shared with me several years ago:

Start in one room. Stay in that room. If something belongs in another room…just throw it into that room and go back to the room you are working in to begin with.

Otherwise…you’ll start in the living room…notice a dirty plate…take the plate into the kitchen…see all the dirty dishes…start to wash them…stop to pick up some dirty socks on the kitchen floor…take the socks to the laundry room…start sorting the laundry…pick up a stuffed frog sitting on the dirty underwear…take the stuffed frog into the kid’s room to put into the toy box…notice your best scissors on your son’s dresser…take the scissors into the craft room…see the wrapping paper all over the floor…

And you’ll never get to the living room.

It’s called Organizational ADD. I have this disorder if I don’t follow the advice of my sister-in-law and work on ONE room until I finish it entirely.

This method works very well. And it is SO nice to at least have one room clean when you start to tackle the others.

Anybody else out there struggle with Organizational ADD? Anybody else out there cleaning out and re-organizing like CRAZY lately? Anybody else think that January should really come more often so we will be inspired to get organized more often? (ooh, except I don’t want it to be cold more often…

Heavenly Homemaker's Club Members: Access your homepage and all your fantastic resources here! Not a member yet? Please join us!

If It Can Be Made Ahead of Time…Make it.

October 6, 2008 by Laura 9 Comments

This post may contain affiliate links. For more information, please see our disclosure policy.

This upcoming weekend is one of my absolute favorite weekends of the whole entire year. It’s homecoming weekend for our local college…the college where Matt and I met, the college where my parents met…the college where we made wonderful memories and friendships. (We also got a good education there and all that stuff.)

So, every year for York College Homecoming weekend, my house fills up with bunches of family members and friends. And I LOVE it. 

But here’s the thing. If I’m not organized and on the ball with all the meals I’ll be feeding my guests…I DON’T love it and it’s not fun and I feel stressed the entire weekend and I don’t get to enjoy any of my friends or family members who have come. 

I want to be able to visit and relax. But I also really, really love to be a hostess and make my guests yummy food and make them feel welcome and loved. 

(Oh, and while I’m usually very good at multitasking…cooking and talking at the same time is not something I do very well. Which means that I can’t very easily prepare food and talk with my guests at the same time. I’m weird like that.)

So, I make as much food ahead of time as I possibly can. 

Check out our menu here. Of all the foods listed from Thursday night on…here are the items I’m preparing ahead of time:

Potato soup
Chicken noodle soup
Lasagna
Salad
Homemade bread
baked potatoes (for the sausage, potato and egg scramble)
Sloppy joe meat
Veggie tray
Applesauce bread
Cookies

Most of this can be made any time and put into the freezer or into the fridge. Oh, this makes hostessing so much easier. When it’s time to prepare a meal, all I have to do is re-heat my food or stick it into the oven. 

And since I don’t have to think very hard to do that part of the meal prep…I can usually hold down my end of the conversations pretty well!

So there’s my little tip on saving sanity when hosting a houseful of guests. Now I guess you know what I’ll be up to all this week! But just don’t talk to me while I’m trying to cook all this food…I’ll get distracted and put too much baking powder into the lasagna. 

Oh right, the lasagna doesn’t call for baking powder….

;)
———————————————————-

Visit Tammy’s Recipes for more kitchen tips!

Heavenly Homemaker's Club Members: Access your homepage and all your fantastic resources here! Not a member yet? Please join us!

Freezing and Canning Peaches for Winter

September 1, 2008 by Laura 142 Comments

This post may contain affiliate links. For more information, please see our disclosure policy.

I mentioned that over the weekend I received millions and millions (okay, maybe not millions) of peaches from a lady in town. I’ve been busy preserving them for winter and thought I’d walk through the steps with you.

Please note:  These peaches were so awesome and juicy, and since there were so many of them, I felt that none of us needed to hold back on how many we ate. So, as I was standing in my kitchen peeling and slicing peaches, and  peach juice was running down my arms…I was also biting into peaches as I worked, because I just couldn’t resist. Therefore, I also had peach juice running down my chin. But with peach juice all over my hands and running down my arms, it’s not like I could do much about my chin, you know? Not one of my finer moments.

Thought you might like to picture that.

peaches7sm.JPG

If you remember, I was given four boxes of peaches. (I did share a few with some friends.)

peaches5sm.JPG

In the past, I’ve always peeled my peaches with a knife…and that’s been fine. But I had so many peaches this time, I went ahead and tried this method of peeling, and whoa was it a time saver! Just put your peaches into boiling water for about 30 seconds…pull them out…

peaches2sm.JPG

And those skins just peel right off!! It was awesome. Except for when they didn’t peel right off, which happened with a few of them for some reason. (Just thought I’d tell you that so that if not all of them peel right off for you, you’ll know that you aren’t the only one!) 

(You don’t have to peel your peaches if you’re going to freeze them. They’ll be more nutritious if you leave the peelings on, and it will save so much time too!) 

freezingpeachessm.JPG

To freeze peaches, just peel, slice and lay the peach slices on a cookie sheet lined with parchment paper. Put the pan into the freezer until the peaches are frozen, about two hours. (Or longer if you forget they’re in there.)  Then put them into a freezer bag and you’ve got great peaches for smoothies and slushies!! And cobblers and crisps! (If you feel like skipping this step and simply just putting your peach slices directly into a pan without freezing them individually like this first, you can…but you’ll end up with one big gallon sized frozen peach-sicle, and you may be very frustrated when you want only part of the rock hard peach-sicle for a smoothie. Just so ya know.)

Now…to can peaches…this is what I do. There are other ways to do it…this is just the way I do it! Please be sure to go back and read Canning 101 for the canning basics!

peaches3sm.JPG

I make a honey/water solution on my stove…which is 2 T. honey to every 5 cups of water. Heat it on the stove and let it sit warm while you prepare your peaches.

Sterilize your jars.

peaches1sm.JPG

Take out a hot jar and put in about 1/16 teaspoon of ascorbic acid to keep your peaches pretty. Just dump it into the bottom of the jar. (Some people use lemon juice)

ascorbicacidsm.JPG

Ascorbic acid is powdered vitamin C. I get mine at a health food store.

peaches4sm.JPG

Fill the jar with sliced peaches. Then, use a funnel to pour your honey/water into the jar, to about a half inch from the top. Place a sterilized lid and ring onto the full jar.

applesauce13sm.JPG

Now it’s time to give your full jars a hot water bath to seal the lids. Put your full jars into the water. Once the water is boiling,  boil the jars for about 25 minutes. (And yes, this is actually a picture of applesauce jars boiling…I forgot to take a picture of the peaches boiling and I’m too tired to go can more peaches just so that I can go take a picture of the jars boiling.)

Oh, and boil your jars with the lid on the water bath pot…I just took off the lid for the picture. :)

peaches6sm.JPG

After the jars have boiled for 25 minutes, take them out with tongs…or better yet, this cool gripping tool made especially for jars and hot water baths. Then you get to listen for the caps to seal. I can’t think of a way to blog the way it sounds…but after all your hard work, it sure is a cool sound to hear them seal! (Thhhhp!) (Or something like that!)  You can be sure they sealed if you can push down on the top and it is down firm. It takes anywhere from 1 second to 30 minutes for the lid to seal after you’ve taken it out of the water. 

Then, just leave your canned peaches out on the counter for a few hours or several days so that you can admire them and smile and feel happy every time you walk into the kitchen and see them. (Okay, that’s what I like to do anyway.)  (Because I’m weird like that.)

Heavenly Homemaker's Club Members: Access your homepage and all your fantastic resources here! Not a member yet? Please join us!

Canning 101

September 1, 2008 by Laura 86 Comments

This post may contain affiliate links. For more information, please see our disclosure policy.

Just in case you may be unfamiliar with the beautiful art of canning fruits and veggies…I thought I’d do this post to explain some of the basics. Then later, I can post about the specifics!

Here are some of the basic supplies you will need in order to can food. Some of these supplies are not entirely neccessary…just really, really helpful. Some of these supplies are entirely neccessary.

canning1014sm.JPG
If you are planning on canning fruits or veggies, you will need jars. 
(Oh, how I love jars!)  I like having both quart and pint sized…
and my favorites are the wide mouth jars.

canning1015sm.JPG
You’ll also need lids and rings. The rings you can re-use year after year,
but in order to have your lid seal, you must use new ones each year.

canning1012sm.JPG
This handy dandy tool is a magnetic wand, which I use to retrieve lids
and rings out of hot sterilizing water. (See below)  I love this tool!!

canning101sm.JPG
This tool helps me grip the jars as I pull them out of the hot water bath. 
Since I’ve had this tool, I have broken fewer jars and burned myself less often. 
I SO recommend one of these.

canning1016sm.JPG
This wide mouth funnel is a lifesaver when you’re trying to get
your produce into the jar without making a big mess. 

canning1013sm.JPG
A water bath pot is pretty neccessary…
if you’re planning to seal your jars in a water bath. 

Okay…next…

Here are a few things you need to know if you don’t want to die from botulism…

*Using the hot water bath system to seal your jars is only safe if you’re canning something acidic. Otherwise, food must be sealed in a pressure cooker. Food that I know of to be safe to can in a hot water bath:  tomatoes, apples, peaches, pears. If you aren’t for sure what’s safe…please look it up to be sure before you use a hot water bath to seal your lids!

*You need to sterilize your jars, lids and rings before you put food into them. All I do is put my clean jars upside down into a shallow pan of boiling water for a couple of minutes.

applesauce7sm.JPG

applesauce10sm.JPG
I do the same with my lids and rings.

applesauce12sm1.JPG
See, this is where that magnetic wand comes in very handy!

*When you put your jars full of yummy fruits or veggies into the hot water bath, I recommend putting them in before you start to boil the water. If your water is already boiling hot, you run the risk of breaking your jars and losing all of the work you put into filling. So, put your jars into the pot of water, then turn it on to begin to get hot. Once it finally starts to boil, then start your timer for the recommended boiling time.

Okay…this will all make more sense with my other posts about canning specific fruits and veggies. But…that gives you the basic information you’ll need so that those posts will make sense. Or maybe none of it makes any sense and you’d rather just come over and watch. (Watch, nothin’. I’d hand over a knife and some apples and tell you to get busy.)  :)

Stay tuned…canning peaches and applesauce coming soon!
————————————————-

Find more kitchen tips on Tammy’s Recipes.

Heavenly Homemaker's Club Members: Access your homepage and all your fantastic resources here! Not a member yet? Please join us!
« Previous Page
Next Page »

Join Our Community!

 Facebook Twitter E-mail Instagram Pinterest

Popular Posts

~ Will All of the Real Moms Please Stand Up?
~ Easy! Stir-and-Pour Whole Wheat Bread
~ How to Make Gatorade
~ 31 Real Food Breakfast Ideas
~ Dear Teenage Girls...
~ When Mom Takes a Step Back
~ The Inexpensive Health Insurance We Love!
~ Let's Talk Real Food Grocery Budgets

Check out our latest posts!

  • Big Family Food and Fun: May 31-June 6, 2026
  • Big Family Food and Fun: May 24-30, 2026
  • Free 7-Day Summer Menu Plan
  • Big Family Food and Fun: May 17-23, 2026
  • Easy Side Dishes for Summer
Home  ~  Simple Meals  ~  Club Membership  ~  Shop  ~  Privacy Policy  ~  Disclosure  ~ Contact

Copyright © 2026 · Beautiful Pro Theme on Genesis Framework · WordPress · Log in