Heavenly Homemakers

Encouraging women in homemaking, healthy eating and parenting

  • Home
    • About
    • FAQs
  • Recipes
    • Bread and Breakfast
    • Condiments
    • Dairy
    • Main Dishes
    • Side Dishes and Snacks
    • Desserts
    • Gluten Free
    • Instant Pot
    • Crock Pot
    • Heavenly Homemaker’s Weekly Menus
  • Homemaking
    • Real Food Sources
  • Store
  • Contact
    • Advertise
    • Disclosure
    • Privacy Policy
  • Simple Meals
  • Club Members!

Homemade Non-Toxic Liquid Hand Soap

July 26, 2011 by Laura 339 Comments

This post may contain affiliate links. For more information, please see our disclosure policy.

I have something to say.

Commercial non-toxic liquid hand soap is way, way too expensive. Since switching over all of our household products to chemical free varieties, purchasing liquid hand soap is something that always makes me choke. We need easy access to soap at our sinks, but good grief all the options I found to order were crazy expensive -like around $5.00 for 12 ounces. Ouch.

Shame on them.

Do you know how much it cost me to make an entire gallon of non-toxic, all natural, organic liquid hand soap? Three dollars and fifty cents. Total. For an entire gallon. (A gallon, by the way, is 128 ounces. That’s some awesome savings!)

This may have been one of the easiest items I’ve ever made. It took hardly any time. And it only cost me $3.50. (Pardon my redundancy. I’m hung up on the fact that it only cost me $3.50 for a gallon of the healthiest hand soap ever. $3.50. $3.50!)

Because of this, I plan to get on a soap box (ha!) and encourage all of us to save a bunch of money by making homemade liquid hand soap.

Other recipes I’ve seen call for several ingredients I didn’t feel safe to use. Then, my friend BryAnna told me she’d been playing with making soap and had found these simple directions. She’s a genius. I love her.

Homemade Liquid Hand Soap

Homemade Non-Toxic Liquid Hand Soap

4 ounce bar of natural soap (I used a bar of coconut oil soap from Tropical Traditions. Any natural bar of soap would work. I think the bars from Victorian Rose Soap Company would be great!)
1 gallon of water

First, heat the water in a pot, just long enough to steam:

In the meantime, grate your bar of soap.

Take the steaming water off the heat. Immediately pour the grated soap into the water. Stir the mixture, then let it sit for about 15 minutes.

Use a hand mixer to blend the soap and water mixture well. Let it sit overnight.

The next morning, use the hand mixer again to blend well. Done. You have a gallon of non-toxic liquid hand soap!

When my friend BryAnna made her batch, she found that it was quite thick and almost gel like the second day. My batch, on the other hand, was still quite runny. If your soap is too thick, you may want to blend in a little extra water. If your mixture is too runny…it doesn’t matter. It works just fine!

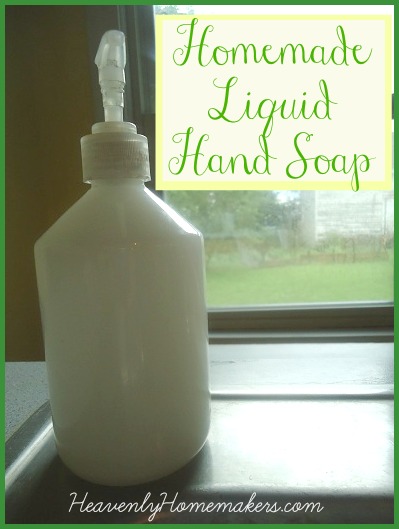
I had some extra pump bottles around the house which I filled and put by each sink. The remaining liquid soap, I funneled into a gallon water jug for storage.


If you’ve never tried making your own liquid hand soap, you’ve got to give this a try. So simple. So safe and pure. And so, so, so much less expensive.

Like, only $3.50 for a gallon. Or did I mention that already?

Ever tried making your own soaps? Which kind(s) have you tried? Hand soap? Laundry detergent? Bar soap?


Heavenly Homemaker's Club Members: Access your homepage and all your fantastic resources here! Not a member yet? Please join us!

Clean Your Ceiling Fans

July 20, 2011 by Laura 63 Comments

This post may contain affiliate links. For more information, please see our disclosure policy.

Included on my Two Week Tackle list is:  Deep Clean the Entire House.

I don’t think I’ll be able to accomplish deep cleaning the entire house before August 1. But I have been able to get several things done so far, including washing curtains and cleaning ceiling fans.

Time to fess up – how long has it been since you’ve cleaned the ugly layer(s) of dust off your ceiling fans?

It seems that it doesn’t take long for mine to get nasty, then cobwebs start to streak from one blade to the next to the ceiling to the light bulbs. Yuck. And yet I seem to always forget about cleaning them. I mean, how often do we stand in a room and just look up at the ceiling? I do believe we homemakers should begin making time to stare at our ceilings more regularly.

Yeah right. And when might we schedule that in? Perhaps after we’ve passed out on our living room floors at the end of the night after a long day of chasing kids and mopping up spilled (fill in the blank)?

Anyway, I finally remembered my ceiling fans and got a round tuit. To mark the occasion, I had Justus (age 11) take a picture.

As you can imagine, he asked, “You really want me to take a picture of you standing on a chair dusting the ceiling fan?!”

Yes, I do ask my children to take pictures of strange things quite often. I’m surprised he questioned it actually. He should be used to my crazy picture taking requests by now.

Do you think there will be support groups someday for BKs? (Bloggers Kids)

Or do you think that children such as mine, once they are married, will walk into the room and see that their wives are under the table scrubbing jelly off the underside of a chair – and then naturally go grab the camera? Or perhaps one of them will notice that his wife has produced a lovely ball of bread dough and ask her to stand in better light so he can get several shots at different angles? Oh dear.

I think I need to start thinking about how to prepare my sons’ future wives.

But really, I want to know – when is the last time you cleaned your ceiling fans??!


Heavenly Homemaker's Club Members: Access your homepage and all your fantastic resources here! Not a member yet? Please join us!

The Two Week Tackle

July 17, 2011 by Laura 46 Comments

This post may contain affiliate links. For more information, please see our disclosure policy.

We like to begin our home school year at the beginning of August. This just works well for our family. That means I have about two weeks left before we hit the books. I’m really excited about this, and they aren’t admitting it, but deep down, my boys are excited too. ;)

August also brings quite a bit of other “excitement” as our garden will be kicking out lots of produce, which will need to be preserved. Our soccer season also starts in August. Our boys are on teams, but more importantly, the college team my husband helps coach gets underway the second week of August. Three-a-day practices keep him hopping plus, if you’ve been reading here long, you know that I usually feed the soccer team for an entire week before the college classes start. I LOVE doing this – the ladies on the soccer team are a joy to serve. I hear there will be 43 players on the team this year. That’s a lot of food! Stay tuned to hear how all of this goes.

Here’s a big pile of our books – in desperate need of some sorting and organization!

I tell you all of this to say that I have a whoppin’ two weeks to get myself organized before the month of August slaps me in my eager – but full scheduled – face. I’ve spent a good part of the summer working on two new books. Now that they are in the editing stage, to say that my house needs a little bit of love would be an understatement. And there are other areas of life I really need to get organized and prepared for, simply so that the beginning of our school year goes more smoothly.

And so…I have made myself a list. I’m calling it the Two Week Tackle because well – I have two weeks to tackle this list. Can I do it? Who knows?

Want to watch me try? Yes, I figured you might.

Here’s the Two Week Tackle List, which I reserve the right to add to or take away from at any given time as the crazy urges hit:

  • Organize school books and create a schedule for our school year
  • Clean out kitchen cabinets – replace shelf liner
  • Deep clean the entire house
  • Plan and begin to prep soccer meals
  • Make and freeze healthy convenience foods for the month of August
  • Make homemade hand soap and laundry detergent (just because I really want to try)
  • Experiment with homemade white chocolate and butterscotch chips for the Heavenly Homemakers Recipe Challenge
  • Finish creating the Whole Foods Pantry resource list that so many of you have been requesting

Regarding this last bullet point – I will, for at least one week, be taking a break from writing my bulk food posts. Creating the Whole Foods Pantry resource page is a big job to undertake, and the more I write about bulk food, the more it has been brought to my attention that you would really benefit from this list. I’ll pick up with the bulk food series once the Whole Foods Pantry resource page is finished.

And so, during the next two weeks, I’ll be cleaning, organizing, sorting, writing, finishing the books, cooking, and in general, preparing my household for the month of August.

I’ll try to blog my way through the list with some pictures and explanations if I can. There may be times I just hop onto Facebook and give a quick update. If you aren’t already following me on Facebook, you may want to click over to do that now. I’d hate for you to miss any pictures of my insanity. ;)

And now a question for you:

What are you most excited for me to tackle and share with you? Which item should I do first?

If you’d like to join the Two Week Tackle – get your list ready and share it in the comments!

Heavenly Homemaker's Club Members: Access your homepage and all your fantastic resources here! Not a member yet? Please join us!

Homemade Vanilla for Christmas

July 13, 2011 by Laura 41 Comments

This post may contain affiliate links. For more information, please see our disclosure policy.

vanilla

In case you were wondering (and I’m just absolutely sure that you were), there are only 164 days left until Christmas.

In the midst of gardening and other summertime activities, Christmas isn’t on my mind very much right now. However, Homemade Vanilla Extract is a wonderful Christmas gift. It takes 4-6 months for your vanilla to be ready to bottle and give away. So, if you’re wanting to get on this project in time to be able to wrap bottles of homemade vanilla and put them under the tree this December – now is the time to get it going!

I love that making homemade vanilla saves money, and is so pure and good to use. It helps that it is completely delicious!

Here are complete instructions for how to make homemade vanilla extract. Trust me, it’s easy and super fun to do! Also, be sure to take advantage of the 10% discount on vanilla beans, offered by my very favorite vanilla bean source, Olive Nation. They are super high quality beans for an excellent price! (Use the code hhm2012 to receive 10% off.) And take a look at these pretty labels that my friend designed! They are customizable, and come in a variety of designs. So fun!

Merry Christmas everyone! (Ugh, it’s too hot and humid to pull that statement off with a straight face.)

Stay cool! (There, that’s better.)


Heavenly Homemaker's Club Members: Access your homepage and all your fantastic resources here! Not a member yet? Please join us!

Vanilla Stickers

June 30, 2010 by Laura 22 Comments

This post may contain affiliate links. For more information, please see our disclosure policy.

Lookie what came in the mail!!

I ordered some pretty stickers to put on my homemade vanilla extract bottles from Delight Design and I LOVE them!! Aren’t they pretty?!

vanilla

Be sure to check out Delight Design if you are in the process of making vanilla!

I, also, love these pretty labels that my friend makes! They are customizable, and come in several fun designs!

And now…I’m totally hungry for homemade vanilla ice cream. ;)

Heavenly Homemaker's Club Members: Access your homepage and all your fantastic resources here! Not a member yet? Please join us!

Freezer Cooking for June

May 30, 2010 by Laura 5 Comments

This post may contain affiliate links. For more information, please see our disclosure policy.

freezer_cooking_april_sm

Here’s a picture from our freezer cooking day in April!

The Problem:  I am out of town visiting family. (Visiting family is not a problem. I’m lovin’ it. But it is a little bit hard to make frozen meals when you’re several hours away from your kitchen and your freezer.)
The Other Problem:  My freezer is full of frozen meat. (Wait, frozen meat is not a problem either – it’s a blessing.)
The Actual Problem:  The only thing in my freezer was frozen meat…we’d eaten up all of our frozen, homemade healthy convenience items.
The Additional Problem:  If I’d waited to make freezer meals until after I got home from my trip, there would have been nothing for my husband to eat while we were gone, plus nothing for me to feed the boys once we got back while I was trying to catch up on twenty-eight loads of laundry.

The Solution:  Make the freezer food before the trip!

Ah, and so that is what I did. I took a few days last week to make up some healthy convenience foods for the freezer. Matt has been eating on it while we’ve been out of town, and when I get home, there will be easy-to-warm-up food in the freezer to make life easier for me while I recover from being away from home.

This was my to-do list:

  • Frozen Potato Chunks (following this Frozen Hashbrown method)
  • Venison Sausage (using this Turkey Sausage recipe)
  • Whole Wheat Hamburger Buns (because I would really like to be able to simply pull buns out of the freezer when I need them)
  • Corn Dog Muffins
  • Sloppy Corn Muffins
  • Porcupine Meatballs (a new recipe from my friend Holly)
  • Chewy Granola Bars (not for the freezer, of course, but just to eat)
  • Chocolate Chip Cookies
  • Orange Muffins
  • Honey Whole Wheat Bread
  • Whole Wheat Tortillas

Check back in a few days and I’ll share how my cooking attempts went. Also, I plan to address the question many of you have asked:  “Laura – are you in the kitchen ALL the time?!”

:)

One of my sponsors, Old Fashioned Homemaking has a wonderful,
helpful post about
Freezing Meals Ahead for the Beginner. Be sure to check it out!

Heavenly Homemaker's Club Members: Access your homepage and all your fantastic resources here! Not a member yet? Please join us!

Which Ice Cream Maker?

April 7, 2010 by Laura 22 Comments

This post may contain affiliate links. For more information, please see our disclosure policy.

Since posting about The Ice Cream Experiment, I’ve had all kinds of comments and emails asking which Ice Cream Maker I would recommend. Thought I’d pop on real quickly and tell you about my favorite!

A couple of years ago when Matt and I were dabbling in the Shaved Ice and Homemade Ice Cream business, a friend told us that the BEST ice cream maker was the White Mountain Electric Ice Cream Maker.

white_mountain_ice_cream_maker

~~~~~~~~~~~~~~~~~~~~~~~~~~~~~~~~~~~~~~~~~~~~~~~~~~~

UPDATE!!

This post was written in 2010 and indeed, we did love our White Mountain Electric Ice Cream Maker. But today is July 2024 and I have better news – a new favorite. A friend gifted us with a Cuisinart Ice Cream Maker and oh my. It’s a million times easier to use, completely mess-free, and there’s no rock salt/ice involved.

Truly, get this one instead. It’s way cheaper too – bonus!

~~~~~~~~~~~~~~~~~~~~~~~~~~~~~~~~~~~~~~~~~~~~~~~~~~~~

We weren’t sure at first, mostly because the White Mountain Electric Ice Cream Maker is quite pricey compared to others we’d looked at (you know, like at Wal-mart).

But after checking into the White Mountain Electric Ice Cream Maker and seeing what a high quality machine it was, we decided to order it. Almost two years later, we couldn’t be more pleased with our purchase. This ice cream maker is like none other we’d ever used. We’d already gone through three cheap ice cream makers (the $25 makers you can get at the store). But our White Mountain? This baby is made to last, making it well worth the investment.

Our favorite part is that the can that you use to make the ice cream in is made of stainless steel. All others we’ve had were made of aluminum (which we now avoid, especially for dairy products). And…the motor/gear piece that turns the ice cream? It’s made of cast iron.

Yeah, the White Mountain is one heavy contraption. Did I mention the big tub is made of pine? It’s awesome.

The White Mountain people aren’t paying me to tell you all of this. I just love their product. Our ice cream is usually finished churning and ready to eat in about 25 minutes.

And now seriously, I am SO hungry for ice cream. I have GOT to get my hands on some cream.

I’d love for you all to let us know what your favorite ice cream maker is! Any great recommendations for us?

Heavenly Homemaker's Club Members: Access your homepage and all your fantastic resources here! Not a member yet? Please join us!

Unclog a Drain Naturally Without Bleach or Drano

March 21, 2010 by Laura 36 Comments

This post may contain affiliate links. For more information, please see our disclosure policy.

I’ve mentioned before that our house has a lot of character. (I have to say it that way just in case my house is listening and so that it won’t get its feelings hurt.)

Our house is over a hundred years old, and while we love our house and feel completely blessed to live in such a nice, large house…it does have some crazy weird issues.  (Sounds like the lady of the house too, doesn’t it? Crazy weird issues indeed.)

One of the biggest issues in our house involves the plumbing. You don’t want to know the details, but let’s just say… No. Let’s not. You don’t want to know the details.

What I will tell you is that keeping our sinks and bathtubs draining nicely feels next to impossible. And as you know, we’d like to keep our house free from harmful chemicals like bleach and drano.

A good friend of ours was over recently and told us a nice tip for unclogging the bathtubs and sinks naturally using the ever wonderful baking soda and vinegar.

Here’s what you do:

  1. Take out your sink or bathtub stopper.
  2. Use an wet washrag to clean out around the drain hole.
  3. Pour 1/2 cup of baking soda down the drain.
  4. Pour 1 cup white distilled vinegar down the drain.
  5. Stop the volcano from bubbling up out of the drain by placing a wash rag over the drain hole. You want the action to take place down where stuff is clogged, not all over your bathtub or sink.
  6. After thirty minutes, pour a big pot of boiling water down the drain.

And there you go.

I love that we can work on our drain issues using natural ingredients…thus avoiding an asthma attack and whatever other icky things we’re avoiding when we skip using bleach and other harmful chemicals in our home. And, as a side benefit…this method saves a lot of money. Do you know how expensive drano is?!

What other great uses have you found for baking soda and vinegar?

I wonder if they would help with the… Oh wait. We weren’t going to talk about that.

Heavenly Homemaker's Club Members: Access your homepage and all your fantastic resources here! Not a member yet? Please join us!

Decorating With Memories

December 13, 2009 by Laura 14 Comments

This post may contain affiliate links. For more information, please see our disclosure policy.

 Ugh…I miss my mom. 

I always miss her…but I really miss her during Thanksgiving and Christmas time.

She always loved getting ready for holidays. While my favorite part of the holiday season is cooking and baking lots of yummy food…her favorite part was always making fun and beautiful crafts. She’d sit for hours on winter evenings working on homemade ornaments and gifts for her co-workers and for our family. She loved it.

Thanksgiving weekend as I was getting out all of our Christmas decorations I really took note of all of the beautiful handiwork that was hers. I am SO thankful we have so many decorations that she made.

It’s like hanging beautiful precious memories all over my home.

I already shared with you about Malachi’s quilt from his Grammy.  Today I’d really like to share some of the Christmas treasures around our house…

The first year Matt and I were married, she hand-quilted us our very own Christmas tree skirt. It is so, so pretty. I stare at it for a long time when I put it at the base of our tree.

christmasdecor092sm

Every single year…until she was just too sick to create any more…Mom made all of her grandchildren their very own hand-made ornament.

christmasdecor093sm

christmasdecor094sm

I am SO glad she put the date on them. The boys love hanging their very own “Grammy” ornaments.

Malachi doesn’t have any “Grammy” ornaments…so he gets to figure out where to put her pillow…

christmasdecor099sm

I was around ten years old or so when Mom first learned how to do counted cross stitch. One of her first big projects was to make stockings for all of us. She made a “Mom” “Dad” “Kevin” and “Laura” stocking.

When my brother and I got married…she made one for our spouses. As we started having kids…she made a stocking for each of them. (Giggle…Each time she found out my sister-in-law or I was expecting, she requested that we please name our new baby something with seven letters or less…so that their name would fit on a stocking!)

christmasdecor0915sm

Mom didn’t plan on getting sick. But she was always planning for the next craft. That’s why there was plenty of stocking material in her “stash” even after she was too sick to make things anymore. And that’s how…even though she’s gone…all of my kids and all of my brother’s kids still have stockings from Grammy.

christmasdecor0913sm

There’s a lot of comfort in memories. 

christmasdecor091sm

What my mom created to be small Christmas gifts…turn out to be our biggest Christmas treasures.

The most beautiful decorations of all.

Heavenly Homemaker's Club Members: Access your homepage and all your fantastic resources here! Not a member yet? Please join us!

Non Toxic Soaps and Sundries

October 13, 2009 by Laura 55 Comments

This post may contain affiliate links. For more information, please see our disclosure policy.

Okay, so let’s talk sundries. I kind of like that word, don’t you? Sunnnndreeees. It’s one of those words that I never use in actual conversations…but I kind of think I might start. “Oh my, I do believe I’m running out of sundries. Perhaps I should order various and sundry items…”

Many of you have asked if I make my own soaps, etc and what kind I use. While I realize that making my own detergents and soaps would save  a little money, it  has not reached the top of my list yet…although it is on my list. Lindsay at Passionate Homemaking has several good recipes you may be interested in if you want to make your own laundry detergent and deodorant. I think it’s awesome, but I just haven’t made the time to figure it all out yet. With the exception of inventing my own dusting solution (one part water added to four parts old rag), I’ll continue at this point to purchase the brands of soaps and lotions that I trust.

I check the EWG website to see if a product is safe and non-toxic. Also, if it comes from Tropical Traditions…I completely trust it. Their products are always pure and safe.

All of the soaps and lotions I buy are unscented and without dyes. Our littlest guy, Malachi, can not tolerate any kind of scent or dye with his eczema and strong scents really irritate my asthma.

Here’s a list I came up with of sundries in my home:

  • Laundry soap – I use Shaklee. It’s the ONLY detergent I found that does not make Malachi break out. I have family members who are Shaklee distributors who helped me finally find this detergent that works for us. You have no idea how thankful I am. It seems pricey…but I can make a box of detergent last a long time. I love that our clothes smell like…nothing. :)  If it smells like nothing…that means CLEAN. I don’t use fabric softener. What’s a little static?I’ve been researching and may try using these soap nuts. They seem to be one of the most economical non-toxic “laundry detergent” around. My Shaklee costs about .25 per load of laundry. Soap nuts are at least half of that. I’ll let you know what comes of my experiment!
  • Dish soap– For the past three years I’ve used Ecover. Love it. Love it. Love it. I use the lemon dish soap and the powdered dishwasher detergent. Love it. No spots on glasses. Clean, clean dishes. No fear of icky, toxic soap residue on our plates. Love it.

31lm4gSX6UL._SL160_

  • Body soap – I love the Unscented Bar Coconut Soap from Tropical Traditions. I even use it to wash Malachi’s hair. Again, it leaves us smelling like nothing….which is clean. I LOVE smelling Malachi’s hair after a bath.
  • Shampoo – The bigger boys and I use Giovanni 50:50 shampoo. I buy it by the gallon. The boys use such a small amount…the gallon lasts us a LONG time (well over a year). I’m the only one at our house who uses conditioner, and I use Giovanni Smooth as Silk. Matt uses Home Health Medicated Scalp Wash.

31eyVq+yo5L._SL160_

  • Toothpaste – We’ve been using Creme de Peppermint from Nature’s Gate. I’m not a fan of fluoride. I suppose that’s another post for another day. We really like this toothpaste. The Creme de Mint is a little less spicy than the Peppermint, so we get the mint one for the boys.

41VllLkcJGL._SL160_

  • Lotion – We’ve fallen in love with the  MadeOn Lotion Bar and use it exclusively, all the time. It is an amazing product and completely safe!
  • Deodorant – My favorite is Tahitian Breeze Roll-On Deodorant from Pure Miessence.
  • Chap stick – Again, Tropical Traditions. I pretty much wait until they’re offering free shipping, then I stock up on all the items I buy from them!
  • Cleaning supplies – Besides my famous water-on-old-rag solution for dusting and wiping things down, I use Shaklee’s Basic H for almost all cleaning. That stuff is pure enough to drink (not recommending that) and does a great job of cleaning. It is SUPER inexpensive. A little bit goes a long way which means your bottle can last for years.
  • Feminine products – Read this post to learn more about my preferences for “punctuation”.

What are your favorite sundries? Isn’t it fun to say sundries?

Heavenly Homemaker's Club Members: Access your homepage and all your fantastic resources here! Not a member yet? Please join us!
« Previous Page
Next Page »

Join Our Community!

 Facebook Twitter E-mail Instagram Pinterest

Popular Posts

~ Will All of the Real Moms Please Stand Up?
~ Easy! Stir-and-Pour Whole Wheat Bread
~ How to Make Gatorade
~ 31 Real Food Breakfast Ideas
~ Dear Teenage Girls...
~ When Mom Takes a Step Back
~ The Inexpensive Health Insurance We Love!
~ Let's Talk Real Food Grocery Budgets

Check out our latest posts!

  • Big Family Food and Fun: May 31-June 6, 2026
  • Big Family Food and Fun: May 24-30, 2026
  • Free 7-Day Summer Menu Plan
  • Big Family Food and Fun: May 17-23, 2026
  • Easy Side Dishes for Summer
Home  ~  Simple Meals  ~  Club Membership  ~  Shop  ~  Privacy Policy  ~  Disclosure  ~ Contact

Copyright © 2026 · Beautiful Pro Theme on Genesis Framework · WordPress · Log in