Heavenly Homemakers

Encouraging women in homemaking, healthy eating and parenting

  • Home
    • About
    • FAQs
  • Recipes
    • Bread and Breakfast
    • Condiments
    • Dairy
    • Main Dishes
    • Side Dishes and Snacks
    • Desserts
    • Gluten Free
    • Instant Pot
    • Crock Pot
    • Heavenly Homemaker’s Weekly Menus
  • Homemaking
    • Real Food Sources
  • Store
  • Contact
    • Advertise
    • Disclosure
    • Privacy Policy
  • Simple Meals
  • Club Members!

Spicy Ranch Dressing

September 6, 2015 by Laura 11 Comments

This post may contain affiliate links which won’t change your price but will share some commission.

I just met something wonderful called Spicy Ranch Dressing.
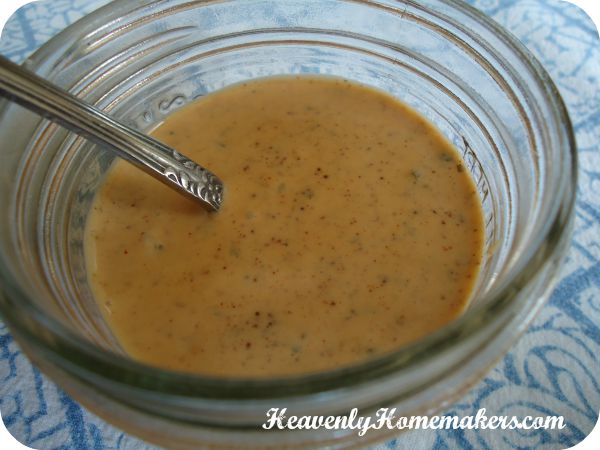
spicy ranch dressing 1

Remember when I went to the Women of Faith conference with my girlfriends and got super silly? It may have been in part because of the meal we ate across the street from the arena before the event. Yes. I blame it on the specialty pizza. It was that good.

Who knew you could put thin slices of red potato on a pizza and turn out something amazing? The pizza had some sort of red-ish sauce drizzled all over it, and that very sauce is what made that pizza taste so good. Well, that and the bacon. Everything is better with bacon.

Of course I came home determined to replicate the sauce. Every potato needs that sauce, whether it’s on a pizza or not. So I looked it up on the restaurant website. It described the pizza blah, blah, blah “with spicy ranch dressing.” Bingo.

So I played. The result is too easy. Make this and forever drizzle it over your baked potatoes, your chicken, and sure – even your pizza.

Spicy Ranch DressingYum

Spicy Ranch Dressing
 
Save Print
Author: Laura
Ingredients
  • 1 cup homemade ranch dressing (because it is good for you and delicious)
  • 1-3 Tablespoons of your favorite hot sauce like Tabasco, Cholula, or Sriracha
  • 1 teaspoon chili powder
  • 1 teaspoon cumin
Instructions
  1. Mix together, and enjoy.
3.4.3177

See how easy that was? You’ll need my homemade ranch dressing recipe.

Want it to be spicier? Add more hot sauce, chili powder, or cumin. Want it to be less hot? Cut down the hot sauce, chili powder, or cumin. Really, it isn’t difficult.
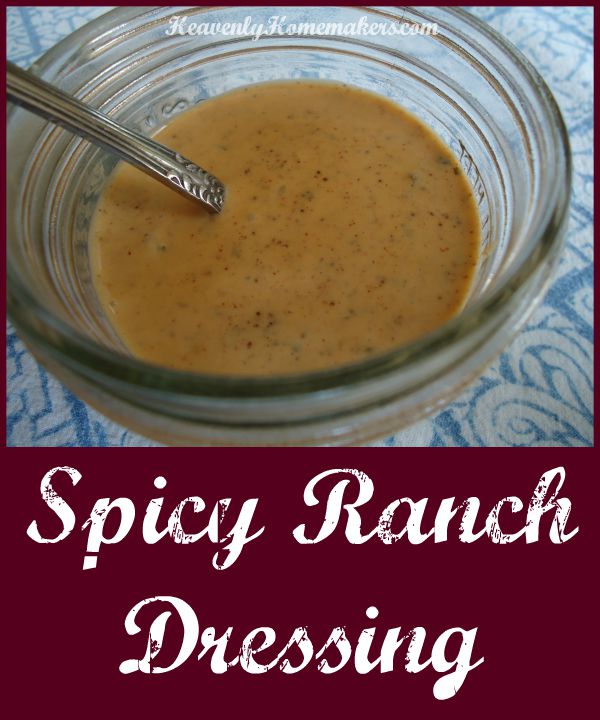
Spicy Ranch Dressing

Later this week, I will share a fun new Baked Potato Casserole I came up with to use with this Spicy Ranch Dressing. You will love how simple it is. And yep, there’s bacon on it. (And all the husbands everywhere said, “Yes. Keep reading that one lady’s blog – the one who gives you recipes that use bacon.”)

Give me more ideas besides potatoes, chicken, and pizza for this dressing. Think it would taste good on a salad? (Yes.) Ooh, maybe with Sweet Potato Fries. Oh my goodness, yes. What else??

Heavenly Homemaker's Club Members: Access your homepage and all your fantastic resources here! Not a member yet? Please join us!
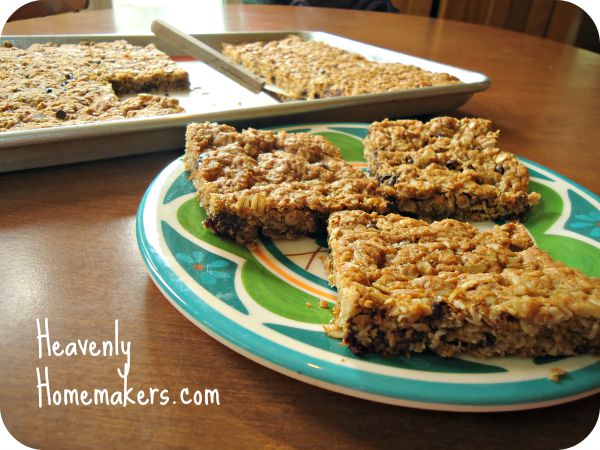
(No Flour) Monster Chocolate Chip Cookie Bars – The Heathier Way

August 25, 2015 by Laura 14 Comments

This post may contain affiliate links which won’t change your price but will share some commission.

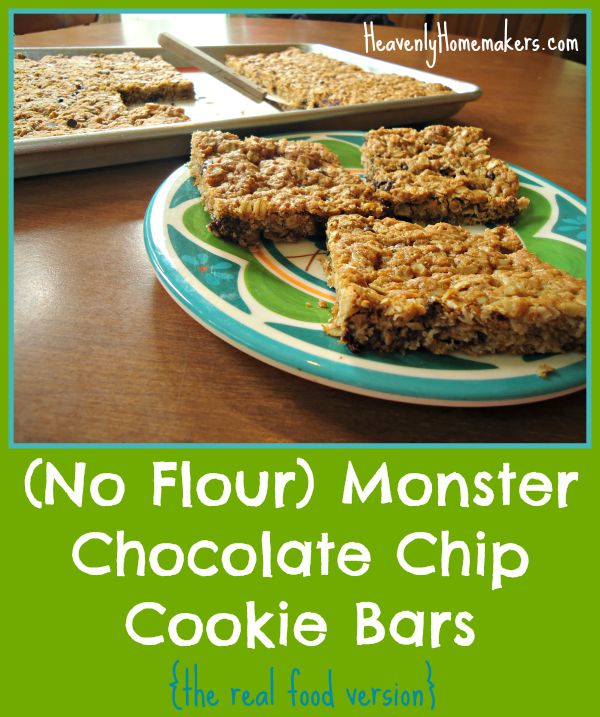
Monster Chocolate Chip Cookie Bars – come and get ’em!

Real Food Monster Cookie Bars

When I saw the original recipe for these bars here, what really jumped out at me was the “no flour” thing. Avoiding flour is always a nice option in recipes. I also noticed the “mini m&m” thing but decided that while those are fun and tasty, they are on the naughty list and not required to make these cookie bars good. Then I wondered if I could cut back on the 2 cups of sugar and the amount of chocolate chips.

Do I know how to ruin a good recipe, or what? 

Hey. I didn’t ruin a thing. I simply cut back on the sugar and cut out the corn syrup and 10 different food dyes. The cookie bars are still delicious, so says my family and several other people I have served these to who didn’t even know I’d healthified this recipe. It probably helps that these bars still have plenty of sugar in them.

The oats and lack of flour create a really fun, chewy bar. I say, make these then wrap them individually and freeze them to grab out for lunch boxes or on-the-go snacks. This makes 24 good sized bars.

(No Flour) Monster Chocolate Chip Cookie BarsYum

(No Flour) Monster Chocolate Chip Cookie Bars - The Heathier Way
 
Save Print
Author: Laura
Serves: 24-36
Ingredients
  • 1 cup sucanat or brown sugar
  • ½ cup melted butter
  • 1½ cups creamy natural peanut butter (here's how to make it yourself)
  • 3 eggs
  • 1 teaspoon vanilla extract
  • 1 teaspoon baking soda
  • 1½ cups quick oats
  • 2½ cups rolled oats
  • ¾ cup mini chocolate chips
Instructions
  1. Cream sugar, butter, and peanut butter together until smooth.
  2. Add eggs, vanilla, and baking soda and mix well.
  3. Stir in oats until well combined.
  4. Fold in chocolate chips.
  5. Spread mixture into a cookie sheet lined by parchment paper.
  6. Bake in a 350° oven for 18-20 minutes or until lightly browned.
  7. Makes 24-36 cookie bars, depending on how large you cut them.
3.4.3177

No Flour Monster Chocolate Chip Cookies (the real food version)

Make these gluten free by using GF oats. Learn to make your own Quick Oats here.

Enjoy this very easy treat!

Heavenly Homemaker's Club Members: Access your homepage and all your fantastic resources here! Not a member yet? Please join us!

Whole Wheat Stuffed Cheesy Bread

March 25, 2015 by Laura 14 Comments

This post may contain affiliate links which won’t change your price but will share some commission.

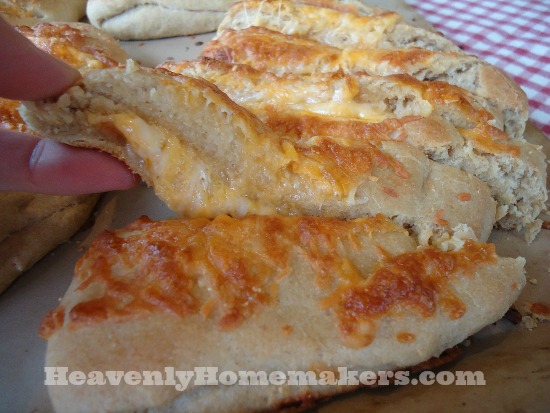
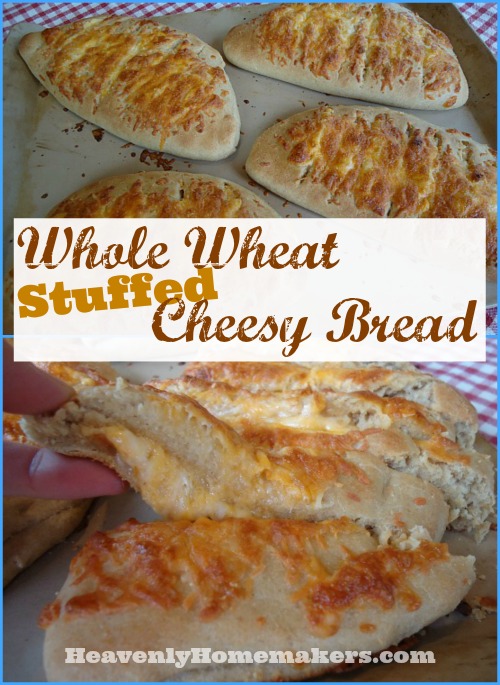
Homemade, soft, pull-apart bread stuffed full of melted cheesy deliciousness? Oh yes.

cheese bread11

What inspired this recipe, you ask? It was pure and total selfishness and that’s the truth.

See, I was serving salad as a main dish for our lunch. The salad was to include mixed greens and other veggies plus flavorful chunks of chicken, so I knew all my men would enjoy it. But I also knew that if I didn’t feed them something a little more substantial with their salad, I’d be hearing the “now what can I have to eat” question right about the time we finished putting salad bowls into the dishwasher.

See? It was selfishness.  I did not want to hear that question. I am over that question. That question makes all mothers want to run in unladylike fashion to the far corners of anywhere but the kitchen. Am I right? I am right.

So I searched online for a fun new kind of bread to go with our salads. The boys all thought I made the bread to treat them to something special. Don’t tell them otherwise. Yes boys. I was June Cleaver delighted to make you this special treat for lunch. (And also, I am very, very selfish and wanted to keep your bellies full until the next actual meal time so that I wouldn’t hear the question.)

Now that my confession is out of the way and you understand the heart behind the recipe, you too can be selfish and make this for your family. This might be the best selfish act you and I will ever commit.

Whole Wheat Stuffed Cheesy Bread (adapted from this recipe)Yum

Dough

1 teaspoon honey
3/4 cup warm water (about 110°)
2 1/4 teaspoons active dry yeast
2 Tablespoons melted butter or coconut oil
2 cups whole wheat flour (I use freshly ground flour from hard white wheat)
3/4 teaspoon sea salt

Cheese Filling

2 cups shredded cheese (I used Colby jack for this)
1 Tablespoon grated Parmesan cheese
1 teaspoon garlic powder
1/4 teaspoon sea salt

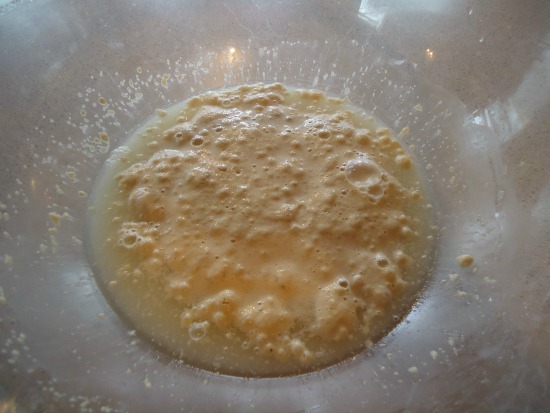
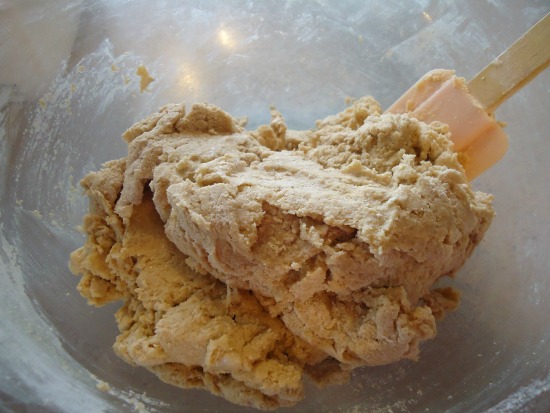
In a large mixing bowl, stir together honey, water, and yeast. Allow mixture to sit for about 10 minutes until it becomes foamy. Add melted butter (be sure it’s not too hot so it won’t kill the yeast). Stir in flour and salt until well combined. Knead dough on a floured surface for about 5 minutes. (Here’s a video showing you how to knead dough.)

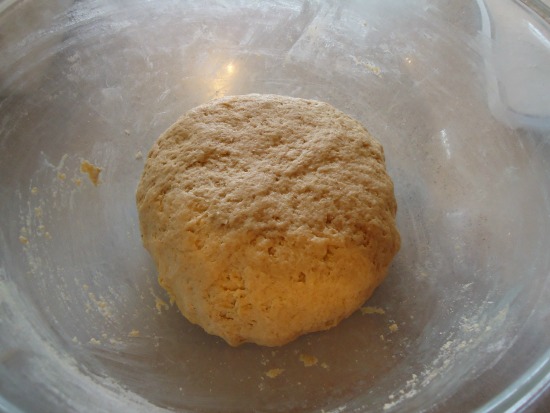
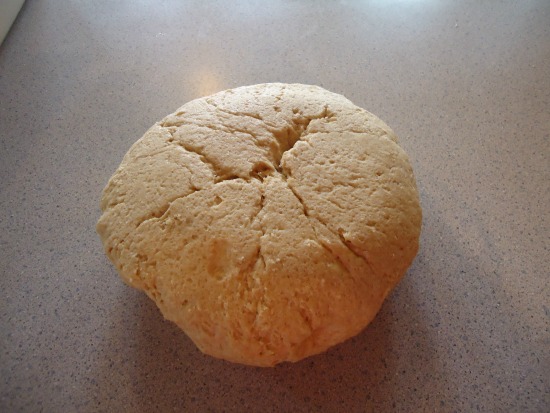
Place dough back in bowl, cover, and allow dough to rest/rise for about one hour. Meanwhile, mix cheese filling ingredients in a bowl.

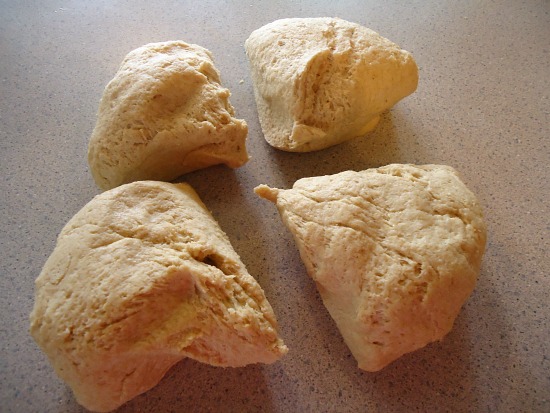
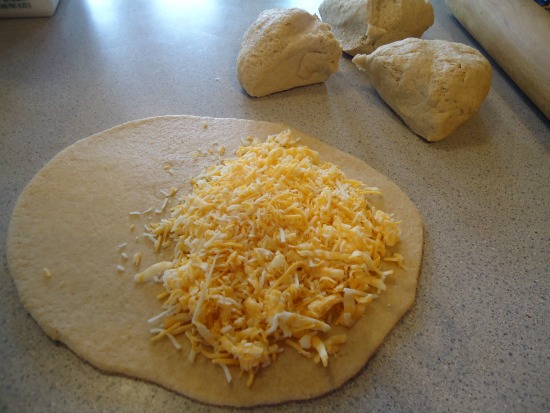
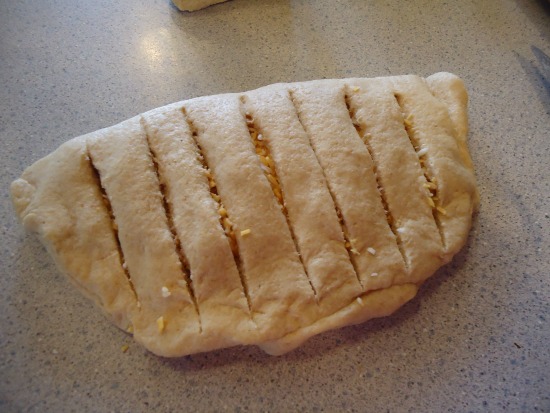
Heat oven to 450°. Divide dough in half. Roll each half into an 8″ square. Scoop about 1/2 cup cheese mixture onto one side of each square. Fold the dough over the cheese and press edges lightly together. Use a sharp knife to slice the dough into 6-8 one-inch strips, stopping just before the folded edge. Sprinkle remaining cheese evenly over the top of the prepared bread.

Bake for 12-15 minutes or until bread is golden brown. Serve right away. Makes 16 Cheesy Bread Sticks.

Note:  In the following pictures, you’ll notice that I doubled the recipe.
Instead of 2 cheesy breads, I made 4. I didn’t want to run out. Remember the selfishness.

cheese bread 1

cheese bread 2

cheese bread 3

cheese bread 4

cheese bread 5

cheese bread 6

cheese bread 7

cheese bread 8

cheese bread 10

And there you have it. A delicious act of selfishness. This was a perfect side with our salads. This bread also tastes great dipped in pizza sauce.

Whole Wheat Stuffed Cheesy Bread

Are you also tired of the question?

Heavenly Homemaker's Club Members: Access your homepage and all your fantastic resources here! Not a member yet? Please join us!

Honey Peanut Bars ~ Like a Healthy Payday Candy Bar

January 22, 2015 by Laura 25 Comments

This post may contain affiliate links which won’t change your price but will share some commission.

Ladies and um, other Ladies (although surely there is a gentleman or three around here too):  We have a winner! Honey Peanut Bars it is!

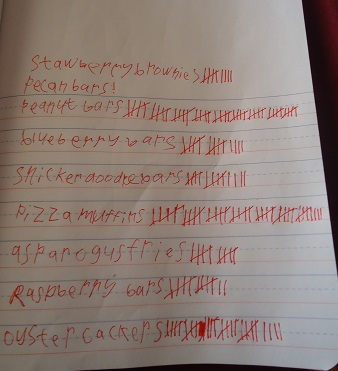
Thanks to all who put in their vote as to which of the new healthy snack recipes from our upcoming eBook we should reveal early. It was a pretty close call on several. I put Malachi to work making tally marks as votes came in (a great school project for him). He had a lot of fun with it…

counting votes

Here’s how my afternoon sounded:

“Pizza Muffins are in the lead. They’re going to win for sure!”
“Mom! Peanut Bars have a ton of votes. They caught up to Pizza Muffins.”
“I think Oyster Crackers are going to pull ahead!”
“It’s back to the Peanut Bars. Why is everyone choosing that one?”

Yeah, Malachi doesn’t like peanuts. ;)

When it was all said and done, the Honey Peanut Bars won by several votes. Not to worry though. Our 227 Healthy Snacks eBook is almost finished. Then you’ll have access to all the recipes forever! (Our goal is to have the book ready for you by Sunday night.)

I mixed up a batch of these Honey Peanut Bars tonight again, just because they sounded good. Our older boys will probably finish them all off once they get home from basketball practice. What a perfect post-workout/bedtime snack for them. (With apples and cheese and whatever else they get out because…do I really need to explain?)

You should be excited to know that it only took about five minutes for me to mix these up tonight. Their simplicity is of the many reasons I love them. :)

Honey Peanut BarsYum

Honey Peanut Bars ~ Like a Healthy Payday Candy Bar
 
Save Print
Author: Laura
Serves: 8-10
Ingredients
  • 1¼ cup roasted, unsalted peanuts
  • ¼ cup roasted, unsalted almonds
  • ⅓ cup honey
  • 3 Tablespoons natural creamy peanut butter
  • ⅛ teaspoon sea salt
Instructions
  1. In a small saucepan stir honey, peanut butter, and salt together over low heat until well combined. Remove from heat.
  2. Stir in peanuts and almonds.
  3. Spread mixture into an 8x8 inch pan.
  4. Chill for 2 hours.
  5. Cut into bars.
3.4.3177

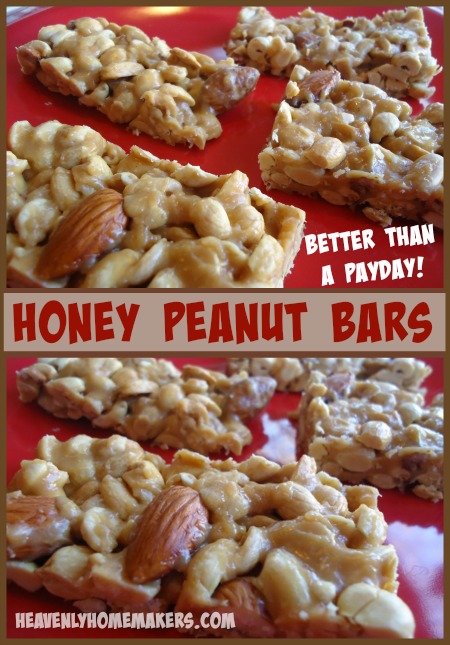
Honey Peanut Bars - Better Than a Payday

Told you they were easy to make! Go grab your simple ingredients and get busy on these bars. You will love them as much as we do (well, everyone but Malachi).

Grab your copy of 227 Healthy Snacks which includes this recipe and 226 more recipes and snack ideas that are super delicious!

227 Healthy Snacks 2

Heavenly Homemaker's Club Members: Access your homepage and all your fantastic resources here! Not a member yet? Please join us!

Homemade Hot Chocolate Mix Without Dry Milk or Creamer {With Free Printable Gift Tags and a Dairy Free Option}

December 17, 2013 by Laura 29 Comments

This post may contain affiliate links which won’t change your price but will share some commission.

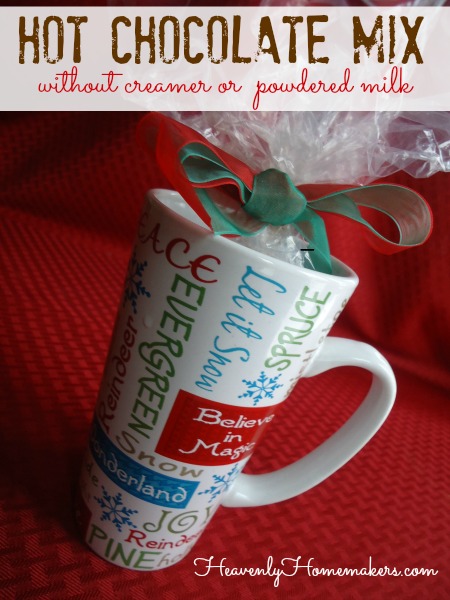
Hot Chocolate Mix

I can’t tell you (because I can’t remember) how many requests I’ve received through the years for a healthier hot chocolate mix. Non-dairy creamer and powdered milk are two ingredients in every homemade hot chocolate mix recipe I’ve ever found – and those are two ingredients I try to avoid if possible. I’ve had to keep telling people through the years that, sorry, I have no idea how to make a hot chocolate mix without those ingredients. I worried, fretted, and lost sleep over the fact that I was failing to provide a healthy hot chocolate mix recipe. (Not really, but shucks if I didn’t want one for myself too.)

Then I realized that I was making this way too hard. After all, what we’re all going for in this real food realm is simple, back to basics, whole food ingredients – right? Then why not mix together the basic, real food ingredients needed to make homemade hot cocoa – and keep the mixture on hand as a quick mix to stir into hot milk? Ladies and gentlemen, boys and girls – we now have a real food, real good, real easy Hot Chocolate Mix! And it’s here just in time for Christmas!

You’ll probably look at the simple recipe below and ask, “Really Laura? It took you six years to come up with this?” And I would have to shrug and say, “Uh-huh.”

Homemade Healthier Hot Chocolate MixYum

3/4 cup cocoa
1 1/2 cups sucanat or brown sugar

Place ingredients in a pint-sized jar and shake well. When you are ready for a cup of hot chocolate, here is what you’ll do:

In a small saucepan, whisk 2 1/2 Tablespoons of Hot Chocolate Mix with 1 cup of milk. Heat and stir on medium heat until warm and ready to serve.

This recipe makes about 12-15 one-cup servings, depending on how “heaping” your Tablespoons are when you stir it into the milk.

Want to make this dairy free? Simply add the mixture to a cup of coconut milk. It’s super delicious!

Malachi had a buddy over the day I was playing with this recipe idea. They were sweet enough to be my taste testers, and they both gave it a thumb’s up. Or at least I believe they would have if they weren’t so busy saying “yum” and guzzling it down.

hot chocolate mix 1

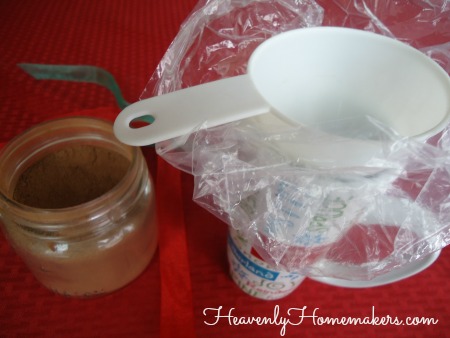
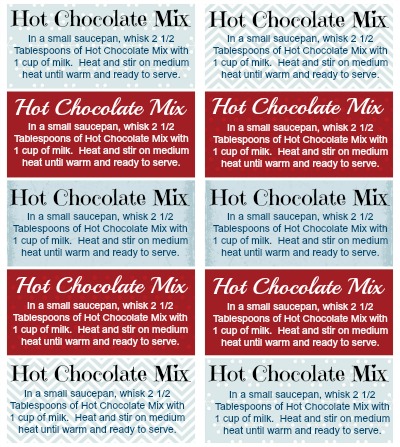
Want to package this Hot Chocolate Mix up for a gift? Simply place a gallon-sized twist tie bag (like this one) down into a mug. Funnel the mix into the bag and tie it up with a bow. Attach a gift tag to the handle of the mug, describing how to make the mix into Hot Chocolate. You’ll find free printable gift tags below!

hot chocolate mix 2

Download and print Hot Chocolate Mix Tags Here

Hot Chocolate Mix Tags sm
Now you tell me – is this exciting or what? How fun to have a real food Hot Chocolate Mix to have on hand and to give as gifts! Sometime within in the next six years, I hope to provide you with another recipe idea as simple as this one.

Hey, check out my friend, Cooking Guy making this hot chocolate!

Heavenly Homemaker's Club Members: Access your homepage and all your fantastic resources here! Not a member yet? Please join us!

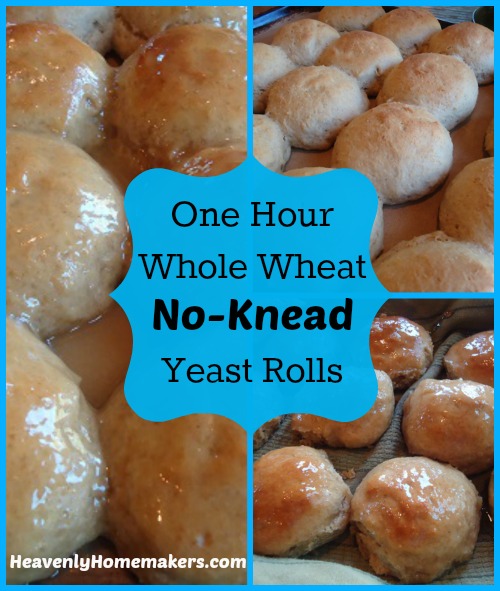
One Hour Whole Wheat Yeast Rolls (No Kneading Required)

September 25, 2013 by Laura 77 Comments

This post may contain affiliate links which won’t change your price but will share some commission.

I got this recipe idea here. Then, I experimented and remade it with more wholesome ingredients.
Here are all of my Real Food Recipe Makeovers so far.

No Knead Rolls

You know all those excuses we use for not making homemade rolls very often? This recipe smacks them all down. Here, witness the smacking:

Homemade Roll Excuse #1 – It takes too long.

Not with this recipe. These take one hour – from the time you get out the bowl until the time you serve these fresh out of the oven. I didn’t believe it myself. But now I do. Because I proved it. {Smack.}

Homemade Roll Excuse #2 – It makes a huge mess.

Not these. You mix everything in one bowl, don’t have to knead the dough, grab the dough straight from the bowl to form rolls, then put them directly onto the pan. I shed not a single tear over the fact that I didn’t have to spend several minutes after kneading dough to scrape crusty flour paste off of my countertop.

Homemade Roll Excuse #3 – I’ll eat too many.

This recipe only makes 12-16 rolls, just enough for a meal or two. Plus, the rolls freeze well if you have leftovers.

Homemade Roll Excuse #4 – It’s hard to make homemade yeast breads.

Oh please. My eleven year old could make these. Measure, stir, wait, stir, wait, stir, wait, roll dough into balls, wait, bake, wait, eat. The hardest part is waiting (and trying to figure out if you already added the salt before the phone rang and distracted you).

Are you now ready to get out a bowl and have hot, fresh rolls ready to go with your dinner? Here’s how to make it happen:

One Hour Whole Wheat Yeast RollsYum

1 cup warm water
2 Tablespoons yeast (I use dry active)
1/4 cup honey
1/3 cup melted butter, coconut oil, or palm shortening (make sure it isn’t too hot)
1 teaspoon sea salt
1 egg
3 – 3 1/2 cups whole wheat flour (I use freshly ground hard white wheat)

1. In a large bowl, mix together water, yeast, and honey. Let the mixture sit for 15 minutes.
2. Add melted butter, salt, and egg.
3. Gradually stir in the flour. The dough will be sticky but manageable. Cover the bowl of dough with a towel and let it rest for 10 minutes.
4. With your hands, shape dough into 12-16 balls. Place the balls so that they don’t touch each other on a buttered cookie sheet. Cover and let rise for 20 minutes.
5. Bake rolls in a 375° oven for 10-15 minutes.
6. If you like (and I do recommend it), brush tops of rolls with a mixture of 4 Tablespoons of butter and 1 Tablespoon honey. Perfection.

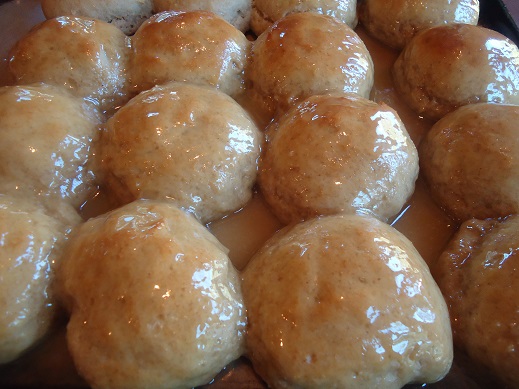
one_hour_rolls_1

Why am I featuring these during the week of the Getting Ahead Dinner Challenge? Can you make these ahead of time to go with your dinner? Sure, if you want. But here’s where I really think it comes in handy:  If I have a simple dinner already prepared and ready to cook, but I want a quick dinner roll to go with it, these rolls are perfect! Plus, since the rest of my dinner is already prepared, I actually now have time to surprise my family with fresh rolls too!

OR, what if you need some buns to go with Sloppy Joe Meat or Barbecue Chicken that you have prepared in your freezer? These rolls are perfect.

So what are you waiting for? You have one hour to make delicious, homemade rolls….GO!

Heavenly Homemaker's Club Members: Access your homepage and all your fantastic resources here! Not a member yet? Please join us!

Homemade Chocolate Peanut Butter Cups {Real Food Recipe Makeover}

July 9, 2013 by Laura 21 Comments

This post may contain affiliate links which won’t change your price but will share some commission.

This recipe was inspired by Laura S., someone I met at the Colorado Springs Meet and Greet. Not only was her idea brilliant, I think her name is absolutely beautiful. ;)

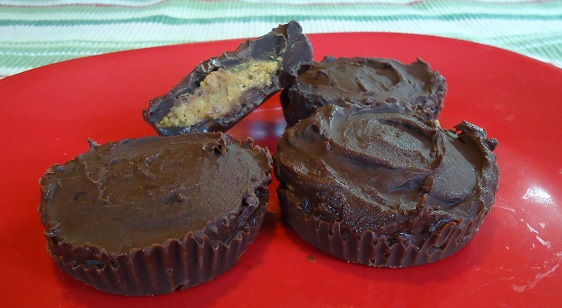
I wasn’t able to make these Chocolate Peanut Butter Cups look perfect and beautiful like one you’d pull out of a Reese’s wrapper. But I did make them taste better, so we’ll go with “taste before beauty” on this one. And of course, with these, you avoid the hydrogenated oils and turn out an even more delicious treat than one that comes from a factory.

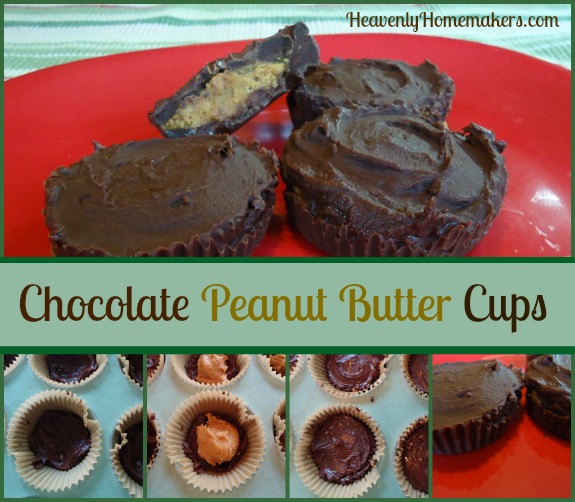
Chocolate Peanut Butter Cups
Warning:  These are super rich and slightly messy. Children and adults alike may end up with chocolaty fingers and faces, not to mention a sugar high. You’re welcome and I’m sorry.

Chocolate Peanut Butter CupsYum

1/4 cup natural peanut butter
2 teaspoons honey
1 cup chocolate chips
2 Tablespoons Butter

Stir together peanut butter and honey in a small bowl. Set aside. Prepare six regular sized or 15 mini-sized muffin cups with paper liners.

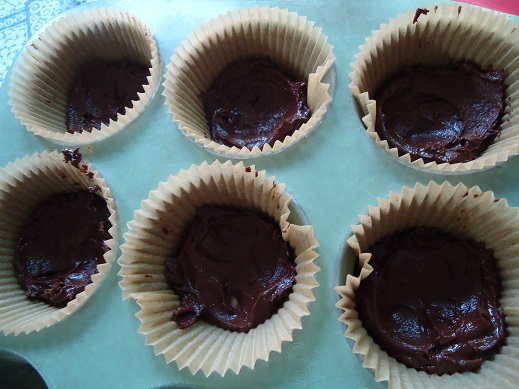
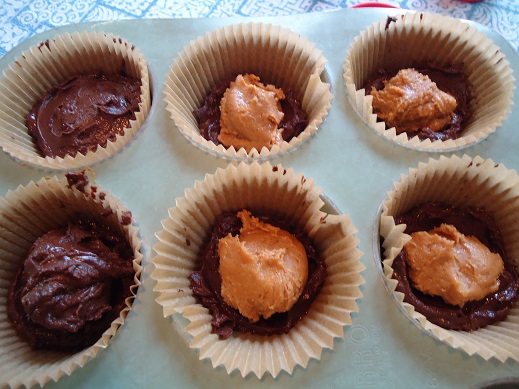
In a small saucepan, melt chocolate chips and butter, stirring until melted. Spoon half of the melted chocolate mixture into the prepared paper-lined muffin cups.

pb_cups_4

Place a spoonful of peanut butter mixture into each cup, dividing the mixture evenly among the cups. Top each with the remaining chocolate, smoothing it the best you can to cover the peanut butter.

pb_cups_5

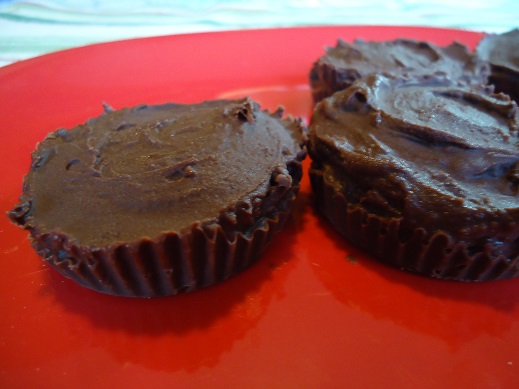
Refrigerate for two hours until solid. (Or place in the freezer for about thirty minutes to speed the process.)  Store in the refrigerator until ready to serve.

pb_cups_2
pb_cups_3
You’ll be happy to know that while playing with this idea, I also came up with a Chocolate Caramel Cup. Recipe coming soon…

Heavenly Homemaker's Club Members: Access your homepage and all your fantastic resources here! Not a member yet? Please join us!

Peanut Butter Chocolate Chip Muffins

March 19, 2013 by Laura 32 Comments

This post may contain affiliate links which won’t change your price but will share some commission.

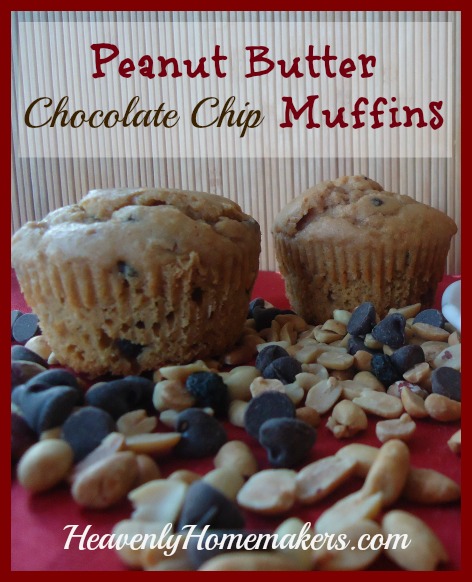
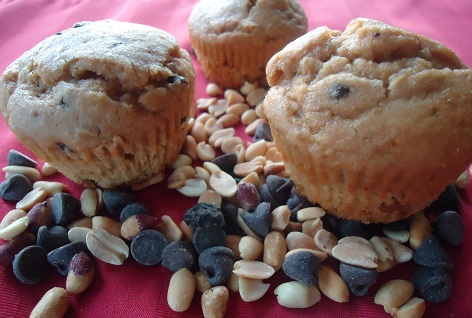
 This recipe for Peanut Butter Chocolate Chip Muffins looked too good to pass up – and it was super easy to makeover with healthier ingredients. We all loved the results. (Except for Malachi, who didn’t try them because he doesn’t like peanut butter. He’s missing out!)

Yum

Have a recipe you’d like me to try and make over?
Submit your recipes on this Real Food Recipe Makeover Submission Page.

It probably goes without saying that these muffins taste awesome with a glass of milk. They are easy to make ahead of time and serve the following day. (Although they really do taste best right out of the oven. Doesn’t everything?!)  These muffins freeze well. They make a great snack. I love recipes like this! It doesn’t get any easier!

Peanut Butter Chocolate Chip Muffins

Peanut Butter Chocolate Chip Muffins

Peanut Butter Chocolate Chip Muffins
 
Save Print
Author: Laura
Ingredients
  • 6 Tablespoons butter, melted
  • ½ cup natural peanut butter
  • 2 teaspoons baking powder
  • ½ teaspoon sea salt
  • 2¼ cups whole wheat flour
  • ⅔ cup sucanat
  • 2 eggs
  • 1 cup milk
  • ¾ cup chocolate chips
Instructions
  1. In a small saucepan, melt together the butter and the peanut butter.
  2. Meanwhile, in a mixing bowl, stir together flour, baking powder, salt, and sucanat.
  3. Add melted butter and peanut butter, eggs, and milk.
  4. Stir until well combined, then fold in the chocolate chips.
  5. Scoop batter into 18-24 paper lined muffin cups.
  6. Bake at 375° for 15-20 minutes or until muffins are golden brown.
3.4.3177

Notes:

  • I use homemade peanut butter. It is amazing, so if you haven’t tried your hand at making peanut butter, learn soon! You’ll love it and it’s much easier than you think!
  • I use freshly ground flour made from hard or soft white wheat. Soft wheat works best as it is lighter and fluffier (more like white flour – except still nourishing).
  • Make these muffins even more moist by subbing 1/2 cup of milk for 1/2 cup of sour cream.
  • Make these muffins ahead of time, freezing the batter like this. You’ll love this time-saving trick!
peanut_butter_cc_muffins_2

Are you a chocolate/peanut butter fan?

Heavenly Homemaker's Club Members: Access your homepage and all your fantastic resources here! Not a member yet? Please join us!

Homemade Healthy(er) Twinkies

February 27, 2013 by Laura 27 Comments

This post may contain affiliate links which won’t change your price but will share some commission.


Have a recipe you’d like me to try and make over?
Submit your recipes on this Real Food Recipe Makeover Submission Page.

Twinkies bring up a very special memory for me. The only time we ever got Twinkies when I was little was when we needed to pack a lunch on school field trip days. Therefore, about two days each year, my mom bought my brother and me a Twinkie, and packed it in our sack lunch – along with a cold grape soda wrapped in tin foil to keep it cold. Such fun memories!! (And the only real reason I liked field trips.) :)

So here we are, over thirty years later, and about three years after the first healthier Twinkie recipe request I received. Obviously, this recipe make-over really had me stumped. While I had an idea about how to make a whole wheat spongy cake, I had no idea how to make a healthier cream filling. So when one reader, Stacy, left a comment a couple of weeks ago on the Redless Velvet Cake post, sharing a recipe that she said tasted “like Twinkie filling” – I tried it right away. 

twinkie_2

Unbelievable.  It really does taste like the Twinkie filling I remember from back in the day. Upon tasting it, I suddenly had the urge to get a grape soda, climb onto a loud school bus, and take a trip to a museum. (But not really.) 

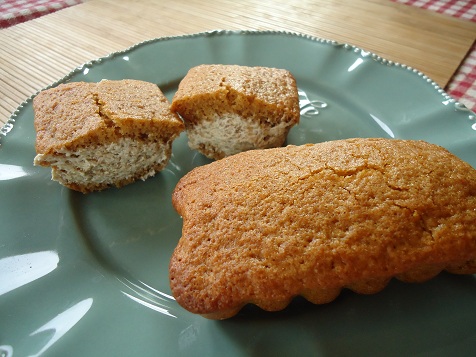
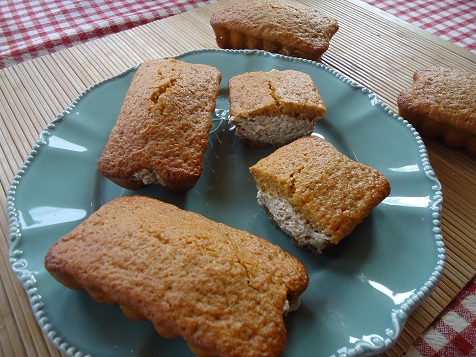
I will admit that it was harder than I thought it would be to duplicate the airy, empty-calorie cake part of a Twinkie. Regardless, these “Twinkies” taste delicious and were a fun treat for my family. My kids devoured them!

Homemade Healthy(er) TwinkiesYum

2 eggs
1 cup sucanat
1 cup whole wheat flour (I use freshly ground flour from hard white wheat)
1 teaspoon baking powder
1/2 cup milk
2 Tablespoons butter

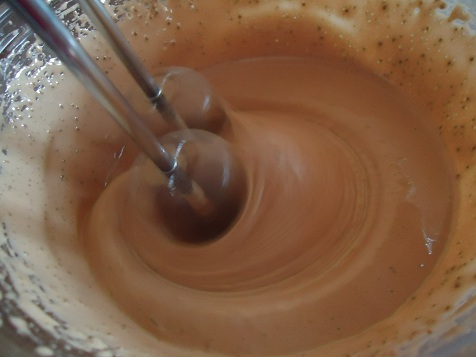
In a bowl, beat the eggs with an electric mixer for about four minutes or until thick. Gradually add sucanat, beating for an additional 4 minutes. (Yes, I know, lots of beating. That’s how it becomes spongy, light, and airy.)

Add flour and baking powder, beating until just combined. Heat milk and butter on the stove until butter melts. Add milk mixture to batter, beating until combined. 

Pour batter into baking pan, and bake in a 350° oven for 20 minutes. (I used a cool Flexipan that I’d gotten from Demarle. Muffin tins would work great, or small loaf pans.)  Allow cakes to cool completely before filling.

Twinkie Filling

3 Tablespoons whole wheat flour
1 cup milk
1 cup sucanat
1 teaspoon vanilla extract
1 cup Palm Shortening or softened butter

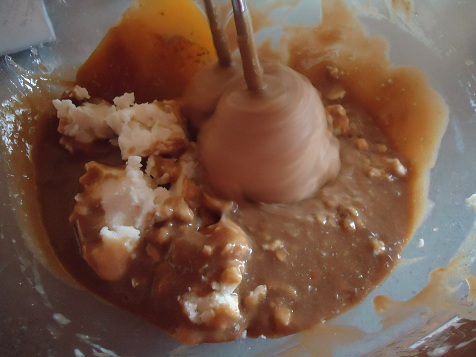
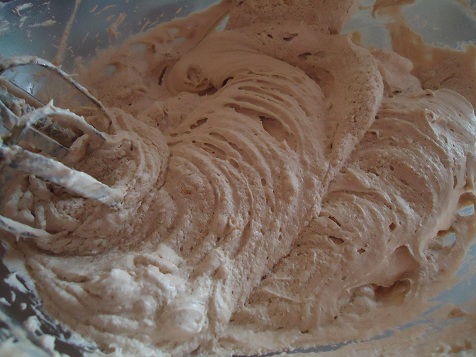
Cook milk and flour, stirring constantly until mixture is very thick. Set aside to cool. Whip milk mixture with sucanat until sucanat has dissolved. 

twinkie_6

Add palm shortening and vanilla and whip until light and fluffy.

twinkie_7

Check it out! Stick your finger in and taste it…just like Twinkie Filling! (Except better. Of course.)

twinkie_8

To fill your Twinkies:

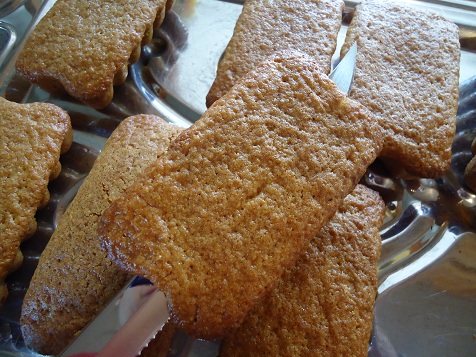
Slide a long knife through each cake – just to make an opening.

twinkie_9

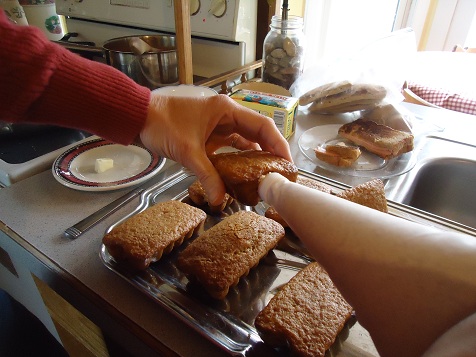
Put Twinkie Filling into a frosting bag with a large, open tip. Place the tip into the slit in the cake and squeeze to fill. (I found that putting some in each end of the Twinkie worked best to fill the Twinkie evenly.
 twinkie_10

When I called the boys in for the treat, it is a fact that my two youngest asked, “Twinkies? What are Twinkies?” I guess they’ll never know – except for what they’ve experienced with this healthified version. :)

Once I explained “Twinkies” to the boys, Malachi said, “Oh! Is this that treat Grammy used to give you on trips?” Yes indeed. {sniff}  I’m so glad he remembered that I had told him the Twinkie story. 

twinkie_3

In case you didn’t already figure this out by reading through the above instructions, Homemade Healthy(er) Twinkies are a little bit of a “high maintenance” recipe. This type of recipe did not make it into my Oh, For Real book. Only recipes that can be made quickly and easily made that book! But hey, this Twinkie recipe is still a keeper. It’s lots of fun and a very special treat to make!

Think you’ll give these a try? Have any fun Twinkie memories to share?

Heavenly Homemaker's Club Members: Access your homepage and all your fantastic resources here! Not a member yet? Please join us!

Red(less) Velvet Cake

February 12, 2013 by Laura 38 Comments

This post may contain affiliate links which won’t change your price but will share some commission.


Have a recipe you’d like me to try and make over?
Submit your recipes on this Real Food Recipe Makeover Submission Page.

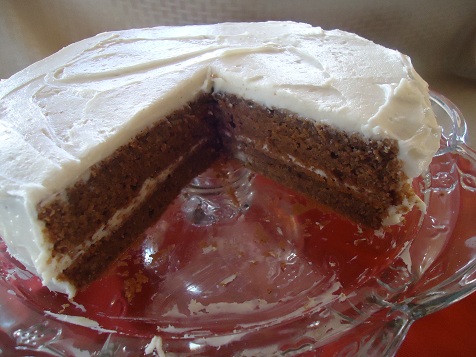
Looking for a special treat for Valentine’s Day? How about a Red Velvet Cake? Without the red. While the red food coloring is pretty, it doesn’t add anything to the cake (except for freakish fake color that I don’t really want in my gut).

This cake experiment became a treat that is super moist and delicious, with a mild chocolate flavor. And hey, if you squint and look through pretend red colored glasses, the light brown color of this cake really does have a reddish tint. It’s true. Can you see it? 

velvet_cake_1

Red(less) Velvet CakeYum

1 cup butter
1/2 cup cocoa powder
4 Tablespoons water
2 1/2 cups whole wheat flour (I recommend using flour made from hard or soft white wheat)
1/2 cup organic cornstarch
1 1/2 teaspoons baking powder
1 1/2 cups sucanat, made into “powdered sugar”
3 eggs
1 cup buttermilk
1 teaspoon vanilla
Cream Cheese Frosting

Place butter, water, and cocoa powder in a small saucepan. Cook over low heat until butter is melted and ingredients are well combined. In a large mixing bowl stir together flour, cornstarch, baking powder, and powdered sucanat. Pour in butter mixture, and the eggs, buttermilk, and vanilla. Beat the ingredients together until smooth.

Pour batter into two well-buttered 9 inch round cake pans. Bake in a 375° oven for 25-30 minutes or until a toothpick inserted in the middle comes out clean. Be careful not to overbake these cakes or they will become dry. Allow cakes to cool for a few minutes, then carefully turn them out onto two separate plates. Allow them to cool completely.

Frost with Cream Cheese Frosting, beginning with a layer in the middle of the cakes, then on the top and around the sides.

velvet_cake_2

See how pretty?

velvet_cake_3

See the red?

velvet_cake_5

 Okay, fine. It really is red(less). But it is crazy delicous. :)

Heavenly Homemaker's Club Members: Access your homepage and all your fantastic resources here! Not a member yet? Please join us!
Next Page »

Join Our Community!

 Facebook Twitter RSS E-mail Instagram Pinterest

Popular Posts

~ Will All of the Real Moms Please Stand Up?
~ Easy! Stir-and-Pour Whole Wheat Bread
~ How to Make Gatorade
~ 31 Real Food Breakfast Ideas
~ Dear Teenage Girls...
~ When Mom Takes a Step Back
~ The Inexpensive Health Insurance We Love!
~ Let's Talk Real Food Grocery Budgets

Check out our latest posts!

  • Easy Meatballs with Sweet Sauce (Freezer Friendly)
  • How to Make Uncrustables
  • The Easiest No-Bake Cheescake
  • Do I Still Buy Organic Food?
  • How I Shop and Budget for Our Large Family
Home  ~  Simple Meals  ~  Club Membership  ~  Shop  ~  Privacy Policy  ~  Disclosure  ~ Contact

Copyright © 2023 · Beautiful Pro Theme on Genesis Framework · WordPress · Log in