Heavenly Homemakers

Encouraging women in homemaking, healthy eating and parenting

  • Home
    • About
    • FAQs
  • Recipes
    • Bread and Breakfast
    • Condiments
    • Dairy
    • Main Dishes
    • Side Dishes and Snacks
    • Desserts
    • Gluten Free
    • Instant Pot
    • Crock Pot
    • Heavenly Homemaker’s Weekly Menus
  • Homemaking
    • Real Food Sources
  • Store
  • Contact
    • Advertise
    • Disclosure
    • Privacy Policy
  • Simple Meals
  • Club Members!

Make a Message Board ~ Homemade Gifts For Less Than $5

December 11, 2014 by Laura 1 Comment

This post may contain affiliate links which won’t change your price but will share some commission.

Here’s another great idea sent in by Vickie. Be sure to check out her beautiful Pinecone Décor craft, too!

I love this Message Board idea for so many reasons. With my kids being so involved in so many activities, having a board like this to keep track of all the comings and goings (and backings and forthings) would be a great help! Look how adorable and useful…

Make a Message Board

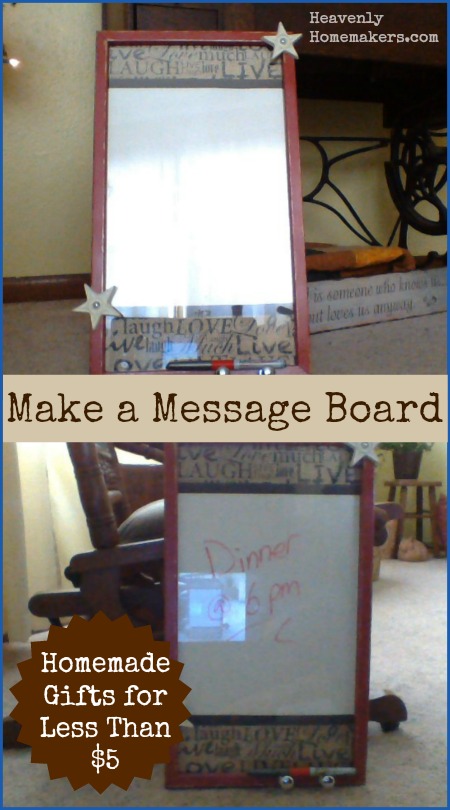
Here are Vickie’s instructions:

This was made using an old picture frame and cost me about $3.

  • picture frame (salvaged old frame with glass still intact and in good condition)
  • craft paper (on sale for 25 cents each)
  • knobs (found in my drawer of junk, but can be bought at any salvage shop for cheap)
  • dry-erase marker ($2)
  • glue stick or double sided tape and crazy glue or hot glue
  • fine sandpaper
  • optional – fun findings
  • optional – paint (left-over paint was used for base and then sealed with clear spray paint)

Carefully remove the glass from the frame and set aside. If you want to paint the frame, scrub it clean and sand lightly. Apply paint and let dry. If desired, scuff it with fine sandpaper and then seal with clear spray paint. Cut craft paper to fit frames backing, making any desired pattern. Make sure to use one large piece of white or cream paper in the center. Adhere paper to frame back using glue stick or double sided tape. Reassemble the frame with it’s back. Optional, decorate with fun findings. Attach knobs with crazy glue or hot glue and let dry. The marker will rest on the knobs.

The glass must be in good condition without scratches or chips. Good smooth glass will allow you to use this as a message board, erasing and re-writing for years. Bonus – if you decided to change your look, all you have to do is open up the frame and change the paper that is inside.

Check out all of our Homemade Gifts for Less Than $5 posts. :)

 
Heavenly Homemaker's Club Members: Access your homepage and all your fantastic resources here! Not a member yet? Please join us!

Filed Under: Gifts Under $5, Things to Make

Comments

  1. Lindsey @ Simply Lindsey says

    December 12, 2014 at 7:41 am

    This is so cute!! My husband and I were just talking about buying one of these, but maybe we’ll make one instead!

    Reply

Leave a Reply Cancel reply

Your email address will not be published. Required fields are marked *


Join Our Community!

 Facebook Twitter RSS E-mail Instagram Pinterest

Popular Posts

~ Will All of the Real Moms Please Stand Up?
~ Easy! Stir-and-Pour Whole Wheat Bread
~ How to Make Gatorade
~ 31 Real Food Breakfast Ideas
~ Dear Teenage Girls...
~ When Mom Takes a Step Back
~ The Inexpensive Health Insurance We Love!
~ Let's Talk Real Food Grocery Budgets

Check out our latest posts!

  • How to Make Uncrustables
  • The Easiest No-Bake Cheescake
  • Do I Still Buy Organic Food?
  • How I Shop and Budget for Our Large Family
  • Why I Make Little Birthday Cakes for my Big Family
Home  ~  Simple Meals  ~  Club Membership  ~  Shop  ~  Privacy Policy  ~  Disclosure  ~ Contact

Copyright © 2023 · Beautiful Pro Theme on Genesis Framework · WordPress · Log in