Heavenly Homemakers

Encouraging women in homemaking, healthy eating and parenting

  • Home
    • About
    • FAQs
  • Recipes
    • Bread and Breakfast
    • Condiments
    • Dairy
    • Main Dishes
    • Side Dishes and Snacks
    • Desserts
    • Gluten Free
    • Instant Pot
    • Crock Pot
    • Heavenly Homemaker’s Weekly Menus
  • Homemaking
    • Real Food Sources
  • Store
  • Contact
    • Advertise
    • Disclosure
    • Privacy Policy
  • Simple Meals
  • Club Members!

Make Your Own Yogurt and Cream Cheese

January 25, 2008 by Laura 271 Comments

This post may contain affiliate links. For more information, please see our disclosure policy.

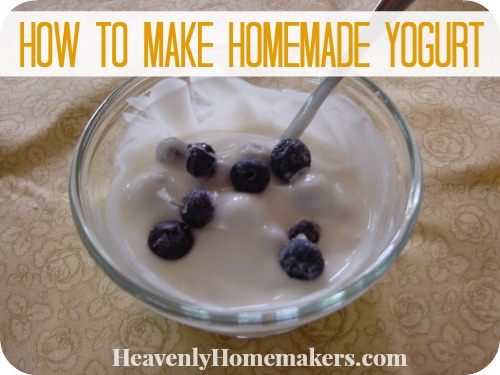
How to Make Homemade Yogurt

Yum

You can make your own yogurt and cream cheese, and it is not hard! You don’t have to have any fancy equipment (and when you see my pictures, you’ll believe it!). Not only will this save you money, you’ll have yogurt and cream cheese that is very good for you! Try making this yogurt, then add your own fruit, sweetener (I recommend stevia or real grade B maple syrup) and a touch of vanilla. YUM!

Here’s what you need to do to make yogurt:

1 quart of whole milk (I use unpasturized milk from a farming friend)
3/4 cup plain yogurt or this yogurt starter

Pour the yogurt into a quart jar (using a glass container is important). Heat the milk on the stove in a saucepan until it is just under 100 degrees.
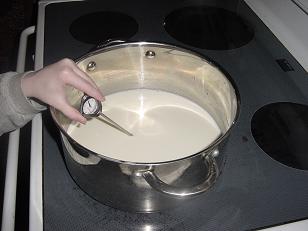
yogurt1sm.JPG

Pour the milk over the yogurt in the jar and shake.

Place the jar into a cooler of hot water, cover and leave in the cooler for seven hours.
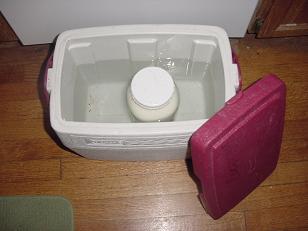
yogurt2sm.JPG

There, you just made yogurt!

Now, you can eat the yogurt as I mentioned before, or you can take your yogurt and make cream cheese (and impress the socks off of someone!).

To make cream cheese, line a strainer with a tea towel. Pour the yogurt into the tea towel.
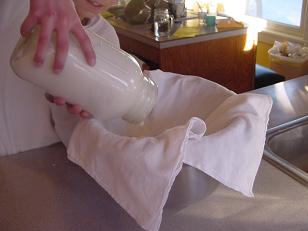
creamcheese1sm.JPG

You need to secure the tea towel full of yogurt and hang it for 7-10 hours (I usually do this overnight) so that the whey can drip off. I’m sure there must be a more impressive way to hang your yogurt, but what we’ve come up with works just fine!
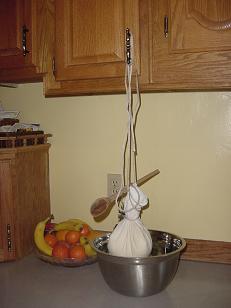
creamcheese2sm.JPG
Here are the secrets to my effective cream cheese-hanging-whey-dripping process (I know, you’re on the edge of your chair!):

I fold over the top of the tea towel and hold it closed with a couple of rubber bands. Then, I use several more rubber bands to attach a long wooden spoon to the wadded up tea towel. Then, I use a rope to dangle the tea towel from a cabinet door. And, of course I leave a bowl under the whole contraption so that whey doesn’t drip all over the floor (because then, my process would not be nearly as cute).

Then, after you can tell that the whey has all separated from the cream cheese (you can tell it’s finished if it isn’t dripping any more), then you pull the whole thing down and scrape the cream cheese into a jar. And that’s it. It is so simple.
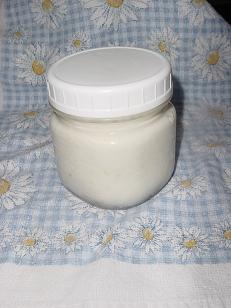
creamcheese3sm.JPG

Sure, you can tell people that it took you hours and hours to make yogurt and cream cheese (because technically it DID take hours to make), but the part you actually played in it took about 10 minutes.

Heavenly Homemaker's Club Members: Access your homepage and all your fantastic resources here! Not a member yet? Please join us!

Create Your Own “Restaurant” Fun

January 11, 2008 by Laura 41 Comments

This post may contain affiliate links. For more information, please see our disclosure policy.

My kids like to eat out, but…

a) the food is usually, almost always, mostly bad for you.
b) my three year old eats a lot, my five year old eats as much as I do, my seven year old and ten year old eat as much as their Daddy, and…
c) have you seen how much their Daddy eats?
d) do you know how much it costs at a restaurant to feed a family of six who eat like five adults?

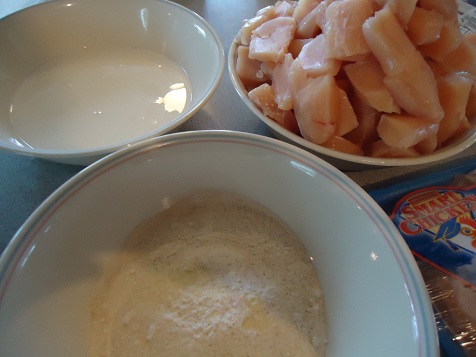
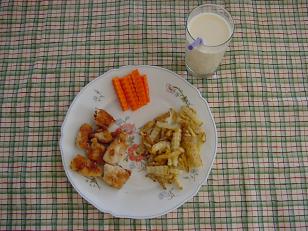
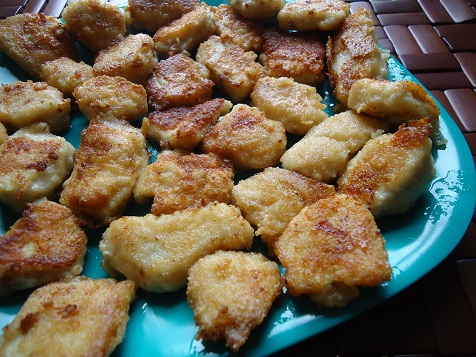
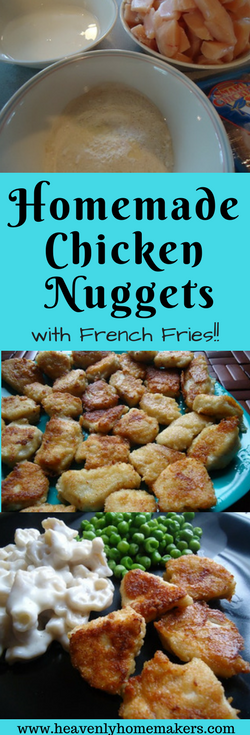
Therefore, I often try to make food fun at home, especially on Friday nights, for our family.Homemade Chicken Nuggets and French Fries, so much healthier than the fast food version!! #chickennuggets #frenchfries #recipe

One of our favorite things to have is my Homemade Chicken Nuggets and French Fries. The kids love it, request it and are joyful over it when they know I’m making it.

I watch for Smart Chicken boneless/skinless breasts to go on sale (that’s the only brand of chicken I feel mostly okay about buying) and I stock up. I found it for $2.29/lb the other day which was great for Smart Chicken!

Potatoes are super cheap and we have about 40 pounds still in storage from our garden last summer (yea!). You can also try making some Creamy Mac and Cheese as a yummy side dish!

So, here’s the recipe for my Homemade Chicken Nuggets and French Fries.

(My side note:  Kids may have a harder time getting used to these chicken nuggets because they are actually made of, well, chicken. Give them a try though – my kids LOVE them and cheer when I’m making them! Every adult I’ve fed them to LOVE them as well.)

5.0 from 1 reviews
Chicken Nuggets and French Fries
 
Save Print
Prep time
15 mins
Cook time
15 mins
Total time
30 mins
 
Author: Laura Coppinger
Recipe type: Main Dish
Serves: 4-6
Ingredients
  • For the Chicken Nuggets:
  • 3-4 boneless skinless chicken breasts or thighs
  • ½ cup whole wheat flour
  • Sea salt
  • ½ cup oil (I use Palm Shortening)
  • For the French Fries:
  • 6-8 medium potatoes
  • 1 cup oil - give or take (again, I use Palm Shortening)
  • Sea salt
Instructions
  1. For the Chicken Nuggets: Cut the chicken into small nugget sized pieces and place in a bowl. Stir chicken around in the flour to coat. Heat oil in skillet. Cook chicken in hot oil for about seven minutes on each side. Salt liberally while cooking.
  2. For the French Fries:
  3. Scrub potatoes well and cut into thin french fries, any length you like. Heat ½ cup oil in skillet. Place half the potatoes in the oil and cook for about 15 minutes, or until potatoes are tender, yet crispy, stirring then around occasionally. Salt well. Repeat process for remaining potatoes. (I keep the first batch warm in a 200 degree oven while I cook the second batch.)
3.5.3229

So there you have it! If I’m really feeling clever, I’ll do one of the following for the meal:

1)  Wrap a few nuggets and a few fries in parchment paper and place them in a lunch sack for each of my boys. Sometimes, I’ll even throw in a little trinket if I have them around. Then the kids feel like they are getting a kid’s meal at a restaurant! They love it!

2) Give each of the boys some coins and have them sit at the table with a menu to order from. They usually order the “special” (since that’s all Mama’s Kitchen is offering!) and have to pay for it with their coins. It’s super fun and a good lesson in restaurant behavior and money.

If I’m not feeling clever (or if I have no energy left for much except eating), I just throw a plate of the nuggets and a plate of the fries on the table and we all just dig in. Hey, that’s fun too.

Have you grabbed this Simple Ingredients for Simple Meals FREE printable yet? Get it here!

Heavenly Homemaker's Club Members: Access your homepage and all your fantastic resources here! Not a member yet? Please join us!

Pizza Night

January 5, 2008 by Laura 49 Comments

This post may contain affiliate links. For more information, please see our disclosure policy.

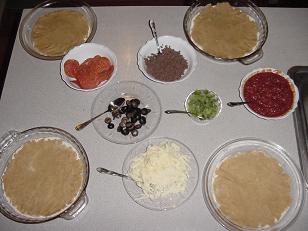
Last night we all got to make our own personal pizzas, which is always a hit around here! I was smart enough (based on past bad experiences) to have all the toppings out and ready AND the crusts already rolled out in each pan. The time I didn’t have the crusts ready was a MESS! Little boys all over my kitchen had pizza crust rolled all around my rolling pins and crust with holes in it and crust in the bowl of pizza sauce, and raw pizza crust in their mouths.

SO, I learned to have a lovely rolled out crust in each  pan with all the ingredients on the counter ready to go and THEN call the boys in to make a pizza.

pizzafixinssm.JPG

Yum

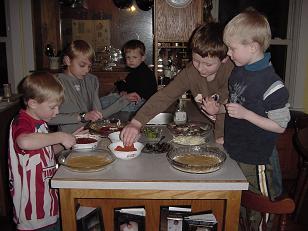
I called them all in and, count them there’s five, not four, boys in the kitchen having a blast putting their pizzas together because we had a friend over for the night.

boysmakingpizzassm.JPG

I forgot to take a picture of one of the boys’ pizzas, and do you think they really would have let me? They were TOO hungry! But, here’s a picture of mine. And just so ya know, it may look big in the picture, but it’s actually a tiny stone I got from Pampered Chef, not one of those you can bake a whole cake in.

pizzasm.JPG

Here’s the recipe if you want to give it a try. The crust is very easy and very yummy.

Homemade Personal Pizzas

Crust:

3 1/2 cups whole wheat flour

1 t. salt

1 cup plain yogurt

1 cup butter, melted

  1. Stir together flour and salt in mixing bowl.
  2. Add yogurt and melted butter. Stir well until ball of dough is formed.

Pizza toppings:

1 jar pizza sauce (I actually made my own sauce last night)

8 oz. mozzarella cheese, or white cheddar
any favorite toppings such as pepperoni, cooked hamburger or sausage, green peppers, mushrooms or olives.

  1. Preheat oven to 400 degrees.
  2. Shred cheese with grater. Set all other pizza toppings out for everyone to work with.
  3. Sprinkle flour on baking pans to cover surface.
  4. Pat dough on pan as thick as you prefer.
  5. Spoon on sauce and spread around dough.
  6. Top with cheese and favorite toppings.

Bake for 20-25 minutes until cheese is melted and turning golden brown.

This recipe is one featured in my “What to Do With the Kids in your Kitchen” ebook.

Grocery List

Heavenly Homemaker's Club Members: Access your homepage and all your fantastic resources here! Not a member yet? Please join us!
« Previous Page

Join Our Community!

 Facebook Twitter E-mail Instagram Pinterest

Popular Posts

~ Will All of the Real Moms Please Stand Up?
~ Easy! Stir-and-Pour Whole Wheat Bread
~ How to Make Gatorade
~ 31 Real Food Breakfast Ideas
~ Dear Teenage Girls...
~ When Mom Takes a Step Back
~ The Inexpensive Health Insurance We Love!
~ Let's Talk Real Food Grocery Budgets

Check out our latest posts!

  • Big Family Food and Fun: September 6-12, 2026
  • Big Family Food and Fun: August 30-September 5, 2026
  • Big Family Food and Fun: August 23-29, 2026
  • Big Family Food and Fun: August 16-22, 2026
  • Big Family Food and Fun: August 9-15, 2026
Home  ~  Simple Meals  ~  Club Membership  ~  Shop  ~  Privacy Policy  ~  Disclosure  ~ Contact

Copyright © 2026 · Beautiful Pro Theme on Genesis Framework · WordPress · Log in