Heavenly Homemakers

Encouraging women in homemaking, healthy eating and parenting

  • Home
    • About
    • FAQs
  • Recipes
    • Bread and Breakfast
    • Condiments
    • Dairy
    • Main Dishes
    • Side Dishes and Snacks
    • Desserts
    • Gluten Free
    • Instant Pot
    • Crock Pot
    • Heavenly Homemaker’s Weekly Menus
  • Homemaking
    • Real Food Sources
  • Store
  • Contact
    • Advertise
    • Disclosure
    • Privacy Policy
  • Simple Meals
  • Club Members!

The Coppinger Castle Kitchen

September 7, 2023 by Laura 10 Comments

This post may contain affiliate links. For more information, please see our disclosure policy.

Would you like to take a look around our “Coppinger Castle Kitchen” to see how we are using it for our family?

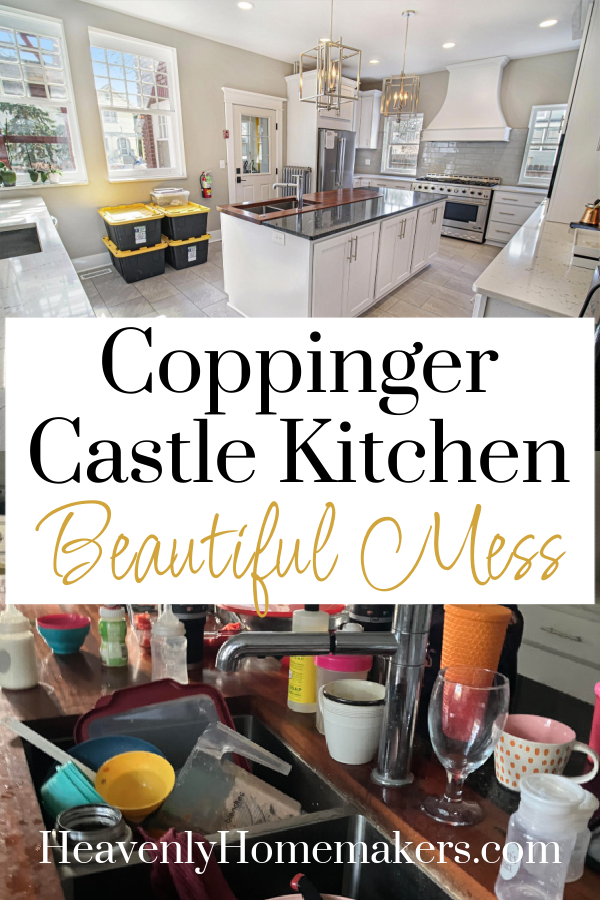
Welcome to the Coppinger Castle

First, this is why we are calling it a Castle. It’s really just a house, but it’s very large and it is God’s gift to us to meet our needs for our family.

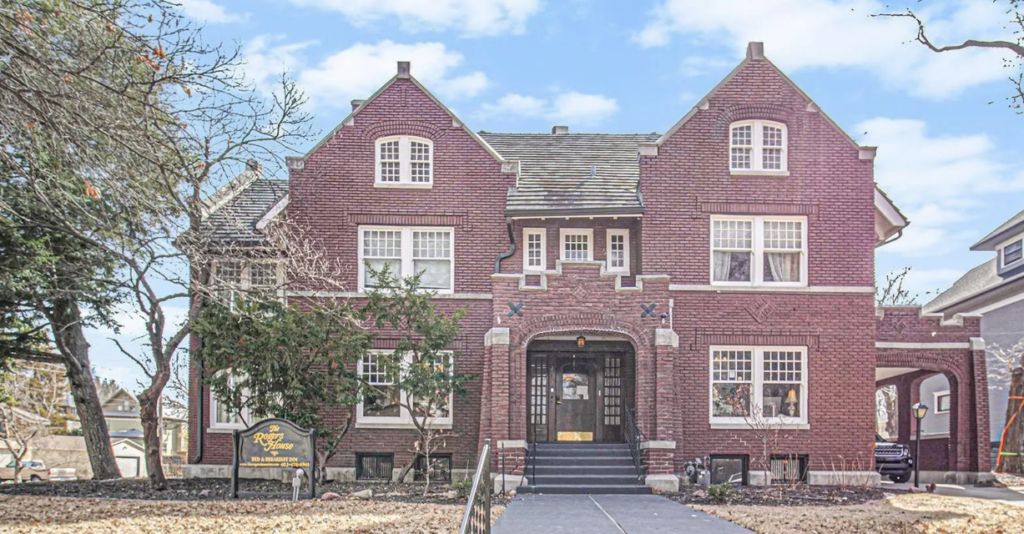
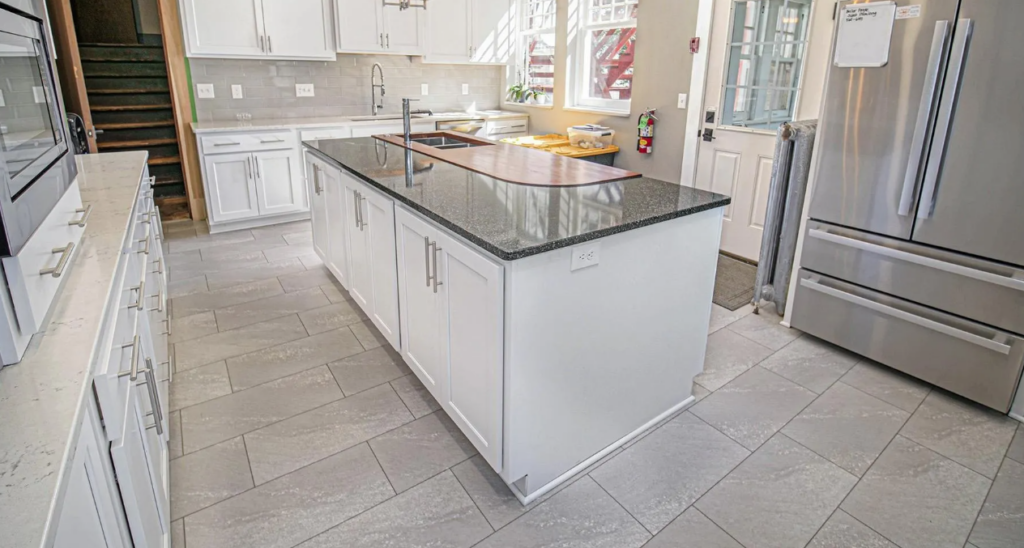
When we looked online as we were searching for a house before we moved, we were amazed by all this house offered for the price. And then we saw photos of the kitchen:

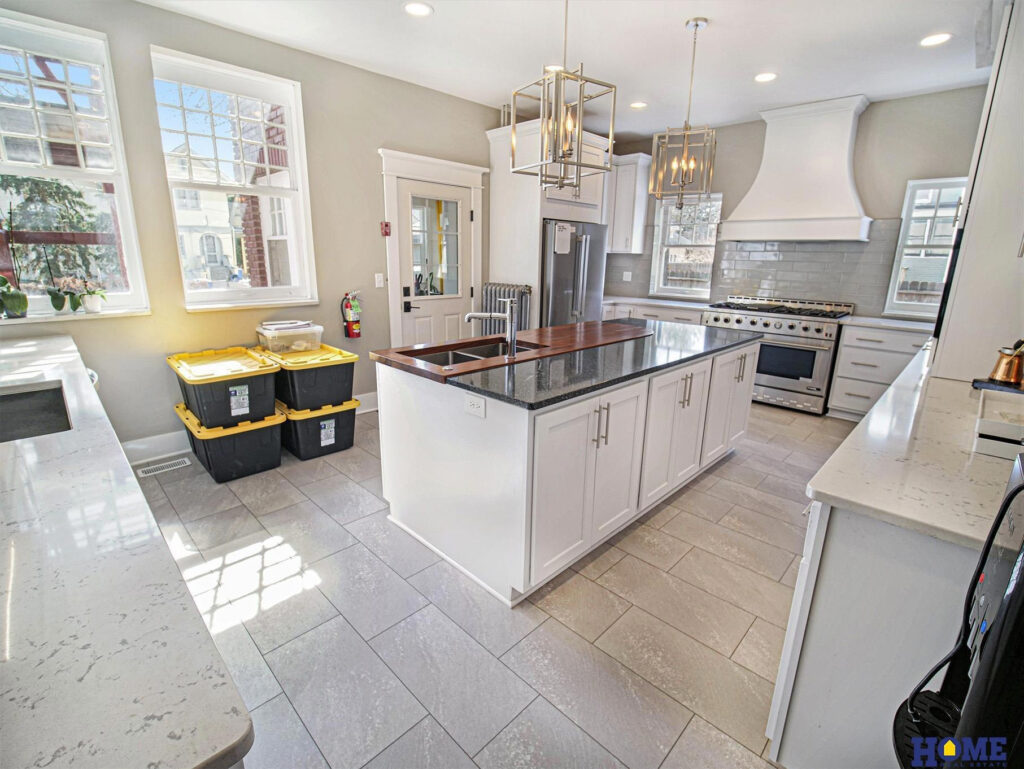
This house – and its kitchen – meet our needs and then some. Truly, we are so grateful and amazed by all God provided with this house. (By the way, most of the other rooms in our house hold onto their 1914 beauty. This kitchen was updated just a few years ago.)

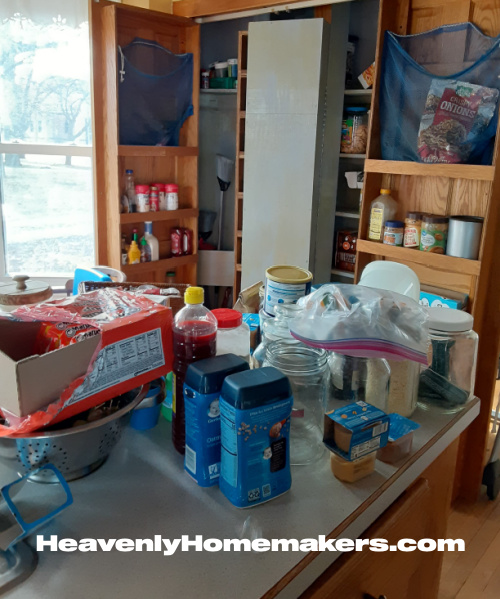
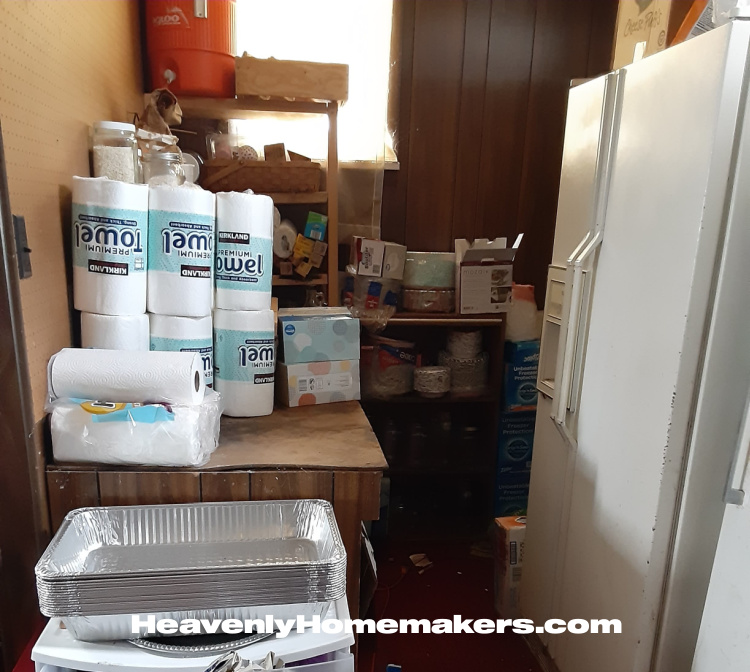
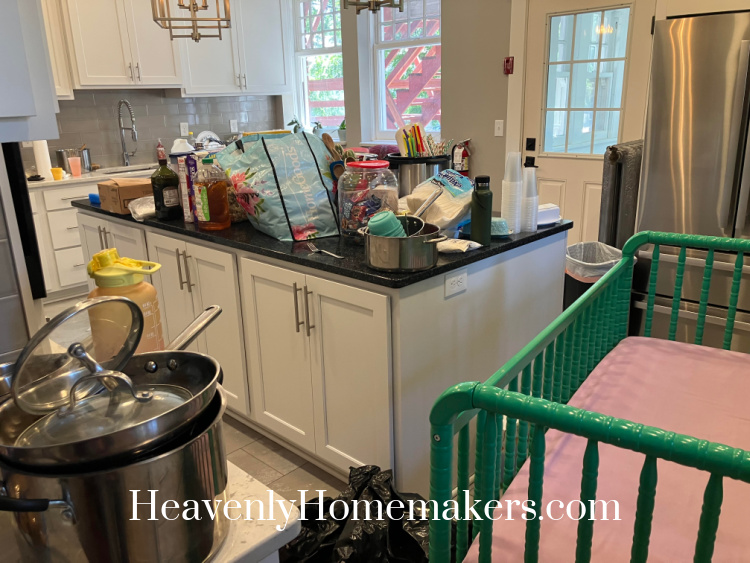
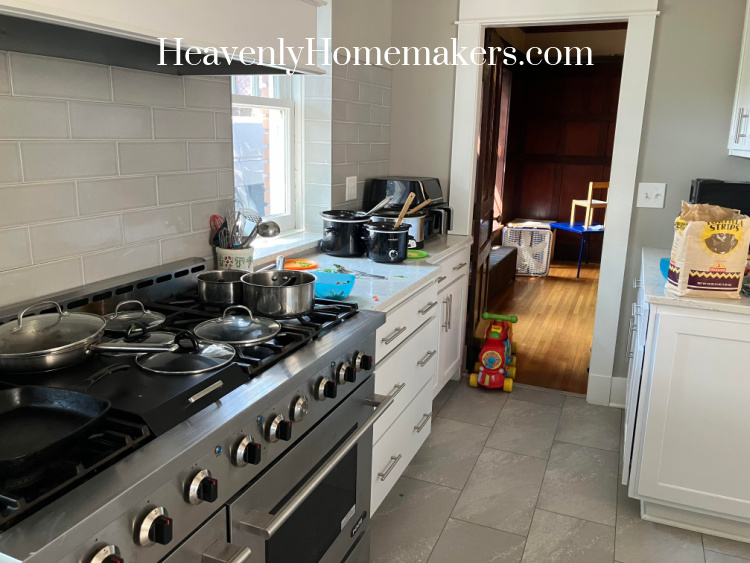
Two days after we moved in, our kitchen looked like this:

After about a week of making the kitchen a priority, we figured out where we wanted everything so that we could be efficient and make the most of this beautiful space. We got everything unpacked into its new home, and would you believe there are still some cabinets left empty?! That’s how vast this kitchen is. Amazing!

The Coppinger Castle Kitchen

We decided to organize our new kitchen in a way that best meets the needs of all of us. We need efficiency because there are so many of us and so many little ones. So first, we decided that instead of putting cups, plates, and bowls into high cabinets that the kids couldn’t reach, we would put them in drawers at their level. This way, Brayden and Kiya (and the others as they get older) can help unload the dishwasher and reach their own cups when they need a drink.

It’s worth noting that we’ve also been using lots of plastic instead of breakable dishes. This has been a lovely game changer!!! A few months ago, I bought about 20 large, sturdy plastic plates at Wal-Mart for $0.50 each. I did the same with small, kid-sized, plastic plates. Then I found large and small plastic bowls – all fun colors – all $0.50 each.

Using these frees us to let the little ones help more. These also clean up easily in the dishwasher. So we find that we use them even when we have company. We are saving a lot of money on paper plates this way!

The Dishwashers

And speaking of the dishwasher – um, dishwasher(s) – plural… Having two dishwashers in our kitchen is so beyond incredible with this many people in our home!! At any given time, you’ll see something like this in which they are both full.

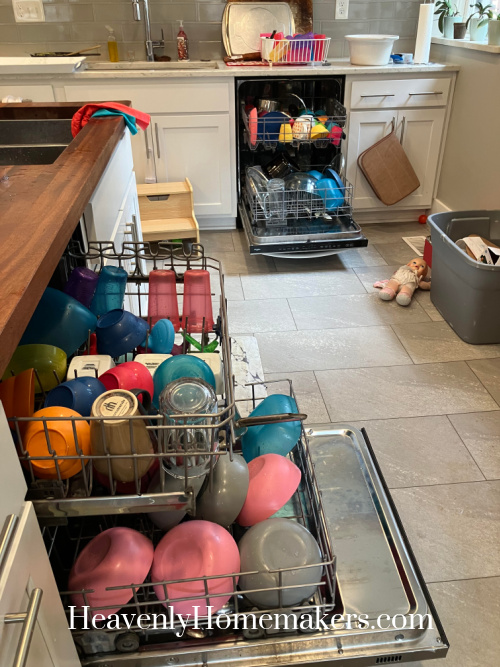
We can fill one and start to run it, then turn to the other one and begin to fill it. We can keep up with dishes so much better this way! And I can turn the unloading of the dishwashers over to Brayden and Kiya now if the timing is right (if they are home and not in school at the moment).

The Silverware

I decided to try something with our silverware, and I 100% love it. Before, when we had silverware dividers in our drawer, whoever unloaded the dishwasher had to touch every piece to put it into its proper spot. Then, because we had so much silverware, it wouldn’t stay in its place anyway. It was always a mess.

Friends, I give you my “dump all the silverware into the drawer directly from the dishwasher basket” drawer:

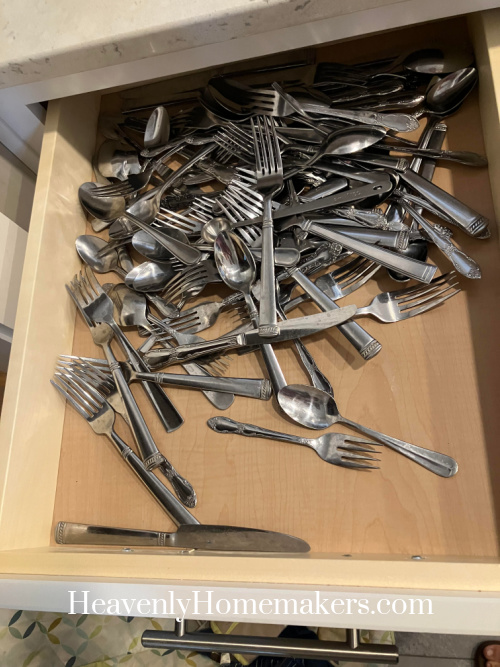
I love this so much! We grab the full, clean basket of silverware from the dishwasher and put away all the baby spoons, sharp knives, and serving spoons. Then DUMP. The rest goes into this drawer. It’s fantastic.
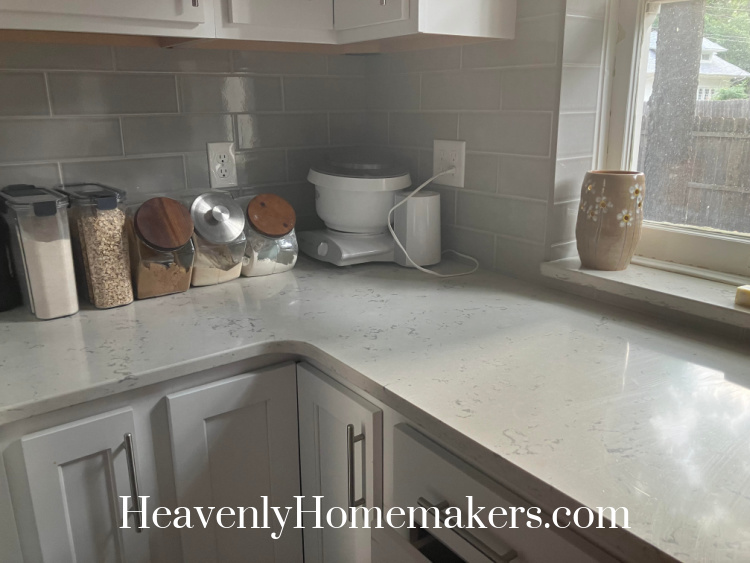
My Baking Area

This is probably my favorite section, though of course, I love all the others too. But looooook! I put all my baking items over in one corner of the kitchen – ingredients, measuring cups and spoons, baking pans – everything. This is SO EFFICIENT and makes it so very easy for me to mix up muffins, cakes, cookies, and bars.

You can see oats, flour, and sugars on the counter. The cabinet right above my mixer holds baking powder, baking soda, cocoa powder, vanilla, etc.

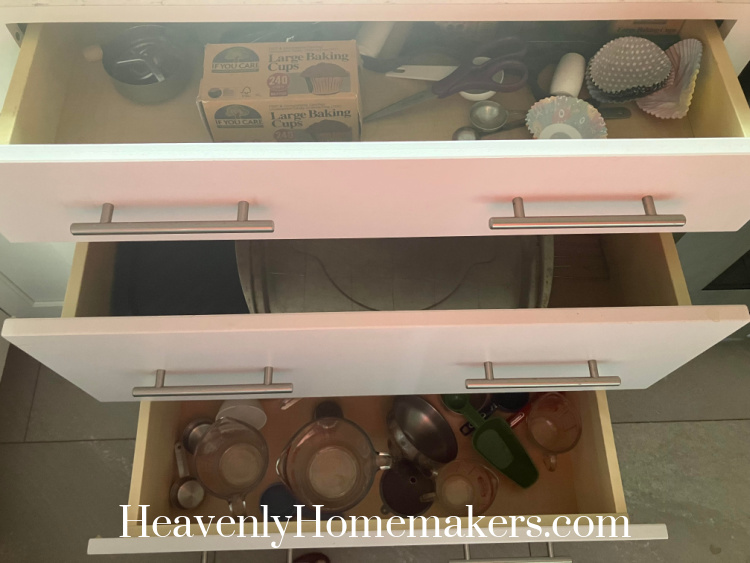
Here are the large drawers in my Baking Area. The top holds small measuring cups, muffin liners, measuring spoons, and cookie scoops. The middle drawer holds all my baking pans from muffin pans to cookie sheets. The bottom drawer contains large glass measuring cups, funnels, and big scoops.

I quickly mix up whatever I need, then I can slip it right into the oven which is directly to the right of my Baking Area.
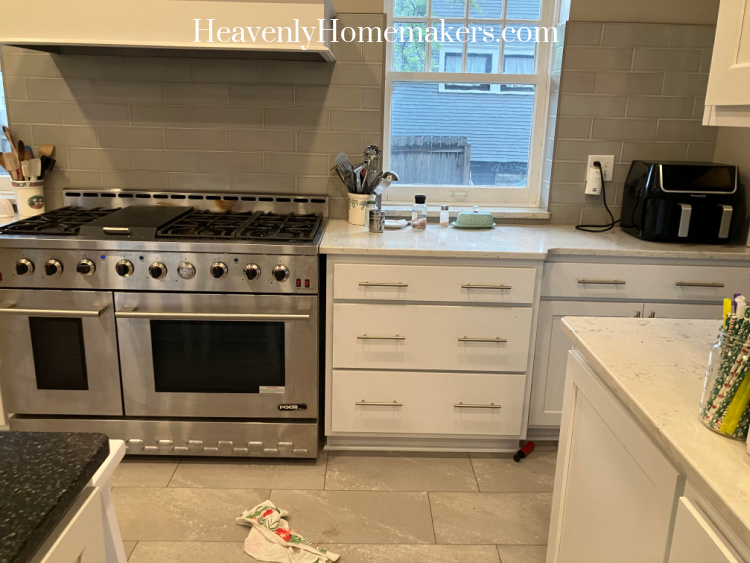
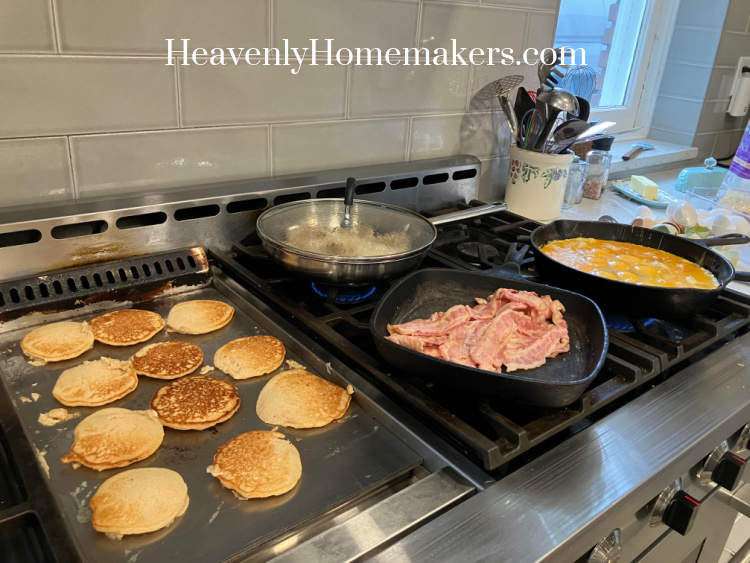
Our Cooking Area

And then on the other side of the stove/oven? That’s where I have items to meet our cooking needs. Pots, pans, lids, skillets, and utensils are in the drawers to the right of the stove. This makes everything easily accessible as we prepare our meals.
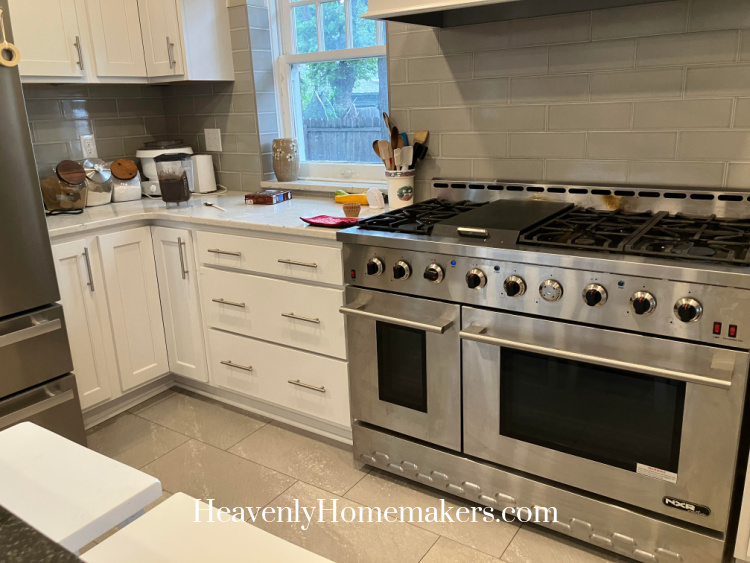
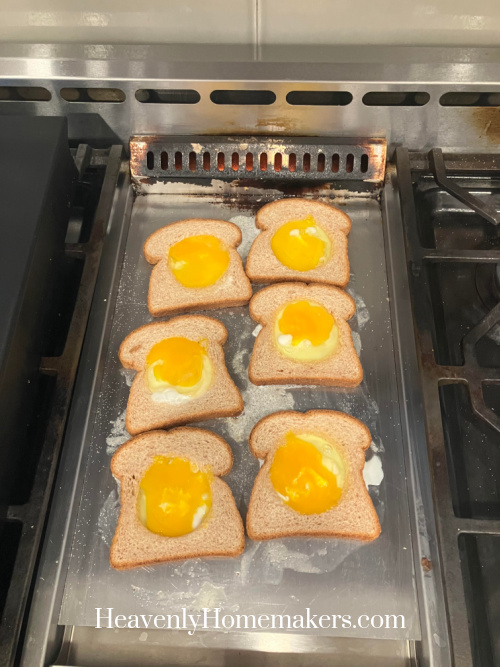
The Stove

This thing is a beast. It has six large gas burners with a griddle in between. There is one large oven with a smaller oven to the side. We are making the most of all that this offers. We love it!
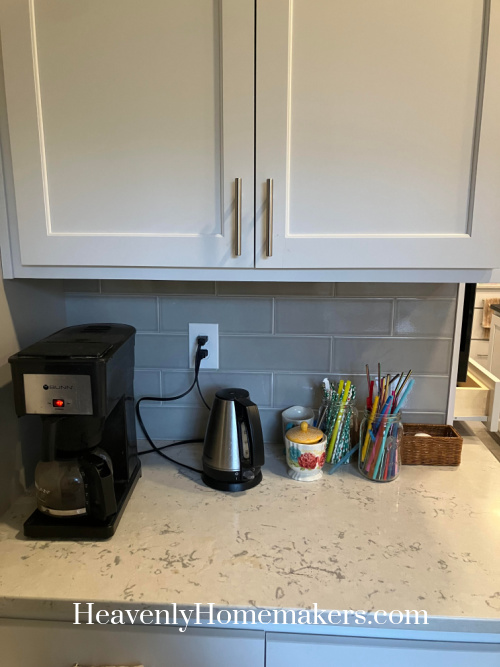
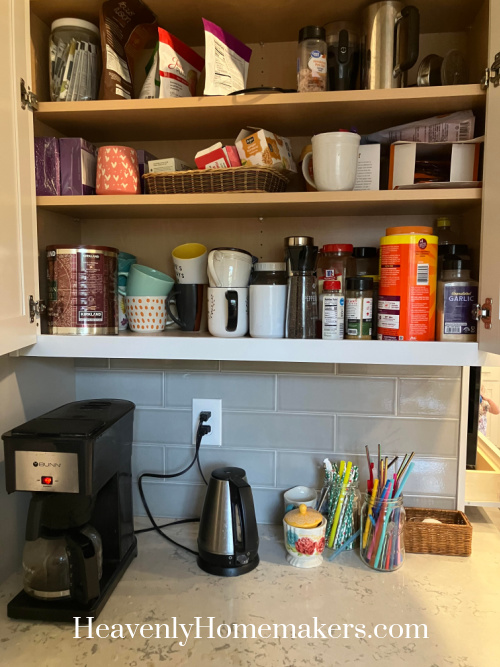
The Coffee/Tea Area

There’s a small countertop and cabinet section behind the Cooking Area that is perfect for making coffee and tea. We keep our coffee pot and electric water kettle there, plus a sugar bowl. Somehow the straws ended up there too – I guess because that’s where we do “all things drinks.”

Here’s a peek inside the cabinet where we house our coffee, tea, and mugs. There are a few random items in there too, plus spices that I can access easily when I’m cooking at the stove.
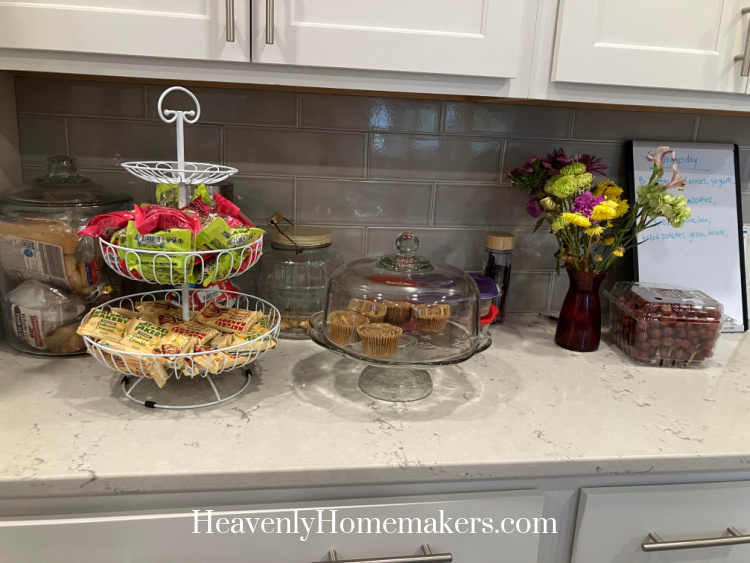
Baked Goods Area

Last but not least, we have a section in our kitchen where we put all of our ready-to-eat breads and muffins. The cookie jar is there – sometimes filled with cookies, but often filled with muffins. I don’t always have a vase of flowers there, haha. Those were from my birthday in August. (See how I started writing this post a month ago and am finally getting around to finishing it?!)

And there you have it, the Castle Kitchen.

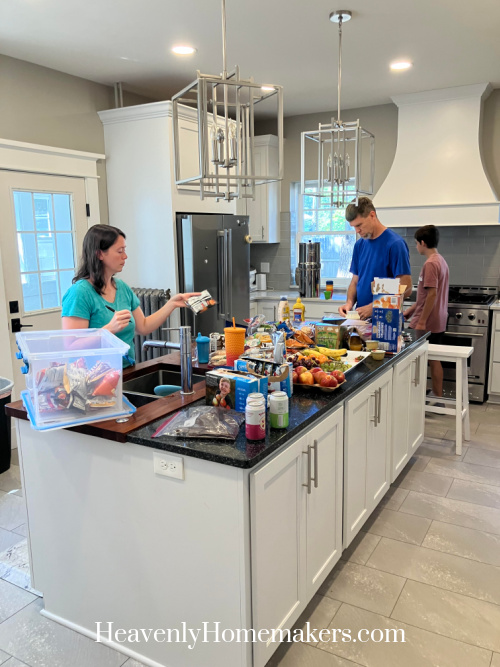
The initial photo of the sparkly kitchen really sold us on this house. But this is what we prefer our kitchen to look like:

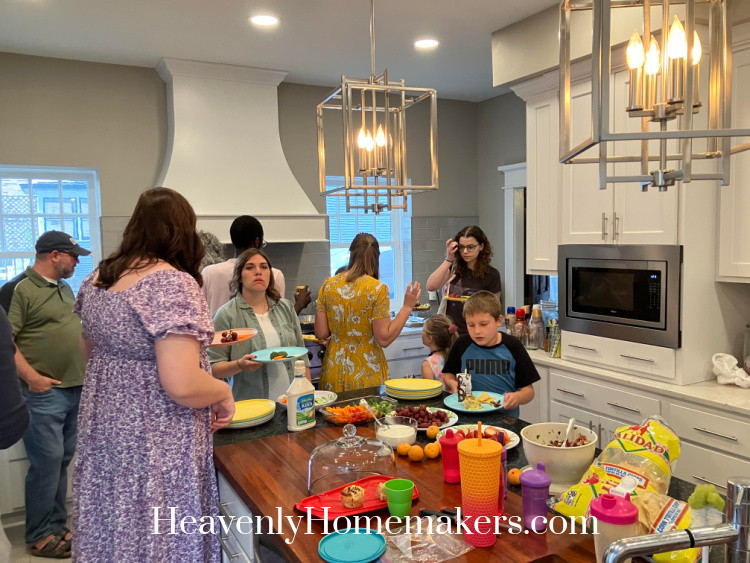
Full of food and people we love.

Heavenly Homemaker's Club Members: Access your homepage and all your fantastic resources here! Not a member yet? Please join us!

Big Family Food: I Have Got to Organize My Kitchen!

April 27, 2022 by Laura 8 Comments

This post may contain affiliate links. For more information, please see our disclosure policy.

Got to organize, got to organize, I have got to organize my kitchen…

Ok. This is starting to get nuts. I’m nuts. My food situation is nuts. Oh my goodness, I just realized I am completely out of nuts. Or am I?

What’s wrong, Laura?

Nothing’s wrong actually. :) And really, I’m kind of having fun as I face this new “food challenge.” But I also feel like I’ve been a homemaker since 1994 and all of a sudden I no longer know what I’m doing.

When we started adding kids to our tribe in 1997, I learned slowly how to fulfill our family’s food needs. I learned how to save money while our family grew. I learned how to feed my family healthy foods. Then, I learned how to feed teenage boys. All the while, I learned how to feed guests.

I learned and I grew and I had a system. I HAD A SYSTEM.

And then everything changed.

My old system doesn’t work anymore. It hasn’t for quite some time and I’ve been adapting. My Great Big Costco Experiment proves that I am over here HOLDING ONTO MY HOTDOG while trying to figure out how to grocery shop for and feed such a large family now.

I actually love this. Not sure how to feed this tribe anymore? The old ways don’t work? Need to develop a new system to make this happen efficiently?

Bring it on.

But also, what happened to all that fruit I bought yesterday? I bought this and this at Costco one Thursday:

Then just a few days later I had to order this from Walmart:

Then a few days later I needed this:

I love that we have such a large family and that we eat so much good food. I just can’t figure out how to keep up.

Is there such a thing? Can I keep up?

Or is this my new norm?

Moms with lots of kids, tell me: Am I going to need to go to the store every few days from now on? After all, the little kids are just going to turn into big kids, and then I’ll look back on my groceries of 2022 and laugh at myself.

I Have Got to Organize THIS!!

I’m not sure I have any answers yet, but I am working now to figure out a new system that works. For grocery shopping, for keeping up with so many mouths and appetites, for dealing with pickiness, and for organizing it all in my house.

So that’s what I’ve been working on lately!

One of my biggest issues (besides keeping up with grocery purchases) is figuring out how to organize all of our food efficiently. Here’s what I’m working with:

  • We have a lovely closet-like pantry and a refrigerator/freezer in our kitchen.
  • Out in a storage room, we have additional shelves for non-perishables. We also have a second fridge/freezer out there plus two deep freezers.

It’s ugly out there, but it’s storage space so that’s what matters.

I’m very blessed to have so much outside room for storage. The problems have been that:

  • We have so many little ones (3, 2, 1, and 9months) that I have very little time to organize all of the food in storage. Whenever I get home from grocery shopping we all just stuff food into whatever freezers, fridges, and pantry spaces we can find room. There is no system and has not been organized.
  • Every time I need something from our storage room (at least a dozen times every day), I have to make my way from the kitchen, through the living room, through Justus’ room, and into the outside storage room. It’s not such a big deal, except that alllllll of the little ones want to follow me out there, then they get mad that they can’t play out there, then I have to grab up babies to get them back into the house…

IT IS A MESS.

As in, the system is a mess and the storage room has been a mess.

These “before pictures” don’t make it look like a total mess, but trust me, we couldn’t even walk in this room.

With all of the cases and boxes of food and paper goods, the storage room barely had a path to walk through to get to anything we needed.

I’ve been praying about how to make it work better, and dumb as it is, I’ve shed some tears over it. I’ve just been frustrated because I need to make it better and I haven’t been sure how.

Finally one day, I just started digging into my kitchen pantry. My goal was to get everything organized in a way that put everything in my kitchen pantry that I used the most. Everything else was going out to the storage room shelves.

Here is my kitchen the day I pulled everything out to regroup.

Meanwhile, I realized that I have an area in my kitchen, just behind my sink, that was basically wasted space. (I didn’t take a before picture, so sorry! I was too focused on figuring out a new system. Just know that it was messy and unusable.)

It occurred to me that with some work, we could turn that space into something useful and helpful for storage and efficiency. But what exactly should we do to make that area usable?

Have I ever told you about my dear friend Pam?

I’m not sure what I would do without her. She comes over for a couple of hours every weekday morning – to help with the kids, to help me with appointments, to help me with housework – whatever I need, she’s there.

Pam helped me brainstorm, then she worked with me to reorganize that unusable kitchen area. Sooooooo thankful!!! Keith “helped” her unscrew a little table that was attached to the wall taking up and wasting space. She yanked stuff off the wall. The baby girls and I scrubbed the walls and floor. Then Pam helped me move a shelf from the storage room into that area in the kitchen.

During nap time, I took trip after trip from storage room to kitchen, filling the shelves, then redoing the pantry.

Here’s the new shelf we moved into the kitchen:

And here’s the reorganized pantry:

Having the additional shelf in the kitchen changes everything! It looks so much nicer than the mess that was there before, plus now I have all of my non-perishables right in my kitchen. I still have to make the trek out to our storage room for food in our extra fridge and freezers, but having everything else right where I need it is SO HELPFUL!!

And speaking of the storage room:

We can walk through it and all that’s stored in there now is all of our paper goods, woot!

There is still more organizing that can be done in our house, but having our kitchen and food more organized sure is a huge blessing!

Heavenly Homemaker's Club Members: Access your homepage and all your fantastic resources here! Not a member yet? Please join us!

The Easiest Way to Organize Your Recipes

March 8, 2018 by Laura 15 Comments

This post may contain affiliate links. For more information, please see our disclosure policy.

Today I want to hear the ways each of you has found to organize your recipes!

Favorite Recipes12

As you all know, I am a recipe nut. A full fledged recipe guru. Recipes are my thing. I love them. I collect them. I invent them. I dream about them. And often these recipes include butter. This cannot be helped.

But recently I was asked, “Laura, what’s the easiest way you’ve found to organize your recipes?” My response, “Oh, I don’t organize them. I just create them.”

You guys do not want to see my recipe cabinet. 

Yes, it’s true. I have an entire, very unorganized cabinet full of recipes. (And also a cabinet full of Pyrex. These are needed so I can bake the recipes piled up in my cabinet. And also so that I can enjoy the butter.)

butter

#iheartbutter
#andpyrex

So my recipe cabinet. It is about as messy as can be. When I need to use one of the recipes in this cabinet, I have to dig and scrounge and muddle. But never fear. While looking through my mess to find the one recipe I need, I end up finding three more I forgot were there. And you guessed it. Many of them require the use of chocolate. (Bet you thought I was going to say “Pyrex” or “butter.” Ha. Just keeping you on your toes.)

So today, my friends, we’re going to talk about the easiest way to organize recipes. It’s high time I found a system. My messy cabinet pile is no longer working. It never worked. So let’s talk about how to organize your recipes!

I’m sure you’re eager to learn about this subject from someone who clearly has no clue. Come closer, my friends. I’ll teach you everything I don’t know.

Tips for the easiest way to organize your recipes

As I’ve searched for a system, these are the new tricks that are working best for me at this point.

  • Keep all your recipes in one place. (At least having all my recipes in one cabinet was better than tucking them randomly inside school books, the silverware drawer, and behind the toaster oven.)
  • If the recipes are cut from magazines, torn from a book, or printed off the computer, slide them all safely inside a large manila folder or envelope.
  • Invest in a binder. This is my best idea so far.

I came across this DIY Recipe Binder idea online and I don’t know why I never thought of it before! It’s way too simple, and turns my messy cabinet into a nicely organized recipe haven.

binder

DIY Recipe Binder – FREE Printables!!

DIY Recipe Binder - Free Printables

I spent a little time creating these lovely binder pages to help me become more organized. I like them so much I decided to share them with you! Not only can all of our recipes be in one place, we can put them all into one organized (and fun!) binder.

How to make and use your Recipe Binder

  1. Enter your email address here and the free printables will be sent to your inbox. (This will connect you to our Heavenly Homemakers email list so I can continue to send you freebies, recipes, and deals!)
  2. Print each of the Recipe Binder pages you will use.
  3. Use a 3-hole punch to prepare them for a 3-ring binder.
  4. As you print recipes from the computer, add them to your binder within the fitting category.
  5. If you have small recipe cards, recipes cut from magazines, etc, re-write them on 8.5×11 inch paper so that they fit your binder. Or slide them into a plastic sleeve that fits in a 3-ring binder.

And that, my friends, is how we’re going to get our recipes organized once and for all!

Or at least that’s the hope. The fact that my new Recipe Binder is cute and fun offers me lots of incentive. :)

Get your FREE DIY Recipe Binder pages here.


What ways have you found to organize your recipes?

Heavenly Homemaker's Club Members: Access your homepage and all your fantastic resources here! Not a member yet? Please join us!

Join Our Community!

 Facebook Twitter E-mail Instagram Pinterest

Popular Posts

~ Will All of the Real Moms Please Stand Up?
~ Easy! Stir-and-Pour Whole Wheat Bread
~ How to Make Gatorade
~ 31 Real Food Breakfast Ideas
~ Dear Teenage Girls...
~ When Mom Takes a Step Back
~ The Inexpensive Health Insurance We Love!
~ Let's Talk Real Food Grocery Budgets

Check out our latest posts!

  • Help Your Kids Become Independent in the Kitchen!
  • Big Family Food and Fun: April 26-May 2, 2026
  • Big Family Food and Fun: April 19-25, 2026
  • Big Family Food and Fun: April 12-18, 2026
  • Big Family Food and Fun: April 5-11, 2026
Home  ~  Simple Meals  ~  Club Membership  ~  Shop  ~  Privacy Policy  ~  Disclosure  ~ Contact

Copyright © 2026 · Beautiful Pro Theme on Genesis Framework · WordPress · Log in