Heavenly Homemakers

Encouraging women in homemaking, healthy eating and parenting

  • Home
    • About
    • FAQs
  • Recipes
    • Bread and Breakfast
    • Condiments
    • Dairy
    • Main Dishes
    • Side Dishes and Snacks
    • Desserts
    • Gluten Free
    • Instant Pot
    • Crock Pot
    • Heavenly Homemaker’s Weekly Menus
  • Homemaking
    • Real Food Sources
  • Store
  • Contact
    • Advertise
    • Disclosure
    • Privacy Policy
  • Simple Meals
  • Club Members!

Pineapple Mango Smoothies (No Sugar Added – Dairy Free Option)

May 21, 2013 by Laura 15 Comments

This post may contain affiliate links which won’t change your price but will share some commission.

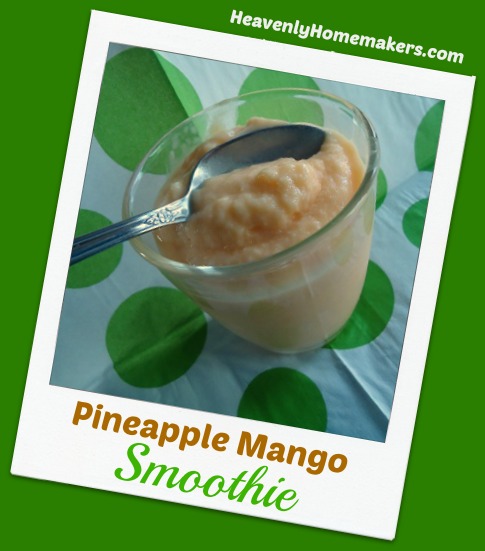
This Pineapple Mango Smoothie is more refreshing that you can imagine. Mmmm!

High Five Recipes 2

We were on our way home from Kansas City after a weekend event our boys had participated in. The event had been awesome, our boys had done great, and we were all flying high. Except for Asa (our 15 year old) and me. It appeared that the two of us were coming down with the flu. Our throats hurt, our chests burned, and we both began to get feverish. Our eyes were red and achy. Our heads pounded.

(Great story so far, eh?)

We were both a little bit hungry, although nothing really sounded good to eat. We had packed food, but all of it seemed too difficult to eat. Funny how the normally simple act of chewing takes so much energy when you’re sick. All I could think of was, “I just want a smoothie.” (Well, and “I just want my bed.” But out on the interstate, a few hours from home, that was not an option.)

Matt, bless his heart, was determined to find his feverish bride a smoothie. We finally managed to find a place that had some decent options (without too many funky, sugary ingredients). I chose a pineapple mango variety and aside from the fact that it was cold and made my chills just a little bit more miserable – I had never enjoyed a smoothie more. It was so refreshing. It was just what Asa and I needed. We slept the rest of the way home.

Asa and I are all better now. In fact, this all happened a couple of months ago. But ever since, I’ve been craving a Pineapple Mango Smoothie. I typically make my smoothies with berries – which we love. But the refreshment that comes from pineapple, mango, and orange juice all blended up in a glass? I knew I needed to recreate this treasure.

It’s not hard to make – you just need five simple ingredients. Add a little maple syrup or stevia if it’s not sweet enough for you. We think it’s sweet enough as is. Coconut milk makes it taste great and offers a dairy free option if you need it. We like it with plain, whole milk yogurt. I think I may make these every single day this summer.

pineapple_mango_smoothie_2

Pineapple Mango SmoothieYum

Pineapple Mango Smoothies (No Sugar Added - Dairy Free Option)
 
Save Print
Author: Laura
Serves: 4-6
Ingredients
  • 1½ cups frozen mango chunks
  • 1½ cups frozen pineapple chunks
  • 1 cup orange juice
  • 2 cups plain yogurt or coconut milk
  • 1 teaspoon vanilla extract
Instructions
  1. Place all ingredients into a blender or food processor together.
  2. Blend until smooth.
3.4.3177

Pineapple Mango SmoothieWhat’s your favorite fruit smoothie combination?  For the record, I don’t recommend getting the flu before trying this. It’s much more fun to eat when you can hold your head up off the pillow.

Heavenly Homemaker's Club Members: Access your homepage and all your fantastic resources here! Not a member yet? Please join us!

My New Kitchen Aid Food Processor (and a little frozen fruit drama)

April 28, 2011 by Laura 67 Comments

This post may contain affiliate links which won’t change your price but will share some commission.

Mama got a new food processor!

I seem to be a breaker of kitchen appliances. (Is breaker a word? Perhaps I’m a breakist?)

I think it’s a combination of two things:  1) I often buy cheap appliances. 2) I use my kitchen appliances constantly.

Therefore, when my previous food processor broke, we decided that instead of paying around $30 for another cheap food processor that would break in a year or less, we should save up and invest in a food processor that would last (because that would save us money in the long run!).

So, we saved. And while we were saving, I continued to use my broken food processor that still sort of worked, but if left unattended would fly off the counter and spray peanuts into the living room. The last day I used my old food processor, everyone was at the table waiting for their Mock Frozen Yogurt when all of a sudden, because I wasn’t holding the gadget with all my weight and standing on my right pinky toe just right, we had a sudden flinging of frozen berries and yogurt. The boys watched in astonishment as their Mama shrieked, the result of three frozen blueberries striking her on the forehead. The walls were covered in spattered yogurt and half the ingredients were dripping off the nearby pile of mail.

It was at that point that Matt, while gently dabbing at the blueberry stain that was running down my face, said, “Let’s get you that new food processor, what do you say?”

And so we looked around a little bit and decided on the Kitchen Aid 9-Cup Food Processor. I cringed when I first saw the price, because I’m used to buying cheap appliances. But now that I’ve got it all set up in my kitchen, I’ve decided that it was worth every penny. It’s so heavy duty that there is no comparison to the dinky things I formerly used.

Ain’t she purty? I’ve been playing…wanna see?

I spent several hours playing with her the first day she arrived. (I’m calling her a her because she’s so lovely and because there are plenty of males in our household so I can call her a her if I want to.)  As you can see, I began by making Peanut Butter. Two batches actually. The boys ate the Homemade Peanut Butter on their Whole Wheat Waffles, then I used some of it to make Peanut Butter Honey Fudge. This processor made my Homemade Peanut Butter making experience SO much easier!!!! What do you know…a food processor that actually works efficiently!

Next, I got out my cashews and dates and made some Homemade Larabars. Wow, those are fun to make and deliciously healthy for snacks!

I couldn’t resist setting the snacks up side by side and taking a picture. Oh lovely food made by my lovely new food processor. (Sorry to be gushing. I am obviously having a lot of fun playing with my new toy, can you tell?)

After I made those snacks, I got her all cleaned up and made some Mock Frozen Yogurt to go with our lunch. After all, I needed to see if I could make this treat without the drama of the previous Mock Frozen Yogurt mishap.

I’m happy to report that with my new Kitchen Aid 9-Cup Food Processor there was no blueberry violence or yogurt flinging. Nor did any peanuts shoot into the living room. All was calm in the kitchen as my new investment went to work for me.

Now there’s a story with a happy ending. :)

So, do you have a food processor? What kind do you have? Do you tend to buy cheap appliances, or do you invest in more efficient ones? Ever been a victim of frozen berry violence?

Heavenly Homemaker's Club Members: Access your homepage and all your fantastic resources here! Not a member yet? Please join us!

Five Minutes to Cultured Dairy

April 27, 2011 by Laura 43 Comments

This post may contain affiliate links which won’t change your price but will share some commission.

I’m out to prove that making your own cultured dairy products is neither intimidating nor difficult. Just yesterday, I made Buttermilk , Kefir and Sour Cream. This took me a total of five minutes. I did not break a sweat, not even when I was putting lids on jars.

Yum

I then started a batch of Yogurt . Yes, it was a big dairy day in my kitchen. Or rather, a big dairy eight minutes. Because that’s really how long it took to do all of this.

As soon as they are done culturing (which these products do all by themselves while I sleep, type, trip on legos or cut my fingernails), I’ll put them into the fridge.

Now, all of you stop thinking that you can’t make your own cultured dairy products and get started on this fun and healthy habit!! :)

Here’s a little Cultured Dairy question and answer time:

Is making your own cultured dairy products hard to do?  Did I or did I not just tell you that this isn’t hard? Okay then.

Can I use regular milk from the store to make these products?  Yep. I recommend drinking and using raw, organic, grass fed cow (or goat) milk to make these, but if that isn’t available to you, you can definitely use milk that you purchase from the store.

Do I have to trip on legos while my products are culturing?  No, in fact I recommend that you step over all legos and call your children in to pick them up before your feet get holes in them. I was just saying that to be funny, or something like that – and to prove that you don’t have to babysit your dairy products while they are culturing.

Why is there a rubber band on your sour cream jar?  I put a rubber band around my sour cream jar so that I’ll know at one quick glance into my fridge which jar is sour cream and which is regular cream. It’s quite helpful to know the difference. You’re welcome to use whatever color of rubber band you prefer. If you really think that sour cream deserves a red rubber band instead of a yellow one, knock yourself out.

What do you mean “knock yourself out”?  That is an expression that really just means “go for it”. To take that expression literally would just seem as though I were a big bully. Please, do not literally “knock yourself out”. Goodness.

Will I really have cultured dairy products in just five minutes like your title suggests?  The five minutes I was referring to was the time it takes for YOU to do any kind of work. It does take several hours for the dairy to become cultured after you’ve done your five minutes of work. Read the specific directions for each of the dairy products to know how long each item takes to become cultured. Here are the quick links:  Buttermilk , Kefir, Yogurt and Sour Cream.

Do you make your own cultured dairy products? Which ones are your favorite?

It’s here! Check out our amazing Simple Meals program!

728x90

Heavenly Homemaker's Club Members: Access your homepage and all your fantastic resources here! Not a member yet? Please join us!

Mock Frozen Yogurt

April 4, 2011 by Laura 110 Comments

This post may contain affiliate links which won’t change your price but will share some commission.

High Five Recipes 2

Yum

Can I now offer you the perfect little side dish to go with your Taco Corn Fritters? This Mock Frozen Yogurt is so very easy and really, really tasty too.

I have no idea why I felt the need to say that. It really is sort of a “duh” statement because if I didn’t feel like it was tasty, would I actually post the recipe on my blog? How would that look…”I don’t really like eating this dish, but I thought I’d post it for you anyway so you could be grossed-out along with me. Feel free to stink up your kitchen and tell your kids that the Heavenly Homemaker made you do it. Be sure to come back and share your gag stories.” I would never do that. And yet I still felt the need to point out that the recipe tastes good. Duh.

So yeah, this recipe is really tasty! You should try it sometime! Anyway…

My favorite thing about this recipe is that it works great as a side dish or snack, but is also sweet enough to be a dessert. And in case I failed to mention it, this Mock Frozen Yogurt is really quite tasty. :)

Mock Frozen Yogurt

3 cups any varieties of frozen fruit (I used blueberries, peaches and strawberries)
1 1/2 cups plain yogurt
1/4 cup grade B real maple syrup
1/2 teaspoon vanilla extract

Place frozen fruit in a food processor.

Add plain yogurt, vanilla and maple syrup.

Blend until all ingredients are well mixed. Easy as that!

Serve right away as a side dish, snack or dessert! I LOVE it when desserts are this healthy!!

And there you go. Come back for more tasty (and gluten free!) recipes all week long!

What are your favorite frozen fruits to use in treats??

Heavenly Homemaker's Club Members: Access your homepage and all your fantastic resources here! Not a member yet? Please join us!

Make Your Own Cultured Buttermilk, Yogurt and Kefir (a Giveaway!)

February 24, 2011 by Laura 61 Comments

This post may contain affiliate links which won’t change your price but will share some commission.

I love how much money it saves and how easy it is to make your own cultured dairy products! It really is as simple as putting the live culture into the milk and walking away. (Well, you do want to put the lid on first.)  Here are my posts which explain how to make buttermilk, how to make yogurt and how to make kefir. You can do this!!

Once you’ve made a batch of any or all of the above, all you have to do to make subsequent batches is to pour the tail end of the previous batch into your fresh milk and start the process all over again. It’s easy, it saves money and it is oh so healthy! These cultured dairy products are so good for your digestion. Mmm, and yummy too!

To give you a little motivation, in case you’ve been wanting to start making your own cultured dairy products…Cultures for Health is offering to give one of you a nice package of a Traditional Yogurt Starter, a package of Milk Kefir Grains and a Buttermilk Starter.  Remember, once you have the starter, as long as you keep your kefir grains alive and save the tail end of your batches of buttermilk and yogurt, you can keep making more and more batches of these delicious dairy products! 

Cultures for Health is a site I fully trust for purchasing culture starters. They know what they’re doing, they are very reasonably priced and their shipping is a flat $3.99!! This is an excellent company to work with and I love their products. By the way, they’ve got more than just dairy cultures at Cultures for Health…be sure to check out all of their products!

Okay…interested in winning this prize package of  from Cultures for Health? This giveaway is just a little bit different than our usual giveaways.  This time, to enter you need to head over to this page on the Cultures for Health site. You can sign up right there, plus receive their free ebook full of Kefir Recipes by signing up!!

I’ll draw a random winner from all entries over at Cultures for Health on Monday, February 28.

Heavenly Homemaker's Club Members: Access your homepage and all your fantastic resources here! Not a member yet? Please join us!

Make Your Own Yogurt and Cream Cheese

January 25, 2008 by Laura 271 Comments

This post may contain affiliate links which won’t change your price but will share some commission.

How to Make Homemade Yogurt

Yum

You can make your own yogurt and cream cheese, and it is not hard! You don’t have to have any fancy equipment (and when you see my pictures, you’ll believe it!). Not only will this save you money, you’ll have yogurt and cream cheese that is very good for you! Try making this yogurt, then add your own fruit, sweetener (I recommend stevia or real grade B maple syrup) and a touch of vanilla. YUM!

Here’s what you need to do to make yogurt:

1 quart of whole milk (I use unpasturized milk from a farming friend)
3/4 cup plain yogurt or this yogurt starter

Pour the yogurt into a quart jar (using a glass container is important). Heat the milk on the stove in a saucepan until it is just under 100 degrees.

yogurt1sm.JPG

Pour the milk over the yogurt in the jar and shake.

Place the jar into a cooler of hot water, cover and leave in the cooler for seven hours.

yogurt2sm.JPG

There, you just made yogurt!

Now, you can eat the yogurt as I mentioned before, or you can take your yogurt and make cream cheese (and impress the socks off of someone!).

To make cream cheese, line a strainer with a tea towel. Pour the yogurt into the tea towel.

creamcheese1sm.JPG

You need to secure the tea towel full of yogurt and hang it for 7-10 hours (I usually do this overnight) so that the whey can drip off. I’m sure there must be a more impressive way to hang your yogurt, but what we’ve come up with works just fine!

creamcheese2sm.JPG
Here are the secrets to my effective cream cheese-hanging-whey-dripping process (I know, you’re on the edge of your chair!):

I fold over the top of the tea towel and hold it closed with a couple of rubber bands. Then, I use several more rubber bands to attach a long wooden spoon to the wadded up tea towel. Then, I use a rope to dangle the tea towel from a cabinet door. And, of course I leave a bowl under the whole contraption so that whey doesn’t drip all over the floor (because then, my process would not be nearly as cute).

Then, after you can tell that the whey has all separated from the cream cheese (you can tell it’s finished if it isn’t dripping any more), then you pull the whole thing down and scrape the cream cheese into a jar. And that’s it. It is so simple.

creamcheese3sm.JPG

Sure, you can tell people that it took you hours and hours to make yogurt and cream cheese (because technically it DID take hours to make), but the part you actually played in it took about 10 minutes.

Heavenly Homemaker's Club Members: Access your homepage and all your fantastic resources here! Not a member yet? Please join us!

Join Our Community!

 Facebook Twitter RSS E-mail Instagram Pinterest

Popular Posts

~ Will All of the Real Moms Please Stand Up?
~ Easy! Stir-and-Pour Whole Wheat Bread
~ How to Make Gatorade
~ 31 Real Food Breakfast Ideas
~ Dear Teenage Girls...
~ When Mom Takes a Step Back
~ The Inexpensive Health Insurance We Love!
~ Let's Talk Real Food Grocery Budgets

Check out our latest posts!

  • Easy Meatballs with Sweet Sauce (Freezer Friendly)
  • How to Make Uncrustables
  • The Easiest No-Bake Cheescake
  • Do I Still Buy Organic Food?
  • How I Shop and Budget for Our Large Family
Home  ~  Simple Meals  ~  Club Membership  ~  Shop  ~  Privacy Policy  ~  Disclosure  ~ Contact

Copyright © 2023 · Beautiful Pro Theme on Genesis Framework · WordPress · Log in