Heavenly Homemakers

Encouraging women in homemaking, healthy eating and parenting

  • Home
    • About
    • FAQs
  • Recipes
    • Bread and Breakfast
    • Condiments
    • Dairy
    • Main Dishes
    • Side Dishes and Snacks
    • Desserts
    • Gluten Free
    • Instant Pot
    • Crock Pot
    • Heavenly Homemaker’s Weekly Menus
  • Homemaking
    • Real Food Sources
  • Store
  • Contact
    • Advertise
    • Disclosure
    • Privacy Policy
  • Simple Meals
  • Club Members!

Is Our Family Still Homeschooling?

July 14, 2021 by Laura Leave a Comment

This post may contain affiliate links. For more information, please see our disclosure policy.

Today seems like a good day to update you on whether or not our family is still homeschooling…

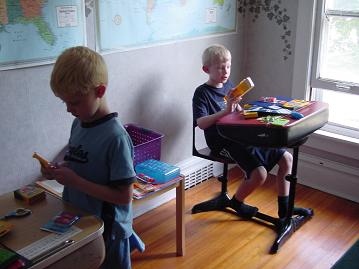
I’m not great at keeping you updated on life, and for good reason. Here’s a small scrapbook to show you what takes up our time and energy these days:


And oh yeah. Asa’s getting married next month!

When people ask me, “How many kids do you have?” I absurdly stutter around for several awkward seconds like a weird-y weirdo because I honestly don’t know how to answer.

The breakdown:

One of our foster babes went back to live with bio family, but he’s still with us three days a week and we still claim him as our own. We’re adding a daughter-in-law to the mix, and she totally counts as ours. Justus also has a serious girlfriend; she is our girl too. We currently have four foster daughters. We have four bio sons and two adopted sons. And there are at least 2o young adults/college students that come and go from our house regularly for food, laundry, and hugs.

So Laura. How many kids do you have?

I don’t know. 27?? 32?? Eighty-twelve??

Currently, though, I’ll go ahead and land on the number ten. That’s the official number as of today, which includes our bios, adopted, and fosters. Today, we have ten kids.

I guess I still haven’t answered the original question though:

Is our family still homeschooling?

The short answer is yes, we are. But also no, we aren’t. Eh?

I’ll explain.

About a year ago, I shared how God led us to put Brayden (our now 7 year old) in public school to help meet his many academic and emotional needs. Head here to read more about that.

How’s it going?

So, so well. Our public school in York is fantastic and is offering Brayden so much of what he needs right now. We are so thankful!

He will start 2nd grade there in August, and his 5yo sister (our foster daughter) will join him as a kindergartener.

Meanwhile, our 16yo Malachi will be doing a hybrid-type of schooling for his junior year. He’ll take two classes at our public school, which will allow him to participate in extra-curricular activities (soccer, tennis, show choir, one-act, and whatever else our extraverted child decides to become a part of). He’ll also take three college classes per semester this year to knock out as many dual credits as possible. And he’ll finish up any regular homeschool credits he needs to meet high school graduation requirements.

So technically, we’re still homeschooling Malachi. But really, we’re just guiding him through college courses and equipping him for adulthood.

But here’s the big truth about homeschooling:

We. Are. All. Doing. It.

Or at least we’d better all be doing it. Officially or unofficially.

No matter who is the main academic educator of your children, as parents, we are all and should be still teaching our kids. We teach them about loving and following Jesus first. We teach them about loving and serving people. We teach them to work hard and share and care and take turns. We teach them to put others before themselves. We teach them to be responsible and for goodness sake please take your dishes to the sink and your trash to the trash can.

And what else? We turn everything into a teaching opportunity. (Ok, not everything. Sometimes by the end of the day, I cop out with “good question I don’t know go brush your teeth” because my mouth is so very tired of talking to so many people all day long. I admit it.)

But (in the morning after I’ve had coffee) when my kids ask a question about the bug they find on the leaf outside, we have fun finding the answer (because there’s an app for that). When we scoop flour into the mixer, we count out loud. When we realize that every kid got to crack three eggs to help with breakfast, we add them all up to see how many that makes altogether.

I read books to them. They read books to me. They read books to themselves. We talk. We explore. We memorize scripture. We talk about budgets, money management, running a business, running a home, running for office, running a race, running for cover (tornado drill, anyone?).

You don’t have to be a homeschooler to homeschool.

Does this make sense? Call it whatever you want, but know the truth: You are your child’s teacher. You are their best teacher. Their first teacher. Their most important teacher – no matter who teaches them to sound out words or explains the finer points of Algebra (and shall we all now take a moment of silence to appreciate these professionals who pour into our kids so that we can avoid having to hurt our brains trying to understand exponential equations?).

Will our family ever homeschool again?

Again, we are still homeschooling. We’re just currently sending our younger kids to public school, and we are so grateful for this wonderful option for our family right now. ;)

But will we ever homeschool again in the traditional sense?

We’re waiting for God to tell us that answer.

Right now, we feel 100% confident that public school is necessary for our kids and also for me with all I am juggling (four kids ages two and under, court, caseworkers, baby’s medical needs and physical therapy, etc).

However, I also sometimes look at our shelf of books with longing. I look back at our years of homeschooling memories and I miss it.


But I also remember how much work it is. It was good, meaningful, worthwhile work, but it was hard work. And I don’t miss that right now. I don’t have the bandwidth to do it well right now. Our kids need more academically than I am able to give.

We are confident that God will make our kids’ educational needs clear in the coming months and years. So while we’re gratefully turning their academics over to the public school teachers, we’re still teaching them at home as God leads us to.

We hope you are too. No matter what educational route you’ve chosen for your family. :)

Heavenly Homemaker's Club Members: Access your homepage and all your fantastic resources here! Not a member yet? Please join us!

How to Make Biscuits With One Hand

July 4, 2021 by Laura Leave a Comment

This post may contain affiliate links. For more information, please see our disclosure policy.

Why do we need to know how to make biscuits with one hand?

Maybe we don’t. Maybe we actually have two hands to work with in the kitchen. Either way, don’t we all love learning ways to make our kitchen work easier? So whether you have one hand or two to work with in the kitchen, you’ll love how this easy biscuit-making-method cuts out a few steps and makes for a less messy biscuit-making process!

Me? I’m almost always working one-handed in the kitchen these days:

Yum

Who actually even cares about biscuits? I’ll just nibble on her neck all day long. Those pudgy hands!! HER CHEEKS.

But back to the biscuits.

I find that I can do quite a bit with just one hand, but using a rolling pin isn’t one of them. So one morning, I decided to attempt biscuits while holding the baby, and would you believe, it worked? From start to finish!

How did I make biscuits with one hand?

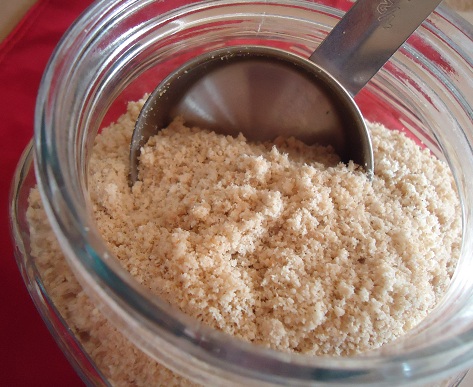
  1. I scooped some Quick Mix into a bowl. I poured in some milk. I didn’t measure. I stirred, kind of. I made dough. The baby used her gummy grin to affirm my abilities.

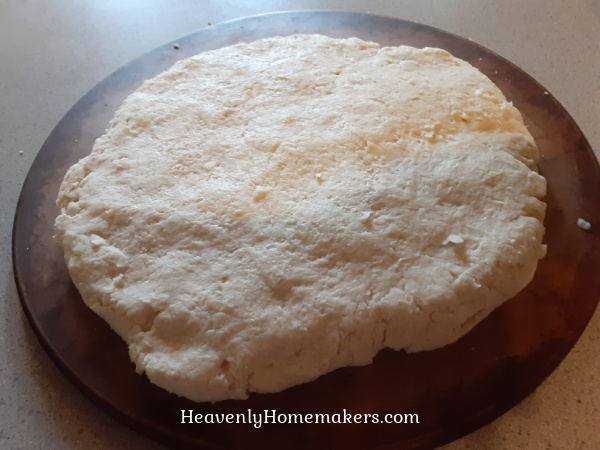
2. I put the dough directly onto my baking stone. I pressed it down with my one free hand. It looked like this:

Good grief. Are we rolling our eyes together about the fact that while I made biscuits with one hand, I also continued to wash said hand so I could take pictures with my phone of the biscuit-making process? I guess I just really wanted you to see how easy this is.

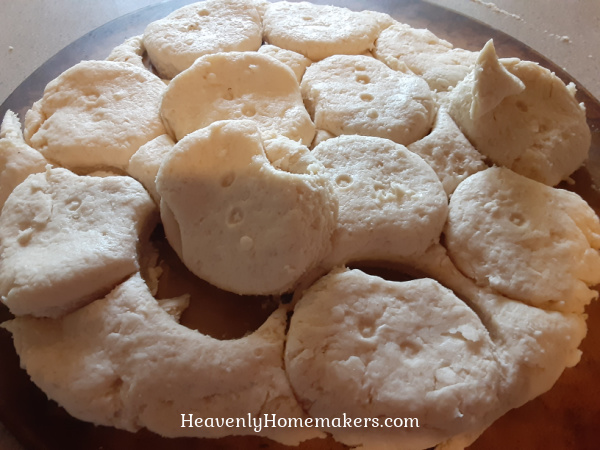
3. I dug my biscuit cutter out of the back of my catch-all drawer. I used it to make the ugliest-shaped biscuits you’ve ever seen. The baby was still impressed.

4. I grabbed up the excess dough and rolled it into two balls, then pushed them down onto the baking stone.

5. I baked the biscuits. They turned out incredible and delicious.

6. We ate them with butter and honey and jelly and gravy. We were all so happy because it had been over a year since I’d last made biscuits.

This gravy recipe is coming soon!

No matter if you have one hand or two while working in the kitchen:

Skip rolling your dough onto the counter before cutting your biscuits!

Simply press your dough onto your baking pan. Then cut your biscuits on your baking pan.

It saves a step. It saves a mess. Why have I not thought of this before?

Recipes you need so you can make biscuits with one hand:

  1. Quick Mix
  2. Quick Mix Biscuits
Heavenly Homemaker's Club Members: Access your homepage and all your fantastic resources here! Not a member yet? Please join us!

How to Make Fruit Teas Like McAlister’s

June 30, 2021 by Laura Leave a Comment

This post may contain affiliate links. For more information, please see our disclosure policy.

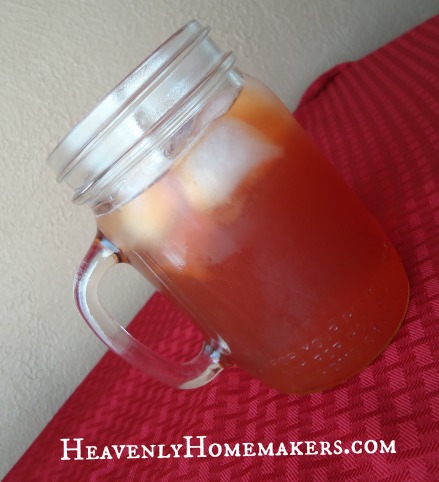
Do you like McAlister’s fruit teas? Sweet or unsweet? Yum! So delicious and fun! Want to save a lot of money and make them at home?

It’s hard for me to spend money on a special drink from a restaurant or coffee shop. If I’m going to justify it, I have to be traveling or working (borrowing the internet at a coffee shop).

Yeah, I should probably loosen up a little. Maybe stop overthinking how much tea or coffee I could make at home for the cost of one purchased restaurant drink. Maybe.

Conversation in my head: This cup of coffee just cost me $4.50?? I could make many, many, many pots of coffee for that price at home. POTS. Not just cups. I can’t believe I just paid that much for one cup. Mmmm, that’s good. Well, it better be good for $4.50…

Don’t ask me about buying ice cream for the family while on vacation. For the cost of one Blizzard, we can buy a nice-sized container of ice cream at the store to feed our entire family a treat. Oy. I am such a barrel of fun, am I not?

Well anyway. Hooray for splurging on fun treats while out and about. But when you’re at home, what if you could make your own fun and fruity teas?

A few years ago, someone introduced us to McAlister’s tea and we all fell in love. Also: we all got about 20 free refills while we sat there eating because we wanted to be sure we got our money’s worth. Like parents, like kids, I guess. Therefore we all had to stop and pee 20 times during the remainder of our trip. Worth. It. Good memories.

Now you can have fun at home with these teas. Make them sweet. Make them unsweet. Either way, they are a great treat and perfectly refreshing in the summertime!

How to Make Fruit Teas Like McAlister’sYum

  • How to Make Peach Sweet (or Unsweet) Tea
  • How to Make Mango Sweet (or Unsweet) Tea
  • How to Make Raspberry Sweet (or Unsweet) Tea
Heavenly Homemaker's Club Members: Access your homepage and all your fantastic resources here! Not a member yet? Please join us!

Grilled Pizza Tortillas – a 10 Minute Meal!

June 27, 2021 by Laura Leave a Comment

This post may contain affiliate links. For more information, please see our disclosure policy.

I shared a similar idea a few years ago, and it’s good enough that I’m bringing it back! Not sure what to make for dinner? Have everyone build Pizza Tortillas. Then throw them on the grill!

Yum

This isn’t even a recipe. This is all too easy. You can look at the picture and know exactly what to do because it is self-explanatory.

Laura answers the hard questions about making Grilled Pizza Tortillas below:

  • What is the base of this Grilled Pizza Tortilla you speak of? That would be a…tortilla.
  • How many tortillas should we use? However many your family can eat.
  • What should I put on top of my Grilled Pizza Tortilla? Whatever you want. I suggest pizza toppings. Those make the best kind of pizzas.
  • How much of the toppings should I use? As much or as little as you like.
  • What kind of cheese should I use? What kind of cheese do you like? {Laura answers a question with a question}
  • Where do I cook Grilled Pizza Tortillas? On the grill.
  • How long do I cook Grilled Pizza Tortillas? Until they are done.
  • Sauce or no sauce? Now that’s a good question. I mean, they were all good questions. 

But about the sauce…

I skip the sauce on these Grilled Pizza Tortillas. I think they cook better and taste better when they are sauce-less, with the cheese directly on the tortilla, then toppings on top of the cheese. But THEN. After you cook them, you can dip them in pizza sauce as you’re eating. Perfection!

So now you know all about making Grilled Pizza Tortillas. Your family will love this!

Want more super fast food ideas for this summer?

  • Fast No-Brainer Stir-Fry
  • 5-Minute Crock Pot Chicken
  • Grilled Burgers with this Easy Tasty Topping
  • Simple Honey-Glazed Pork Tenderloin
Heavenly Homemaker's Club Members: Access your homepage and all your fantastic resources here! Not a member yet? Please join us!

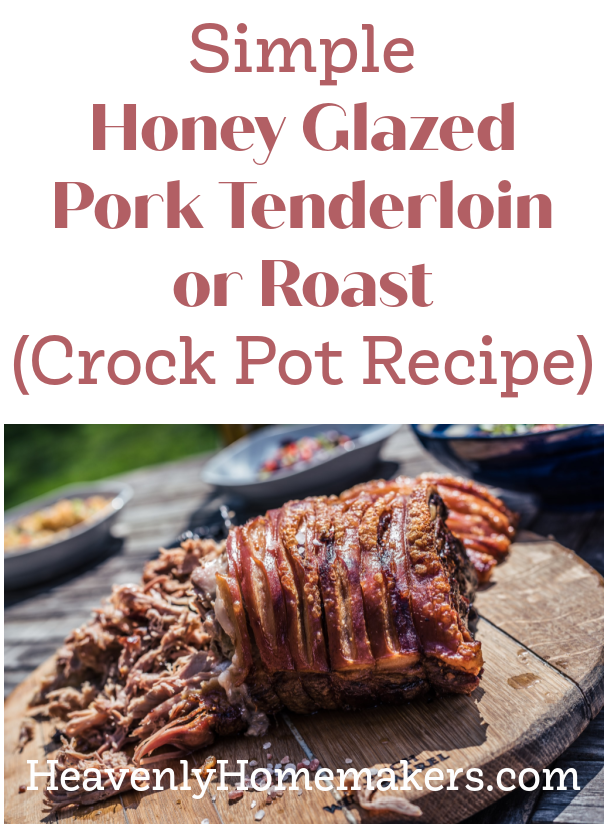
Simple Honey Glazed Pork Tenderloin or Roast (Crock Pot Recipe)

June 20, 2021 by Laura Leave a Comment

This post may contain affiliate links. For more information, please see our disclosure policy.

Here we are with another super fast meal for summertime! This Simple Honey Glazed Pork Tenderloin will wow everyone!

Yum

There’s something about the combination of flavors poured over this pork tenderloin (or pork roast) that makes it so very good. It slow cooks all day, so that makes the meat extra juicy and the flavor extra amazing. Simply put a Pork Tenderloin in your crockpot (these are inexpensive, by the way!), stir together a few ingredients to pour over the top of the meat, turn on your crockpot, and walk away!

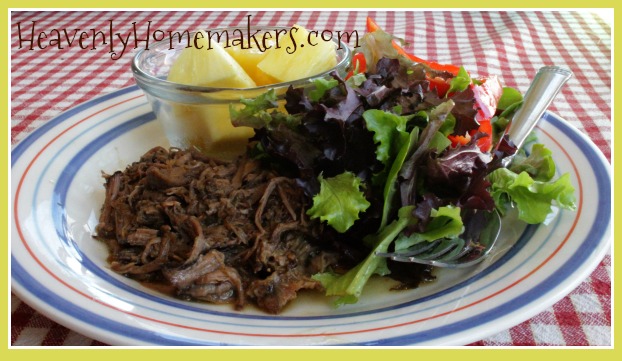
What’s great about a meal like this is that well, a Pork Tenderloin or Pork Roast just feels like a special meal. You can serve it with:

  • a salad
  • a steamed veggie
  • and some fresh fruit

and your meal will be amazing!! But you will have worked very little to pull it off.

Meals like this are my favorite. Or have you figured that out about me by now? :)

Tip for choosing a cut of pork:

  • Check for meat mark-downs! Our local grocery store often has a high quality brand of pork marked down when it’s getting close to the “freeze-by” date. When I see these, I grab them! They are usually between $2-3/pound at this point, making for some very affordable and delicious meat options for our freezer!
  • Pork Tenderloin, Pork Butt (he-he-he, Pork Butt…I’m in middle school), and Pork Roast are my favorites. They turn out tender and juicy every time with this recipe!

Simple Honey Glazed Pork Tenderloin or Roast (Crock Pot Recipe)

Simple Honey Glazed Pork Tenderloin (Crock Pot Recipe)
 
Save Print
Author: Laura
Serves: 4-6 servings
Ingredients
  • 2 pounds Pork tenderloin
  • ½ teaspoon sea salt
  • ¼ teaspoon black pepper
  • 2 teaspoons garlic powder
  • ¼ cup honey
  • ¼ cup balsamic vinegar
  • ½ cup water
  • 2 Tablespoons soy sauce
Instructions
  1. Place the pork tenderloin in the crock pot.
  2. In a small bowl, whisk together the remaining ingredients.
  3. Pour the mixture over the pork tenderloin.
  4. Cook on low for 6-8 hours or until pork is tender and falling apart.
3.5.3251

I hope the recent meal ideas I’ve shared recently have been helpful to you this summer as you figure out what to feed your family when it’s too hot to care about cooking. I’ll keep the recipes coming!

What I’ve shared so far:

  • Fast No-Brainer Stir-Fry
  • 5-Minute Crock Pot Chicken
  • Grilled Burgers with this Easy Tasty Topping
Heavenly Homemaker's Club Members: Access your homepage and all your fantastic resources here! Not a member yet? Please join us!

Easy, Tasty Burger Topping!

June 16, 2021 by Laura Leave a Comment

This post may contain affiliate links. For more information, please see our disclosure policy.

Need a tasty burger topping? This turns a regular burger into something special!

Right now I’ve been sharing some super-fast meals for us to put together this summer when we don’t feel like cooking. So far: Fast No-Brainer Stir-Fry and 5-Minute Crock Pot Chicken

Now I’m going to share about making grilled burgers, which isn’t a new idea, of course. But, this can become a go-to quick meal that turns into something special!

This sauce!!!!! I can’t get over how much it changes our burgers. Sooooooo good! This has turned into a favorite, which means I fall back on grilled burgers about once every week now.

Give this a try and see if your family doesn’t feel like you’re feeding them something extra special too!

Easy, Tasty Burger ToppingYum

Easy, Tasty Burger Topping!
 
Save Print
Author: Laura
Serves: 6-8 servings
Ingredients
  • 1 cup mayonnaise
  • 3 Tablespoons ketchup
  • 1 teaspoon mustard (any will do - honey mustard is extra fun!)
  • 2 teaspoons Worcestershire sauce
  • 1 teaspoon onion powder
  • 1 teaspoon garlic powder
  • Sea salt and pepper to taste
Instructions
  1. Whisk all ingredients together until well combined.
  2. Store in a covered bowl or a squeeze bottle, refrigerate for at least an hour before serving.
3.5.3251

While we’re talking burgers:

Do you have an Air-Fryer?

Matt and the kids got me one like this a couple of years ago for Christmas. Man, we love that thing! On a night we grill burgers, we’ll throw french fries into our Air Fryer and we feel like we’ve paid $12/plate at a restaurant. SO GOOD. And for the record, we’ve paid around $1.50/plate. Such good food for such a low cost!

I’d love to hear about your Air Fryer experiences.

And burger toppings! What are your favorites?

Heavenly Homemaker's Club Members: Access your homepage and all your fantastic resources here! Not a member yet? Please join us!

Fast No-Brainer Stir-Fry!

June 13, 2021 by Laura Leave a Comment

This post may contain affiliate links. For more information, please see our disclosure policy.

Don’t feel like cooking? Here’s how to make Fast No-Brainer Stir-Fry!

Yum

I promised you meal ideas for the hot summer days when you just can’t find inspiration to cook.

Did you try our 5-Minute Crock Pot Chicken yet? It truly only takes 5-minutes of effort to make. Perfect for this summer (or next winter, obviously).

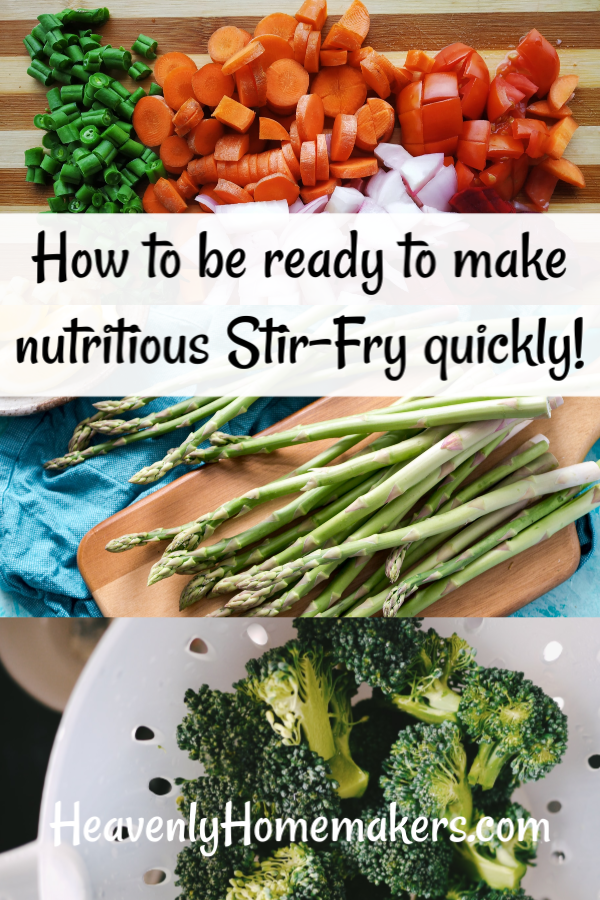
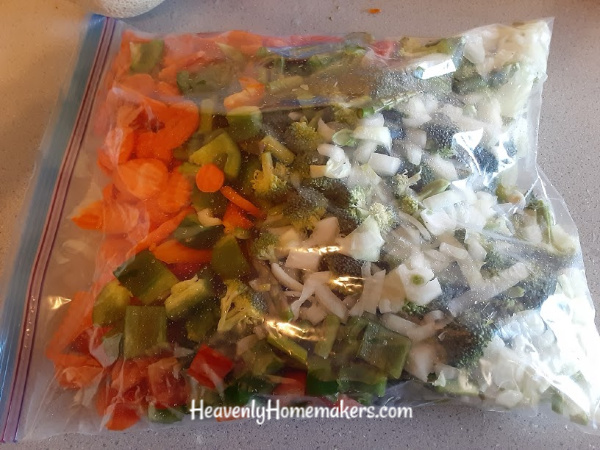
And now, I encourage you to spend a few minutes putting together some Stir-Fry Packets so that you can quickly make stir fry on a busy evening.

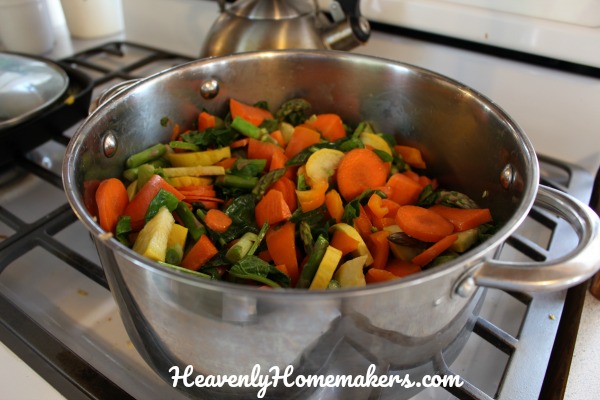
It looks something like this:

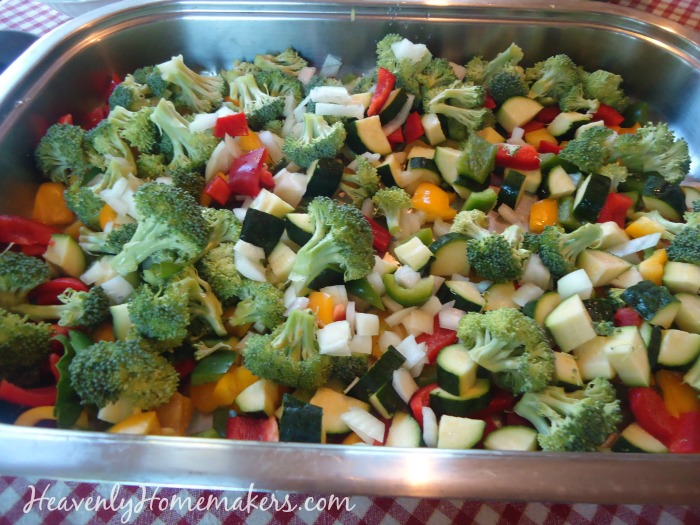
  1. Gather Veggies.
  2. Rinse Veggies.
  3. Chop Veggies
  4. Baggie Up the Veggies.
  5. Freeze the Veggies.
  6. Pull Out the Veggies on an “I Don’t Wanna Cook” Day

Oh, and while you’re at it, make several baggies at once. It only makes sense!

Having baggies of chopped veggies like this truly has been a life-saver for me. It makes for very quick meals, and does it go without saying that these meals are full of veggies? What a perk!

My favorite ways to use Stir-Fry Veggies are:

  • Stirred into cooked spaghetti noodles like this.
  • Stirred into Stick-of-Butter-Rice.

With gardens in full swing right now, it’s a smart idea to chop and freeze excess garden veggies anyway.

  • Carrots
  • Zucchini
  • Summer Squash
  • Asparagus
  • Sweet Peppers
  • Onions
  • Green Beans
  • Any of your favorites!

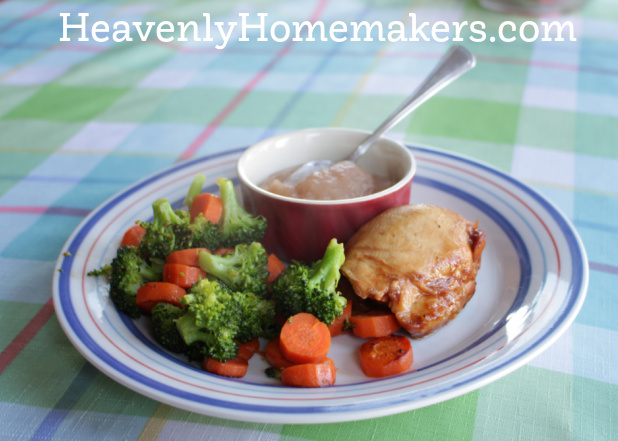
Use these veggies for a side dish!

Here’s another idea: Use these stir-fried veggies as a side dish with this 5-Minute Crock Pot Chicken. Or with any meat that you might throw on the grill.

What are your favorite Stir-Fry Veggies? Have you put together Veggie Packets for your freezer like this?

Heavenly Homemaker's Club Members: Access your homepage and all your fantastic resources here! Not a member yet? Please join us!

5-Minute Crock Pot Chicken

June 9, 2021 by Laura Leave a Comment

This post may contain affiliate links. For more information, please see our disclosure policy.

Can you really make 5-Minute Crock Pot Chicken in only 5 minutes? Try it and see! Maybe you can make it in only 4 minutes? :)

Meals like this are my very favorite:

  1. Throw chicken in a crockpot.
  2. Dump something on top of the chicken.
  3. Turn on the crockpot and come back at dinner time.

Add a simple vegetable, a salad, some fruit, and your meal is complete. It’s so easy and delicious and perfect for summertime right?

That’s why I’m going to share several days worth of 5-Minute recipes in the coming days! I’m always looking for quick meals in the summertime that don’t heat up the house. As much as I love to cook, I don’t enjoy it as much in the summer. So if we can have meals that both:

  • Take very little prep time and
  • Don’t heat up the house

We love it, right?!

Right.

So subscribe if you haven’t already so that you don’t miss any of these 5-Minute recipes!!! And now for our first one:

5-Minute Crock Pot ChickenYum

5-Minute Crock Pot Chicken
 
Save Print
Author: Laura
Serves: 4-6 servings
Ingredients
  • 4-6 boneless chicken thighs or breasts
  • 2 cups Italian dressing
  • ½ cup grated parmesan cheese
Instructions
  1. Place chicken pieces in a crock pot.
  2. Pour Italian dressing over the chicken.
  3. Sprinkle cheese over the top.
  4. Cook on low for 8 hours.
3.5.3251

I try to keep Homemade Italian Salad Dressing on hand if I can, which works great in this recipe! But any Italian dressing will work. So open a bottle and pour it on!

More 5-Minute Recipes coming. Stand by!

Heavenly Homemaker's Club Members: Access your homepage and all your fantastic resources here! Not a member yet? Please join us!

Easy Orange Julius

June 2, 2021 by Laura 3 Comments

This post may contain affiliate links. For more information, please see our disclosure policy.

This Easy Orange Julius is a perfectly refreshing summer treat!

You guys. I totally cheat now when making so many of our meals and snacks. I only make whatever is the easiest and fastest because there are people to love and we just wanna play outside.

I’ve made Orange Julius for our family for years and years. But this little “cheater” idea came about after a local church had offered a food distribution to our community. They had several boxes leftover at the end of the day, and since we have so many kids, they thought of us. How kind and fun! They piled five boxes of food onto our porch, and we were super grateful!

Some of the items included in the box? Vanilla Yogurt, Milk, and Oranges

Does that sound like a delicious Orange Julius to you? Indeed it does. Brayden thought so too. :)

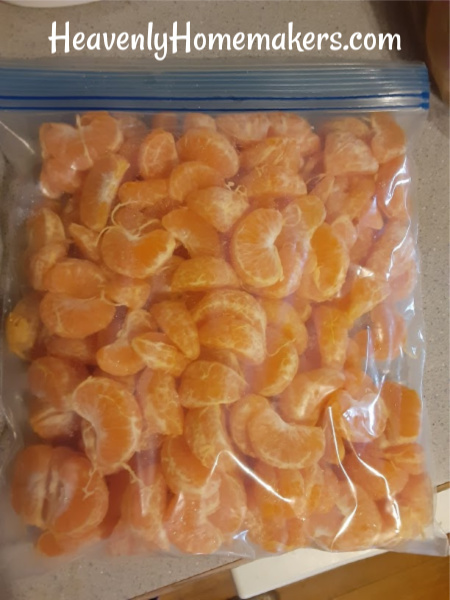
With a huge pile of oranges rolling off of our countertops, we started with an “Orange Peeling Party.” Our kitchen smelled citrus-y good, and soon we had several bags of these frozen orange slices:

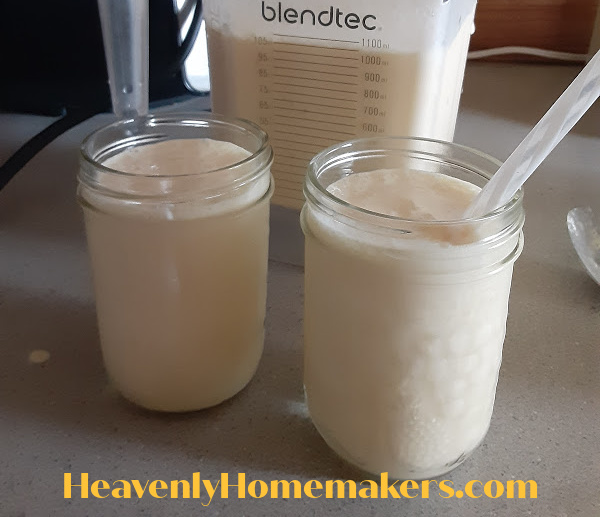
Then, I took those frozen oranges and blended them up with the vanilla yogurt and some milk. Easy Orange Julius perfection!

So, if you find yourself with an abundance of oranges, freeze them like this. Then blend them up with yogurt and milk and grab yourself a straw!

Easy Orange JuliusYum

Easy Orange Julius
 
Save Print
Author: Laura
Serves: 6 cups
Ingredients
  • 2-3 cups frozen orange slices
  • 2 cups vanilla yogurt
  • 2 cups milk
Instructions
  1. Blend the three ingredients together until smooth.
  2. Serve right away!
3.5.3251

Don’t want the added sugar in the yogurt? I usually don’t either, but hey, it was free food! You can make this treat with plain yogurt and honey or maple syrup if you want to cut down on the sugar content. This will be just as delicious and even better for ya!

Heavenly Homemaker's Club Members: Access your homepage and all your fantastic resources here! Not a member yet? Please join us!

Easy Homemade Chocolate Milk

May 30, 2021 by Laura 4 Comments

This post may contain affiliate links. For more information, please see our disclosure policy.

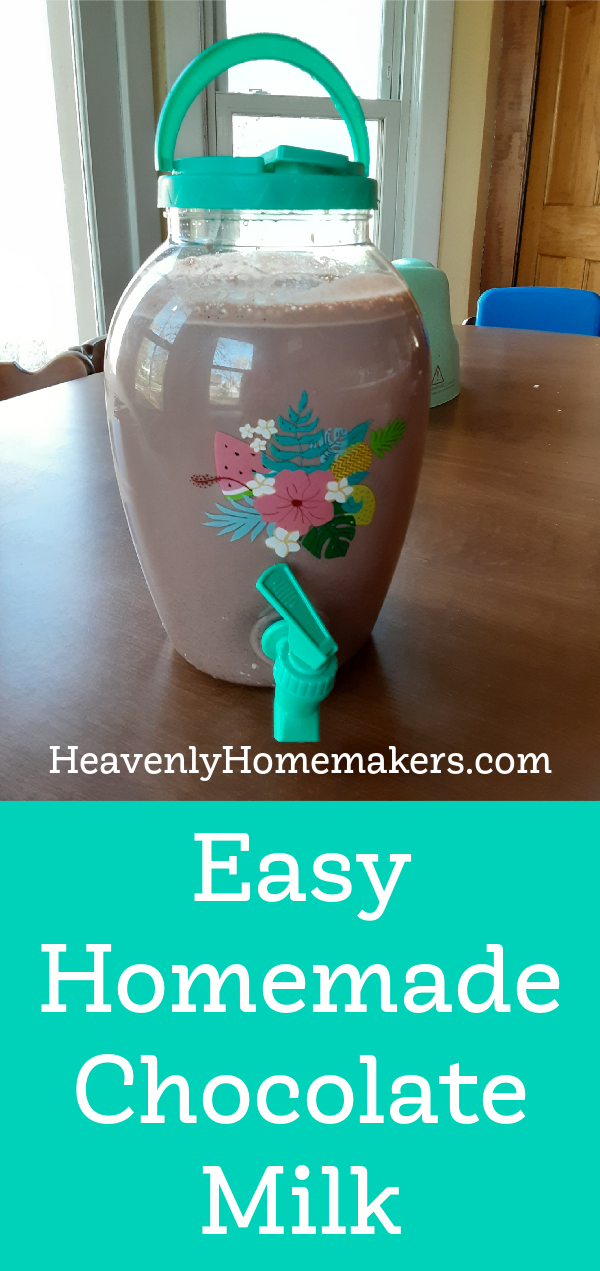
It really is easy to make Homemade Chocolate Milk! And it tastes better than any store-bought chocolate milk you can find. What a treat!

Recently, someone gave us 5 gallons of milk. FIVE! I mean, we have a big family, but it’s still hard to get through five gallons of milk before it goes bad.

I had fun figuring out ways to use up the milk. Pudding ranked high on the list:

  • Vanilla Pudding
  • Butterscotch Pudding
  • Tapioca Pudding
  • Peanut Butter Pudding
  • Chocolate Pudding

Mac and Cheese is also a great way to use up milk, especially this amazing recipe. And then, making Chocolate Milk as a special treat always makes my family happy!

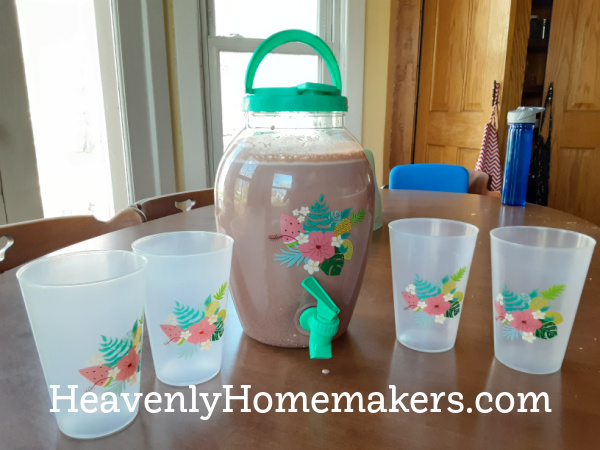
I don’t love for us to drink much sugar. So I made this Easy Chocolate Milk to share with college students when they came over so that the gallon of fun could be spread throughout many of us, not just our family. :)

Ready for the recipe? Keep this one in your back pocket for a fun treat to serve guests on a hot day!

Easy Homemade Chocolate MilkYum

5.0 from 1 reviews
Easy Homemade Chocolate Milk
 
Save Print
Author: Laura
Serves: 1 gallon +
Ingredients
  • 1 cup brown sugar
  • ½ cup unsweetened cocoa powder
  • ½ cup water
  • 1 gallon milk
Instructions
  1. In a large pot, mix together sugar, cocoa, and water.
  2. Cook on low heat until the sugar is dissolved and the mixture is well combined.
  3. Turn off the heat.
  4. Stir in the milk with a whisk until the chocolate is evening mixed throughout.
  5. Pour chocolate milk into a gallon-sized serving jar.
  6. Chill for at least two hours before serving.
3.5.3251

Try this and let me know what you think? Best Chocolate Milk you’ve ever had? That’s what many of our guests tell me when they try this. :)

Heavenly Homemaker's Club Members: Access your homepage and all your fantastic resources here! Not a member yet? Please join us!
« Previous Page
Next Page »

Join Our Community!

 Facebook Twitter E-mail Instagram Pinterest

Popular Posts

~ Will All of the Real Moms Please Stand Up?
~ Easy! Stir-and-Pour Whole Wheat Bread
~ How to Make Gatorade
~ 31 Real Food Breakfast Ideas
~ Dear Teenage Girls...
~ When Mom Takes a Step Back
~ The Inexpensive Health Insurance We Love!
~ Let's Talk Real Food Grocery Budgets

Check out our latest posts!

  • Big Family Food and Fun: October 25-31, 2026
  • Big Family Food and Fun: October 18-24, 2026
  • Big Family Food and Fun: October 11-17, 2026
  • Big Family Food and Fun: October 4-10, 2026
  • Big Family Food and Fun: September 27-October 3, 2026
Home  ~  Simple Meals  ~  Club Membership  ~  Shop  ~  Privacy Policy  ~  Disclosure  ~ Contact

Copyright © 2026 · Beautiful Pro Theme on Genesis Framework · WordPress · Log in