Heavenly Homemakers

Encouraging women in homemaking, healthy eating and parenting

  • Home
    • About
    • FAQs
  • Recipes
    • Bread and Breakfast
    • Condiments
    • Dairy
    • Main Dishes
    • Side Dishes and Snacks
    • Desserts
    • Gluten Free
    • Instant Pot
    • Crock Pot
    • Heavenly Homemaker’s Weekly Menus
  • Homemaking
    • Real Food Sources
  • Store
  • Contact
    • Advertise
    • Disclosure
    • Privacy Policy
  • Simple Meals
  • Club Members!

30 Real Food Money Saving Tips

January 22, 2018 by Laura 2 Comments

This post may contain affiliate links. For more information, please see our disclosure policy.

I couldn’t have done it without you. I asked what YOUR best real food money saving tips might be, and oh did you come through!

It was so fun to put all of our heads together and put together this great (FREE!) resource full of Real Food Money Saving Tips! There truly are many great ways to save money on real food groceries!

groceries august17

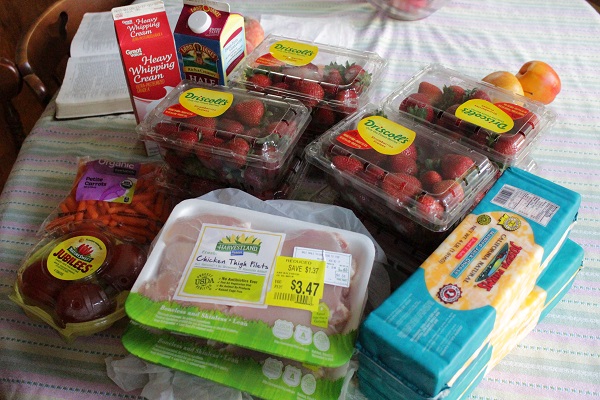
I love it when high quality meat is marked down!

Sure, I know some great ways I’ve learned to save money on real food through the years. But so many of you have different experiences and ideas from what I’ve learned. Putting so many of your tips together into this little booklet means we all get just that much smarter! (Just when we thought we knew everything about buying apples…)

Real Food Money Saving TipsYum

Ready to get started? You’ll find all 30 tips detailed in this absolutely FREE resource. Here are some of my favorites:

  1. Crystal: I only have a family of 3, but because of prices of grass fed beef and organic chicken, I only use half a pound when I make spaghetti or a casserole and I use 1 chicken breast when I make a noodle dish or casserole that calls for chicken. I’m always using less meat than called for as a way to stretch it. That way I can afford higher quality meat. It works for us!
  2. Nicole: Last year I switched around how I menu planned instead of finding recipes then going shopping for those ingredients I now hit the produce & meat area buying what’s on sale (and good quality!) then I come home and find recipes that contain those items. Now I don’t feel obligated to buy the higher non sale item because of the time I already have invested in menu planning.
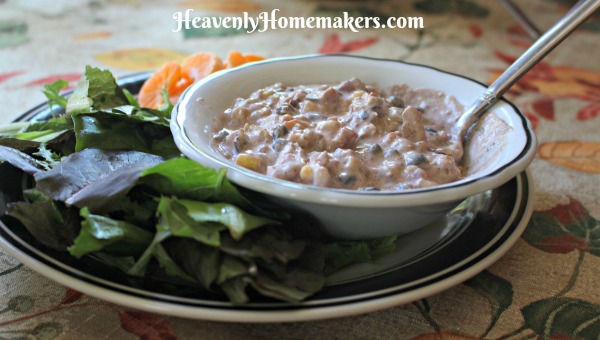
  3. Melody: We have meatless Mondays, tuna recipes for Tuesdays, and I “shop” my pantry and fridge/freezer first, then the on-line ads, and make my menu plan from that. I make out my grocery list for just the items I will need to make the items on my menu. We also use less meat than a recipe calls for and add beans to stretch out the meat in meals like tacos or casseroles.
  4. Susan: My best money saving advice is the skip fancy recipes that require you to buy ingredients you don’t have on hand or use often. I often leave out or substitute a fancy ingredient for a more economical or practical ingredient. I can’t be a 5 star cook on my budget and some days I wish I had fresh herbs or a fancy vinegar, but running out to buy them for 1 recipe isn’t the best use of my funds. I have been sticking to simple real food recipes with basic cost effective ingredients. I make menus based on my own pantry and sale items. Also, I use leftovers for casseroles or soups (freezing them if I am not using them right away). Leftover or stale bread is used to make croutons.
  5. Christy: Twice a year we clean out the pantry and freezer. We buy only milk, eggs and bread until we are down to almost nothing in the pantry. The meals get interesting, but it is great for the budget and can be as healthy as what you originally put in there.
  6. Mary Beth E: Right now–and tomorrow– I am waiting for UPS and/or FedEx to drop off packages of grocery staple items I buy in bulk. Because I cook whole foods at home, this will cover all our bread, rolls, tortillas, rice, pies, cakes, spices, seasonings, and much more, even toilet paper. I will place another order about mid-year. When I see almost any recipe, I have on hand the basics. When I go to the grocery store–every other week–I mainly buy fresh or frozen produce, eggs, and dairy. Buying in bulk and thinking of your budget in terms of a year rather than a week, really saves a lot of money.
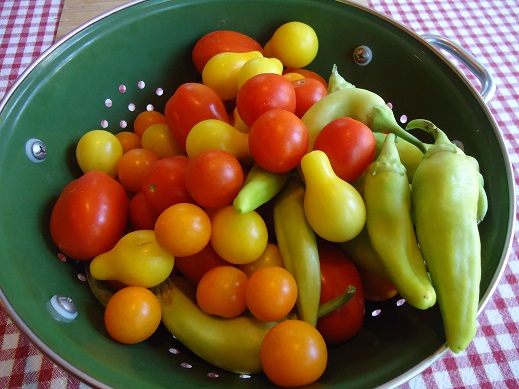
  7. Birdie: Garden and can, however you are able. A small plot in your yard, partner with others on a shared plots, help a neighbor with a plot, encourage your apartment/duplex owner to allow some of you to garden in the yard (check bylaws), talk to the college in your area to see if they would be interested in allowing community gardens. Even create a raised bed so you can sit and garden from a chair or wheel chair if you are not as mobile. Container garden on a balcony or deck (remember to water often).If you can’t garden, buy meat, fruits and vegetables in super sales, can, freeze, and dehydrate. Approach a few farmers and see if you can have shares in their live stock. Participate in butcher time and you may receive a great deal on meat. If you can get your hands on garden herbs and spices from others, dry and add lots of flavor to your cooking.

  8. Nedrda: One way I save money on quality meat is to partner with my sister and mom to buy a grass-fed/pasture raised cow or hog. We can buy those meats at $4.00 a pound and then split the meat between the three of us. We also do this for the bulk coconut oil through Tropical Traditions and other items through Azure Standard and Amazon. By doing this, I do not have to come up with total amount myself to buy the beef/pork/oil and I can enjoy the quality for a great price. It also helps with storage issues to split the order!
  9. Crissi: For most of our grains, frozen fruits, some fresh fruits, and odds and ends we use Azure Standard. We’ve purchased foods from them for well over a year now, I’d highly recommend them. They have excellent customer service.
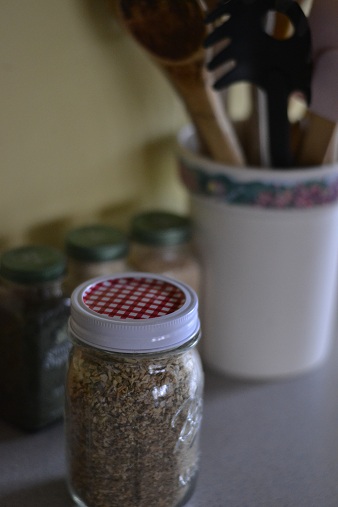
  10. Cassondra: One thing I do when I run out of something like a spice or condiment or anything else is look online to see if I can make it from scratch with items here at home. For example, I make our taco seasoning but was out of chili powder…so I went online and found a recipe for chili powder, had all the ingredients for it and it turned out great. So now I have one more from scratch recipe on hand.

Want to read all 30 Real Food Money Saving Tips?

We’ve compiled them all into this simple-to-read FREE eBook!

30 Real Food Money Saving Tips

This great little book is full of tips I compiled when I asked you, “What are your best tips for saving money on real food?” Since we’ve been talking about Simple Meals on a Simple Budget this month, I thought it would be fun to remind you about this great free download. I truly loved compiling these tips and learned great new ideas to try as I work to save money while feeding my family well!

How to get 30 Real Food Money Saving Tips

Enter your email address here, confirm that you would like to receive this information, and the freebie will land in your inbox! Easy as that!

Bonus Freebie:

When you sign up to get the free 30 Real Food Money Saving Tips eBooklet, you’ll also get this free Heavenly Homemaker’s Top 10 Money Saving Recipes eBooklet! Don’t you love getting free books to help you learn more about saving money? It’s like we’re getting free grocery money! :)

Top 10 Money Saving Recipes

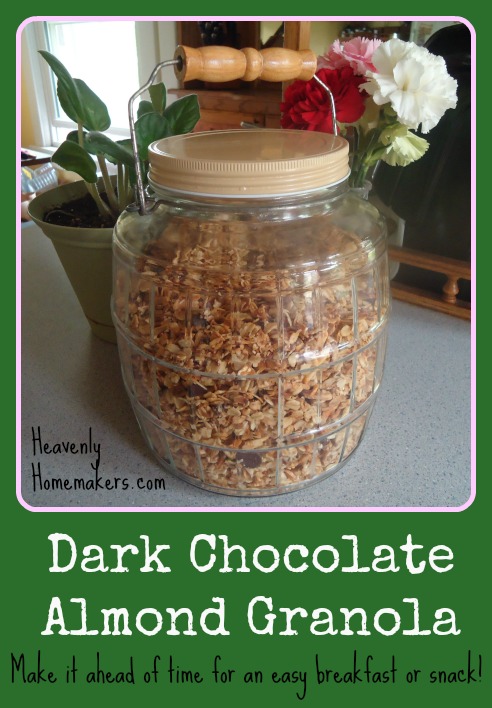
Want a sneak peek inside the 10 Money Saving Recipes eBook?? Here’s one of our favorites!

Dark Chocolate Almond Granola

(This recipe cuts the cost from $2.00/serving with store-bought granola to only $0.50/serving. Yep. The store-bought version really is that expensive!)

Dark Chocolate Almond Granola
 
Save Print
Author: Laura
Serves: 10-12
Ingredients
  • 4 cups rolled oats
  • ¾ cup shredded, unsweetened coconut
  • 1 cup slivered almonds
  • ¾ cup honey
  • ¾ cup coconut oil
  • ½ cup dark chocolate chips or chunks
Instructions
  1. In a small saucepan, melt coconut oil and honey together.
  2. Stir oats, shredded coconut, and slivered almonds together in a large bowl.
  3. Drizzle on the honey/coconut oil mixture and stir well.
  4. Pour mixture onto a large, parchment paper-lined baking sheet (or two 9x13 inch dishes).
  5. Bake at 300° for 35-45 minutes, stirring after the first 20 minutes.
  6. Allow mixture to cool.
  7. Stir in dark chocolate chunks.
  8. Store granola in an air-tight container.
  9. Makes 10-12 servings.
3.4.3177

Dark Chocolate Almond Granola - A Great Make-Ahead Meal

Saving money is fun when there’s chocolate involved.

I can’t wait for you to enjoy all of the money saving tips and recipes!

Sign up here and watch for these great free eBooks to hit your inbox!

P.S. Signing up for these great freebies will connect you to our free Savings Club so we can occasionally let you know of other wonderful food and homemaking deals we learn about!

Heavenly Homemaker's Club Members: Access your homepage and all your fantastic resources here! Not a member yet? Please join us!

That One Time I Tried to Make My Own Dishwasher Detergent

July 12, 2016 by Laura 8 Comments

This post may contain affiliate links. For more information, please see our disclosure policy.

It was such a good idea. I was going to make these and give some away and use them always as a way to save money on dishwasher detergent.

Yep. It was a great idea.

dishwasher soap fail

I’m not sure what I did wrong. I’m sure it had nothing to do with how I skimmed over the recipe and rushed to get it done before leaving for a trip. It probably wasn’t that I tried popping the tabs out of my ice cube tray before they were fully dried.

Now I have a solid rock of dish soap on a plate. Once I get it to ever dissolve off of there, that is going to be the cleanest plate ever. But let’s just say, Laura won’t be sharing this recipe yet with you because something went terribly wrong.

Do you make your own dishwasher detergent? I want to!!! But I don’t want to use Borax. I’d be happy with a recipe for any form of liquid, powder, or tabs. I just think it will be a nice way to save money and avoid toxins.

If you have a great non-toxic dishwasher detergent recipe idea, will ya share?

Heavenly Homemaker's Club Members: Access your homepage and all your fantastic resources here! Not a member yet? Please join us!

This Week at Heavenly Homemakers: What You Can Cook, Read, Serve, and Craft for a Dollar or Less

May 22, 2016 by Laura 5 Comments

This post may contain affiliate links. For more information, please see our disclosure policy.

Over the weekend I had a fun idea to highlight some of my fun money saving ideas for you. So this week, I’ll be posting:

  • Meals you can serve your family for a $1.00 or less per plate
  • Crafts you can make with your kids for $1.00 or less
  • Ways you can serve/bless others for $1.00 or less
  • Random $1.00 or less tips
  • Freebies

It’s going to be kind of hodge-podge because I’m trying to keep you on your toes. Or maybe I’m just unorganized. (Hey, I’m working on it.)

$1.00 or Less Recipes, Crafts, Gift Ideas, and more!

First a fun craft and service idea for around a dollar or less

You all know I’m not the craftiest gal among us. But I can cut and glue, so there’s that. I had fun making these fun Owl Gift Sacks a couple years ago. You’ll find the free printables for this project here. Print ’em off, cut, glue, and fill the sacks with a treat to share. Get your kids involved. Have fun!

Owl Gift Sacks Free Printable

Now how about a recipe?

It’s the perfect time of year to put Garden Veggie Chicken Skillet on your menu frequently. This is a one-dish meal. It uses many vegetables, you can make it to your family’s liking, and it doesn’t cost much to make. I’ve calculated that it costs $1.00 or less per plate!

Garden Veggie Chicken Skillet 2

Want more inexpensive recipes?

You’ll get this eBooklet for free when you sign up to be a part of the Homemaker’s Savings Club. That’s the newsletter where I keep you up to date on all the best homemaking deals I find!

Top 10 Money Saving Recipes cover

Stay tuned all week for many more fun $1.00 or less ideas!

Subscribe here to make it easy to keep up!

  • Free Daily Subscription
  • Free Weekly Subscription
  • Join the Free Homemaker’s Savings Club!

The running list:

I’ll continue to update this post all week with the newest links to $1.00 or less ideas shared!

~ Tuesday: Bread, Recipe Card Craft, Service Ideas, and More

~ Wednesday: All Chocolate, All the Time

Heavenly Homemaker's Club Members: Access your homepage and all your fantastic resources here! Not a member yet? Please join us!

How We Teach Our Kids About Nutrition

May 17, 2016 by Laura 2 Comments

This post may contain affiliate links. For more information, please see our disclosure policy.

Our family has been on our healthy eating journey for over 10 years now. Yep. I’ve been shunning the margarine and pushing the veggies and serving the spinach and delighting in the free-range eggs for over a decade.

As a result, all of my kids hate junk food. They snack on huge bowls of greens and never ask for chips. They read all the labels and become excited when they know asparagus is on sale.

If you believe that, you should probably go read this post. 

The Truth About My Family and Junk Food

The truth is, my kids like Doritos and store-bought pizza just like most. I’ve chosen not to freak out about this, seeing as freaking out is rarely a blessing for anyone. And also: you should go read all of these thoughts. That’s where I’ve chosen to land.

So what about nutrition? How do we teach our kids about nutrition?

I hadn’t found any books that I felt taught nutrition they way I wanted. So instead, we’ve done what has come naturally:

1. We talk about it 

As you can imagine, food is a popular topic in the Coppinger household. Mom loves nutrition and cooking. Dad and the boys love to eat.

Through the years I’ve shared what I’m learning about nutrition while we hang out in the kitchen or while we’re eating together. I don’t force the information, but they’ve caught the gist: Real food is where it’s at. Please pass the butter.

2. We focus on making our nourishing food taste good

Yes, our boys like candy. But they also love nourishing food because what’s not to love about Strawberry Cheesecake Parfaits and BLT Tossed Salads?

One of the things I love most about real food is that the more nourishing it is, the better it tastes. There is so much good flavor in natural foods! Imagine that. We don’t have to create tasty food in a factory. God already made food amazing.

3. We model it

We continue to add more and more fruits and vegetables to our diets. Matt and I load up our own plates, and get excited about food from the garden or from Bountiful Baskets. We drink several glasses of water every day.

Ultimately, our kids are learning about nutrition because of what they see and what is available in the home. Not to worry. They also see us sometimes compromising on food choices. I like to think that since we do this without freaking out, they will have a healthy understanding of what it means to enjoy treats and will hopefully keep a relaxed perspective on food instead of making it an idol.

Why I Usually Don’t Like Books About Nutrition

I’ve had two major issues with books that teach about nutrition:

  1. They are too heady and overwhelming to hand to a kid. (I’m talking to you, Nourishing Traditions.)
  2. Or, they are based on FDA standards, which focus on eating low fat, counting calories, and eating a lot of grain products. Basically they give a lot of information as “fact” that I very much disagree with. (Dare you actually tell my child that margarine is a better choice? Oh. I don’t think so.)

So we’ve just stuck with talking about nutrition and making sure our kids eat salads and fruit and good eggs and meat, etc.

I found a book!

When I was prepping for this week’s homeschool curriculum sale, there were some books with fruits and veggies that jumped out at me (surprise, surprise) in one of the Unit Studies Packets. I contacted the author, Amy Blevins, and she was kind enough to send them to me before the sale started so I could look them over so I’d know what to tell you about them.

nutrition-set

I knew the art work would be great. But would the nutrition information be overwhelming? Would I agree with it?

Well, it’s all I can do to wait until fall to start working through these with Malachi. (Does he really need a summer break? Fine. So do I. We’ll start in the fall.)

Man, this book is good. I’m mostly talking about the “Learning About Nutrition” section of this book (though the coloring and dot-to-dot books are fantastic for additional fun). There were just a few points I didn’t agree with, but I think those points will be good to bring up for discussion and further research.

This book is very thorough while being incredibly kid friendly. It’s just over 532 pages (some of it is just for parents), and I feel it will be such a nice unit to study with Malachi – taking just a few minutes each day to increase his knowledge of nutrition and to get him thinking more on his own about good food choices.

I really love how the book is laid out with light reading and small activities throughout (NOT just busy work, thankfully!!). There are even fun writing exercises sprinkled in. Really, I think they’ll be fun – food and creativity and nutrition can actually go together because she wrote this so well.

As you know, nutrition is one of my biggest things so telling you that I like this book kind of means something. :)

Fruits and Veggies Curriculum Sale

Just like all the 200+ books in this week’s curriculum sale, you’ll be amazed at majorly discounted prices. This Nutrition Unit Study pack comes in a set of 14 other unit study books – and they are all 91% off! The complete set costs less than one book normally costs.

TIP: Have big kids and little kids? That’s going to be perfect with this unit study. Littler ones can color and connect the dots while your entire family reads and studies the Learning About Nutrition book. That’s the beauty of unit studies – the whole family can learn together.

ANOTHER TIP: Pick two more bundles to go along with this one to take advantage of the Buy-2-Get-1-Free offer. Then you’ll save even more. It’s almost crazy.

The links in this post are my affiliate links.

I’m excited that there is so much goodness being offered this week in this sale, at such incredible prices! So tell me – how have you been teaching your kids about nutrition?

Visit the Build Your Bundle Curriculum Sale Here.

Heavenly Homemaker's Club Members: Access your homepage and all your fantastic resources here! Not a member yet? Please join us!

The Right Way to Squeeze a Lime or Lemon (How cool is this?!)

June 7, 2015 by Laura 6 Comments

This post may contain affiliate links. For more information, please see our disclosure policy.

Brace yourself for the most amazing kitchen hack you’ll ever read between now and precisely three to five minutes from now. When you next see your friends, or you strike up a conversation with the fella bagging your groceries – you’ll be sure to tell them about this, won’t you? I mean, everyone needs to know that the squeezing of limes and lemons has been done wrong for years but you now know the correct way to do it – so you shall therefore enlighten the world on the correct squeezage procedure of limes and lemons.

The Right Way to Squeeze a Lime (or a lemon)

I recently learned this trick, and it’s a good thing. I think I was well on my way to being diagnosed with lime-squeezing-induced carpal tunnel in my right hand. This hack has saved me, no doubt. It’s here to save you too.

All nonsense aside (and by nonsense, I mean completely necessary life-changing information) – this tip is really cool. You’ll need a lime or a lemon (was that not obvious?) and you’ll need a strong pair of tongs.

First things first: Roll the unsliced lime or lemon along the counter-top, pressing it down as you roll. This will soften the fruit and make it easier to juice.

Next, cut your lime or lemon in half. Grab one half with your tongs, like so:

squeezing lime 1

Now (aiming downward, for the love) squeeze that lime or lemon with all your might (I use two hands because I’m a weakling like that). Continue the rolling, the slicing, and the squeezing until you have all the juice you need.

squeezing lime 2

The tong trick helps prevent juice from getting all over your hand and running down your arm and up your sleeve. Not that this would actually happen, but now it most definitely won’t. Plus you won’t get lime-squeezing-induced carpal tunnel, so I think we can all breathe a sigh of relief there.

I first tried this trick while making BLT Chopped Salad, and I’m pretty sure I’ve made it clear that I have been eating that salad three meals a day for the past eleventy days or so because I love it so much. I’ve learned to just squeeze the lime directly onto the salad because life’s too short to squeeze it into a jar for the purpose of making a dressing. Just squeeze it directly, then pour in the oil, and sprinkle with salt.

Then, because you are amazingly efficient, you can use your lime squeezing tongs to toss the salad altogether (thus mixing the lime juice, olive oil, and salt along with all the other ingredients) and then to serve the salad with those very tongs. If by now tongs are not your favorite kitchen gadget, I believe you need to go back and read this post more thoroughly. Or maybe you just haven’t made this salad yet, for reasons I will never understand.

Grab you some limes (or lemons) and grab you some tongs and commence the squeezing.

Now you tell me. Is that not the most amazing kitchen hack you’ve read in the last three to five minutes? And have you made this salad yet? Do it already.

Heavenly Homemaker's Club Members: Access your homepage and all your fantastic resources here! Not a member yet? Please join us!

Something Is Wrong With This Picture

October 15, 2014 by Laura 7 Comments

This post may contain affiliate links. For more information, please see our disclosure policy.

I wash dishes like this so often, I forget how it must look to a guest hanging out in my kitchen.

crazy gloves

What? It’s the best way to do dishes.

Two left handed gloves, one on each hand, two different colors. Sometimes, on a day I feel wild and crazy, I’ll switch the gloves around, putting the blue one on my right hand and the purple one on my left. Y’all, doing dishes is never boring at my house – I’ll tell you that right now.

You know what’s great about this post, and the picture, and all that seems rather pointless?  I actually do have a point.  Two points actually:

1. Never worry about what people think about you when you’re washing dishes. Two lefthanded gloves of different colors worn at the same time? Why, we can establish a new dishwashing trend.

2. If you use rubber gloves to wash dishes and one of the gloves gets a hole in it, save the glove that doesn’t have a hole. Eventually, you can use it with another glove that has lost its mate. You’ll save a lot of money doing this. And I believe we’ve already established how cool you will look…not that we care what other people think.

In practicing this, sometimes my mismatched gloves end up being the same color. Sometimes I actually end up with a left-handed and a right-handed pair of misfits. But more often than not, I end up with two left-handed gloves of different colors. It matters not. They still work just fine.

And that, my friends, is my very helpful, money-saving homemaking tip for you today.

P.S. This money-saving method does not apply to shoes or contact lenses.

Heavenly Homemaker's Club Members: Access your homepage and all your fantastic resources here! Not a member yet? Please join us!

How to Stretch a Meal When Extra Company Comes

March 25, 2014 by Laura 11 Comments

This post may contain affiliate links. For more information, please see our disclosure policy.

How To Stretch a Meal When Extra Company Comes 2

Matt only knew my paternal grandmother for a few years before she died. One of his favorite memories of her is the response she gave after being told that extra people were coming to join us for a meal. “Great! I’ll just add more water to the soup,” she said with a chuckle. Seeing as we weren’t having soup that day, he then watched in amazement as she “added water” to stretch the meal she had prepared.

Grandma seemed to make more food appear out of no where, and in record time, too. The table was soon filled with all varieties of goodness. The little bowls of this and the small dishes of that didn’t look like they would feed the number of people we were anticipating. But sure enough, just like the loaves and the fish, Grandma had enough to fill us all with twelve (give or take) baskets left over.

What was Grandma’s secret? Well, she just always had a good supply of food on hand. And not just frozen meat that would take hours of time to thaw and prepare. I’m talking about home-canned fruits and vegetables, homemade bread and cookies – food that she could pull out and feed people in a moment’s notice.

This Sunday, I was blessed with the opportunity to “add water to my soup.” We already had plans for another family of 6 to join us for lunch after church. Their 6 plus our 6 would equal 12. (Thank you, Laura, for stating the obvious.)  I was making a roast, carrots, potatoes, and gravy. My friend was bringing rolls. It would be a simple, nothing-fancy, but tasty meal.

Then, at the last minute, a friend of my brother’s family needed a meet-up place here in Nebraska. The friend would come here, my brother’s family would drive up from Kansas and pick him up, and guess what? They’d make it in time for church. Bliss! I got to worship with my brother and his family of 6 and feed them all afterward!

So let’s see here. Six plus six is twelve, plus six more – that’s 18. Then there was my brother’s friend who was meeting us by lunchtime. Did I mention he was a 6’8″ college athlete? And last but not least, a friend of Elias’ needed a place to hang out after church while his family headed out of town. That made a total of 20 people. Super fun.

Thankfully, I had decided to make two roasts instead of just one – just in case. I had loaded the roasting pan with potatoes and carrots. I caught my friend (the one already planning to come over with her family) between class and worship, filled her in on the crazy, and asked her to pick up extra rolls – plus maybe a bucket of ice cream? She was happy to help stretch our meal.

Once I got home after church and started making gravy, I also started a big pot of green beans and another big pot of corn. Our simple meal remained simple, yet because there were so many different foods to choose from (roast, potatoes, carrots, gravy, rolls, green beans, corn, ice cream), it looked like a feast. We had plenty to go around and even a little bit left over. Phew!

How to Stretch a Meal for Extra Company

All of that to say, when it comes to hospitality and being able to say, “The more the merrier!” always try to have a few key foods on hand to help stretch your meal. Here are a few items I’ve thought of that you might have on hand to pull out and serve quickly, or that you can grab at the store if you have time/accessibility:

  • Frozen food that cooks quickly like green beans, peas, or corn
  • Applesauce
  • Canned peaches, pears, or mandarin oranges
  • A jar of pickles
  • A can of olives
  • Quick breads or muffins you might have in your freezer
  • Fresh fruit like strawberries, sliced apples, oranges, or grapes
  • A fruit salad, mixing several different fruits you have on hand
  • Canned or fresh pineapple poured into a nest of cottage cheese
  • Raw veggies like carrots sticks, celery, sweet peppers, or cucumber slices
  • Crackers and sliced cheese
  • Tossed salad
  • Grape or cherry tomatoes
  • Chips and salsa
  • Dessert such as cookies or ice cream

If you’re opening a can or jar, I suggest pouring its contents into a nice serving bowl to make your “spread” look tasty and welcoming for your guests. Did you grab a bag of prepared salad on the fly? Pour it into a bowl and throw in some grape tomatoes to make it pretty.

Don’t hesitate to ask your guests to pick something up at the store on their way to your house (especially if they offer or ask what they can bring). Most of the foods on the list above take little to no prep time, but will stretch your meal and offer your guests a delicious variety.

What would you add to this list? What have you found works well to stretch a meal to feed extra people?

Heavenly Homemaker's Club Members: Access your homepage and all your fantastic resources here! Not a member yet? Please join us!

How Do You Clean Your Home Naturally? (What Would Grandma Do?)

November 6, 2013 by Laura 32 Comments

This post may contain affiliate links. For more information, please see our disclosure policy.

cleaners

I thought I was going to gag. I almost got a headache. My lungs got tight. I’m not exaggerating.  Elias (my 11 year old) was with me, and he started to feel queasy. We were there only about seven seconds.

Where had I taken my child, you ask? To aisle nine.  We were simply walking down the cleaning products aisle at the store.

I avoid that aisle at all costs. But that particular day last week, I needed one item – an ingredient to make a homemade cleaning product. Go figure, after those seven seconds of torture, I still couldn’t find what I was looking for.

Elias asked, “Mom, why is that aisle so disgusting?” Obviously, I’ve avoided taking my kids there since my eleven year old didn’t know that it even existed. If found it hard/ironic/frustrating to explain that all of those products that seemed so nasty to him are offered for sale to help us get our house, dishes, hands, air, clothes, furniture, bathroom, floors, and windows clean.

I’m all for getting rid of the dark cloud of dirty sock scent that hovers over my boys’ room. But when did “clean” begin to smell so toxic? And why are there so many hundreds of varieties of cleaning products to choose from? Do I really need twenty-seven separate products to clean approximately five major areas of my home? Must we all keep a large cabinet full of sprays, bottles, drops, powders, and scrubby bubbles in order to be fully equipped with everything it takes to keep a house clean?

Absolutely not. Be relieved and take a deep breath (but by all means, get out of the cleaning aisle first so that you don’t pass out).

I’m inclined to ask, “What would Grandma do?” I spent hours at my grandma’s house, helping her cook and clean. Try as I might, I can not remember where in the world her cleaning cabinet was. This leads me to believe that she didn’t have one. She wouldn’t have seen the value of spending money on a variety of different cleaning products when her home naturally had everything she needed. In fact, as long as I can remember, she made her own bars of soap. If I close my eyes, I can still smell it. Mmmm, there’s nothing toxic about it. In fact, it didn’t have much of a scent at all. It only smelled…clean.

I’ll admit – I don’t make my own soap. Instead, I have found some great online resources for a few products I trust for our skin, hair, laundry and dishes.

As for cleaning my home? Well, I don’t find that it’s very complicated really. There’s nothing like good old water. Norwex products are awesome. And the best? Baking soda and vinegar.

I found a great online resource, sharing 27 Ways to Clean with Baking Soda. Not to be outdone, here’s a post I found called 1001 Uses for Vinegar. I’m guessing Grandma knew many of these tricks, because she knew that getting her home clean didn’t require that she spend much money or use toxic chemicals. I’m guessing, actually, that she never gave thought much to toxic chemicals – she simply used what she had, and she knew how to keep her home clean.

Ahhh, fresh, clean, and chemical free. That’s what I call cleaning your home naturally.

I know many of you have knowledge on this topic! Share your tips and ideas. How do you clean your home naturally?

Heavenly Homemaker's Club Members: Access your homepage and all your fantastic resources here! Not a member yet? Please join us!

Putting Up Green Beans From Our Garden

July 6, 2012 by Laura 15 Comments

This post may contain affiliate links. For more information, please see our disclosure policy.

Our green bean plants are beautiful this year. Matt and the boys have been picking beans like crazy. I guarantee that when they bring a bucket of green beans in to me, I display a much more excited reaction than if they were to bring me a bouquet of flowers. Garden produce makes my heart flutter. :)

Here was our counter-full of beans last week once we picked, snapped, and blanched them for the freezer. (Don’t you worry. We ate a bunch of them too.)  :)

You can learn more about how we prepare green beans from the garden here. Even if you don’t grow your own beans, I’d recommend looking into purchasing fresh beans from your local farmer’s market or another resource near you. They are soooooo good!

If you have any fun homemaking tips, we’d love for you to share them in the comments section or link them up here today. Feel free to share kitchen tips, cleaning solutions, recipe ideas, cooking short-cuts, household money-saving suggestions, decorating ideas, gardening tips, or anything else you feel fits this category. (No product reviews or giveaways – thanks!) As always, when linking your blog post, please post a link back to this blog so that your readers will know where to find more Homemaking Hints.


Heavenly Homemaker's Club Members: Access your homepage and all your fantastic resources here! Not a member yet? Please join us!

Make Fun Pancake Designs

May 31, 2012 by Laura 9 Comments

This post may contain affiliate links. For more information, please see our disclosure policy.

Remember how I said that we’d feature a Homemaking Hints link-up on the first Friday of each month? Yes, well…I completely forgot about it in May. So sorry. Now that it’s June 1, I am remembering and very much looking forward to hearing your fun tips!

The tip I’m sharing comes from my lovely friend and mentor, Avon. After I shared my “Bird’s Nests” idea, this is what she emailed me:

I like to pour my pancake batter into a squeeze bottle… then it is amazing all the things you can design.

When the grandchildren are here I make a second squeeze bottle of batter and mix in some syrup. Then I make a design on the griddle (like a smiley face or their initials or in your case the state of idaho) then cover the whole thing with the regular batter. When you flip it over the design cooked darker so it looks really cool.

This was our traditional finale at all our sleepover parties when my kids were growing up.

Well, isn’t that just a super fun idea? I need to give it a try – I know my boys would love it! Now, if I could only find just a little bit of artistic ability so that my boys can actually recognize the designs I’m going for in my pancakes!

Feel free to share kitchen tips, cleaning solutions, recipe ideas, cooking short-cuts, household money-saving suggestions, decorating ideas, gardening tips, or anything else you feel fits this category. (No product reviews or giveaways – thanks!)  As always, when linking your blog post, please post a link back to this blog so that your readers will know where to find more Homemaking Hints.

Heavenly Homemaker's Club Members: Access your homepage and all your fantastic resources here! Not a member yet? Please join us!
« Previous Page
Next Page »

Join Our Community!

 Facebook Twitter E-mail Instagram Pinterest

Popular Posts

~ Will All of the Real Moms Please Stand Up?
~ Easy! Stir-and-Pour Whole Wheat Bread
~ How to Make Gatorade
~ 31 Real Food Breakfast Ideas
~ Dear Teenage Girls...
~ When Mom Takes a Step Back
~ The Inexpensive Health Insurance We Love!
~ Let's Talk Real Food Grocery Budgets

Check out our latest posts!

  • Big Family Food and Fun: May 10-16, 2026
  • Big Family Food and Fun: May 3-9, 2026
  • Help Your Kids Become Independent in the Kitchen!
  • Big Family Food and Fun: April 26-May 2, 2026
  • Big Family Food and Fun: April 19-25, 2026
Home  ~  Simple Meals  ~  Club Membership  ~  Shop  ~  Privacy Policy  ~  Disclosure  ~ Contact

Copyright © 2026 · Beautiful Pro Theme on Genesis Framework · WordPress · Log in