Heavenly Homemakers

Encouraging women in homemaking, healthy eating and parenting

  • Home
    • About
    • FAQs
  • Recipes
    • Bread and Breakfast
    • Condiments
    • Dairy
    • Main Dishes
    • Side Dishes and Snacks
    • Desserts
    • Gluten Free
    • Instant Pot
    • Crock Pot
    • Heavenly Homemaker’s Weekly Menus
  • Homemaking
    • Real Food Sources
  • Store
  • Contact
    • Advertise
    • Disclosure
    • Privacy Policy
  • Simple Meals
  • Club Members!

Simple DIY Coconut Milk

November 24, 2021 by Tasha Hackett Leave a Comment

This post may contain affiliate links which won’t change your price but will share some commission.

Simple DIY Coconut Milk

by Tasha Hackett

diy coconut milk

Dairy-free milk is good to have on hand these days. This simple DIY coconut milk is going to wow you, I’m sure of it. Even if you’re not on a special diet, the chances are high you know someone who is! Of all the nut milk options, coconut milk is the one I’ve landed upon for all my dairy-free baking and cooking. After almost a year of eating paleo to combat migraines, I’m embarrassed at how long it took me to try to this simple method. (Hi! Tasha, here.) If I wanted a yogurt or cream substitute, I used canned coconut milk or coconut cream. If I wanted simple coconut milk for smoothies and baking, I bought the jugs and ignored any added ingredients.

I finally tried making my own coconut milk.Yum

Don’t get too excited. I’m not out there foraging coconuts and shredding the meat into milk. #aintnobodygottimeforthat. But I am side-stepping buying water in a jug. I had convinced myself that making my own was going to be too complicated. Silly Tasha. Once I mustered the proper sense of adventure and ingenuity, there’s really been no turning back.

Not only is this simple DIY coconut milk unadulterated with added ingredients, it is significantly cheaper, and saves the landfill and the factories from dealing with those obnoxious plastic/cardboard jugs. And because I Subscribe and Save my canned coconut milk from Amazon, I don’t even have to think about buying it. It just magically appears on my porch. Poof!

Simple Coconut Milk Recipe

I’m really stepping out on a limb here to call this a recipe. But if Laura can tell you to pour salsa on the chicken in the crock pot and call it a recipe, than we’re calling this a recipe.

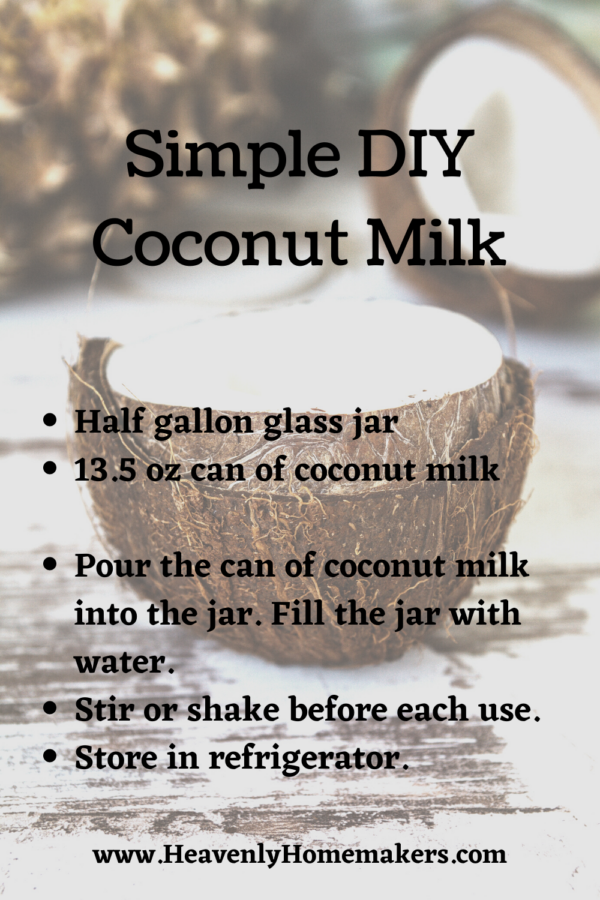
You will need a half gallon glass jar and a can of coconut milk. I currently use this brand. I’ll go over all the steps very slowly for you, just be sure you can keep up: Open the canned coconut milk. Pour it into the jar. Fill the jar the rest of the way with water and leave an inch or so at the top. Put the lid on the jar. In case you missed it, that last step is very important. A lidless jar is hazardess. Shake your lidded jar before using the coconut milk in smoothies, pancakes, muffins, and any recipe that calls for milk! As it happens, I pour a splash of it into my coffee each morning.

DIY Coconut Milk Recipe in Pictures

Because this recipe is very complicated, I decided to go the extra mile and show you the process step-by-step. I hope this clears things up for you.

Set out your supplies.
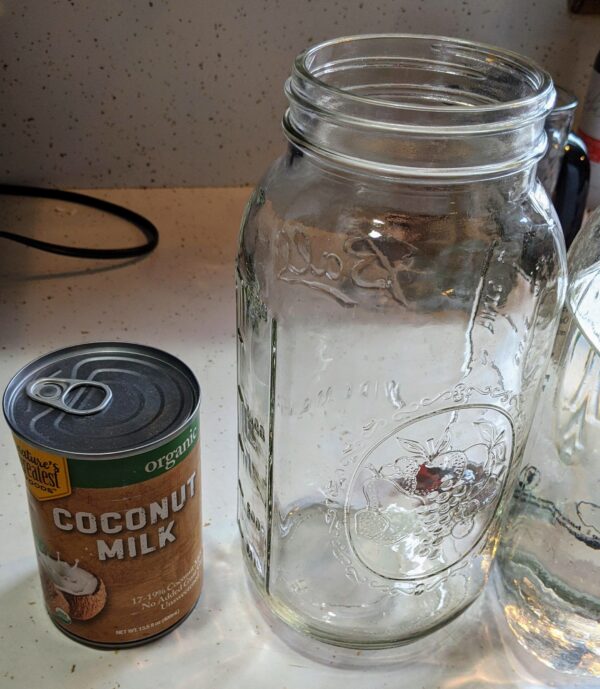
canned coconut milk

Open the canned milk and pour it into the half gallon glass jar.
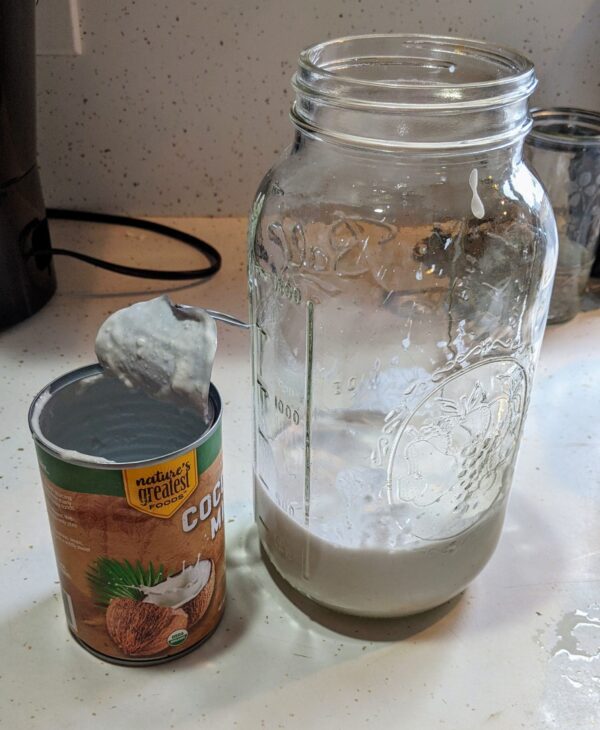
 

diy coconut milk

Fill the remainder of the jar with water.
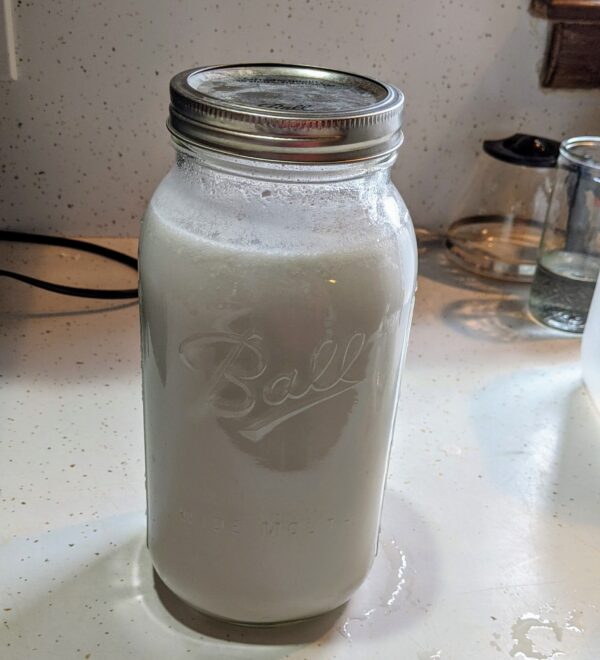
homemade coconut milk

I hope you don’t mind, but I combined a step in this picture. See how the lid is on the jar?

Store in the refrigerator and give it a shake before using. That’s all, kids! I hope you enjoyed learning a new skill that will impress all of your friends the next time you’re at a party in need a parlor trick.
homemade coconut milk


Tasha HackettTasha Hackett is a friend of Laura and loves to eat homemade chocolate bars, potato chips, and yes, even salsa on chicken. A homeschooling mom of four, author, and recovering DIY addict, she loves to take a walk on the prairie as time allows. Her debut novel, a historical romance set in 1879 Nebraska released Summer 2021: Bluebird on the Prairie. (Print and Kindle options available.) Though Tasha likes to do All The Things, most of her time is spent with four chatty children and an incredibly supportive husband. They give her the kind of love people write books about.

To learn more about Tasha and her works of fiction, find her at www. TashaHackett.com.

Heavenly Homemaker's Club Members: Access your homepage and all your fantastic resources here! Not a member yet? Please join us!

Three Keys to an Organized Home

March 31, 2021 by Bethany Lotulelei Leave a Comment

This post may contain affiliate links which won’t change your price but will share some commission.

I always feel like decluttering, cleaning, and, organizing my entire house this time of year. Perhaps it is the promise of spring, but I really start craving a tidier, more efficient home. Today I am sharing how you can get your home organized in just a few minutes per day!
Three Keys to an Organized Home

Three Keys to an Organized Home

1. Declutter first

It’s hard to organize when you have a lot of clutter.
The more toys, clothes, and dishes you have the greater amount of containers and organizational components you will need to obtain.
Make the entire job easier by starting by decluttering! Get rid of trash, bag up items for Goodwill, or set things aside for a garage sale in the spring (here are Laura’s best garage sale tips!)

2. Tackle one room at a time

Organizing the entire house is way too overwhelming!
I suggest you start with one room, even better if you choose the room that will be the easiest for you! I usually choose our bathroom to start with, because it is a small room, has a limited amount of items already, and is fairly painless to organize! Once you have completely finished one area, then choose the next room to conquer!

3. Use what you have before purchasing anything new

Before you go out and buy a bunch of new totes, and bins go ahead and shop your own home. You might be surprised by all the items you have collecting dust that can be used to organize!

Three Projects to Try

Looking for a few new organizational project? Here are a few fun ideas!

1. Organize Your Recipes in a Binder

I don’t know about you, but I am always printing off recipes from blogs. I had an entire pile of loose recipes on top of the fridge, that I often had to sift through to find what I was looking for. It was frustrating to say the least!
It occurred to me one day that I needed a binder to corral all these recipes, enter Laura’s DIY Recipe Binder! I found an old binder, printed off the pages, and set it all up within one afternoon! Next, I want to grab some clear page protectors to make it even more fancy. Grab your free printables here!

2. Organize Your Homeschool Days

Homeschooling this year? If so, check out all Laura’s tips and tricks on how she organizes her homeschool days . I LOVE the folder system she uses for her kids!

3. Clean out your kids’ closets!

It’s a smart idea to go through your kids’ closets at least twice a year, and switch out the clothes seasonally! When your kids are little, you might want to do this even more often. I go through my kids’ clothes every couple of months, because it only seems to take that long for them to grow into the next size! Here’s how Laura cleans out her boys’ closets!

Your turn to share! What’s your favorite organizational tip?

Heavenly Homemaker's Club Members: Access your homepage and all your fantastic resources here! Not a member yet? Please join us!

How to Use a Cast Iron Skillet like a Pro

January 27, 2021 by Tasha Hackett 1 Comment

This post may contain affiliate links which won’t change your price but will share some commission.

I’ve loved and recommended using a cast iron skillet for years. Today, Tasha will tell you how to use one like a pro!

How to use a cast iron skillet like a pro

by Tasha Hackett

I didn’t know how to properly cook with a cast iron skillet until very recently. 

Even though I have prepared food almost exclusively on my cast iron skillet, I continually burned food or the food stuck so badly I spent far too long scraping it off the bottom and reseasoning again. 

I burned the pancakes on my cast iron again and I was sad. As I served my family I said, “I know it’s burned. Sorry. It is what it is. This is the last of the flour, I’m not making anything else. Sorry. Just eat it. I know it’s burned. Sorry. Don’t ask me why it keeps burning.” 

I burned the zucchini patties and I was sad. “I don’t know why they’re burning! The bottom is burned before I can even flip them without it falling apart! I turned it down and they’re still burning.” 

The scrambled eggs stuck to the bottom of the pan so badly I felt like I sacrificed two whole eggs to the cast iron gods. 

Please tell me I’m not the only one who struggles with the cast iron skillet? 

Figuring out how to use a cast iron skillet shouldn’t have taken me this long.


With all my struggles, you may be asking, “Why do you even use it if it causes so much trouble?” A few reasons. 

Now that I know how to use a cast iron skillet, I love it even more.

Foremost, I like the simplicity of it. I use this one pan multiple times a day. I clean it after each meal and it lives on my stovetop. The nostalgia that this is the same type of pan the pioneers used hundreds of years ago speaks to my author soul. I don’t wear 1800’s dresses, or travel by horse or train or write letters with an inkwell, but by golly I can cook with the same pan! (In theory, except I was disproportionately burning everything.) Another main reason I like to use it is that I don’t trust modern technology when it comes to our health. Teflon is bad for you–correction, teflon is bad for you when heated. HA! 

I know there are other non-stick pans out there today that claim to be non-toxic, but I haven’t had the time to look into them yet. (I’ve been far too busy wondering why I keep burning the Simple Tuna Patties.)

cast iron eggs

Here are my how-to tips for using your cast iron skillet:

  1. Start with a well-seasoned cast iron skillet. Which I have. Many times. Keeping it well-seasoned was my problem. Seasoning a skillet is simple: Clean. Dry. Rub a teaspoon of vegetable oil or lard all over. Top, bottom, outside, underneath, and the handle. Bake upside down in a 350* oven for an hour. Let it cool in the oven before putting it away.
  2. Be patient. Let the pan preheat at a low temperature for up to five minutes before cooking on it. A drop of water should immediately sizzle and then you may add the oil. If the butter, oil, lard, etc., is smoking, that means your skillet is too hot. Heating a cast iron skillet/pot/pan on high heat right away, especially on an electric stove, causes the iron to expand and heat unevenly and can cause warping. This is one of the only things that will ruin your skillet.
  3. Preheat the oil. Do this after the pan is preheated. Again, if the oil smokes or burns, this is a bad sign. If the butter is burning, the pancakes will soon be burning. (You’d think I could have figured that out sooner.) On my gas stove, I do most of my cooking just above Low or directly between Low and Medium. On my stove, the butter burns at Medium. Once the pan is heated, if you turn the temperature down it will not immediately make a difference. One of the pan’s strengths is the ability to hold heat. Therefore, adjusting the temperature up and down while you’re cooking isn’t going to work well for your food or your taste buds. Or your family’s trust in your cooking abilities. Have patience while preheating, and you will quickly learn where to set the temperature and can leave it there.
  4. Do the sizzle dance.

  5. The food should sizzle as soon as it touches the pan. Food that doesn’t sizzle means your pan wasn’t preheated enough and now your food is going to stick and then probably burn. (Preheat the skillet even if you are baking cornbread in the oven. The sizzle as you pour in the cornbread batter will create a delicious crust and keep the wet cornbread from sticking to the pan.)
  6. A properly seasoned cast iron skillet is easily cleaned with a wipe-down of a paper towel or hot water and plastic scraper. Boiling water in the pan, using soap, or not properly drying will cause your pan to rust and this is bad. If the pan rusts, you get to scrub it off with a steel brush and do the reseasoning thing again.
  7. Whenever dry spots appear on the pan, it’s time to reseason. If you use enough oil while cooking on the pan, you shouldn’t have to do the reseasoning thing more than a few times a year. If that. But… if you were anything like me and frequently burned the food and then had to scour it off with hot water, reseason it as often as necessary until you’ve perfected the patience that is required for preheating your pan. 

And that’s how to use your cast iron!

cast iron onions

This pan was not preheated. There was no sizzle when the onions were added. The butter wasn’t melted and then it will later burn.

I’m curious, how many of you have skillets passed down from your grandma? Years of history and thousands of meals prepared in a pan that is still in great use today? Amazing!

I love to invest in things that will last. Cast iron is just one of those things. Now that I know how to really use mine, I foresee some delicious pancakes in my family’s future. 


Tasha HackettTasha Hackett, friend of Laura, is fueled by sunshine or chocolate, whichever is more readily available. Recently embarking on a paleo journey to combat some chronic inflammation, she is still finding ways to eat chocolate. Though she proudly sings every word of the Wee Sing Silly Songs albums and often pretends to be a ballerina while unloading the dishwasher, her favorite thing is writing with hope and humor to entertain and encourage women—specifically young moms. Most of her time is spent with four chatty children and an incredibly supportive husband. They give her the kind of love people write books about. Her debut novel, Bluebird on the Prairie, a heartwarming Historical Romance will release spring, 2021. You can connect with her at www.tashahackett.com or on Instagram @HackettAcademy. 

Heavenly Homemaker's Club Members: Access your homepage and all your fantastic resources here! Not a member yet? Please join us!

7 Ideas to Make Your Home Extra Cozy

January 5, 2021 by Bethany Lotulelei Leave a Comment

This post may contain affiliate links which won’t change your price but will share some commission.

It’s this time of year when I always start looking around my house, and brainstorming ways to make it a nicer, comfier place for my family. That’s why today I am sharing 10 ideas to make your home extra cozy, in case you, too, are feeling a bit cooped up in need of inspiration!
7 Ways to Make Your Home Extra Cozy
I always want my home to feel like a respite, a safe place, a comforting spot for my family to return to at the end of the day. But with littles underfoot, a very busy schedule, and a other committments it can feel super overwhelming to stay on top of all the homemaking tasks some days, anyone else?

However, I do think that with just a bit of effort, we can all create cozy, warm, and inviting homes for our families. Here are my top tips for creating a bit of extra coziness in your home this winter.

7 Ways to Make Your Home Extra Cozy

1. Declutter

One of the best ways to make your home feel better in the short term is to donate anything that you no longer use, need or like. The more I declutter each room, the happier I am with my home! January is the perfect time to start going through clothes, toys, and closets to rid of anything that no longer brings you joy.

2. Serve hot drinks to your family

Is there anything cozier than holding a hot mug while you watch the snow fly? Every winter I try to find a new, yummy drink to make every afternoon. It’s the best! Need inspiration? Here’s a list of the best hot drinks for fall and winter! Try a couple, and let me know which one is your favorite! Might I suggest this recipe for the perfect Hot Chocolate or a Warm Vanilla Soother!

3. Pull out the warm blankets

This is a great time of year to set a basket full of soft, fuzzy blankets in your living room. Even my toddlers like to cuddle under a blanket while they read books! In need of a few new blankets for your home? Here are a few of my favorites:
Ultra Soft Sherpa Blanket(comes in many colors!)
Plaid Throw Blanket
Fuzzy Large Fleece Blanket(great price!)

4. Bake some bread or other goodies

On especially cold days, I love mixing up a few loaves of bread, a couple dozen muffins, or a few pans worth of cookies. There’s nothing like the smell of warm bread or cookies in the house, when everyone is cooped up inside. Not sure what to bake? Here’s 111 recipes for you to choose from!

5. Play a board game with your family

Build family memories together while enjoying a fun board game! Pop popcorn, make hot cocoa, and then pull out one of your favorite games. Better yet, grab a new game to learn together! Here’s a list of our family’s favorite games!

6. Light a candle

Candles are one of my favorite ways to make a room feel extra welcoming. Grab a new candle or two, for the warmth, the scent, and the decor!

7. Start a new book as a family

I love choosing a new read aloud for my family! We open it up, and read a chapter or two every evening. When I was growing up, my Dad always read the Little House series to us or James Herriot books. Here is a great list of book ideasfor you and your kiddos!

How are you making your home extra cozy this time of year? Share your tips below!

Heavenly Homemaker's Club Members: Access your homepage and all your fantastic resources here! Not a member yet? Please join us!

Food Ideas For Feeding a Large Group

August 5, 2020 by Laura 3 Comments

This post may contain affiliate links which won’t change your price but will share some commission.

Need some food ideas for feeding a large group? Here’s what I’ve been working on recently!

I’ve been prepping to feed our York College soccer teams several times during our pre-season this fall, so I thought I’d share what I’ve been up to! (My husband is one of the women’s coaches so we are blessed to be heavily involved with the teams. Plus our third son, Elias, will be the fourth Coppinger to be on the YC men’s team!)

If you think I’m crazy for taking this on while chasing our busy 6-year-old and two 1-year-old toddlers, I’d probably agree with you. BUT, all I can say is that I had a strong desire to do this. God said yes. I love food, I love feeding people, and I especially love feeding our YC soccer teams as they transition back into a school year and a new season.

We are praising God that we can have a soccer season and an on-campus school year at this point. We are taking all the precautions to stay safe and the fact that we can have such a beautiful opportunity to enjoy community in this way is such a joy to us. We are SO THANKFUL.

How I can feed a large group while chasing babies

Even if I wasn’t chasing babies, I still have to do the following to make this work:

  1. I have to be very organized.
  2. I have to keep my menus very simple.
  3. I have to ask for help.
  4. I have to get as much food prepped ahead of time as possible.

So I’ve detailed my meal ideas. I’ve made thorough grocery lists (Wal-mart grocery pickup for the WIN!). I have lists of tasks others can take off my plate when they come into the kitchen and say, “What can I do to help?” And I started baking five weeks ago!

The plan right now is that I will feed:

  • The guy’s team one evening in our yard.
  • The girl’s team the next evening in our yard.
  • Both teams during an entire weekend retreat (6 meals)

I’ve been feeding big crowds (and chasing littles) for many years now, so I’ve definitely learned a lot about what works well and what doesn’t. I used to go all out and make everything from scratch. Phew, not anymore! I still do what I can, but wow have I simplified compared to making homemade ice cream sandwiches for everyone like I used to!

Food Ideas When Feeding a Large Group

Here’s a simple list of what I’m planning to feed everyone (about 80 people) during the weekend retreat. I’ll share more details below.

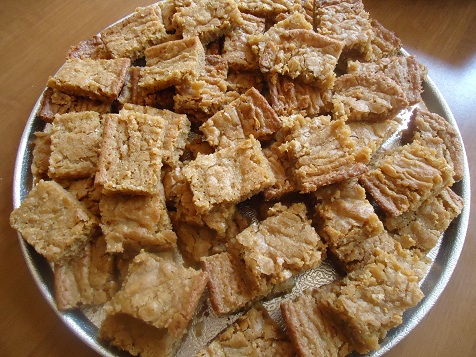
Friday Evening: Crock Pot Beef and Chicken Fajitas with Fixins, Watermelon, Butterscotch Bars

Saturday Morning: Egg Casseroles, Quick Breads, Fruit

Saturday Lunch: Dips with Chips, Dips with Veggies, Dips with Fruit, Brownies

Saturday Dinner: Lasagna, Salad, French Bread, Green Beans,  Chocolate Chip Cookie Bars

Sunday Morning: Cereal, Fruit, Yogurt, Leftover Quick Bread

Sunday Lunch: Pulled Pork Sandwiches, Chips, Baked Beans, Leftover Veggies and Fruits and Dips

During the weeks leading up to the retreat, I have cooked or baked a little bit each day to put food in the freezer to get ahead and prepared for the retreat.

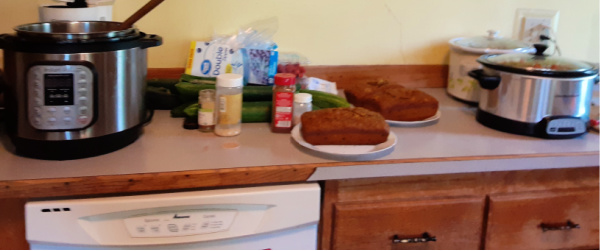
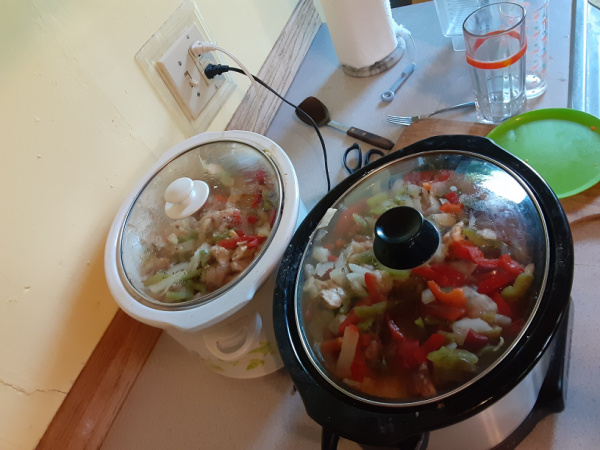
Here’s my countertop one morning after I started cooking Fajita Meat in two crockpots,
Stick of Butter Rice in my Instant Pot,
and pulled three loaves of Pumpkin Chocolate Chip Bread from my oven.

What Can Be Made Ahead of Time and Frozen

  • Chicken Fajita Meat (15 pounds)
  • Beef Fajita Meat (made just like the Chicken Fajita recipe – 6 pounds)
  • Rice for Fajitas (x8)
  • Easy Breakfast Casseroles (9 dozen eggs worth)
  • Lasagna (x10)
  • Pumpkin Chocolate Chip Bread (3 loaves)
  • Zucchini Bread (3 loaves)
  • Banana Bread (3 loaves)
  • Orange Poppyseed Bread (5 loaves)
  • Chocolate Chip Bread (3 loaves)
  • Chocolate Chocolate Chip Bread (3 loaves)
  • Pulled Pork (20 pounds)
  • Brownies (x8)
  • Butterscotch Bars (x4)
  • Chocolate Chip Cookie Bars (x4)

What Can Be Made Ahead of Time and Refrigerated

  • Creamy Italian Veggie Dip
  • Fruit Dip
  • Bean and Cheese Salsa Dip

In Case You’re Curious:

  • Fajita Fixin’s: tortillas, prepared meat, rice, black beans, shredded cheese, salsa, sliced olives, diced tomatoes, shredded lettuce, sour cream

What I Can Ask Others to Help With

It’s helpful for me to have a list made for ways others can help simply because while I’m in the middle of cooking before a big meal starts, my brain can’t always think of what to say when someone offers, “What can I do to help?”

During the retreat, soccer team members will be coming into the kitchen to help me (or grabbing babies to take them outside to play while I cook!). So here’s what I plan to turn over to the students:

  • Prep Fruit – Apples, Bananas, Peaches, Strawberries, Grapes
  • Prep Veggies – Carrots, Broccoli, Cucumbers
  • Slice Quick Breads
  • Shred Cheese
  • Wash Dishes! ;)

Meals in our Yard

The week after the retreat we’ll feed each team once at our house. I haven’t done any prep work for these yet, but I plan to make the same meal both nights for both teams to save effort and my brain energy. :)

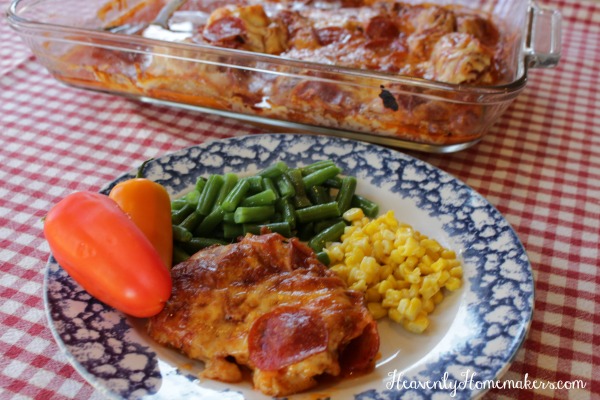
  • Simple Pizza Chicken Bake (this is so easy to put together!)
  • Tossed Salad
  • Corn
  • Grapes
  • Italian Bread
  • Oatmeal Chocolate Chip Cookies

What are your go-to meals when feeding large crowds?

Heavenly Homemaker's Club Members: Access your homepage and all your fantastic resources here! Not a member yet? Please join us!

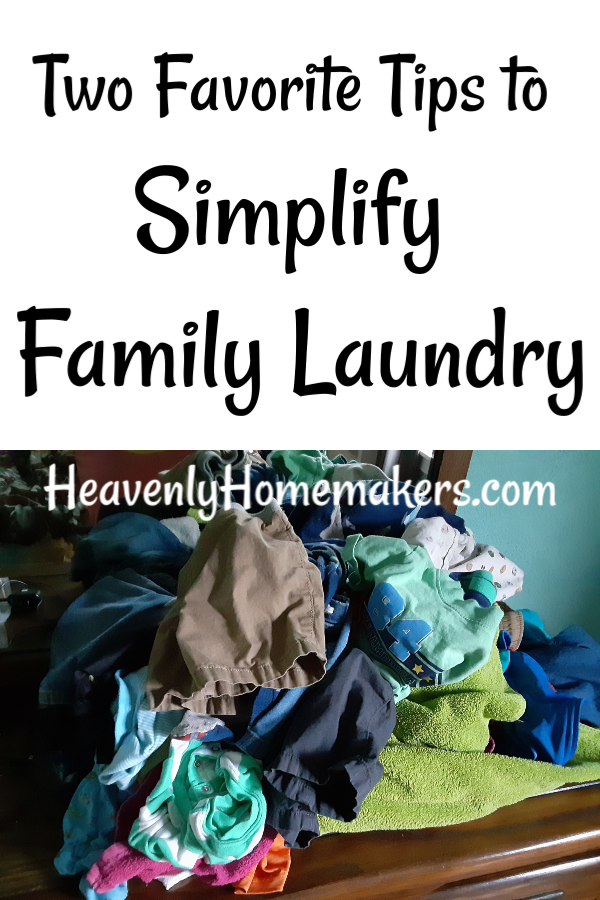
Two Favorite Tips to Simplify Family Laundry

June 28, 2020 by Laura 17 Comments

This post may contain affiliate links which won’t change your price but will share some commission.

Feel like your family laundry is a daunting, never-ending task? It doesn’t have to be! Here are my best tips to simplify family laundry. :)

How to Simplify Family Laundry

Laundry is an inevitable chore. But it doesn’t have to be one that overwhelms you. Allow me to share my 25+ years of homemaking, 23+ years of parenting, and 7 sons’ worth of experience to help you simplify!

1. Do not do it by yourself.

I cannot emphasize this enough. I know too many mamas who are constantly overwhelmed by laundry, but they don’t get their family members involved with helping! I learned long ago that it is important to get my sons involved in every single job that they are capable of doing, from laundry to cooking to cleaning. (And not to worry, my sons are led by my husband’s great example as he also pitches in every way that he can.)

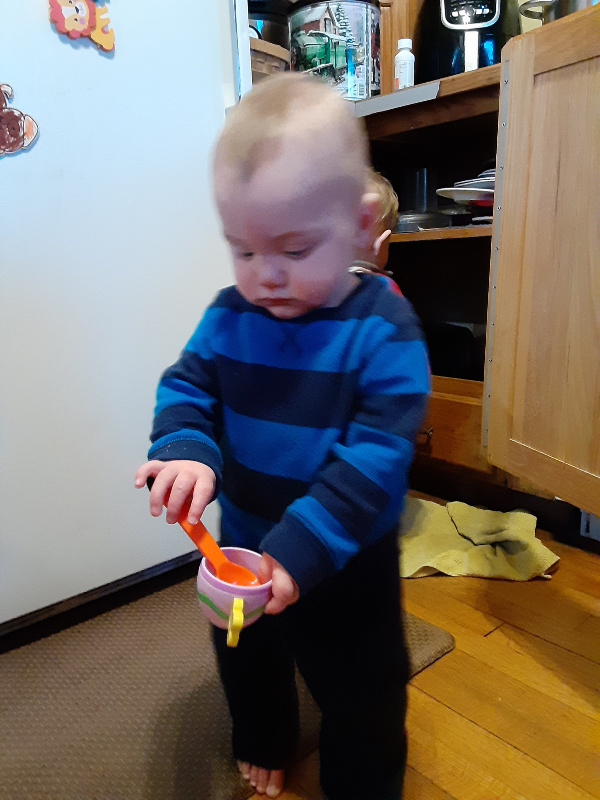
The only people in the household who should get out of laundry duty are babies. And toddlers. Toddlers try to be helpful but they think that their job is to take clothes out of drawers and washing machines faster than you put them in. I should know. I have Toddlers x 2. They are doubly helpful:

They are so sweet though, and they are so proud of how well they ruin my laundry efforts.

But beyond babies and toddlers:

  • As soon as a kid is old enough/able to drag a basket of dirty laundry over to a washing machine, that should become their job.
  • As soon as a kid is old enough/able to put laundry into a washing machine, that should become their job.
  • As soon as a kid is old enough/able to switch laundry from a washer to a dryer, that should become their job.
  • As soon as a kid is old enough/able to fold and put away laundry, that should become their job. Start with washrags and towels, graduate to clothing items when they are ready.

And in my experience, somewhere around 3rd or 4th grade, a child is capable of being completely in charge of their own laundry. From start to finish. Their laundry basket is full? They wash their clothes. They dry their clothes. They put their clothes away. Your job here is done. :)

Teaching my older boys to do all of their laundry by themselves has been incredibly helpful! For years, I only needed to wash my laundry and Matt’s. Then God moved in our little boys and now I’m back to washing laundry for 5 people again! Not to worry – I’ve learned another great tip that helps me get through these loads more efficiently. So let’s move on to Tip #2.

2. Start folding the biggest items first

This may seem silly, but this tip helps me get through my laundry piles more easily every time!

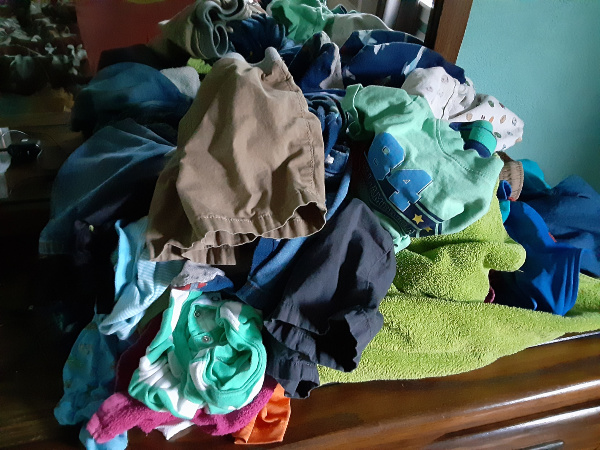
Laundry piles for several people can look pretty big…because they are. :)

The pile you see here is just the result of washing/drying one load. Because we have 3 little ones, there are many tiny items of clothing within the load to fold and put away. Seeing it all together in a pile can make me feel like I have a big job ahead of me, especially if there are two or three loads that have piled up.

But I’ve found that if I start by pulling out and folding towels and baby blankets first, the pile very suddenly looks much smaller and less daunting.

The large items are easy to fold and make me feel like I’ve quickly completed half the pile! Once those are done, I move on to the little shirts and pants, which I pretty much just fold in half and stack. Easy peasy, laundry squeezy. Well, as long as my toddler helpers leave my pretty piles alone. :)

Review: Get your family involved. Fold big items first.

I will now reward your laundry efforts with two bonus tips!

Bonus Tip #1: I never fold underwear. Life is too short and wrinkled undies never hurt anyone.

I throw mine directly into my drawer, close it, and walk away without a second thought. I hand Brayden (age 6) his wad of his unfolded undies to put into his drawer and he stuffs them right in. And let’s be real – even if I would have folded them, they would have come unfolded by the time he made it to his dresser. You know I’m right.

Bonus Tip #2: I never sort laundry. And we are still clean and living to tell about it.

My apologies to everyone who is cringing over this admission. Some people are diligent laundry sorters. And some of us wash everything together in cold and don’t think twice.

The only time I care is if I have a nice white shirt that I don’t want to ruin. Otherwise, everything pretty much goes in at the same time. I kind of forgot sorting laundry was a thing.

The future wives of my sons may shake their heads at me for failing to teach their husbands to sort. But hey, I taught them to cook and clean toilets and so much more. They can take it from here. :)

And that’s how I simplify family laundry.

What are your best tips? 

Heavenly Homemaker's Club Members: Access your homepage and all your fantastic resources here! Not a member yet? Please join us!

Books I Would Love for You to Love with Me

March 8, 2020 by Tasha Hackett 4 Comments

This post may contain affiliate links which won’t change your price but will share some commission.

One of my favorite things is a fresh crispy salad with bacon, feta cheese, and thin homemade ranch with extra garlic. Mmmm. And also: books! My house is full of many kinds of books. Every year I purge stacks of them and yet my collection continues to grow. I’m going to share a few of my current favorites, listed in no particular order.

I’ve included the link to each. (Budget tip: Don’t buy them new! If you can wait a week or so, snag a used copy if available.) Keep scrolling to read my comments on each!

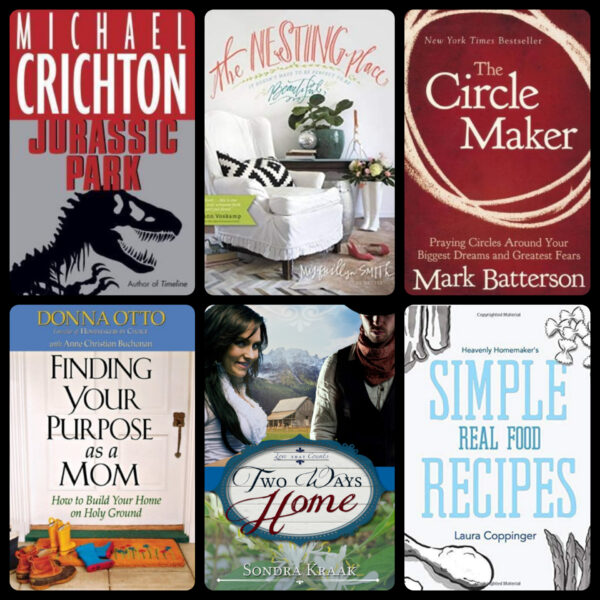
  1. The Nesting Place by Myquillyn Smith
  2. The Circle Maker by Mark Batterson
  3. Jurassic Park by Michael Crichton
  4. Finding Your Purpose as a Mom: How to Build Your Home on Holy Ground by Donna Otto

Bonus Novels: Two Ways Home by Sonda Kraak (Sequel to the equally delightful One Plus One Equals Trouble in the Love That Counts Series) and our favorite cookbook of course.

The Nesting Place by Myquillyn Smith

Among all the books I own, I’ve never read one on interior design! Gifted to me by my sweet sister-in-law for Christmas, I have devoured it. While reading it, I became aware of how poorly I was speaking of my home:

“I hate having the laundry in the kitchen,”

“My bedroom on the main floor is annoying because the kids are so far away,”

“The toilet in the basement is so old, I can’t stand to use it,”

“This house is so big I can’t keep it clean!”

Myquillyn Smith says, “Don’t apologize for what you have. It makes guests feel uncomfortable, it encourages discontentment, and if you’re married and your husband hears you apologizing for what he’s provided, it could be hurtful.” That hit home for me and my list of things that were “wrong” with my house. She showed me how to begin loving my home, and how to use my “lovely limitations” (like the laundry in the kitchen) as springboards for creative action.

She gives step-by-step guides to making your house a home. No, she doesn’t tell you what colors to use or designers or type of furniture or decor. She goes a step deeper and gets you asking, what is the purpose of this home? This room? This couch? She is always reminding us that a home is there to serve people, not the other way around and it doesn’t have to be perfect to be beautiful.

I’ll be the first to admit, interior design is not my strongest skill, but this book is SO MUCH MORE than a decorating book. It’s a confidence-building, take action, bloom where you’re planted, seize the day, kind of book that I will be returning to for years to come. She has another I haven’t read that I will get my hands on soon: Cozy Minimalist: More Style, Less Stuff

The Circle Maker by Mark Batterson

I was not excited to read this when my Dad gifted it to me. “Yay… a book about prayer…” But, let me just say, “WOW.” The growth in my faith that I have today was watered by reading The Circle Maker. I have underlined passages in every chapter and filled margins with notes. Batterson uses his own personal experiences and biblical miracles to show God’s ever-present ever-listening qualities. He says, “Nothing honors God more than a big dream that is way beyond our ability to accomplish.” After reading this chapter, I fell on my knees and spilled out my dreams of paying down $20,000 of our debt in one year. This was June we weren’t even close to the $10,000 mark. I began circling that dream. By December we had paid back $29,000. Whaa?? God gets full glory for that one.

What it boils down to is believing that God is able and yet the answer will always be “No,” if we don’t ask. He encourages us that we “don’t worship the Great I-Used-To-Could.” We worship the Great I Am. If you want a book to energize, inspire, and fuse hope back into your relationship with God, this is a great choice.

Jurassic Park by Michael Crichton

Um, no, this book will not inspire you to be a better homemaker or teach you better ways to pray. But yes, really, really, it’s one of my favorites! When my baby girl was two days old I began reading aloud to her as something to do. I had a long and slow postpartum recovery, spending upwards of seven hours a day sitting and resting for months. This book was one of the few we owned that I had never read. Why would I want to read a book about dinosaurs?! Gag! But the husband insisted I give it a try.

Once I started, I couldn’t put it down. There is a lot of blood and some language, the dinosaurs and the gagging, remember? But the story is incredibly fascinating, the science is intriguing, and the characters are interesting. All around an exciting and thrilling read. I also love his sequel The Lost World. And we won’t talk about the movies. They’re fine. But the books are fantastic. If my daughter needs therapy someday because her mother read aloud Jurassic Park her first week of life… send me the bill.

Finding Your Purpose as a Mom: How to Build Your Home on Holy Ground by Donna Otto

I own almost every one of Donna’s books. I stumbled upon her podcasts, Modern Homemakers, after searching, “Organization.” Apparently she was teaching about organizing before it was trendy! Though this book isn’t about your physical home as much as your role as a spiritual leader in your home. (The one she wrote about managing your physical house is called “How to Get More Done in Less Time.”)

Is your home peaceful? Are you a thermometer or a thermostat? Is home a place where everyone feels safe? She gently teaches you what to do when you’re overwhelmed and don’t know what to do.

While this is not a quick read, it is worth the energy. I find I do best reading a couple pages at a time and letting it sink in. It is packed full of wisdom. Finding Your Purpose would make a fantastic book for a bible study or book club. I have read through it twice in the past four years, each time feeling more empowered in my roles as a woman, wife, mother, and homemaker.

BONUS books:

Two Ways Home by Sonda Kraak and the rest of the Love That Counts Series.

Reading novels was my main hobby. At least a couple hours every day. Growing up, I read so much that I didn’t understand there were people who didn’t read. What sort of life would that be… I was such a reader all my life I didn’t know it was to be classified as a “hobby,” it’s just what I did.

Not surprisingly, I went to college and got a degree in English because… books.

In Middle School, I blasted through all the Janette Oke novels and fell in love with anything Historical Fiction with clean romantic tension, but also fantasy and dragons and epic adventures (and dinosaurs apparently). I tried to give up reading a few years ago when I had too many kids and not enough time or sleep. But recently, I started again. Bless my baby who doesn’t sleep through the night and the hours I spend awake when I should be sleeping. I bought Sonda Kraak’s novel on my phone’s Kindle app for free with my Amazon points and I read it in 1 minute, 3 minute, 5 minute, and 7 minute intervals while letting my baby work through his emotions, if you know what I mean. Also, I find I can read in night-mode without disturbing the baby while he nurses in the evenings.

So, bla bla bla… I love books. Let me tell you about Two Ways Home and how much I loved reading it. Girl meets Boy and … well, if you’ve read an inspirational romance book ever then you know the drill. EXCEPT, Kraak’s writing is topnotch. The characters are funny and witty and do silly things that make them realistic. The hero is swoon-worthy, yet has his own demons to slay. The heroin is strong, yet she learns the beauty of having someone love her and pray for her.

Your turn!

Outside tales of how Laura had to chase down her taco, what do you read? I’d love to hear about any great books you’ve stumbled upon. Are there stories that have just stuck with you? Non-Fiction you keep thumbing through and pick up again and again? We all know that your newest favorite cookbook is Simple Real Food Recipes (#sorrynotsorry) but is there anything else you’ve been reading lately? Let me know!

-Tasha


Tasha Hackett, friend of Laura, lives in the middle of Nebraska where God has blessed the earth with extreme versions of all four seasons. When she is not feeding her family of six, including her Middle School science teaching husband, three sons and a daughter, she can be found sewing, painting, sneaking Jalapeno Cheetos, dreaming of forests, staying out of debt, Instagramming for Laura at @heavenlyhomemaker and looking snazzy in a vintage tweed blazer while attempting to write a novel in 1 minute, 3 minute, 5 minute intervals.


Heavenly Homemaker's Club Members: Access your homepage and all your fantastic resources here! Not a member yet? Please join us!

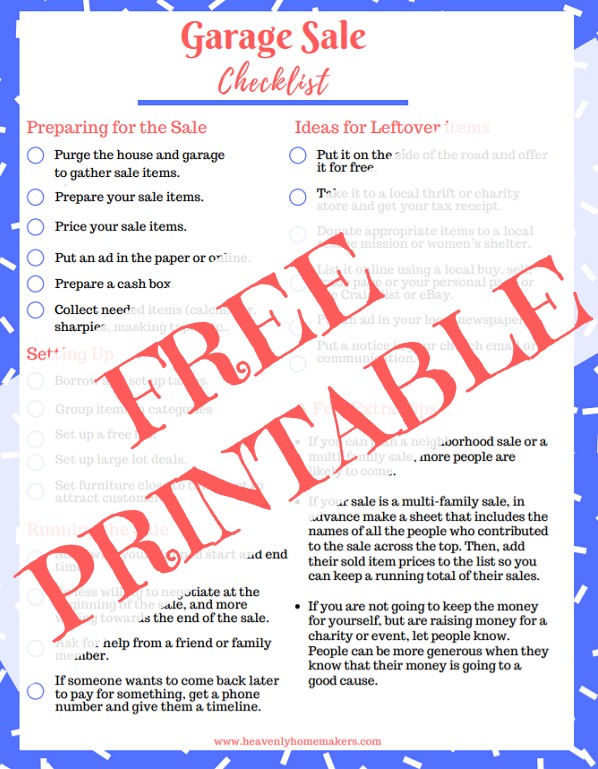
How to Host a Rockin’ Garage or Yard Sale {Plus a FREE Printable Checklist!}

June 4, 2018 by Laura Leave a Comment

This post may contain affiliate links which won’t change your price but will share some commission.

Hoping to clear out clutter from your house this summer? Here are some fabulous tips for hosting a ROCKIN’ garage or yard sale. Get rid of unneeded items from your home and make some extra cash too! (Be sure to get your Free Printable Checklist below!)

Kudos to my friend Kim (aka Garage Sale Queen) for providing all the wisdom for this post!

1. Prepare for your Garage or Yard Sale

Purge the House and Garage to Gather Sale Items

Several weeks before your sale, do a room by room purge. Check closets, cupboards, under beds, in storage places/tubs/shelves, etc. As you work your way through each room and see each item, ask yourself:

  • Are we using this?
  • Do we need it?
  • Can we do without it?
  • Would life be simpler if this was gone?
  • Is it more important to have a few dollars or cents in my hand or to still have this thing taking up space in my house?

If you see an item and hear yourself saying, “Why do we still have this?” – put it in the garage sale pile.

Prepare Your Sale Items

  • Wipe down everything that is dusty or dirty so they will look more appealing.
  • Put jewelry and other small items in ziploc bags to keep them from getting lost and so you can put a price tag on them more easily.
  • Group items in flat boxes so people can easily see what is inside.

Price Your Sale Items

If people cannot find a price, they will often choose not to purchase. In addition, most people do not like to “make an offer.” We recommend putting a price tag on everything!

  • Price items in 25 cent increments (eliminating the need for dimes, nickels, and pennies).
  • Use brightly colored stickers and large print to mark prices on each item.
  • Be willing to negotiate your prices if someone offers you a lower price that is still reasonable.

Put an Ad in the Paper or Online

It’s often worth the investment of putting an ad in the newspaper so more people know to come to your sale! What to consider when writing your ad:

  • Highlight major items like furniture, bicycles, appliances, unique items, homeschool curriculum, antiques and name brand clothing.
  • Think about what might make your garage sale stand out. Mention specific collectibles, children’s play equipment, tools, or outdoor furniture.
  • If you are doing a multi-family sale, emphasize that. It makes people more likely to come because there will be more things to see in one location.
  • If you are doing a moving sale and “everything must go”, say that because people know that you are more motivated to get rid of things.
  • If you are selling off baby equipment, make sure you say that. New moms are always looking for great deals on baby equipment- Grandmas and child care providers, too!
  • Include the specific dates and times you will hold your sale. Friday afternoon/evening and Saturday mornings tend to be the best times for most.
  • If your address is one that is hard to find, include directions in the ad.

This guy is incredibly excited to come to your sale after reading your ad.

Free Advertising: Post your ad to your local Facebook Selling Page. Consider posting it on your personal page.

A Note About Posting Online: People may ask about the prices of things and ask you to sell them “before” the sale, sometimes at a reduced price. While this can be nice, it can also make for some difficult situations, especially if you have already put that item in your newspaper ad. If someone came to your house specifically for that item at the beginning of your sale only to find that it is already sold, it can make for some not very nice exchanges.

Prepare a Cash Box

A bag, box, or drawer works nicely for your garage sale money. In advance of the sale, be sure to fill it so as to have change on hand for customers.

  • It is best to begin with about $20 in ones, $20 in fives, $40 in tens, plus at least one roll of quarters for making change. Keep track of what you began with so you have a more accurate total of your sales at the end.
  • Try to keep it organized throughout the sale. Keep ones together in front of fives, in front of tens, etc.
  • If your bag is getting full during the sale, take some inside your house (especially the checks and larger bills) and put it in a safe place.
  • Decide ahead of time: Are you willing to take checks? If so, do you have requirements? For instance, check has to be local and include a usable telephone number.
  • Most people are not set up to take credit or debit cards, but would you accept PayPal? This new way of paying is becoming more popular at garage sales, especially with the commonality of smart phones.

Collect Needed Items:

There are several items that are nice to have on hand before and during a garage or yard sale.

  • You might need masking tape to write on, to tape up signs, to mark prices, to hold boxes together, and group items together.
  • You might need scratch paper to make signs about prices, to write down additional information, etc.
  • Sharpies, both small and large point, come in handy.
  • Consider locating a tarps or two to cover sale items overnight.
  • Measuring tape is nice to have to lend to customers interested in specific items.
  • A calculator can come in handy unless you’re great at doing math in your head.

2. Setting Up Your Garage Sale or Yard Sale

  • Borrow and set up many tables to place sale items on. Tables are better than the grass or driveway in most cases because people don’t want to bend over. Make things easier for people to see and reach and you are more likely for them to sell.
  • Group things in categories:  kitchen, bath, kids toys, clothing, bedding, tools, books, curriculum, crafts, baby equipment, etc. Arrange furniture in nice groupings, if you can. Put the same size clothing and shoes together. Put bedding sizes together and mark them clearly.
  • Have a free box. If you don’t know how to price it and you’d price it super cheap, put it in the free box and watch it leave!
  • Make LARGE LOT deals: For example, “These books are 50 cents each or 12 for $5.” “This box of toys is $5 for the box.” “Clothing is “$1 each or 12 for $10.” It is amazing what people will take to make a great deal. The more they take, the less you have to deal with at the end.
  • Set furniture close to the street so it will attract buyers to your sale.

3. Running Your Garage or Yard Sale

  • Stick with your planned start and end times.
  • Ask for help. There are often times when you need two or more people to move a table, set up something quickly, get a drink, change the baby, or cover for you while you use the restroom.
  • Be less willing to negotiate at the beginning of the sale and much more willing to negotiate toward the end of the sale. If someone wants an amazing deal (like less than half the requested price), tell them you will think about it and call them back later. Get their number and give them yours. If it doesn’t sell later, call them and work on the amazing deal.
  • If someone wants to come back later to pay for something, consider that they might not come back and you might miss out on another sale. Get a phone number and give them a timeline. “If you are not back and/or have not paid for the item before XXX time, then I will make it available to someone else.”

Obviously the people helping you move furniture will be dressed in matching red overalls.

4. Other Considerations:

  • Larger sales are more likely to draw greater numbers of people. If you can plan a neighborhood sale or a multi-family sale, more people are likely to come.
  • If your sale is a multi-family sale, in advance make a sheet that includes the names of all the people who contributed to the sale across the top. Then, add their sold item prices to the list so you can keep a running total of their sales. Or have each family’s price stickers of a different color or mark price stickers with initials.
  • If you are not going to keep the money for yourself, but are raising money for a charity or event, let people know. People can be more generous when they know that their money is going to a good cause.

5. What to Do with Garage and Yard Sale Leftovers

Not sure what to do with items that don’t sell? Here are some ideas:

  • Put it on the side of the road and offer it for free. It will likely disappear.
  • Take it to a local thrift or charity store and get your tax receipt. That is not immediate money in your hand, but it might help with your taxes later on.
  • Donate appropriate items to a local rescue mission or women’s shelter.
  • List it online using a local buy, sell, trade page or your personal page. Use Craigslist or ebay, if you are savvy.
  • Put an ad in your local newspaper. Some newspapers offer one free ad after your garage sale if you advertised with them.
  • Put a notice in your church email or communication. You never know when the right person will be listening or know someone who “was looking for that.”

Get a FREE Garage Sale Checklist Printable.

Use this handy checklist to help you have a super effective garage or yard sale!

Get this free printable when you join our Heavenly Homemaker’s Savings Club. We love sharing great freebies, deals, and money saving tips with you!


Heavenly Homemaker's Club Members: Access your homepage and all your fantastic resources here! Not a member yet? Please join us!

The Easiest Way to Get the Stink Out of Shoes

March 4, 2018 by Laura 7 Comments

This post may contain affiliate links which won’t change your price but will share some commission.

Do you have stinky shoes at your house? If so, today I shall become your new best friend as I reveal my fabulous (but weird) secret to getting the stink out of shoes.

shoes

You can be very sure that my methods work as I am, most definitely, an expert on shoe stink. Is my profound wisdom on the matter a result of time spent doing extensive research on the subject? No. In fact, my expertise comes from living with five male, adult-sized athletes. We have four pairs of basketball shoes plus ten pairs of soccer shoes (because, of course, they all need both indoor and outdoor varieties).

The stink here is real, folks. Anyone who opens our front closet does so at their own risk, as the stench of 28 athletic shoes rises up inside in a thick, green cloud that makes a person wonder if a dead animal lies therein.

We tried airing the shoes outside, stuffing newspaper inside them to draw out the smell, and used multiple commercial products that promise great results.

And yet, the stink remained. The tears rolled down our faces. We thought we might have to move out of our house, but of course, the shoes would move with us, so then what would we do?

newspapershoessm

See? I told you we tried the “stuff newspapers inside” method.
It works. Sort of.

The Easiest Way to Get the Stink out of Shoes

Not to worry. There’s a simple remedy for shoe stink and you are about to be amazed!

I should warn you that as excited as I am that my shoe stink removal methods work so fabulously, my grandma would likely shake her head in dismay were she alive to read this article. “Surely there is another way, Laura,” she might say. But I would say no. I’ve tried all the other ways and nothing else works as well as this.

So ladies and gentlemen, I’m afraid it’s time to buy some vodka. Yes, this is what it’s come down to.

Vodka just so happens to be a magic ingredient in Grandma’s baking vanilla extract, a fact of which I’m sure she was blissfully unaware. And, as my husband and I have recently discovered, it also works fabulously, mixed with tea tree oil, at immediately killing the stink in shoes.

Spray Bottle with Flower and Scrub

This fabulous discovery became known to us on a day we had finally had enough. The shoe stink has somehow risen to a new level. There were no words.

My husband did a quick online search to find that simply spraying a mixture of vodka and tea tree oil into the offending shoes would immediately remove the stink. Could it be?

Well, I always have a bottle of vodka on hand so that I can make batches of Homemade Vanilla. So we quickly got out our vanilla-making vodka and poured it into a spray bottle. We added some tea tree oil from our collection of essential oils. We sprayed the mixture into a pair of shoes.

Miracle of miracles. The shoes immediately smelled fresh. I’m talking, you can put your face right down into the shoe, live to tell about it, and even come up smiling.

I double dog dare you to try this amazing concoction. Spray it into your most offensive shoes. Put your face into the shoe. Be filled with joy.

Now this spray is not a one-and-done stink removal remedy. We’ve found that we must spray our shoes down after every athletic event because while the DIY spray is powerful, so is fresh sweat. Good talk.

DIY Shoe Stink Spray

The Easiest Way to Get the Stink Out of Shoes
 
Save Print
Author: Laura
Serves: 2 cups
Ingredients
  • 2 cups plain vodka (the cheap stuff is just fine)
  • 8-10 drops tea tree oil
Instructions
  1. Pour vodka into a spray bottle.
  2. Drop tea tree oil into the bottle and shake to mix.
  3. Spray mixture into stinky shoes and be amazed!
3.4.3177

The Best Way to Get the STINK Out of Shoes

Why this works

Vodka kills bacteria and Tea Tree Oil is both antibacterial and antifungal. The combination works magic. So now the only reason I make sure our closet door stays closed is because well, have you ever seen 28 shoes thrown haphazardly into one space? Someone give me a DIY remedy for that mess. :)

Some of these links are my affiliate links.

Heavenly Homemaker's Club Members: Access your homepage and all your fantastic resources here! Not a member yet? Please join us!

30 Real Food Money Saving Tips

January 22, 2018 by Laura 2 Comments

This post may contain affiliate links which won’t change your price but will share some commission.

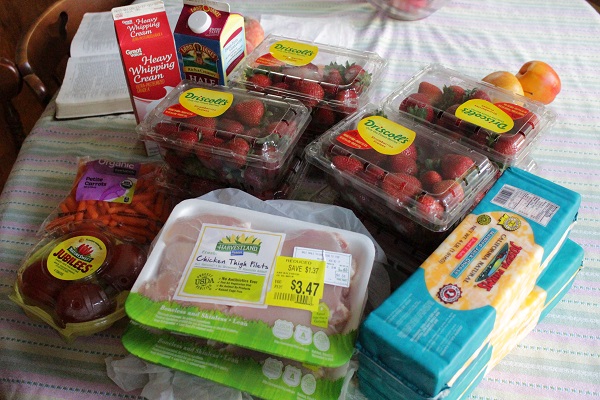
I couldn’t have done it without you. I asked what YOUR best real food money saving tips might be, and oh did you come through!

It was so fun to put all of our heads together and put together this great (FREE!) resource full of Real Food Money Saving Tips! There truly are many great ways to save money on real food groceries!

groceries august17

I love it when high quality meat is marked down!

Sure, I know some great ways I’ve learned to save money on real food through the years. But so many of you have different experiences and ideas from what I’ve learned. Putting so many of your tips together into this little booklet means we all get just that much smarter! (Just when we thought we knew everything about buying apples…)

Real Food Money Saving TipsYum

Ready to get started? You’ll find all 30 tips detailed in this absolutely FREE resource. Here are some of my favorites:

  1. Crystal: I only have a family of 3, but because of prices of grass fed beef and organic chicken, I only use half a pound when I make spaghetti or a casserole and I use 1 chicken breast when I make a noodle dish or casserole that calls for chicken. I’m always using less meat than called for as a way to stretch it. That way I can afford higher quality meat. It works for us!
  2. Nicole: Last year I switched around how I menu planned instead of finding recipes then going shopping for those ingredients I now hit the produce & meat area buying what’s on sale (and good quality!) then I come home and find recipes that contain those items. Now I don’t feel obligated to buy the higher non sale item because of the time I already have invested in menu planning.
  3. Melody: We have meatless Mondays, tuna recipes for Tuesdays, and I “shop” my pantry and fridge/freezer first, then the on-line ads, and make my menu plan from that. I make out my grocery list for just the items I will need to make the items on my menu. We also use less meat than a recipe calls for and add beans to stretch out the meat in meals like tacos or casseroles.
  4. Susan: My best money saving advice is the skip fancy recipes that require you to buy ingredients you don’t have on hand or use often. I often leave out or substitute a fancy ingredient for a more economical or practical ingredient. I can’t be a 5 star cook on my budget and some days I wish I had fresh herbs or a fancy vinegar, but running out to buy them for 1 recipe isn’t the best use of my funds. I have been sticking to simple real food recipes with basic cost effective ingredients. I make menus based on my own pantry and sale items. Also, I use leftovers for casseroles or soups (freezing them if I am not using them right away). Leftover or stale bread is used to make croutons.
  5. Christy: Twice a year we clean out the pantry and freezer. We buy only milk, eggs and bread until we are down to almost nothing in the pantry. The meals get interesting, but it is great for the budget and can be as healthy as what you originally put in there.
  6. Mary Beth E: Right now–and tomorrow– I am waiting for UPS and/or FedEx to drop off packages of grocery staple items I buy in bulk. Because I cook whole foods at home, this will cover all our bread, rolls, tortillas, rice, pies, cakes, spices, seasonings, and much more, even toilet paper. I will place another order about mid-year. When I see almost any recipe, I have on hand the basics. When I go to the grocery store–every other week–I mainly buy fresh or frozen produce, eggs, and dairy. Buying in bulk and thinking of your budget in terms of a year rather than a week, really saves a lot of money.
  7. Birdie: Garden and can, however you are able. A small plot in your yard, partner with others on a shared plots, help a neighbor with a plot, encourage your apartment/duplex owner to allow some of you to garden in the yard (check bylaws), talk to the college in your area to see if they would be interested in allowing community gardens. Even create a raised bed so you can sit and garden from a chair or wheel chair if you are not as mobile. Container garden on a balcony or deck (remember to water often).If you can’t garden, buy meat, fruits and vegetables in super sales, can, freeze, and dehydrate. Approach a few farmers and see if you can have shares in their live stock. Participate in butcher time and you may receive a great deal on meat. If you can get your hands on garden herbs and spices from others, dry and add lots of flavor to your cooking.

  8. Nedrda: One way I save money on quality meat is to partner with my sister and mom to buy a grass-fed/pasture raised cow or hog. We can buy those meats at $4.00 a pound and then split the meat between the three of us. We also do this for the bulk coconut oil through Tropical Traditions and other items through Azure Standard and Amazon. By doing this, I do not have to come up with total amount myself to buy the beef/pork/oil and I can enjoy the quality for a great price. It also helps with storage issues to split the order!
  9. Crissi: For most of our grains, frozen fruits, some fresh fruits, and odds and ends we use Azure Standard. We’ve purchased foods from them for well over a year now, I’d highly recommend them. They have excellent customer service.
  10. Cassondra: One thing I do when I run out of something like a spice or condiment or anything else is look online to see if I can make it from scratch with items here at home. For example, I make our taco seasoning but was out of chili powder…so I went online and found a recipe for chili powder, had all the ingredients for it and it turned out great. So now I have one more from scratch recipe on hand.

Want to read all 30 Real Food Money Saving Tips?

We’ve compiled them all into this simple-to-read FREE eBook!

30 Real Food Money Saving Tips

This great little book is full of tips I compiled when I asked you, “What are your best tips for saving money on real food?” Since we’ve been talking about Simple Meals on a Simple Budget this month, I thought it would be fun to remind you about this great free download. I truly loved compiling these tips and learned great new ideas to try as I work to save money while feeding my family well!

How to get 30 Real Food Money Saving Tips

Enter your email address here, confirm that you would like to receive this information, and the freebie will land in your inbox! Easy as that!

Bonus Freebie:

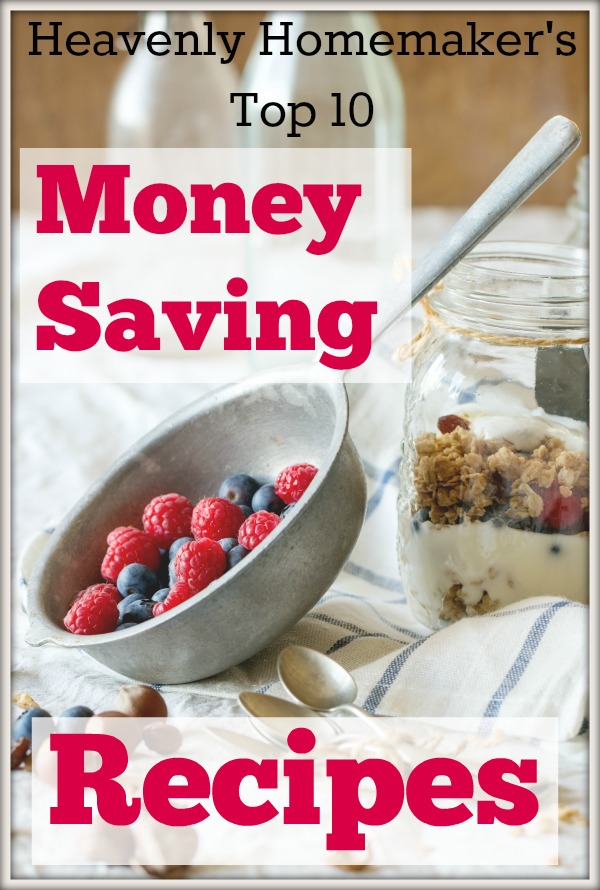
When you sign up to get the free 30 Real Food Money Saving Tips eBooklet, you’ll also get this free Heavenly Homemaker’s Top 10 Money Saving Recipes eBooklet! Don’t you love getting free books to help you learn more about saving money? It’s like we’re getting free grocery money! :)

Top 10 Money Saving Recipes

Want a sneak peek inside the 10 Money Saving Recipes eBook?? Here’s one of our favorites!

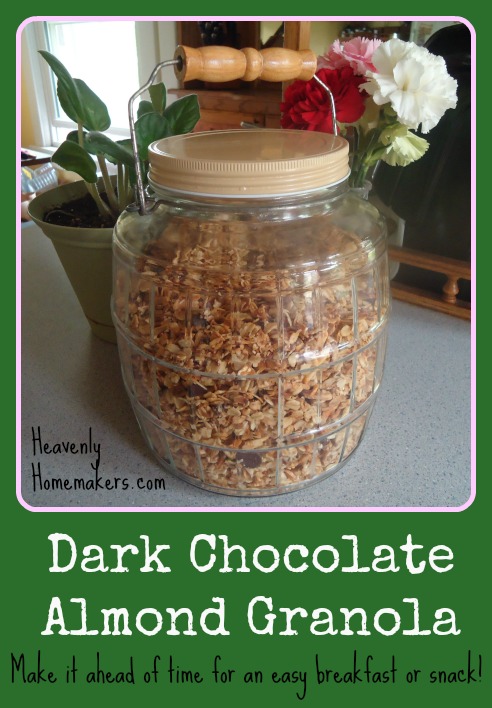
Dark Chocolate Almond Granola

(This recipe cuts the cost from $2.00/serving with store-bought granola to only $0.50/serving. Yep. The store-bought version really is that expensive!)

Dark Chocolate Almond Granola
 
Save Print
Author: Laura
Serves: 10-12
Ingredients
  • 4 cups rolled oats
  • ¾ cup shredded, unsweetened coconut
  • 1 cup slivered almonds
  • ¾ cup honey
  • ¾ cup coconut oil
  • ½ cup dark chocolate chips or chunks
Instructions
  1. In a small saucepan, melt coconut oil and honey together.
  2. Stir oats, shredded coconut, and slivered almonds together in a large bowl.
  3. Drizzle on the honey/coconut oil mixture and stir well.
  4. Pour mixture onto a large, parchment paper-lined baking sheet (or two 9x13 inch dishes).
  5. Bake at 300° for 35-45 minutes, stirring after the first 20 minutes.
  6. Allow mixture to cool.
  7. Stir in dark chocolate chunks.
  8. Store granola in an air-tight container.
  9. Makes 10-12 servings.
3.4.3177

Dark Chocolate Almond Granola - A Great Make-Ahead Meal

Saving money is fun when there’s chocolate involved.

I can’t wait for you to enjoy all of the money saving tips and recipes!

Sign up here and watch for these great free eBooks to hit your inbox!

P.S. Signing up for these great freebies will connect you to our free Savings Club so we can occasionally let you know of other wonderful food and homemaking deals we learn about!

Heavenly Homemaker's Club Members: Access your homepage and all your fantastic resources here! Not a member yet? Please join us!
Next Page »

Join Our Community!

 Facebook Twitter RSS E-mail Instagram Pinterest

Popular Posts

~ Will All of the Real Moms Please Stand Up?
~ Easy! Stir-and-Pour Whole Wheat Bread
~ How to Make Gatorade
~ 31 Real Food Breakfast Ideas
~ Dear Teenage Girls...
~ When Mom Takes a Step Back
~ The Inexpensive Health Insurance We Love!
~ Let's Talk Real Food Grocery Budgets

Check out our latest posts!

  • Least Expensive Burrito Recipe
  • Summer Supper Ideas and Recipes
  • Summer Lunch List of Ideas
  • Inexpensive Meals I Made From Costco
  • $5 Family Supper Club – Join Us!
Home  ~  Simple Meals  ~  Club Membership  ~  Shop  ~  Privacy Policy  ~  Disclosure  ~ Contact

Copyright © 2022 · Beautiful Pro Theme on Genesis Framework · WordPress · Log in