Heavenly Homemakers

Encouraging women in homemaking, healthy eating and parenting

  • Home
    • About
    • FAQs
  • Recipes
    • Bread and Breakfast
    • Condiments
    • Dairy
    • Main Dishes
    • Side Dishes and Snacks
    • Desserts
    • Gluten Free
    • Instant Pot
    • Crock Pot
    • Heavenly Homemaker’s Weekly Menus
  • Homemaking
    • Real Food Sources
  • Store
  • Contact
    • Advertise
    • Disclosure
    • Privacy Policy
  • Simple Meals
  • Club Members!

How to Make Peach Sweet (or Unsweet) Tea

June 20, 2016 by Laura 4 Comments

This post may contain affiliate links. For more information, please see our disclosure policy.

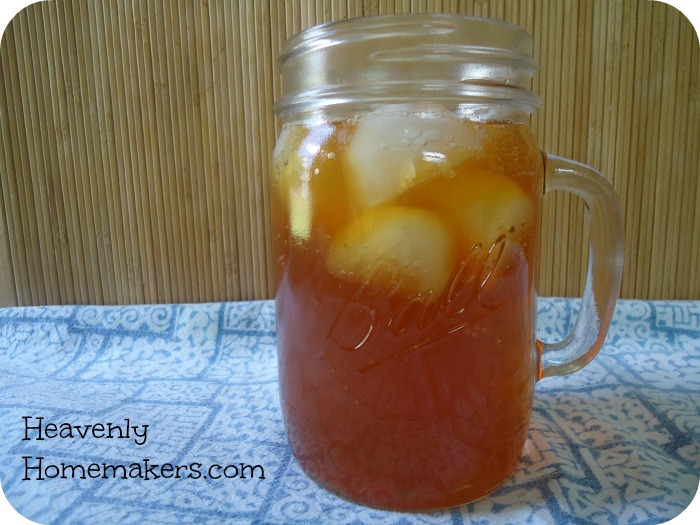
If I like the Iced Mango Tea (which I do), I think like this Peach Tea even more. Talk about refreshment on a hot day!
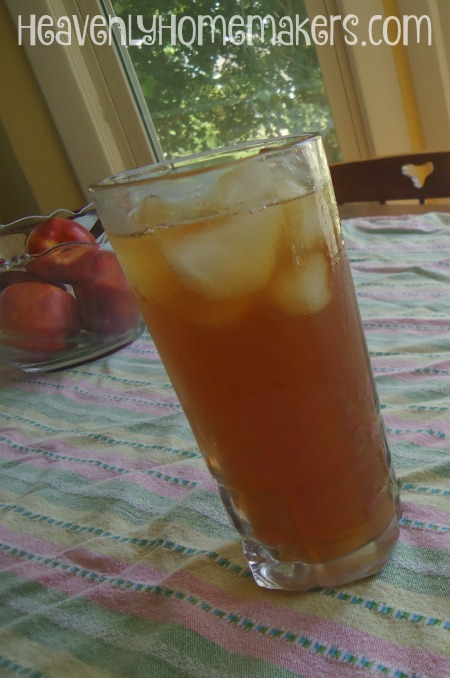
Peach Tea

The trick I learned since starting to play with fruity tea recipes is that it works best if we add just a tiny bit of honey or sugar to the fruit and water while we bring it to a boil. This brings out the natural sweetness and great flavor of the fruit. I wondered if this might make the tea too sweet for my liking (I’m an unsweet tea girl). But I find it to be just right. On the other hand, my husband (who likes sweet tea), doesn’t mind drinking this tea as-is, without any added sugar beyond the tiny bit of honey I add to the fruit during the boiling process.

Experiment with this and see if you can also cut down on the sugar by letting the fruit do the job naturally!

Peach Sweet (or Unsweet) TeaYum

5.0 from 1 reviews
How to Make Peach Sweet (or Unsweet) Tea
 
Save Print
Author: Laura
Serves: ½ gallon
Ingredients
  • 2 quarts of water, divided
  • 4-5 ripe peaches, sliced
  • 4-8 tea bags of your favorite black or green tea, depending on how strong you like your tea
  • Liquid stevia, honey, or sugar to taste
Instructions
  1. In a medium-sized pot, heat 1 quart of water and the peaches to boiling. Add a teaspoon of sugar or honey if you like. This will help make a "peach syrup."
  2. Simmer for about five minutes.
  3. Mush the peaches in the water and add the tea bags.
  4. Allow tea to steep for 5-10 minutes.
  5. Strain tea into a ½ gallon jar or pitcher.
  6. Add a quart of water.
  7. Stir in stevia or sugar if you want your tea sweetened.
  8. Refrigerate until thoroughly chilled.
  9. Serve over ice.
3.4.3177

How to Make Peach Tea

Be sure to also try the Mango Sweet (or Unsweet) Tea along with this Peach Tea. See which you like best. Up next, Raspberry Sweet (or Unsweet) Tea!

Heavenly Homemaker's Club Members: Access your homepage and all your fantastic resources here! Not a member yet? Please join us!

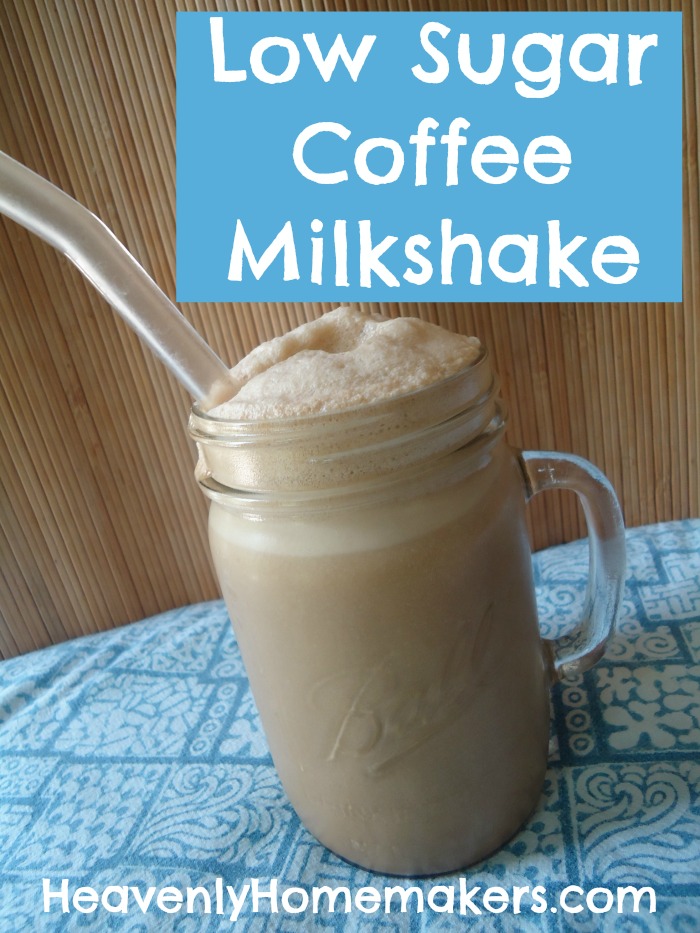
Low Sugar Coffee Milkshake Recipe

June 19, 2016 by Laura 3 Comments

This post may contain affiliate links. For more information, please see our disclosure policy.

If you’re wondering what I’m up to every single afternoon of every day during the entire summer – and obviously, you surely do wonder – you can be certain that I am making myself a smooth and creamy coffee shake and sipping it slowly. This, at about 1:30 each afternoon, CST. Set your clock by it. At 1:30 each day, you can think to yourself, Laura is most certainly enjoying her coffee milkshake right about now. We are so happy for her.

Thank you for your support.

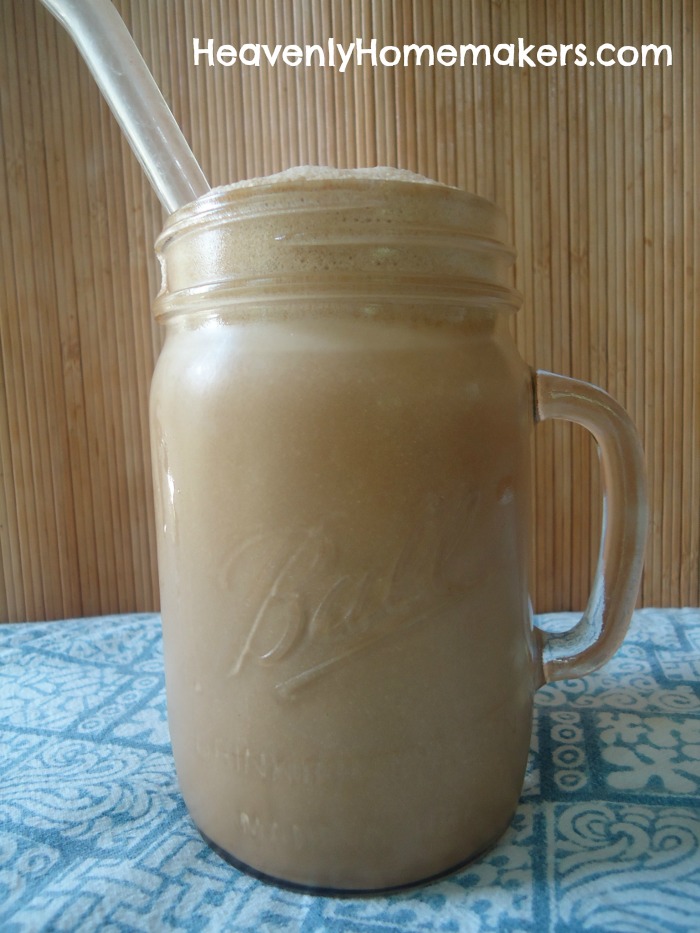
Coffee Milkshake

I would love for you to also have the option of beginning your afternoon in this way, so please, allow me to share this recipe so you can indulge and love your treat right down to the last drop. The good news is that this is very low in sugar (though you can add more if you like!) and includes all real food ingredients. I suppose the other good news is that the coffee will perk us all up for the afternoon so that we can rock on with whatever it is we need to do. Hi-yah! Glory, hallelujah.

Perhaps the one draw back to making this milkshake is that you must think and plan ahead. Hot coffee ruins the moment. All key ingredients must be cold or even frozen. And then there’s the homemade ice cream issue. The ice cream amazing and easy, but too hard to scoop if not set out a few minutes ahead of your milkshake making endeavors. So here’s the breakdown so that you can achieve Low Sugar Coffee Milkshake perfection:

  1. Cold brew some coffee, or make regular hot brew and chill it thoroughly.
  2. Make yourself some coffee iced cubes. This isn’t a must, but almost.
  3. Be sure to have Homemade Low Sugar Ice Cream in the freezer (it’s easier than you think).
  4. Set your ice cream out on the counter about ten minutes before making your shake so that it will be soft enough to scoop.

Don’t get the impression that this is a high maintenance recipe. It really is not. I typically have coffee in my fridge and coffee cubes in my freezer. It takes 2 minutes to whip up a batch of this Homemade Low Sugar Ice Cream. Then it’s just a matter of pulling it all together. At 1:30 every single afternoon.

Low Sugar Coffee MilkshakeYum

Low Sugar Coffee Milkshake Recipe
 
Save Print
Author: Laura
Ingredients
  • 1-2 scoops Homemade Low Sugar Vanilla Ice Cream
  • 4-6 coffee ice cubes
  • 1-2 cups cold coffee
Instructions
  1. Mix all ingredients thoroughly in a blender.
  2. Serve right away.
3.4.3177

low sugar coffee milkshake

Take note that this is not a super-sweet treat as is, so you’ll want to adjust the sweetness level by adding maple syrup according to your taste. I personally love it with a strong coffee flavor and only a tiny bit of sweetness and creaminess. But the beauty of this recipe and the Homemade Vanilla Ice Cream recipe is that you can make it sweet or less sweet without messing anything up!

Get your ingredients ready! 1:30 will be here before you know it.

Heavenly Homemaker's Club Members: Access your homepage and all your fantastic resources here! Not a member yet? Please join us!

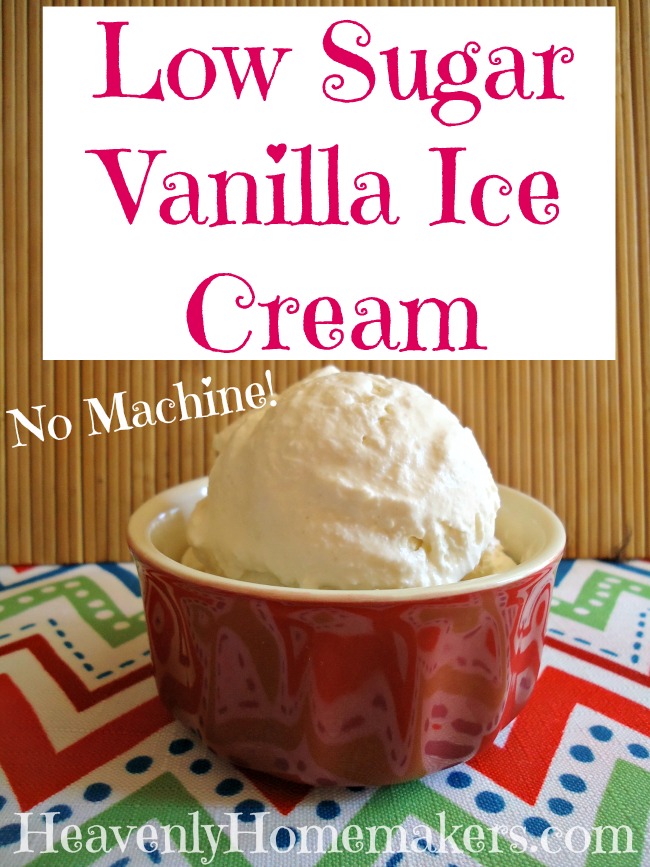
Low Sugar Vanilla Ice Cream ~ 3 Ingredients ~ No Machine

June 15, 2016 by Laura 20 Comments

This post may contain affiliate links. For more information, please see our disclosure policy.

I just ate a bowl of vanilla ice cream. This hasn’t happened in over three years because my body gets mad at me now when I eat much sugar. But let me say it again: I just ate a bowl of ice cream. Happy, happy, happy, happy!!

Low Sugar Ice Cream

I’ve been wanting to figure out how to make low sugar ice cream (for three years), but I had two hang-ups:

  1. I was feeling pretty lazy about pulling out my ice cream freezer.
  2. I wasn’t confident that cutting the sugar in ice cream would taste good and I didn’t want to waste ingredients.

So I started doing some looking online. There are plenty of recipes for “no churn” ice cream so I could avoid the trouble of getting out my ice cream machine, but they all call for sweetened condensed milk. Nope. That wouldn’t make it low sugar.

Other recipes took way too many steps, at which point I figured I might as well suck it up and get out my ice cream freezer.

Finally, I decided to try the “no-churn” method I’d read about – but with healthier ingredients I feel good about instead of condensed milk – and just see what would happen. I decided if it didn’t turn out – at the very least I could re-purpose the cream mixture into a smoothie.

When you see this recipe you will wonder (like I am wondering) why it took me so much research and time to figure this out.

Three ingredients. Three. They are so obvious. (Cream, maple syrup, vanilla. See? Why did I make this so hard?)

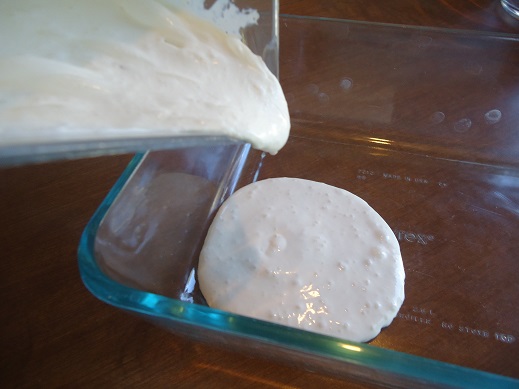
The trick is to whip the ingredients together just long enough that they thicken, but don’t turn into whipped cream. This isn’t hard as long as you’re watching carefully. I put the ingredients into my Blendtec, whipped for 15-20 seconds, poured the mixture into a dish, froze it, and boom. I had Low Sugar Vanilla Ice Cream.

Low Sugar Vanilla Ice CreamYum

4.6 from 5 reviews
Low Sugar Vanilla Ice Cream ~ 3 Ingredients ~ No Machine
 
Save Print
Author: Laura
Serves: 6-8
Ingredients
  • 2 cups heavy whipping cream
  • 3 Tablespoons real maple syrup (more or less to taste)
  • 2 teaspoons vanilla extract
Instructions
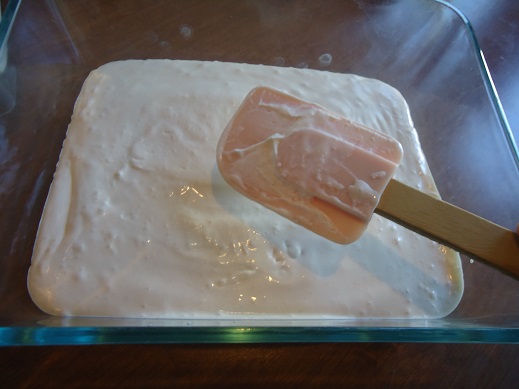
  1. Blend ingredients together with a hand mixer or in a high power blender until they have thickened - but have not yet turned into stiff whipped cream. (The mixture should still be runny.)
  2. Pour mixture into a small casserole dish.
  3. Cover and freeze for about three hours.
  4. Scoop and serve right away.
  5. If ice cream is left in the freezer overnight, you may need to let it sit on the counter a few minutes before serving!
3.4.3177

Low Sugar Vanilla Ice Cream

A key player in this recipe is Homemade Vanilla Extract. I decided “why just add one teaspoon when I could add two?” This, of course, makes the ice cream much, much better tasting. (Ironic, isn’t it, since I was just saying that you can use half the amount called for in recipes since this vanilla is so potent? Use less vanilla in this if you like, but I am loving the strong vanilla punch of two teaspoons in this vanilla ice cream!)

I learned that if you freeze this for less than 3 hours, the ice cream will be too liquidy. But if you freeze it for more than 3 hours it becomes a bit hard. The solution for “too hard” ice cream? Simply pull it out of the freezer and let it sit on the counter for about 10 minutes before serving. It’ll soften just enough for you to scoop it out.

low sugar icecream5

low sugar icecream4

Want your ice cream to be not-so-low in sugar?

My kids agree. Simply add a little more maple syrup until you have reached your desired sweetness level. You might also try adding a few drops of liquid stevia.

Because we have the whole summer ahead of us, I will now spend time creating variations of this Low Sugar Homemade Ice Cream. I’m thinking peach, strawberry, chocolate, mint, chocolate mint, and whatever other ideas you have for me.

Go make yourself some ice cream!!

Heavenly Homemaker's Club Members: Access your homepage and all your fantastic resources here! Not a member yet? Please join us!

How to Make Mango Sweet (or Unsweet) Tea

June 14, 2016 by Laura 16 Comments

This post may contain affiliate links. For more information, please see our disclosure policy.

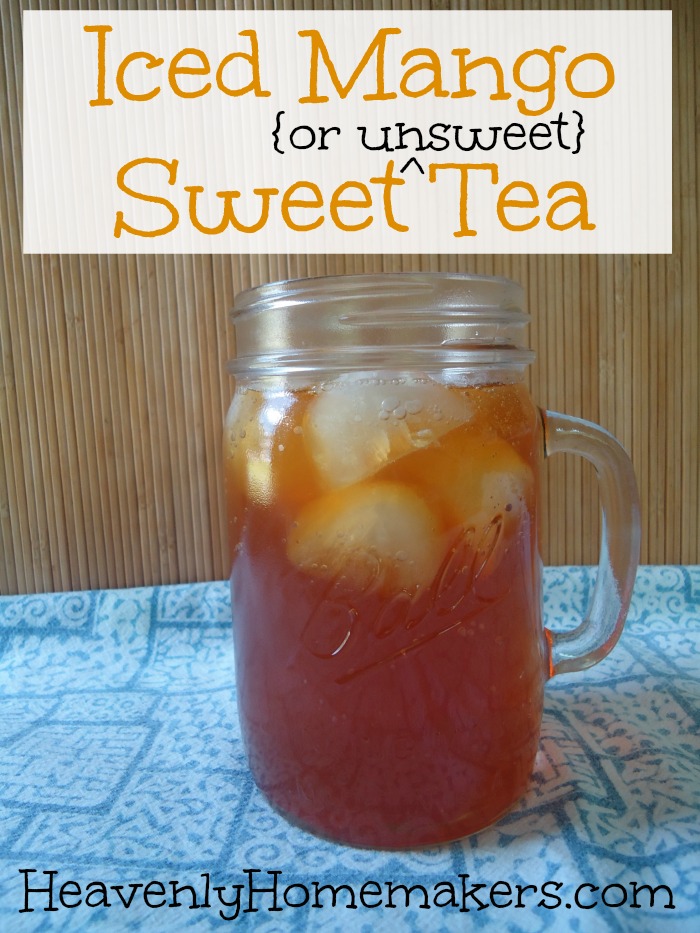
Y’all. (Because I think it’s a given that sweet tea and y’all must be said simultaneously.) This mango tea is happiness in a glass and yet one more reason to love summertime.

Mango Sweet Tea

Last week when we took a trip to Arkansas, a friend of ours took us to McAlister’s Deli with the claim that their sweet tea was the best, insisting that we must try it. Now, I trust my friend, but I was also skeptical because it’s tea. What was the big deal? How amazing could it really be?

And then I drank some.

Y’all.

We all drank and drank, and sure, maybe it’s just because we were all in vacation mode, enjoying the treat of eating out and enjoying friendship and “the famous tea” – but we all loved the tea and took full advantage of every offer of, “Can I get you a refill?”

(Why yes. We did have to stop several times for potty breaks as we headed further up the road. Thanks for asking. At least it wasn’t just for me every time. That’s a first.)

I agree with my friend and declared it to be the best tea I’ve ever had even though I didn’t even get the sweet tea. I ordered an Unsweet Mango Tea, and I could not get over how much I loved it. I’m certain my family didn’t get tired of me saying, “Wow, this tea is good” after every sip during our next 100 miles of travel as we headed down the road toward our next destination.

It goes without saying that I decided that I would need to try and create a recipe to make this at home. Not surprisingly, I used actual mangos instead of whatever it is that comes out of a squirt pump. I do not want to know.

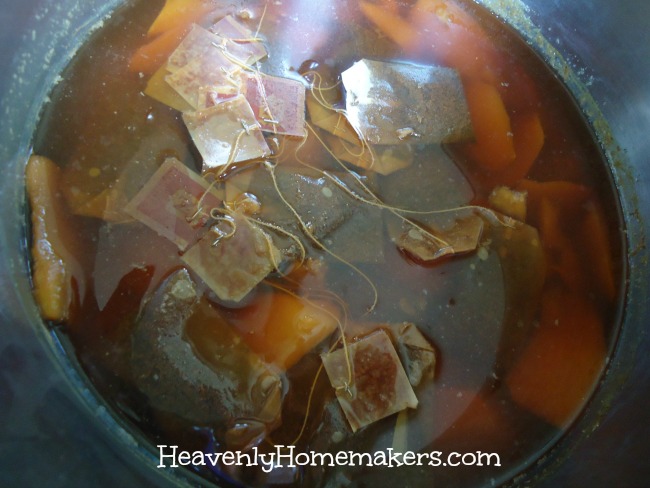
How to make Mango Tea

As if it’s hard to cut mangos and put them in water with tea bags. C’mon now.

Mango Sweet (or Unsweet) TeaYum

5.0 from 3 reviews
How to Make Mango Sweet (or Unsweet) Tea
 
Save Print
Author: Laura
Serves: 2 quarts
Ingredients
  • 2 quarts of water, divided
  • 2 ripe mangoes, peeled and sliced
  • 1-3 teaspoons honey or sugar
  • 4-8 tea bags of your favorite black or green tea, depending on how strong you like your tea
  • Liquid stevia or sugar to taste
Instructions
  1. In a medium-sized pot, heat 1 quart of water and the mango to boiling. Add 1-3 teaspoons honey or sugar to draw out sweetness in fruit.
  2. Simmer for about five minutes.
  3. Mush the mango in the water and add the tea bags.
  4. Allow tea to steep for 5-10 minutes.
  5. Strain tea into a ½ gallon jar or pitcher.
  6. Add a quart of water.
  7. Stir in stevia or sugar if you want your tea sweetened.
  8. Refrigerate until thoroughly chilled.
  9. Serve over ice.
3.4.3177

If you glance over the instructions quickly, you might think it says to “serve over rice.” But it doesn’t. Ice and rice are different and ice is the obvious better choice for this tea.

Ice Mango Sweet (or Unsweet) Tea

Now of course, I will be experimenting with other varieties such as Peach Tea and Raspberry Tea. Watch for updates as I get these figured out!

Are you a sweet tea drinker or an unsweet tea drinker? 

P.S. My favorite black tea is Newman’s Own Organics Royal Black Tea. My favorite stevia is Nunaturals.

This post contains some of my affiliate links.

Heavenly Homemaker's Club Members: Access your homepage and all your fantastic resources here! Not a member yet? Please join us!

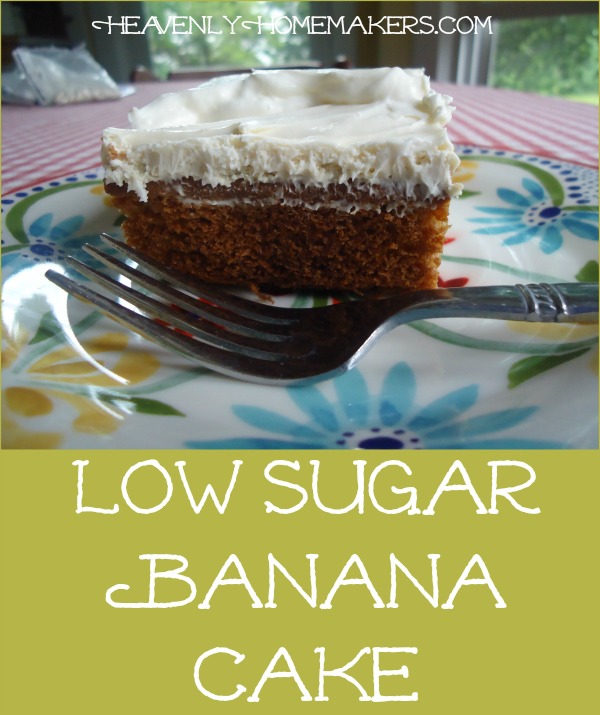
Low Sugar Banana Cake

June 9, 2016 by Laura 8 Comments

This post may contain affiliate links. For more information, please see our disclosure policy.

I’ve come a long way since 2008.

Here’s what I used to think about adapting recipes to make them healthier: I thought that if I simply switched white flour for whole wheat, white sugar with sucanat or honey, and vegetable oil with coconut oil or butter – I was healthifying a recipe. So way back in 2008, I did just that. I took my regular recipe for Banana Cake and switched out all the bad for the good and shared the recipe with you here. I even called it “Healthy Treat for Today: Banana Cake.”

I really thought the changes I’d made had created a healthy treat.

In my defense, I suppose the changes I’d made did make the cake healthy-er. Getting rid of empty ingredients and bad fats and replacing them with ingredients our bodies can utilize does make a recipe healthier. But I stop short now of calling a treat healthy if it still has loads of sugar in it.

This goes to show that we always have room to grow and learn, right? Makes me wonder what I’ll write a year from now after I learn more!

In the meantime, I’ve re-healthified what I thought was a healthy cake. Even with this newest version of Banana Cake, I still maintain that it is a treat and that other foods provide more of a nutritional punch than this. Still – with the sugar cut way down and with the ingredients all being foods our bodies recognize and can utilize – do feel free to eat this for breakfast if you like. ;)

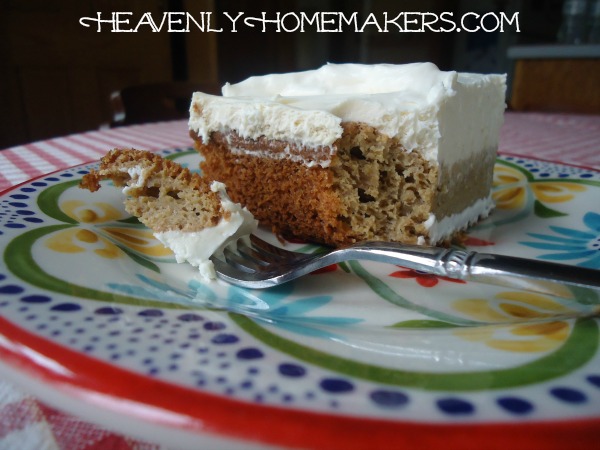
Banana Cake

Low Sugar Banana CakeYum

5.0 from 2 reviews
Low Sugar Banana Cake
 
Save Print
Author: Laura
Serves: 12
Ingredients
  • 2 cups whole wheat flour
  • ⅓ cup sucanat or brown sugar
  • 1 teaspoon baking powder
  • 1 teaspoon baking soda
  • ½ teaspoon sea salt
  • 2 over-ripe bananas, mashed
  • 2 eggs
  • ½ cup milk or buttermilk
  • 1 stick butter, melted
  • 1 teaspoon vanilla
Instructions
  1. In a large bowl, stir together dry ingredients.
  2. Mash bananas in a separate bowl.
  3. Make a well in the center of dry ingredients.
  4. Pour in mashed bananas and all other ingredients.
  5. Stir well (or beat with hand mixer).
  6. Pour into a greased 9×9 inch pan.
  7. Bake at 350° for 30 minutes.
  8. Allow to cool completely before frosting with the Cream Cheese Frosting below.
3.4.3177

I prefer to make Cream Cheese Frosting with Stevia now so that it has no sugar in it. My boys prefer it if I add just a little bit of maple syrup.

Stevia Sweetened Cream Cheese Frosting

8 ounces softened cream cheese
1 cup heavy whipping cream
1/2 teaspoon vanilla extract
Liquid stevia to taste (I use 2 droppers full)

Whip ingredients together until smooth. Spread over cooled cake. Store in the refrigerator.

Maple Cream Cheese Frosting

8 ounces softened cream cheese
¼ cup softened butter
3-4 Tablespoons real maple syrup
1 teaspoon vanilla extract

With a hand mixer (or in your blender), whip together all ingredients until smooth. Spread over cooled cake.

Low Sugar Banana Cake

Share something you’ve learned recently that has changed your mind about what makes a recipe “healthy.” 

Heavenly Homemaker's Club Members: Access your homepage and all your fantastic resources here! Not a member yet? Please join us!

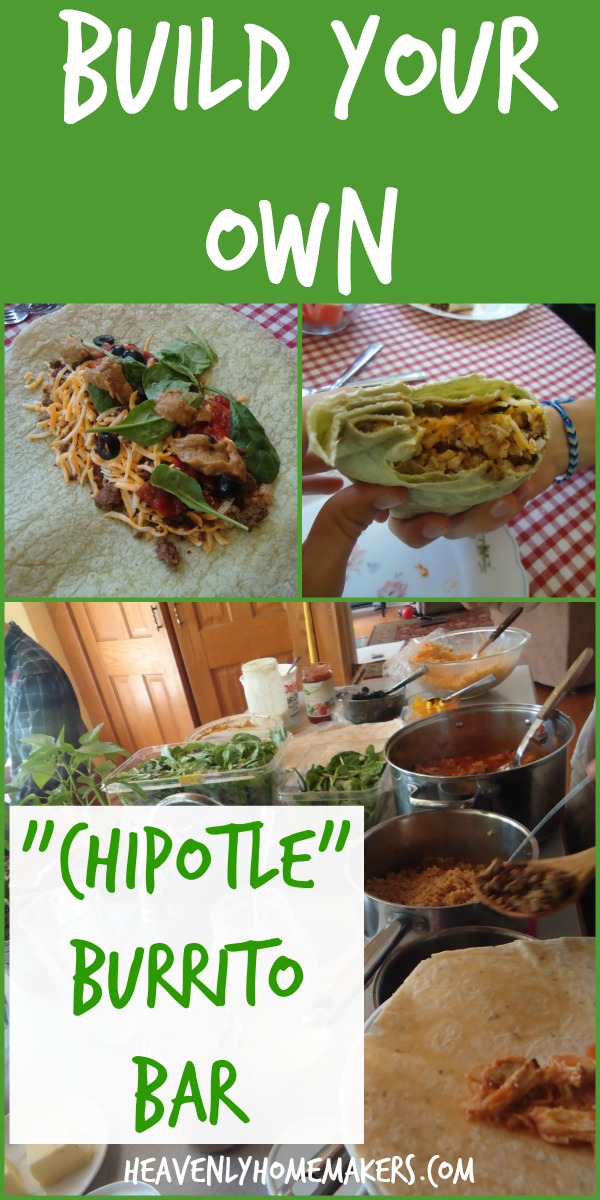
Build a Burrito Bar (It’s like Chipotle, only better. And cheaper.)

June 5, 2016 by Laura 11 Comments

This post may contain affiliate links. For more information, please see our disclosure policy.

I have been to Chipotle exactly one time.

It’s borderline ridiculous that it took me until last April to try it out. After all, I’d heard great reviews about this restaurant. We just don’t eat out much unless we’re traveling.

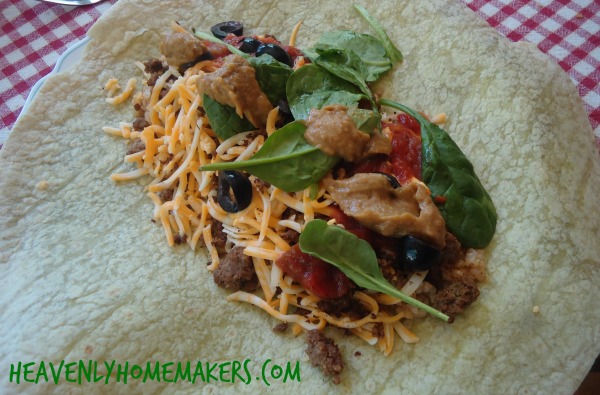
After our (one and only) great experience there, we will definitely put this on our list of restaurants to find when we’re on the road. But in the meantime, we’ve started “making Chipotle” at home for easy Sunday lunches after church. It’s not much different, I suppose, than a regular Burrito Bar in which I’ve set out fixin’s and everyone fills a tortilla. But copying the Chipotle idea means I add a few burrito fillings that I hadn’t added before.

This has been great for our family, but even better when we have guests over. Everyone can make their burrito however they like. I personally skip the tortilla and make a big Burrito Bowl. So yum.

Burrito Bar

Build a Burrito Bar (Like Chipotle)Yum

Here are the food items we like on our burrito bar:

  • Salsa Chicken
  • Seasoned Hamburger Meat
  • Brown Rice (seasoned with chili powder, garlic powder, salt, and a splash of lime juice)
  • Black Beans and or Pinto Beans
  • Salsa
  • Guacamole
  • Sauted onions and peppers
  • Mixed Greens or Spinach
  • Shredded Cheese
  • Tomatoes
  • Olives
  • Corn
  • Sour Cream
  • Tortillas

I think one of the best aspects of setting up this Burrito Bar is that I can get my entire family in on prepping it. I try to have the meat and rice made the day before so we can quickly warm them up when we get home from church. We all work together to cut and shred and dice – and within just a few minutes we can sit down to lunch!

Build Your Own Chipotle Burrito Bar

Here are other “Build a _______ Bar” ideas I’ve shared:

  • Build a Brownie Sundae Bar
  • Build a Fruit Salad Bar
  • Build a Pasta Salad Bar
  • Build a Breakfast Burrito Bar
  • Build an Iced Coffee Bar

Let me know if I’ve forgotten anything that you would have added to the “Burrito Bar” list! Also, help me think of other “Build a ______ Bar” ideas!

Join Simple Meals!

728x90

Want all the work of menu planning to be done for you? We invite you to subscribe to Simple Meals! We equip you – every single week – to put great money and time saving meals on the table – every single night!

[wp_eStore_subscribe_fancy id=19]


Heavenly Homemaker's Club Members: Access your homepage and all your fantastic resources here! Not a member yet? Please join us!

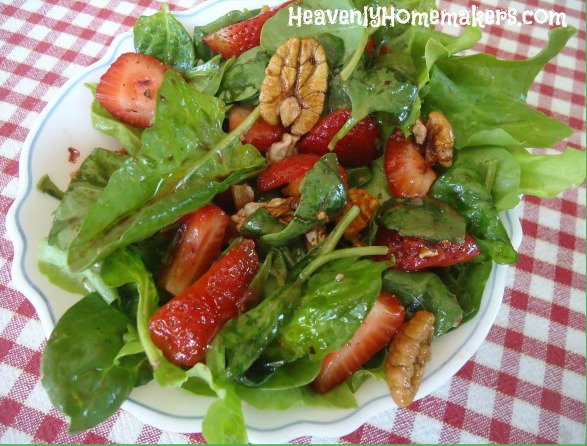
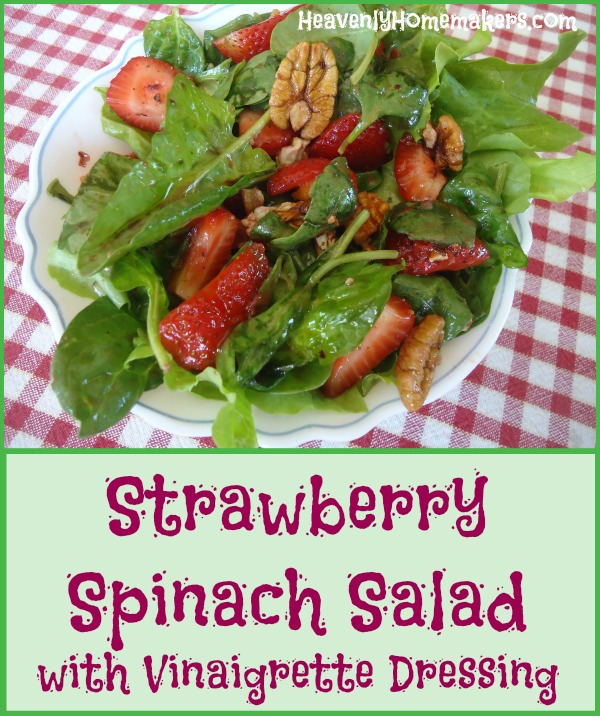
Strawberry Spinach Salad with Vinaigrette Dressing

May 30, 2016 by Laura 7 Comments

This post may contain affiliate links. For more information, please see our disclosure policy.

It seems we’re starting off this week with a bit of a strawberry theme. This Strawberry Spinach Salad is a little bit different than the Strawberry Blueberry Parfaits – so feel free to eat them during the same meal.

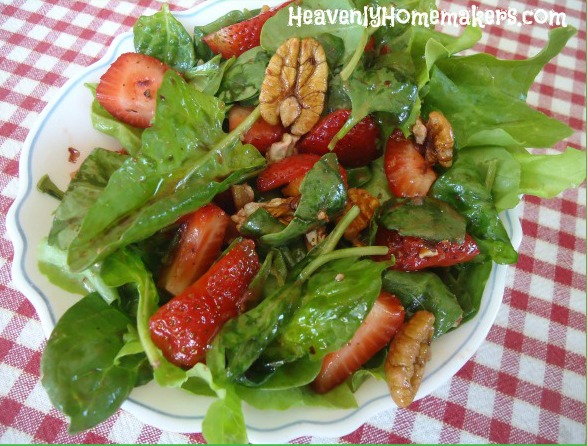
Strawberry Spinach Salad

I’m typically a pretty boring salad maker – as if adding fruit and nuts to salad is difficult (which, of course, it is not). I blame it on the fact that I am a meat-and-potato-farm-girl at heart. I grew up eating the basics. The only way we ate pecans was in pies. Strawberries were made into jelly. And spinach? The only kind I’d heard of was the slimy canned variety – and I didn’t touch it.

Now that I’ve branched out into loving all kinds of different foods (like actual strawberries – you should try them), I figure it might be time for me to try a few different salads beyond the basic kind with mixed greens and ranch dressing. Last week, I was out of mixed greens, but had a big container of spinach and several containers of strawberries. I did a little searching and came across this, which I tweaked and made for our lunch.

It was surprisingly very tasty. (Why was I surprised? I don’t know. Because it wasn’t basic mixed greens with ranch?) The combination of roasted pecans with the strawberries with the easy-to-make dressing packs a great punch of flavor.

Look at me. I’m such a big girl now – eating salads with fruit and nuts and vinaigrette.

Strawberry Spinach Salad with Vinaigrette DressingYum

Strawberry Spinach Salad with Vinaigrette Dressing
 
Save Print
Author: Laura
Ingredients
  • 6 cups fresh spinach (give or take)
  • 1 pound fresh strawberries, sliced into fourths
  • ¾ cup pecans
  • ⅓ cup olive oil
  • ¼ cup balsamic or red wine vinegar
  • ½ teaspoon ground mustard
  • 2 shakes of sea salt
Instructions
  1. In a small saucepan, roast pecans by warming them over medium heat for 3-4 minutes. Stir them frequently to keep them from scorching. (I didn't find it necessary to add any oil to the pan.)
  2. Toss the roasted pecans into a large bowl with spinach and strawberries
  3. In a jar, mix the oil, vinegar, mustard, and salt.
  4. Drizzle dressing over salad just before serving.
3.4.3177

Isn’t it pretty?

Strawberry Spinach Salad with Vinaigrette Dressing

Are you brave with your salads or do you typically stick with the basics?

Heavenly Homemaker's Club Members: Access your homepage and all your fantastic resources here! Not a member yet? Please join us!

Americana Cheesecake Parfaits (It’s too easy)

May 29, 2016 by Laura 3 Comments

This post may contain affiliate links. For more information, please see our disclosure policy.

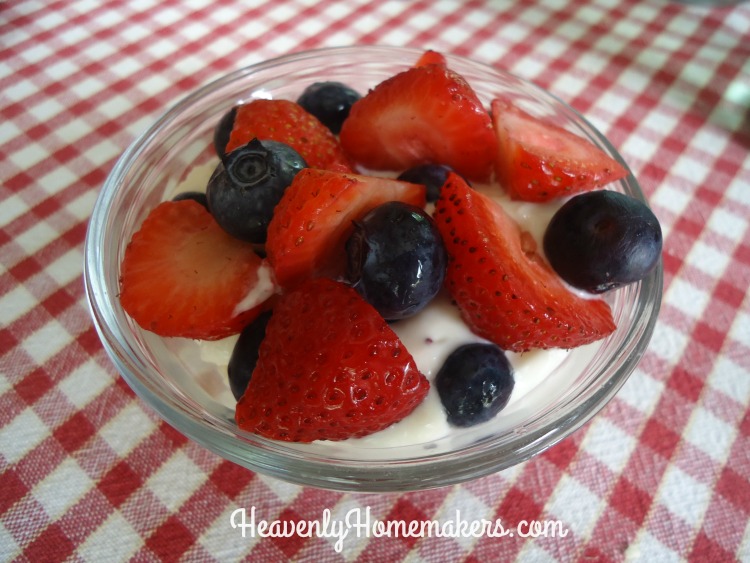
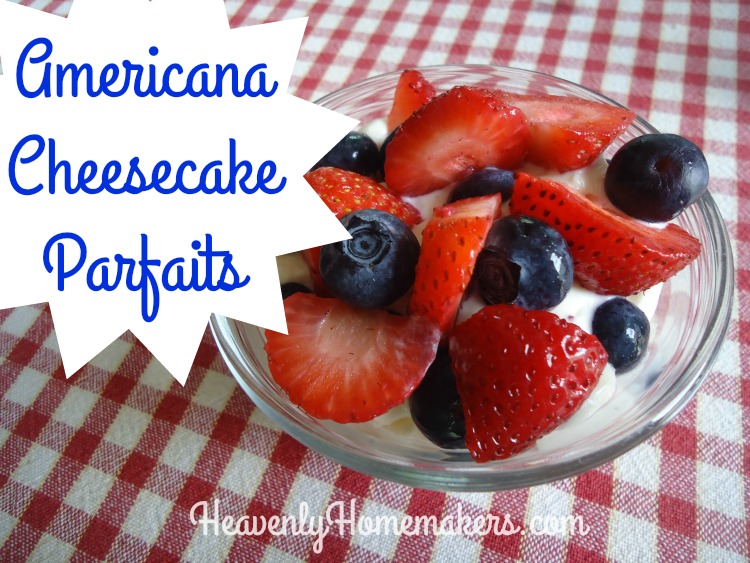
What happens when you cross a blueberry with a strawberry with cheesecake filling? Red, white, and blue. This is what you have. Regular cheesecake parfait becomes Americana Cheesecake Parfait. Just like that, you’ve created a perfect treat for your holiday.

Strawberry Blueberry Cheesecake Parfaits

I realize it might be too late for you to do this for Memorial Day – unless you happen to have these fine ingredients already in your fridge. I once (last week) bought 18 packages of cream cheese at one time because it was on sale for $1.00 and I couldn’t help myself (obviously). Plus, I frequently bring home 12-16 pounds of berries at once when they are in season and on sale. (No one ever looks at me funny while I’m going through check-out.) Perhaps you also have a fridge full of cream cheese and berries?

If not, you can tuck this recipe away to make when you find these ingredients on sale. After all, it never hurts to make these with no holiday attached. And of course, you’ll want to remember these for the Fourth of July.

The Original Cheesecake ParfaitsYum

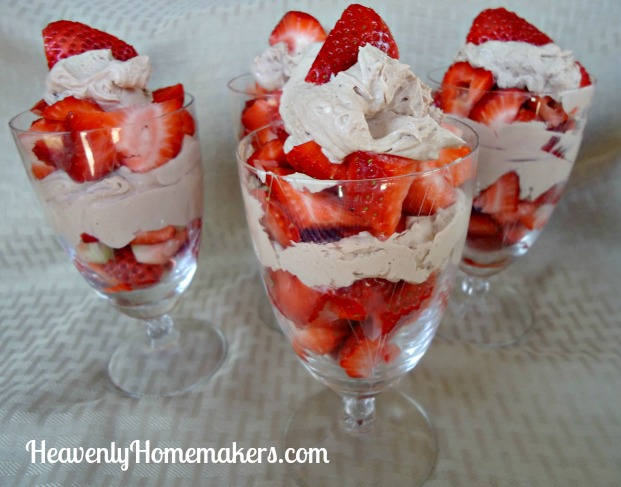
About this time last year, I concocted our first Strawberry Cheesecake Parfaits. We have since declared this to be the best way to eat fruit. Recently we tried Chocolate Strawberry Cheesecake Parfaits, which are just as amazing.

chocolate cheesecake parfait

Matt and I much prefer this made with stevia. Our boys make a batch for themselves with a little sugar instead. We’ve been eating this and serving this to friends who come over pretty much constantly since berries came back in season a few weeks ago. This is a definite family favorite!

Americana Cheesecake Parfaits

4.0 from 1 reviews
Americana Cheesecake Parfaits (It's too easy)
 
Save Print
Author: Laura
Ingredients
  • 2½ cups heavy whipping cream
  • 8 ounces softened cream cheese
  • 1 teaspoon vanilla extract
  • 1 Tablespoon real maple syrup
  • Liquid stevia to taste (I use about 20 drops) (Use a few Tablespoons of sugar if you prefer.)
  • 1 -2 pounds fresh, sliced strawberries
  • 1 pint fresh blueberries
Instructions
  1. Place all ingredients (minus the berries) into a blender.
  2. Whip until smooth and creamy.
  3. Spoon mixture into bowls or cups - layering them with blueberries and sliced strawberries.
3.4.3177

Americana Cheesecake Parfaits

However are you remembering and celebrating this weekend?

Heavenly Homemaker's Club Members: Access your homepage and all your fantastic resources here! Not a member yet? Please join us!

Veggie-n-Egg Scramble ~ A Great Last Minute Meal Idea

May 18, 2016 by Laura 2 Comments

This post may contain affiliate links. For more information, please see our disclosure policy.

I think this Veggie-n-Egg Scramble might become one of my favorite and most relied upon go-to meals.

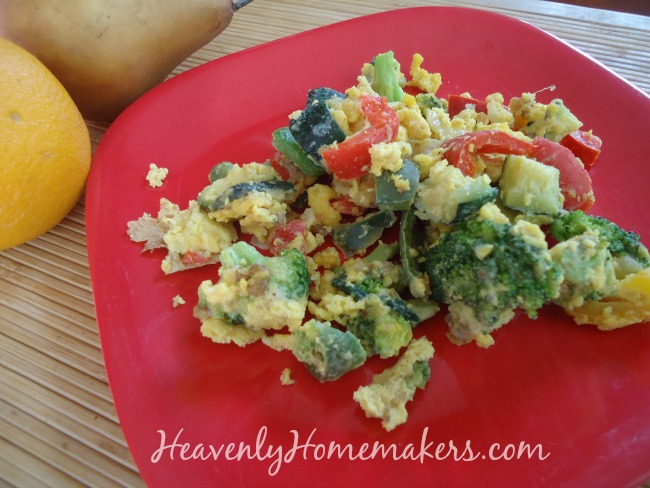
Veggie and Egg Scramble

Yum

I used to make something like this years ago, but kind of forgot about it. Weird how that happens.

A few weeks ago, I needed a quick meal before we headed out to a soccer game. I didn’t have time to cook meat, but I did have a fridge full of veggies and a few dozen eggs. I called the boys into the kitchen and started throwing vegetables and knives at them. Hold on. That didn’t come out right. I didn’t throw knives at them. (Peppers maybe, but not knives.) I’m just saying I started handing out jobs and we all worked together to make this quick and nourishing meal.

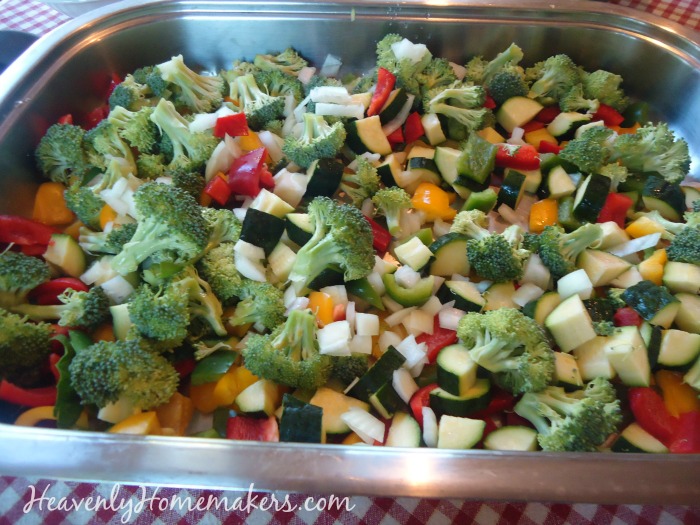
Everyone started chopping until my big electric skillet looked like this:

Veggies for veggie scramble
All the veggies are good in this Veggie-n-Egg Scramble, but I will suggest that onions are a key player. Onions give this dish such amazing flavor! Sweet peppers are a close second. Broccoli, asparagus, zucchini, and spinach come next. The beauty is that you can use whatever veggies you like and whatever you have on hand.

Saute the veggies in olive oil or butter until tender. Scramble in some eggs with salt. Toss in a little cheese for extra amazingness. So much deliciousness. Very little work. Extra wonderful nourishment.

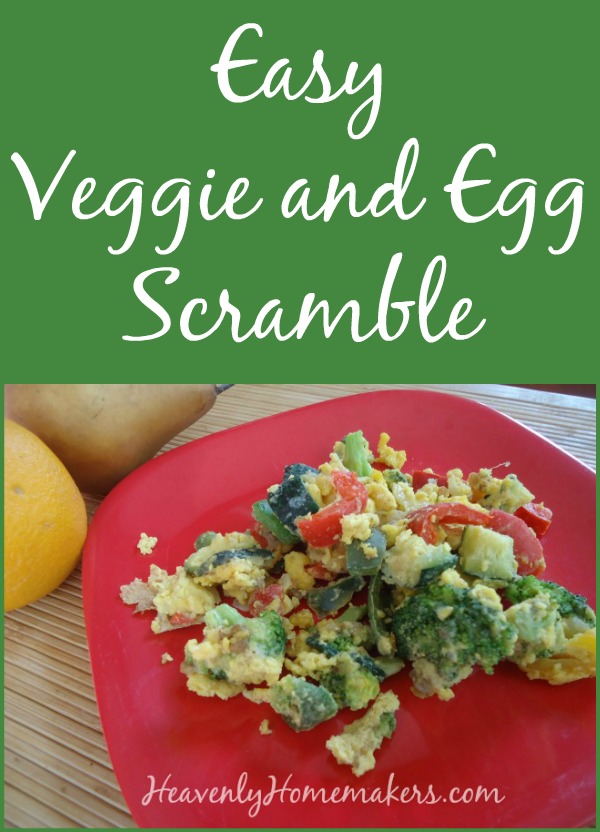
Veggie-n-Egg Scramble ~ A Great Last Minute Meal Idea
 
Save Print
Author: Laura
Serves: 3-4
Ingredients
  • 4 cups chopped veggies (onions, sweet peppers, zucchini, asparagus, spinach, broccoli, or any others you like in any combination)
  • 3 Tablespoons butter or olive oil
  • 6 eggs
  • 2 Tablespoons milk
  • sea salt to taste
  • shredded cheese to taste
Instructions
  1. Saute vegetables in oil or butter until tender.
  2. Meanwhile, crack eggs into a bowl and whip with milk.
  3. Pour egg mixture over cooked veggies and salt as you like.
  4. Scramble the eggs with the veggies until they are cooked through.
  5. Sprinkle cheese on top to melt.
  6. Serve
3.4.3177

I at least double this for my family of 6 big eaters. Plus we serve it with fresh fruit. Buttered toast also helps fill them up. Seriously. We really do eat and keep eating at our house.

TIP: If you happen to have leftover ham or bacon – even chicken or beef – hanging out in your fridge, those would be a wonderful addition to this dish.

This meal has become one of the easiest ways to get my family to eat a big variety of veggies in one meal. It ranks right up there with Easy Noodle Stir-Fry.

Easy Veggie and Egg Scramble

Do you ever make a meal like this at your house? What veggies would you or do you include? 

It’s meals like this that make “teaching our kids about nutrition” quite natural.

P.S. It is worth noting that this dish makes it possible to feed my family very well for about $1.00 per plate. (We won’t talk about how many plates we go through during a meal…)

Heavenly Homemaker's Club Members: Access your homepage and all your fantastic resources here! Not a member yet? Please join us!

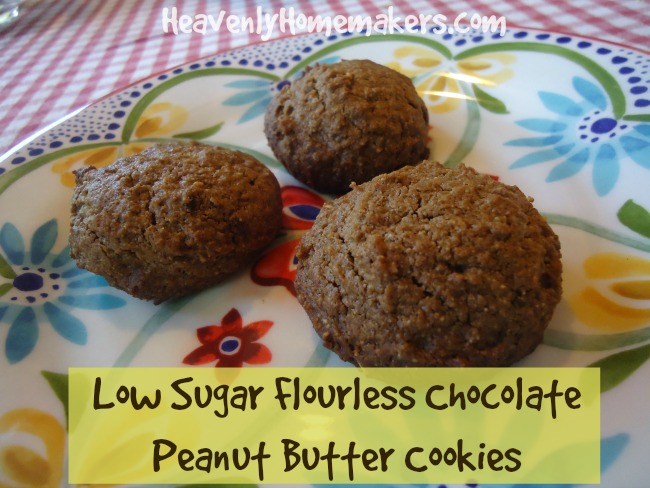
Low Sugar Flourless Chocolate Peanut Butter Cookies

May 16, 2016 by Laura 3 Comments

This post may contain affiliate links. For more information, please see our disclosure policy.

If we can make Low Sugar Flourless Peanut Butter Cookies, then surely we can add a little cocoa powder and make Low Sugar Flourless Chocolate Peanut Butter Cookies, dontcha think??

It’s too easy.

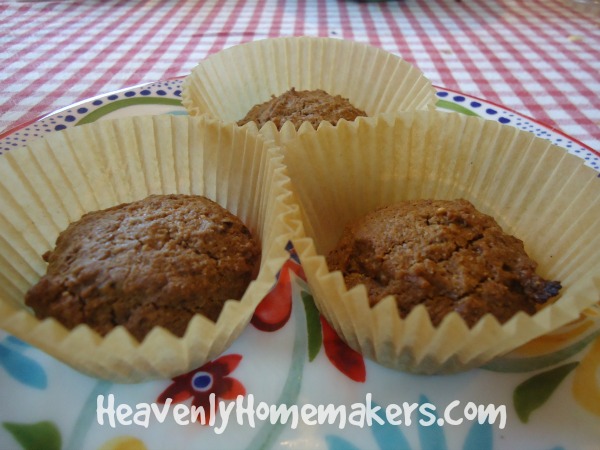
I had the grand idea of baking these in muffin cups so that they’d take on the look of a peanut butter cup. Too bad that didn’t really work.

low sugar chocolate pb cookies1

They look kinda cute in the muffin liners, but they didn’t really flatten enough to take on the shape of a peanut butter cup. We ate them anyway. It wasn’t a problem.

Low Sugar Flourless Chocolate Peanut Butter Cookies

Get my Homemade Natural Peanut Butter Recipe here. You’ll be amazed at how delicious homemade peanut butter tastes (and how easy it is to make)!

Low Sugar Flourless Chocolate Peanut Butter CookiesYum

Low Sugar Flourless Chocolate Peanut Butter Cookies
 
Save Print
Author: Laura
Serves: 15-20
Ingredients
  • 2 cups natural peanut butter
  • ⅓ cup sucanat, honey, or brown sugar
  • ¼ cup unsweetened cocoa powder
  • 1 teaspoon vanilla extract
  • 1 egg
Instructions
  1. Mix the ingredients together until smooth.
  2. Use a small or medium scoop to place dough balls on a cookie sheet, about two inches apart.
  3. Bake in a 350° oven for 10-12 minutes or until cookies are lightly browned.
  4. Allow them to sit on the cookie sheet for a few minutes before removing them to cool on a rack.
3.4.3177

The flavor of these cookies is super delicious. These will give you a great chocolate peanut butter fix, without all the sugar or even flour!

I know I just shared this low sugar cookie list last week, but when it comes to cookies and cutting sugar, I want to be sure you know I have your back.

More Low Sugar Cookie Recipes

  • Easy {Low} Sugar Cookies
  • Low Sugar Lemon Melt-Away Cookies
  • Low Sugar Almond Melt-Away Cookies
  • Low Sugar Orange Melt-Away Cookies
  • Low Sugar Lime Melt-Away Cookies
  • Low Sugar Chocolate Fudge Cookies
  • Low Sugar Flourless Peanut Butter Cookies

I get many of my best ideas from YOU. What other cookie recipes should I play with to see if I can create a low sugar version?


Heavenly Homemaker's Club Members: Access your homepage and all your fantastic resources here! Not a member yet? Please join us!
« Previous Page
Next Page »

Join Our Community!

 Facebook Twitter E-mail Instagram Pinterest

Popular Posts

~ Will All of the Real Moms Please Stand Up?
~ Easy! Stir-and-Pour Whole Wheat Bread
~ How to Make Gatorade
~ 31 Real Food Breakfast Ideas
~ Dear Teenage Girls...
~ When Mom Takes a Step Back
~ The Inexpensive Health Insurance We Love!
~ Let's Talk Real Food Grocery Budgets

Check out our latest posts!

  • Big Family Food and Fun: September 6-12, 2026
  • Big Family Food and Fun: August 30-September 5, 2026
  • Big Family Food and Fun: August 23-29, 2026
  • Big Family Food and Fun: August 16-22, 2026
  • Big Family Food and Fun: August 9-15, 2026
Home  ~  Simple Meals  ~  Club Membership  ~  Shop  ~  Privacy Policy  ~  Disclosure  ~ Contact

Copyright © 2026 · Beautiful Pro Theme on Genesis Framework · WordPress · Log in