Heavenly Homemakers

Encouraging women in homemaking, healthy eating and parenting

  • Home
    • About
    • FAQs
  • Recipes
    • Bread and Breakfast
    • Condiments
    • Dairy
    • Main Dishes
    • Side Dishes and Snacks
    • Desserts
    • Gluten Free
    • Instant Pot
    • Crock Pot
    • Heavenly Homemaker’s Weekly Menus
  • Homemaking
    • Real Food Sources
  • Store
  • Contact
    • Advertise
    • Disclosure
    • Privacy Policy
  • Simple Meals
  • Club Members!

Pumpkin Breakfast Cake with Stevia Sweetened Cream Cheese Frosting

November 11, 2014 by Laura 14 Comments

This post may contain affiliate links. For more information, please see our disclosure policy.

If it’s made with whole grain, is low in sugar, includes an entire cup of healthy fat, has 4 eggs, and one of its main ingredients is a vegetable – you can use the words “cake” and “breakfast” in the same title. Of course, nothing is stopping you from using the word “birthday” and “cake” in the same title for this very recipe. After all, who says birthday treats have to be loaded with sugar? I just love that this recipe is healthy and filling enough to be a great breakfast option. I serve this with a side of applesauce and my family loves it!

You might look at this recipe and think that it is surprisingly similar to my Pumpkin Chocolate Chip Muffins recipe. That’s because it is.  ;)  I took the recipe, and made it into a cake with a stevia sweetened Cream Cheese Frosting. See? It’s not so hard to be creative in the kitchen.
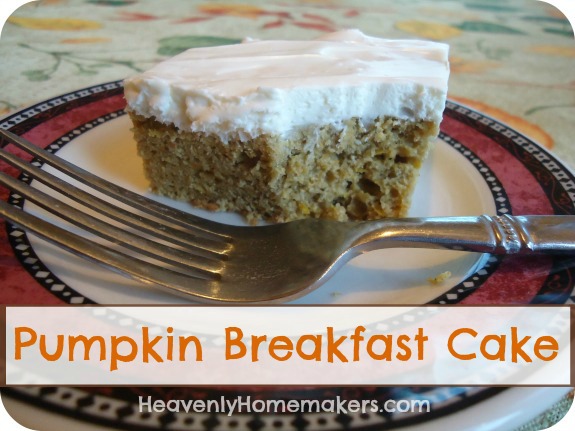
Pumpkin Breakfast Cake2

Pumpkin Breakfast CakeYum

3 cups whole wheat flour (I used freshly ground hard white wheat)
1/2 cup sucanat
1 teaspoon baking soda
2 teaspoons baking powder
1 teaspoon sea salt
1 teaspoon cinnamon
4 eggs
2 cups pureed pumpkin (or one 16 ounce can)
1 cup melted coconut oil (or butter)

Stir together flour, sucanat, baking soda, baking powder, salt, and cinnamon. Add eggs, pumpkin, and melted coconut oil. Spread batter into a 9×13 inch baking pan. Bake in a 350° oven for 25-35 minutes or until a toothpick inserted in the middle comes out clean. Allow cake to cool before frosting.

Stevia Sweetened Cream Cheese Frosting

8 ounces softened cream cheese
1 cup heavy whipping cream
1/2 teaspoon vanilla extract
Liquid stevia to taste (I use 2 droppers full)

Whip ingredients together until smooth. Spread over cooled Pumpkin Cake. Store in the refrigerator.

As you can imagine, I will be adding some pureed spinach to this cake next time I make it. Why not, right?

Here’s another Breakfast Cake recipe our family loves. Now tell me: What will your family say when you tell them you’re having cake for breakfast?!


Heavenly Homemaker's Club Members: Access your homepage and all your fantastic resources here! Not a member yet? Please join us!

Cream Cheese BLT – The Best Sandwich You’ll Ever Eat

November 6, 2014 by Laura 5 Comments

This post may contain affiliate links. For more information, please see our disclosure policy.

We had decided to go on an unplanned road trip. I was determined to avoid the grocery store and instead work with the abundance of food we had on hand to put together a meal we could take along with us and eat in the van. However, I had no bread, no lunch meat, no tortillas, and no cheese. It was time to get creative.

I quickly made a batch of One Hour Whole Wheat Yeast Rolls. Seriously, these rolls practically make themselves. (Although they are terrible about washing their own dishes.)  I almost always have a supply of bacon and cream cheese on hand because those are staple foods at the Coppinger house, along with butter and cocoa, of course. Therefore, I decided to take my BLT Wrap idea and turn them into sandwiches.

What makes a BLT even better? Cream cheese, of course. This “to-go” meal was a hit, though the sandwiches were a tiny bit messy. Eh, that’s what napkins are for, right?

Cream Cheese BLT

Cream Cheese BLT SandwichesYum

8 ounces softened cream cheese
1/2 cup mayonnaise
8 slices cooked and crumbled bacon
Tomato slices
Lettuce

Mix cream cheese and mayonnaise until smooth. Stir in bacon crumbles. Spread mixture on bread or buns and top with lettuce and tomatoes. Delicious!! This mixture makes enough for 10-12 sandwiches.

The best news of all is that you can add this Cream Cheese BLT Sandwich idea to your Make-Ahead Lunch Box list. Simply make the bacon/cream cheese/mayo mixture ahead of time, prep your lettuce and tomatoes, and put it all together on bread, buns, or tortillas when packing your lunch box. It’s a great change of pace from a regular ol’ sandwich.

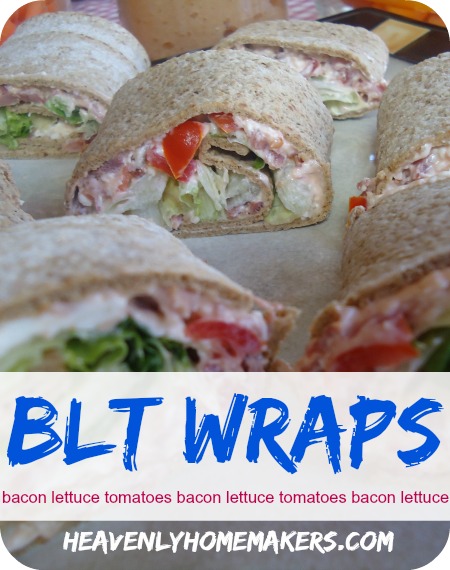
You’ll definitely want to check out the inspiring idea behind this recipe:  BLT Wraps. Whether in a tortilla, on a bun, or even simply wrapped in lettuce – these are truly amazing.

BLT Wraps

Need more Make-Ahead Lunch Box ideas? Look through all these posts of yumminess.

These BLT Wraps and Cream Cheese BLT Sandwiches rich and filling, so the sides you’ll want to go alongside these need to be simple and light. Our favorites are:

  • Carrot sticks
  • Sliced cucumbers
  • Apples
  • Sliced sweet peppers
  • Pears
  • Applesauce

Now go get out your cream cheese and bacon. Wait. You do have these staples on hand, right?! :)

Heavenly Homemaker's Club Members: Access your homepage and all your fantastic resources here! Not a member yet? Please join us!

An Egg Free Version of Warm Vanilla Soother ~ Share Your Story

November 5, 2014 by Laura 7 Comments

This post may contain affiliate links. For more information, please see our disclosure policy.

Share Your Heavenly Homemakers Recipe Story

Our Warm Vanilla Soother recipe is a favorite around here. It is rich and comforting with its whole milk, maple syrup, and eggs. But for everyone with an egg allergy, it seems that this recipe is a no-go for you. I can adapt many of my recipes to become allergy friendly, but for this one? I’ve been at a loss as to how to substitute the eggs.

Why did I even think I needed to try? All of you make Heavenly Homemakers such a wonderful forum, helping each other, offering suggestions, and sharing your experiences. I see dozens of comments on past posts every day in which you are interacting with each other and blessing each other with what you know. This is just one of the many reasons I love you all!

Jenny was one such reader. While others have left comments on my Warm Vanilla Soother recipe post asking how I would adapt it to make it egg free, and I was all, “uhhh, I totally have no idea…” Jenny took her experience and expertise and gave it a try. It worked!!! She emailed to share her story so that I can now share it with you!

Dear Laura,

Two of my kiddos have egg,  peanut and tree nut allergies. So I usually alter your recipes. I was the one commenting on your warm vanilla soother. I kept the egg yolks out but put 2 teaspoons baking powder, 3 tablespoons coconut oil and 3 tablespoons water (mixed together is my sub for 2 whole eggs). It turned out awesome. So delicious. Love your recipes.

Jenny

Oh my goodness. Can Jenny’s little boy get any cuter?

egg free warm vanilla soother 1

Well yes, apparently he can.

eggless warm vanilla soother 2

Here is the complete recipe for Egg Free Warm Vanilla Soother…

Egg Free Warm Vanilla SootherYum

3 cups whole milk
2 teaspoons baking powder, 3 tablespoons coconut oil, and 3 tablespoons water mixed together
1/3 cup real maple syrup
2 Tablespoons arrowroot powder or corn starch
1 Tablespoon butter
1 teaspoon vanilla extract

In a medium saucepan, whisk together milk, baking powder/oil/water mixture, maple syrup, and arrowroot powder. Cook over medium heat, stirring constantly (I use a whisk) until mixture begins to thicken. Remove from heat and add butter and vanilla. Stir until creamy. Pour into mugs and serve warm.

Jenny, thank you so much for figuring this out for everyone!

For those of you with milk allergies, coconut milk works great in this recipe. :)

Please continue to send in your stories. I love reading them and sharing them here!

~~~~~~~~~~~~~~~~~~~~~~~~~~~

stretch island strawberry

Heavenly Homemaker's Club Members: Access your homepage and all your fantastic resources here! Not a member yet? Please join us!

Salted Caramel Apple Crisp

November 4, 2014 by Laura 14 Comments

This post may contain affiliate links. For more information, please see our disclosure policy.

You know how I talk about my Apple Crisp recipe being so healthy you can eat it for breakfast? This particular version tips the scale from could be breakfast to definitely dessert. This is because of the fantastic caramel sauce drizzled all over the lightly sugared apple crisp, which makes this treat become very sugary and of course, more delicious than ever.

Let us pause right here to smack me in the forehead. How dare I tell you on Monday to cut back on sugar, then post a sugary recipe on Wednesday? I have no explanation or excuse. It’s fall, I have lots of apples, I took this recipe idea to our church fall festival and everyone loved it, this idea is a very easy one to execute, um, um… <— that was me, not giving explanation or excuses. I’m stumbling all over myself here.

Well, do cut back on sugar. But if you have apples, need to make a fantastic dessert to share with others, and want something easy to make, here is a recipe for you. And if you are being a good girl (or boy) and cutting back on sugar like that one lady once encouraged (I have such a sheepish look on my face right now) – just take a couple nibbles of this and hand the rest over to…. See. I can not even finish writing this.

Here’s a naughty recipe for you. I am so, so sorry for posting this.

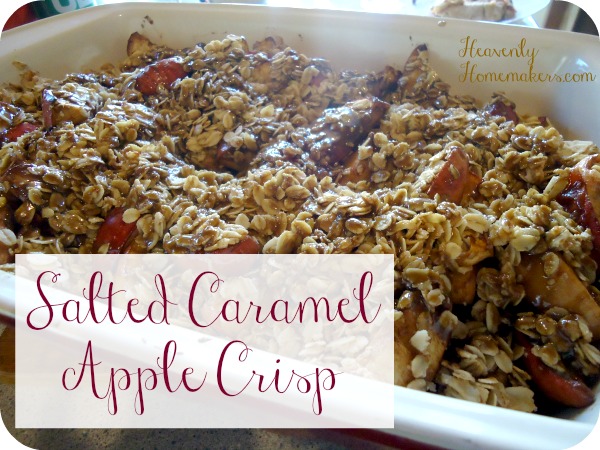
Salted Caramel Apple Crisp


Salted Caramel Apple Crisp
 
Save Print
Prep time
20 mins
Cook time
35 mins
Total time
55 mins
 
This dessert is super easy, especially if you happen to already have Caramel Sauce made. When I made this last week, I had a jar of caramel sauce in the fridge, so I just warmed it up and drizzled it over the top of my fruit crisp. Easy and awesome!
Author: Laura
Recipe type: Dessert
Ingredients
  • Crisp:
  • 5 cups sliced apples
  • 2 Tablespoons sucanat or brown sugar
  • 1 teaspoon ground cinammon
  • Crumb Topping:
  • ½ cup rolled oats
  • 2 Tablespoons sucanat or brown sugar
  • ¼ cup melted butter
  • Caramel Drizzle
  • ½ cup sucanat or brown sugar
  • 2 Tablespoons butter
  • 2 Tablespoons cream (heavy whipping cream)
  • ¼ teaspoon vanilla extract
Instructions
  1. Stir the fruit together with the sucanat and cinnamon. Place mixture in a small baking dish (8×8 inch).
  2. To make the crumb topping, mix together oats, sucanat, and melted butter. Sprinkle crumb topping over fruit mixture. Bake in a 375° for 30-35 minutes or until fruit is tender and topping is golden brown.
  3. To make the caramel drizzle, place sucanat, butter, and cream in a small saucepan. Stir over medium heat until butter is melted and ingredients are well combined. Remove from heat. Stir in vanilla. Drizzle hot caramel sauce over baked Apple Crisp. Sprinkle with sea salt. Serve warm.
3.4.3177

Forget you ever saw this recipe. We’re supposed to be cutting down on sugar. C’mon now.

Heavenly Homemaker's Club Members: Access your homepage and all your fantastic resources here! Not a member yet? Please join us!

How to Make Frozen Hashbrown Patties

October 28, 2014 by Laura 16 Comments

This post may contain affiliate links. For more information, please see our disclosure policy.

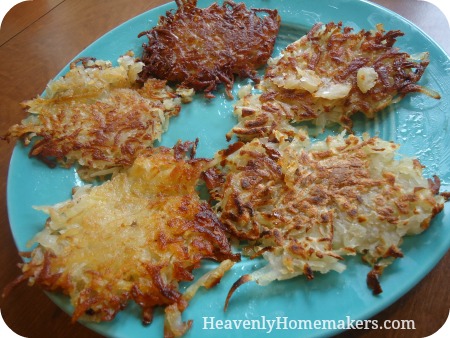
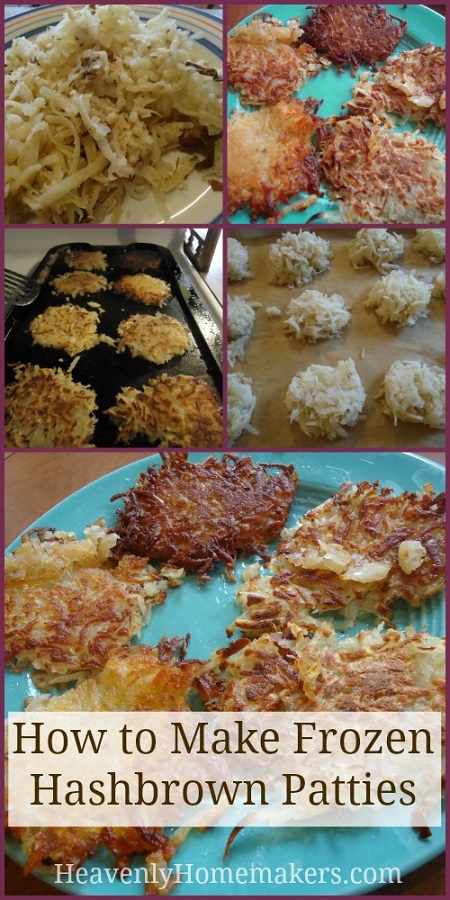
Homemade Hashbrown Patties

I always get my best ideas from you, my adorable readers. A few weeks ago, Camilla left a comment on my Homemade Hashbrowns post asking, “How would I do this if I wanted to make frozen patties?” I left a reply, telling her what I would suggest, then I promptly hollered at my boys to start scrubbing potatoes. What a fantastic idea – to make hashbrowns ahead of time in the shape of patties so that all we have to do is pull them out and fry them up!

25 consumed Hashbrown Patties and 72 frozen Hashbrown Patties later, here I am to share all the fun details with you! This idea is a great one – plus it’s easier than you would think. Don’t you love it when delicious, healthy, and easy all make it into the same sentence?

How to Make Frozen Hashbrown PattiesYum

1. Scrub and bake as many potatoes as you like. We fill a big roasting pot with scrubbed potatoes, cover, and bake for about an hour and a half.
2. Allow the potatoes to cool. You can even refrigerate overnight if you like.
3. Shred the cooled baked potatoes as if grating cheese.
4. Use a large cookie scoop or spoon to scoop out nice portions of shredded potatoes. Put the scoops directly into hot oil to fry OR –
5. Place the scoops of shredded potatoes onto a parchment paper-lined cookie sheet.
6. Freeze the mounds of shredded potatoes on the cookie sheets. Transfer them to a freezer bag once frozen solid.
7. Store frozen hashbrown patties in the freezer in freezer bags until ready to cook and serve.
8. To cook frozen hashbrown patties, heat palm shortening or coconut oil in a skillet or on a griddle. Do not thaw hashbrown patties. Put patties into the hot oil and fry for about 2 minutes on each side or until golden brown and as crispy as you like. Salt and serve!

How to Make Frozen Hashbrown Patties

Do you love this idea?! Let’s hear it for another great freezer cooking idea to help us get ahead!

Heavenly Homemaker's Club Members: Access your homepage and all your fantastic resources here! Not a member yet? Please join us!

Whole Wheat Zucchini Carrot Bread & Natural Value Foods 25% off Plus 20% off at Amazon

October 23, 2014 by Laura 5 Comments

This post may contain affiliate links. For more information, please see our disclosure policy.

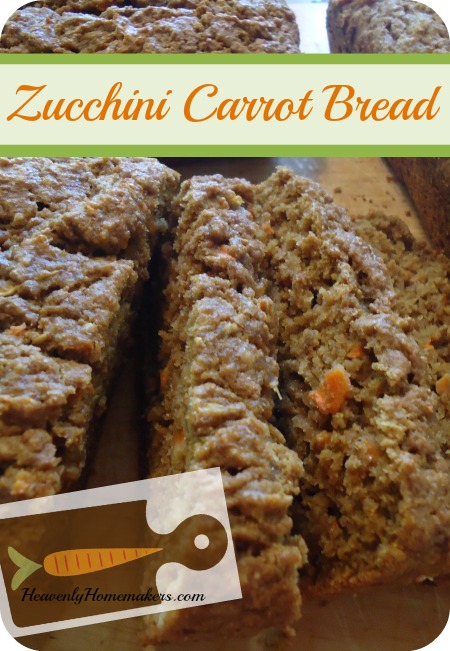
The more nutrients you can stuff into one recipe, the better, right? My friend Emily tried this idea of adding shredded carrots into zucchini bread, then let me know that I should try it. Great idea. Mmmmm, so good!

Zucchini Carrot BreadYum

3 cups whole wheat flour
2 teaspoon cinnamon
1 teaspoon baking soda
1/2 teaspoon sea salt
1/2 teaspoon nutmeg
1/2 teaspoon baking powder
1 cup honey
1 1/2 cups shredded zucchini
1 cup shredded carrots
1/2 cup melted butter
2 eggs

In a large mixing bowl combine flour, cinnamon, baking soda, sea salt, nutmeg and baking powder. Stir in honey, zucchini, carrots, eggs, and melted butter. Mix ingredients until dry ingredients are moistened. Pour into two well buttered loaf pans. Bake at 350° for 45-60 minutes or until a toothpick inserted in the middle comes out clean.

zucchini carrot bread

Slices of this Zucchini Carrot Bread would be perfect in your Make-Ahead Lunch Box! Simply allow the bread to cool, slice, wrap individually, then freeze. Pull a wrapped slice of bread out of the freezer, then toss it into your lunch box for a dessert or snack!

What other veggie combinations have you thrown together in quick breads?

Heavenly Homemaker's Club Members: Access your homepage and all your fantastic resources here! Not a member yet? Please join us!

Whole Wheat Pumpkin Donuts

October 16, 2014 by Laura 24 Comments

This post may contain affiliate links. For more information, please see our disclosure policy.

After months of trial, illness, starvation, exhaustion, and many other forms of misery (encouraging post so far, Laura) – the Pilgrims and the Wampanoags came together for a great feast on what is now known as The First Thanksgiving. These incredible people had much to celebrate, no doubt.

On their table there was an abundance of lobster, rabbit, chicken, squash, chestnuts, hickory nuts, onions, leeks, dried fruits, radishes, and cabbage – all of the traditional foods you and I always serve to our families on Thanksgiving, right? (I always tear up a little during the carving of our traditional Thanksgiving Lobster.)

Quick question: How did the above First Thanksgiving menu give way to boxed stuffing and canned cranberry sauce that plops out onto a plate? Don’t answer that. But what I do what to know is this:  Where have these Whole Wheat Pumpkin Donuts been all my life? These need to be added to everyone’s Thanksgiving menu: turkey, green bean casserole, sweet potatoes, relish tray, mashed potatoes and gravy, homemade rolls with butter, and a big, huge platter of Pumpkin Donuts. Oh, and don’t forget the Lobster.

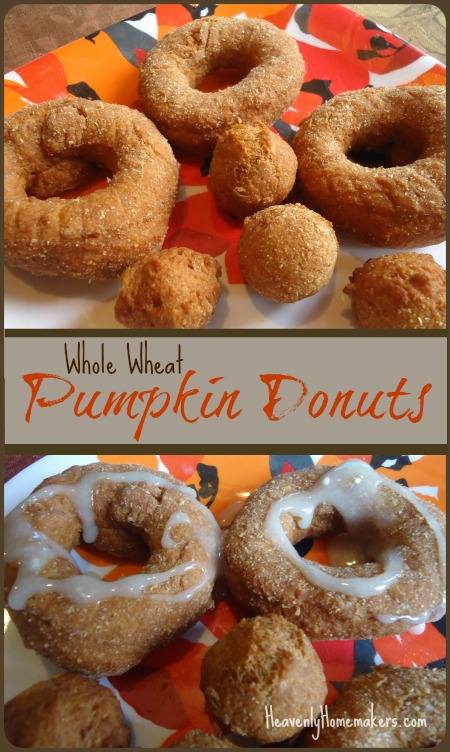
Whole Wheat Pumpkin Donuts with Glaze

These Pumpkin Donuts scream, “Fall is here! Be thankful! Inhale deeply the scent of cinnamon spice! Eat me already!” This is a fall treat that ranks right up there with all things amazing. This donut recipe stirs up quickly, rolls out easily, and fries up into fantastic goodies that might make you pass out. They are great with a cup of coffee or apple cider.

Whole Wheat Pumpkin Donuts (adapted from this recipe)Yum

5.0 from 1 reviews
Whole Wheat Pumpkin Donuts
 
Save Print
Author: Laura
Serves: 15-20
Ingredients
  • 3½ cups whole wheat flour (I use freshly ground hard white wheat)
  • 4 teaspoons baking powder
  • 1 teaspoon sea salt
  • 1 teaspoon ground cinnamon
  • ½ teaspoon nutmeg
  • ½ cup sucanat (or brown sugar)
  • 2 Tablespoons melted butter
  • 2 eggs
  • 1 teaspoon vanilla extract
  • ½ cup buttermilk
  • 1 cup pumpkin puree
  • Oil for frying (I recommend coconut oil or palm shortening for healthy frying)
  • GLAZE:
  • 2 cups powdered sugar (I use unbleached powdered sugar)
  • ⅓ cup buttermilk
  • ½ teaspoon vanilla extract
Instructions
  1. Stir together whole wheat flour, baking powder, sea salt, ground cinnamon, nutmeg, and sucanat. Add melted butter, eggs, vanilla, buttermilk, and pumpkin puree - mixing until all ingredients are well combined.
  2. Roll dough on a well-floured surface.
  3. Cut out donuts and donut holes (makes about 15-20 of each).
  4. Fry dough in hot oil for about 3 minutes or until donuts are golden brown.
  5. Whisk glaze ingredients together and drizzle over warm donuts before serving.
3.4.3177

Whole Wheat Pumpkin Donuts

What are your family’s traditional Thanksgiving foods that are a little different from the norm?  I have to admit, not only have I never had a Thanksgiving Lobster on my table, I’m not sure I’ve ever actually eaten lobster, period. I’m a Kansas girl turned Nebraska girl. What can I say?

Heavenly Homemaker's Club Members: Access your homepage and all your fantastic resources here! Not a member yet? Please join us!

Apple Nachos ~ Quick and Easy!

October 7, 2014 by Laura 6 Comments

This post may contain affiliate links. For more information, please see our disclosure policy.

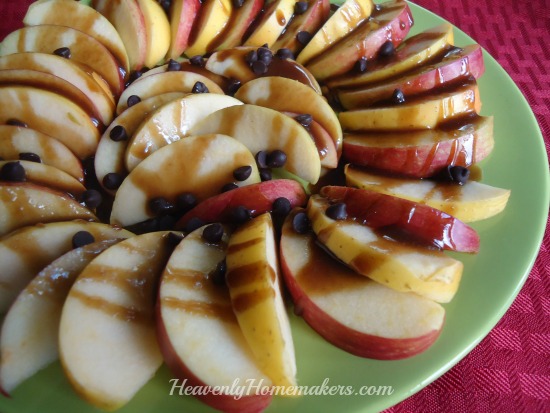
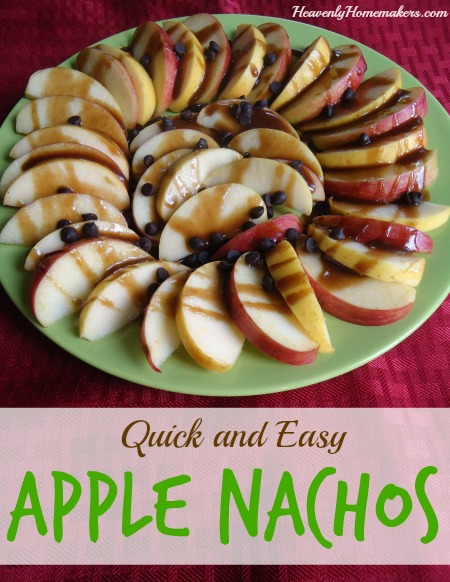
Apple Nachos - Easy!

There aren’t even words to describe this treat. But not to worry. I can always come up with plenty of words (just ask my family full of men). Let me see if I can come up with something…

Simple, fast, deliciously sweet, a little bit tart, sticky, drippy, caramely, chocolaty, the perfect fall treat. There.

If you’re questioning whether or not caramely is a word or not, I declare that it definitely is. The dictionary just doesn’t know it yet.  Don’t trust everything you don’t read. (I don’t get paid to make sense.)  I figure, if chocolaty is a word, caramely should be too. Also, I like to say words that get my point across whether they are real or not. So don’t get all grammary and English languagey on me. After all, you really want to know how to make these Apple Nachos.

How to Make Apple NachosYum

Slice apples and lay them on a plate. If you like, you can sprinkle them with lemon juice to keep them from turning brown. Drizzle warm Homemade Caramel Sauce over the apple slices. Sprinkle mini chocolate chips over the warm caramel sauce. Serve immediately.

The result is a chocolaty, caramely plate of amazingness.

apple nachos

I think we can all agree that caramely should be a real adjective found in the dictionary, as should the word soccery. What? I used that word just yesterday to describe how our front closet almost made me pass out. I innocently opened the closet door to throw in a pair of shoes and was met with a blast of stink that is typical in our home during soccer season. Sweaty shin guards and wet soccer cleats, along with all the other gear – ah, the lovely scent of autumn. I threw in the shoes and quickly slammed the door closed proclaiming, “Whoa-oh, gag me. It smells completely soccery in there.” Why take time to say real words in full sentences like, “The inside of this closet appears to be thick with the aroma of unpleasant apparel associated with this particular sport season in which we are all participating.”

No.  It just smells soccery.  It’s as simple as that. When basketball season comes, the closet will become basketbally. That’s just the truth of it.

I’m suddenly very aware that this is a terrible thing to talk about when writing a food post. I apologize. Sometimes, I get a little too real lifey when I write, forgetting that good food and sweaty footware should never be discussed in the same conversation. How terribly nonproper-ish of me.

I now take your attention back to the wonderful Apple Nachos idea, whose caramely goodness brought us all here to this unlikely point of conversation. Make these Apple Nachos. They’ll make us all use the word caramely so much that the dictionary will have no choice but to include it.

You heard it here first.

Heavenly Homemaker's Club Members: Access your homepage and all your fantastic resources here! Not a member yet? Please join us!

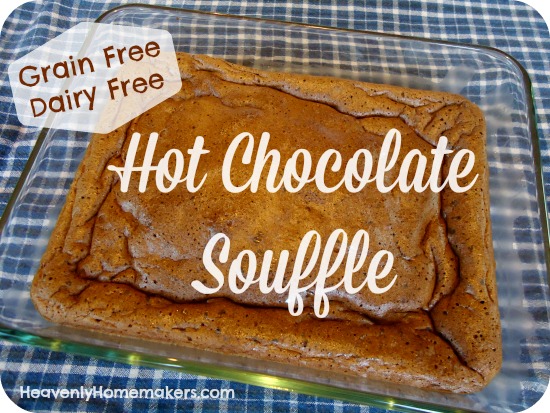
Hot Chocolate Souffle ~ A Recipe That Just So Happens To Naturally Be Grain Free and Dairy Free

October 2, 2014 by Laura 9 Comments

This post may contain affiliate links. For more information, please see our disclosure policy.

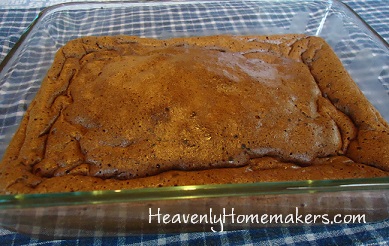
hot chocolate souffle 2

Elias, our 12 year old, is my cookbook buddy. Just like me, he enjoys looking through new recipes, getting food ideas, looking at the food pictures. He’s my right hand man when it comes to finding new recipe ideas to play with.

During our past few trips to the library, Elias and I have picked up different cookbooks to look through and get ideas from. This Hot Chocolate Soufflé is one he found recently. He liked the look of the dessert and figured we could adapt it with our healthier ingredients pretty easily. Obviously, he cares so much about using healthier ingredients, just like all normal 12 year old boys. Ha. Haha. Ha. Ha.  Well, at least he knows his mom cares, and he sort of understands why. Really, all he was concerned about was that this recipe looked like a yummy chocolate dessert. What else matters, right?

Here’s what’s fun about this Hot Chocolate Soufflé recipe:

  • It’s very easy to make
  • It only has 4 ingredients
  • It can be made for those who need to avoid gluten and/or dairy

Hot Chocolate SouffléYum

1/2 cup dark chocolate chips
1/3 cup sucanat powdered sugar
5 eggs, separated
pinch of sea salt

Separate eggs – whites and yolks – into two separate bowls. Stir sucanat powdered sugar into the egg yolks until smooth. In a small saucepan, melt the chocolate, stirring constantly and removing from heat immediately after chocolate has melted. Stir melted chocolate into egg yolks and sucanat mixture. Beat egg whites and sea salt until stiff peaks form. Fold chocolate mixture into the egg whites until barely mixed. Pour mixture into a 8×8 inch baking pan. Bake in a 400° oven for about 15 minutes or until done through and through.

Grain Free, Dairy Free Hot Chocolate Souffle

These would be great for your Make-Ahead Lunch Box. Also, I looked into where you can purchase allergy free dark chocolate chips. Here’s what I found:

    Do you like looking through cookbooks and recipes? (Hope so – this site is full of ’em!)

    This post contains affiliate links.

Heavenly Homemaker's Club Members: Access your homepage and all your fantastic resources here! Not a member yet? Please join us!

Lazy Dogs ~ The Make-Ahead Lunch Box

September 30, 2014 by Laura 20 Comments

This post may contain affiliate links. For more information, please see our disclosure policy.

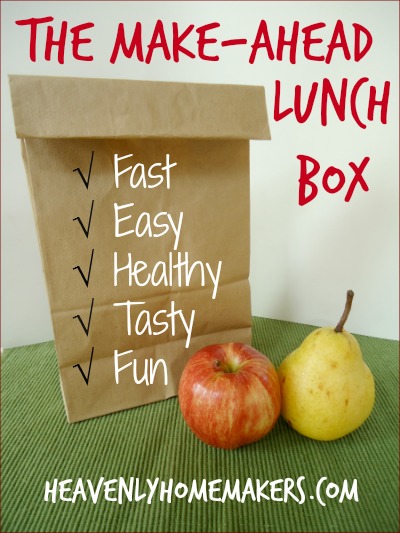
The Make-Ahead Lunch Box

Find all of our Make-Ahead Lunch Box recipes and ideas here.

You might laugh at this recipe for several reasons. It is a little different from those I typically share.

First of all…hot dogs?

Yes, hot dogs. Remember how I’ve told you that I really love me a good, all beef hot dog? It’s true. I love sweet peppers, apples, strawberries, and asparagus better. But a good quality beef hot dog tastes really yummy to me. What can I say?

Second reason to laugh at this recipe:  This is not exactly the most inexpensive recipe I’ll ever suggest that you make. I didn’t find my hot dogs on sale, and I got the best quality dogs I could find at the store that don’t contain nitrites. So…cha-ching.  I used real cheese, not American cheese slices, which is obviously, more expensive because it’s real.

I did save by making my own whole wheat tortillas. But other than that? I’m not telling you how much each of these Lazy Dogs cost me. I’ll do it better next time by waiting for a sale on hot dogs. (If you have my Oh, For Real cookbook, you’ll find the tortilla recipe there. It’s also in my Totally Tortillas eBook.)

So if these Lazy Dogs are a little more on the pricey side, why am I sharing this recipe with you? Because these Lazy Dogs taste good. Because they are still less expensive than eating out. Because they are a fun, kid friendly (and apparently Laura friendly) food. And because you can make them ahead of time and put them in your lunch box.

I can’t take the credit for this great idea. When I posted my Taco Quesadilla recipe, “Busy Mom in AL” shared this:

Another of our “wraps” are some that we call Lazy Dogs! We boil some hot dogs to plump them up, roll them up with some cheese in a tortilla and heat them up in the oven until the cheese melts! Very good, even cold!

I loved the idea and made them for our soccer games and travel that very weekend. Once I had the tortillas made, the boys got in an assembly line to help put the Lazy Dogs together. Just like that, our to-go meal was ready.

Lazy DogsYum

Tortillas (I use homemade whole wheat tortillas)
Cheese Slices (I use Colby jack slices)
High Qualtity Beef or Turkey Hot Dogs (I found Oscar Meyer Angus Nitrite Free Dogs)

Boil the hot dogs just long enough for them to plump. ( <— what a weird sentence.)  Lay one slice of cheese on each tortilla, top with a hot dog, and roll it up. Bake in a 350° oven for about 10 minutes or until cheese has melted.

Make these ahead of time! Warm them in the oven, then serve.

Lazy Dogs ~ Perfect For Your Lunch Box

We found that we preferred these warm instead of cold. Still, if you want to pack them to-go, simply bake, wrap, and pack. Easy and fun!

Are you a hot dog lover? What is your favorite kind?

Heavenly Homemaker's Club Members: Access your homepage and all your fantastic resources here! Not a member yet? Please join us!
« Previous Page
Next Page »

Join Our Community!

 Facebook Twitter E-mail Instagram Pinterest

Popular Posts

~ Will All of the Real Moms Please Stand Up?
~ Easy! Stir-and-Pour Whole Wheat Bread
~ How to Make Gatorade
~ 31 Real Food Breakfast Ideas
~ Dear Teenage Girls...
~ When Mom Takes a Step Back
~ The Inexpensive Health Insurance We Love!
~ Let's Talk Real Food Grocery Budgets

Check out our latest posts!

  • Big Family Food and Fun: September 6-12, 2026
  • Big Family Food and Fun: August 30-September 5, 2026
  • Big Family Food and Fun: August 23-29, 2026
  • Big Family Food and Fun: August 16-22, 2026
  • Big Family Food and Fun: August 9-15, 2026
Home  ~  Simple Meals  ~  Club Membership  ~  Shop  ~  Privacy Policy  ~  Disclosure  ~ Contact

Copyright © 2026 · Beautiful Pro Theme on Genesis Framework · WordPress · Log in