Heavenly Homemakers

Encouraging women in homemaking, healthy eating and parenting

  • Home
    • About
    • FAQs
  • Recipes
    • Bread and Breakfast
    • Condiments
    • Dairy
    • Main Dishes
    • Side Dishes and Snacks
    • Desserts
    • Gluten Free
    • Instant Pot
    • Crock Pot
    • Heavenly Homemaker’s Weekly Menus
  • Homemaking
    • Real Food Sources
  • Store
  • Contact
    • Advertise
    • Disclosure
    • Privacy Policy
  • Simple Meals
  • Club Members!

Zucchini Recipes: Whole Wheat Zucchini Cake

August 6, 2009 by Laura 37 Comments

This post may contain affiliate links. For more information, please see our disclosure policy.

With all these zucchini experiments you might think that I don’t have any more huge zucchini in my kitchen any more. Oh but you’d be wrong. There’s still a big huge one on my countertop waiting to be played with. I’ve still got a Zucchini Brownie recipe coming for you…and in case you missed them…here are more zucchini recipes you might be interested in:  Chocolate Chip Zucchini Cookies and Bars; Cheeseburger Zucchini Boats; Whole Wheat and Honey Zucchini Bread and Muffins.

This cake was maybe my favorite of all the experiments. It was really, really good (and by was, I mean that every last piece is gone). Of course I happen to think cream cheese frosting makes everything good!
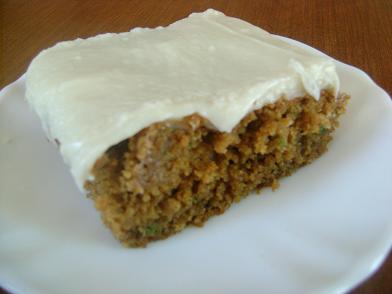
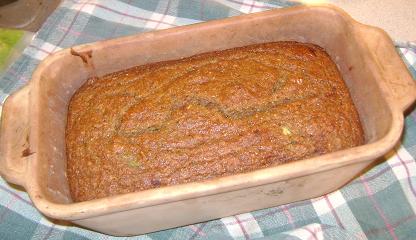
zucchinicakesm

Whole Wheat Zucchini CakeYum

2 cups whole wheat flour
1 1/2 cups sucanat or rapadura
1 teaspoon baking powder
1 teaspoon baking soda
1/2 teaspoon cinnamon
2 cups shredded zucchini
2 eggs
1/2 cup butter, melted

Stir together dry ingredients. Mix in zucchini, eggs and butter. Pour batter into a buttered 9×13 inch baking dish. Bake at 350 degrees for 30-35 minutes or until a toothpick inserted in the middle of the cake comes out clean.

Allow cake to cool completely. Frost with Cream Cheese Frosting. Below are two recipe choices:

Sorta-Naughty (But at Least the Sugar is Unbleached) Cream Cheese Frosting

1/2 cup melted butter
8 oz. cream cheese, softened
1 t. vanilla
4 1/2 cups organic/unbleached powdered sugar

Cream butter and cream cheese together. Add vanilla. Beat powdered sugar in gradually until you reach the right consistency.

Not-So-Naughty (But Still Really Good) Cream Cheese Frosting

1/2 cup heavy whipping cream
3 ounces cream cheese
1 t. vanilla
4 T. honey

Whip cream until soft peaks form. In a separate bowl, stir cream cheese, vanilla and honey together until smooth. Gently fold in whipped cream.

Either frosting recipe is really good…the latter one is just a bit more natural and healthy.

If you like carrot cake…we all kinda thought this cake tasted a lot like carrot cake. Mmmm!

(If you don’t like carrot cake, then this cake tasted nothing like carrot cake.)  You should totally try it. ;)
—————————————————-

This post is linked to Frugal Fridays.

Heavenly Homemaker's Club Members: Access your homepage and all your fantastic resources here! Not a member yet? Please join us!

Zucchini Recipes: Cheeseburger Zucchini Boats

July 29, 2009 by Laura 26 Comments

This post may contain affiliate links. For more information, please see our disclosure policy.
You’ve gotta try this fun zucchini recipe! Little boats that you can eat…how cool is that? What a perfect way to get your kids to eat zucchini!

Cheeseburger Zucchini BoatsYum

3 small zucchini
1 pound ground beef
1 small onion, chopped tiny
1/2 t. garlic powder
1/2 t. chili powder
sea salt
1/2 cup cheddar cheese (I use raw white cheddar)

Cut off the ends of the zucchini and boil them for about 10 minutes. In the meantime brown hamburger meat, onion, garlic powder and chili powder. Salt to taste.

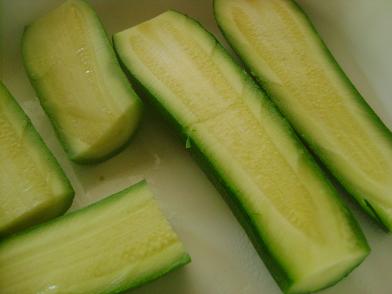
zucchiniboats1sm
Slice cooked zucchini lengthwise.

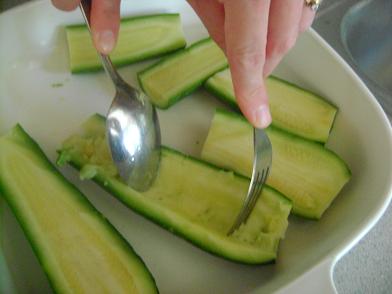
zucchiniboats2sm
Use a fork and spoon to scrape out the “zucchini guts”  (sorry, I live with boys) and add it to cooked hamburger meat.

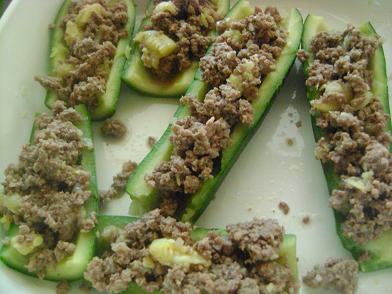
zucchiniboats3sm
Scoop equal amounts of hamburger mixture into each “boat”. Top with shredded cheese.

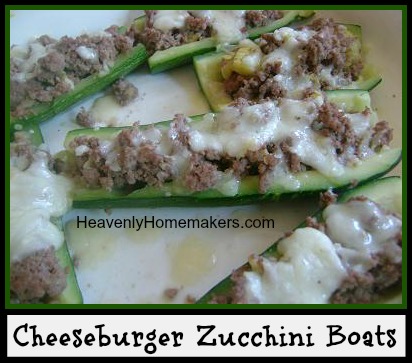
Cheeseburger Zucchini Boats
Put in oven broiler for a couple of minutes until cheese is melted then serve right away.

Now you can eat them while singing, “Great green globs of slicky, slimy zucchini guts…”

Or…you can skip the sing-along and just eat them.

Heavenly Homemaker's Club Members: Access your homepage and all your fantastic resources here! Not a member yet? Please join us!

Zucchini Recipes: Whole Wheat and Honey Zucchini Bread and Muffins

July 24, 2009 by Laura 58 Comments

This post may contain affiliate links. For more information, please see our disclosure policy.

Here’s the recipe I’ve been promising!

Whole Wheat and Honey Zucchini BreadYum

3 cups whole wheat flour
2 teaspoon cinnamon
1 teaspoon baking soda
1/2 teaspoon sea salt
1/2 teaspoon nutmeg
1/2 teaspoon baking powder
1 cup honey
2 cups shredded zucchini (I use my food processor to shred zucchini, skin and all)
1/2 cup melted butter
2 eggs

In a large mixing bowl combine flour, cinnamon, baking soda, sea salt, nutmeg and baking powder. Stir in honey, zucchini, eggs and melted butter. Mix ingredients until dry ingredients are moistened. Pour into two well buttered loaf pans. Bake at 350° for 45-60 minutes or until a toothpick inserted in the middle comes out clean.

zucchinibreadsm

Whole Wheat and Honey Zucchini Muffins

Prepare as above, except scoop dough into 24 paper-lined muffin tins. Bake at 400° for 20 minutes.

I’ve still got a few zucchini recipes coming up, including Zucchini Brownies, Zucchini Cake and even fun Cheeseburger Zucchini Boats! 

As you can tell…I’m baking this weekend! What are you up to?

Heavenly Homemaker's Club Members: Access your homepage and all your fantastic resources here! Not a member yet? Please join us!

How to Make Sweet Pickle Relish (the healthier way)

July 23, 2009 by Laura 66 Comments

This post may contain affiliate links. For more information, please see our disclosure policy.

Your family will be so excited that I am giving you this sweet pickle relish recipe. Yes, the very strong smell of onions, cucumbers and vinegar cooking on your stove will bring them to tears and make them beg for a spoonful. (Or rather they will be like my boys and come downstairs with a disgusted look on their faces while holding their noses asking WHAT in the world you are making.)

Don’t worry…the smell in your kitchen goes away. Eventually. And then you are left with several jars of sweet pickle relish…enough to last you quite a while. (This recipe makes more than a year’s supply for our family. We don’t tend to go through pickle relish very quickly, but I really like having it on hand.)

If you have a few extra cucumbers and enjoy adding sweet pickle relish to your tuna salad, etc…you’ll like this healthier version. I cut the sugar in half compared to the other recipes I found..plus used organic sucanat (dehydrated cane sugar juice) instead of regular sugar and it is plenty sweet enough for our taste!

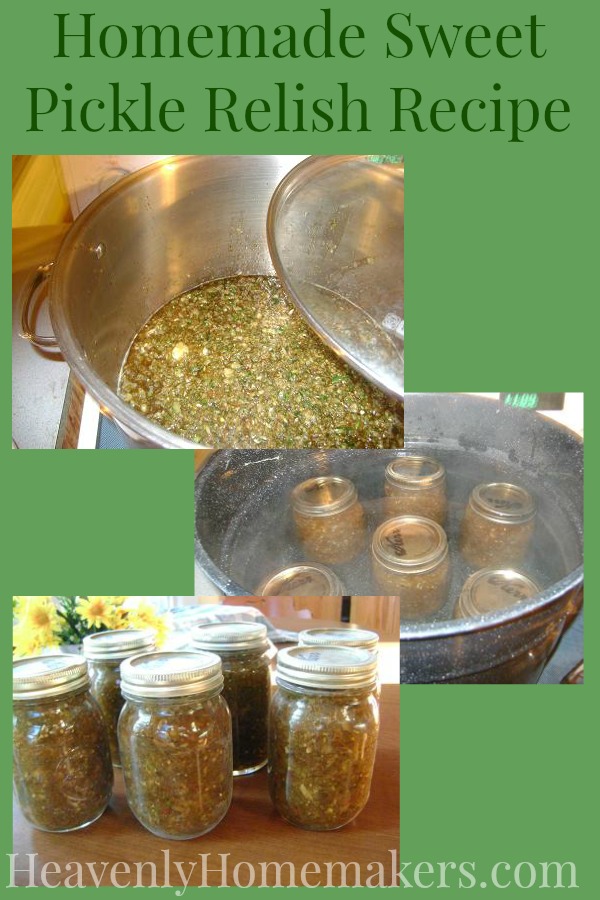
Homemade Sweet Pickle Relish Recipe

Sweet Pickle RelishYum

How to Make Sweet Pickle Relish (the healthier way)
 
Save Print
Author: Laura
Ingredients
  • 8 medium sized cucumbers
  • 2 large onions
  • 2 sweet green peppers
  • 1 sweet red pepper
  • ⅓ cup sea salt
  • 3 cups rapadura or sucanat
  • 3 cups apple cider vinegar
  • 2 T. whole celery seed
  • 2 T. whole mustard seed
Instructions
  1. Begin by slicing the cucumbers, peppers and onions.
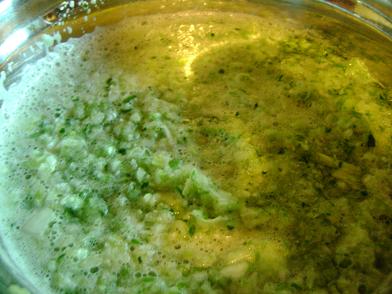
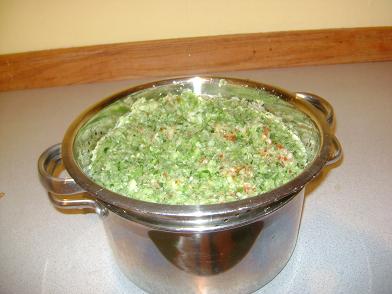
  2. Chop the vegetables into tiny pieces. I find that putting them into my food processor works best for this.
  3. Pour the chopped veggies into a large bowl.
  4. Cover them with water and let them soak for about two hours (longer won't hurt).
  5. Pour the soaked veggies through a strainer until all the water is drained out.
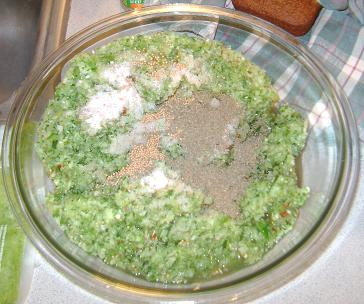
  6. Pour strained veggies into a bowl and add remaining ingredients.
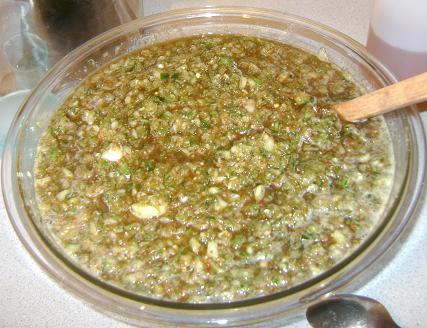
  7. Stir well.
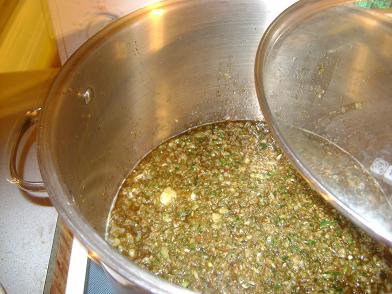
  8. Pour contents of bowl into a large pot.
  9. Bring to a boil.
  10. Simmer relish for ten minutes, then transfer it into pint sized jars. (I was able to make six full pints, with a little bit leftover.)
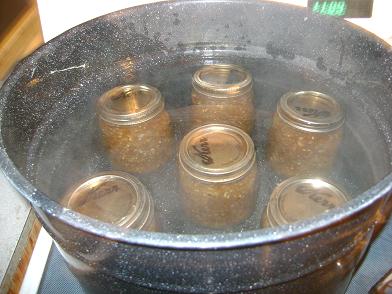
  11. Following these hot water bath canning methods, process the pickle relish for 10 minutes (from start of boiling).
3.4.3177

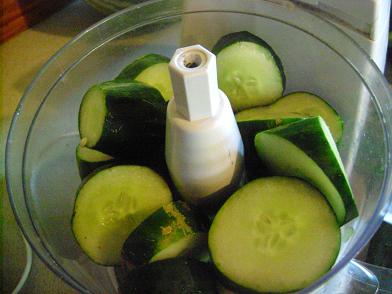
 picklerelish1sm
Begin by slicing the cucumbers, peppers and onions.

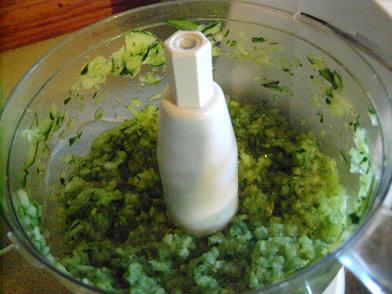
    picklerelish2sm
Chop the vegetables into tiny pieces.
I find that putting them into my food processor works best for this.

piclerelish3sm
Pour the chopped veggies into a large bowl.
Cover them with water and let them soak for about two hours (longer won’t hurt).

piclerelish4sm
Pour the soaked veggies through a strainer until all the water is drained out.

piclerelish5sm
Pour strained veggies into a bowl and add remaining ingredients.

picklerelish6sm
Stir well.

picklerelish7sm
Pour contents of bowl into a large pot. Bring to a boil.

Simmer relish for ten minutes, then transfer it into pint sized jars. (I was able to make six full pints, with a little bit leftover.)

piclerelish8sm
Following these hot water bath canning methods,
process the pickle relish for 10 minutes (from start of boiling).

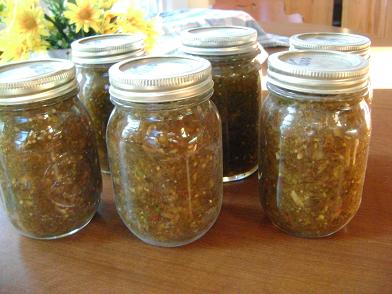
picklerelishsm
Six beautiful jars of pickle relish all ready to go!

You’ll find more preserving help and tutorials in my Gardening and Preserving ebook!

The cost for this relish was very low, as the cucumbers were given to me for free and the other veggies came from my garden. The added ingredients were low cost as it all divided into SIX jars of pickle relish! Each jar only cost a few cents. I LOVE gardening season!

Heavenly Homemaker's Club Members: Access your homepage and all your fantastic resources here! Not a member yet? Please join us!

Zucchini Recipes: Chocolate Chip Zucchini Cookies

July 19, 2009 by Laura 24 Comments

This post may contain affiliate links. For more information, please see our disclosure policy.

Tis the season for zucchini to grow into the size of baseball bats (and be used as such if you live at my house). Tis the season for everyone to lock their doors while at church…just to prevent someone from unloading their overgrown zucchini into other people’s cars when no one’s looking. Tis the season for people to start offering to pay you money just to take zucchini off their hands.

It’s amazing how one little hill can produce enough zucchini to fill an entire kitchen. (Did I mention that I didn’t even plant zucchini this year?!)

We’ve eaten a bunch of zucchini in stir fry or simply sauted it in a bit of olive oil. It’s SO good like that. I’ve already shredded a bunch and put it into the freezer. Now, I’m on a quest to figure out some great recipes that will sneak zucchini into a variety of dishes, making them more nutritious. And well…a zucchini can only serve as a baseball bat for so long. Eventually it must be eaten.

I don’t like eating a huge zucchini as is. The seeds are larger than my teeth and the skin is tougher than I prefer. I like shredding the large ones in my food processor and stirring them into zucchini bread (whole wheat and honey recipe coming soon). 

While making zucchini bread last week (and then looking around at all the other huge zucchini in my kitchen) I realized that surely one could come up with a cookie, or at least a cookie bar that included zucchini. So I tinkered around. I discovered this:  Cookies are a delicious way to eat more zucchini. 

Here’s the recipe I came up with:

Giant Chocolate Chip Zucchini Cookies Yum

2 cups shredded zucchini
1/2 cup melted butter
1 cup organic sucanat (dehydrated cane sugar juice)
1 egg
1/2 t. salt
1 t. baking soda
3 1/2 cups whole wheat flour
3/4 cup chocolate chips

Shred zucchini (I use a food processor). In a large mixing bowl mix sucanat, flour, salt and baking soda. Stir in shredded zucchini, melted butter and egg. Fold in chocolate chips. Use a large scoop to put 1 1/2 T. sized balls of dough onto a cookie sheet. Bake in a 350° oven for 15 minutes. Makes about 20 giant cookies.

zucchinicookiessm

Chocolate Chip Zucchini Bars

Follow the same recipe as above, only spread the dough into a 9×13 inch pan. Bake in a 350° oven for 20-25 minutes.

zucchinibars1sm

My husband, kids and I all loved these. Zucchini makes them moist…and of course chocolate makes everything good.

Coming up in my next Zucchini Recipes post…I’ll share my whole wheat and honey zucchini bread and muffin recipe!
————————————

Go check out  Amy’s awesome list of zucchini recipes!

[print_link]

Heavenly Homemaker's Club Members: Access your homepage and all your fantastic resources here! Not a member yet? Please join us!

Making Homemade Chocolate Chips…In Detail

July 13, 2009 by Laura 357 Comments

This post may contain affiliate links. For more information, please see our disclosure policy.

I posted about making homemade chocolate chips a long time ago. Since that time, I’ve received several emails asking for more help and detail about how this works. It seems that many of you who tried the recipe are having trouble getting everything to melt and dissolve and mix like it should.

In light of your chocolate chip frustration…I decided to do a more thorough tutorial about how I make chocolate chips. The words Chocolate and frustration should never be in the same sentence together. Ever.

You can use coconut oil or butter to make your chips. I used butter this time because I’m almost out of coconut oil. Butter doesn’t quite work as well as coconut oil. They tend to be softer with butter…but still oh so good. Especially when you put them in these Chocolate Chip Brownies.

Here again is the recipe:

Homemade Chocolate ChipsYum

1/2 cup cocoa powder
1/2 cup rapadura or sucanat (you can use white sugar if you want)
1 cup coconut oil or butter
1 teaspoon vanilla extract  (homemade vanilla extract if you have it!)

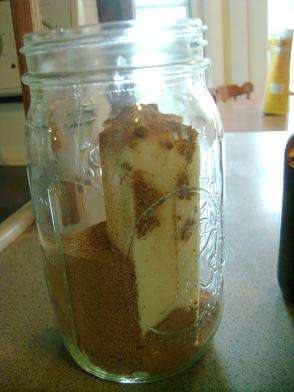
Begin by placing the cocoa, sucanat and butter (or coconut oil) into a quart sized jar. 

chocolatechiptutorial1sm

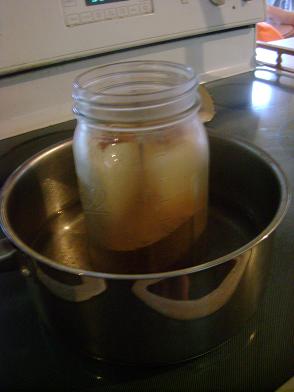
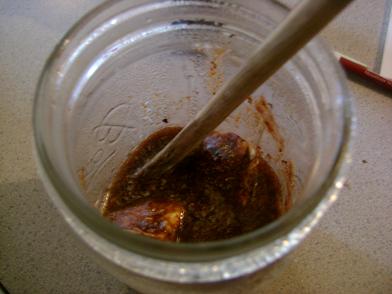
Fill a small saucepan with two or three inches of water. Place the jar into the saucepan/water. Turn the heat on medium/high to begin melting the butter.

chocolatechiptutorial2sm

Stir often. After five minutes, my mixture looked like this:

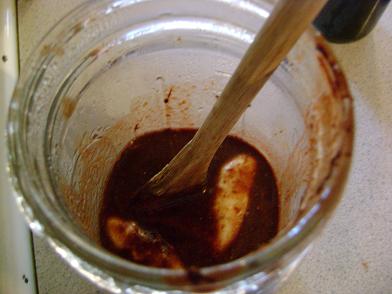
chocolatechiptutorial3sm

After ten minutes, my mixture looked like this:

chocolatechiptutorial4sm

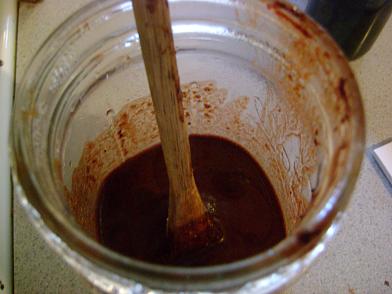
It took a total of thirteen minutes for the butter to completely melt. I then pulled it out of the water, added the vanilla and stirred well.

The mixture in my jar looked and smelled SO GOOD that I wanted to drink it. But I didn’t.  That would have made quite a mustache. 

chocolatechiptutorial5sm

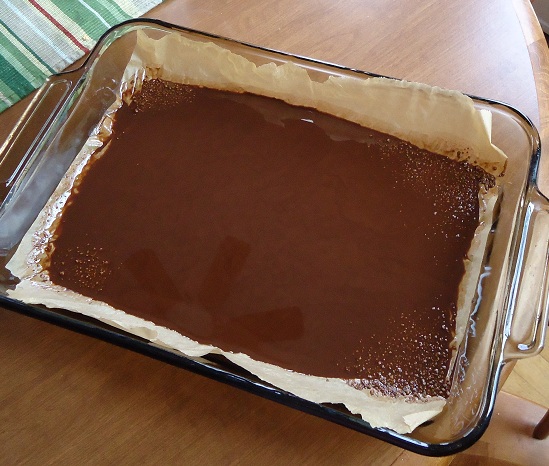
Pour the mixture into a 9×13 inch pan covered with parchment paper. Spread it as evenly as you can. 

As you can hopefully tell from the following picture, I still have a little sucanat that refused to completely dissove. Can you see the bits of chunkyness? That’s been one of the questions I’ve received from several of you. But…the little bits of chunkyness don’t hurt anything. My chocolate chips tasted just fine!

You like how the ceiling fan is reflecting in the chocolate? 
I’m just trying to show off my terrible photography skills.

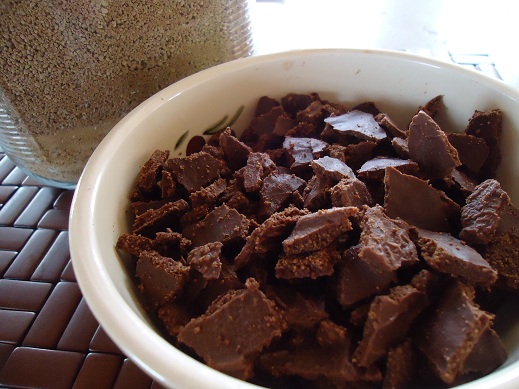
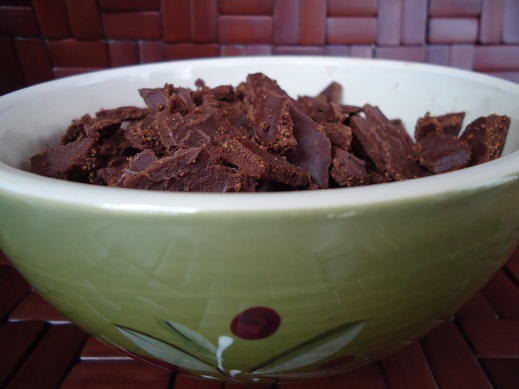
Place your pan into the refrigerator for 1-2 hours so that the chocolate can harden. Remove it from the parchment paper and break it into chunks. Store in refrigerator in an airtight container (unless you and your family eat them all first).

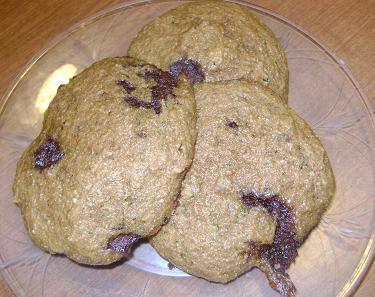
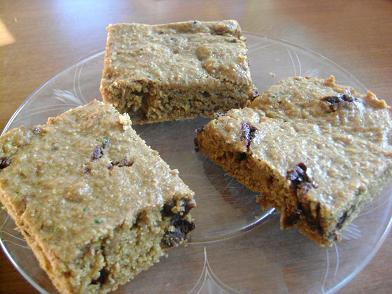
Just a note:  These chocolate chips taste wonderful in Homemade Chocolate Chip Cookies, but keep in mind that they are very pure and therefore tend to melt and get runny while baking. Chocolate Chip Cookies with homemade chocolate chips taste wonderful, but might look a little bit funny. No matter, ugly cookies taste good too. :)  I recommend eating these chocolate chips plain, mixed with peanuts or in trail mix, in Chocolate Chip Brownies or in Chocolate Chocolate Chip Muffins.

And now, I do believe I need to use my freshly made chocolate chips to bake brownies. After I eat some green beans and broccoli of course…

Heavenly Homemaker's Club Members: Access your homepage and all your fantastic resources here! Not a member yet? Please join us!

High Five Recipes: Homemade Barbeque Sauce

July 7, 2009 by Laura 46 Comments

This post may contain affiliate links. For more information, please see our disclosure policy.

I’ve had several requests for my homemade barbecue sauce recipe. Turns out…it’s a high five recipe! Doesn’t get much easier than that!

High Five Recipes 2

Homemade Barbecue SauceYum

High Five Recipes: Homemade Barbeque Sauce
 
Save Print
Author: Laura
Ingredients
  • ¾ cup ketchup (I use an organic, no high fructose corn syrup variety)
  • 2 Tablespoon minced onion
  • ¼ teaspoon garlic powder
  • 1 teaspoon liquid smoke
  • 1 Tablespoon molasses, honey or sucanat (optional)
Instructions
  1. Mix ingredients in a small sauce pan.
  2. Simmer for a few minutes until flavors are blended.
3.4.3177

As for the ketchup, I use an organic, no high fructose corn syrup variety. Muir Glen is my favorite.

I mix this Barbecue Sauce up as a dip for our meatballs or Popcorn Chicken…YUM!

bbq_sauce

Sometimes I put a few pieces of chicken into the crock pot, dump the sauce over the top, and let it cook slowly for a few hours. It’s the easiest main dish ever! Get the details on my Crock Pot Barbecue Chicken Breasts here. It’s also fantastic on Grilled Barbecue Chicken.

Or, sometimes I add it to leftover roast beef for BBQ beef sandwiches. Even more fun? Make your BBQ Beef into Barbecue Beef and Cheese Hot Pockets. They are freezable so you can make them ahead and pull them out as needed.

So let’s review.

Recipes that use Homemade Barbecue Sauce

  • Crock Pot Barbecue Chicken Breasts
  • Grilled Barbecue Chicken
  • Barbecue Beef and Cheese Hot Pockets
  • Use it as a dip for Popcorn Chicken

What all do you put barbecue sauce on?

Easy Homemade Barbecue Sauce

Oh, and by the way – I really have no idea what “liquid smoke” is. I’m assuming that it isn’t the healthiest ingredient in the world. BUT…it makes for a yummy, easy BBQ sauce. This version is MUCH healthier than the HFCS versions I could buy at the store.

If I ever figure out how to turn smoke into a liquid and put it into a bottle all by myself, you’ll be the first to know.

Heavenly Homemaker's Club Members: Access your homepage and all your fantastic resources here! Not a member yet? Please join us!

Making Homemade Vanilla Extract (aka…Why Laura Bought a Gallon of Vodka)

June 30, 2009 by Laura 598 Comments

This post may contain affiliate links. For more information, please see our disclosure policy.

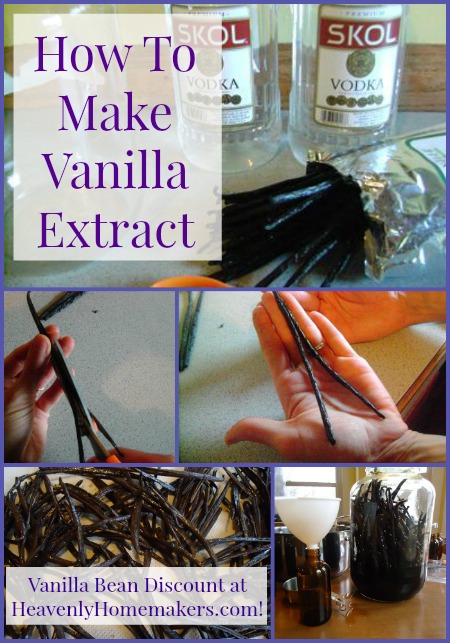
Learn to make Homemade Vanilla Extract!

How To Make Vanilla Extract

Yum

Yes indeed. The four boys and I went into Walmart a few days ago for the sole purpose of buying vodka. A gallon of it.

I felt the need to tell the check out lady why I was buying an entire gallon of vodka. She just looked at me like I was a lunatic and shrugged as if to say, “Hey, do whatever you want to with your vodka, girl.”

And then she wouldn’t let Justus carry it out of the store. You know…just in case I was buying the vodka for my nine year old minor.

It made for some good discussion on the way home: what drinking alcohol can do to your brain…why the lady had to make sure I was over 21 to buy it…why it’s okay to carry a watermelon out of Walmart when you’re nine but not a couple jugs of vodka.

All that to say:  I just started my very first batch of homemade vanilla!!! I’m super excited. My friend Jill sent me a beautiful bottle of her homemade vanilla a couple of weeks ago and it’s fabulous!!! (I guess you could say that I was pressured by a friend into buying alcohol. “Go ahead Laura…make your own vanilla. Everyone’s doing it.”)

Now that I’m hooked on the idea…I thought I’d try to influence you too…

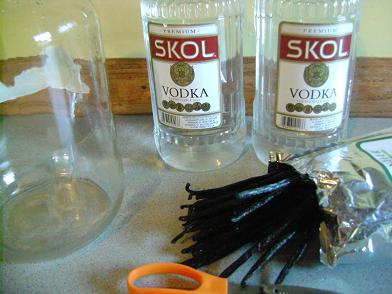
What You Need to Make Homemade Vanilla Extract

A gallon jar
One gallon of Vodka (the cheap stuff is fine) (To keep you from standing in the liquor section too long to calculate this…2 bottles of 1.75 liters each will be the exact amount you need to make a gallon of vanilla.)
50-80 Vanilla Beans (You’ll need about 1/2 – 3/4 pound) – enter code home for a 20% discount on Vanilla Beans through Olive Nation!!
Kitchen shears

vanilla1sm.JPG

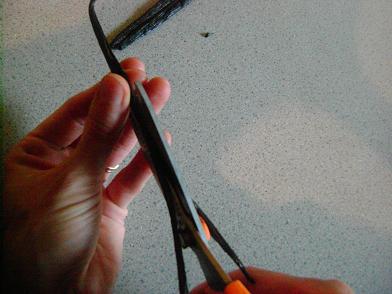
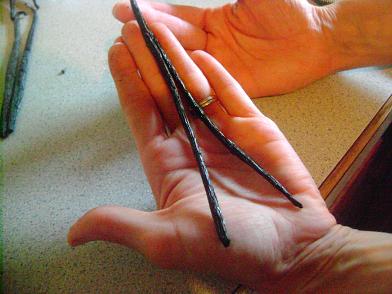
Begin by slicing through each bean lengthwise, leaving about one inch at the top of each bean uncut so that it stays together.

vanilla3sm.JPG

See? Like this…

vanilla4sm.JPG

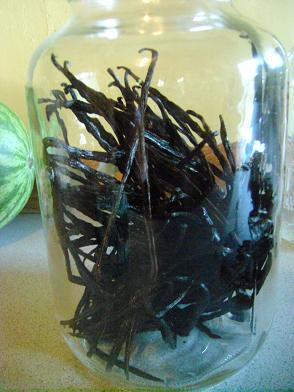
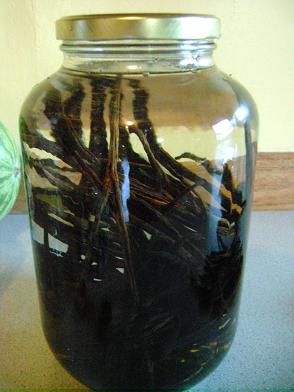
Place all of your cut Vanilla Beans into your jar.

vanilla5sm.JPG

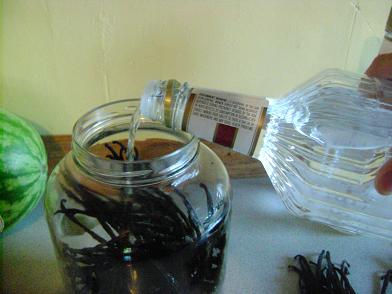
Fill the jar with vodka. (I took the following picture with my left hand while pouring the vodka with my right hand. This proves that apparently…I can really handle my liquor.)

vanilla6sm.JPG

Once the jar is full with beans and vodka, put the lid on…then put the jar in a dark place (like in the back of a cabinet). It needs to stay there for FOUR to SIX MONTHS in order to become vanilla extract! Occasionally, you should get it out and shake it up a bit, then put it back into it’s dark place.

vanilla7sm.JPG

Here’s the cool thing:  If you start a batch of vanilla really soon, it will be ready in time to put into little bottles and give as Christmas gifts. (Family members reading this – you have exactly six months to forget all about this post and be surprised on Christmas morning.)  If you don’t get it started right this minute, from what I’ve researched, a little less than six months of “vanilla extracting” time won’t hurt anything.

To complete your vanilla once four-six months have passed:  strain out your vanilla beans with a coffee filter lined colander and tada…you have vanilla extract! Bottle it up in dark amber bottles – give it as gifts and start cooking with it yourself!! Yum!

AND…if you don’t want to make a whole gallon of vanilla…you can make a lesser amount:

  • 1/2 gallon of vanilla….use 1/2 gallon of vodka (1.75 liters) and20-30 Vanilla Beans (enter code home for a 20% discount!)
  • 1 quart of vanilla…use one quart of vodka and 10-15 Vanilla Beans (enter code home for a 20% discount!)

Well…I know I’ve influenced many of you to eat healthier and plant potatoes in a container. Is it now possible that several of you are going to run out to buy liquor? Tell the clerk the Heavenly Homemaker sent you.
————————————————-

Read this post to learn how to finish and strain your vanilla after 4-6 months.

————————————————-

I recommend that you purchase your Vanilla Beans through Olive Nation. You’ll receive 20% off your entire order!!!! Thank you Olive Nation for offering HeavenlyHomemakers readers free shipping on orders over $50 and a special 20% discount!

————————————————

You can purchase dark amber bottles here.

————————————————-

Here’s where I ordered my labels for vanilla bottles.

I, also, love these pretty labels! They are customizable, and come in several designs.

Heavenly Homemaker's Club Members: Access your homepage and all your fantastic resources here! Not a member yet? Please join us!

Once Upon a Hot Kitchen: Strawberry Bread

June 23, 2009 by Laura 46 Comments

This post may contain affiliate links. For more information, please see our disclosure policy.

I decided to do a little baking today. Why? Because it’s always fun to bake on a 101° day, right?

I know I’m weird, but we have to eat…and cooking and baking in a hot kitchen reminds me of my grandma. And thinking of my grandma makes me happy (even in my hot kitchen). I used to help her a lot in the summers, feeding the men during the long hot days of wheat harvest, making sauerkraut, feeding family members who would come by. Seems like Grandma was always feeding people.

Her kitchen was about as big as my small bathroom. And – it was hot. But because I was with my grandma, doing all the things I loved to do, I didn’t even care. And neither did she.

Anyway, even though it was hot (and humid) today, I decided to do some baking. Inspired by my friend Megan, I came up with a Strawberry Bread recipe to share with you!

Strawberry BreadYum

2 cups fresh (or frozen) strawberries
3  cups whole wheat flour
1 1/2 cups sucanat
1 tablespoon ground cinnamon
1 teaspoon salt
1 teaspoon baking soda
1/2 cup melted butter
3 eggs

First…you can do one of two things with your strawberries:  If they’re fresh, you can slice them and stir them into your dry ingredients. Or, if you don’t think your family will like chunks of strawberries in their bread, blend them all up in the blender, then mix in. If you’re using frozen strawberries, thaw, then blend in blender.

Mix dry ingredients together. Stir in butter, eggs and strawberries. Pour into two buttered loaf pans. Bake in a 350° oven for 45-50 minutes.

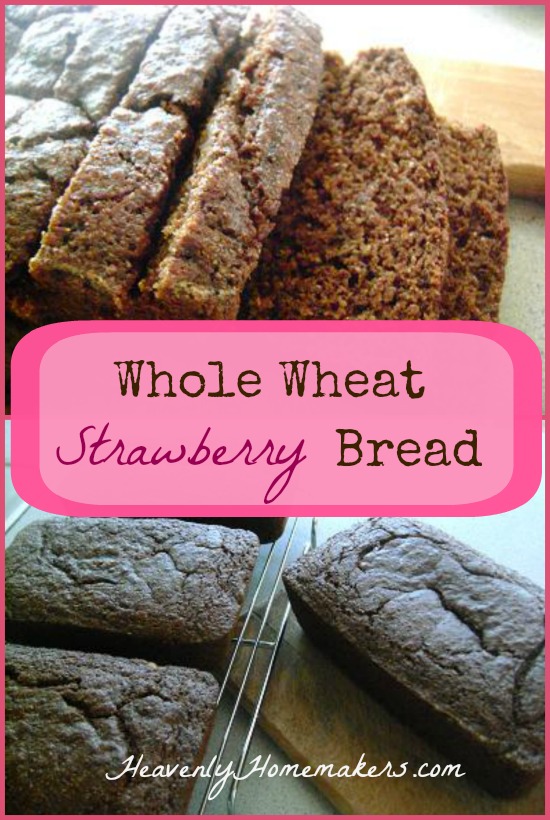
Strawberry Bread
The bread looks a little bit dark…probably from the whole wheat flour and sucanat. Oh, but it TASTES so good! I’m thinking that throwing a few chocolate chips in might be good too!

Since I had to have the oven on anyway, I doubled the recipe and made four loaves! I also mixed up some Corn Dog Muffins and threw those in. Gotta make the heat worth it right? Now, I’ve got a big batch of Corn Dog Muffins and two loaves of Strawberry Bread in the freezer for another day when I don’t want to turn on the oven!

Now that I’m finished baking, I’m sitting in the living room under the ceiling fan with a cold glass of Limeade. It’s fun having these “hot kitchen memories” of Grandma…but maybe now I’ll just sit in the coolness and think of a snowy Christmas with Grandma…

Heavenly Homemaker's Club Members: Access your homepage and all your fantastic resources here! Not a member yet? Please join us!

Homemade Ice Cream! (So healthy you could eat it for breakfast.)

June 18, 2009 by Laura 69 Comments

This post may contain affiliate links. For more information, please see our disclosure policy.

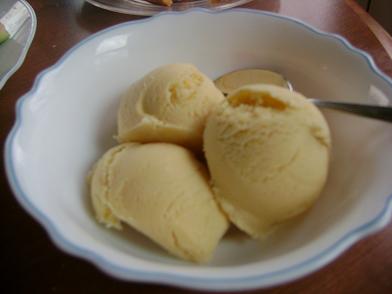
Seriously, I’m thinking we really might do this sometime soon. I mean…cream, milk, eggs, maple syrup…all breakfast foods. See?  You could eat this for breakfast. I think we all should. Our children will think we’re awesome. (Not that they don’t already of course.)

homemadeicecream3sm.JPG
A part of this balanced breakfast.

So here’s my recipe:

Homemade Vanilla Ice CreamYum

2 quarts heavy cream
1 quart (4 cups) whole milk
6 egg yolks
1 cup real maple syrup
2 T. vanilla
2 T. arrowroot powder (helps thicken it a bit)

Mix all ingredients together with a whisk. Freeze according to your ice cream freezer directions.

homemadeicecreamsm.JPG
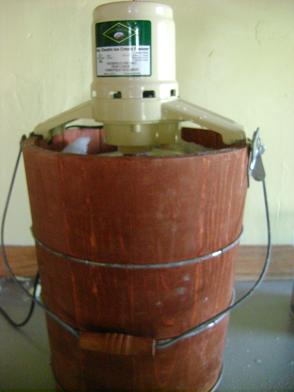
We invested in this Rival F69206-X 6-Quart Electric White
Mountain Ice Cream Freezer last year to go along with our
shaved ice business. It is so great.

In case you’re wondering…I’m not afraid of raw eggs. The eggs we use are free range, organic…and are as healthy as can be. We eat them raw all the time. (On the flip side, I don’t think I would eat a “regular” raw egg from the store…but that’s just me.)  (Maybe I should do a post about that sometime?)

If you like, you can add more than 1 cup of maple syrup. I feel like it’s sweet enough with this amount, but others may not.

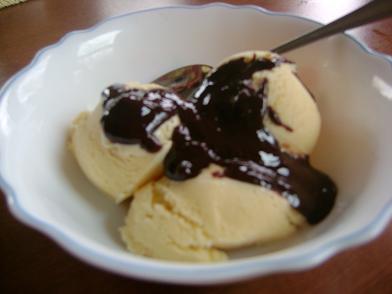
homemadeicecreamwithfudgesm.JPG
You really should put some of this delicious hot fudge sauce 
on top too. It is SO good.

Now, this weekend for Father’s Day, we’ll be adding strawberries to this recipe because of all the delicious strawberries we’ve been picking. I can’t wait!

Shucks, with strawberries in it…it’s an even more balanced breakfast (what with the fruit and all). Perhaps this will be our Father’s Day breakfast. 

(I just mentioned this idea to Matt. His eyes lit up and he said um, OKAY. Uh-huh, we’ll be having strawberry ice cream for breakfast Sunday. :) )

Please feel free to use this recipe for a fun dessert sometime too. 
————————————————

You can read more about why I recommend the White Mountain Ice Cream Maker here!

Heavenly Homemaker's Club Members: Access your homepage and all your fantastic resources here! Not a member yet? Please join us!
« Previous Page
Next Page »

Join Our Community!

 Facebook Twitter E-mail Instagram Pinterest

Popular Posts

~ Will All of the Real Moms Please Stand Up?
~ Easy! Stir-and-Pour Whole Wheat Bread
~ How to Make Gatorade
~ 31 Real Food Breakfast Ideas
~ Dear Teenage Girls...
~ When Mom Takes a Step Back
~ The Inexpensive Health Insurance We Love!
~ Let's Talk Real Food Grocery Budgets

Check out our latest posts!

  • Big Family Food and Fun: September 6-12, 2026
  • Big Family Food and Fun: August 30-September 5, 2026
  • Big Family Food and Fun: August 23-29, 2026
  • Big Family Food and Fun: August 16-22, 2026
  • Big Family Food and Fun: August 9-15, 2026
Home  ~  Simple Meals  ~  Club Membership  ~  Shop  ~  Privacy Policy  ~  Disclosure  ~ Contact

Copyright © 2026 · Beautiful Pro Theme on Genesis Framework · WordPress · Log in