Heavenly Homemakers

Encouraging women in homemaking, healthy eating and parenting

  • Home
    • About
    • FAQs
  • Recipes
    • Bread and Breakfast
    • Condiments
    • Dairy
    • Main Dishes
    • Side Dishes and Snacks
    • Desserts
    • Gluten Free
    • Instant Pot
    • Crock Pot
    • Heavenly Homemaker’s Weekly Menus
  • Homemaking
    • Real Food Sources
  • Store
  • Contact
    • Advertise
    • Disclosure
    • Privacy Policy
  • Simple Meals
  • Club Members!

Snow Ice Cream!

February 2, 2009 by Laura 34 Comments

This post may contain affiliate links. For more information, please see our disclosure policy.

I can’t decide what exactly to feel about all of you who live in warm climates. On one had…I’m CRAVING a bit of your warm weather and sunshine. On the other hand…bless your heart you can’t make Snow Ice Cream like we can. Everyone should be able to experience the joy of making snow ice cream!

Here’s what you need to make Snow Ice Cream:

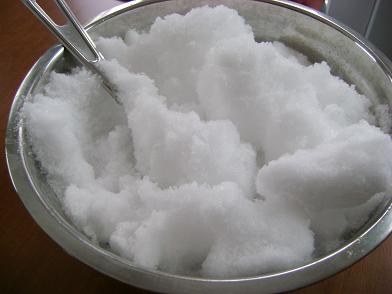
A big bowl of snow (um, no substitutions)
Real maple syrup (you can use sugar if you want…but it’s a much healthier dessert if you use real maple syrup)
Vanilla extract
Heavy Cream (you can use milk too…but OH you really should use cream!)
snowicecream2sm.JPG

Yum

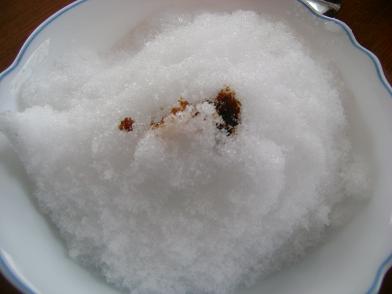
Go out and gather a big bowl of snow. Clean snow is preferred, unless you enjoy gritty ice cream….
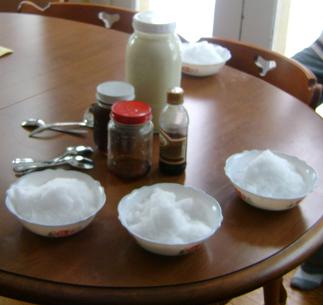
snowicecream8sm.JPG
Fill cereal sized bowls with snow.

snowicecream1sm.JPG
Drop 1/4 t. of vanilla extract into each bowl.
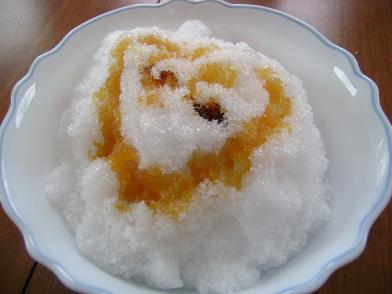
snowicecream3sm.JPG
Drizzle 1-3 Tablespoons of real maple syrup in each bowl, depending on how sweet you want your ice cream to be. I really didn’t mean to drizzle this maple syrup into a heart shape, but the effect is sure lovely, isn’t it?
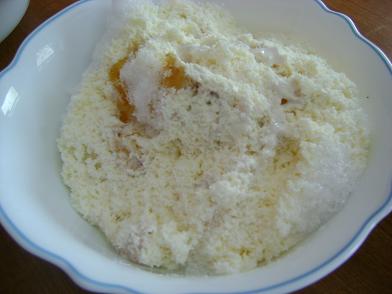
snowicecream4sm.JPG
Pour 4-6 Tablespoons of cream over the top of everything in your bowl.
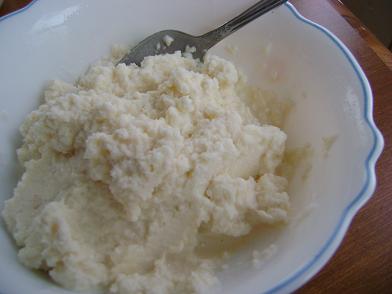
snowicecream7sm.JPG
Stir all the ingredients together until…what do you know…there’s Ice Cream in your bowl! Eat it right away before it melts!

Warning:  Contents in bowl will be extremely cold.

:)

My kids had SO much fun making this…and I didn’t feel one bit bad about feeding it to them (twice in one day). 

Bring on the snow!! (Okay, but yeah…I’m still ready for some warm days and sunshine!)
—————————————–

Visit Tammy’s Recipes for more kitchen tips.


Heavenly Homemaker's Club Members: Access your homepage and all your fantastic resources here! Not a member yet? Please join us!

Warm Up With Snowflakes

January 13, 2009 by Laura 40 Comments

This post may contain affiliate links. For more information, please see our disclosure policy.

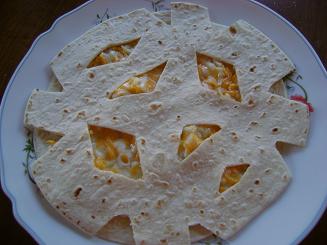
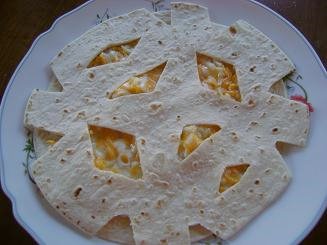
I think this idea is too much fun not to share!! My kids LOVE getting in on cooking lunch when we make these Melting Snowflakes! And of course…no two look exactly alike!

meltingsnowflakes6sm1.JPG

Yum

It’s the first time eating a snowflake has ever warmed me up! Here’s how to make ’em:

meltingsnowlakes1sm.JPG
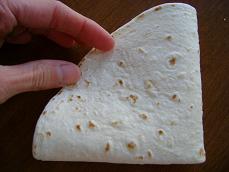
Start by folding a tortilla into fourths.

meltingsnowflakes2sm.JPG
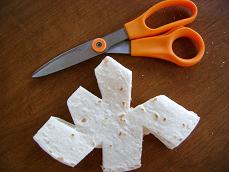
Use kitchen shears to cut notches out around the tortilla.

meltingsnowflakes3sm.JPG
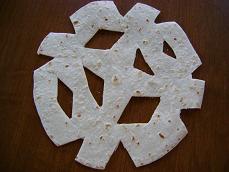
Open up the tortilla that has now become a snowflake.

meltingsnowflakes4sm.JPG
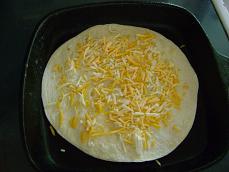
Place a whole tortilla into a skillet…sprinkle with cheese.

meltingsnowflakes5sm.JPG
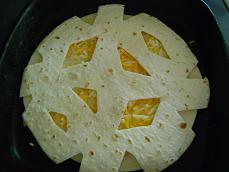
Top with the snowflake shaped tortilla. Cook over low heat until cheese is melted. (You may need to put a lid on the skillet to keep the heat in and melt the cheese.)

(p.s. I usually use my homemade whole wheat tortillas and white cheddar cheese to make these…but I already had these pictures taken so decided to use them.)  :)

Isn’t that such a fun, yummy way to eat lunch?! 

Oh, and bake the “cut out” scraps from the tortillas for a few minutes at 350 degrees for chips to dip in salsa. 

I also think it would be fun to fold a tortilla in half and cut it into a heart for Valentine’s Day…don’t you think so!?
———————————————–

Grocery List

Heavenly Homemaker's Club Members: Access your homepage and all your fantastic resources here! Not a member yet? Please join us!

Smells Like Christmas Cookies! Reindeer Cuties

December 15, 2008 by Laura 16 Comments

This post may contain affiliate links. For more information, please see our disclosure policy.

These simple cookies are a hit. Fun to make…fun to eat. I like that they are made with honey and whole wheat. And they really don’t take much time at all.

Easy Reindeer Cookies

Reindeer Cuties Yum

1 /2 cup butter, melted
1/2 cup natural peanut butter
1/2 cup honey
1 egg
1/2 teaspoon baking powder
1/2 teaspoon baking soda
1/2 teaspoon vanilla
2 cups whole wheat flour

tiny pretzels
chocolate chips
red hot candies

Stir together butter, peanut butter and honey. Add egg, baking powder, baking soda and vanilla. Mix in flour. Chill dough for about an hour.

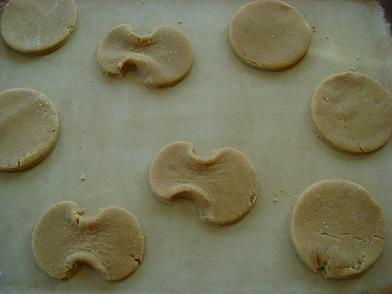
Roll dough to 1/4 inch thickness on a well floured surface. Cut circles using a small drinking glass. Place on cookie sheet. Use fingers to squeeze the circles in the middle.

reindeercookies1sm.JPG

 Place two pretzels at the top for antlers, two chocolate chips on for eyes and one red hot candy for a nose.

reindeercookies3sm.JPG

reindeercookies2sm.JPG

Bake for 10 minutes at 350 degrees. Allow reindeer to cool 2-3 minutes before removing from cookie sheet.

Allergic to peanut butter? Simply make your favorite sugar cookie recipe and create reindeer that way instead!

malachisreindeercookiesm.jpg

From the Land of the Misfit Cookies…
I just had to show you Malachi’s attempt at a reindeer.
He sure did have fun helping!

Heavenly Homemaker's Club Members: Access your homepage and all your fantastic resources here! Not a member yet? Please join us!

Smells Like Christmas Cookies: Chocolate Snowballs

December 8, 2008 by Laura 13 Comments

This post may contain affiliate links. For more information, please see our disclosure policy.

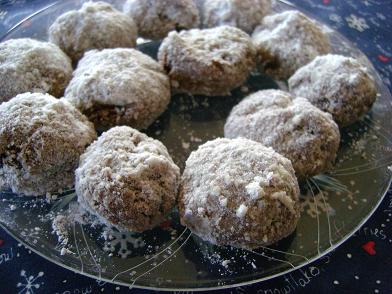
Chocolate Snowballs
Here’s the promised Chocolate Snowball recipe. I like that these aren’t super rich or heavy…just kind of like a little ball of chocolate cake.

Chocolate SnowballsYum

3/4 cup butter, melted
3/4 cup sucanat or brown sugar
1/4 cup cocoa
1/4 cup milk
1 egg
1 teaspoon baking powder
1/2 teaspoon sea salt
1 teaspoon vanilla
2 cups whole wheat flour
powdered sugar

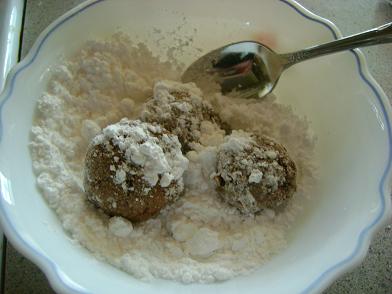
Cream butter, brown sugar, and cocoa. Add milk and eggs and stir well. Mix in baking powder, salt and vanilla. Stir in flour. Chill dough for at least two hours. Roll dough into teaspoon sized balls and place on cookie sheet. Bake at 350 degrees for 8-10 minutes until the tops are cracked slightly. Roll balls immediately in powdered sugar.

snowballcookies2sm.JPG

snowballcookies3sm.JPG

Be sure not to miss the recipes for Christmas Spice Cookies and Orange Cream Cheese Cut Out Cookies!

Heavenly Homemaker's Club Members: Access your homepage and all your fantastic resources here! Not a member yet? Please join us!

Smells Like Christmas Cookies! Orange Cream Cheese Cut-Outs

December 2, 2008 by Laura 38 Comments

This post may contain affiliate links. For more information, please see our disclosure policy.

I have decided that these are my favorite Christmas cookies. And this recipe makes a lot of them…which is why it’s a good idea to have lots of people in mind to share them with!!  Because having them just sitting around the house screaming at me to come eat them is a bad idea.

I’d like to give in to the notion that since they have orange juice in them, they’re good for me and just packed with vitamin C.  Oh, if only.

Orange Cream Cheese Cut Outs

Yum

Orange Cream Cheese Cut-Outs

1 cup melted butter
1 8 oz. pkgs cream cheese, softened
2 cups sugar (I used organic unbleached sugar crystals)
2 eggs
1 t. baking powder
1 t. vanilla
1 t. finely shredded orange peel
3 T. orange juice
4 cups whole wheat flour (I used freshly ground soft white wheat)

Cream butter, cream cheese and sugar. Add eggs, baking powder, vanilla, orange peel and orange juice. Stir in flour one cup at a time until mixed well. Chill dough for about 2 hours.

Roll dough to 1/4 inch thickness, cut with cookie cutters and bake on a cookie sheet for 10-12 minutes at 350 degrees. Allow cookies to cool completely before frosting.

Orange Cream Cheese Frosting

4 oz. cream cheese, softened
1/4 cup butter, softened
1 t. vanilla
2 T. orange juice
2 1/4 – 2 1/2 cups powdered sugar

Cream together cream cheese, butter, vanilla and orange juice with beaters. Gradually add powdered sugar.

—————————————-

If you’re wondering if this recipe is worth going to all the trouble of actually shredding orange peel (a step that takes a total of about 20 seconds), it is. If you’re wondering if I’m serious about making them, and then giving them away as quickly as you can so that you won’t eat too many of them, I am. And if you’re wondering if there will still be other fun Christmas recipes soon, there will.

Heavenly Homemaker's Club Members: Access your homepage and all your fantastic resources here! Not a member yet? Please join us!

Turkey Leftovers…Turkey-n-Biscuits

November 29, 2008 by Laura 10 Comments

This post may contain affiliate links. For more information, please see our disclosure policy.

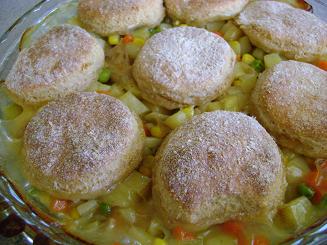
Here’s the Turkey-n-Biscuit recipe I promised you! If this doesn’t sound good…there are 19 other turkey ideas here. And if none of those sound good…you seriously need to put the rest of your turkey in the freezer and go make yourself a hamburger. With onion rings.

But, if you can handle another meal of turkey, I think you’ll really like this dish: 

Turkey -n- BiscuitsYum

2 cups cooked turkey
3 cups turkey broth
4 medium potatoes, diced
3 carrots, diced
2 cups frozen peas
2 T. arrowroot powder
1/3 cup water
sea salt 

Stir together the arrowroot powder and water in a glass or a jar until arrowroot powder is dissolved. In a large pot, bring the broth to a boil. Stir arrowroot powder and water mixture into the broth. Continue to stir until broth thickens. Add turkey, potatoes, carrots and peas. Salt liberally. Bring to a boil, then turn heat down and cook vegetables until they are tender. Pour into a casserole dish. Top with whole wheat sourdough biscuits rolled very thin. Bake at 400 degrees for 20 –30 minutes or until biscuits are golden brown.

chickenbiscuitssm.JPG

So have you all been eating bunches of turkey lately, or are you on to other meats? Why is pork called the “other white meat”? Sorry, that was random.

Grocery List

Heavenly Homemaker's Club Members: Access your homepage and all your fantastic resources here! Not a member yet? Please join us!

It’s Beginning to Smell a Lot Like Christmas…Cookies!

November 25, 2008 by Laura 24 Comments

This post may contain affiliate links. For more information, please see our disclosure policy.

As you all know, I love tweaking recipes and working to create a healthier version of recipes I find. Thanksgiving and Christmas time give me plenty of excuses to exercise this crazy hobby of mine. Nobody around me seems to mind. :)  (Hehe, funny that I used the word exercise…talking about baking cookies! Hey, exercise comes in many forms.)

My favorite part of holiday baking:  I LOVE THE WAY CHRISTMAS BAKING MAKES THE HOUSE SMELL!!!

I’m planning on baking up quite a few treats in the next few weeks to share with neighbors and friends…so be looking for several new recipes coming up here!!!

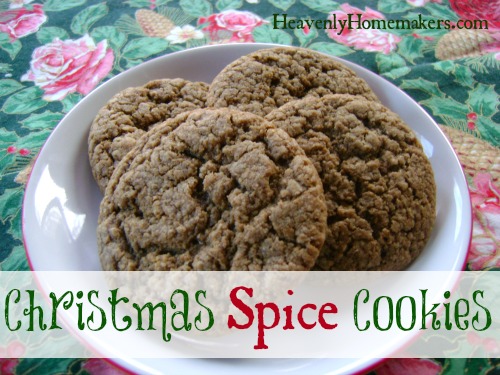
The first recipe I’ll share is one that smells just like Christmas!! MMMmmm!!

Christmas Spice CookiesYum


It's Beginning to Smell a Lot Like Christmas...Cookies!
 
Save Print
Author: Laura
Serves: 2 dozen
Ingredients
  • 1 cup melted butter
  • ½ cup sucanat or brown sugar
  • 1 egg
  • 1 teaspoon cinnamon
  • ½ teaspoon baking soda
  • ½ teaspoon vanilla
  • ¼ teaspoon nutmeg
  • ¼ teaspoon cloves
  • 2¼ cups whole wheat flour
Instructions
  1. Stir together melted butter and sucanat.
  2. Mix in egg, cinnamon, baking soda, vanilla, nutmeg and cloves.
  3. Add flour gradually until mixed thoroughly.
  4. Chill dough at least 2 hours.
  5. Roll dough into teaspoon sized balls. Place on cookie sheet 2 inches apart. Bake at 350°for 10-12 minutes.
3.4.3177


Christmas Spice Cookies

These cookies are soooo yummy with a cup of hot cocoa!!! (If you haven’t tried this hot cocoa recipe, you really, really should!)

Upcoming cookie recipe:  Orange Cream Cheese Cut-Outs!!  Possibly my favorite!

P.S. Don’t fall out of your chair, but some of the recipes I’ll share might contain some compromising ingredients like powdered sugar and (gasp!) sprinkles.   What’s Christmas without an occasional red and green sprinkle??

So, what are your favorite kinds of Christmas cookies??!!

Heavenly Homemaker's Club Members: Access your homepage and all your fantastic resources here! Not a member yet? Please join us!

Pumpkin Pecan Pie Squares

November 18, 2008 by Laura 30 Comments

This post may contain affiliate links. For more information, please see our disclosure policy.

I recently found this great recipe, then played with it and adapted it to create a healthier dessert! It is very tasty!! Simple and sweet – and just a little nutty (which are some of the exact characteristics I strive for in my life). ;)

I love the crust part the best. But I also love the filling the best. The topping was also very, very good. And of course, I always love the fresh whipped cream the best. Oh, such a great combination of lots of yummy tastes. Try it for yourself and see which part you like best!

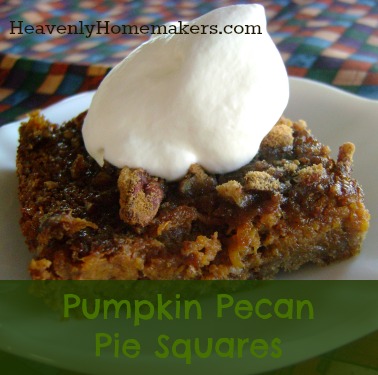
Pumpkin Pecan Pie SquaresYum

Pumpkin_Pecan_Pie_Squares
I was trying to go for a dollop of whipped cream…
but I can’t quite do a dollop.
Anybody out there good at a dollop?
(I think it’s fun to say the word dollop.)

Pumpkin Pecan Pie Squares

Pumpkin Pecan Pie Squares
 
Save Print
Author: Laura
Ingredients
  • CRUST:
  • 1 cup whole wheat flour
  • ½ cup oats
  • ¼ cup sucanat
  • ½ cup butter
  • FILLING:
  • ¾ cup sucanat
  • 2 cups pumpkin
  • 1 cup heavy whipping cream
  • 2 large eggs
  • 1 teaspoon cinnamon
  • ¼ teaspoon nutmeg
  • ½ teaspoon cloves
  • ½ teaspoon ginger
  • TOPPING:
  • ½ cup pecans, chopped
  • ¼ cup sucanat
  • Whipped cream
Instructions
  1. For Crust: Combine flour, oats, sucanat and butter. Mix until crumbly. Press on bottom of ungreased 13 x 9-inch baking pan. Bake for 15 minutes at 350 degrees.
  2. For Filling: Combine sucanat, pumpkin, cream, eggs and spices in large bowl. Beat at medium speed for 1 to 2 minutes; pour over crust. Bake for 20 minutes.
  3. For Topping: Combine pecans and sucanat in small bowl. Sprinkle pecan topping over filling. Continue baking for 20 to 30 minutes or until knife inserted in center comes out clean.
  4. Cool completely in pan on wire rack. Cut into bars. Top with whipped cream (just a dollop).
3.5.3229


If you recall, I don’t usually like recipes with nuts in them. I surprised myself by liking the pecan topping.

See? Everyone likes to be nutty every now and then…

Heavenly Homemaker's Club Members: Access your homepage and all your fantastic resources here! Not a member yet? Please join us!

Such a Sweet Post, Sort Of…**UPDATED!

November 17, 2008 by Laura 28 Comments

This post may contain affiliate links. For more information, please see our disclosure policy.

I’ve told you how much I love Rapadura to bake with. (If you’ve never eaten a brownie made with rapadura…you haven’t had a brownie…well in my chocolate loving opinion…which is just an…opinion.) (Oh dear, now I’m hungry for brownies.)

Rapadura is unbleached, unrefined dehydrated cane sugar juice. It bakes just like sugar (you substitute it one for one)…has a wonderful molasses-y taste and it is SO yummy! Because it is unrefined, it still contains nutrients from the sugar cane.

Many of you have asked if Sucanat is the same thing as Rapadura and if it was just as good for you. I looked at the label of Sucanat…which happens to be named for “SUgar CAne NATural” (very clever), and it appears that Sucanat too is dehydrated sugar cane juice.

I’ll admit to being (more than) a bit confused about Sucanat. It appears to be practically the same as Rapadura…yet my trusty Nourishing Traditions book tells me to avoid Sucanat like I would avoid other processed sugars. It says that Turbinado, Sucanat and Florida Cyrstals “are all refined sugars from which the nutrients have been removed. Small amounts of molasses may be added back to give a light brown color.”

The Sucanat package says that it is “dehydrated whole cane sugar that has not been separated or blended”. THEN, it says that “basically nothing has been added and nothing taken out!”. What does “basically” mean?! Is that something like “Sort of”? Has stuff been added or taken out…or hasn’t it? Oh, I’m so confused.

I googled this subject, researched for way too long and found more confusion. Sigh. Like I need this kind of confusion. I have a hard enough time staying on my feet sometimes.

Here’s what I’ve decided for our family:  I order my Rapadura from Azure Standard. It is cheaper than the organic Sucanat from Azure. I love Rapadura. I’m going to stick with Rapadura.

NONE OF THIS WOULD EVEN MATTER IF BROWNIES WEREN’T SO STINKIN’ YUMMY!!!!

(I’m sorry for yelling.)

What have the rest of you learned about the great Sucanat vs. Rapadura mystery?

**UPDATE**

Valerie commented that I should check out the Weston Price website for information on this. THANK you. (Why did I not think of that before?)  I trust this website. In fact, Sally Fallon, author of Nourishing Traditions bases her nutritional information on Weston Price’s research. Here’s what I found there:

Q. I’m confused as to which type of sugar is better, Sucanat or Rapadura?

A. Both are fine; both are made by dehydrating cane sugar juice. For a while Sucanat changed the way they made it and were using white sugar, so we stopped recommending the product. But they are now making Sucanat the old fashioned way, so we can recommend it again.

Sooo, there you have it. NOW what do you think? :)
—————————————————-

Visit Tammy’s Recipes for more kitchen tips.
Heavenly Homemaker's Club Members: Access your homepage and all your fantastic resources here! Not a member yet? Please join us!

Making Cultured Buttermilk, Kefir and Sour Cream

November 14, 2008 by Laura 189 Comments

This post may contain affiliate links. For more information, please see our disclosure policy.

Wanna know how EASY it is to make cultured buttermilk, kefir and sour cream? Yeah, it takes about 30 seconds of your time. (Don’t tell anyone that though…they think it’s impressive when you make your own.)  :)

The beauty of making your own cultured dairy products is that once you make one batch, you can save the last cup or two to start a new batch. It saves a lot of money to do this, and it is so easy!

I buy my buttermilk, kefir, and sour cream (also known as kreme fresh) starter online. Here are some great starter packet options:

  • Buttermilk and Sour Cream Starter Culture (yep, you can use the same one for both products)
  • Kefir Starter Culture

To Make Kefir:

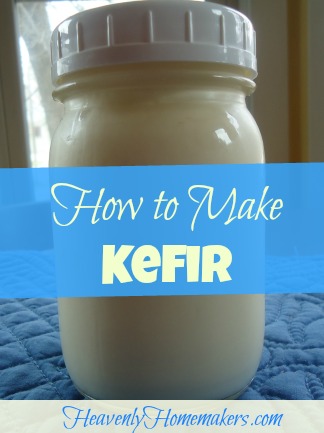
How to Make Kefir

Yum

I begin with just under a half gallon of raw milk in a glass jar. (You can make this with pasturized milk too as far as I know.)  I pour the packet of kefir starter into the milk, shake it up, and put a lid on it. Then, I set the jar in the cabinet above my refrigerator for about 24 hours (in the winter, it takes a little longer in my COLD kitchen!). You’ll know it is done “culturing” when it is thick and has some bubbly looking bubbles all through it. And when you tip your jar over, it kind of…glops. (see how helpful I am?)

To Make Buttermilk:

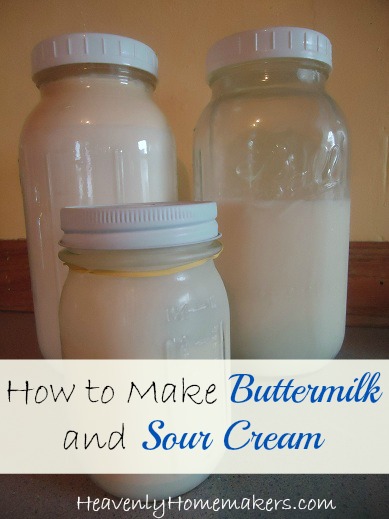
How to Make Buttermilk and Sour Cream

Follow the same instructions as for the Kefir, only use the Buttermilk Culture Starter.

To Make Sour Cream (aka kreme fresh):

Use the Buttermilk Culture Starter with one pint of cream. Follow the same directions as above.

Now, to make more batches of each of these…

Save about a cup each of kefir or buttermilk (or about a third cup of sour cream) from your initial batch.

Use this remaining kefir, buttermilk or sour cream to shake into more raw milk or cream (1/2 gallon of milk…or 1 pint of cream) to begin a fresh batch. Just put it in, shake it up, and let it sit out for 24 hours or so. (Until you’ve got the glop thing going on.)  You can do this up to eight times before you need to begin with a new starter package. (I’ve continued it more than eight times when I’m feeling rebellious. It still works.)

buttermilk1sm.JPG
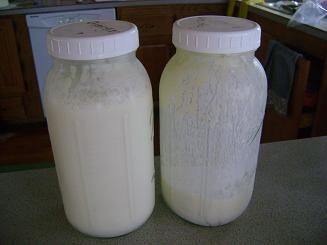
Here’s the tail end of one jar of buttermilk,
ready to be poured into a fresh 1/2 gallon jar of milk.


buttermilk2sm.JPG
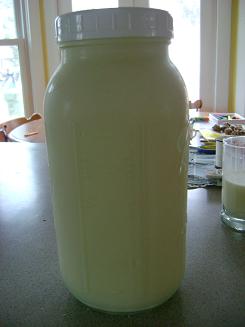
Here’s a jar of milk with a cup of buttermilk shaken into it,
ready to begin the culturing process.
(Yes, I know it looks like a plain ol’ jar of milk.
You’ll have to humor me and act like you can tell .
Nod and say, oh…very nice.)

buttermilk4sm.JPG
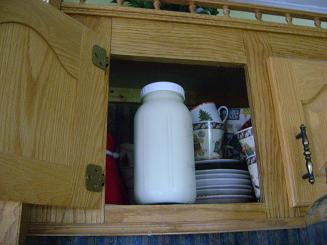
And here is my milk turning into buttermilk in the cabinet above my fridge. (With my Chrismas dishes.)
I’ve been advised that this spot is the best one in my kitchen to culture things because it has a fairly consistent temperature.

Oh, and when I do put my culturing dairy products in this cabinet, I LEAVE THE CABINET DOOR OPEN so that I can see it. It’s a bad idea to forget you have buttermilk or kefir or sour cream culturing in a cabinet. A bad, bad idea.

Now you have really, really healthy kefir for smoothies, and really, really healthy sour cream for your tacos, etc, and really, really healthy buttermilk for drinking or for making Creamy Orange Cooler.

See how easy it is?! :)

Heavenly Homemaker's Club Members: Access your homepage and all your fantastic resources here! Not a member yet? Please join us!
« Previous Page
Next Page »

Join Our Community!

 Facebook Twitter E-mail Instagram Pinterest

Popular Posts

~ Will All of the Real Moms Please Stand Up?
~ Easy! Stir-and-Pour Whole Wheat Bread
~ How to Make Gatorade
~ 31 Real Food Breakfast Ideas
~ Dear Teenage Girls...
~ When Mom Takes a Step Back
~ The Inexpensive Health Insurance We Love!
~ Let's Talk Real Food Grocery Budgets

Check out our latest posts!

  • Big Family Food and Fun: September 6-12, 2026
  • Big Family Food and Fun: August 30-September 5, 2026
  • Big Family Food and Fun: August 23-29, 2026
  • Big Family Food and Fun: August 16-22, 2026
  • Big Family Food and Fun: August 9-15, 2026
Home  ~  Simple Meals  ~  Club Membership  ~  Shop  ~  Privacy Policy  ~  Disclosure  ~ Contact

Copyright © 2026 · Beautiful Pro Theme on Genesis Framework · WordPress · Log in