Heavenly Homemakers

Encouraging women in homemaking, healthy eating and parenting

  • Home
    • About
    • FAQs
  • Recipes
    • Bread and Breakfast
    • Condiments
    • Dairy
    • Main Dishes
    • Side Dishes and Snacks
    • Desserts
    • Gluten Free
    • Instant Pot
    • Crock Pot
    • Heavenly Homemaker’s Weekly Menus
  • Homemaking
    • Real Food Sources
  • Store
  • Contact
    • Advertise
    • Disclosure
    • Privacy Policy
  • Simple Meals
  • Club Members!

Putting up Green Beans for Winter

July 27, 2014 by Laura 34 Comments

This post may contain affiliate links. For more information, please see our disclosure policy.

This was originally posted in 2008. This is evident in the fact that Justus and Elias are only 8 and 6 in the picture below. They are now 14 and 12. Time flies – and little boys become teenagers. The green bean freezer method is still the same, however. Since we have been harvesting many the past few weeks, I thought it would be fun to re-post this tutorial. :)

How to Freeze Fresh Green Beans

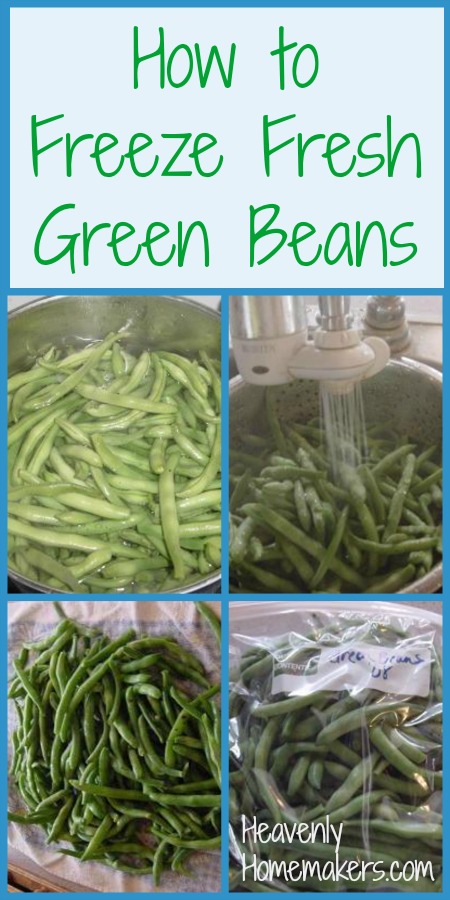
After posting about how I put up corn for winter, many of you asked about green beans. I just happen to be in the middle of crazy green bean season. So…here you go!!

beans5sm.JPG

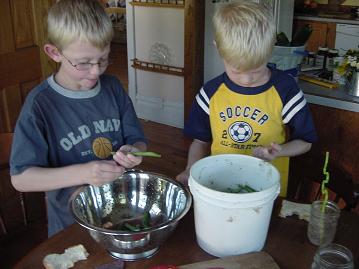
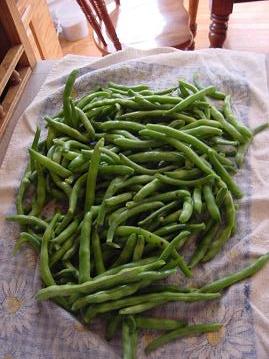
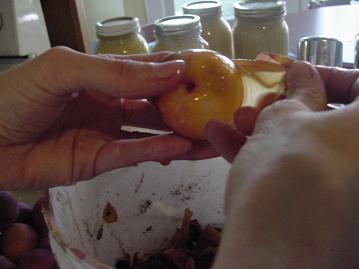
After picking our beans, I usually get my boys on “bean snapping duty” right away. (They never complain about this job. I think it’s because they are given permission to “break things”….what do you think?)  They snap off the ends and put the green beans into a colander. As soon as the colander is full I wash the beans to try to get as much “garden” (my nice way of saying bugs and dirt) off.

It is my understanding that in order to maintain as much green bean nutrition as possible, it is best to only snap the ends off the bean…not to snap the bean into pieces. It makes sense that if you snap the green bean into three pieces, when you cook the bean, more of the nutrients will be washed away in the water. But if it’s a whole bean…more of the nutrients stay inside the bean. (And you can have “My green bean is longer than your green bean” competitions while you eat dinner.)

beans1sm1.JPG

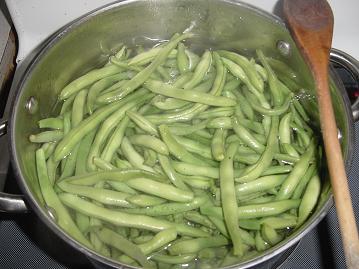
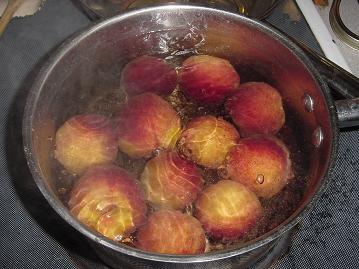
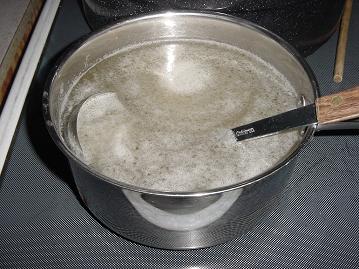
After washing the green beans, I then put them into a pot of boiling water. This blanching process stops their aging process. (No, you can not blanche people in order to stop their aging process.)

beans2sm1.JPG

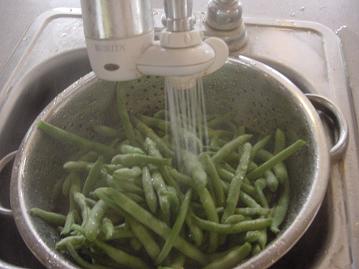
After about two minutes in the boiling water, the green beans are a brighter green…and they go back into the colander where they are given a cold, cold shower. This process stops the cooking process that the blanching part started.

beans3sm1.JPG

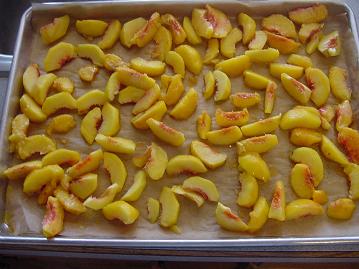
After the green beans are cooled from the cold water shower, I then spread them out onto a dry towel. I use another towel to pat over the top of them to help dry them off more. If your beans are too wet when you put them into a freezer bag, you’ll have ice form around your beans. (You don’t want ice to form around your beans.)

beans4sm1.JPG

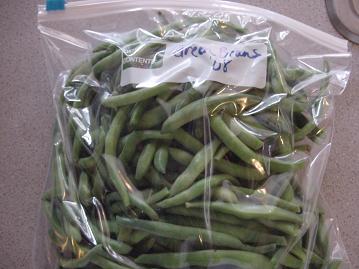
And then, I put my beans into a gallon freezer bag and label it. And into the freezer it goes. I know some people prefer to can their green beans. I don’t can them for two reasons:

1. Freezing them maintains more of the green bean’s nutrition.
2. I’m incredibly afraid of my pressure cooker. (When I got my mom’s pressure cooker, it didn’t have a manual with it. I have no idea how to use it properly.)  I do not need to cause an explosion in my kitchen.

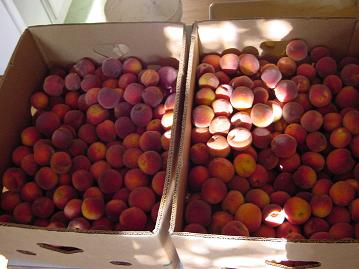
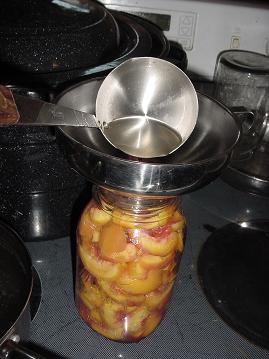
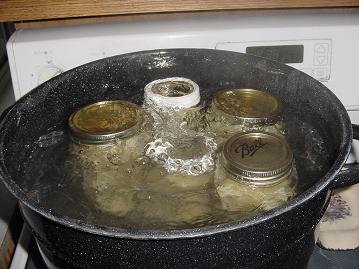
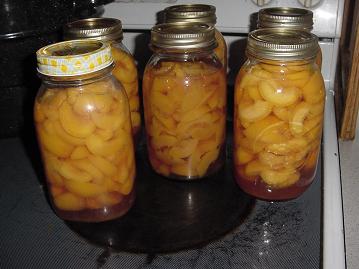
So there you go! As I begin to can and freeze my tomatoes and fruit for the winter, I’ll be sure to show you those processes too! (Yeah, because those don’t require a pressure cooker, just a hot water bath…and I’m not so afraid of those.)

Heavenly Homemaker's Club Members: Access your homepage and all your fantastic resources here! Not a member yet? Please join us!

Gratituesday: Staying Warm

January 6, 2014 by Laura 31 Comments

This post may contain affiliate links. For more information, please see our disclosure policy.

I was dreading the day. I knew it was going to be freeeeeezing cold. Keeping our big, old, drafty house warm on a 30° day is hard enough. But on a day that is below zero? I knew I was in for it. Great attitude, huh?

I started my day with a hot cup of coffee, my Bible, and a blanket. Perfection. And warmth.

Matt built a fire first thing this morning and kept it rip-roaring all day. Toasty and comforting all in one.

We had hot meals. I baked bread. I cooked chickens and made broth. Cooking is a great way to keep warm! I had a good 25 minute work-out. I was beyond warm after that. Amazing.

Then, I got a wonderful bonus to my day. I got to go over to a friend’s house and snuggle her newborn for several hours. Not one time did I think about being cold. How could I? Her house was inviting and cozy…and I was snuggling a newborn. MmmmMmmMmmm!

God is just so cool. Warm. Well, you know what I mean.  During our family prayer time last night, we thanked God for our home, knowing that even if we were chilly, we at least had a roof over our heads. Blankets. A fireplace. Hot water. An oven for baking food. And we asked Him to help us remember how blessed we are. As I’m writing this, I’m recalling that prayer. We asked, but somehow I didn’t see how I would stay warm, so I braced myself to be miserable. Even with my pouty attitude, God still gave me warmth today in ways I wasn’t expecting it. I love that He teaches us lessons so constantly.

Hooray for warm jammies, wool socks, slippers, and a God who answers when I’ve forgotten I’ve even asked.

Now your turn. Share what you’re thankful for!  Leave a comment on this post letting us know how God is working in your life. If you’ve written a blog post about what you’re thankful for, leave the link in the comments so we can visit your blog to read about it. We love sharing and reading about God’s blessings!

Heavenly Homemaker's Club Members: Access your homepage and all your fantastic resources here! Not a member yet? Please join us!

Putting Up Green Beans From Our Garden

July 6, 2012 by Laura 15 Comments

This post may contain affiliate links. For more information, please see our disclosure policy.

Our green bean plants are beautiful this year. Matt and the boys have been picking beans like crazy. I guarantee that when they bring a bucket of green beans in to me, I display a much more excited reaction than if they were to bring me a bouquet of flowers. Garden produce makes my heart flutter. :)

Here was our counter-full of beans last week once we picked, snapped, and blanched them for the freezer. (Don’t you worry. We ate a bunch of them too.)  :)

You can learn more about how we prepare green beans from the garden here. Even if you don’t grow your own beans, I’d recommend looking into purchasing fresh beans from your local farmer’s market or another resource near you. They are soooooo good!

If you have any fun homemaking tips, we’d love for you to share them in the comments section or link them up here today. Feel free to share kitchen tips, cleaning solutions, recipe ideas, cooking short-cuts, household money-saving suggestions, decorating ideas, gardening tips, or anything else you feel fits this category. (No product reviews or giveaways – thanks!) As always, when linking your blog post, please post a link back to this blog so that your readers will know where to find more Homemaking Hints.


Heavenly Homemaker's Club Members: Access your homepage and all your fantastic resources here! Not a member yet? Please join us!

Baking Day (Ugly) Photo Shoot

June 11, 2011 by Laura 34 Comments

This post may contain affiliate links. For more information, please see our disclosure policy.

We’ve had some unusually cool days this week, so beginning Thursday, once I realized the temps weren’t actually going to even reach 66°, I decided to take advantage and get some baking done. Once those 90 and 100 degree days come back, I’m going to be very thankful I did this (if there are actually any baked goods left by then!).

I always get a little bit tickled at my baking day pictures. They aren’t the prettiest pictures in the world, you know? Take for instance this picture of my big roasting pan of baked potatoes:

Ugly, isn’t it? Does it inspire you to bake potatoes? Eat potatoes? Cut black spots off of potatoes?

Well, anyway, I took that picture to show you that we (as in the boys) scrubbed 26 potatoes and baked them so we can make Homemade Hashbrowns. I LOVE doing this, but certainly don’t love baking potatoes when it’s hot outside. Now we’ve got a nice stash ready for Hashbrowns!

Moving on to the next (ugly?) picture, we have my bowl of bubbling sourdough starter:

Now, deciding whether a picture of sourdough starter is ugly or not depends on whether or not you get a kick out of making sourdough bubbles. The picture itself looks a little strange, but I happen to really appreciate sourdough, which means that I think those bubbles are beautiful. But what do I know? I think armadillos are cute.

I made a batch of Corn Dog Muffins and snapped the picture while the hot dogs were still exposed. Not the most appetizing picture, but the end result is always yummy!

So how about we quickly follow those pictures up with a picture of a big batch of Chocolate Chip Cookies I made to put in the freezer? I’m always needing cookies to take somewhere, so I decided to bake some and stash away to be prepared for later.

It was almost dark when I took the following picture, so the shot looks a little bit yellow. I made a double batch of Honey Whole Wheat Bread, a batch of Whole Wheat Hamburger Buns and a double batch of Pancake and Sausage Muffins.

That should hold us over for a while (in theory).

One last picture – I’m excited to show you my container of Cocoa Butter that I ordered and just received from Mountain Rose Herbs. I want to use them to try a different variety of Homemade Chocolate Chips, and maybe Homemade White Chocolate Chips. Wouldn’t that be fun?

Is it baking weather at your house, or are you more in the mood to sit in a swimming pool while sipping lemonade?

Heavenly Homemaker's Club Members: Access your homepage and all your fantastic resources here! Not a member yet? Please join us!

Cooking Week Recap (Complete with Ugly Corn Dog Pictures)

January 16, 2011 by Laura 26 Comments

This post may contain affiliate links. For more information, please see our disclosure policy.

Well, I got a lot of cooking done last week. I don’t have a lot of food to show for it, as we did our fair share of eating last week too. But, eating is a good thing, and I was able to stash a little bit in the freezer for quick meals later on too.

I am happy to report that I was able to make everything on my list (except for the Ranch Dressing), plus a few extras. What I’m not so happy to report is that with some of the cooking…I got a little bit lazy.

Take for instance these Corn Dog Muffins. They’re so easy to make and are great to have in the freezer for a grab and go meal. My problem though came when I just didn’t feel like taking the time to cut the hotdogs to the right size. I was in a hurry and just cut them all in half (instead of into thirds). This means that the dogs did not fit into the muffin cups at all and instead just sort of sat on top of the cornbread. 

Thankfully, my family doesn’t mind eating ugly little Corn Dog Muffins, but let’s just say these fellas wouldn’t win any prize at the fair.

Nor would my Honey Whole Wheat Bread this time around. Want to know what happens when you’re too lazy to knead your bread for as long as you should knead your bread?

It get’s all funky in the oven and comes out looking like this:

Again, my family doesn’t mind funky looking bread, especially if I slice it before they notice. While making our bread, we took a little extra time to make some loaves of Cinnamon Swirl Bread – always a favorite. My kitchen helper loaded it up with cinnamon…the more the better right?

And again, I have to say…if the bread is ugly, slice it up before anyone can see it. It doesn’t look nearly so ugly when it’s toasted and has butter melted all over it…

For a snack while the boys were having an art lesson (because drawing and eating at the same time is a great way to creatively sketch animals), we had Cream Cheese Apple Dip with sliced apples. That stuff tastes SO good.

I made six pounds worth of Turkey Sausage, browned it and bagged it up for future use with Pancake Sausage Muffins and Easy Breakfast Casseroles. I can’t tell you how nice it is to have pre-made Turkey Sausage on hand to grab out of the freezer for a quick meal!!

Of course, while I was at it, I went ahead and made two batches of Pancake Sausage Muffins. We ate a batch the next morning and froze a batch for later.

Again, my lazy side took over and instead of making Mini Apple Pies, I made one big apple pie and an apple crisp. The boys decorated the top of the pie using cookie cutters with the leftover pie crust dough.

I made a batch of Whole Wheat Hamburger Buns, which is probably one of my favorite foods to have in the freezer! They’re great to have ready to pull out for Sloppy Joes or Ranch Burgers or just plain sandwiches. 

Because I had talked about stretching one chicken to make six meals…I decided I’d better cook a chicken to prove it to myself and to experiment with the best way to get six great meals from one chicken. After eating some of the chicken and broth, we still have some chicken and broth in the fridge for future meals. I’ll be working on the “How to Stretch Your Chicken” post, and in the meantime, I hope you are all picturing us in the kitchen with a raw bird, seeing how far we can stretch him…kind of like a tug of war. Just kidding…don’t picture that.  And please, whatever you do, do NOT give my children any ideas.

I made Warm Vanilla Soother one morning to go with our breakfast, so with the leftover egg whites, I made a batch of Coconut Macaroons for a friend who can’t have wheat. We did a little “quality control” before sending the cookies off, and we declared that the cookies were certainly fit to eat.

The Poptarts finally got made toward the end of the week…and there is exactly one left. These Poptarts are a hit…and I’m just sure they freeze well…but in my house, they have yet to make it to the freezer.

So what do you suppose is the loudest activity in our kitchen? Give up? It’s making Homemade Peanut Butter. Peanuts flying around in a food processor is really, really loud. Of course, then it gets even louder because my kids tend to like to try yelling over the noise. It’s a highly effective way to communicate.

With our fresh Peanut Butter, we made some Healthier Rice Crispy Treats for snacking. Then we made more (loud) Peanut Butter to fill our jar for the fridge.

So let’s see…what did I learn from my week of cooking? Don’t be lazy. Cut the hot dogs smaller, knead the bread dough longer. Don’t try to draw animals while eating apples and dip because you’ll end up with a very sticky horse. And never tell your kids you’re going to see how far you can stretch a chicken, or they’re likely to grab the bird and yank the legs off.

Heavenly Homemaker's Club Members: Access your homepage and all your fantastic resources here! Not a member yet? Please join us!

Freezer Cooking Plan for April

March 28, 2010 by Laura 11 Comments

This post may contain affiliate links. For more information, please see our disclosure policy.

Crystal and Jessica are at it again, working to inspire all of us to save time and money by preparing some foods in advance with an April Freezer Cooking Day.

This is going to be especially important for me to do right now with all four boys being involved in our home school musical in April. Plus spring soccer season is just about to come into my life at full force. Meal times are likely to be rushed many nights this month as we head out to practices, games and rehearsals. 

Therefore, I must be organized. I must plan ahead. I must put some ready to grab food in the freezer. I must not panic.

Ugh, but I must make four animal costumes in the next 3 weeks. 

Okay, I can do this. I have a plan (for the cooking, not for the costumes). Do you want to hear about it?

Each day this week, I’ll be making a little extra food to freeze. By the end of the week, I should have all kinds of food in the freezer to keep me from panicking while I attach black spots to white sweat pants so that I can make my eight year old look like a dalmatian puppy. 

Here’s what I’ll be working on:

Giant Breakfast Cookies x 2

breakfastcookiessm

Mini Apple Pies

miniapplepies9sm

Beefy Enchilada Bake x2

enchiladalasagna2sm

Bean and Cheese Burritos

burritosm

Corn Dog Muffins x 2

corndogmuffinssm.JPG

Homemade Pizza Pockets x 2

pizzapockets2sm

Sloppy Joes x 3

sloppyjoemeatsm

Here’s what I need to do to prep:

  • Soak oats/flour for breakfast cookies
  • Soak dough for apple pies and pizza pockets
  • Soak beans for burritos
  • Make whole wheat tortillas for burritos
  • Thaw five pounds of ground beef for enchilada bake and sloppy joes
  • Thaw/grate cheese for burritos and pizza pockets

In addition, I’d like to also prepare the following to simplify my life:

  • Homemade Chewy Granola Bars
  • Ranch  Dressing Mix x2
  • Italian Dressing Mix x2
  • Bunches of carrot sticks

I’ll post the results of my efforts (again, for the cooking, not the costumes) at the end of the week!

Heavenly Homemaker's Club Members: Access your homepage and all your fantastic resources here! Not a member yet? Please join us!

Heavenly Homemaker’s Guide to Gardening and Preserving Ebook

July 8, 2009 by Laura 19 Comments

This post may contain affiliate links. For more information, please see our disclosure policy.

Homemaker's Guide Collection

These seasonal guides provide you with recipes, money saving tips, service ideas, encouragement, and fun!


[wp_eStore_fancy1 id=7]

Heavenly Homemaker's Club Members: Access your homepage and all your fantastic resources here! Not a member yet? Please join us!

Freezing and Canning Peaches for Winter

September 1, 2008 by Laura 142 Comments

This post may contain affiliate links. For more information, please see our disclosure policy.

I mentioned that over the weekend I received millions and millions (okay, maybe not millions) of peaches from a lady in town. I’ve been busy preserving them for winter and thought I’d walk through the steps with you.

Please note:  These peaches were so awesome and juicy, and since there were so many of them, I felt that none of us needed to hold back on how many we ate. So, as I was standing in my kitchen peeling and slicing peaches, and  peach juice was running down my arms…I was also biting into peaches as I worked, because I just couldn’t resist. Therefore, I also had peach juice running down my chin. But with peach juice all over my hands and running down my arms, it’s not like I could do much about my chin, you know? Not one of my finer moments.

Thought you might like to picture that.

peaches7sm.JPG

If you remember, I was given four boxes of peaches. (I did share a few with some friends.)

peaches5sm.JPG

In the past, I’ve always peeled my peaches with a knife…and that’s been fine. But I had so many peaches this time, I went ahead and tried this method of peeling, and whoa was it a time saver! Just put your peaches into boiling water for about 30 seconds…pull them out…

peaches2sm.JPG

And those skins just peel right off!! It was awesome. Except for when they didn’t peel right off, which happened with a few of them for some reason. (Just thought I’d tell you that so that if not all of them peel right off for you, you’ll know that you aren’t the only one!) 

(You don’t have to peel your peaches if you’re going to freeze them. They’ll be more nutritious if you leave the peelings on, and it will save so much time too!) 

freezingpeachessm.JPG

To freeze peaches, just peel, slice and lay the peach slices on a cookie sheet lined with parchment paper. Put the pan into the freezer until the peaches are frozen, about two hours. (Or longer if you forget they’re in there.)  Then put them into a freezer bag and you’ve got great peaches for smoothies and slushies!! And cobblers and crisps! (If you feel like skipping this step and simply just putting your peach slices directly into a pan without freezing them individually like this first, you can…but you’ll end up with one big gallon sized frozen peach-sicle, and you may be very frustrated when you want only part of the rock hard peach-sicle for a smoothie. Just so ya know.)

Now…to can peaches…this is what I do. There are other ways to do it…this is just the way I do it! Please be sure to go back and read Canning 101 for the canning basics!

peaches3sm.JPG

I make a honey/water solution on my stove…which is 2 T. honey to every 5 cups of water. Heat it on the stove and let it sit warm while you prepare your peaches.

Sterilize your jars.

peaches1sm.JPG

Take out a hot jar and put in about 1/16 teaspoon of ascorbic acid to keep your peaches pretty. Just dump it into the bottom of the jar. (Some people use lemon juice)

ascorbicacidsm.JPG

Ascorbic acid is powdered vitamin C. I get mine at a health food store.

peaches4sm.JPG

Fill the jar with sliced peaches. Then, use a funnel to pour your honey/water into the jar, to about a half inch from the top. Place a sterilized lid and ring onto the full jar.

applesauce13sm.JPG

Now it’s time to give your full jars a hot water bath to seal the lids. Put your full jars into the water. Once the water is boiling,  boil the jars for about 25 minutes. (And yes, this is actually a picture of applesauce jars boiling…I forgot to take a picture of the peaches boiling and I’m too tired to go can more peaches just so that I can go take a picture of the jars boiling.)

Oh, and boil your jars with the lid on the water bath pot…I just took off the lid for the picture. :)

peaches6sm.JPG

After the jars have boiled for 25 minutes, take them out with tongs…or better yet, this cool gripping tool made especially for jars and hot water baths. Then you get to listen for the caps to seal. I can’t think of a way to blog the way it sounds…but after all your hard work, it sure is a cool sound to hear them seal! (Thhhhp!) (Or something like that!)  You can be sure they sealed if you can push down on the top and it is down firm. It takes anywhere from 1 second to 30 minutes for the lid to seal after you’ve taken it out of the water. 

Then, just leave your canned peaches out on the counter for a few hours or several days so that you can admire them and smile and feel happy every time you walk into the kitchen and see them. (Okay, that’s what I like to do anyway.)  (Because I’m weird like that.)

Heavenly Homemaker's Club Members: Access your homepage and all your fantastic resources here! Not a member yet? Please join us!

Join Our Community!

 Facebook Twitter E-mail Instagram Pinterest

Popular Posts

~ Will All of the Real Moms Please Stand Up?
~ Easy! Stir-and-Pour Whole Wheat Bread
~ How to Make Gatorade
~ 31 Real Food Breakfast Ideas
~ Dear Teenage Girls...
~ When Mom Takes a Step Back
~ The Inexpensive Health Insurance We Love!
~ Let's Talk Real Food Grocery Budgets

Check out our latest posts!

  • Big Family Food and Fun: April 19-25, 2026
  • Big Family Food and Fun: April 12-18, 2026
  • Big Family Food and Fun: April 5-11, 2026
  • Big Family Food and Fun: March 29-April 4, 2026
  • My 2026 NON-Grocery Budget Update
Home  ~  Simple Meals  ~  Club Membership  ~  Shop  ~  Privacy Policy  ~  Disclosure  ~ Contact

Copyright © 2026 · Beautiful Pro Theme on Genesis Framework · WordPress · Log in