Heavenly Homemakers

Encouraging women in homemaking, healthy eating and parenting

  • Home
    • About
    • FAQs
  • Recipes
    • Bread and Breakfast
    • Condiments
    • Dairy
    • Main Dishes
    • Side Dishes and Snacks
    • Desserts
    • Gluten Free
    • Instant Pot
    • Crock Pot
    • Heavenly Homemaker’s Weekly Menus
  • Homemaking
    • Real Food Sources
  • Store
  • Contact
    • Advertise
    • Disclosure
    • Privacy Policy
  • Simple Meals
  • Club Members!

Free $10 to Spend at iHerb, Plus Get Sierra Bees Bumpy Road Salve for Only $1.00

July 14, 2014 by Laura 2 Comments

This post may contain affiliate links. For more information, please see our disclosure policy.

If you haven’t checked out iHerb, you’re missing out. But the good news is this: If you are a brand new customer with iHerb, you will get a free $10 to spend on your first order of $40 or more!

Here’s a sample of all you can get for $30 after your $10 discount:

Free Groceries at iHerb

Here are the specifics of what I’ve purchased:

  • Organic Raw Honey
  • Delallo Organic Whole Wheat Pasta (x2)
  • Now Foods Cocoa Powder
  • St. Dalfour Golden Peach 100% Fruit Jelly
  • Redmond Cinnamon Earthpaste

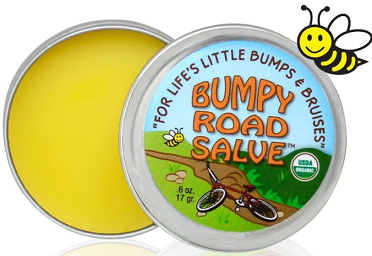
In addition, I suggest adding a container of Sierra Bees Bumpy Road Salve. It’s only $1.00 right now – an amazing deal!

iherb salve

You’ll need to use my referral code: BID487 to get your free $10 to spend at iHerb. Have fun!

Heavenly Homemaker's Club Members: Access your homepage and all your fantastic resources here! Not a member yet? Please join us!

How to Stretch a Chicken to Make Six Meals

July 13, 2014 by Laura 130 Comments

This post may contain affiliate links. For more information, please see our disclosure policy.

How to Stretch a Chicken to Make 6 Meals

When I mentioned that I can stretch a chicken to last us six meals, many of you thought I was kidding. I can’t believe you thought I was kidding. I’m always so serious about everything I say around here. Just kidding.  About being serious. I’m not kidding about the chicken though.

(eh?)

There are six of us in our family and we all enjoy our food. That’s my polite way of saying, “Good grief, my boys can put away a lot of groceries in a short amount of time and then come back in an hour asking for more.” That said, if I roast a nice chicken for dinner and serve it as the main dish, there won’t be much left of said chicken at the end of the meal. Just enough to pull a few scraps of meat together for a small casserole, then the bones are used to make broth. So, worst case chicken scenario at my house:  One Chicken, Two and a Half Meals.

But if I cook a chicken to make broth, and then use the meat from the chicken to make several different meals…now that is the best way to get the most out of a chicken! It’s cost effective, it saves loads of time and it’s easy.

The chickens I buy are from a farm nearby and they are big (between 4-6 pounds) and nice and meaty. I pay good money for them (around $15), which sounds like a lot…but if I get SIX meals from one bird? That’s only $2.50 worth of excellent protein per meal (42¢ per serving)…for my family of six!

Okay, so let’s say I cook a chicken all day to make broth and to have cooked chicken meat ready for meals. This has got to be one of the easiest things to do ever when it comes to cooking nutrient rich and inexpensive meals for your family, by the way. To stretch the chicken to last our family six meals, here is an example of what I might do over the course of a week or week and a half (freezing the broth and/or chicken after a few days to pull out as needed):

1. Use one batch of broth and a little bit of chicken to make Chicken Tortilla Soup. Because I’m using the rich broth, I don’t feel the need to use much chicken (if any) in this soup.

chickentortillasoupsm.JPG

2. Use the other batch of broth to make Chicken Noodle Soup. Again, I would use very little chicken to make this as there is so much goodness in the broth. And if you recall, sometimes I forget the chicken altogether, much like I forget to put the bananas in my banana bread. You’ve got to love my “duh” moments.

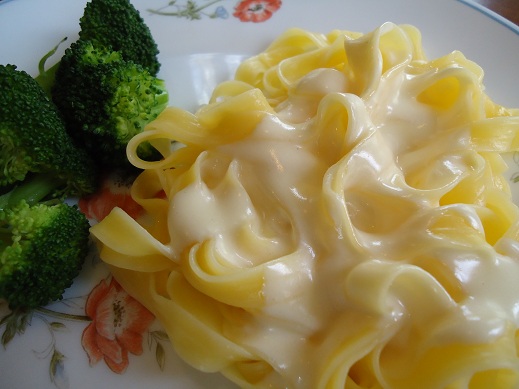
3. Next, I’d throw some chicken in Homemade Alfredo Sauce with pasta. I just use about 1 1/2 cups of cooked chicken for this as the sauce and noodles make up the bulk of the meal. (Add steamed veggies and a salad and you’re good to go!)

4. For a tasty lunch later in the week I’d make Black Bean Taco Salad. Because there are black beans and cheese in this salad, it doesn’t require a lot of chicken to complete the meal. Yum – this salad is so good!!

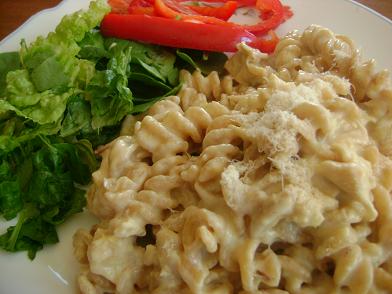
5. Not out of chicken yet, I can now make Three Cheese Garlic Chicken Pasta. Again, the pasta and cheese and milk are so filling, not a lot of chicken is needed. Plus, the cheese helps add protein to this meal.

garlicchickenpastasm

6. Last, I’d use whatever chicken is left to make Chicken Veggie Quesadillas. With all the veggies to fill these quesadillas, the small bits of chicken add just a little bit of protein to complete the meal!

veggiequesadilla1sm.JPG

Now, I feel very strongly that our family needs good, healthy protein at each meal, so I’m not usually parked in the “skimp on meat” camp. We eat lots of eggs and nuts and beef and other meat. But getting a lot of goodness out of one chicken is a great way to cut down on time in the kitchen and save money too!

The moral of the chicken stretching story is:  If you don’t use the chicken as the main part of the meal, but just as a supplementary part…you too can stretch a chicken for all it’s worth.

What is your favorite way to stretch a chicken? As in…what are your favorite meals to eat with leftover, cooked chicken?

Disclaimer:  No chickens were actually stretched during the writing of this post.

This post was originally published on January 23, 2011.

Heavenly Homemaker's Club Members: Access your homepage and all your fantastic resources here! Not a member yet? Please join us!

How to Adapt a Recipe to Make it Healthier

July 11, 2014 by Laura 130 Comments

This post may contain affiliate links. For more information, please see our disclosure policy.

How to Adapt a Recipe to Make it Healthier

I’m often asked how much Sucanat to substitute for white sugar, or if whole wheat flour can be substituted one for one with white flour. I decided to share a little bit about how I adapt “regular recipes” to make them healthier! Please know that when I say “healthier”…I’m not talking low fat. To me, healthier means real, whole food. Click on the following links so read about how I feed my family and why I love real, whole foods!! Be sure to also check out this entire series on Simple Steps Toward Healthy Eating.

Fats


  • If a recipe calls for vegetable or canola oil I switch it out one for one with melted coconut oil or melted palm shortening. It’s a little bit tough to measure out solid coconut oil to an exact needed amount. I just kind of “eyeball it”. If a recipe calls for 1/4 cup of vegetable oil, I make my best guess at how much 1/4 cup of coconut oil (or palm shortening) is while I’m scooping it out…then I melt it down in a small saucepan on the stove. If you are new to cooking/baking…you may prefer to melt it, then pour it into a measuring cup to be sure you  have the correct amount.
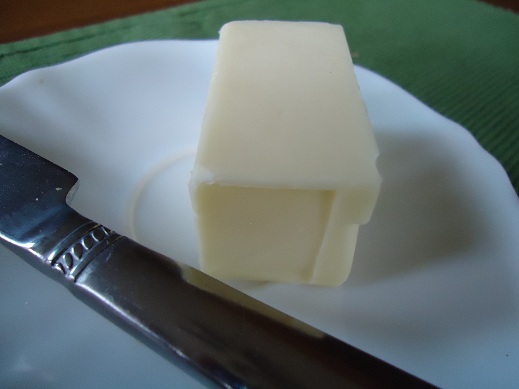
  • If a recipe calls for margarine (I gag and then) I switch it out one for one with real butter. This means that if the recipe calls for 1/2 cup margarine, I use 1/2 cup of butter.
  • Usually butter and coconut oil can be used interchangeably. For instance, when I make muffins…sometimes I use coconut oil and sometimes I use butter. It depends on what I have on hand and what sounds good at the moment (coconuty goodness, or rich buttery flavor). If you are unable to eat dairy, you can substititute coconut oil for butter in most recipes.
  • I almost always use melted palm shortening to fry foods (like french fries, onion rings, homemade corn dogs, etc.). Palm shortening does NOT create the same freaky effects from frying that vegetable or canola oils create. This means that foods fried in palm shortening (or coconut oil) are NOT unhealthy!
  • I use olive oil if a recipe calls for just a few teaspoons or Tablespoons of vegetable oil.
  • You can read more about the fats I prefer and why I prefer them here!!

Sugars


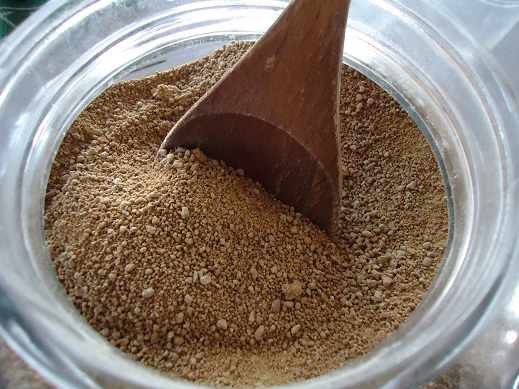
  • Sucanat (or Rapadura, which is the same thing…just under a different name) can be substituted one for one with white or brown sugar. This means that if a recipe calls for one cup of white sugar…you can instead use one cup of Sucanat. However, I generally cut the Sucanat down just a hair because the flavor is stronger…and because it is more expensive…and because wow…do we really need that much sugar? :)  Sucanat, by the way, is dehydrated cane sugar juice and the healthiest form of cane sugar I’ve found. You can read more about it  here.
  • Honey can be substituted for white or brown sugar, but I usually use 1/2 to 2/3 the amount the recipe calls for. This means that if a recipe calls for one cup of white or brown sugar, I only use 1/2 to 2/3 cup of honey. Honey has a rich flavor and is sweeter than sugar. I have not found that substituting honey causes much difference in the consistency of a recipe, even though honey is a liquid and sugar is not. If anything, I find that honey makes quick breads, muffins and cookies more moist…and that’s never a bad thing if you ask me!
  • Real Grade B Maple Syrup can be substituted for white or brown sugar, but I don’t often bake with it (ooh, except for Coconut Macaroons!). I use maple syrup for liquid treats like Chocolate Milk and Smoothies and Ice Cream. If a recipe calls for corn syrup, I use Grade B Maple Syrup instead, substituting it one for one.
  • You can read more about the sweeteners I prefer and why I prefer them here!!

Flours

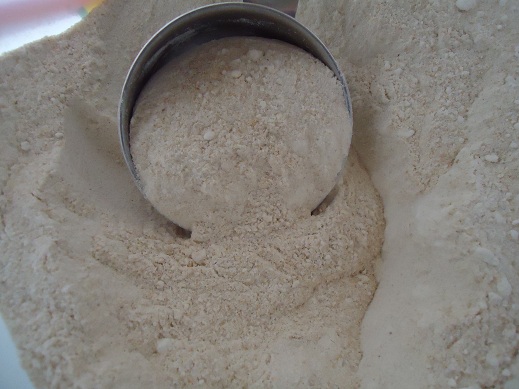
  • I substitute my freshly ground whole wheat flour (made from hard white wheat) one for one in recipes that call for white flour. However, freshly ground whole wheat flour is often lighter in texture, making a one to one substitution possible.
  • If you are using store-bought whole wheat flour, I find that this seems to be a heavier flour. Therefore, I recommend using a lesser amount than the white flour that is called for in a recipe. You may find that this is even true with my recipes that call for whole wheat flour, since I am using freshly ground flour. I receive quite a few comments, particularly on my Honey Whole Wheat Bread from people using King Arthur’s whole wheat flour or another store bought flour that they didn’t need to add in all of the flour the recipe called for. I suggest just adding flour until the dough is the correct consistency…then stop.
  • You can read more about grains and grain mills in this series of posts!!

To make things a little bit easier…I created a free printable “Healthy Recipe Substitutions” download. Click the following link, print it off and keep it in your kitchen as a handy reference!

Healthy Recipe Substitutions

How do you feel about adapting recipes? Are you good at making substitutions…or do you prefer to follow a recipe exactly?

This post was originally published March 9, 2011.

Heavenly Homemaker's Club Members: Access your homepage and all your fantastic resources here! Not a member yet? Please join us!

How to Finish Your Homemade Vanilla Extract

July 10, 2014 by Laura 93 Comments

This post may contain affiliate links. For more information, please see our disclosure policy.

How To Finish Your Vanilla Extract

I’ve talked about making Homemade Vanilla Extract just a little tiny bit on this site. You’ve seen:

  • How to Make Homemade Vanilla
  • Where to Buy Vanilla Beans
  • Where to buy Cute Labels for Your Homemade Vanilla Bottles
  • What to Make with your Vanilla Extract
  • WHY You Should Use Homemade Vanilla Extract.

Just in case you need MORE reasons to make your own Vanilla Extract, here’s a post about All the Nasty Stuff Found in Most Commercial Vanilla Extracts.

But for some reason, I never shared with you how to finish off and bottle your homemade vanilla extract. Sometimes I forget important details, such as the names of my children and telling you how to finish off your homemade vanilla. What’s his name – my youngest son – helped me bottle some vanilla last week and we took pictures. Finally. (Malachi…his name is Malachi.)

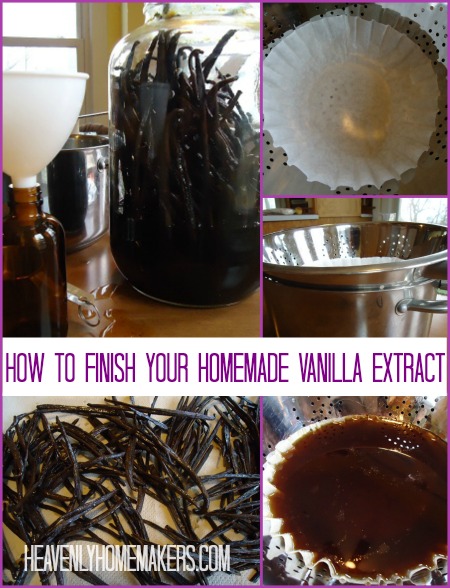
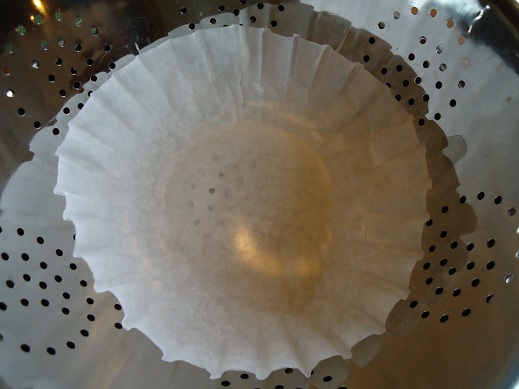
Once your vanilla beans  have been sitting in the vodka (or other alcohol of choice) for 4-6 months, it’s strong and ready to be bottled. Begin by lining a colander with a coffee filter or thin tea towel.

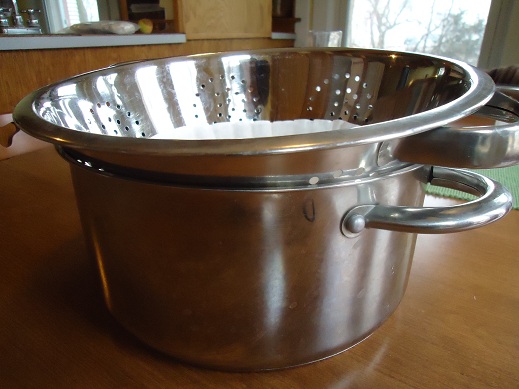
Place lined colander in a pot to catch the vanilla. If you don’t, you will have excellent quality homemade vanilla extract running down all over your kitchen table and floors. Your kitchen will smell great for months, but that will only be a long, sad reminder of the wasted vanilla. Put the colander in a pot.

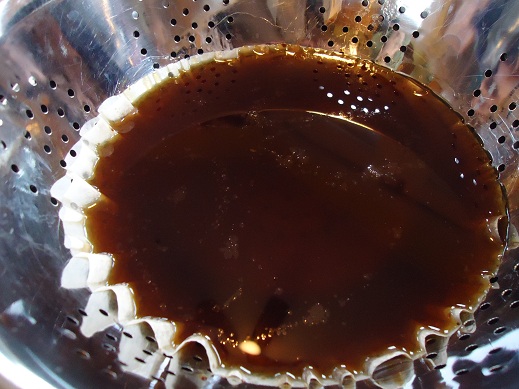
Pour contents of your jar into the colander so that the coffee filter can strain all of the tiny vanilla specks out. The vanilla specks won’t hurt anything, but it’s nice to have speck-less vanilla extract.

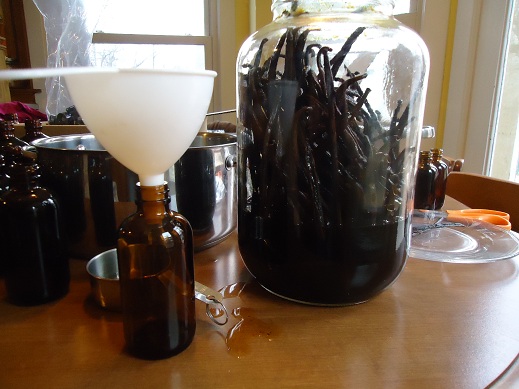
Use a funnel to bottle up the strained vanilla. I have found amber bottles (recommended) Mountain Rose Herbs.

I, also, love these pretty labels! They are customizable, and there are several designs to choose from!

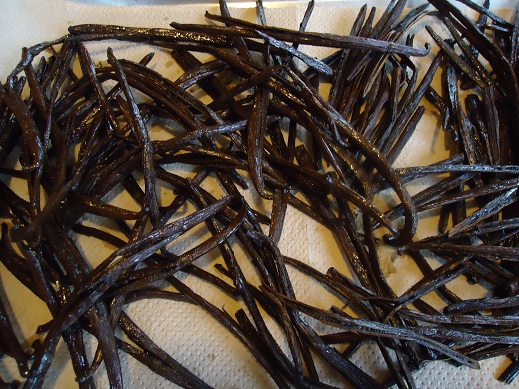
Lay your used vanilla beans on a cookie sheet lined with paper towels to dry. You can then put them into a container of sugar for 4-6 months which will turn that sugar into Vanilla Sugar!

Finally, FINALLY I have shown you how to finish up your vanilla. And now, if I can figure out how to call my children by the correct names without running down the list of all four boys before I get to the right one, I’d be all set.

This post was originally published November 28, 2010.

Heavenly Homemaker's Club Members: Access your homepage and all your fantastic resources here! Not a member yet? Please join us!

Hello From Church Camp!

July 9, 2014 by Laura 11 Comments

This post may contain affiliate links. For more information, please see our disclosure policy.

It’s been almost humorous how difficult it’s been to get online while I’m out at church camp with my family! I’ve been too busy to write anyway, but shucks, I’ve missed hanging out here with you. :)

Would you believe the one other time I finally got internet access, my laptop started acting up? I almost cried, but that seemed silly. So I took a nap. I needed that more than anything. (I’m on a borrowed laptop right now. Internet is slow, but it’s working…at the moment. I’m typing quickly so as to hopefully not lose my chance to touch base with you.)

Matt and I have been helping in the kitchen this week, assisting the amazing head cook as we feed around 140 people three meals a day. It has been so much fun – and super exhausting too. I am shocked that so many of my muscles ache from standing all day, lifting heavy pans, and in general working harder physically than I have in a long time. I feel rather wimpy, but I hear I’m normal – at least when it comes to having achy back/legs/arms/feet/shoulders when cooking all day a camp. Kudos to those of you who do this type of work all the time. 

It’s possible that I’m also a little bit sore from playing a game of Ultimate Soccer with all the campers a few nights ago. I’m proud of my bruises, and I still officially stink at kicking a soccer ball – but it sure was a load of fun. I thought you might like to know that while I completely whiffed the ball (missed it entirely. twice. while everyone was watching), and wasn’t fast enough to get to the ball many times over (but who’s counting?), I actually scored a goal for my team. You may have heard me scream with excitement. I think my boys were proud…and very shocked. Heh.

Speaking of soccer, you know Matt must be dedicated to serving this week at camp since this meant he missed being able to watch the semi-final World Cup games. We did look up the game scores on our phones. Dude!! What happened to Brasil? 

Well, that is the end of my scattered thoughts for the evening. Yay for finding a working computer and an hour of online access – at the same time. Hopefully I’ll be able to check in with you over the weekend.

Now you tell me about what you’ve been up to this week. I may not be able to get to a computer much, but I can read your comments through the email on my phone. I’ll welcome the fun breaks to read about what you’ve been doing!


Heavenly Homemaker's Club Members: Access your homepage and all your fantastic resources here! Not a member yet? Please join us!

How to Warm Up Food Without a Microwave

July 8, 2014 by Laura 158 Comments

This post may contain affiliate links. For more information, please see our disclosure policy.

Our family stopped using a microwave about six years ago when we began our healthy eating journey. We still have a microwave, because it is a permanent fixture above my stove and would be a pain to take down. Guests do use it occasionally, which means that I should probably actually clean it every once in a while. But in general, I’ve pretty much forgotten that it exists.

Why do we not use a microwave?

I’d like to write an entire post about why you may want to consider avoiding the use of a microwave oven. But I’m not a girl who uses big words or who can write informative sentences about the dangers of microwaves, imparting knowledge like, “The apparent additional energy exhibited by the luminescent bacteria was merely an extra confirmation.” Shoot, not only can I not write a sentence like that, I can’t even read one and come away feeling like I have an actual working brain in my head. Therefore, if you’d like to read all the big words and reasons for avoiding a microwave, I encourage you to check out all of the helpful information in this article.

Otherwise, in Laura’s simple and non-big-word language:  We don’t use a microwave because we think that it makes our food yucky.

The question I receive often then is:  How do you warm up leftovers if you don’t have a microwave?

Easy. I warm up our food on either the stove-top, in our oven, or in our toaster oven.

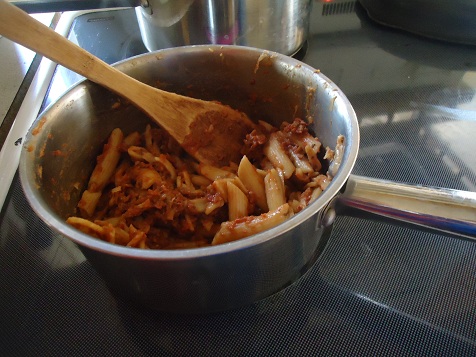
Pardon the fairly ugly picture, but really, how cute can leftovers in a saucepan actually be?! ;)

I usually add just a shot of water to the saucepan with our leftovers to keep the food from sticking. I have also found that it is a good idea to keep the heat at a medium setting and to stir often. If I’m rewarming Creamy Mac and Cheese or something else milk based, instead of adding a shot of water, I will add a shot of milk, which keeps the food creamy!

To warm up Pizza, Taco Corn Fritters, Popcorn Chicken, or Burritos and such, I’ll use our oven or toaster oven. We LOVE our toaster oven! We pop the food in, put it on “toast” or “bake” depending on what we want, walk away and do something else for a few minutes, then our food is perfect.

toaster oven

While a microwave might take one minute to warm up your food, I’d say the stovetop takes about two minutes. A toaster oven might take five. Those few extra minutes really don’t hurt my feelings very much. It’s not so hard to wait. My food tastes better rewarmed this way, plus I don’t have to worry about it losing it’s nutritional quality. Those are a few extra minutes well spent.

What are your thoughts about using a microwave? How do you warm up leftovers?

This post was originally published February 28, 2012.

Heavenly Homemaker's Club Members: Access your homepage and all your fantastic resources here! Not a member yet? Please join us!

How to Grind Flour in a Grain Mill

July 6, 2014 by Laura 56 Comments

This post may contain affiliate links. For more information, please see our disclosure policy.

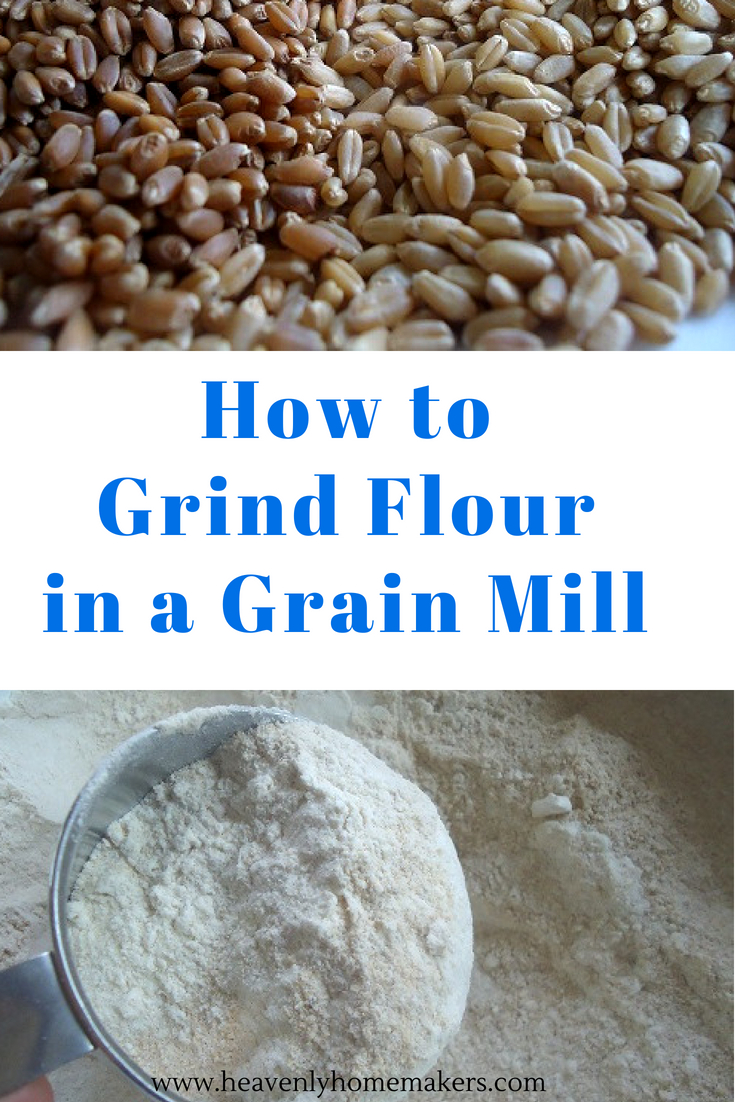
Wanna see how easy it is to
grind wheat into flour in a Nutrimill?
——————————————-

I’ve talked about how I love freshly ground flour and about how I love my nutrimill. You’ve all helped me share about great sources for organic or chemical free grains. I’ve even written a letter to your husbands trying to convince them that getting you a grain mill is a fabulous idea.

But I’ve never taken the time to show you how a grain mill works. Is it hard to run? Does it take a lot of time? Do you work up a sweat using it?

The answer to all three questions is a definite no!

So many people have mentioned to me things like “I don’t know how you have time to grind your own flour. I barely have time to cook, much less make the flour for my baked goods.”

You’re welcome to continue to think that because I grind my own flour, I am a modern day wonder woman. Or, you can watch this video clip and learn the truth…

Did you see that? I put in the wheat, turned on the machine…and then I walked away and made lunch and did some dishes. Then I came back and had freshly ground flour. It doesn’t get any easier than that. And wow, this flour tastes more delicious than any you’ve ever had (in my opinion)!

How to Grind Flour in a Grain Mill! #grainmill #grindflour #wholewheatflour

Check out the wonderful Nutrimill here!

This post was originally published June 1, 2010.

Heavenly Homemaker's Club Members: Access your homepage and all your fantastic resources here! Not a member yet? Please join us!

Lasagna Casserole…On the Stovetop

July 6, 2014 by Laura 19 Comments

This post may contain affiliate links. For more information, please see our disclosure policy.

I mentioned here that I’m trying to avoid the oven during these hot summer days. Later this week, I’ll be making Lasagna Casserole, which is one of our family’s favorite recipes (and one of mine because it’s so easy).

Cook Your Casserole on the Stovetop

Yum

But, I don’t want to bake it in the oven right now. It’s just too hot.

For recipes like this, I “bake” them on the stove top. Just follow the recipe as normal, but then leave it in the pot on the stove. Sprinkle cheese over the top and put the lid on. Let it sit and simmer for a few minutes until the cheese is all melty all over the place, then serve.

This method also works for Cheesy Beef and Rice and Pizza Casserole – and probably a bunch of other casserole recipes you have that are all pre-cooked and then baked for a few minutes.

This summer, skip the oven. Use the stovetop. Unless of course you like sweating profusely and passing out. I’ll use my oven when I absolutely have to. In the meantime, when I can, I’ll stick to my stove-top.

This post was originally published on June 29, 2009.

Heavenly Homemaker's Club Members: Access your homepage and all your fantastic resources here! Not a member yet? Please join us!

Orange Creamsicle Recipe

July 4, 2014 by Laura 4 Comments

This post may contain affiliate links. For more information, please see our disclosure policy.

Did you like the Strawberry Creamsicle recipe I shared? How about an Orange Creamsicle recipe to add some variety? For that matter, you can sub just about any fruit you like to make creamsicles. Such a refreshing treat!

It’s worth your small investment to get a box of small 3-ounce cups and a package of popsicle sticks. These truly are so easy to make and everyone at my house loves them!

Make them with a little maple syrup, or with stevia if your family likes it. (Stevia is an herb that is naturally sweet – not artificial, not a sugar – perfect! However, if you use too much, it can have a bitter aftertaste. You have to get used to how much to use to make it sweet enough without overusing it!)

Orange Creamsicle Recipe

Orange Creamsicle Recipe
 
Save Print
Author: Laura
Serves: 12
Ingredients
  • 2 cups whole milk
  • ½ cup orange juice concentrate
  • 1 Tablespoon real maple syrup (or about 10 drops liquid stevia)
  • 1 teaspoon vanilla extract
Instructions
  1. Blend all ingredients in a food processor or blender until smooth and creamy.
  2. Pour mixture into popsicle molds or 3-ounce cups.
  3. If using 3-ounce cups, place a popsicle stick into the middle of each after these have been in the freezer for about 30 minutes.
  4. Freeze for about 2 hours before serving. Makes about 12 small creamsicles.
3.4.3177


Orange Creamsicles


Other variations:

Use a mixture of berries (like raspberries, blueberries, and strawberries) for these. Use different varieties of 100% juice – any of your favorites. Use whipping cream instead of milk to make them even more rich and creamy. Make them in popsicle molds instead of with cups and popsicle sticks.

What else can you think of to make these delicious?

Heavenly Homemaker's Club Members: Access your homepage and all your fantastic resources here! Not a member yet? Please join us!

How I Will Blog and Be Away From Home At the Same Time

July 4, 2014 by Laura 9 Comments

This post may contain affiliate links. For more information, please see our disclosure policy.

During the next two and a half weeks, I will be making a quick trip for the 4th of July, then I’ll be out at our church camp with my family. There is wireless internet at the camp, so we’ll be packing up the laptop to keep up with work as we can.

nyc

However, internet can be a little tricky there. Plus, I plan to spend time with campers and other staff while I’m there instead of working on my computer for several hours each day like I try to do at home.

Here’s what you can expect here during the next two and a half weeks:

  • New posts now and then.  I’ll try to check in here when I can, because two weeks is a long time to be gone and I’ll just miss you all too much if I stay away that whole time.
  • Gratituesday as normal – hopefully. At the very least, I hope to get online to share how God is working in my life and to praise Him with you on Gratituesday. If my schedule at camp just doesn’t allow this, or if the internet doesn’t cooperate, we’ll all just be grateful on our own. :)
  • Older posts re-posted each day.  To date, I have written 3,650 posts for this website. I bet there are a few you’ve missed here and there, eh? I’ve picked out some that I think will benefit you to read (or re-read), and scheduled them to pop up throughout the next two weeks. It’ll be a fun blast from the past!

How can you pray for me?

Oh hey, thanks for asking. :)  This summer has been great so far, and also very, very full. I’m a little tired already as I head into these weeks away from home. I’d love prayer for energy. But mostly, I need prayer to be fully surrendered to letting God work. I want the people I’m with to see Jesus shining through me, not myself shining through me. I struggle with this. But God is biggest, and He has already won the victory over this battle in my life. How very gracious of Him to continue working this out in me.

I’ll be praying for you too.

You are all an important part of my life, and I appreciate you. I want you to know that I pray for you, and will continue to pray while I am away. Thank you for being a blessing in my life!

Heavenly Homemaker's Club Members: Access your homepage and all your fantastic resources here! Not a member yet? Please join us!
« Previous Page
Next Page »

Join Our Community!

 Facebook Twitter E-mail Instagram Pinterest

Popular Posts

~ Will All of the Real Moms Please Stand Up?
~ Easy! Stir-and-Pour Whole Wheat Bread
~ How to Make Gatorade
~ 31 Real Food Breakfast Ideas
~ Dear Teenage Girls...
~ When Mom Takes a Step Back
~ The Inexpensive Health Insurance We Love!
~ Let's Talk Real Food Grocery Budgets

Check out our latest posts!

  • Big Family Food and Fun: September 6-12, 2026
  • Big Family Food and Fun: August 30-September 5, 2026
  • Big Family Food and Fun: August 23-29, 2026
  • Big Family Food and Fun: August 16-22, 2026
  • Big Family Food and Fun: August 9-15, 2026
Home  ~  Simple Meals  ~  Club Membership  ~  Shop  ~  Privacy Policy  ~  Disclosure  ~ Contact

Copyright © 2026 · Beautiful Pro Theme on Genesis Framework · WordPress · Log in