Heavenly Homemakers

Encouraging women in homemaking, healthy eating and parenting

  • Home
    • About
    • FAQs
  • Recipes
    • Bread and Breakfast
    • Condiments
    • Dairy
    • Main Dishes
    • Side Dishes and Snacks
    • Desserts
    • Gluten Free
    • Instant Pot
    • Crock Pot
    • Heavenly Homemaker’s Weekly Menus
  • Homemaking
    • Real Food Sources
  • Store
  • Contact
    • Advertise
    • Disclosure
    • Privacy Policy
  • Simple Meals
  • Club Members!

High Five Recipes – PRINTED COOKBOOK!!!!

November 3, 2020 by Laura 1 Comment

This post may contain affiliate links. For more information, please see our disclosure policy.

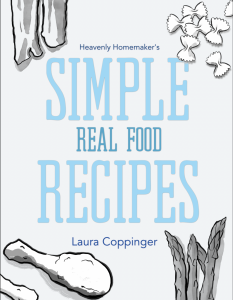
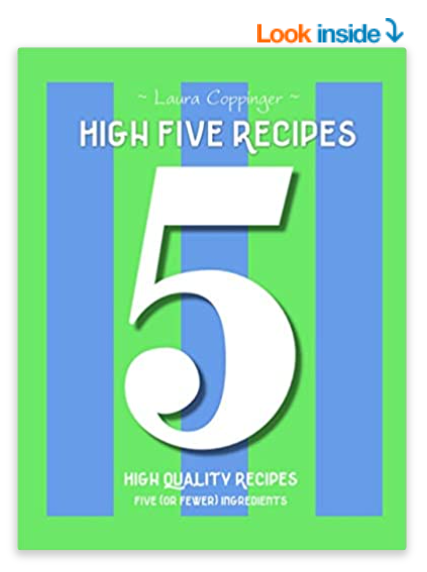
High Five Recipes, our most popular eBook, has now been turned into a printed cookbook! And just in time for Christmas!

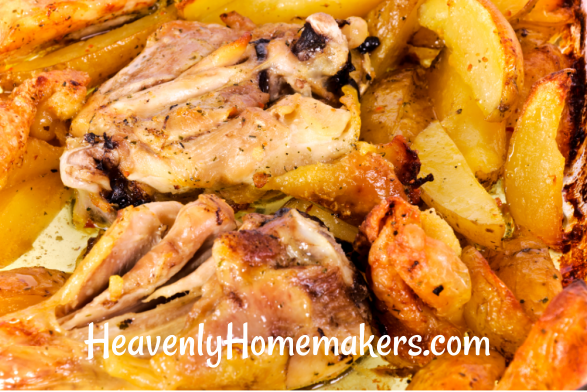
I love the simplicity of this cookbook and how you can now have it in your kitchen, ready to use every day to make your kitchen life easier. Find recipes from Breakfast Casserole to Pizza Chicken Bake to Homemade Ice Cream to Homemade Ranch Dressing – and over a hundred more! And all of them call for only 5 or fewer ingredients!!

High Five Recipes

High quality recipes, five or fewer ingredients. Bring it in for a high five!!

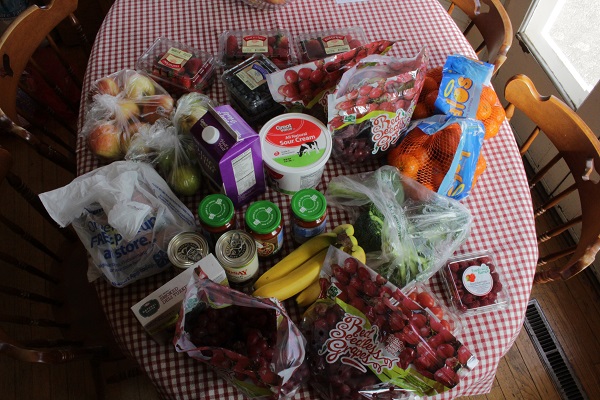
Cooking for your family has never been easier. Especially because your family will love how delicious all these meals and snacks taste! When you make these recipes, your time and energy can be used to do what is more important – loving people.

Take a peek inside the book and get hungry as you read the table of contents:

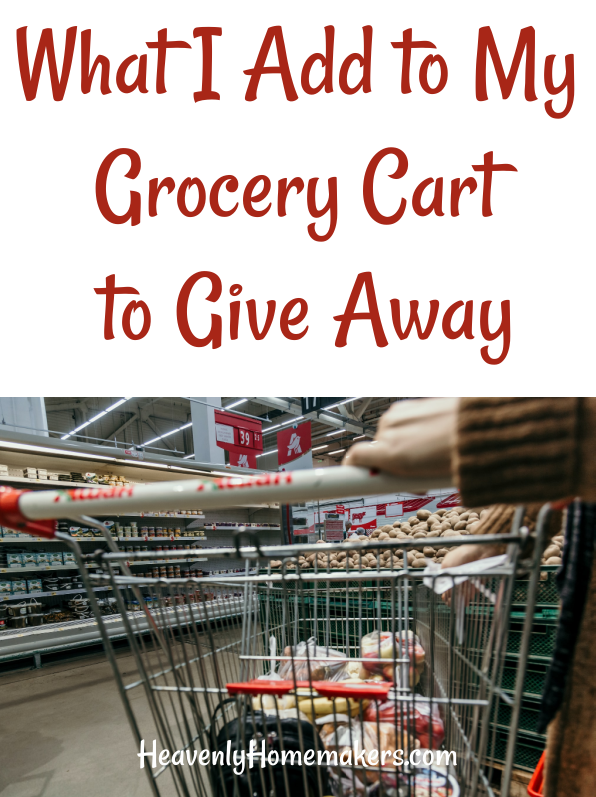
Grab a copy for yourself and some for family members, teachers, friends, and neighbors too. This book makes a fantastic gift and saves everyone time.

Can’t wait for you all to enjoy all that this cookbook will offer you. Be blessed and fall in love with these delicious, simple recipes!

Get your High Five Recipes Cookbook here.

Heavenly Homemaker's Club Members: Access your homepage and all your fantastic resources here! Not a member yet? Please join us!

What Should I Bake?

November 1, 2020 by Laura Leave a Comment

This post may contain affiliate links. For more information, please see our disclosure policy.

As much as I love summer the best of all the seasons, I sure love fall so I can get to baking again! In case you’re in the baking mood too, I thought it would be fun to give you some ideas if you’re asking yourself: What should I bake?

What should I bake?

I organized 111 of our favorite baking recipes into Yeast Bread Recipes, Muffin Recipes, Quick Bread Recipes, Cookie Recipes, Bar Recipes, and Cake Recipes. You’ll love how simple, yet how delicious these recipes are!

Get ready to bake up a storm and share with your neighbors. Wondering “what should I bake?” Wonder no more!

And by the way, if you don’t have a Bosch Mixer, I do highly recommend one. That has made my baking endeavors so much easier!!! (Read about why I invested here.)

Yeast Bread RecipesYum

  1. Chocolate Swirl Bread
  2. Cinnamon Swirl Bread
  3. Honey Whole Wheat Bagels
  4. Honey Whole Wheat Bread
  5. Monkey Bread
  6. No Knead Whole Wheat Bread
  7. One Hour Whole Wheat Yeast Rolls
  8. Pita Bread
  9. Stir-n-Pour Bread – So Easy!
  10. Soft Pretzels
  11. Soft Pretzel Bites
  12. Whole Wheat Hamburger Buns
  13. Whole Wheat Hot Dog Buns
  14. Whole Wheat Butterhorns
  15. Whole Wheat Cinnamon Rolls

Muffin Recipes

  1. Almond Flour Muffins
  2. Bacon Cheese Muffins
  3. Banana Muffins
  4. Blueberry Streusel Muffins
  5. Breakfast Cake Muffins
  6. Chocolate Chocolate Chip Muffins
  7. Chocolate Swirl Muffins
  8. Chocolate Zucchini Muffins
  9. Cinnamon Nectarine Muffins
  10. Coconut Flour Muffins
  11. Coconut Flour Banana Muffins
  12. Cornbread and Cornbread Muffins
  13. Cream Cheese Pumpkin Muffins
  14. Easy Chocolate Cheesecake Muffins
  15. Easy Chocolate Chip Cheesecake Muffins
  16. Easy Banana Cheesecake Muffins
  17. Easy Pumpkin Cheesecake Muffins
  18. Eggnog Muffins
  19. Honey Cinnamon Muffins
  20. Orange Muffins
  21. Pancake Muffins
  22. Pancake and Sausage Muffins
  23. Peanut Butter Chocolate Chip Muffins
  24. Peanut Butter Muffins (gluten free!)
  25. Pumpkin Chocolate Chip Muffins
  26. Snickerdoodle Muffins
  27. Strawberry Cream Muffins
  28. Sweet Potato Streusel Muffins
  29. Whole Wheat and Honey Zucchini Muffins
  30. Whole Wheat Chocolate Zucchini Muffins

Quick Bread Recipes

  1. Applesauce Bread
  2. Banana Bread
  3. Chocolate Chocolate Chip Bread
  4. Lemon Bread
  5. Pumpkin Chocolate Chip Bread
  6. Whole Wheat and Honey Zucchini Bread
  7. Zucchini Carrot Bread
  8. Strawberry Bread

Cookie Recipes

  1. Cranberry White Chocolate Chip Breakfast Cookies
  2. Giant Breakfast Cookies
  3. Chocolate Chip Cookies
  4. Chocolate Chip Zucchini Cookies
  5. Chocolate Crinkle Cookies
  6. Christmas Spice Cookies
  7. Coconut Macaroons
  8. Flourless Fudge Cookies
  9. Flourless Peanut Butter Chocolate Chip Cookies
  10. Flourless Peanut Butter Cookies
  11. Oatmeal Butterscotch Chip Cookies
  12. Orange Cream Cheese Cutouts
  13. Snickerdoodles
  14. The Best Chocolate Chip Cookies
  15. Super Soft Chocolate Cookies
  16. Sweet and Simple Butter Cookies
  17. Sweet and Simple Cranberry Cookies
  18. Low Sugar Cream Cheese Cut-Out Cookies
  19. Buttery Almond Cookies
  20. Simple Oatmeal Cookies
  21. Honey Sweetened No-Bake Cookies
  22. Easy {Low} Sugar Cookies
  23. Low Sugar Lemon Melt-Away Cookies
  24. Low Sugar Almond Melt-Away Cookies
  25. Low Sugar Orange Melt-Away Cookies
  26. Low Sugar Lime Melt-Away Cookies
  27. Low Sugar Chocolate Fudge Cookies
  28. Low Sugar Flourless Peanut Butter Cookies
  29. Low Sugar Flourless Chocolate Peanut Butter Cookies
  30. Pumpkin Spice Cut-Out Cookies

Bar Recipes

  1. Apricot Breakfast Bars
  2. Oatmeal Breakfast Bars
  3. Butterscotch Bars
  4. Cheesecake Brownies
  5. Chocolate Chip Brownies
  6. Coconut Flour Brownies
  7. Honey Peanut Bars
  8. Monster Chocolate Chip Cookie Bars
  9. Peanut Butter Apple Cookie Bars
  10. Peanut Butter Honey Bars
  11. Pumpkin Pecan Pie Squares
  12. Zucchini Brownies
  13. Low Sugar Chocolate Brownies
  14. Low Sugar Chocolate Chip Cookie Bars

Cake Recipes

  1. Banana Cake
  2. Blueberry Coffee Cake
  3. Breakfast Cake
  4. Peanut Butter Breakfast Cake
  5. Pumpkin Breakfast Cake
  6. Carrot Cake
  7. Chocolate Cake
  8. Lemon Pound Cake
  9. Peanut Butter Cake
  10. Peanut Butter Chocolate Chip Cake
  11. Pumpkin Chocolate Chip Cake
  12. Red(less) Velvet Cake
  13. Strawberry Shortcake
  14. Zucchini Cake
Heavenly Homemaker's Club Members: Access your homepage and all your fantastic resources here! Not a member yet? Please join us!

The Easiest Pulled Pork

October 28, 2020 by Laura Leave a Comment

This post may contain affiliate links. For more information, please see our disclosure policy.

Need a meal to feed a crowd? Make the Easiest Pulled Pork!

You know I’m not a gourmet cook. I’m not even super eager to try new spices in my recipes, simply because I like to stick with basics that I always have on hand. It’s just easier for me this way and saves brain energy and effort.

The food is still delicious!

One of the first times I made this Easiest Pulled Pork and fed it to our YC soccer teams, one of the coaches told Matt, “I don’t know what your wife does to season that meat, but it is so good!”

Truth: Matt’s wife barely does anything to season the meat. But shh. Don’t tell!

I just find that food can really taste great without going to a lot of trouble and taking a lot of time. Since it was a hit last year, I made pulled pork again for the teams this year. I made 20 pounds of pork, and I’m pretty sure it only took 5 minutes of prep.

How I make pulled porkYum

  1. Put the pork butt in the slow cooker (when I make huge amounts, I use a large roaster instead of a crockpot).
  2. Sprinkle on salt and garlic powder.
  3. Peel a few onions if I have time. Cut them and throw them in with the meat.
  4. Cover and walk away.
  5. Well yeah, plug it in and turn it on low first. Then cover and walk away.

The meat slow cooks for hours then falls apart at the end of the day. It practically shreds itself. Then it can be served on buns with barbecue sauce and that’s that!

Now, those of you with smokers can surely turn out much better-tasting pulled pork than I! But this is a method that any of us can do if we have a slow cooker of some kind. And pulled pork is an inexpensive and easy way to feed a crowd!

The Easiest Pulled Pork

The Easiest Pulled Pork
 
Save Print
Author: Laura
Serves: 24 servings
Ingredients
  • 6-8 pound pork butt
  • sea salt
  • garlic powder
  • 2-3 onions (optional)
Instructions
  1. Place the pork in a slow cooker.
  2. Sprinkle on seasonings liberally.
  3. Peel onions and chop them on top of the meat.
  4. Cook on low for 10 hours.
  5. Use a knife and fork to shred the meat, which pulls apart quite easily after the meat has cooked slow and low!
3.5.3251

Don’t need to feed a crowd, just your family? You can still make this easy meal and then freeze the shredded meat in meal-sized portions to pull out and rewarm as needed. SO EASY!

Feeding a crowd and want to get ahead? Make this meat days or weeks ahead. Put the shredded, cooled meat into freezer bags to save in the freezer until you need it. Then thaw and reheat as needed.

Great Sides to Serve with Your Pulled Pork

  • Buns and Barbecue Sauces
  • Party Potatoes
  • Simple Cream Cheese Corn
  • Simple Baked Beans
  • Raw Veggies with Dip
  • Fruit like grapes, watermelon, or cantaloupe
Heavenly Homemaker's Club Members: Access your homepage and all your fantastic resources here! Not a member yet? Please join us!

Awesome Freebie to Save Your Skin this Winter!

October 26, 2020 by Laura Leave a Comment

This post may contain affiliate links. For more information, please see our disclosure policy.

Renee at MadeOn has come through for us once again! I love this so much and am so thankful for her generosity. She’s here to save our skin this winter – and save us money too!

I’ve used MadeOn products for years and years. Every winter, I stock up because our skin needs extra care during the dry months. My favorite of all her products used to be her hard lotion bars. They have truly saved my hands from dryness, cracking, bleeding, and pain.

But then she came out with a brand new product, the Simply Shea Facial Emollient. Technically it’s a product for our faces. But shucks if I don’t use it on my face, my hands, my legs, and my arms too. It’s so soft and easy to use. Just like her hard lotion bars, Simply Shea makes a huge difference for my skin. I guess the only reason this product moved up into my “favorite” spot is that it’s a little bit easier to use compared to the hard lotion bars. I keep them both on hand (pun intended) at all times!

Besides the fact that MadeOn products work incredibly well, I love that they are completely non-toxic and use only the finest of pure ingredients. I honestly think that this is WHY they work so well. They only include ingredients that nourish and benefit our skin. So perfect.

How to get a free tub of Simply Shea Emollient (worth $14.75) plus free shipping:

Renee has offered to give all of us a free tub of Simply Shea! This is no small gift because it’s normally priced at $14.75! Here’s how it works:

1.) Shop the store and add $45 worth of products to your cart.
2.) Add the Simply Shea Facial Emollient to your cart.
3.) Apply code HHSHEA at checkout and your Simply Shea is free! (So is shipping!)
Order before midnight PST on October 30th

When I took advantage of this offer, I grabbed several pocket-sized lotion bars and a few lip balms to give as gifts this Christmas (for my older boys’ girlfriends, btw – I’m a big fan of these godly beauties). I got my freebie and free shipping! I’ll tuck the free Simply Shea into my cabinet to use when my other one runs out.

Ready to go enjoy this offer? Head here to get started!

Have fun shopping, enjoy the huge money savings, and thoroughly enjoy how great your skin feels!

Take advantage of this offer before midnight PST on October 30th. Let’s take care of our skin before winter dryness takes over!

Heavenly Homemaker's Club Members: Access your homepage and all your fantastic resources here! Not a member yet? Please join us!

Vanilla Extract in the Instant Pot. Is it Good??

October 21, 2020 by Laura 6 Comments

This post may contain affiliate links. For more information, please see our disclosure policy.

I’ve heard about making Vanilla Extract in the Instant Pot. But I had to wonder: Is it good? As good as the Homemade Vanilla Extract I usually brew for 6 months? I decided to give it a try!

Yum

I’ve been making my own vanilla extract since 2009. It’s super easy to make, but it does take 4-6 months to finish extracting so that we end up with good strong vanilla.

Recently I saw on the internet that you can make vanilla extract in the Instant Pot – in 40 minutes!!! Fun fact: 40 minutes is a lot less time to wait on homemade vanilla compared to waiting for 6 months. I figured it wouldn’t cost much to try it out and compare it to my super special 6-month homemade vanilla. So I gave it a try!

First, let’s look at how this works:

When I long-brew my vanilla extract, I cut my beans and put them into a big jar filled with vodka for 4-6 months. It’s as simple as can be and turns out THE MOST AMAZING vanilla extract!

The Instant Pot method for making vanilla extract takes fewer beans and way less time. I cut a total of 6 beans – first the long way, then in half so they fit into pint-sized jars.

I then fill the jars with vodka and put them on the trivet in my Instant Pot. Carefully set lids on the jars, but do not screw on tightly. Add water to the Instant Pot, seal, and set the timer to 40 minutes at high pressure.

Allow the vanilla extract to pressure cook for 40 minutes, then carefully quick release the pressure so that you can open your Instant Pot lid. The result?

Beautiful vanilla extract in just 40 minutes!!!

How to make Vanilla Extract in the Instant Pot

Vanilla Extract in the Instant Pot. Is it Good??
 
Save Print
Author: Laura
Serves: 32 ounces
Ingredients
  • 6 vanilla beans (use the code HOME for a 20% discount!)
  • 1 quart of vodka
  • 2 pint jars with lids
Instructions
  1. Cut vanilla beans along down the middle of the bean, then cut them in half and place them into 2 pint-sized jar. (3 beans per jar)
  2. Pour vodka over the beans.
  3. Place a trivet into your Instant Pot.
  4. Add 1 cup of water to the bottom of the pot.
  5. Set the prepared jars of vodka/vanilla beans onto the trivet.
  6. Loosely place the lids on the jars, not sealing tightly.
  7. Lock on the Instant Pot lid and seal the pressure valve.
  8. Cook on manual setting for 40 minutes at high pressure.
  9. Quick release the pressure valve (watch out for the steam!)
  10. Carefully remove the jar and allow the vanilla to cool.
3.5.3251

How does it compare?

The old fashioned me wants to say, “Oh, the long brew method of making vanilla extract is so much better!!” But the truth is that I actually can’t tell much difference.

Therefore, the simple-cook me gets to say, “Hey, want to save A LOT of time and effort making vanilla extract? Try making it in your Instant Pot!!”

So in summary, we’ve got a win-win here! If you decide to stick with the regular, long brew method you’ll turn out wonderful vanilla extract! And if you have an Instant Pot and decide to make a fast batch, you will still turn out wonderful (tho not quite as strong) vanilla extract!

Make this for Christmas gifts!

If you do have an Instant Pot, you can order your beans and make a bunch of vanilla for gifts – it’s not too late!! People love receiving homemade vanilla as a gift – teachers, family members, neighbors, co-workers!

Where to buy vanilla beans:

I always buy my vanilla beans from Olive Nation. I’ve tried other sources to “save money” but instead ended up wasting money because the quality of the beans from cheap sources was terrible!

Olive Nation beans are so, so good. I’ve used their beans for years. They love working with us here at Heavenly Homemakers so they offer us 20% off when we use the coupon code: home. Plus we get free shipping on orders over $50!

Cost Breakdown to Make Vanilla in the Instant Pot:

I ordered the 25-bean package on this page and used the lovely discount code, home. This landed me 15% off plus free shipping, so total cost for 25 beans was $50.14. With these beans, I can make 4 quarts of vanilla!! (I’ve just made 1 quart so far.)

Cost for one quart of vanilla in my Instant Pot:

  • 6 beans = 12.00
  • 1 quart of vodka = $5.50
  • TOTAL = $17.50

With this, I can put together four 8-ounce bottles of vanilla for gifts!! This makes each 8-ounce bottle cost just $4.38! That is an incredible price!!

(Cost at the store for high-quality vanilla? Most of what I find has water added, and it’s still $8.97 for just TWO OUNCES. Homemade cost for two ounces is just $1.10!!!)

Extra resources:

  • Read this post to learn how to finish and strain your vanilla after 4-6 months if you choose to do the long-brew method.
  • You can purchase dark amber bottles here.
  • Order personalized vanilla stickers for bottles and gifts here.
  • Get your beans here, and use the code HOME to get 20% off!

I’m super excited about this option for making vanilla extract! Have you tried it before?!

Heavenly Homemaker's Club Members: Access your homepage and all your fantastic resources here! Not a member yet? Please join us!

More Healthy Food Convenience Foods

October 18, 2020 by Laura 4 Comments

This post may contain affiliate links. For more information, please see our disclosure policy.

A few years ago, I shared 10 of my favorite pre-packaged foods that are still a healthy option! I’ve since discovered even more! Here are several more healthy food convenience food options…

Healthy Food Convenience Foods

I’ll begin by reminding you of the 10 I shared in the former post. Then I’ll add the new ones I’ve discovered!

1. Mini Sweet Peppers

Oh my goodness, have you tried these? They are deliciously sweet, perfectly crunchy, and wonderful all by themselves or in a salad. We take these on the road trips, munch on them for snacks, add them to our lunch plates, and argue about which color tastes the sweetest. I can’t get enough of these.

packaged convenience 1

2. Fresh Berries

Without a doubt, you can not compete with fresh berries picked and eaten right out of the garden. But during the times those are not available, we look for the best deals on strawberries, blueberries, blackberries, and raspberries at the store. Wash ’em and eat ’em. It doesn’t get any easier than pulling out berries for a snack or a side dish with a meal.

packaged convenience 2

3. Grape or Cherry Tomatoes

Again, these are best fresh out of the garden. But since ours won’t be ready for another month or two, buying these pre-packaged works great for us.

packaged convenience 3
 4. Baby Carrots

There is some controversy over buying packaged baby carrots because of the information many have heard about baby carrots being soaked in chlorine before being packaged. Read this info and do with it what you wish. As for me, sometimes buying a package of baby carrots is a huge help in my effort to provide my family with extra veggies during a meal.

packaged convenience 4

5. Mixed Greens

Think making salad is too time consuming? Oh for Pete’s sake. Just buy a container of mixed greens and throw it on the table. It’s pre-washed and ready to eat. We go through a couple packs of these each week.

packaged convenience 7

6. Pickles

Open a jar, put it on the table, your work here is done.

packaged convenience 6

 7. Cheese Sticks

These can be a little pricey compared to buying a hunk of cheese and slicing it yourself. But when we’re talking about pre-packaged convenience foods, this one is a winner. Cheese is great for an on-the-go protein snack. Yay cheese.

packaged convenience 5

8. Larabars

Yes, you can made these homemade. I’ve done it myself many times. But sometimes my family needs something to stuff in a pocket to eat in between soccer games. I watch for great sales and coupons through Amazon and buy these by the case. They contain fruit and nuts only – a great healthy snack.

packaged convenience 8

9. Fruit Leather

Again, I make this homemade sometimes too. But for a fun treat, I like getting pre-packaged fruit leather when I find it on sale.

packaged convenience 9

10. Raisins

Buy them by the bag or in individual serving sized boxes. This pre-packaged convenience food is awesome for snacking. And really, aren’t those tiny little boxes just the cutest?

packaged convenience 10

What else? Oh, I could list tons. Peanuts, cashews, almonds, bananas, apples, grapes, oranges – think of all the pre-packaged real foods there are to pick from! Never again can we ever claim that healthy eating is difficult. And never again should anyone carry my favorite pen out of my office, put it down, and forget about it.

Here are my favorite newly discovered convenient health foods!

11. Carrot Chips

They are more expensive than whole carrots. But oh my loveliness, they are cut for me. While I juggle and bounce baby/toddlers, opening a bag of these carrots and tossing them into my Stir Fry or Steamed Veggie mixture is such a time saver. Spending a little extra for this convenience is worth it for me right now.

12. Mr. Dells Hashbrowns

I’ve talked about these here and there any time I’ve shared a new recipe that includes hashbrowns. They include one ingredient: Potatoes. SIGN ME UP.

Scroll through these recipes to find all the ways I like to use these when cooking quick meals for my family!

13. Sliced olives

Instead of whole olives. I know. But it saves time when I’m making pizza and that makes me happy.

14. Sliced Mushrooms

Same story as above. Open the package, throw them on our pizza or into our stir fry.

I promise I’m not turning into a lazy cook. Or am I? I prefer to think that I’m still eating real food while spending less time in the kitchen and taking advantage of conveniences such as these as my life becomes more full! Perhaps you’d like to get in on this fun? Save time. Still eat well. Buy the sliced mushrooms. :)

What are your favorite healthy convenience foods?

Heavenly Homemaker's Club Members: Access your homepage and all your fantastic resources here! Not a member yet? Please join us!

Low Sugar Pecan Cookies

October 14, 2020 by Laura Leave a Comment

This post may contain affiliate links. For more information, please see our disclosure policy.

It’s baking season! These Low Sugar Pecan Cookies are buttery and delicious!

You might remember our other Low Sugar Cookie recipes. Here are just a few of our favorites:

  • Easy {Low} Sugar Cookies
  • Low Sugar Lemon Melt-Away Cookies
  • Low Sugar Almond Melt-Away Cookies
  • Low Sugar Orange Melt-Away Cookies
  • Low Sugar Lime Melt-Away Cookies
  • Low Sugar Chocolate Fudge Cookies
  • Low Sugar Oatmeal Cookies

We adapted a few of those to create these Low Sugar Pecan Cookies because it’s so easy to make a tiny tweak to create a brand new recipe!

The “melt-away” cookies listed above are my favorites simply because they are so buttery. This truly makes them melt in your mouth! No one can tell that these are low in sugar OR that they are made with whole grain flour. And the toasted pecans give these such a delightful flavor and crunch!

Low Sugar Pecan CookiesYum

Low Sugar Pecan Cookies
 
Save Print
Author: Laura
Serves: 20
Ingredients
  • 1½ cups melted butter (3 sticks)
  • ½ cup sugar (sucanat, raw, brown)
  • 1 teaspoon vanilla extract
  • 3 cups whole grain flour (I use freshly ground soft white wheat)
  • ½ cup pecan pieces toasted in 2 Tablespoons butter
Instructions
  1. Toast pecans by stirring them in a small saucepan over low heat for 2-4 minutes. Set aside.
  2. In a mixing bowl, stir together butter, sugar, vanilla, and flour.
  3. Fold in toasted pecans.
  4. Scoop ½ inch sized balls of dough onto a cookie sheet.
  5. Press balls down with the end of a drinking glass.
  6. Bake in a 350 degree oven for 10-15 minutes or until cookies are golden brown.
3.5.3251

Want to cut down on sugar while still enjoying occasional treats?

We have an entire eBook full of Low Sugar Treats, which you can check it out here. But it makes more sense to join our Heavenly Homemakers Membership Club so that you can enjoy ALL of our eBooks and much more any time, anywhere. :)

Heavenly Homemaker's Club Members: Access your homepage and all your fantastic resources here! Not a member yet? Please join us!

Simple Honey’d Italian Chicken and Potatoes

October 8, 2020 by Laura Leave a Comment

This post may contain affiliate links. For more information, please see our disclosure policy.

This Simple Honey’d Italian Chicken and Potatoes will take you just a few minutes to prep!

Our amazing across-the-street neighbors decided in the midst of April quarantine to start raising and butchering chickens. They generously asked if we wanted in on it.

Wellllllll. Yes. We wanted some chickens, most definitely. But we knew nothing about raising them and butchering them, and we didn’t have time to commit to it. They assured us that they’d take care of the hard part (which sounded more fun than hard to them). So how could we say no?!

We helped pay for feed and other supplies, saved all of our food scraps for the growing chicks, and best of all? Our littlest guys learned to stop whatever they were doing outside to holler “doodle-do!” across the street whenever their roosters started crowing. Cutest. Thing. Ever.

So now we have several locally grown chickens in our freezer (can it possibly get more local than ACROSS THE STREET?!). They even went so far as to cut legs and thighs off for us during the butchering process.

I’ve been using the thighs in this Honey’d Italian Chicken recipe and not only is it incredibly simple to put this all together, but it is also super delicious! I can quickly slide this into the oven to bake, then steam a veggie and get out mixed greens to go with it. So easy!

Simple 4-Ingredient Honey’d Italian ChickenYum

Simple 4-Ingredient Honey'd Italian Chicken
 
Save Print
Author: Laura
Serves: 4-6
Ingredients
  • 2 pounds boneless or bone-in chicken thighs or breasts
  • 2 pounds yellow or red potatoes
  • 3 Tablespoons honey
  • ¾ cup Italian Dressing
Instructions
  1. Place chicken in a baking dish.
  2. Scrub potatoes and cut them into wedges, placing them in the dish with the chicken.
  3. In a small saucepan, mix honey and Italian dressing over low heat until combined.
  4. Drizzle dressing mixture over the chicken.
  5. Bake, uncovered, in a 425 degree oven for 45 minutes or until chicken is no longer pink.
3.5.3251

If you prefer to use boneless chicken in this recipe, cut the baking time down to 25-35 minutes.

If you like simple recipes like this, you will love our Simple Real Food Recipes Cookbook. These are my go-to recipes now!

Heavenly Homemaker's Club Members: Access your homepage and all your fantastic resources here! Not a member yet? Please join us!

How to Create a Kid’s Craft Treasure Box

October 4, 2020 by Laura 2 Comments

This post may contain affiliate links. For more information, please see our disclosure policy.

Looking for a fun way to inspire your kids to get creative? Why not put together a Kid’s Craft Treasure Box!

I stole this idea from Tasha, who brought over her four kids and this fun craft box that her kids had received as a gift. Brayden sat down with her three oldest and they had fun making a mess creating everything from cards to swords for over an hour!

The box is full of foam pieces, beads, pipecleaners, popsicle sticks, glue, scissors, paper, pom poms, and more. Oh, and glitter. As much as I am open to offering fun creative times for my kids, I do draw the line at glitter.

Laura does not like glitter!!! And now you know.

For the record, I do love all things that sparkle. But I do not like sparkly glitter that gets all over the table and the floor and my face and never, ever comes off.

So as for me and my house, we will craft with everything fun – except for glitter. Sequins!! Those sparkle. We can use sequins instead!

After Tasha and her kids took off that day, knowing that Brayden had had so much fun creating with the variety of supplies, I put together a Craft Treasure Box of our own. I didn’t even have to buy anything! I already had almost everything in a cabinet. So instead of leaving it disorganized in the cabinet, I put it all into a tote so we can have all the supplies together in one place and pull it out to use at any time!

How to Create a Kid’s Craft Treasure Box

Grab a box or tote and fill it with any of these fun craft supply ideas!

  • Beads
  • Pipecleaners
  • Colored Paper
  • Colored Foam
  • Foam Stickers and Shapes
  • Pom Poms
  • Popsicle Sticks
  • Glue
  • Scissors
  • Markers
  • Crayons
  • Colored Pencils
  • Stencils
  • Googly Eyes
  • Sequins
  • Small paper bags
  • Paper Plates
  • Coffee Filters
  • Gemstones
  • Feathers
  • Colored Thread
  • Glitter

If you don’t already have these supplies on hand, this great craft box from Amazon is actually very reasonably priced and filled with fun supplies!

How to Use Your Kid’s Craft Treasure Box

Clear off a table, hand your kids the Craft Treasure Box and let them have at it, creating whatever they are inspired to create! Or, assign a specific project like:

  • Make cards to give to people you know who are struggling and need encouragement
  • Make beaded bracelets or ornaments with beads and pipecleaners
  • Make holiday decorations for whatever holiday is coming up
  • Glue together shapes to create a special design
  • Sky’s the limit!
Heavenly Homemaker's Club Members: Access your homepage and all your fantastic resources here! Not a member yet? Please join us!

What I Add to My Grocery Cart to Give Away

September 30, 2020 by Laura Leave a Comment

This post may contain affiliate links. For more information, please see our disclosure policy.

A few weeks ago, I encouraged us to consider how we can all be more aware of ways we can help feed people in need. Today I want to share more specifics of what I add to my grocery cart to give away.

Please know that this post is meant to inspire and offer tips and suggestions to get your juices flowing as you consider ways you can help people who might be facing food insecurity or who need love to be shown to them in the form of food. Your spiritual gifts are different than my spiritual gifts, so you may never give away food, but you might fix people’s cars or give people rides or wash people’s laundry or make encouraging phone calls or whatever it is God has you doing because of your gifts!!!

But if you feel called to help people with food needs they might have, here’s a post to share ways that work for me that just might work for you too!

Who I’m Blessed to Share With

First, I’ll tell you about some of the people that I often share food with so you know who I’m thinking of as I’m making grocery purchases for people beyond my family.

  • College Students – We feed a large group each Sunday after church for “Sunday Lunch.” I often send leftovers in disposable containers, extra cookies in baggies, slices of quick bread on a paper plate, and fresh fruit for them to have in their dorm rooms.
  • Disabled Widows – I’ve met several ladies in town who are on a fixed income for one reason or another. If anything out of the ordinary comes up during the month, sometimes their grocery budget takes a hit. They know to call me if they are running low on groceries (though they don’t always like to ask so I try to check in with them regularly). I take them small bags of staples and sometimes a small loaf of homemade bread or other homemade goodies if I have it.
  • Families – There are several families I check in with from time to time to see if they could use a few extra bags or boxes of groceries. Then I go through my freezers and pantry and see what all I’ve been able to stock up on when it was on sale. I put together a variety of staples and even treats if I have them. Sometimes I call on some friends to help me with this, simply because it’s so great to get others involved in the teamwork of loving people.
  • Local Mission – We have relationships with the employees at our local Living Water Rescue Mission so I keep in touch with them about their food needs. They feed their residents and anyone who walks through the door three meals each day. Plus they give free food boxes to families who have need. They rely on donations for this, so our family donates when we can. But better yet, we’ve gotten our entire church involved in collecting food when the mission was starting to get really low on supply!

Here’s our Elias standing with our van completely filled with groceries donated by our church members. He helped pick it up and deliver so they took this pic to post on their mission Facebook page.

What I Add to My Grocery Cart to Give Away

What you’ll see below are foods I buy for my family regularly. So I find that it’s easy to buy extra whether we need it or not. This helps with my orgniziation so that I always have food on hand to make simple meals for my family. But it’s also been so nice to have these extras ready to bag up and deliver to others. Here’s what I often “over buy” and share:

  • Sale items – especially meat mark-downs because this is such a valued gift I can give families.
  • Canned Fruit
  • Frozen Veggies
  • Applesauce Cups
  • Cereal
  • Instant Oatmeal Packets
  • Fresh Fruit – If there are great deals on fruit I’ll buy several bags and hand them out to whoever God puts on my heart.
  • Pasta
  • Pasta Sauce
  • Rice
  • Granola Bars
  • Fun Coffee Creamers – Because the college kids who come over love coffee! We make several pots on Sundays and it’s fun to have different creamers for them to use. I just don’t read the ingredient label. ;)
  • Kleenex
  • Toilet Paper – This sure did get tricky for a while! But it was great to have some extra to share when some of our friends completely ran out!

What ways has God used you to bless others recently?

Heavenly Homemaker's Club Members: Access your homepage and all your fantastic resources here! Not a member yet? Please join us!
« Previous Page
Next Page »

Join Our Community!

 Facebook Twitter E-mail Instagram Pinterest

Popular Posts

~ Will All of the Real Moms Please Stand Up?
~ Easy! Stir-and-Pour Whole Wheat Bread
~ How to Make Gatorade
~ 31 Real Food Breakfast Ideas
~ Dear Teenage Girls...
~ When Mom Takes a Step Back
~ The Inexpensive Health Insurance We Love!
~ Let's Talk Real Food Grocery Budgets

Check out our latest posts!

  • Big Family Food and Fun: June 14-20, 2026
  • Big Family Food and Fun: June 7-13, 2026
  • Big Family Food and Fun: May 31-June 6, 2026
  • Big Family Food and Fun: May 24-30, 2026
  • Free 7-Day Summer Menu Plan
Home  ~  Simple Meals  ~  Club Membership  ~  Shop  ~  Privacy Policy  ~  Disclosure  ~ Contact

Copyright © 2026 · Beautiful Pro Theme on Genesis Framework · WordPress · Log in