My life has not been the same since I discovered this Chocolate Whipped Cream.

My men ban me from doing any work on Mother’s Day. They take over the kitchen, putting together all the meals in a way that is both hilarious and beautiful to me. Sometimes, I shout instructions from the living room. Other times I offer some quiet advice to help avoid culinary disaster. But they always do a nice job working together, and I’ve found it’s best if I simply walk away and let them do things their way.
Therefore, I needed a Mother’s Day dessert that was easy to make. I needed a Mother’s Day dessert that could be made ahead of time. I needed a Mother’s Day dessert that was low in sugar. And I needed chocolate. Obviously.
There’s nothing like inventing a recipe in my head, then writing it down and handing it to my boys to experiment with. Why give them a tried and true recipe when something else sounds better…inside my head. Right? Bless my boys. They are so used to how I roll in the kitchen, they didn’t even blink when I said, “For dessert, we’re going to try something new.” I’m sure they expected nothing less.
Chocolate Whipped Cream on Strawberries
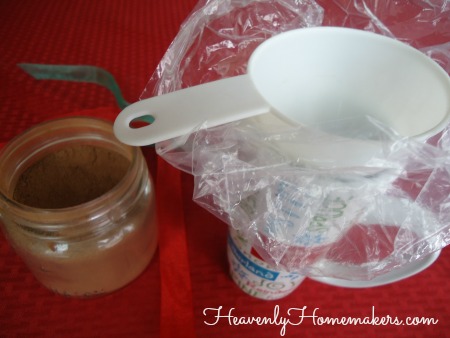
- 1 cup heavy whipping cream
- 1 rounded Tablespoon cocoa powder
- Liquid stevia to taste (we used about 10 drops)
- Sliced strawberries
- In a bowl, whip the cream until soft peaks form.
- Add cocoa and stevia, and whip again for a few seconds until ingredients are mixed well.
- Serve on top of sliced strawberries.

Everyone loved this dessert! The boys especially loved that I said, “Have as much as you want.” When do I ever say that about dessert? Never. But with this, since it is sweetened with stevia, I felt no need to limit how much they ate. This will be a great breakfast, snack, or dessert that we’ll surely be making over and over.
Now it’s your turn. Make this Chocolate Whipped Cream and sit back and enjoy it guilt free. Oh sweet happiness in a bowl.
What dessert did you request for Mother’s Day?