Heavenly Homemakers

Encouraging women in homemaking, healthy eating and parenting

  • Home
    • About
    • FAQs
  • Recipes
    • Bread and Breakfast
    • Condiments
    • Dairy
    • Main Dishes
    • Side Dishes and Snacks
    • Desserts
    • Gluten Free
    • Instant Pot
    • Crock Pot
    • Heavenly Homemaker’s Weekly Menus
  • Homemaking
    • Real Food Sources
  • Store
  • Contact
    • Advertise
    • Disclosure
    • Privacy Policy
  • Simple Meals
  • Club Members!

Freezer Cooking Plan for April

March 28, 2010 by Laura 11 Comments

This post may contain affiliate links. For more information, please see our disclosure policy.

Crystal and Jessica are at it again, working to inspire all of us to save time and money by preparing some foods in advance with an April Freezer Cooking Day.

This is going to be especially important for me to do right now with all four boys being involved in our home school musical in April. Plus spring soccer season is just about to come into my life at full force. Meal times are likely to be rushed many nights this month as we head out to practices, games and rehearsals. 

Therefore, I must be organized. I must plan ahead. I must put some ready to grab food in the freezer. I must not panic.

Ugh, but I must make four animal costumes in the next 3 weeks. 

Okay, I can do this. I have a plan (for the cooking, not for the costumes). Do you want to hear about it?

Each day this week, I’ll be making a little extra food to freeze. By the end of the week, I should have all kinds of food in the freezer to keep me from panicking while I attach black spots to white sweat pants so that I can make my eight year old look like a dalmatian puppy. 

Here’s what I’ll be working on:
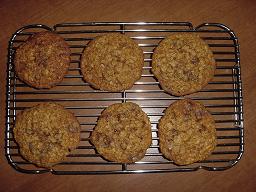
Giant Breakfast Cookies x 2

breakfastcookiessm

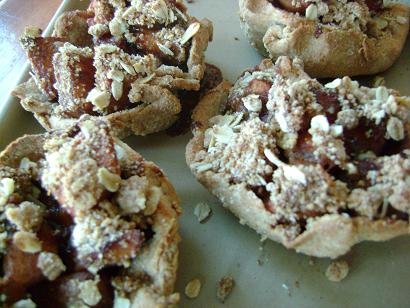
Mini Apple Pies

miniapplepies9sm

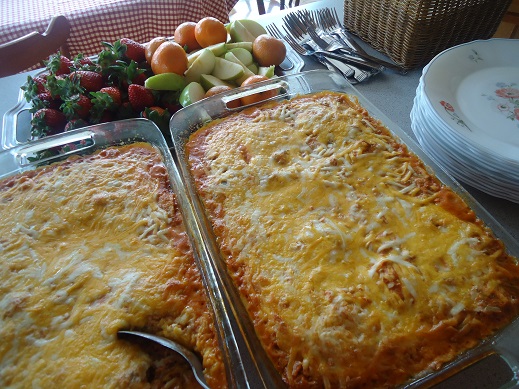
Beefy Enchilada Bake x2

enchiladalasagna2sm

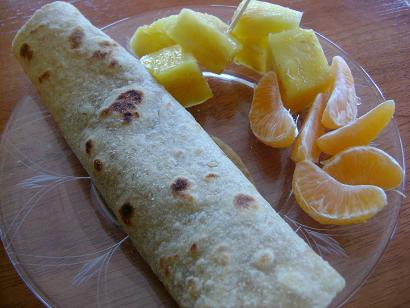
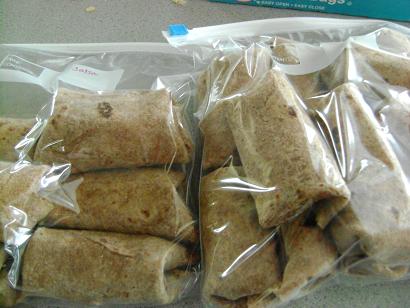
Bean and Cheese Burritos

burritosm

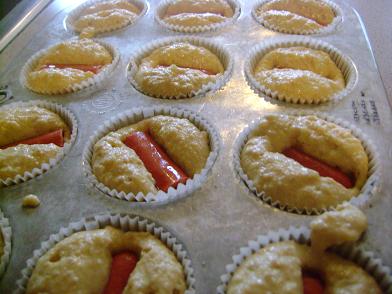
Corn Dog Muffins x 2

corndogmuffinssm.JPG

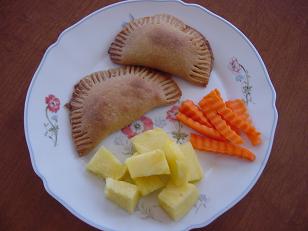
Homemade Pizza Pockets x 2

pizzapockets2sm

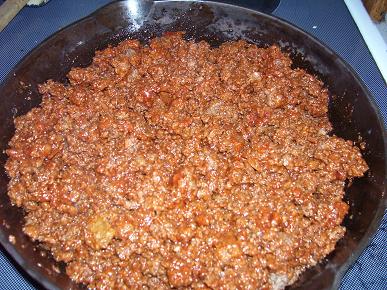
Sloppy Joes x 3

sloppyjoemeatsm

Here’s what I need to do to prep:

  • Soak oats/flour for breakfast cookies
  • Soak dough for apple pies and pizza pockets
  • Soak beans for burritos
  • Make whole wheat tortillas for burritos
  • Thaw five pounds of ground beef for enchilada bake and sloppy joes
  • Thaw/grate cheese for burritos and pizza pockets

In addition, I’d like to also prepare the following to simplify my life:

  • Homemade Chewy Granola Bars
  • Ranch  Dressing Mix x2
  • Italian Dressing Mix x2
  • Bunches of carrot sticks

I’ll post the results of my efforts (again, for the cooking, not the costumes) at the end of the week!


Heavenly Homemaker's Club Members: Access your homepage and all your fantastic resources here! Not a member yet? Please join us!

High Five Recipes: Layered Cheesy Salsa Enchiladas

March 18, 2010 by Laura 24 Comments

This post may contain affiliate links. For more information, please see our disclosure policy.

Layered Cheesy Salsa Enchiladas are about to become one of your family’s favorite recipes!

High Five Recipes 2

Yum

This recipe can not get any easier! Typically, I have all the ingredients on hand for these Layered Cheesy Salsa Enchiladas. So that means I can throw this together at the last minute whenever we need it. Everyone in my family loves this, which is a huge score!

We prefer flour tortillas, but these enchiladas can also be made with corn tortillas if you have a gluten intolerance or if you just like corn tortillas better.

Layered Cheesy Salsa Enchiladas

High Five Recipes: Layered Cheesy Salsa Enchiladas
 
Save Print
Author: Laura
Serves: 4-6
Ingredients
  • 1 pound ground beef
  • sea salt to taste
  • 2 cups salsa
  • 2 cups shredded cheddar cheese, divided (I use raw white cheddar)
  • 8 whole wheat flour tortillas (or corn tortillas)
Instructions
  1. Brown meat. Stir in salsa and ½ cup of cheese.
  2. Lay 4 tortillas in the bottom of a 9x13 inch baking dish.
  3. Spread half of meat mixture over tortillas.
  4. Layer again with the 4 remaining tortillas.
  5. Spread remaining meat mixture over tortillas.
  6. Top with 1½ cups cheese.
  7. Bake uncovered at 350° for 20-25 minutes.
3.4.3177


Save Print
3.4.3177

Cheesy Salsa Enchiladas
This dish freezes easily too, making it a great make ahead meal!

Freezing Instructions:  Cover dish well and freeze. Thaw and bake as directed above. Or, if the enchiladas are frozen, bake in a 250° oven for one hour, then at 350° for another 30 minutes or until cheese is bubbly.

Serve these Cheesy Salsa Enchiladas with a tossed salad and fresh fruit. This meal is as simple as can be!

creamy salsa enchiladas

I have several more High Five Recipes up my sleeve (not literally of course, but wouldn’t that be fun to see?). Oh, and actually if you haven’t already, you should go read the story of my sleeves because, well it’s always fun to read about sleeves.

It’s here! Check out our amazing Simple Meals program!

728x90

Heavenly Homemaker's Club Members: Access your homepage and all your fantastic resources here! Not a member yet? Please join us!

March Freezer Cooking Report (aka My Baggies of Food Photo Album)

March 1, 2010 by Laura 35 Comments

This post may contain affiliate links. For more information, please see our disclosure policy.

Well now, there’s just something so satisfying about seeing a bunch of prepared food in baggies, isn’t there?  Or is it just me?  

I knocked out everything on my list over the weekend. Would you care to take a look at my baggies of prepared food with me? (What, like I’m actually giving you a choice?)

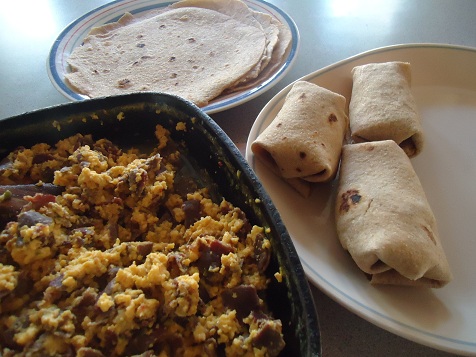
Here are 20 Breakfast Burritos frozen, ready and waiting in the freezer for a busy morning…

breakfastburritos7smI practiced FishMama’s baggie-air-sucking-out technique…very cool!

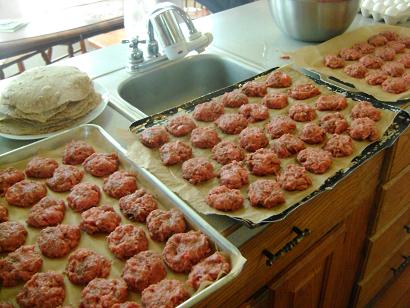
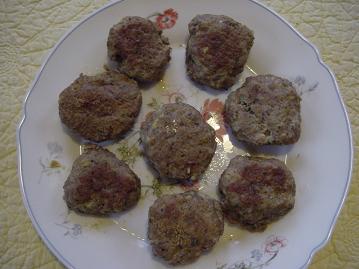
And here we have about 80 little Turkey Sausage Patties prepped and waiting to be cooked up for a breakfast or lunch…

turkeysausagebaggedsm

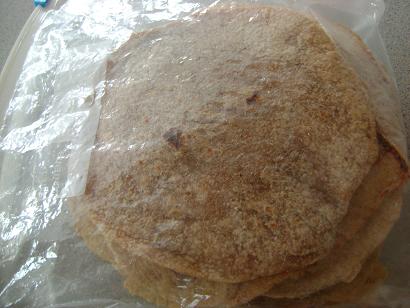
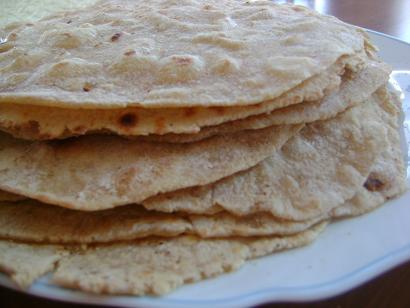
And here is a baggie of Whole Wheat Tortillas, waiting in the fridge to be made into Melting Snowflakes  or Tuna Wraps… 

tortillabaggiesm

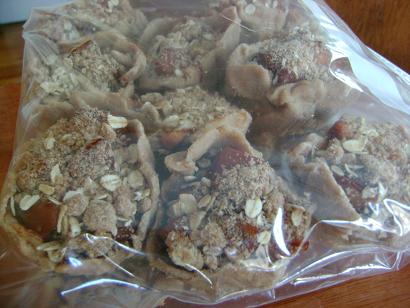
And here are a bunch of Mini Apple Pies in baggies ready to be baked for a special breakfast sometime…

miniapplepies8sm

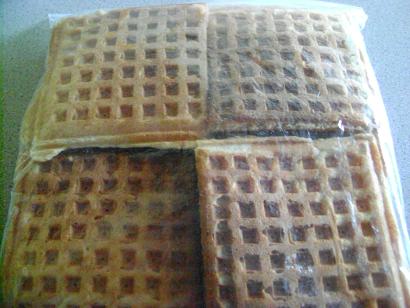
And even though it wasn’t on the list, I had a chance to make a big batch of Whole Wheat Waffles to freeze (and pop in the toaster another day!). Oh look, I put them in a baggie and took a picture for you…

wafflebaggiesm

Thank you for nodding and smiling and saying “oh very nice, Laura” and trying to stay awake while looking at my all of my baggies of food.

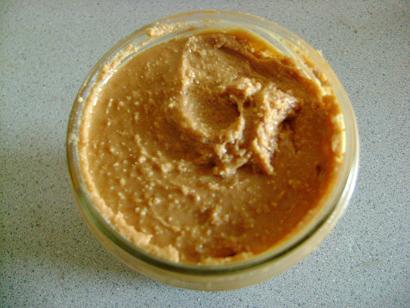
I also made a batch of Homemade Peanut Butter and filled up a pint sized jar. Mmmmm! Um, here’s a picture in case you’d like to see it (and because I didn’t want the peanut butter to feel left out)…

peanutbutterjar

I think my most favorite part of my food preparation weekend was mixing together six pounds of Turkey Sausage!! When I make this sausage, I have to get twelve herbs and spices out of my cupboard. That’s kind of a lot of effort.  It was WONDERFUL to get out all of those ingredients one time, then make SIX batches of the sausage.

I saved out one batch of sausage to make the Breakfast Burritos, but made the rest (five pounds worth!) into little frozen sausage patties. I am SO excited to have these convenient little sausage patties in my freezer!

turkeysausagepattiessmI just froze them on parchment paper lined cookie sheets,
then put them into two gallon sized freezer bags
(shown above, because you know you want to go look at the baggies again).

To cook them, I’ll thaw the desired number of patties on a plate overnight in the fridge, then cook them up at breakfast the next day!

Wow, who knew 80 little sausage patties and all the other above pictured baggies of food could make me feel such a sense of accomplishment.

If I feel this great after making food and putting it into baggies…just think how I will feel when I watch my children receive a high school diploma.
—————————

You’ll find more great monthly cooking tips at Moms in Need of Mercy.

Heavenly Homemaker's Club Members: Access your homepage and all your fantastic resources here! Not a member yet? Please join us!

Healthy Homemade Breakfast Burritos

February 27, 2010 by Laura 41 Comments

This post may contain affiliate links. For more information, please see our disclosure policy.

Well, I made the kids mad at lunch today. I stood there making 20 breakfast burritos and wouldn’t even let them eat one.

Instead, they had to eat tuna.   I was heartless enough to actually make them wait until next week to eat the Breakfast Burritos. Hey, I’m just trying to get ahead here. Someday when they become the parent, they too might have a Breakfast Burrito agenda and make their children settle for tuna. And then they’ll come back to me and tell me how sorry they are for being mad about the 2010 Withholding of the Breakfast Burritos.

Someday.

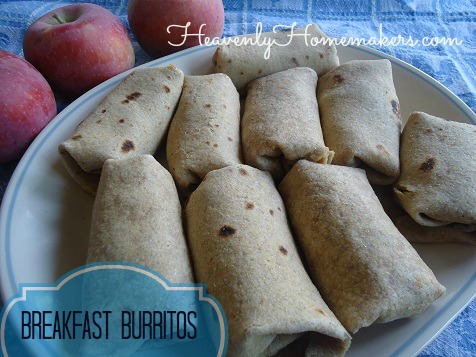
breakfast_burritos_2

Homemade Breakfast BurritosYum

1 pound turkey sausage, browned
12 eggs, scrambled
1 1/2 cups shredded cheddar cheese (I use Landmark Raw White Cheddar)
2 cup salsa (more or less to taste)
20 whole wheat tortillas*

*Tortilla Hint:  If you’re making your own tortillas (and if you aren’t, you really should be, because YUM)…try this tip to make burrito forming so much easier! As you roll your tortillas, cook them on just one side, leaving the other side softer and more flexible.  Also, I find it works best to form the burritos within two or three hours of making the tortillas…before the tortillas have been refrigerated.

To put together the burritos:

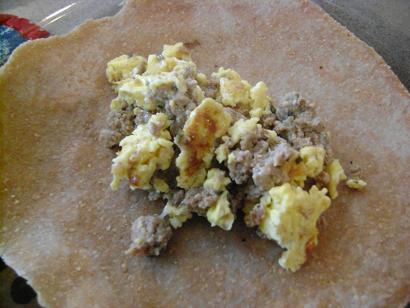
Stir together scrambled eggs, cooked sausage, cheese and salsa. (I leave out the salsa at first and make up some salsa-less burritos for a couple of boys in my life who don’t like salsa. Then I add salsa to the remainder of the mix and make a few with salsa for the rest of us!)

breakfastburritos2smPlace a nice spoonful of burrito mixture onto a tortilla.
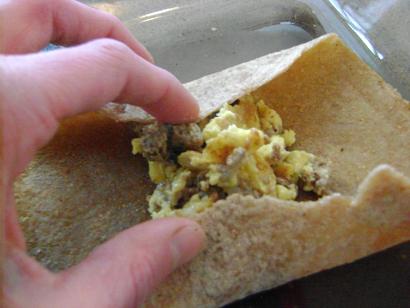
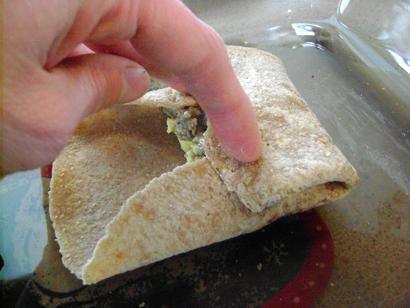
breakfastburritos3smFold in the ends.

breakfastburritos4smFold up one side, and then the other.
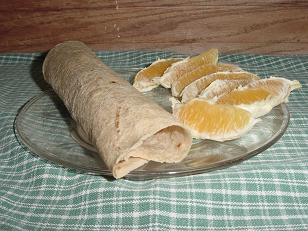
breakfast_burritos

Place burritos in a freezer bag and store in the freezer for up to three months.

To reheat:  Place desired number of thawed or frozen burritos on a baking sheet. Heat in a 350° oven for 10-20 mintues until heated through.

P.S. The children weren’t mad for long. They really like tuna…but just temporarily forgot that fact when they smelled the sausage cooking. They happily ate their tuna and will ever so much more happily eat their Breakfast Burritos some morning next week when I have yet another agenda:  the-hurry-up-and-eat-breakfast-so-that-you-can-start-your-handwriting-and-math…agenda.

Heavenly Homemaker's Club Members: Access your homepage and all your fantastic resources here! Not a member yet? Please join us!

Healthy Make Ahead Meals for March

February 26, 2010 by Laura 19 Comments

This post may contain affiliate links. For more information, please see our disclosure policy.

Remember my Cooking and Baking Marathon last month? Encouraged by Jessica and Crystal, I’m at it again (although this time my list is quite a bit shorter).

Based on many emails and comments I receive regarding your desire to eat healthier foods…I’m convinced that more of you would take the plunge if preparing healthy food was more convenient for you. So, I’m working hard to figure out more healthy meals and treats that can be prepared ahead of time, frozen, and pulled out to eat in a hurry. Scroll through these posts to read through the ideas and recipes I currently have on my site.

Hey, as nice as it may sound that I’m doing this for you…really and truly my family and I are the ones benefiting. ALL the food I made and froze a few weeks ago has been SO nice to have on hand on days we have places to go and people to see. I actually STILL have Pizza Pockets, Cheesy Beef and Rice, Beef and Cheese Burritos and Whole Wheat and Honey Zucchini Bread  in the freezer from the last Cooking/Baking Marathon. I also have three bags of Chicken Fried Steak Strips made up and ready to cook up quickly! 

My favorite benefit of having convenience foods in the freezer is how it helps with the challenge of trying to get school work done and feed hungry boys at the same time. Ready-to-heat-up healthy lunches have been WONDERFUL to have on hand!!

So…Here’s my new list of freezer foods to try:

  • Mini Apple Pies  (These are now done and in the freezer already. The boys LOVED these!)

miniapplepies9sm

  • Pre-made Turkey Sausage Patties  (Now that I know that it’s okay to thaw and refreeze raw meat one time…I’m going to make up several batches of this sausage to make for some easy breakfasts/lunches.)

turkeysausage2sm

  • Breakfast Burritos  (I make lunch type burritos…why not make some sausage-egg-cheese burritos while I’m working up the sausage?)

breakfastburritosm

  • Whole Wheat Tortillas  (Okay, these aren’t new for me to try, but if I’m going to make burritos…I’ll need to make a batch or two of tortillas. Also, it’s ALWAYS nice to have extra tortillas on hand for quesadillas – especially these Melting Snowflakes this time of year! Therefore, I’ll probably go a little Tortilla Crazy and make four or five batches of these awesome tasting tortillas this weekend.)

tortillassm

Beyond these foods…I’m planning on making Peanut Butter to have in the fridge for next week. (If you haven’t ever made homemade peanut butter, you HAVE to try it and see how EASY and DELICIOUS it is!!). 

I’m also going to keep working on making homemade ketchup. I’m still not entirely pleased with the recipe I’ve come up with…which, if you have been wondering, is why I haven’t shared it yet! I’m still tweaking. And tasting. And tweaking some more.

I’ll share with you early next week how the weekend of cooking and preparing went!

Are you doing any cooking/baking this weekend?

Heavenly Homemaker's Club Members: Access your homepage and all your fantastic resources here! Not a member yet? Please join us!

Mini Apple Pies (A Part of This Complete Breakfast)

February 25, 2010 by Laura 169 Comments

This post may contain affiliate links. For more information, please see our disclosure policy.

Who decided that sugar coated sugar dobbers and frosted sprinked poptarts were the best way to start the day? I also want to know why the aforementioned choices…or a pancake drenched in syrup is considered a great breakfast food…yet an apple pie is considered to be a dessert.

Remember, I like to think outside the box when it comes to breakfast. I’m all about Giant Breakfast Cookies, Breakfast Cake, Funnel Cake, Whole Wheat Donuts…and if you recall…even Homemade Ice Cream for breakfast. And what about our Valentine’s day Peach Cobbler? Yes, I think breakfast should be enticing, delicious, nutritious and sometimes even fun. And I think Apple Pie should be okay to eat for breakfast.

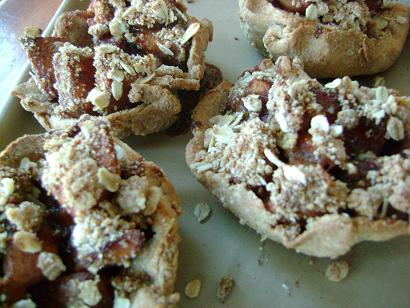
This Mini Apple Pie recipe is a new one I’ve come up with as I work on creating more Healthy Make-Ahead Meals. These freeze well (unbaked) – then you can just pull out a little pie (or 3) per person and bake.

Make them for breakfast…and your family will smell them baking, jump out of bed and come running into the kitchen and plow you over onto the kitchen floor (out of joy and love of course).

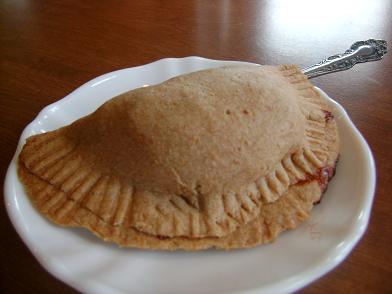
You can make these a couple of different ways:  Mini Apple Pies, or Apple Pie Pockets…depending on what works best for you. I use the same crust recipe I use for my Homemade Pizza Pockets. Follow the same instructions for the pizza pockets to create an Apple Pie Pocket…

applepiepockets2sm

Yum

The following directions are for Mini Apple Pies:

Crust:

3 1/2 cups whole wheat flour
1 t. sea salt
1 cup melted butter
1 cup plain yogurt

Stir ingredients together until thoroughly mixed. Use the dough right away to create pockets or pies…or let the dough sit overnight on the countertop to break down the phytates and make the grains more digestable. This dough is MUCH easier to work with if you work it like playdough in your hands a while before you try to roll it out.

Filling:

3 pounds of apples – about 11-12 smallish apples (any kind you like)
1/4 – 3/4 cup sucanat (your preference)
1 Tablespoon ground cinnamon

Topping:

1/2 cup whole wheat flour
1/2 cup rolled oats
2-4 Tablespoons sucanat
3 Tablespoons melted butter

To make Mini Apple Pies:

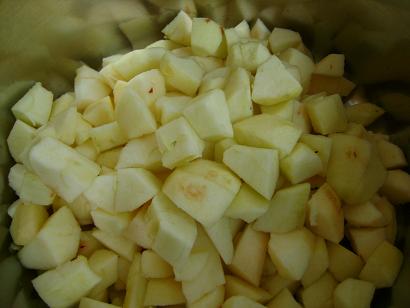
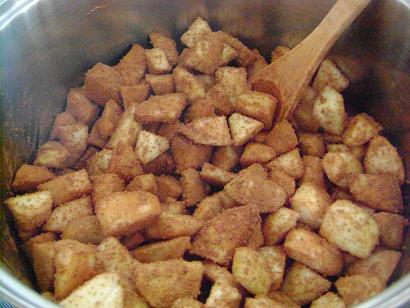
miniapplepies1smPeel apples and cut them into bite sized chunks.
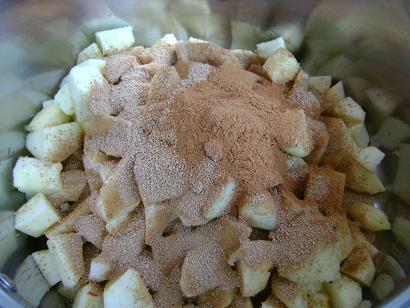
miniapplepies2smAdd sucanat and cinnamon.

miniapplepies3smStir well and cook over medium heat until apples are
tender and a syrup has formed (about 10 minutes).

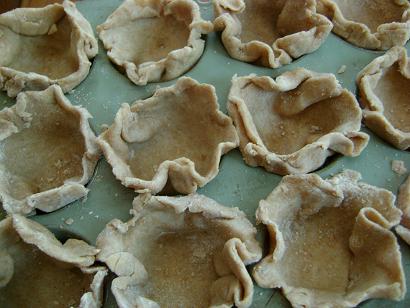
miniapplepies5smIn the meantime, separate dough into 21-24 pieces.
Roll each piece into a little circle with a rolling pen.
As you can see, I am NOT a perfectionist. If I was making these for a
ladies’ brunch or something…I might take the time to make them pretty.
But for my family of boys?
Do you think they really care if their pies are pretty?
They eat them in three minutes flat. Thus my sloppy dough squishing.

Squish (or place nicely) your dough circles into well buttered MUFFIN PANS. Using a muffin pan for these Mini Apple Pies eliminates the need to go buy 24 little mini pie pans.

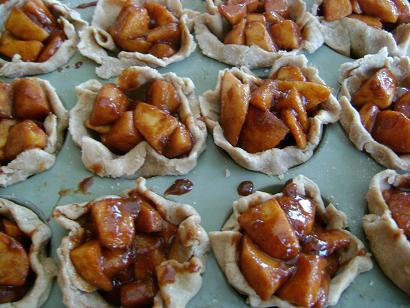
miniapplepies4smFill each (unbaked) crust with apple pie filling.
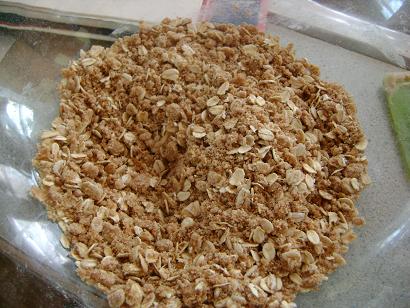
miniapplepies6smIn a bowl, stir together topping ingredients until the dry ingredients are moistened.
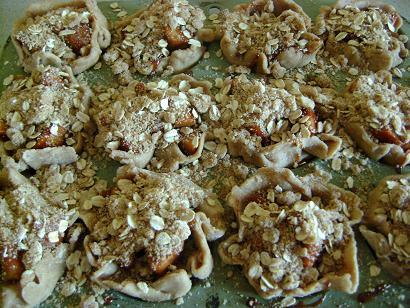
I find that melting the butter and stirring it into the flour, oats and sucanat makes a great crumb topping…much less effort than “cutting in the butter”.

miniapplepies7smSprinkle topping all over the top of your little pies.
Try if you can to be as messy about this process as I am. Sheesh.

Freeze your pies in your buttered muffin pans for a couple of hours.

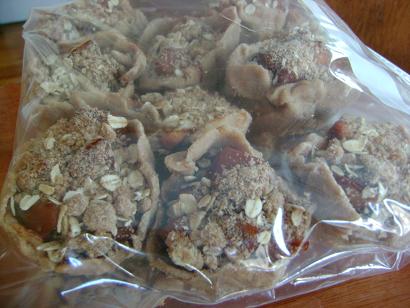
miniapplepies8smRemove your muffin pans from the freezer and allow them to sit on the counter for 10-15 minutes.  Use a fork to gently pry the pies out of the pan. Place them carefully into freezer bags and put them bag into the freezer.

To bake your Mini Apple Pies:

Take desired number of pies out of the freezer and place them on a baking pan. Bake in a 375° oven for 35-45 minutes. You can let them thaw first if you want…but I find that the frozen pies bake just fine!

Mini_Apple_Pies

And now I’d like to point out that (depending on how much you use) there is about 1/2 cup of sucanat divided by 24 little pies…making this a very healthy, very low in sugar breakfast. Much less even than my Applesauce Bread or something otherwise considered a breakfast food.

Bring on the Breakfast Pie! Shucks…maybe we should even serve it with Ice Cream!

What’s your opinion about serving cobbler or pie for breakfast? Do I sound like a weirdo?  (Wait, don’t answer that.)
——————————————-

Need more healthy and family friendly breakfast recipes? I’ve got a whole page of ’em here! And yes, would you believe…you can easily make Homemade Poptarts!!

Heavenly Homemaker's Club Members: Access your homepage and all your fantastic resources here! Not a member yet? Please join us!

Flash Freezing Chicken Fried Steak Strips

February 15, 2010 by Laura 28 Comments

This post may contain affiliate links. For more information, please see our disclosure policy.

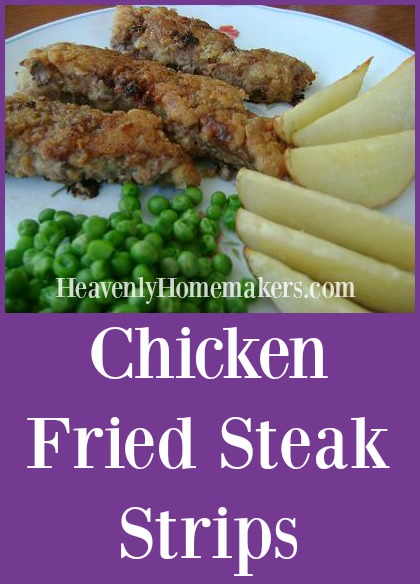
We’re gonna talk about flash freezing Chicken Fried Steak Strips. This is fantastic!

Chicken Fried Steak Strips

Right after I posted my Chicken Fried Steak Strip recipe last week, I ran into my friend Brenda. Always, after a visit with her I’m usually wishing I would have brought a notebook and pen to take notes. This girl knows stuff. Brenda doesn’t have a blog…so I get to share the stuff I learn from Brenda on mine. Then I get to look smart. Cool. For the record, I have several more “Brenda Tips” for you…most of them involving potatoes. (You’re intrigued aren’t you?)  I’ll share them with you as soon as I get a round tuit.

So here’s the tip Brenda shared with me about the Chicken Fried Steak Strips:

When you get cubed steak on sale (or when you buy several packages of cube steak from a farmer, like I do) make them all up into strips at one time, bread them, flash freeze them, then fry them as needed.

I love this tip, but my first question to Brenda was, “WAIT!  I can’t thaw and refreeze raw meat, can I?” I mean, that’s what my mama always told me.

Nope, Brenda said. That’s an old wive’s tale. (Hey, are you calling my mama an old wife? Just kidding.)  Thawing and refreezing raw meat is okay and it is safe, and Brenda, who’s done it time and again was alive and well and able to stand there in the church foyer telling me about it.

Well, if I’d have known that, I would have been flash freezing these Chicken Fried Steak Strips a long time ago, along with Chicken Strips and Nuggets and Popcorn Chicken. Funny that I never knew WHY it wasn’t safe…I just thought it wasn’t. Makes me wonder what else I’ve been believing to be true that really isn’t. (Is there any chance dusting isn’t necessary? My mama told me it was, but if anyone wants to tell me that it really isn’t important…)

It just so happens that I had a meat order delivered to my door the VERY morning after I had that conversation with Brenda…and it included five packages of cube steak.

Flash Freezing Chicken Fried Steak Strips

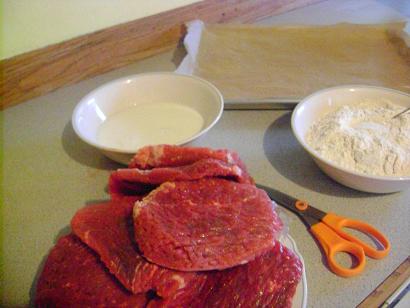
I got my big bowl of flour mixture and a big bowl of milk and got very busy making a big mess. See, that’s the point. If you’re going to make a big mess when you’re making these strips, you might as well make a big mess all at once and save yourself the trouble later! Love it!

chickenfriedsteakstripsffsmI cut each cube steak into three pieces then started double and triple dipping.
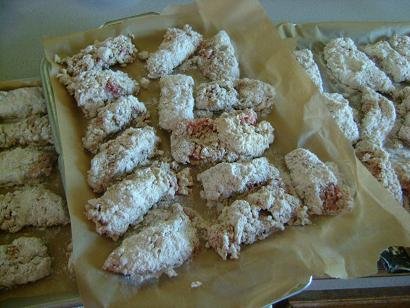
chickenfriedsteakstripsff2smI laid the breaded strips all out on cookie sheets lined with parchment paper,
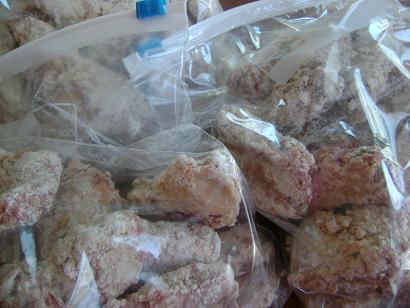
then put them in the freezer overnight.

chickenfriedsteakstripsff3sm
The next morning, I popped them off the cookie sheets and into gallon sized freezer bags. Yay! Now I have five batches of Chicken Fried Steak Strips ready to cook up for quick meals. One mess…five meals!  Thanks Brenda!

So, what have you all heard about refreezing raw meat? Am I the last to know this information?

Heavenly Homemaker's Club Members: Access your homepage and all your fantastic resources here! Not a member yet? Please join us!

Baking and Cooking to Get Ahead All Weekend (And Still Standing to Tell About it)

January 31, 2010 by Laura 25 Comments

This post may contain affiliate links. For more information, please see our disclosure policy.

I did it. Everything on the list…I got it done. By Friday late afternoon, I started to feel completely wiped out and didn’t think I could do it. Then I remembered that I needed to eat something.  Somehow because I’d been in the kitchen all day around food, my brain figured I had already eaten dinner even though I hadn’t. After I ate, I got a second wind and checked several more items off the list. Saturday I finished up and well…I’m still alive and able to tell about it.

Let’s start with a few picture highlights shall we?

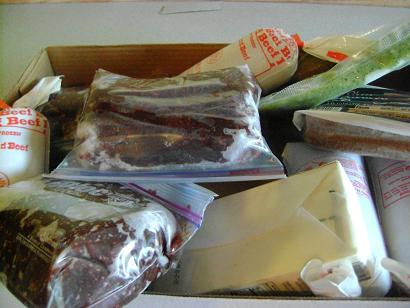
frozenfoodsmHere we have a box of frozen meat, butter and fruit. As I took this picture, one of the boys asked me if I was making a movie of the meat. I said, no of course not, because making a movie of frozen meat would just be weird. Taking a still picture? That’s not weird at all.
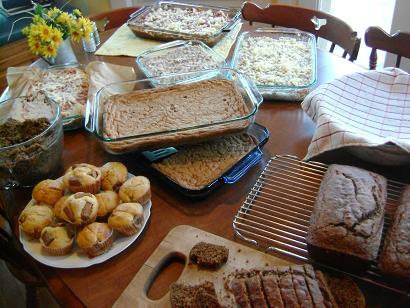
corndogmuffins,strawberrybread,cookiebars,casseroles,tortillassm Here was the result of round one of cooking/baking. I made the Chocolate Chip Cookies into bars to save time. I browned up all eight pounds of the ground venison and beef at the same time. We sliced into some of the Strawberry Bread because how could we not? The Corn Dog Muffins turned out ugly with all of their hot dogs exposed. The Cheesy Beef and Rice, Lasagna Casserole and Beefy Enchilada Bake went together easily. And that bowl with the cloth? That’s Whole Wheat Tortillas soaking for burritos.
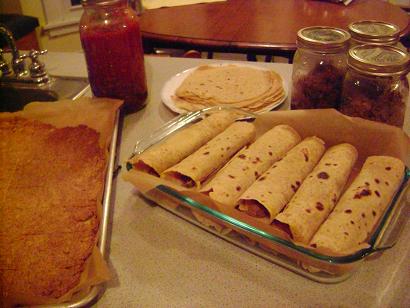
burritos,tortillas,grahamcrackers,sloppyjoes,chilsmThis is a picture of what I got done Friday night after I got my second wind. I already had the meat browned, so I cooked my beans and put some of the meat into a jar of chili. I stirred up three jars worth of Sloppy Joes. I stuck Graham Crackers into the oven. Then I made my Tortillas and finished up a big pan of Meat and Cheese Burritos. I was happy to have leftover tortillas for quesadillas. I put everything away and staggered up to bed.
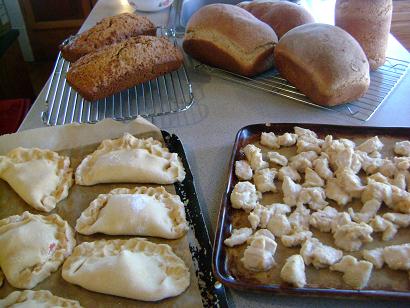
pizzapockets,bread,chicken,zuchbreadsmSaturday, I baked Zucchini Bread and Honey Whole Wheat bread. One of those loaves up there was made into Cinnamon Swirl Bread. Oh dear…which one is it? Last but not least, I put together Pizza Pockets and one batch of Popcorn Chicken.

Based on the assumption that you may have several questions for me about how I did all of this…I took the liberty to interview myself. 

Me:  How long did it take you to make all of this stuff?

Me again:  I started on Friday afternoon about 1:00 and cooked/baked/wash dishes until 9:30 that night (with a two hour break to run a couple of errands and feed the boys). Then, I started Saturday morning again around 9:00 and finished the last of the list around 3:00. 

Me:  What were your boys doing the whole time you were working in the kitchen?

Me again:  You mean besides asking me 34 times each if they could eat all the food I was making? Well, I had a list of several house cleaning chores I needed them to do, which they did ever so cheerfully and whistling whilest they worked. Yeah. Beyond that, both days we had extra kids here to play…so they all spent hours running through the house shooting nerf guns and playing hide and seek and making lego movies and eating the food I actually let them eat. Remember, my kids are five, eight, nine and twelve…I don’t think I could have pulled all this off in two days with littler ones.

Me:  When you put all the food into the freezer, how’d you do it? Have any cool storage tips?

Me again:  You mean besides standing on my head with my foot in the freezer trying to hold the frozen hamburger in while I stuffed one last loaf of zucchini bread in before everything fell out? I first tried Amy’s/Tammy’s frozen casserole method…except that I used parchment paper and it didn’t work very well. I then just resorted to using up most of my pyrex casserole dishes with lids. Matt surprised me with these for Christmas, so I had plenty.

I used freezer bags for the quick breads and cookies. Also, for the popcorn chicken, burritos and pizza pockets…I flash froze them on cookie sheets, them transfered them to freezer bags to save space.

Me:  How long will all of this food last you?

Me again:   Hard to tell. We’ll be eating quite a few of these items this week, since we have quite a few activities that will require warming up a quick meal before we leave or as soon as we get home. I’d really like to just leave a couple of the casseroles and loaves of quick bread in the freezer for a time when I’m in desperate need for a quick meal. Plus, it’s nice to have items like this on hand for a time when company comes over unexpectedly or when I need to take a meal to someone else.

With the amount of time it took me to make the food I made this weekend…and the amount of food my family can consume in one week…I can’t IMAGINE trying to pull off the OAMC (once a month cooking). Maybe I just don’t know enough about it, but trying to cook the majority of our meals for one entire month within a couple of days time…I think I’d pass out cold. 

Me:  How would you rate your bulk cooking/baking experience overall, 10 being the best?

Me again:  I’d give it an eight. I mostly loved it. It was a VERY productive two days and I actually feel like I got ahead a little bit. One thing I struggled with during this whole thing:  I have a tendency to be very task-oriented. I get into “get-it-done” mode and forget to stop and smile at my children and husband and say nice things because “oh my word, I have so much to get done so don’t bother me”. I caught myself doing that and had to make a real conscious effort to remember that my “to-do-list” was just a “try-to-list” not a “have-to-list”. 

Me:  So, did you actually get around to experimenting with homemade Catch-Up (ketchup) ?!

Me again:  Why yes as a matter of fact I did. Would you like to hear about it sometime?
—————————————————-

Be sure to check out the Once a Month Cooking Festival at Moms in Need of Mercy.

Heavenly Homemaker's Club Members: Access your homepage and all your fantastic resources here! Not a member yet? Please join us!

Playing Catch Up and Trying to Get Ahead

January 28, 2010 by Laura 20 Comments

This post may contain affiliate links. For more information, please see our disclosure policy.

I’ve been needing to do this for months. 

The problem with trying to get ahead is that before you can get ahead, you have to catch up first. But I’ve been behind, so trying to catch up has been tough, which means that getting ahead has just been a far off dream.

Oh, and that reminds me that I’ve really been wanting to experiment with making my own catch up (or ketchup or however you want to spell it). Maybe once I’ve figured out how to make homemade catch up I will feel caught up?

Is this anything like getting a round tuit?

Is this conversation making anyone else tired, or is it just me?

So here’s my point:  This weekend I’m going to attempt to get ahead in the kitchen. The idea has been in the back of my mind for weeks now and I truly love having big cooking marathons. Once I saw that Crystal and Jessica were challenging others to join them in their Freezer Cooking Days, I decided that caught up or not, I was going to try to get ahead.

I really want to put some food in the fridge and freezer to make our school days easier. Oh, and the snacking. Lately I have felt like there are not nearly enough “easy to grab” snacks available. 

This weekend I plan to let the house fall down around me while I make a huge mess in my kitchen. Actually, I plan to have my boys clean the rest of the house while I make a big mess in the kitchen. They don’t know that yet. But I have a list for them, oh yes I do.

Here’s my list for this weekend:

  • Cheesy Beef and Rice (x2)
  • Beefy Enchilada Bake
  • Sloppy Joe Meat (x2)
  • Corn Dog Muffins
  • Chili
  • Popcorn Chicken (x 2 ready to rewarm for quick lunches)
  • Beef and Cheese Burritos (x 2)
  • Lasagna Casserole
  • Homemade Pizza Pockets
  • Cinnamon Swirl Bread (2 loaves + 2 regular loaves of Honey Whole Wheat Bread)
  • Whole Wheat Tortillas (x 4 – some for burritos and some to have on hand for quesadillas and tostadas)
  • Chocolate Chip Cookies (3 batches for upcoming church activities)
  • Whole Wheat Graham Crackers
  • Strawberry Bread (x2)
  • Whole Wheat and Honey Zucchini Bread (x2)

And now forgive me while I think out loud about some of the things I need to do before I can pull off this big “cooking ahead weekend”. I’d spare you, but it needs to be done and since Matt and I have very limited conversation time these days I hesitate to use up our precious minutes to tell him how much hamburger I need to thaw for my burritos. 

  • Thaw five pounds of ground beef.
  • Thaw three pounds of ground venison.
  • Thaw a package of hot dogs.
  • Grind flour for baked goods.
  • Thaw strawberries for bread.
  • Thaw zucchini for bread
  • Thaw two pounds of butter for cookies and tortillas.
  • Thaw two pounds of cheese for burritos, pizza pockets and casseroles.
  • Soak beans for chili.
  • What am I forgetting?
  • Hey did you fall asleep?

That’s okay…that was a boring list. But it was helpful to me, so thank you for putting up with it.

Okay, well I’m pretty excited about getting all of this done! Think I can pull it off? I’ll share a report and pictures on Monday to show how it went! 

Want me to have the boys take a picture of all the flour that will be in my hair?

Oh, and after all of this…if I’m still standing upright…I REALLY AM going to try to make homemade catch up….ketchup. Maybe?

Heavenly Homemaker's Club Members: Access your homepage and all your fantastic resources here! Not a member yet? Please join us!

High Five Recipes: Super Simple Burritos

January 28, 2010 by Laura 47 Comments

This post may contain affiliate links. For more information, please see our disclosure policy.

All this time, I thought burritos was spelled “b-u-r-r-i-t-o-e-s”. Duh, I know. Spelling is not my gift. (You’ve probably figured that out by now.)  I had “burritoes” typed in this recipe, but it just didn’t look right.

High Five Recipes 2

So, I did a swag search for “burritoes” and you know what it asked me?

“Did you mean burritos?”

Well, that answered my question. But sheesh, it’s like the computer is mocking me when it does that, you know?

Super Simple Meat and Cheese BurritosYum

1 pound ground beef, venison or turkey
sea salt to taste
3/4 cup shredded cheese (I use raw white cheddar)
1 cup salsa
10-12 whole wheat tortillas

Brown meat in a large pan. Salt to taste. Remove from heat and stir in salsa and shredded cheese. Spoon 2-3 tablespoons onto a tortilla and wrap.

To Freeze:  Lay burritos barely touching in a 9×13 freezer safe dish. If you are freezing more than one layer of burritos, place wax paper or parchment paper between the layers to prevent them from sticking together.

To Re-Heat:  Place burritos on a baking sheet. If burritos are thawed, warm in the oven for about 15 minutes until heated through and through. If burritos are frozen, leave them in the oven for about 30 minutes. They might get a little crispy on the outside, but yum!

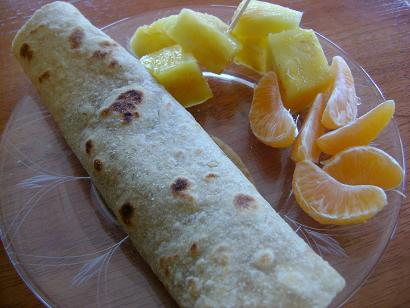
burritosm

Super Simple Bean and Cheese Burritos

3 cups cooked black or pinto beans
1 cup salsa
3/4 cups shredded cheese
sea salt to taste
8-10 whole wheat tortillas

Mix beans, salsa, cheese and salt. Wrap 2-3 tablespoons in each tortilla. Freeze and reheat as above.

Not flavorful enough for ya? Add any one or more of the following (which will mean that this recipe will no longer be a High Five Recipe…but who’s counting?):

  • 3 Tablespoons chopped onion
  • 1 teaspoon chili powder
  • 1/2 cup chopped olives
  • 1/2 cup cooked sweet corn

Or, make the ingredients go a little farther by stirring in 1 cup cooked brown rice.

Why This is One of My Very Favorite Recipes:

  • Everyone in my family loves them. The boys cheer when I make them.
  • They are SO easy to make!
  • They freeze VERY well. In fact, instead of making them just before serving time, I much prefer to make a triple batch of these, freeze them and have them ready to go for a quick meal.
  • When I have them made ahead of time, they are the EASIEST lunch to serve:   Heat…eat…done.
  • They are very low in cost, especially if you use beans.
  • They are good and healthy.
  • They are a PERFECT item to take to someone who has just had a baby or a surgery or a whatever. The recipient can warm them up as they need them. I take these to people ALL the time!
  • They keep my children full for longer than ten minutes.
  • Last but not least, I now know how to spell them correctly. ;)
Heavenly Homemaker's Club Members: Access your homepage and all your fantastic resources here! Not a member yet? Please join us!
« Previous Page
Next Page »

Join Our Community!

 Facebook Twitter E-mail Instagram Pinterest

Popular Posts

~ Will All of the Real Moms Please Stand Up?
~ Easy! Stir-and-Pour Whole Wheat Bread
~ How to Make Gatorade
~ 31 Real Food Breakfast Ideas
~ Dear Teenage Girls...
~ When Mom Takes a Step Back
~ The Inexpensive Health Insurance We Love!
~ Let's Talk Real Food Grocery Budgets

Check out our latest posts!

  • Big Family Food and Fun: May 17-23, 2026
  • Easy Side Dishes for Summer
  • Big Family Food and Fun: May 10-16, 2026
  • Big Family Food and Fun: May 3-9, 2026
  • Help Your Kids Become Independent in the Kitchen!
Home  ~  Simple Meals  ~  Club Membership  ~  Shop  ~  Privacy Policy  ~  Disclosure  ~ Contact

Copyright © 2026 · Beautiful Pro Theme on Genesis Framework · WordPress · Log in