Heavenly Homemakers

Encouraging women in homemaking, healthy eating and parenting

  • Home
    • About
    • FAQs
  • Recipes
    • Bread and Breakfast
    • Condiments
    • Dairy
    • Main Dishes
    • Side Dishes and Snacks
    • Desserts
    • Gluten Free
    • Instant Pot
    • Crock Pot
    • Heavenly Homemaker’s Weekly Menus
  • Homemaking
    • Real Food Sources
  • Store
  • Contact
    • Advertise
    • Disclosure
    • Privacy Policy
  • Simple Meals
  • Club Members!

Healthy Crockpot Recipes: Apple Butter

October 25, 2011 by Laura 44 Comments

This post may contain affiliate links. For more information, please see our disclosure policy.

Many of you offered suggestions as to how to make Apple Butter – thank you!

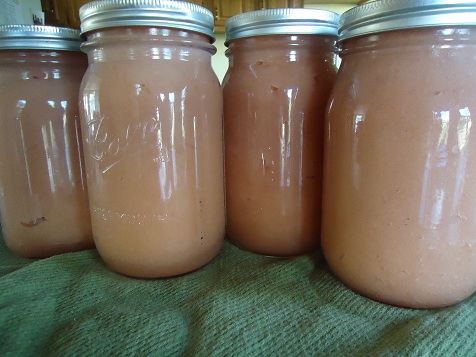
My house smelled wonderful for hours, thanks to all of you! I decided to experiment with my friend Leesa’s apple butter method, and found it to be very simple and delicious. I only made a small amount this time, since I was experimenting – so you’ll want to double or triple this recipe if you want a larger amount. When I started with one quart of applesauce, I ended up with two and a half – half pints of apple butter. However, it is very clear to me that writing half – half just looks weird and confusing. It may make more sense for me to say that one quart of applesauce resulted in 2.5 half-pint jars.

Or we could say that I ended up with one full pint plus a half of a half pint of apple butter. This is, of course, the same as two and a half cups of apple butter, which is otherwise known as five half cup portions of apple butter, better known as ten – 1/4 cup portions, which we all know is precisely 20 – half of a half of a half of a half of a half pints of apple butter. Give or take a half of a half of a pint.

I’m done now.

Homemade Apple ButterYum

Healthy Crockpot Recipes: Apple Butter
 
Save Print
Author: Laura
Ingredients
  • 1 quart homemade apple sauce
  • 2 Tablespoons sucanat
  • 1 teaspoon cinnamon
Instructions
  1. Stir ingredients into a crock pot.
  2. Cook on low for about six hours on low setting, with LID OFF, stirring occasionally.
  3. Store the apple butter in the refrigerator - or process in a hot water bath for 10 minutes to seal.
  4. If the jars are sealed properly, you can store your apple butter in the pantry until you're ready to serve.
3.4.3177

Find my Homemade Apple Sauce recipe here. Read information on how to process in a hot water bath for 10 minutes to seal your jars here.

apple_butter

Caution:  Contents cooking in crock pot are hot. Refrain from sticking a finger into the crock pot for a lick, even though the delicious smell will create a major temptation. Dipping in with a teaspoon is obviously a much better option. No double dipping allowed. In addition, be aware that partaking in too many licks from the crock pot will result in a smaller amount of finished product, which will mean that all of the math I labored over above, rounding carefully to the nearest half of a half pint, will be null and void.

Heavenly Homemaker's Club Members: Access your homepage and all your fantastic resources here! Not a member yet? Please join us!

Gratituesday: The Fall I’ve Always Wanted

October 24, 2011 by Laura 24 Comments

This post may contain affiliate links. For more information, please see our disclosure policy.

No, I didn’t fall. Well, actually I did stumble down a few stairs a couple of days ago, and managed to look perfectly ridiculous in front of my teenager, without hurting myself (thankfully). Eh, it was good for a laugh.

The fall I’m referring to in this post is the season. Just about every Autumn I can remember in Nebraska has seemed to only last for a grand total of 20 minutes. We typically go from very hot to very cold with a very short time of “perfect fall weather” in between.

This year has been absolutely gorgeous!!! We’ve had day after day after day of beautiful weather that is in the 60’s or 70’s. I’ve been so thankful for this, and was reminded again today of the blessing of such pretty weather. Even after the sun started to go down tonight, it was still warm enough for us to play outside comfortably. In fact, we all headed out for a little trampoline time (which I am likely to pay for tomorrow – but shucks, it sure was fun).

Here is Elias in mid-flip, which I have to say, was not easy to capture forever on camera. I think I finally got this picture after about seven tries. It’s a good thing he enjoys doing flips.

Brace yourself for the next one. We found that if Malachi would lie down in the middle of the trampoline while I jumped in circles around him “bouncing him” for a few minutes, a little static electricity action began to take place. We laughed so hard at this, I almost fell off the trampoline. But I didn’t. That’s not the kind of fall I’ve always wanted. ;)

I’m grateful for this wonderful fall, and all the joy and fun that has come with it.

What are you thankful for this Gratituesday? Write about it on your blog, then come link up with us here. If you don’t have a blog, be sure to leave a comment letting us know what you’re grateful for!

If you are linking up a blog post for Gratituesday,
please copy and paste the following sentence into your post! Thanks!

Join us for Gratituesday at Heavenly Homemakers!

Heavenly Homemaker's Club Members: Access your homepage and all your fantastic resources here! Not a member yet? Please join us!

Leaving the Skins on Homemade Applesauce and Apple Pies

October 23, 2011 by Laura 59 Comments

This post may contain affiliate links. For more information, please see our disclosure policy.

Slowly but surely I’m getting a few things figured out with this applesauce-making business. Many of you left comments sharing that you were shocked that with all the canning I do, I don’t have a Victorio. Others were shocked that I take off the apple skins. Yep, I’m just learning along with the rest of us here. I didn’t grow up doing any canning, so I’m learning as I go. I’d never even heard of a Victorio or a Squeezo before last week, so I’ve appreciated your ideas and suggestions!

Since I don’t have a Victorio strainer, nor do I know anyone who has one I can borrow, and since I’ve got apples that need to be put up right now, I went ahead and tried yet another applesauce method. Ladies and Gentlemen, we have a winner! (I think we will probably end up investing in a nice strainer, especially for tomato sauce. But for apples, can you all reassure me that the bad, wormy parts in the apples really do get strained out? I’m still hesitant about that since the apples I work with aren’t always pretty once I cut into them. Really – do I just quarter them and throw them all into the pot, worms and all?)

This time, I followed the advice of leaving the skins on and blending them up along with the apples. I hesitated with this idea at first because I figured there would be little bits of apple peelings in the sauce and that my family would rebel. Well, what’s a mother to do, but to try the idea and not tell her family what she’s done?

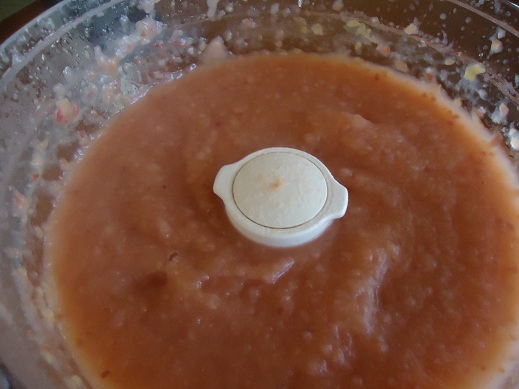
Sure enough – I cooked my apples, ran it all through my food processor, served it up, and would you believe – not one boy or husband knew that there were apple peelings in the applesauce!

Not only did this method save lots of time, we’re getting a healthier applesauce. Plus, there was much less waste – so I got several more quarts of applesauce for my efforts!! Ahhh, I’m so happy about this.

Applesauce Instructions:

Quarter and core apples, cutting out bad spots. Cook apples in a large pot, following these directions. When the apples are soft, run them through a food processor until smooth. See, the peelings just get blended up in there! (I don’t have an immersion blender, but according to many of you, sticking the immersion blender directly into the pot saves yet another step. I may ask for one for Christmas.)  :)

Yum

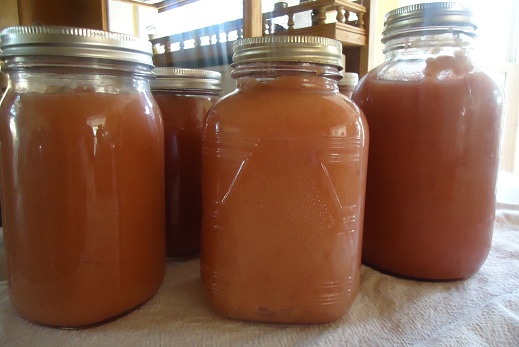
I used some of my “special” jars this time, because this applesauce is so pretty. These jars came from my late friend Lorna Mae. I miss her. :(  I think she’d be thrilled that her jars are being put to good use for my family.

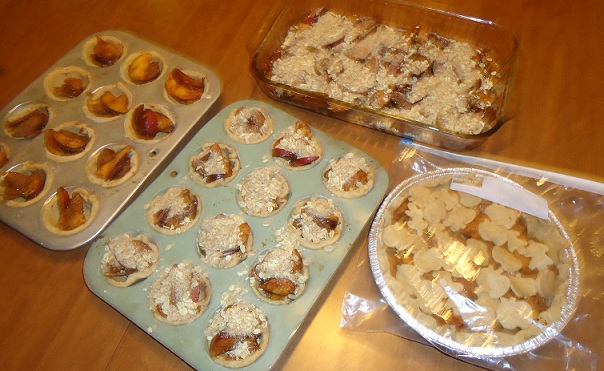
I also made a bunch of mini apple pies, a big apple pie and an apple crisp – all with apple skins left on. I may never peel another apple again.


So there we have it. Leaving the skins on the apples when making applesauce and apple pies saves time and adds nutrients. Now, on to the Apple Butter…

Heavenly Homemaker's Club Members: Access your homepage and all your fantastic resources here! Not a member yet? Please join us!

Menu Plan for the Week

October 23, 2011 by Laura 27 Comments

This post may contain affiliate links. For more information, please see our disclosure policy.

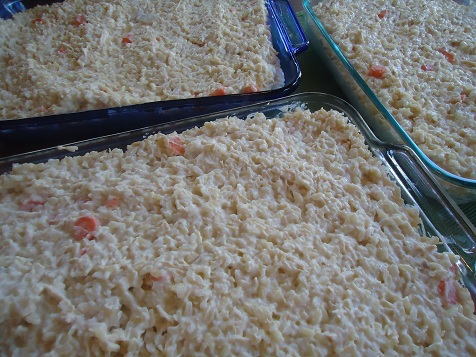
Tonight for High School Huddle, I made three big dishes full of Creamy Chicken and Rice Casserole. I also made a big whole wheat chocolate sheet cake plus 24 cupcakes.

Funny story (or maybe boring story, whichever way you want to look at it):  As I was planning tonight’s huddle meal (for 35 people), I consulted my high schooler to see what he thought I should serve with the chicken and rice. Because he has two hollow legs, he suggested that rolls would be good, but I got overwhelmed with that because I was already making cakes and casseroles. Brilliant child that he is, my son said, “Maybe you could just buy some rolls this time.” Oh duh. I forget these things are an option. Therefore, everything else is homemade, but I bought rolls to feed the group tonight. This afternoon, instead of baking rolls, I’m going to take a nap. I like this plan. ;)

Here’s our menu for this week:

Sunday, October 23
Marriage Class Treat – Apple crisp, coffee
Easy noodle stir fry with broccoli and carrots, grapes
Huddle – Creamy chicken and rice casserole, green beans, homemade dinner rolls, whole wheat chocolate sheet cake and cupcakes with fudge frosting

Monday, October 24
Angie’s pumpkin waffles (can’t wait to try this new recipe!)
Taco corn fritters, applesauce
Three cheese marinera with spaghetti noodles, tossed salad, corn

Tuesday, October 25
Chocolate chocolate chip muffins, bananas
Homemade  beef summer sausage, crispy cheese crackers, carrot sticks with ranch, apples
Roast, carrots, potatoes, green beans, coconut flour muffins

Wednesday, October 26
Scrambled eggs, hashbrowns, creamy orange cooler
Popcorn chicken, steamed broccoli and carrots, cottage cheese
Bbq meatballs, baked potatoes, peas

Thursday, October 27
Breakfast burritos, pears
Pigs in a blanket, apples or bananas
Chicken noodle soup with carrots, fruit salad

Friday, October 28
Peanut butter honey toast, applesauce
Bean and cheese burritos, raw veggies
Homemade pizza, apples

Saturday, October 29
Whole wheat cinnamon rolls, fruit
Chicken alfredo, tossed salad
Attending a baby shower – taking Pumpkin Chocolate Chip Muffins and Apples with Caramel Apple Dip

Heavenly Homemaker's Club Members: Access your homepage and all your fantastic resources here! Not a member yet? Please join us!

Read Together

October 20, 2011 by Laura 9 Comments

This post may contain affiliate links. For more information, please see our disclosure policy.

~Appreciate Your Spouse~Buoyancy in Marriage~Consult Your Partner~
~Dream Together Part One ~Dream Together Part Two~Empower Your Spouse~
~Have Fun With Your Spouse~Give to One Another~Honor Each Other~
~Be Intentional~Jubilee~Kingdom Focused~Listen~~Mentor Relationships~
~Nourish~Own It~Pray With Each Other~Quick to Listen~

Read Together

Being on the Same Page – Matt’s Thoughts

Variety in marriage is fun. So, when it comes to reading together, mix it up, taking into consideration what would be good for the two of you. Laura and I have never gone wrong by reading books, articles, posts or other material that is written to help marriages. Even if it is not insightful for our context, at the very least we are side by side trying to align ourselves with each other. We have read from the Bible and discussed it and we have read material that is just plain fun…like a joke book. We don’t read together every night, but we talk about what each of us is reading separately. I urge you to read at least one book together every year that is specifically for marriage relationships written by an author(s) who has a Christian worldview. Whether you borrow it from your local library, church library, or a friend, or whether you purchase it so that you can own it and reference it, the key word here is TOGETHER. If only one of you reads the book, then you’re not on the same page…pun intended. Make it happen TOGETHER.

If you are like us, we have good ideas like reading a book together and then we blink and 2011 is almost history. This “good idea” of reading together probably won’t take place unless you agree on the book and schedule it TOGETHER. Of course life happens and schedules need to be rearranged on occasion, but our experience has been that the time together and discussion that follows connects the two of us.

Yes, it needs to be intentional, but beware of the checklist mentality and the critiquing spirit – as in critiquing the author. Speaking from experience, I have needed to choose to have the right attitude when it is reading time. I remember one particular couple’s devotional book that I was counting down the pages ’til it was complete. It just wasn’t doing anything for me. The reason it wasn’t doing anything for me was because of my attitude. Once I stopped the countdown and ceased being critical of the writer’s style, then the discussion about its relativity to my marriage improved.

A suggestion if you are having trouble deciding: Visit with other couples who have healthy marriages and see what they would recommend reading and ask them why they would recommend it.

Yeah, What Matt Said – Laura’s Thoughts

I think Matt said all of this wonderfully. The only thing I’d like to add is this:  For those of you who don’t enjoy reading, try books on CD. (I almost said “books on tape”, which like totally tells you that we grew up in the 80’s and that I used to have big hair.)  You may not love every book or concept you read together, but be sure to ask yourself if you don’t love it because it’s difficult to hear. Sometimes the truth hurts. Allow God to stretch you and challenge you with books that enrich your marriage.

Books That Have Benefitted Us or Other Couples (alphabetical order):

Created to Be His Help Meet by Debi Pearl
His Needs Her Needs by Willard F. Harley Jr.
Intended for Pleasure by Ed Wheat MD and Gaye Wheat
Love and Respect by Dr. Emerson Eggerichs
Loving Your Marriage Enough to Protect It by Jerry B. Jenkins
Men are from Mars, Women are from Venus by John Gray
Night Light by Dr. James & Shirley Dobson
Saving Your Marriage Before It Starts: Seven Questions to Ask Before (and After) You Marry by Les & Leslie Parrot  (This is what we are currently reading and it’s good for us even after 17 years of marriage)
The 5 Love Languages by Dr. Gary Chapman

What have you and your spouse read together that you would recommend?


Ladies, we know you’re reading here more often than the guys. ;)  We’d love husbands to read this article as well. If you feel so inclined please send the link to your husbands, or if it’s easier, we’ve created a downloadable article for you to quickly print off and share. Healthy Marriage Tips A to Z – Read Together

Heavenly Homemaker's Club Members: Access your homepage and all your fantastic resources here! Not a member yet? Please join us!

Organize Your Pantry and Shelves with CanOrganizer – A Giveaway!

October 20, 2011 by Laura 255 Comments

This post may contain affiliate links. For more information, please see our disclosure policy.

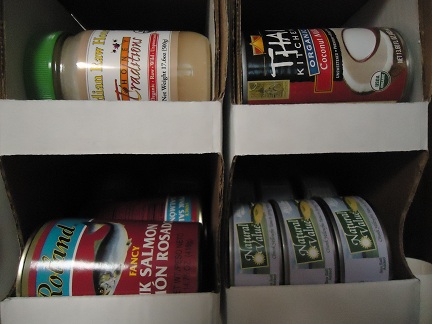
Remember my scary storage room clean up and how I like to stare at my bulk food? I’m very excited that my new organizers from CanOrganizers.com help even more to keep my food storage area organized, which makes it even more fun to stare at my groceries. (geek)

I don’t use many canned foods, but I do try to have a few canned items on hand at all times for quick meals. I’ve got my new CanOrganizers stocked with our organic coconut milk, canned salmon and tuna (all from Amazon) and some organic raw honey (from Tropical Traditions). The kids loved helping me put the cans into the containers – you put them into the top, then they roll back and fall to the bottom. This makes it simple to grab a can, then a new can will automatically roll to the front for easy access!

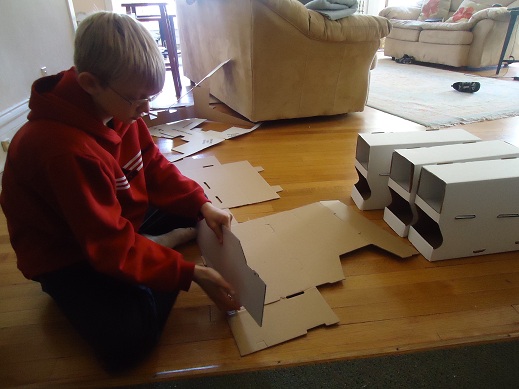
I put my 11 year old on the task of putting together our CanOrganizers. They have a great video to watch which helped us figure out how to assemble them. It was a bit of a learning curve as we figured this out – let’s just say Justus and I bonded a little bit over pieces of heavy cardboard. But, once we figured out the first one, the other three went together fairly quickly!

Here’s some helpful information from CanOrganizer:

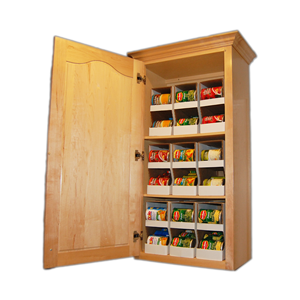
The 11″ deep Cupboard Organizer is perfect for smaller spaces like your cupboard where you need to maximize space. This is ideal where a pantry or extra storage may not be available. You can simply use one Organizer or many depending on your needs. Fill up your cupboard so you can easily find what you’re looking for!

The 16″ deep Shelf Organizer is deeper so you can store even more cans! Designed to fit nicely on your standard shelf so it is perfect for storage areas like your garage or storage room.

And finally the 22.5″ deep Pantry Organizer is the deepest of the bunch. This system is optimal for those deep pantries or storage racks where you have plenty of space. You will be amazed how many you can fit in the Organizer and well organized your food storage will be. Now you can hit those canned good sales and stock up for your family, saving money and having food on hand for whenever you need it.

These CanOrganizers come four to a pack, making them very economical – a perfect way to get yourself organized inexpensively! Plus, through the end of October, CanOrganizer is offering a 10% discount to all of us, by using the code:  HOME at check-out.

Interested in winning a pack of CanOrganizers? Leave a comment on this post letting us know which size would work best for you! I’ll draw two random winners on Monday, October 24.

This giveaway is now closed, thank you!

Heavenly Homemaker's Club Members: Access your homepage and all your fantastic resources here! Not a member yet? Please join us!

Healthy Homemade {Pink} Applesauce

October 19, 2011 by Laura 167 Comments

This post may contain affiliate links. For more information, please see our disclosure policy.

For years, I’ve used this method of making applesauce. The past couple of years, I’ve decided to try something new, in an effort to cut down on preparation time and to make the homemade applesauce a bit healthier. Still, I have to say, this process still takes quite a bit of time and effort. After spending several hours making applesauce yesterday and only yielding five quarts – I felt a little bit discouraged. Several of you have mentioned that a Victorio Food Strainer is a worthwhile investment. After looking into this, I have to say that Matt and I are talking seriously about making the purchase. Check out this pretty tool. Does that not look like a life saver when making applesauce and tomato sauce?

Here is a run-down of yesterday’s applesauce process:

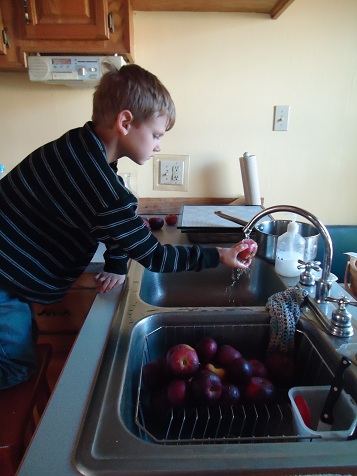
We used a mixture of apples, most of which had very dark red skin (Empire, I think). Cooking the apples with skin on created a lovely pink colored applesauce. To start, we gave the apples a good washing. I looked around for the cutest assistant I could find. Since everyone else was busy with math and vocabulary lessons, Malachi got the job.

Yum

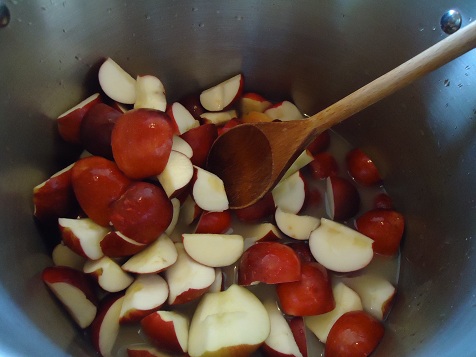
While he was washing apples (about 18 pounds), I prepped my huge stock pot. I stirred 2 heaping tablespoons of Vitamin C Powder (ascorbic acid to keep the apples from turning brown) into 5 cups of water.

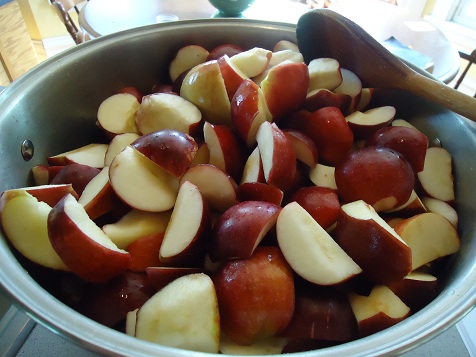
Then, I began to quarter and cut out all yucky parts. These apples were mostly organic (he had sprayed a little bit early on before the fruit set on), so there were some wormy parts to cut out. As I added apples, I stirred them around so that they would be coated with the ascorbic acid/water to  keep them from browning.


I continued this process until my pot was full and until my right hand was cramped permanently into a claw-like position.

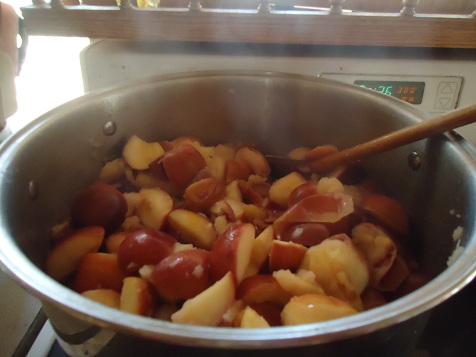
I then cooked the apples on the stove for about an hour, stirring occasionally, until they became nice and soft.

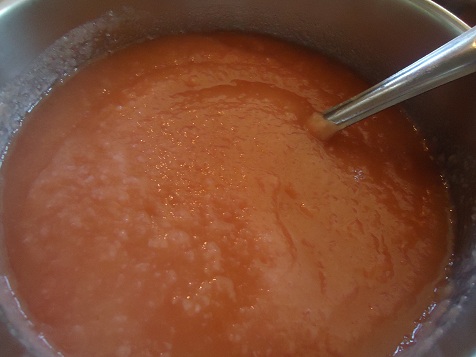
Next I blended the apples in my Blendtec, careful to dip down to the bottom of the pot to get some of the juices with each scoop. I blend until the peelings are completely pureed along with the flesh of the apples. This makes the applesauce pretty and creamy!

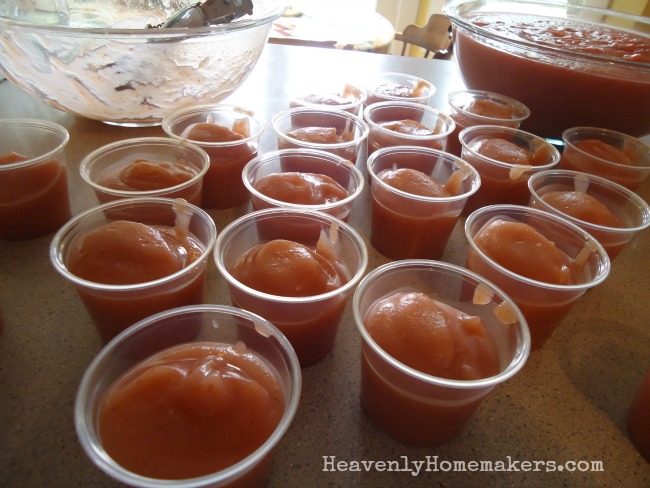
Applesauce Cups

I ended up with smooth, beautiful, delicious applesauce that my family had seconds and thirds of at lunch time.

I then canned four remaining quarts (using this water bath process for 20 minutes) and put them into my pantry.

What do you use to make applesauce? I highly recommend the Blendtec to make this process super easy! (I also love the Blendtec for oodles of other kitchen tasks.)

I have yet to make apple butter or any of the other tasty apple dishes I talked about earlier this week. I do believe that next I will experiment with my crock pot and apple butter. Which means that I really need to make some whole wheat biscuits. Doesn’t apple butter spread on a hot, fresh biscuit sound wonderful?

Heavenly Homemaker's Club Members: Access your homepage and all your fantastic resources here! Not a member yet? Please join us!

Healthy Crock Pot Recipes: Turkey Sausage and Red Bean Stew

October 18, 2011 by Laura 30 Comments

This post may contain affiliate links. For more information, please see our disclosure policy.

This Turkey Sausage and Red Bean Stew is a pretty awesome comfort food!

How nice is it that I put this stew into my crock pot before a soccer game, then came home to dinner all ready and waiting for us to eat? In fact, my crock pot was so nice that as we walked in the door, it scooped the prepared stew into six serving bowls, poured milk for us to drink, set the table and sang us a song while we gathered around. Okay, not really. But still, having a hot meal ready and waiting made me feel like someone else had done all the work.

This stew is especially easy to make if you already have turkey sausage and red beans cooked up ahead of time. I typically make six pounds of the sausage at a time, then freeze it in one pound packages, making it easy to throw into a meal like this one.

Turkey Sausage and Red Bean StewYum

Healthy Crock Pot Recipes: Turkey Sausage and Red Bean Stew
 
Save Print
Author: Laura
Serves: 6-8
Ingredients
  • 1 pound turkey sausage (browned)
  • 2 cups cooked red beans or 1 can (15 ounces) small red beans
  • ½ cup brown rice (uncooked)
  • 1 cup water
  • 1½ cups corn (frozen or canned)
  • 2 cups tomato juice
  • ½ cup chopped sweet green pepper (more if you like)
  • salt and pepper, to taste
Instructions
  1. Combine all ingredients in a slow cooker.
  2. Cook on low setting for 6 hours.
  3. This stew is great served with hot cornbread and a glass of milk.
  4. It is also gluten free - a bonus for those of you with GF needs!
3.4.3177

You need this recipe: Turkey Sausage

Crock Pot Turkey Sausage and Red Bean Stew

With my crock pot cooking our dinner for us, now all I need is an appliance that will clean my kitchen for me. Oh wait – that’s what the kids are for. We make kitchen clean-up a family project – here’s a post explaining more, along with a free downloadable kitchen chore chart.

Is it stew weather where you live? (If it’s still warm and sunny at your house, break it to me gently.) ;)

Heavenly Homemaker's Club Members: Access your homepage and all your fantastic resources here! Not a member yet? Please join us!

Reminder…

October 18, 2011 by Laura 1 Comment

This post may contain affiliate links. For more information, please see our disclosure policy.

Just a quick reminder for those of you who purchased a Heavenly Homemakers Gift Certificate at half price last week –

They expire one week from date of issue, which means that they will be expiring within just a few more days. If you haven’t redeemed yours already, head to our shop and use them before they are no longer valid!

Heavenly Homemaker's Club Members: Access your homepage and all your fantastic resources here! Not a member yet? Please join us!

Did You Know That Today is Gratituesday? – Share the Love

October 17, 2011 by Laura 35 Comments

This post may contain affiliate links. For more information, please see our disclosure policy.

We’ve been celebrating Gratituesday at Heavenly Homemakers since January of 2008. That’s about three months after I began blogging – back when about four people read this regularly (and I was one them). I love how Gratituesday has grown since then. I love that now, many of you take special notice on Tuesdays and search your heart for something to be thankful for. Some days it’s easy, some days it isn’t – but when we truly look at all God has done for us, there is always something to be grateful for.

I was so tickled when I read my friend Jill’s Gratituesday post last week. It seems that she’s been taking the Gratituesday idea to the bank, to McDonalds – to wherever she happens to be going each Tuesday. She’ll say, “Hey, did you know today is Gratituesday?” She may receive a questioning look initially, but after she’s finished explaining that Gratituesday is a day we pause and reflect on what we’re grateful for, she’s likely to have changed that person’s outlook on the day.

I felt challenged by this idea and wanted to share it with you. I’d love to see Gratituesday go beyond this blog (and yours when you link up!). Think of the grateful attitude that could spread through Facebook. And how about taking Gratituesday offline like my friend Jill has been doing? What if you took it to your workplace? Or to businesses as you run errands? How about sharing it with your family around the dinner table? Or talk about what you’re grateful for on the car ride to gymnastics.

Being grateful is a huge part of stepping outside of ourselves and recognizing that God is truly at work among His people. Take time now to reflect, then share with us – either on your blog or by comment on this post. Then, take it one step further. Share with others beyond this blog. Ask your friends on Facebook to share what they are grateful for this Gratituesday. Talk it up amongst your “real life” friends. Focus on being grateful and encourage others to do the same. A little gratitude goes a long way.

Heavenly Homemaker's Club Members: Access your homepage and all your fantastic resources here! Not a member yet? Please join us!
« Previous Page
Next Page »

Join Our Community!

 Facebook Twitter E-mail Instagram Pinterest

Popular Posts

~ Will All of the Real Moms Please Stand Up?
~ Easy! Stir-and-Pour Whole Wheat Bread
~ How to Make Gatorade
~ 31 Real Food Breakfast Ideas
~ Dear Teenage Girls...
~ When Mom Takes a Step Back
~ The Inexpensive Health Insurance We Love!
~ Let's Talk Real Food Grocery Budgets

Check out our latest posts!

  • Big Family Food and Fun: September 20-26, 2026
  • Big Family Food and Fun: September 13-19, 2026
  • Big Family Food and Fun: September 6-12, 2026
  • Big Family Food and Fun: August 30-September 5, 2026
  • Big Family Food and Fun: August 23-29, 2026
Home  ~  Simple Meals  ~  Club Membership  ~  Shop  ~  Privacy Policy  ~  Disclosure  ~ Contact

Copyright © 2026 · Beautiful Pro Theme on Genesis Framework · WordPress · Log in