Heavenly Homemakers

Encouraging women in homemaking, healthy eating and parenting

  • Home
    • About
    • FAQs
  • Recipes
    • Bread and Breakfast
    • Condiments
    • Dairy
    • Main Dishes
    • Side Dishes and Snacks
    • Desserts
    • Gluten Free
    • Instant Pot
    • Crock Pot
    • Heavenly Homemaker’s Weekly Menus
  • Homemaking
    • Real Food Sources
  • Store
  • Contact
    • Advertise
    • Disclosure
    • Privacy Policy
  • Simple Meals
  • Club Members!

Teamwork

November 4, 2011 by Laura 5 Comments

This post may contain affiliate links. For more information, please see our disclosure policy.


~Appreciate Your Spouse~Buoyancy in Marriage~Consult Your Partner~
~Dream Together Part One ~Dream Together Part Two~Empower Your Spouse~
~Have Fun With Your Spouse~Give to One Another~Honor Each Other~
~Be Intentional~Jubilee~Kingdom Focused~Listen~~Mentor Relationships~
~Nourish~Own It~Pray With Each Other~Quick to Listen~Read Together~Selfless~

Teamwork

1+1 is … – Matt’s Thoughts

I absolutely love teamwork. I loathed my chores when I was young: folding laundry, doing the dishes, dusting, vacuuming, cleaning the sinks and toilets. I couldn’t do these activities while playing Atari or eating a Scooby snack with “Raggy.” Then my sister and I figured out synergy. Well, we didn’t know the word synergy or its definition – a mutually advantageous conjunction – at  ages 11 and 12 but we found out that we could get our chores finished quicker if we worked together. The teamwork routine was that we put off our chores until 30 minutes before mom would be getting home and first we’d frantically do the chores that had to be completed going solo. Then we’d holler from another room, “Ready to do teamwork?” Then, it was almost fun as we accomplished more in a few minutes than we could have by ourselves in twice the amount of time. The flurry of joint activity would complete just as mom drove up and after a high five we could act like our chores had been finished hours ago.

What if in marriage we could “do teamwork”? The Teacher says in Ecclesiastes 4:9-12, “Two are better than one, because they have a good return for their labor:  If either of them falls down, one can help the other up. But pity anyone who falls and has no one to help them up. Also, if two lie down together, they will keep warm. But how can one keep warm alone? Though one may be overpowered, two can defend themselves. A cord of three strands is not quickly broken.”

Man’s math is 1+1=2; God’s math is 1+1 > 2

In a healthy marriage because of God’s grace two individuals united accomplish more than the sum of its parts. To sum up and confuse more, God makes the two become one (1+1=1) and yet the two are greater than two (1+1 > 2).

The Negative Equation – Laura’s Thoughts

God’s math works every time. When a couple is on the same page and selflessly working together, they can accomplish so much more for God’s kingdom than they can accomplish as individuals.

But I’d also like to throw in another math equation. In a marriage, if both spouses aren’t working together in a selfless way and are instead tearing each other down, 1+1 can actually be less than one.

Since that equation doesn’t match up with God’s math, I guess we’d need to say that 1+1 < 1 would be the math of the Enemy. Satan would love to see you and your spouse destroy each other so that not only are you no longer effectively pursuing God’s kingdom as a strong Christian couple, you aren’t even productive as an individual.

Which equation are you going to choose? Are you going to pursue teamwork, which in effect produces much for the Kingdom; or are you going to live for yourself and treat your spouse in a way that chips away at their productivity?

If your spouse isn’t building you up, don’t let that give you an excuse for being less productive. And if you are the spouse that needs to step it up and become more of a team player, consider yourself kicked in the pants.

Be what God calls you to be. Anything less just simply doesn’t add up.

Ladies, we know you’re reading here more often than the guys. ;)  We’d love husbands to read this article as well. If you feel so inclined please send the link to your husbands, or if it’s easier, we’ve created a downloadable article for you to quickly print off and share. Healthy Marriage Tips A to Z – Teamwork

Heavenly Homemaker's Club Members: Access your homepage and all your fantastic resources here! Not a member yet? Please join us!

Kitchen Mill Wheat Grinder Giveaway!

November 3, 2011 by Laura 2,142 Comments

This post may contain affiliate links. For more information, please see our disclosure policy.

You wouldn’t be interested in another grain mill giveaway would you? Ah, well then, let’s do it!

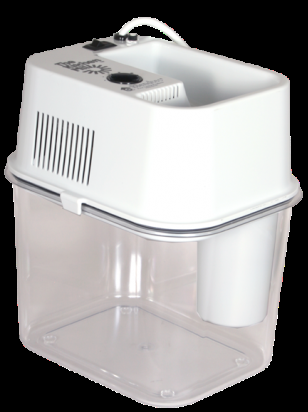
Misty, a consultant with Shelf Reliance, has offered to give away a Kitchen Mill Wheat Grinder – is she generous or what?! You’ll want to go read her site and learn all about what she has to offer. You may be especially interested to learn how you can put together 72 hour survival kits – very inspiring.

So, what is the Kitchen Mill Wheat Grinder? It’s definitely not just for wheat, that’s for sure! You’ll be able to grind whole wheat, rye, oats, rice, buckwheat, millet, corn, soybeans, barley, triticale and others. I don’t have personal experience with this variety of mill, but my research tells me that it is a high quality, efficient machine. I love freshly ground flour and have found that our baked goods taste wonderful and are much healthier!

If you haven’t started your journey toward baking with freshly ground grains, this is your opportunity to jump in! Thanks to Misty, one of you will be receiving this Kitchen Mill Wheat Grinder in the mail some day very soon!!!

To enter this giveaway you must leave a comment on this post letting us know you’re interested in winning.

For additional entries, do any or all of the following, leaving a separate comment on this post for each of the items you have completed:

  • Join Misty’s Facebook Page
  • Subscribe to Misty’s “Shelf Reliance Specials” Email List
  • Subscribe to Heavenly Homemakers by Rss or by Email
  • Join Heavenly Homemakers Facebook Page

That’s up to five chances to win! I’ll draw one random winner on Wednesday, November 9, 2011. Be watching for a post sharing who the winner is – you will be responsible for contacting me if your name is chosen!

Heavenly Homemaker's Club Members: Access your homepage and all your fantastic resources here! Not a member yet? Please join us!

Multi-Grain Pumpkin Waffles and Pancakes (wheat free)

November 2, 2011 by Laura 21 Comments

This post may contain affiliate links. For more information, please see our disclosure policy.

I am such a whole wheat girl. I love my freshly ground hard white wheat. I order 500 pounds of wheat at a time for goodness sake. But, in an effort to add variety to our diets, I’ve been on a mission to try different grains.

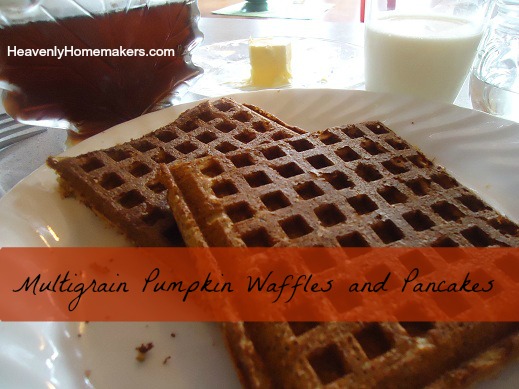
As you know, I’ve done a fair amount of experimenting lately with Coconut Flour (which isn’t a grain, but it does add variety to our healthy baked goods). Recently, my dear friend Angie sent me this Pumpkin Waffle recipe, and then another dear friend Jenny (who is Angie’s sister) affirmed how good these are – so I went for it. This recipe calls for several different grains and none of them are wheat. Look at me, growing in my grain varieties! Hey, it’s not difficult when you have good recipes like this one. In fact, my kids loved them and my pickiest eater even said, “Wow, these taste like your homemade donuts!” I think we have a winner.

Multi-Grain Pumpkin Waffles and PancakesYum

1 cup sorghum or barley flour
1 cup buckwheat flour
1/3 cup millet flour
1/3 cup brown rice flour
1 teaspoon baking soda
2 teaspoons baking powder
1/2 teaspoon salt
1/4 teaspoon ginger
1 teaspoon cinnamon
1/4 teaspoon nutmeg
3/4 cup pumpkin puree
4 tablespoons melted coconut oil
4 tablespoons maple syrup or sucanat
1 teaspoon vanilla extract
2 eggs
2 cups milk (or coconut milk if you’re going for dairy free also)

Whisk together dry ingredients. Beat the wet into the dry ingredients to combine. Cook the batter in a waffle iron – greasing well between each batch. Or, add a few extra tablespoons of milk and cook the batter into pancakes.

pumpkin_waffles
I can attest to the fact that it’s best to keep your waffle iron greased well to keep these from sticking. Otherwise, these were easy to make and incredibly delicious. And we just added some multi-grain variety to our diets. It wasn’t even painful. ;)  Remember, my nine year old thinks these taste like donuts. That’s a multi-grain transition anyone can make!

What grains do you eat at your house? Have you ventured beyond whole wheat yet?

Heavenly Homemaker's Club Members: Access your homepage and all your fantastic resources here! Not a member yet? Please join us!

How to Cook a Whole Pumpkin (to make pumpkin puree)

November 1, 2011 by Laura 219 Comments

This post may contain affiliate links. For more information, please see our disclosure policy.


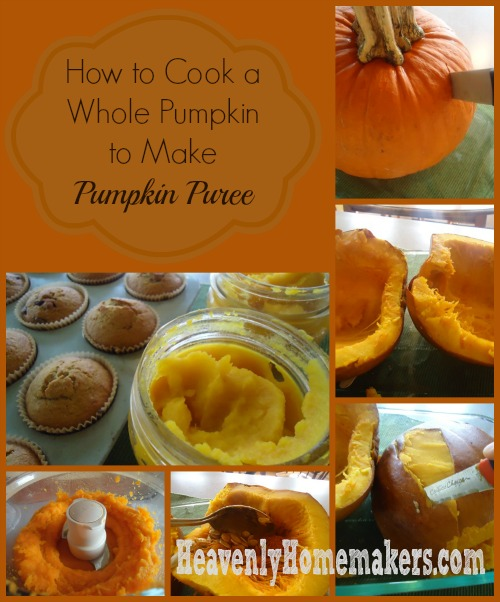
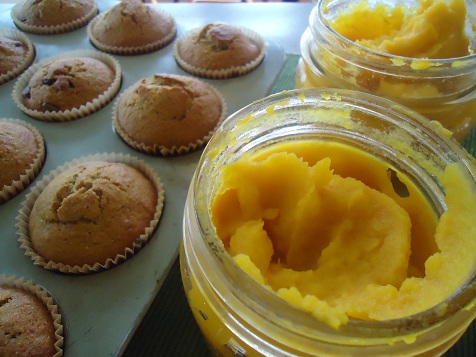
Pumpkin_Puree_Collage_2

Yum

Every year, the boys and I visit a pumpkin patch. Every year after visiting the pumpkin patch, I bake a few of the pumpkins we bring home so that I’ll have plenty of pureed pumpkin in the freezer for pies, breads, muffins and other treats throughout the year. Every year, in order to bake the pumpkins, I slice them in half to put them into a baking dish.

Ever tried slicing a raw pumpkin in half? It’s horribly not enjoyable or easy. Now don’t make fun of me, because it is a fact that I have very wimpy muscles. Therefore, I find that cutting a pumpkin in half makes me a little cranky -and also a little bit scared that I’m going to lose a finger.

This year, I decided to rebel – mostly because after the trip to the pumpkin patch with six boys (I took extras), I was a little tired and in no mood to lose a finger.

I’m not sure why I haven’t been cooking the pumpkin in its whole form all along – but now that I know it works so well, I will for sure be doing it this way from now on. Or at least on the days I don’t feel like losing a finger.

How to Make Pumpkin Puree from a Whole Pumpkin

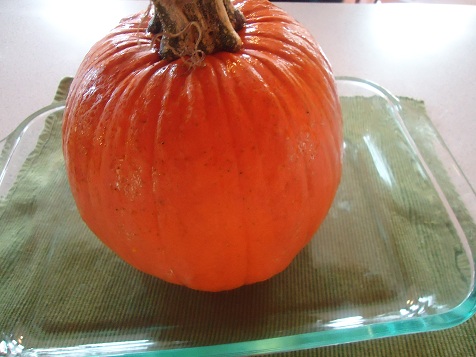
First wash your pumpkin so that there will be no chance for soil or squished bugs to be mistaken for raisins in your muffins on a cloudy, autumn morning.

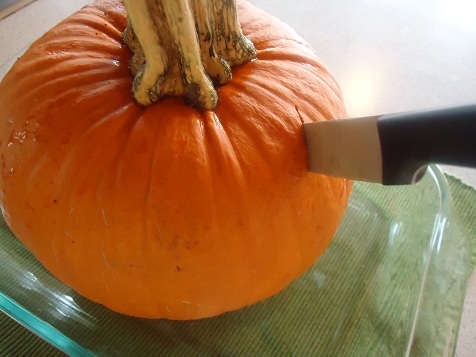
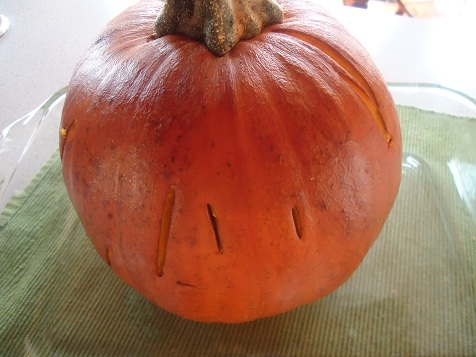
Next, give your pumpkin 6-10 nice stabs with a knife. There’s no better way to say it – there’s no such thing as gently poking a fork into a raw pumpkin. It must be stabbed. Although, I’m the one with the wimpy muscles, so what do I know?

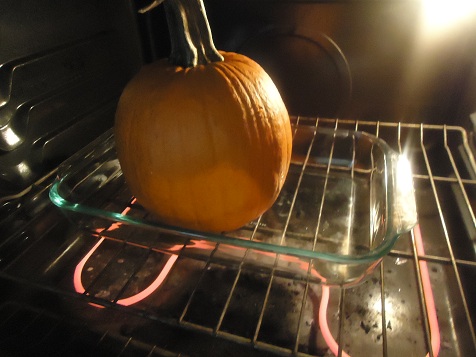
Third, place your pumpkin in a baking dish, then into a 350° oven. I had to remove one of my oven racks to make this happen, but I figured I’d just saved at least three fingers, so this five second bit of labor was worth my time.

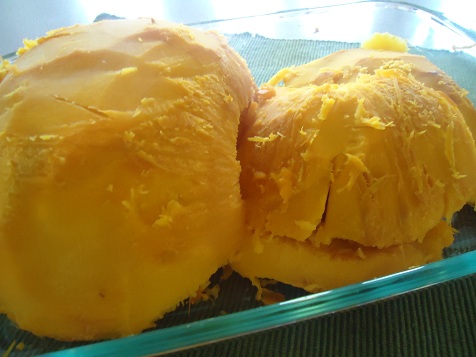
Bake your pumpkin for about an hour and a half or until poking it with a fork has become effortless.

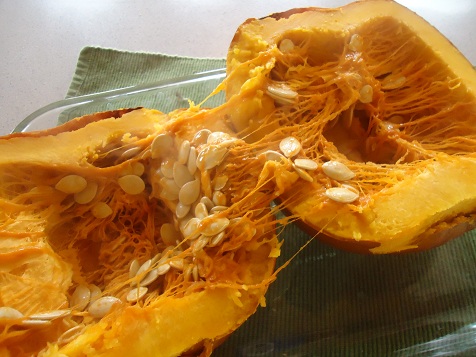
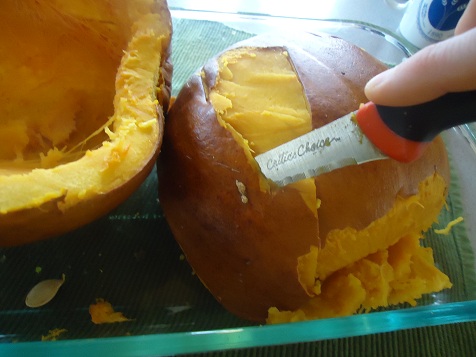
Now slice the pumpkin in half – see how easy that is? Allow pumpkin to cool for 15-30 minutes.


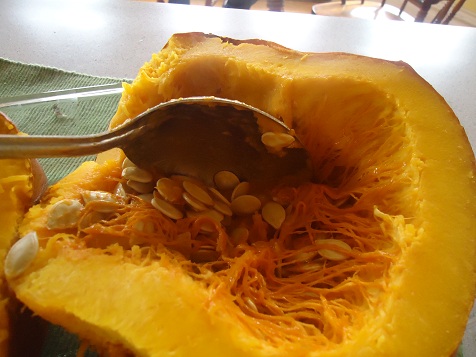
Use a metal spoon to scrape out the seeds and the stringy stuff. Save the seeds for making roasted pumpkin seeds if you’d like.

Someone tell me what the real name of that stringy stuff is. It probably has some technical name like “glutinous threads”.

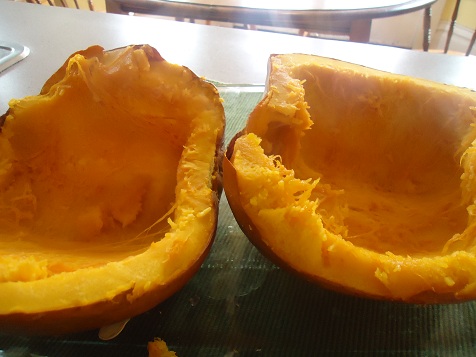
Scoop out the soft pumpkin – or turn the pumpkin over and easily slice away the rind.

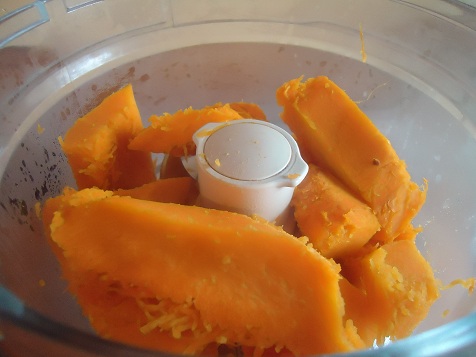
All done:


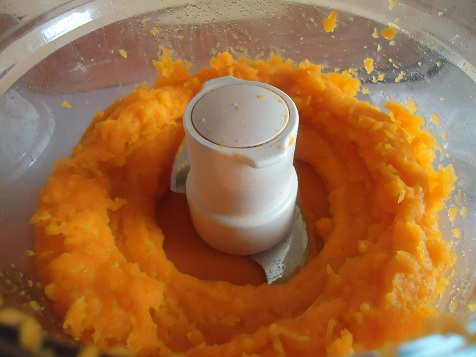
Place a few slices into a food processor and puree until smooth.

Continue pureeing pieces of pumpkin until you’re finished, because that is the point at which you will be done. (Sometimes it’s fun to simply state the obvious.)

Freeze pumpkin puree in jars or freezer bags. I like to freeze it in two-cup portions for easy measuring while baking.

With my pumpkin puree, I make Pumpkin Pie, Pumpkin Chocolate Chip Muffins, Pumpkin Bars, and Pumpkin Pie Squares – plus a delicious Multi-Grain Pumpkin Pancake/Waffle recipe my friend Angie shared with me that I will in turn be sharing with you tomorrow.

How do you make pumpkin puree (or do you buy it already canned)? What do you like to make with pumpkin?

Disclaimer:  No fingers were lost while making this pumpkin puree. Let us all rejoice.

Heavenly Homemaker's Club Members: Access your homepage and all your fantastic resources here! Not a member yet? Please join us!

Peanut Butter Apple Cookie Bars

November 1, 2011 by Laura 26 Comments

This post may contain affiliate links. For more information, please see our disclosure policy.

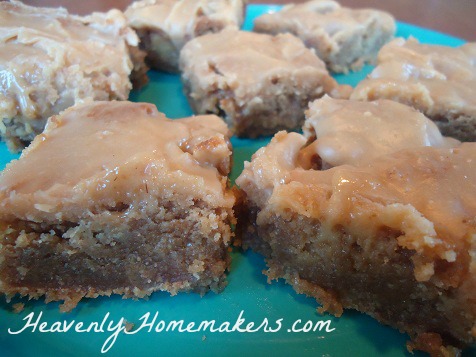
Peanut_Butter_Apple_Bars

I’ve managed to whittle my apple supply down to about only 50 pounds of apples after making two rounds of Apple Sauce, Apple Butter, Caramel Apple Dip, Apple Crisp and Mini Apple Pies. Since I’m still surrounded by apples, I knew I had to try these Peanut Butter Apple Cookie Bars when I saw them at the Diva Entertains Blog. If you are unable to eat nuts, I would imagine you could substitute Sunbutter in this recipe, but I haven’t tried it to know for sure how it would work.

Peanut Butter Apple Cookie Bars (adapted from Diva Entertains Blog)

1/2 cup butter, melted
1 1/2 cups sucanat (or brown sugar)
1/2 cup peanut butter (homemade or natural)
2 eggs
1 teaspoon vanilla extract
1 teaspoon baking powder
1/4 teaspoon baking soda
1/2 teaspoon sea salt
2 cups whole wheat flour (I use freshly ground hard white wheat)
1 1/2 cups peeled and diced apples

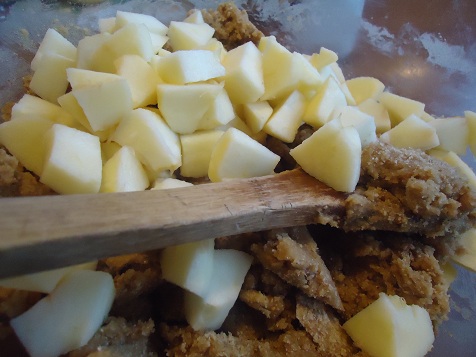
In a large mixing bowl, stir together melted butter, peanut butter and sucanat until creamy. Add eggs, vanilla, baking powder, baking soda and salt, stirring until well combined. Mix in flour thoroughly. Fold in diced apples.

Spread dough into a 9×13 inch baking dish. Bake at 350° for 25-30 minutes or until golden. Allow bars to cool before adding the glaze.

Peanut Butter GlazeYum

2 cups powdered sugar (I recommend making your own with sucanat or using organic, unbleached)
1/4 cup milk
1/4 cup creamy peanut butter (homemade or natural)
1/2 teaspoon vanilla extract

Combine all ingredients and beat until smooth. Drizzle or spread over the cooled bars.

peanut_butter_apple_bars_5

As you can see, drizzling the glaze kinda led to spreading the glaze like a frosting in my case, so feel free to drizzle or spread or slop the glaze on there however you’d like. They’ll pretty  much taste great no matter how you do it. :)

Heavenly Homemaker's Club Members: Access your homepage and all your fantastic resources here! Not a member yet? Please join us!

Gratituesday: My {surprise} Gift in a Jar

October 31, 2011 by Laura 17 Comments

This post may contain affiliate links. For more information, please see our disclosure policy.

Do my friends know me or what? I mean, true friends are the ones who give gifts in jars, right? ;)

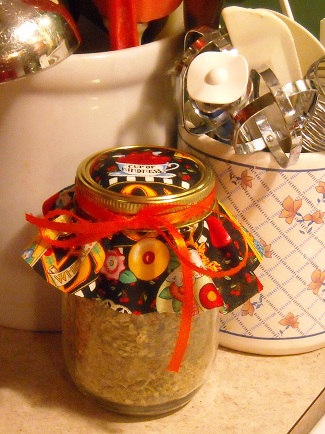
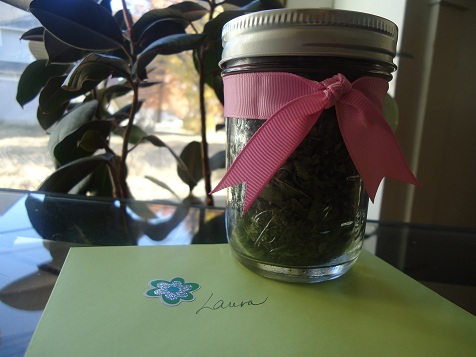
I’m not sure how she did it. I’m guessing somewhere between greeting me and hugging me after church on Sunday, it would appear that my (sneaky) friend Lisa put this into my purse:

Turns out, it’s a jar full of wonderful dried mint, that Lisa grew herself! So that’s why my purse felt a little heavier when I was leaving the church building on Sunday!! (You’d think I would have figured it out sooner.)

What a fun surprise. It kinda makes me want to figure out ways to sneak gifts into people’s purses at church too. Gifts in jars, of course. What a fun way to make some-one’s purse heavy surprise someone with a little extra love! This idea is totally making it into the Gifts in a Jar eBook (after Lisa gives me all the details on how she made this, of course).

I’m thankful for friends and fun surprises. What are you thankful for?

Share how God is working in your life on your blog, then come link up with us here. If you don’t have a blog, be sure to leave a comment letting us know what you’re grateful for!

If you are linking up a blog post for Gratituesday,
please copy and paste the following sentence into your post! Thanks!

Join us for Gratituesday at Heavenly Homemakers!

Heavenly Homemaker's Club Members: Access your homepage and all your fantastic resources here! Not a member yet? Please join us!

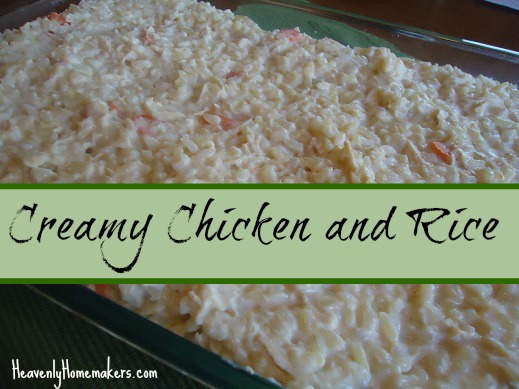
Creamy Chicken and Rice Casserole (with no cream soups!)

October 30, 2011 by Laura 108 Comments

This post may contain affiliate links. For more information, please see our disclosure policy.

I am a canned Cream of Fill in the Blank Soup rebel. I have avoided canned cream soups since we began Our Healthy Eating Journey. Why? Because their ingredient lists scare me. (As in, I literally scream out loud, from deep in the back of my throat, when I pick up a can and read it at the store. Not really. But I wonder what my boys would do if I did? Maybe I’ll do that sometime. Not really.)

The ingredients in a can of Campbell’s Cream of Celery Soup, according to the Campbell’s Food Service Website are (and do try not to scream when you read this):

Water, Celery, Vegetable Oil (Corn, Cottonseed, Canola, and/or Soybean), Wheat Flour, Modified Food Starch, Contains less than 2% of: Salt, Soy Protein Concentrate, Monosodium Glutamate, Cream Powder (Cream [Milk], Soy Lecithin), Yeast Extract, Flavoring, Beta Carotene for Color.

Well, at least the first two ingredients are water and celery. ;)

There are all kinds of recipes which share how to make homemade cream soups. I’ve tried some of them, and I’m thankful that the recipes are available. For some reason though, I just haven’t had a loving enough relationship with cream soup to try to keep the homemade varieties on hand.

The question is then, how do you make a casserole without a cream soup? Ah, very simple:  I use cream.

Cream of what? No, just cream. Cream. The stuff that rises to the top of your raw milk. Or the thick, white liquid you can buy in the dairy department of the store, usually labeled Heavy Whipping Cream. If you use cream, along with a few spices that enhance your casserole, your dish will be tasty, easy and surprise, surprise:  creamy.

Here is how I now make my Creamy Chicken and Rice Casserole with real, whole food ingredients:

Creamy Chicken and Rice CasseroleYum

4 cups chicken broth (I avoid canned broth or bouillon because they are also loaded with MSG.)
4 carrots, peeled and sliced
1 medium onion, diced
2 cups brown rice
2-3 cups cooked chicken, cut into bite sized pieces
1/2 teaspoon (or more) garlic powder
Sea salt, to taste
1 1/2 cups cream (heavy whipping cream, or fresh cream which has risen to the top of whole, raw milk)

In a large pot, bring chicken broth, carrots and onion to a boil at high heat. Add rice, stir, and place the lid on the pot. Reduce heat to low and cook the rice and vegetables in the broth for 45 minutes. (To avoid sticky rice, don’t stir the rice while it’s trying to cook – just walk away and ignore it for the entire 45 minutes. You can do it.)

When the rice is done, stir in cooked chicken, garlic powder and cream. Shake in liberal amounts of sea salt for best flavor. (I use Redmonds Real Sea Salt, which is unbleached and full of natural minerals.)  Cook ingredients for about five more minutes to heat the chicken and cream. Serve directly from pot, or pour into a 9×13 inch baking dish. This meal can be prepared ahead of time, refrigerated and reheated in the oven at serving time. Cover and heat in a 350° oven for 20-30 minutes or until hot through and through. Serves eight.

(You can also freeze this meal. To reheat, simply put the frozen, covered casserole into the oven, turn the oven onto 350° and cook for about 1 1/2 hours or until it is heated thoroughly.)

Creamy Chicken and Rice

Creamy Chicken and Rice Casserole (with no cream soups!)
 
Save Print
Author: Laura
Serves: 8-10 servings
Ingredients
  • 4 cups chicken broth (I avoid canned broth or bouillon because they are also loaded with MSG. Here's my easy homemade chicken broth recipe, which includes frighteningly ugly pictures of a chicken carcass. Again, try not to scream.)
  • 4 carrots, peeled and sliced
  • 1 medium onion, diced
  • 2 cups brown rice
  • 2-3 cups cooked chicken, cut into bite sized pieces
  • ½ teaspoon (or more) garlic powder
  • Sea salt, to taste
  • 1½ cups cream (heavy whipping cream, or fresh cream which has risen to the top of whole, raw milk)
Instructions
  1. In a large pot, bring chicken broth, carrots and onion to a boil at high heat.
  2. Add rice, stir, and place the lid on the pot.
  3. Reduce heat to low and cook the rice and vegetables in the broth for 45 minutes.
  4. When the rice is done, stir in cooked chicken, garlic powder and cream.
  5. Shake in liberal amounts of sea salt for best flavor.
  6. Cook ingredients for about five more minutes to heat the chicken and cream.
  7. Serve directly from pot, or pour into a 9x13 inch baking dish.
  8. Cover and heat in a 350° oven for 20-30 minutes or until hot through and through.
3.4.3177

Cooking your rice in the chicken broth gives this dish a wonderful, naturally delicious flavor. And in case I didn’t mention it before, the cream makes this dish…creamy.

Where have you landed on the Cream of Fill in the Blank issue? Have you given them up yet? Have you ever screamed out loud when reading the ingredient list on a can of soup at the store? Do you make your own cream soups? Or do you use another substitution? (Sour cream works well too, in some recipes!)

Heavenly Homemaker's Club Members: Access your homepage and all your fantastic resources here! Not a member yet? Please join us!

Menu Plan for the Week (And a Week Full of New Recipes!!)

October 30, 2011 by Laura 7 Comments

This post may contain affiliate links. For more information, please see our disclosure policy.

I’ve had sick kids all weekend and a Daddy out of town for soccer games, so we’ve tried to keep things calm and quiet around here. The boys and I watched a couple of Adam 12 episodes on Hulu while they were coughing and resting. (We’ve chosen not to have cable, but I love having the option to watch shows online occasionally.)  Adam 12 was a blast from the past, that’s for sure. I was thrilled with how clean the show was, and how the intensity was quite un-intense. Yep, the worst language I heard was, “Let go of me, you…you big pig!” Ahahaha!! I accidentally chuckled out loud a little bit at that, so as a good mother, I quickly reminded the kids that we don’t call people names. But for that to be the worst thing said in the show? Let’s bring back TV from the 70’s. (This has nothing to do with recipes or a menu plan, but apparently I thought it was worth saying.)

Because we’ve had a houseful of sickies, I made a big batch of Chicken Broth and Chicken Noodle Soup. There’s no better way to get lots of needed nutrients down sore throats than good, rich chicken and veggie broth.

I have several new recipes to share this week, so during the next few days you can expect to see several tasty new dishes and treats. I’ve got an exciting giveaway lined up too – just you wait!! In the meantime, here are a couple of pictures of food I made last week that I felt just sure you’d like to see…

We got to go to a pumpkin patch last week with our home school group – very fun! I packed up some homemade Chewy Granola Bars for the boys to eat on the way home. I made two varieties, as you can see in the picture. It seems that each time I add chocolate chips to a batch, they melt and create peanut butter chocolate granola bars. Nobody seems to mind. ;)

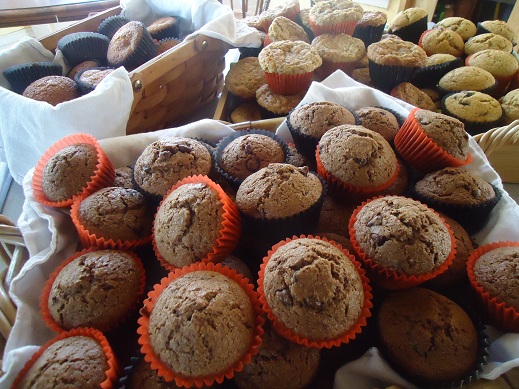
I helped provide some of the food for a baby shower last week, making mini sized Pumpkin Chocolate Chip Muffins. If you haven’t tried this recipe yet, you’re missing out! (If I do say so myself.)

We won’t be feeding the high schoolers for Huddle tonight like we usually do. There’s an “All Things Pumpkin” fellowship night at church, so I’ve got the “night off”. :)

Here’s our menu for this week:

Sunday, October 30
Marriage Class treat – Diva Entertain’s Peanut Butter Apple Bars (adapted), coffee
Lunch – Baked potatoes with sour cream and cheese, green beans
Dinner – Eat leftovers before going to the Pumpkin Fellowship night at church

Monday, October 31
Applesauce bread, bananas
Tomato soup with grilled cheese sandwiches
Beef stroganoff, tossed salad

Tuesday, November 1
Scrambled egg sandwiches, creamy orange coolers
Quesadillas, pears
Teriyaki chicken with veggies

Wednesday, November 2
Honey whole wheat bagels, oranges
Pizza casserole, peas
Meatballs, cream scalloped potatoes, green beans

Thursday, November 3
Mini crustless quiches, applesauce
Taco potatoes with lettuce and tomatoes
Swiss steak over brown rice

Friday, November 4
Giant breakfast cookies, bananas
Chicken tortilla soup, raw veggies
Hamburgers, homemade fries, grapes

Saturday, November 5
Whole wheat donuts
Leftovers
Venison steak, ranch potato wedges, tossed salad

Stay tuned for an exciting week filled with food and food related posts!!! And if you haven’t started working on your Gifts in a Jar ideas to send me, read the details here, then get started!!

Heavenly Homemaker's Club Members: Access your homepage and all your fantastic resources here! Not a member yet? Please join us!

Selfless

October 28, 2011 by Laura 8 Comments

This post may contain affiliate links. For more information, please see our disclosure policy.

~Appreciate Your Spouse~Buoyancy in Marriage~Consult Your Partner~
~Dream Together Part One ~Dream Together Part Two~Empower Your Spouse~
~Have Fun With Your Spouse~Give to One Another~Honor Each Other~
~Be Intentional~Jubilee~Kingdom Focused~Listen~~Mentor Relationships~
~Nourish~Own It~Pray With Each Other~Quick to Listen~Read Together~

Selfless

Symbiotic Relationships – Matt’s Thoughts

Just a reminder in case you forgot: The universe does not revolve around you…It revolves around me. HaHa and Ouch because that’s what I’m constantly fighting. I need the reminder found in Philippians 2:4, “Each of you should look not only to your own interests, but also to the interests of others.”

When the universe revolves around me, then the relationships I form are self-serving. I befriend someone who is an encourager in order to stroke my ego. I spend time with another so that it will make me look good. I get married for what I’m going to get out of it. God’s design is best, where a relationship sharpens both people (Proverbs 27:17).

At our family trip to the Omaha Zoo this summer I learned about the three different symbiotic relationships – parasitism, commensalism and mutualism. Symbiosis is “the living together in more or less intimate association or close union of two dissimilar organisms” (from merriam-webster.com). (It makes me laugh when I connect symbiosis to marriage as the “union of two dissimilar organisms.”)

Let’s each evaluate our role in our symbiotic marriage relationships while defining the three types. Does your role fall into the category of parasitism where you are living entirely for yourself to the detriment of your spouse? Maybe commensalism sounds more like the way you treat your spouse. You obtain benefits from the other organism in your more or less intimate association while you neither damage nor benefit them…even roommates should perform better. If you are, instead, selflessly laying your life down for your spouse and your spouse is doing the same, then you are practicing mutualism- a mutually beneficial relationship. Healthy marriages are mutualistic relationships where you serve and sharpen one another because you are selfless.

True Joy – Laura’s Thoughts

I have found that when I am truly seeking to live selflessly, that is when I am most joyful. Ironic, isn’t it? I would think that my happiness would overflow each time I am able to get my own way and do things exactly the way I want to do them, thankyouverymuch.

It is okay to allow yourself to be served, to be encouraged by others, to spend time with people who will make you a better person. But if your heart is focused on self – getting, doing and having things your way – and not on what you can give, do and share with others, you will never experience true joy.

It’s a beautiful thing when a husband and wife both seek to serve one another selflessly. Needs are met, bitterness and anger fade away, and true peace and joy fill the home.

Selflessness begins with you. Who are you living for?

Ladies, we know you’re reading here more often than the guys. ;)  We’d love husbands to read this article as well. If you feel so inclined please send the link to your husbands, or if it’s easier, we’ve created a downloadable article for you to quickly print off and share. Healthy Marriage Tips A to Z – Selfless

Heavenly Homemaker's Club Members: Access your homepage and all your fantastic resources here! Not a member yet? Please join us!

Announcing: Gifts in a Jar! {A Group Effort}

October 26, 2011 by Laura 26 Comments

This post may contain affiliate links. For more information, please see our disclosure policy.

I’m not sure if I’ve ever mentioned this here or not, but I really, really love  jars. Oh, I’m sorry, it seems that I have spoken of my jar obsession one or forty-eight times.

Doesn’t it just make sense then that we put together some posts and even an eBook featuring Gifts in a Jar? Yes, it really does make perfect sense. We’ve decided, since you are all full of so many wonderful ideas, to make this a group project. Come closer my friends – let me share the details.

During the next two weeks, I’ll be compiling any and all (okay, not necessarily all – see the rules below) of your Gifts in a Jar ideas. (I will give you full credit in the eBook for your idea.)  While gifts of food and baking mixes are perfect for this project, I’d also love to see your ideas go beyond food. Do you have ideas for natural bath and body or household products? Know any fun ways to decorate jars or use jars for home decor? Oooh, and does anybody have a great tutorial on making liquid soap dispensers out of jars? I’ve seen those before and they are SO cool!!!

The possiblilites are endless for gifts we can put together in jars. With Christmas coming up, the timing couldn’t be better. (Although, I’d love for this eBook to be full of ideas that can be used any time of the year – not just Christmas.)

You may recall a post in which I shared Teresa’s Gift Certificate in a Jar idea. This, of course, will be featured in the eBook.

Here are the rules and guidelines for Gifts in a Jar submissions:

  • You may email me up to three ideas. One idea is fine though, or yes, even two.
  • Email your ideas to laura @ heavenlyhomemakers dot com no earlier than yesterday and no later than midnight on Thursday, November 10, 2011. I’ll probably be asleep by that time though, so as long as your idea is in my inbox by the morning of the 11th, you’re good to go.
  • So that I can keep your idea email separate from other emails I receive, please type the words Gifts in a Jar in the subject line of your email. You could also type Wow Laura, Your Ponytail is Stunning as the subject line, but be aware that your idea may get lost among all of my other hair related fan mail.
  • Each idea submitted must be accompanied by at least one nice picture. Not a picture of your kids, although I’m sure I’d enjoy that too. I am referring to a picture of your finished gift in a jar. An entire picture tutorial is fine too, but only if necessary.
  • Some of the ideas sent to me will be posted here on my blog, with credit (and blog link if applicable) given to the sender. I won’t be able to post all of the ideas though because knowing how clever you all are, your Gifts in a Jar ideas would probably take over this website, leaving no room for Gratituesday, Crock Pot Recipes or other important posts in which I share about the times birds fly into my face while I’m putting decorations away in the attic.
  • I’d prefer the food gifts and baking mixes to include whole food ingredients – as much as possible. Since these are gifts, I’ll compromise a little on this. But I really shy away from ingredients such as margarine, Crisco and I can’t think of the name of it right now, but it’s that stuff I can’t pronounce. You know what I’m talking about? Yeah, let’s avoid that one.
  • Please include thorough instructions with your idea. For example, if you send me a brownie baking mix in a jar idea, please let me know what exactly is to be included in the jar, the size of the jar needed, as well as clear instructions for the recipient so they know how to actually make the brownies after they take your gift home.
  • Since we all enjoy saving money, I’d appreciate it if the gift ideas you send cost just a few dollars or less. If that’s not an ambiguous amount, I don’t know what is.

Just as soon as I begin to receive your emails, I will begin to compile your wonderful ideas into a Gifts in a Jar eBook, which will be offered FREE to everyone.  This eBook will be ready for release just as soon as I have it finished. If that’s not an ambiguous time frame, I don’t know what is.

Let the creative Gifts in a Jar ideas begin to flow – I’ll be watching for your emails!

Heavenly Homemaker's Club Members: Access your homepage and all your fantastic resources here! Not a member yet? Please join us!
« Previous Page
Next Page »

Join Our Community!

 Facebook Twitter E-mail Instagram Pinterest

Popular Posts

~ Will All of the Real Moms Please Stand Up?
~ Easy! Stir-and-Pour Whole Wheat Bread
~ How to Make Gatorade
~ 31 Real Food Breakfast Ideas
~ Dear Teenage Girls...
~ When Mom Takes a Step Back
~ The Inexpensive Health Insurance We Love!
~ Let's Talk Real Food Grocery Budgets

Check out our latest posts!

  • Big Family Food and Fun: September 20-26, 2026
  • Big Family Food and Fun: September 13-19, 2026
  • Big Family Food and Fun: September 6-12, 2026
  • Big Family Food and Fun: August 30-September 5, 2026
  • Big Family Food and Fun: August 23-29, 2026
Home  ~  Simple Meals  ~  Club Membership  ~  Shop  ~  Privacy Policy  ~  Disclosure  ~ Contact

Copyright © 2026 · Beautiful Pro Theme on Genesis Framework · WordPress · Log in