Heavenly Homemakers

Encouraging women in homemaking, healthy eating and parenting

  • Home
    • About
    • FAQs
  • Recipes
    • Bread and Breakfast
    • Condiments
    • Dairy
    • Main Dishes
    • Side Dishes and Snacks
    • Desserts
    • Gluten Free
    • Instant Pot
    • Crock Pot
    • Heavenly Homemaker’s Weekly Menus
  • Homemaking
    • Real Food Sources
  • Store
  • Contact
    • Advertise
    • Disclosure
    • Privacy Policy
  • Simple Meals
  • Club Members!

Women With a Mission: Family First

January 14, 2009 by Laura 29 Comments

This post may contain affiliate links. For more information, please see our disclosure policy.

womenwithamission3sm2.JPG

Before we talk about the importance of seeking out what ministries God wants you to be doing for him…before we talk about all the different ministry opportunities there are for women…let’s talk about our families!

OUR FAMILIES ARE OUR NUMBER ONE MINISTRY.

If you are married…your husband and his needs are number one. God created you to be your husband’s help meet. HE IS YOUR TOP MINISTRY. It is the most blessed ministry you will ever be a part of. It may also be the most challenging. Helping to make your husband strong, confident and successful…encouraging him to be the leader of your home…working beside him in what God has called him to do. This is your most important work as a Christian woman/wife.

If you have children, your mission is to take care of them, train them, love them, and help them to grow in the way of Jesus. They need you more than any other child or adult or charity or organization outside your home needs you. 

Because your family is your number one mission, you really are “doing your ministry” everytime you do a load of laundry, wipe a nose, cook a meal, wash the dishes, clean up a mess or shop for food. Everytime you smile at your husband or read a book to your kids…you are ministering to them.

I say all of this to reassure you of two different but specific things:

1. If you feel like all you do all day is run from one chore to the next or from one dirty diaper to the other…and because of that you don’t feel like you are being productive for God…think again. The things you are doing for your family is your ministry to them and for God. (“Whatever you did for one of the least of these brothers of mine, you did for me.” Matthew 25:31-40…)

2. If you are doing all sorts of good things for the community, for the church and for the needy families next door…but you keep telling your own kids “just a minute” and are so busy running from one “outside need” to another that you don’t have any smiles left to give to your husband at the end of the day…you need to re-evaluate your ministry priorities.

Above all…focus on your family’s needs first…their physical, emotional and spiritual needs.

Pray for God to reveal His great purposes to you as a wife and mother. And then listen.  You will be amazed by how God will bring to light the ways He wants you to be serving (and what you should say “no” to). He will show you want is important. 

Next in this series, we’ll talk about ways you can minister to others simply by doing the things you already do everyday. I have a GREAT grocery store story to share with you!

Heavenly Homemaker's Club Members: Access your homepage and all your fantastic resources here! Not a member yet? Please join us!

Get Ready to Share Your Love Story

January 14, 2009 by Laura 6 Comments

This post may contain affiliate links. For more information, please see our disclosure policy.

lovestorybannersm1.JPG

After I posted the story of how Matt and I met and started dating…Patti suggested that maybe we could all share the story of how we met and began dating our mate. Great idea! 

I would love to hear your stories! And well…with Valentine’s Day coming up…what better time than this to remind ourselves of WHY we chose to spend our lives with the ones we love. 

Start writing down your Love Story…and on Saturday, Feb. 7…we can all meet up here with Mr. Linky. (Wonder if he has a love story? I mean…is there a Mrs. Linky? A bunch of Little Linkys running around? Hmm…)

Spread the news. Grab the Share Your Love Story banner for your site. Make plans to join us here on Saturday, Feb. 7 to share your love story!

lovestorybannertiny.JPG

P.S. If you don’t have a blog, but would like to share your story, write it and send it to me via email ([email protected]) . I’ll put your story on a page here at Heavenly Homemakers and link it up too so that everyone can read your story!

Heavenly Homemaker's Club Members: Access your homepage and all your fantastic resources here! Not a member yet? Please join us!

Blog

January 13, 2009 by Laura 9 Comments

This post may contain affiliate links. For more information, please see our disclosure policy.

Welcome! We’re on a new server now!

Please visit us at our “new home” www.heavenlyhomemakers.com.

If you have any incoming links to my site…you’ll just need to change the link from www dot heavenlyhomemakers dot com/blog to https://www.heavenlyhomemakers.com. That’s it…just take out the word “blog”.

Most importantly…if you are a subscriber:  PLEASE TAKE TIME TO RE-SUBSCRIBE! Now that we’re on a new server, the old subscriptions don’t work. I miss you!! Please re-subscribe using the links in my right side bar!!

Bookmark this new location so that you can visit at least once a day. 
(Three or four times a day would be great too.)

;)

Heavenly Homemaker's Club Members: Access your homepage and all your fantastic resources here! Not a member yet? Please join us!

Warm Up With Snowflakes

January 13, 2009 by Laura 40 Comments

This post may contain affiliate links. For more information, please see our disclosure policy.

I think this idea is too much fun not to share!! My kids LOVE getting in on cooking lunch when we make these Melting Snowflakes! And of course…no two look exactly alike!

meltingsnowflakes6sm1.JPG

Yum

It’s the first time eating a snowflake has ever warmed me up! Here’s how to make ’em:

meltingsnowlakes1sm.JPG
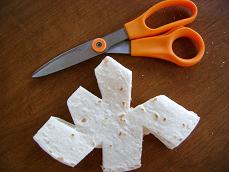
Start by folding a tortilla into fourths.

meltingsnowflakes2sm.JPG
Use kitchen shears to cut notches out around the tortilla.

meltingsnowflakes3sm.JPG
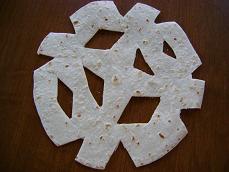
Open up the tortilla that has now become a snowflake.

meltingsnowflakes4sm.JPG
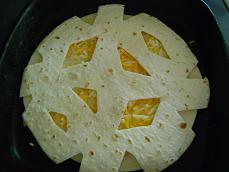
Place a whole tortilla into a skillet…sprinkle with cheese.

meltingsnowflakes5sm.JPG
Top with the snowflake shaped tortilla. Cook over low heat until cheese is melted. (You may need to put a lid on the skillet to keep the heat in and melt the cheese.)

(p.s. I usually use my homemade whole wheat tortillas and white cheddar cheese to make these…but I already had these pictures taken so decided to use them.)  :)

Isn’t that such a fun, yummy way to eat lunch?! 

Oh, and bake the “cut out” scraps from the tortillas for a few minutes at 350 degrees for chips to dip in salsa. 

I also think it would be fun to fold a tortilla in half and cut it into a heart for Valentine’s Day…don’t you think so!?
———————————————–

Grocery List

Heavenly Homemaker's Club Members: Access your homepage and all your fantastic resources here! Not a member yet? Please join us!

Gratituesday: A Fine Example

January 12, 2009 by Laura 17 Comments

This post may contain affiliate links. For more information, please see our disclosure policy.

gratituesday4whitewhite5.jpg

Mabrey, an 86 year old man…a former elder at our church…a man married for over 60 years is laying in his bed with only a few days left on this earth. 

He and his wife, Madge have lived here for over 50 years and worked with the church and local Christian college for every single one of those years. They have visited and prayed with the sick, they have taken meals to people who have a need. They have made phone calls and sent cards and checked on people to let them know that they care about how they are doing.

They traveled four hours to my home town to be at my mom’s funeral four and a half years ago. They knew my parents as students here at York College…but for them to make that trip…I was so honored and touched.

Mabrey was diagnosed with cancer several months ago and took quite a turn for the worse over Christmas time. All his family are in town, Hospice care is helping, he is at his house now in a hospital bed waiting to go home…

I visited their house last week to hug Madge and to take some food for the family. While I was there to encourage her…Madge was asking me how I was. Through her weariness and sadness…she was still loving on others. I am always amazed at her care for others.

I don’t know if I’ve ever seen a finer example of a help meet. She is a woman who has worked tirelessly alongside her husband to further God’s kingdom. 

I’m so grateful for the lives of Mabrey and Madge and the example they have been of a couple who spent their life serving others. What a fine example to follow.
———————————————–

What are you grateful for? How has God been working in your life? Write about it on your blog then come link up with us here. Here are the details. If you don’t have a blog, please leave a comment to let us know what you’re grateful for!

[blenza_autolink code]

Heavenly Homemaker's Club Members: Access your homepage and all your fantastic resources here! Not a member yet? Please join us!

Sourdough Starter: Day 8…Time to Make Bread!

January 12, 2009 by Laura 66 Comments

This post may contain affiliate links. For more information, please see our disclosure policy.

After seven days of feeding your sourdough starter with water and flour…it is fermented and ready to make into bread! 

Now, keep in mind that this method of making bread is an old fashioned method. It isn’t quick. (Neither is it difficult.)  From start to finish, the bread takes anywhere from 8 to 24 hours. Most of those hours are spend just waiting for the dough to rise.

I happen to like the pace of this bread making. Slow and easy wins the race. AND, the nutritional benefits?! Because the bread is fermented, all of the difficult-to-digest phytates from the grain are broken down making this bread GREAT for your digestion! This is the best, most healthy bread you can make.

Okay, so are you ready?

sourdough81sm.jpg
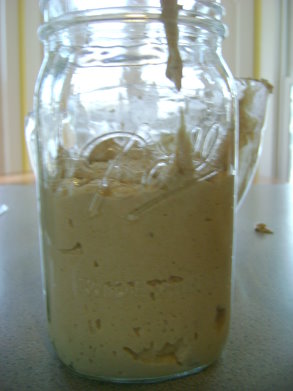
Here is what my starter looked like on the eighth morning.

sourdough83sm.jpg
Put about one to two cups of starter into a quart jar, seal it with a lid and put it into your refrigerator for future use. 

Here’s what you’ll need to make your bread:

2-3 cups sourdough starter
2 teaspoons sea salt
1 1/2 cups cold water
4-8 cups whole wheat, rye, or spelt flour (if your flour is freshly ground, make sure it has had a chance to cool)

sourdough82sm.jpg
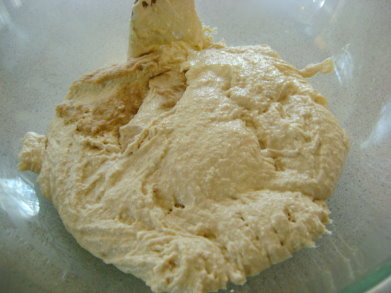
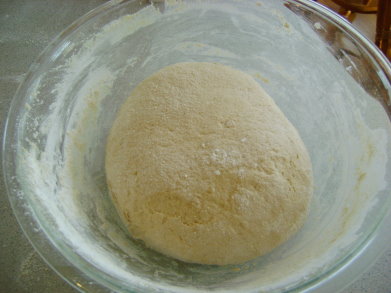
Pour the remaining starter into a large clean glass bowl. (I had about 3 cups of starter in my bowl to start with.)

sourdough84sm.jpg
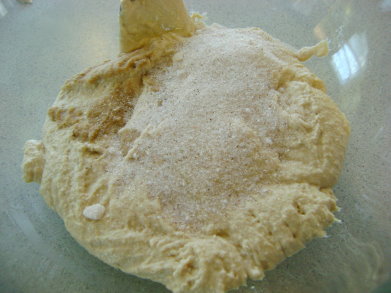
Add 2 teaspoons of sea salt to the starter. 

sourdough85sm.jpg
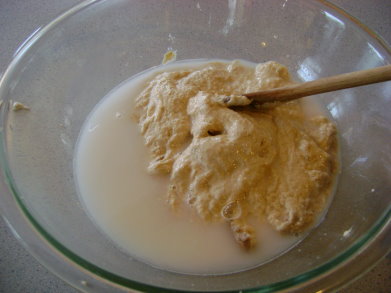
Pour in 1 1/2 cups of cold water and stir until the salt it disolved.

sourdough87sm1.jpg
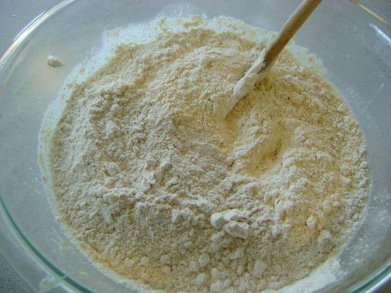
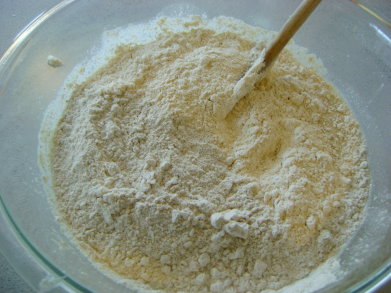
Slowly stir in flour, two cups at a time. For this batch, I only used about five cups. This is because my starter was not very liquidy to begin with. Remember, the more soupy your starter, the more sour your bread. I was trying to create a starter that was a little on the thicker side.

sourdough88sm.jpg
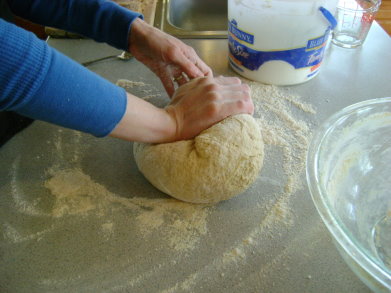
Work in the flour on a clean surface until your dough is knead-able. Knead your dough for 8-10 minutes (or until you think you might pass out). Hey, how do you think we breadmakers get these amazingly buff arm muscles anyway? :)

(You can also knead your dough in a machine if you’d rather!)

sourdough89sm.jpg
Place your well kneaded dough back into your bowl.

sourdough810sm.jpg
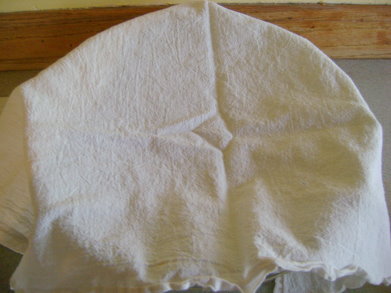
Cover your bowl with a clean cloth and set it on your counter. Now, the natural yeast in your sourdough will go to work to make the dough rise…and all the healthy bacteria in the dough will work to break down the phytates and release the nutrients!

sourdough811sm.jpg
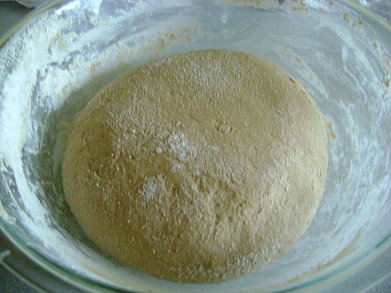
I put my dough in the bowl ready to start rising at 9:00 a.m. By 3 p.m. it had risen to about double. So this time, it took six hours for my dough to rise. In the summer you may find that it takes less time.

sourdough812sm.jpg
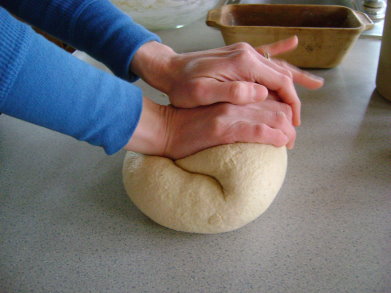
Knead your dough for a good solid five minutes. (Yay, another upper body workout.)

sourdough813sm.jpg
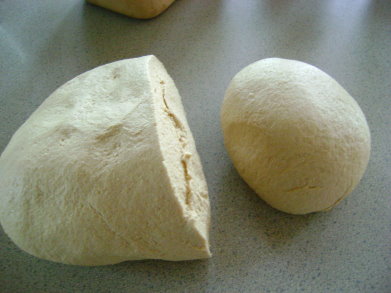
Divide your dough into three sections, using a knife to slice. (Yes, I realize this picture only shows you two sections. The picture is to show you the slice. Focus on the slice.)

sourdough814sm.jpg
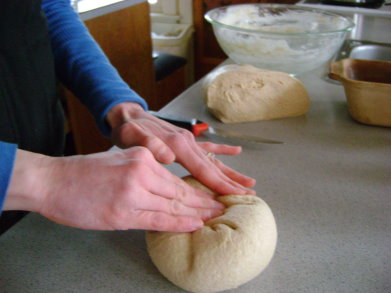
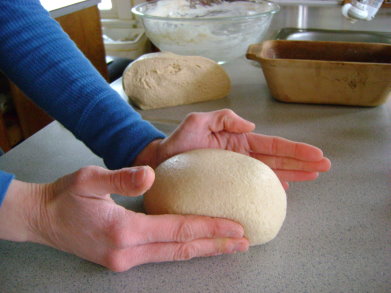
Shape your dough into balls.

sourdough815sm.jpg
Good job Asa , taking time away from your math assignment to come take pictures of your mother’s hands with the dough. Oh wait, I think I was blinking in that one.

sourdough816sm.jpg
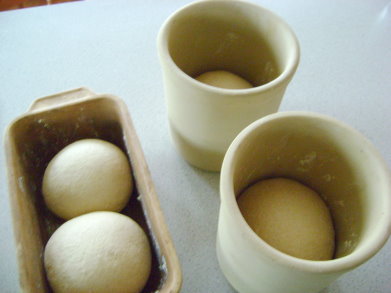
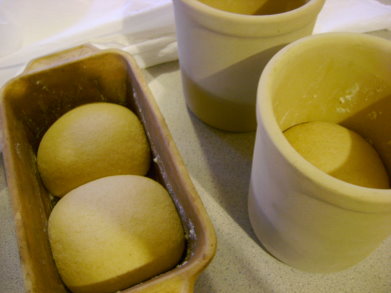
I prefer to use my round loaf pans from Pampered Chef. When I use my regular loaf pans, you’ll notice that instead of making one long loaf to fit the pan, I shape two balls and set them side by side into the pan. The sourdough rises much better this way. When you are deciding on the size of dough for your pan, think small. If you have too much dough in your pan, the bread not rise well and it will be very heavy.

sourdough817sm.jpg
Because the sourdough has been sitting and working all day, the natural yeast in it has been activated so that the bread rising in the pans will not take as long as the initial rising of the dough. In about three hours, my bread was ready to go into the oven.

Bake your bread in a 350 degree oven for one hour or until the bread sounds hollow when you thump it.

sourdoughbreadsm1.jpg
I always have a hard time getting a “pretty” loaf of bread. The older the starter gets, the easier it will be to work with and the tastier it will be. We thought these loaves tasted great even if they were a little funny looking. The sourness was just right! In fact, it hardly tasted sour at all! (Also, I’m having trouble with the flash on my camera. I tried to fix the coloring on this very yellow original picture and this is the best I got since it is evening. I’ll keep making sourdough and keep taking pictures…hopefully I’ll be able to show you a better one soon!)

Now, the next time you want to make a batch of sourdough bread…get your starter out of the fridge in the evening. Pour it into a clean glass jar or bowl. Feed it by adding 1 cup of flour and some cold water. (You need to keep your starter fed about once a week whether you bake bread that often or not.)  Place cheesecloth on top and let it sit in a warm place all night.

In the morning, if there are bubbles in the sourdough, indicating that the yeast has been activated, begin the above process of making a batch of bread…being sure to leave a few cups of starter in the jar for future use! 

Want to figure out sourdough pancakes with me too? I’m working on it!
————————————————-

Heavenly Homemaker's Club Members: Access your homepage and all your fantastic resources here! Not a member yet? Please join us!

Menu Plan for the Week

January 11, 2009 by Laura 13 Comments

This post may contain affiliate links. For more information, please see our disclosure policy.

Thanks to everyone who joined me in getting a Sourdough Starter going this week. If you want to learn to make whole wheat sourdough…check out these posts! Now we’re ready to make the Sourdough Bread! I’ll post the steps sometime on Monday. (Probably that night by the time it finishes baking!)

Our family is geared up to start school again after a three week Christmas break. Ohhh the break was nice..but ohhh a routine will be even nicer! Among other subjects, we’re excited to dive back into our history reading..start a new read-aloud, Cheaper by the Dozen…and get Asa and Justus going on their LTC projects. 

Here’s what we’ll be eating this week:

Sunday, Jan 11
Oatmeal, apples
Chicken and noodles, mashed potatoes, relish tray, chocolate cake with hot fudge and whipped cream (with guests)
Leftovers

Monday, Jan. 12
French toast
Pizza casserole, corn
Deer steak, mashed potatoes and gravy, peas

Tuesday, Jan. 13
Turkey sausage and eggs, pears
Sloppy joes on homemade buns, baked beans, carrot sticks
Chicken stir-fry with rice and veggies

Wednesday, Jan. 14
Apricot Breakfast Bars, bananas
Chicken tortilla soup, fruit salad
Shepherds Pie

Thursday, Jan. 15
Homemade honey oat crunch cereal with dried fruit
Black eyed peas and cornbread, spinach salad
Potato soup, carrot sticks

Friday, Jan. 16
Fruit and yogurt delight, toast
Homemade pizza pockets, apple slices, tossed salad
Hamburgers and fries (Elias’ Birthday Sleepover!)

Saturday, Jan 17
Sleepover breakfast – Donuts
Potato wedges, cottage cheese with peaches
Beef stroganoff, steamed broccoli

On the blogging menu this week:

Besides posting about making sourdough bread, I have a really fun winter-time lunch idea to share…we’ll start the Women with a Mission series…and I’ll take you on a LIVE tour of my kitchen!  (Yes, I videoed my kitchen for you. You can even hear my pantry door squeak!). I also hope you’ll join us for Gratituesday!

Here’s to a great week!
————————————

Be inspired to plan your meals over at Organizing Junkie!

Heavenly Homemaker's Club Members: Access your homepage and all your fantastic resources here! Not a member yet? Please join us!

Question #25

January 10, 2009 by Laura 26 Comments

This post may contain affiliate links. For more information, please see our disclosure policy.

I don’t know why I haven’t asked you this before (since I am ever so nosy and all of that).

What kind of music do you listen to? 

I generally listen to Christian radio…I have a radio in my kitchen and LOVE listening to Christian songs while I work. 

My favorite group (currently) is Switchfoot. Somehow we ended up with their “Beautiful Letdown” CD. (Someone accidently left it at our house a couple of years ago…is it yours?)  We keep it in the van and listen to it over and over. I love their song Twenty-Four. 

And, well..you know I like this song and this one.

But I don’t know what kind of music you like listening to! Share! What do you like?

Feel free to sing to us in the comments as well. Singing is always appreciated.

Heavenly Homemaker's Club Members: Access your homepage and all your fantastic resources here! Not a member yet? Please join us!

Sourdough Starter: Day 6 and 7

January 10, 2009 by Laura 6 Comments

This post may contain affiliate links. For more information, please see our disclosure policy.

I’m combining today and tomorrow because tomorrow is Sunday and it’s always hard enough getting all six of us ready and out the door for church on time without stopping to post pictures of sourdough starter. It just might push me over the edge to insanity. :)

This morning my starter didn’t have any liquid hanging around anywhere. I think it is because yesterday I started working to thicken my starter so that it wouldn’t be SO sour. If you remember, I only added 1/4 cup of water. I’m glad I did that. It’s getting to be more of the consistency I want it to be now.

sourdough61sm.jpg

Today was graduation day for us. (Oh, I couldn’t be more proud.)  My starter went from big glass jar to big glass bowl. I didn’t want sourdough overflowing all over the place.

Again today, I added a cup of flour and only 1/4 cup of liquid. Here is a picture of how thick my starter is now.

sourdough62sm.jpg

sourdough63sm.jpg

I layed a big piece of cheesecloth over my bowl without securing it with anything. 

On Day 7…just do the very same thing by adding 1 cup of flour and enough cold water to make your starter as thick (less sour) or as thin (more sour) as you want. I may try to pop back in briefly if I feel like there’s anything important I need to tell you about the Day 7 process.

And GUESS WHAT?! On Monday we can make BREAD!!! Would it surprise you to hear that the only ingredients you need to have ready to go are more flour and water…and some salt? (I use Redmonds Real Sea Salt.) 

Heavenly Homemaker's Club Members: Access your homepage and all your fantastic resources here! Not a member yet? Please join us!

Sourdough Starter: Day 5

January 9, 2009 by Laura 22 Comments

This post may contain affiliate links. For more information, please see our disclosure policy.

Whoa-oa-oa! Get back! So much for the “sweetly sour” smell of my starter from yesterday morning. 

Shew!

A few of you commented that your starter was NOT smelling sweetly sour…but more like…well none of you said exactly. Although Cindy’s husband said that it smells like some of the calls he goes on (he is a fireman/paramedic).

May I suggest a description something like a cross between a dirty gym socks and baby spit up? Okay…so sorry. DON’T let this discourage you from making sourdough!!!!!  It gets better I promise! And…the sourdough bread doesn’t taste like the above mentioned descriptions. I PROMISE!

So…Day 5…if sniffing your sourdough starter makes you want to cough, gag, and run screaming from the room with tears running down your face…it’s doing exactly what it’s supposed to be doing. Good job creating a stinky masterpiece. :)

This morning a lot of liquid had risen to the top of my starter…and it had a frothy film on the top of the liquid. The froth was darker than yesterday and there was less of it. This is normal.

sourdough51sm1.jpg

sourdough52sm.jpg
Elias saw this picture on my computer screen and said,
“Oh WEIRD…what IS that?” 
Oh how I love posting weird pictures on my blog…

So…a note about stinky…SOUR…sourdough:

The more liquidy and soupy your sourdough starter is…the more sour it is going to be/taste. Some people like their sourdough to have a very strong taste. My family and I don’t prefer it quite so sour.

Since this is Day 5 and there are only two days left before I make bread from my starter (woohoo!)…I decided today to start making my starter a little thicker to help with the over-sourness factor.

This morning I added one cup of flour as normal…but only 1/4 cup of water. I also poured off most of the liquid that had risen to the top again before adding the flour/water. As I stirred in the flour/water…it all mixed in just fine and was by no means too thick to stir. So, depending on how thick or runny your starter is at this point, you may want to adjust the amount of water you add. 

Several of you have asked if I would be sure to walk you through the sourdough bread making steps. ABSOLUTELY. I would NOT dare tell you how to make a sourdough starter and then leave you hanging about making the bread. It’s a tiny bit of a different process than making “yeast breads”…but it’s SO not hard to make. I’m getting so excited to finally be able to make my sourdough starter into bread! Yay!

So…anyone care to leave a description of how their sourdough is smelling by now?

Heavenly Homemaker's Club Members: Access your homepage and all your fantastic resources here! Not a member yet? Please join us!
« Previous Page
Next Page »

Join Our Community!

 Facebook Twitter E-mail Instagram Pinterest

Popular Posts

~ Will All of the Real Moms Please Stand Up?
~ Easy! Stir-and-Pour Whole Wheat Bread
~ How to Make Gatorade
~ 31 Real Food Breakfast Ideas
~ Dear Teenage Girls...
~ When Mom Takes a Step Back
~ The Inexpensive Health Insurance We Love!
~ Let's Talk Real Food Grocery Budgets

Check out our latest posts!

  • Big Family Food and Fun: September 20-26, 2026
  • Big Family Food and Fun: September 13-19, 2026
  • Big Family Food and Fun: September 6-12, 2026
  • Big Family Food and Fun: August 30-September 5, 2026
  • Big Family Food and Fun: August 23-29, 2026
Home  ~  Simple Meals  ~  Club Membership  ~  Shop  ~  Privacy Policy  ~  Disclosure  ~ Contact

Copyright © 2026 · Beautiful Pro Theme on Genesis Framework · WordPress · Log in