Heavenly Homemakers

Encouraging women in homemaking, healthy eating and parenting

  • Home
    • About
    • FAQs
  • Recipes
    • Bread and Breakfast
    • Condiments
    • Dairy
    • Main Dishes
    • Side Dishes and Snacks
    • Desserts
    • Gluten Free
    • Instant Pot
    • Crock Pot
    • Heavenly Homemaker’s Weekly Menus
  • Homemaking
    • Real Food Sources
  • Store
  • Contact
    • Advertise
    • Disclosure
    • Privacy Policy
  • Simple Meals
  • Club Members!

Kids In the Kitchen, Pt. 1

March 10, 2008 by Laura 3 Comments

This post may contain affiliate links. For more information, please see our disclosure policy.

Almost everything I know about making my home a haven  is from watching and doing and learning from my mom.

Especially in the kitchen.

I spent HOURS of my time growing up in the kitchen with my mom. I would pull up a chair and just watch. And stir. And help.

And when I went to my grandma’s…I would stand with her in her teeny tiny kitchen and just watch. And stir. And help.

By the time I was about eight or nine…my mom put me in charge of some of the cooking (usually the cookie baking part!). 

We often had extra farm hands around in the summer time to feed, and I know that I was a big help to her. We would cook all day it seemed. I would bake about one batch of chocolate chip cookies per day during those summers. By the time I was ten, I could bake them in my sleep (and probably did sometimes!).

Now that I’m (10 x 3 + ?)…I love cooking!

And, my cooking styles are a lot like my mom’s…or my grandma’s..

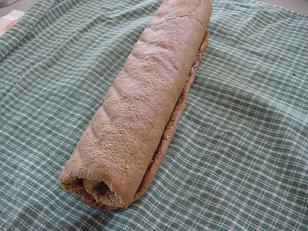
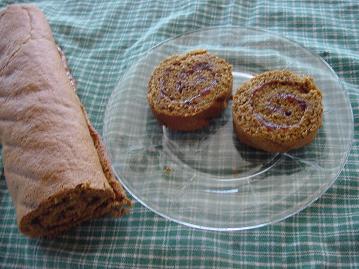
My dad has told me from time to time when he’s here visiting…”These rolls taste just like your grandma’s did”…or “That dinner was just like what your Mom would have made.”

<blink> <gulp>

What an honor for my dad to rank my cooking up there with the two favorite women in my life.

Oh, how I miss them. 

But, my memories are so clear and sweet.

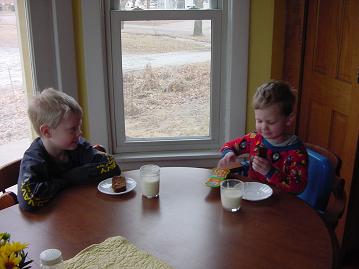
My encouragement for all of us then…is to pull your kids into the kitchen and make some sweet memories.

Over the next several days, I’ll be writing about some fun things to do in the kitchen with your kids…and some fun ways to teach them. Be sure to check back in!

You’ll never regret the precious time spent alongside your children in the kitchen. 

And the skills you will teach them will last them a lifetime.

Heavenly Homemaker's Club Members: Access your homepage and all your fantastic resources here! Not a member yet? Please join us!

Our Menu

March 10, 2008 by Laura 3 Comments

This post may contain affiliate links. For more information, please see our disclosure policy.

mar9menusm.JPG

You’ll find great recipes on the HeavenlyHomeMakers Site.

Want some free, pretty downloadable menu planners?

More Menu Plan Monday…

Have a joyful week!

Heavenly Homemaker's Club Members: Access your homepage and all your fantastic resources here! Not a member yet? Please join us!

Healthy Treat For Today: Strawberry Jelly Roll

March 7, 2008 by Laura 4 Comments

This post may contain affiliate links. For more information, please see our disclosure policy.

Today, I asked Elias what we should make for our healthy treat…

He said, “Something with strawberries!! Some kind of cake!!”

Since strawberries aren’t in season yet…and I couldn’t really come up with any good ideas for a cake using frozen strawberries…

We came up with the idea to make a Strawberry Jelly Roll.

I’ve actually never made a jelly roll before…

Um, because, they’ve intimidated me.

 I admit it. I have Jellyrollaphobia. 

I’m usually a mix-up-a-cake-and-throw-it -into-the-pan kind of a girl. The idea of whipping my egg whites and folding in my flour mixture…blah, blah, blah…

And then rolling the cake thingy and spreading the filling, and rolling it back up without the thing breaking apart all over the place really scared me…

Jellyrollaphobia.

But today, everyone…

Today, I have overcome my fear of the Jelly Roll.

I have learned that Jelly Rolls are nothing to be afraid of.

This was very easy to make…and not at all scary.

Strawberry Jelly RollYum

1/2 cup whole wheat flour
1/2 t. baking powder
4 eggs yolks
1/2 t. vanilla
1/3 cup rapadura
4 egg whites
1/2 cup rapadura
Strawberry Jelly – the kind made with only fruit, of course

Stir together flour and baking powder. Set aside. In another bowl, beat egg yolks and vanilla and 1/3 cup rapadura. And in another bowl, beat egg whites until soft peaks form. Add 1/2 cup rapadura to the egg whites and beat some more until hard peaks form. 

Then, fold the egg yolk/vanilla mixture into the egg whites. Next, fold the flour mixture into the egg whites. 

Spread the batter onto a buttered piece of parchment paper lining a cookie sheet. Bake it for 12-15 minutes at 375 degrees. The cake should “spring back” if you gently touch it in the middle.

Immediately pull the cake off of the parchment paper and lay it onto a tea towel. Roll it up in the towel. Allow it to cool completely.

Unroll it, spread jelly all over it, and roll it back up.
jellyroll5sm.JPG

jellyroll4sm.JPG

jellyroll3sm.JPG

jellyroll2sm.JPG

Done.

Slice it, eat it, share it, exclaim over it, be amazed by it.

jellyroll1sm1.JPG

We all really liked this treat.

And I will definitely make it again sometime.

I’ll probably even play with it and make different fun variations to the Jelly Roll.

Pumpkin Roll, Chocolate Roll, Cream Cheese something or other Roll, Chocolate-Pumpkin-Cream Cheese-something or other Roll…

I am a Jellyrollaphobic no more.

Heavenly Homemaker's Club Members: Access your homepage and all your fantastic resources here! Not a member yet? Please join us!

Email…and Kids

March 6, 2008 by Laura 2 Comments

This post may contain affiliate links. For more information, please see our disclosure policy.

frugalfridays.jpg

Recently, my two older boys got themselves each an email account…

They have had SO much fun emailing their buddies back and forth  (and then calling each other on the phone right away to let each other know that they just sent an email…)  :)

And sometimes they email our family members… 

What aunt or uncle or grandparent doesn’t love that?!

We’ve decided it’s a super way for our big kids to learn more about computers and to learn to write…you know – complete sentences…equipped with capital letters and punctuation and everything. They don’t even complain about this kind of “writing” like they sometimes do about other writing assignments.

And, my most favorite way to use email with the kids? 

Emailing back and forth with Mom and Dad! 

I’ve had so much fun surprising them with an email letting them know how proud I am of their hard work that day, or how great they did on their math assignment, or whatever.

Here’s my email to my oldest son a couple of days ago…

Asa,

You are SO the  best 10 year old boy EVER!!
 
Thanks for making lunch and helping with everything else while I didn’t feel well.

Love you,

Mom

And here’s his reply:

Hi Mom! You are SO the best 34 year old Mom EVER. HeHe  Asa

Isn’t he “oh, so clever”? 

I should get him started on a blog.

In the meantime…I’ll just enjoy this completely free way to send encouragement to my kids…and this great tool to get my kids writing more!

More on Frugal Fridays…

Heavenly Homemaker's Club Members: Access your homepage and all your fantastic resources here! Not a member yet? Please join us!

Healthy Treat for Today: Mudballs

March 6, 2008 by Laura 35 Comments

This post may contain affiliate links. For more information, please see our disclosure policy.

Who wouldn’t want to eat a Mudball?! These treats give the idea of making mud pies a whole new meaning!

sunbutter7sm.JPG

These are great fun to make…and great fun to eat!

Just ask my boys…who have gone through about 4 double batches of them since Jayme sent me the recipe!

As Jayme put it…

“Sometimes we eat them warm right out of the pan…sometimes we eat chill them and then eat them…but mostly…we just EAT them!”

Perfectly said!

You have to try these! They are a great snack to have on hand in the fridge. And they really do just take about five minutes to make.

MudballsYum

1/4 cup peanut butter
1/4 cup honey
1/4 cup wheat germ
1/2 cup oats
1/4 cup chocolate chips
1/4 cup sesame seeds or flax seeds

Cook the peanut butter and honey over low heat until melted. Add remaining ingredients. When cool enough to handle roll into oohey gooey mud balls.

Have fun! Let me know if you don’t like the name of these treats just as much as my boys do!

UPDATE

Every time I make these, I have to do way too much mental math to figure out how to make a large batch. Finally I realized that I needed to update this post with an additional recipe card to help us all just make these without having to stretch our brains to figure out how many 1/4 cups are in 40 ounces. Oy.

You may wish I had some sort of happy medium recipe – somewhere between Tiny Recipe and Monster Recipe. I suggest that you might want to cut the Monster Recipe in half, or make the big recipe and then wrap/freeze some Mudballs for another time!

NOTE: If you do the math, you’ll notice that not all of the ingredient amounts listed above are multiplied the same. This is because I refuse to use that much honey, which then changes the liquid consistency of the big batch. What you see below is how I make these now as I use a 40-ounce jar of our favorite peanut butter from Sam’s. (40-ounces is 5-cups, by the way. You can see then, that I don’t want to use 5-cups of honey!?!?! These are perfectly sweet with way less honey!)

Monster-Sized Recipe for Mudballs

Healthy Treat for Today: Mudballs
 
Save Print
Author: Laura
Serves: 50-60
Ingredients
  • 40 ounce jar natural peanut butter
  • 1 cup honey
  • 1 cup wheat germ
  • 1 cup flax seeds (ground or regular)
  • 1 cup unsweetened coconut flakes
  • 1½ cups chocolate chips
  • 4 cups oats
Instructions
  1. Cook and stir the peanut butter and honey over low heat until melted together
  2. Add remaining ingredients.
  3. Use a medium-sized cookie scoop to form balls.
  4. Store in an air tight container.
3.5.3251


Heavenly Homemaker's Club Members: Access your homepage and all your fantastic resources here! Not a member yet? Please join us!

So Much Spam…So Little Time…

March 5, 2008 by Laura 7 Comments

This post may contain affiliate links. For more information, please see our disclosure policy.

Here are 13 spam messages I’ve received the last few weeks:

1. Stop snoring tonight  *I never knew I started snoring.*

2.  Chat with singles in your area  *Sure…I’d love to tell them all about my super husband.*

3. You qualify for a free power wheelchair  *I’m curious…what might be the qualifications?*

4. Meet wealthy York men  *I’m pretty sure I’ve met all the wealthy York men…both of them.*

5. Laura, want to win at slots?  *Hm, is that a trick quesion?*

6. York singles want to meet Laura this weekend  *To do what? Help me catch up on laundry?*

7. Casting for movies in the York area  *So, someone is finally recognizing my acting talent, huh?*

8. Get rid of the buzz in your ears  *I’m sorry, did you say something?*

9. Losing your hair?  *I suppose if I were, you wouldn’t want me for that movie after all?*

10. What SHOULD  Laura weigh?  *None of your business.*

11. Are you a big beautiful woman?  *Okay, now this is getting personal.*

12. A years supply of free diapers for your baby  *We’ve done potty trained ’em all, thanks…but I would take a years supply of groceries…if you’re offering.*

13. Laura, back from the brink of death?  *It sure feels like it somedays…and apparently I’m also losing my hair, snore and have a constant buzz in my ears. It’s okay though…the wheelchair I qualified for should be here any day…some single men are coming over to help me do some laundry…then, I get to be in a movie.*

More Thursday Thirteen

Heavenly Homemaker's Club Members: Access your homepage and all your fantastic resources here! Not a member yet? Please join us!

Healthy Treat for Today: Applesauce Bread

March 5, 2008 by Laura 132 Comments

This post may contain affiliate links. For more information, please see our disclosure policy.

Wanna know the biggest problem I had with my Applesauce Bread this morning?!

applesauce_bread

Yum

I only made one loaf! What was I thinking?!

We downed the whole loaf very quickly…

And then, “Mom, did you make anymore?” say all the boys as they peek around in hope at all the countertops and at the oven.

So, be warned, you might want to double this recipe if you’re going to wake your family up some morning to the delicious smell of this bread baking.

And, it is a great way to wake your family, I promise!

5.0 from 1 reviews
Healthy Treat for Today: Applesauce Bread
 
Save Print
Author: Laura
Serves: 1 loaf
Ingredients
  • 1½ cups whole wheat flour
  • ¾ cup sucanat or ½ cup honey
  • ½ teaspoon baking powder
  • ½ teaspoon baking soda
  • ¼ teaspoon sea salt
  • 1 teaspoon cinnamon
  • ½ teaspoon nutmeg
  • ¾ cup applesauce
  • 2 eggs
  • ¼ cup melted butter
Instructions
  1. Mix dry ingredients.
  2. Make a well in the center and add applesauce, eggs, and butter.
  3. Stir well.
  4. Pour batter into one buttered bread pan or stone.
  5. Bake at 350° for 45-55 minutes or until a toothpick inserted in the middle of the loaf comes out clean.
3.4.3177

Check out these cutie boys eating their Aplesauce Bread this morning with butter melted on it, with a glass of milk…

See, Malachi has his green cell phone handy right there – ready to call someone to let them
know what a great breakfast he’s having. (I can’t believe my kids were actually this little once!)

applesaucebread2sm.JPG

This is one of our favorite fall recipes! Put some in the oven, and your whole house will smell like fall. Or Christmas. Or comfort. Or all of the above.

Hint: If you have some apples that are beginning to get mushy and no one wants to eat them – simply core them and put them into a food processor or blender. Puree them, then stir them into this recipe. Works like a charm!

Heavenly Homemaker's Club Members: Access your homepage and all your fantastic resources here! Not a member yet? Please join us!

Hooray for the Sunshine!

March 4, 2008 by Laura 3 Comments

This post may contain affiliate links. For more information, please see our disclosure policy.

gratituesday1.jpg

Today…I am SO thankful for bits of sunshine we’ve been having lately!

So thankful!

It has been so nice to be able to send the kids outside for some fresh air and running around time.

It has been so nice not to have to put on 23 layers of clothes just to go get the mail.

It has been so nice to walk outside and not have an instant ice cycle hanging from our noses.

It’s been so nice not to be walking around inside the house with an ice cycle hanging from our noses.

Winter has some wonderful, cozy blessings that I really am grateful for too…

But today, I’m thankful for the sunshine and the hope of spring.

What are you grateful for this Gratituesday?

Heavenly Homemaker's Club Members: Access your homepage and all your fantastic resources here! Not a member yet? Please join us!

Healthy Treat for Today: Homemade Pizza Pockets

March 4, 2008 by Laura 113 Comments

This post may contain affiliate links. For more information, please see our disclosure policy.

Lunch time around here can be a hectic time…

These Pizza Pockets are a perfect treat that you can make ahead put in the freezer…then throw in the oven at lunchtime.
pizzapockets2sm.JPG

Here’s how I made these:

I used my regular pizza recipe…

CrustYum

3 1/2 cups whole wheat flour
1 teasoon sea salt
1 cup melted butter
1 cup plain yogurt

Stir ingredients together until thoroughly mixed. You can make these pockets right away, or you can allow this dough to soak for 12-24 hours in order to break down the phytates and make the grain more easily digestible.

Pizza Sauce

1 1/2 cups tomato sauce
1/2 teaspoon garlic powder
1 1/2 teaspoon oregano
1 1/2 teaspoon basil

Stir together and simmer for a few minutes.

Pizza Pocket Fillings

Grated mozzarella or white cheddar cheese, cooked hamburger, pepperoni, olives, peppers, mushrooms

To form a Pizza Pocket

Roll a small ball of dough into a circle. Place one tablespoon of pizza sauce in the center. Put in a small amount of your choice of toppings. Fold the dough in half. Use a fork to pinch the edges together.

Lay Pizza Pockets on a cookie sheet lined with parchment paper. Freeze for about one hour. Pop them off the cookie sheet and put them into a freezer bag…and back into the freezer.
cookmarathon3sm.JPG

Bake your Pizza Pockets

For frozen Pizza Pockets, bake in a 400 degree oven for 30 minutes. If the Pizza Pockets are thawed, bake at 400 degrees for 20 minutes.

I love the convenience of this nutritious “fast food”! Serve them with fruit and veggies(God’s fast food!)…and you’ve got yourself a quick and easy lunchtime treat!!

You’ll find more healthy treat recipes here.

Grocery List

Heavenly Homemaker's Club Members: Access your homepage and all your fantastic resources here! Not a member yet? Please join us!

Healthy Treat for Today: Chocolate Chip Brownies

March 3, 2008 by Laura 98 Comments

This post may contain affiliate links. For more information, please see our disclosure policy.

Do you like rich chocolate like I do?

For me…the richer the better…
ccbrownies2sm.JPG

And this is one wealthy brownie. Loaded. Rollin’ in it. It’s got bank.

These babies require a glass of milk. A tall one.

After you have these, a brownie from a box just won’t do anymore. You won’t even be able to call those boxed things brownies anymore. They’ll just be a brown square of blah-ness. Nope, now these…these are real brownies.

And, guess what?! I experimented a little with the chocolate chips to see if I could make them with butter instead of coconut oil.

Oh yeah!! You SO can!

The chips are a little softer when made with butter, but they still worked just fine.

And they definitely taste good.

And make great Chocolate Chip Brownies!
ccbrowniessm.JPG

Chocolate Chip BrowniesYum

1 stick butter, melted
1 cup sucanat
1/4 cup cocoa powder
1 egg
1 teaspoon vanilla
3/4 cup whole wheat flour
1/2 cup homemade chocolate chips (chunks)

Stir together butter, sucanat and cocoa. Mix in egg and vanilla. Stir in flour and mix until combined. Fold in chocolate chips. Pour into a 8×8 baking stone or pan. Bake at 350 degrees for 20 minutes, or until a toothpick inserted in the center comes out clean.

I had to double this recipe today because I’m taking a few to some friends tonight, and because…YUM!

Get yourself a tall glass of milk and sit down and enjoy one of these rich treats!

And then, get up and jog a few laps, because even though these are on the healthier side of things…

They aren’t carrot sticks.

:)

Heavenly Homemaker's Club Members: Access your homepage and all your fantastic resources here! Not a member yet? Please join us!
« Previous Page
Next Page »

Join Our Community!

 Facebook Twitter E-mail Instagram Pinterest

Popular Posts

~ Will All of the Real Moms Please Stand Up?
~ Easy! Stir-and-Pour Whole Wheat Bread
~ How to Make Gatorade
~ 31 Real Food Breakfast Ideas
~ Dear Teenage Girls...
~ When Mom Takes a Step Back
~ The Inexpensive Health Insurance We Love!
~ Let's Talk Real Food Grocery Budgets

Check out our latest posts!

  • Big Family Food and Fun: June 14-20, 2026
  • Big Family Food and Fun: June 7-13, 2026
  • Big Family Food and Fun: May 31-June 6, 2026
  • Big Family Food and Fun: May 24-30, 2026
  • Free 7-Day Summer Menu Plan
Home  ~  Simple Meals  ~  Club Membership  ~  Shop  ~  Privacy Policy  ~  Disclosure  ~ Contact

Copyright © 2026 · Beautiful Pro Theme on Genesis Framework · WordPress · Log in