Heavenly Homemakers

Encouraging women in homemaking, healthy eating and parenting

  • Home
    • About
    • FAQs
  • Recipes
    • Bread and Breakfast
    • Condiments
    • Dairy
    • Main Dishes
    • Side Dishes and Snacks
    • Desserts
    • Gluten Free
    • Instant Pot
    • Crock Pot
    • Heavenly Homemaker’s Weekly Menus
  • Homemaking
    • Real Food Sources
  • Store
  • Contact
    • Advertise
    • Disclosure
    • Privacy Policy
  • Simple Meals
  • Club Members!

Easy (Make-Ahead) Baked Potato and Bacon Casserole

September 9, 2015 by Laura 15 Comments

This post may contain affiliate links. For more information, please see our disclosure policy.

It’s a Potato and Bacon Casserole. Life is good.
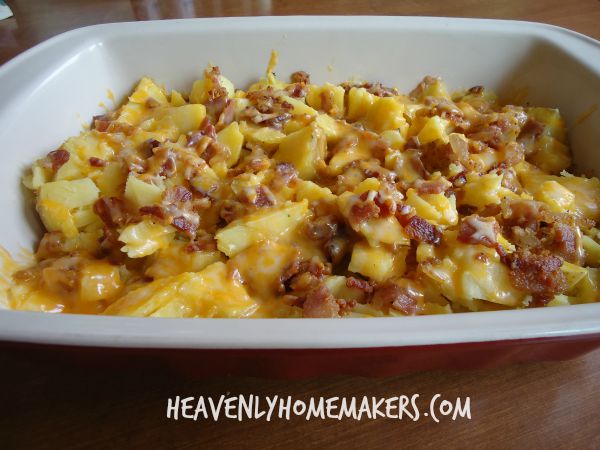
Bacon Baked Potato Casserole

This is so easy we can hardly call it a recipe. I’m pretty sure my family will be having this every other week for the rest of our lives for the following reasons:

  1. Bacon. Of course. And also, cheese.
  2. We can slather it with Spicy Ranch Dressing, which tastes so good I believe I shall become addicted to it.
  3. I can make several of these casseroles at once and freeze them for later, making this easy meal even easier.

This “casserole” is basically baked potatoes cut up in a dish with bacon and cheese all over it. I’m sorry that I can’t make it more complicated for all of you who would rather spend many more minutes sauteing, braising, and broiling. This time, you’ll have to get your steeping and zesting fix elsewhere.

Everyone else: I lovingly suggest that you go scrub some potatoes. You’re having this for dinner tonight.

Baked Potato and Bacon CasseroleYum

Easy (Make-Ahead) Baked Potato and Bacon Casserole
 
Save Print
8 medium-sized potatoes (any variety) 1 pound bacon 2 cups shredded cheddar or colby jack cheese Sour cream, chives, and/or Spicy Ranch Dressing for topping
Author: Laura
Ingredients
  • 8 medium-sized potatoes (any variety)
  • 1 pound bacon
  • 2 cups shredded cheddar or colby jack cheese
  • Sour cream, chives, and/or Spicy Ranch Dressing for topping
Instructions
  1. Scrub and bake potatoes by putting them into a covered dish in a 350° oven for 1½ hours.
  2. In the meantime, cut bacon into bite-sized pieces and cook thoroughly on the stove-top.
  3. Cut baked potatoes into chunks, spreading them out into a 9x13" baking dish.
  4. Sprinkle cooked bacon over the potatoes.
  5. Top with shredded cheese.
  6. Bake in a 350° oven for about 10 minutes or until the cheese has melted.
3.4.3177

Offer sour cream, chives, and/or Spicy Ranch Dressing to complete this main course. Serve with a salad and another fruit or veggie. It is too easy. Makes 6-8 servings.
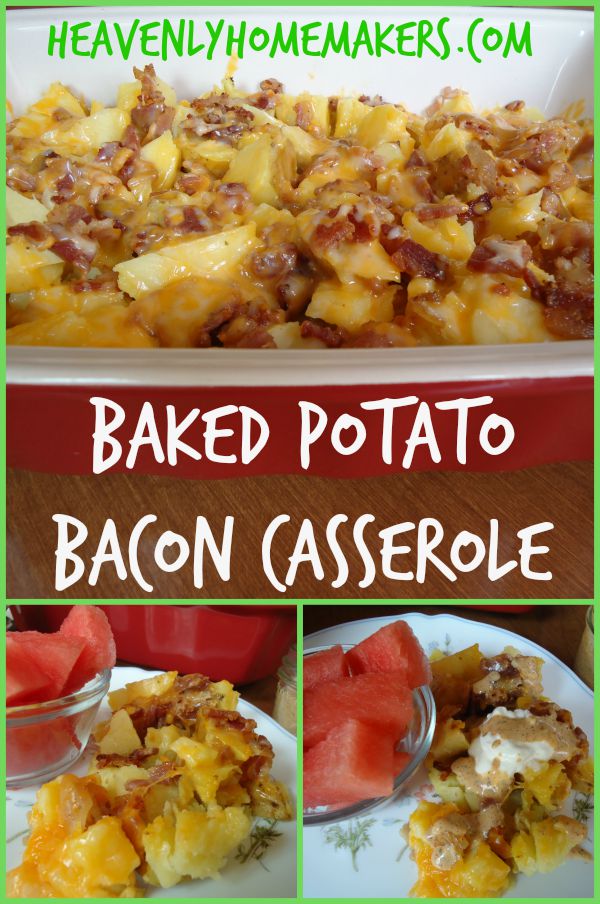
Baked Potato Bacon Casserole

To Freeze This Dish: 

Make it as directed above. Allow it to cool completely. Cover and label. Put it in the freezer.

To Reheat and Serve This Dish:

This is my favorite trick. Get the casserole out of the freezer. Cover the frozen dish with foil (somebody needs to invent a 9×13 glass cover for my pyrex dishes). Put the frozen casserole into a COLD oven. Turn the oven on to 250° allowing it to heat up along with the casserole. After one hour, turn the oven up to 350° and bake for one more hour or until the casserole is thawed, heated through, and looks like wonderful cheesy deliciousness.

Let us all add this recipe to our “Reasons to Make Extra Baked Potatoes When We’re Making Baked Potatoes Anyway” list.

7 Ways to Use Baked Potatoes

Switch out the bacon in this casserole for other cooked meats. Switch out the regular potatoes for sweet potatoes. Just whatever you do, try it with the Spicy Ranch Dressing. Ah-mazing.

Heavenly Homemaker's Club Members: Access your homepage and all your fantastic resources here! Not a member yet? Please join us!

Spicy Ranch Dressing

September 6, 2015 by Laura 11 Comments

This post may contain affiliate links. For more information, please see our disclosure policy.

I just met something wonderful called Spicy Ranch Dressing.

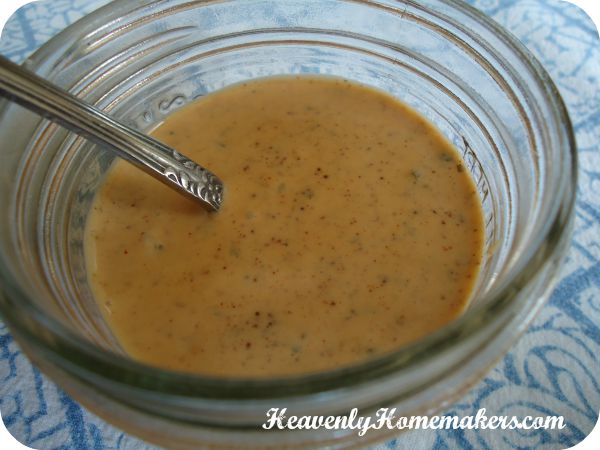
spicy ranch dressing 1

Remember when I went to the Women of Faith conference with my girlfriends and got super silly? It may have been in part because of the meal we ate across the street from the arena before the event. Yes. I blame it on the specialty pizza. It was that good.

Who knew you could put thin slices of red potato on a pizza and turn out something amazing? The pizza had some sort of red-ish sauce drizzled all over it, and that very sauce is what made that pizza taste so good. Well, that and the bacon. Everything is better with bacon.

Of course I came home determined to replicate the sauce. Every potato needs that sauce, whether it’s on a pizza or not. So I looked it up on the restaurant website. It described the pizza blah, blah, blah “with spicy ranch dressing.” Bingo.

So I played. The result is too easy. Make this and forever drizzle it over your baked potatoes, your chicken, and sure – even your pizza.

Spicy Ranch DressingYum

Spicy Ranch Dressing
 
Save Print
Author: Laura
Ingredients
  • 1 cup homemade ranch dressing (because it is good for you and delicious)
  • 1-3 Tablespoons of your favorite hot sauce like Tabasco, Cholula, or Sriracha
  • 1 teaspoon chili powder
  • 1 teaspoon cumin
Instructions
  1. Mix together, and enjoy.
3.4.3177

See how easy that was? You’ll need my homemade ranch dressing recipe.

Want it to be spicier? Add more hot sauce, chili powder, or cumin. Want it to be less hot? Cut down the hot sauce, chili powder, or cumin. Really, it isn’t difficult.

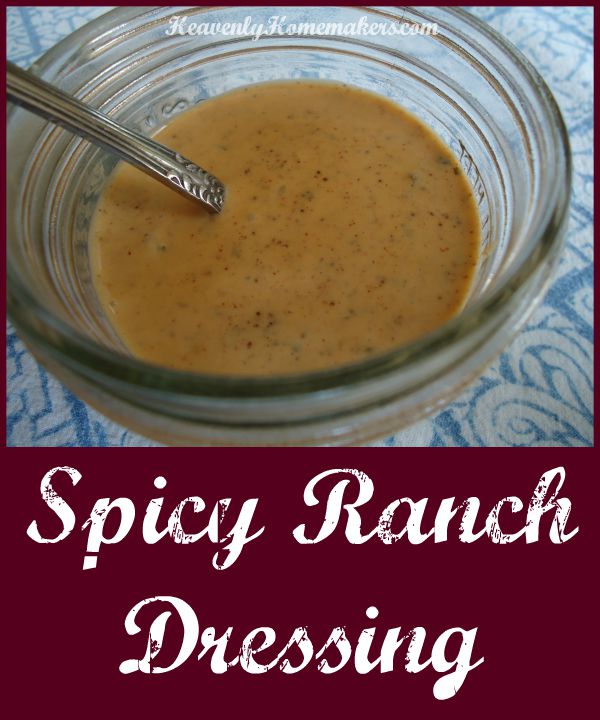
Spicy Ranch Dressing

Later this week, I will share a fun new Baked Potato Casserole I came up with to use with this Spicy Ranch Dressing. You will love how simple it is. And yep, there’s bacon on it. (And all the husbands everywhere said, “Yes. Keep reading that one lady’s blog – the one who gives you recipes that use bacon.”)

Give me more ideas besides potatoes, chicken, and pizza for this dressing. Think it would taste good on a salad? (Yes.) Ooh, maybe with Sweet Potato Fries. Oh my goodness, yes. What else??

Heavenly Homemaker's Club Members: Access your homepage and all your fantastic resources here! Not a member yet? Please join us!

Sugar Cookies ~ the Whole Wheat, Low Sugar, Super Delicious Way

September 3, 2015 by Laura 15 Comments

This post may contain affiliate links. For more information, please see our disclosure policy.

Easy (Low) Sugar Cookies

I tinkered with my old sugar cookie recipe and cut the sugar from 1 1/2 cups down to just 1/2 cup. I personally think it could be cut even more, but that’s because I am weird about sweetness levels now. I’m the one who thinks coffee is sweet when it has only cream stirred into it. It looks so creamy delicious, and I say things like “mmm it is so sweet and good” while I’m sipping it, so my people keep trying it thinking that maybe this time I really mean it. I mean, I do mean it – why would I lie? It’s sweet. But then they take a sip and they make faces and say, “Eww that is so not sweet, what are you even talking about?” This is how I never have to share my coffee.

Now sharing these cookies is a different story. Everyone loves these lightly sweetened jewels. The butter makes them flaky good. This will be my new go-to sugar cookie recipe at all holidays, special events, and uneventful Wednesdays when the mood strikes.

Note about the sugar: Most of the time I use sucanat because it is sugar with some nutrients left behind. For occasional recipes when I’d like to avoid the product turning out too dark brown, I pull out some organic raw sugar. It’s only barely better than white sugar, but we’re going light on the sugar here so I don’t throw a fit about this.


Sugar Cookies the Healthier WayYum

4.0 from 1 reviews
Sugar Cookies ~ the Whole Wheat, Low Sugar, Super Delicious Way
 
Save Print
Author: Laura
Serves: 20-30
Ingredients
  • 1 cup melted butter
  • ½ cup sucanat or raw sugar
  • 2 eggs
  • 1 teaspoon vanilla extract
  • 1 teaspoon baking powder
  • 3½ cups of whole wheat flour (give or take)
Instructions
  1. Stir together melted butter and sugar.
  2. Add eggs, vanilla, and baking powder.
  3. Stir in flour until a solid ball of dough forms.
  4. Cover the bowl and place it in the refrigerator to chill for about an hour.
  5. Roll chilled dough on a well-floured surface and thin or thick as you like.
  6. Cut with cookie cutters and place them about a half inch apart on a baking sheet.
  7. Bake in a 350° oven for about 12 minutes or until cookies are lightly browned.
  8. Makes 20-30 cookies depending on the thickness and size.
3.4.3177


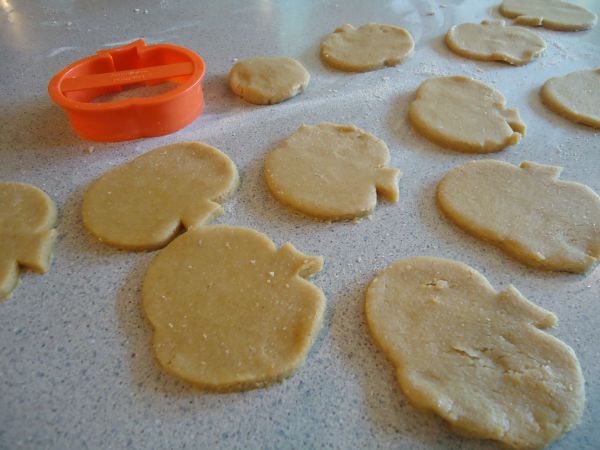
sugar cookies 4

Notice the little round piece of squished circle dough, ready to be baked along with the pumpkin-shaped cookies. It is a part of the “No Cookie Left Behind” program. It’s what you do when your remaining dough isn’t big enough to shape.

Frost these cookies if you like, but then they fall out of the Low Sugar category. We find these to be perfect as they are, and some of us love to eat them with our coffee that is sweetened only with cream.

It’s almost cookie rolling, cutting, and baking season – so I can’t wait to hear what you think about these! (We’re on our third batch already. I may have failed to mention to my kids that I cut down the sugar in this recipe. Do not tell.)

Heavenly Homemaker's Club Members: Access your homepage and all your fantastic resources here! Not a member yet? Please join us!

Busy Morning Breakfasts That Can Be Made Ahead of Time

September 2, 2015 by Laura 11 Comments

This post may contain affiliate links. For more information, please see our disclosure policy.

I am so messed up on breakfasts right now. Our second son started taking a college class on MWF and he has to be on campus at 8:00. Color me late to this “get your kids out the door for school on time” game, but well, that’s exactly what I am. We work from home and we’ve home-schooled forever, so getting out the door to church with combed hair on Sundays has been our only morning schedule struggle. On school days, we usually eat while beginning our Bible time and school time in our jammies a few minutes after we wake the kids. Now, if you can possibly imagine, I must actually be dressed and have breakfast on the table by 7:20.

Yes, I’m sure most of you can possibly imagine, and many of you are thinking, “Really, girl? 7:20 am is practically mid-afternoon at our house.” God bless all of you early morning head-out-the-door-to-work-and-school friends. I have some recipes to share with you. We shall all eat well together…at whatever time each of us considers to be early.

Busy Morning Breakfasts That Can Be Made Ahead of Time

Yum

Busy Morning Breakfasts That Can Be Made Ahead of Time

My goal this week was to prep breakfast foods and put them into the freezer so that I’ll be perfectly organized and never have to think again. Scratch that. My goal this week is simply to prep some breakfast foods and put them in the freezer. I’ll never be perfectly organized and in typical mom-life fashion, I found myself having to think straight and answer difficult questions like “are my soccer socks clean?” just a few minutes ago.

Here are my favorite breakfast foods to put into the freezer. They save time, money, and brain – my favorite things to save.

1. Hashbrowns and Hashbrown Patties

I’ll be baking a few pounds of potatoes this week to shred and put into the freezer. Fry up some eggs with these, serve with fruit – done. Everyone loves these and thinks you’re wonderful when you make these. It is fun when everyone thinks you’re wonderful.

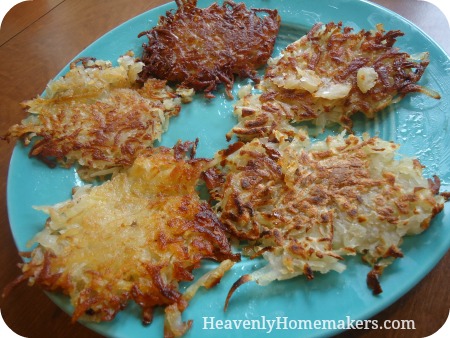
Homemade Hashbrown Patties

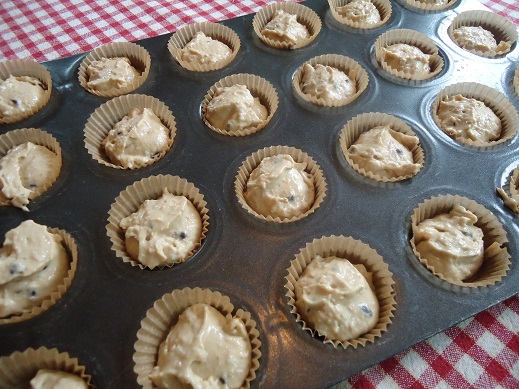
2. Muffin Batter

You knew I would say this one. I can’t help it. Making and freezing muffin batter saves so much time. Not to mention dirty dishes. Deliver me from dirty dishes.

frozen_muffins_3

3. Cooked Turkey Sausage and Prepared Biscuits

I can make biscuits and gravy sooooo fast when I do this. My family is always amazed. Let’s just let them keep thinking that I am incredible to pull this off. Add the above mentioned Hashbrowns to this meal and you can picture my kids breaking into a lively Mom is Our Favorite Person in the Whole World dance (not really).

Freezer Biscuit Tutorial

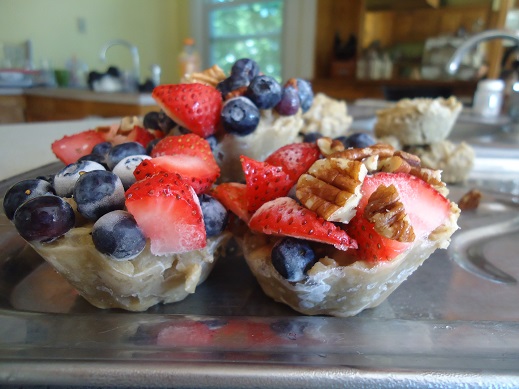
4. Oatmeal Cups

You wouldn’t think that this would save time, but it truly does. At least it saves brain. That’s worth a whole lot.

frozen oatmeal3

5. Giant Breakfast Cookies

Best thing to pull out of the freezer for breakfast…ever.

breakfast_cookies

6. Pancake Muffins

Yep. My newest favorite. I cannot get over how easy these are.

Easy Pancake Muffins

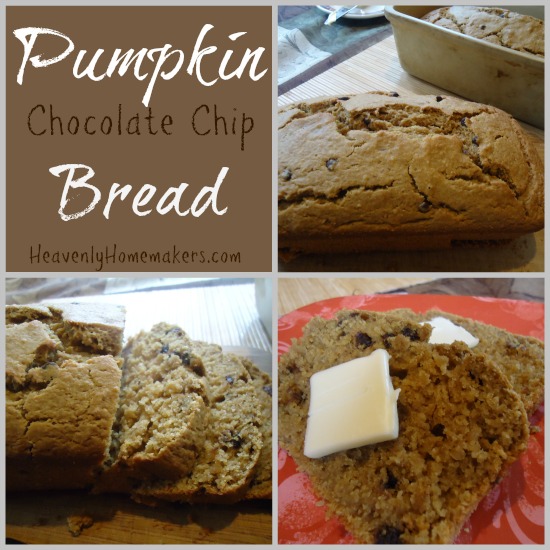
7. Quick Breads

Find our favorite quick bread recipes here. I usually double or triple a batch. If I allow them to cool completely, then wrap them well before freezing them, quick breads thaw and serve well. It is so very nice to pull a prepared loaf or two out of the freezer to go with breakfast in the morning.

Pumpkin Chocolate Chip Bread

If you freeze nothing else to save yourself time, brain, and money (while also eating healthy, because you are just that awesome) – make and freeze some of these breakfast foods. It will make your morning routine so much easier. Pick the recipe that looks the easiest to you – then go for it!

What are your favorite breakfast foods to prep ahead? Have any new ideas for me? What time to you eat breakfast at your house?

Heavenly Homemaker's Club Members: Access your homepage and all your fantastic resources here! Not a member yet? Please join us!

Easy Pancake Muffins – Great for the Freezer!

September 1, 2015 by Laura 24 Comments

This post may contain affiliate links. For more information, please see our disclosure policy.

Pancake Muffins? Seriously?! Why did I not think of this before?

Easy Pancake Muffins

I think I heard this idea from one of you brilliant minds a few dozen weeks or possibly even years ago. If it was you, thank you. My apologies for taking so long to try it. It’s just that...change is hard, you know? I’m so used to pouring pancake batter on a griddle, so scooping it into a muffin cup was just such a hard, hard adjustment for me.

Not really. I just never got around to trying it. Sheesh.

The thing about the traditional pancake is how long one has to stand at the griddle flipping the cakes. Yum, and all that. But it is time consuming if you must move make mountains of pancakes to fill up your people. With the muffin idea, you can scoop the very same pancake batter into muffin cups, slide them into the oven, and be on your way. And {please hold your applause} you can make extras of these and put them into your freezer, then pull them out and rewarm them without even having to think or stir or dirty up a bowl.

I may never stand at a griddle again. {standing ovation}

I no longer know how to cook in small quantities, as is evidenced by the following large-sized ingredient list. Forgive me, cut the recipe in half, or simply put your leftovers in a freezer bag and then into the freezer for a no-brainer breakfast of the future.

Pancake Muffins Yum

Easy Pancake Muffins - Great for the Freezer!
 
Save Print
Author: Laura
Serves: 24
Ingredients
  • 3 cups whole wheat flour (I use freshly ground white wheat - hard or soft)
  • 1 teaspoon baking powder
  • ½ teaspoon sea salt
  • ½ cup melted butter
  • 3 eggs
  • 2½ cups milk
Instructions
  1. Whisk all ingredients together until smooth-ish.
  2. Scoop into prepared muffin cups (buttered, paper-lined, whatever you choose).
  3. Drop in berries or chocolate chips if you wish.
  4. Bake in a 350° oven for 15-20 minutes or until muffins are golden brown.
3.4.3177

Easy Pancake Muffins - Great for the Freezer

You’d think I would have done this earlier since I’ve been making Sausage Pancake Muffins for so long.

If you want to make these a “to-go” muffin, simply add about 1/4 cup of real maple syrup to the batter before scooping and baking. Then you can skip the necessary “dip them in syrup while holding your chin over the table” step.

Ever tried this idea? Were you the one who told me about it? Love you.

Heavenly Homemaker's Club Members: Access your homepage and all your fantastic resources here! Not a member yet? Please join us!

Bacon Tomato Dip With Baked Tortilla Chips

August 26, 2015 by Laura 11 Comments

This post may contain affiliate links. For more information, please see our disclosure policy.

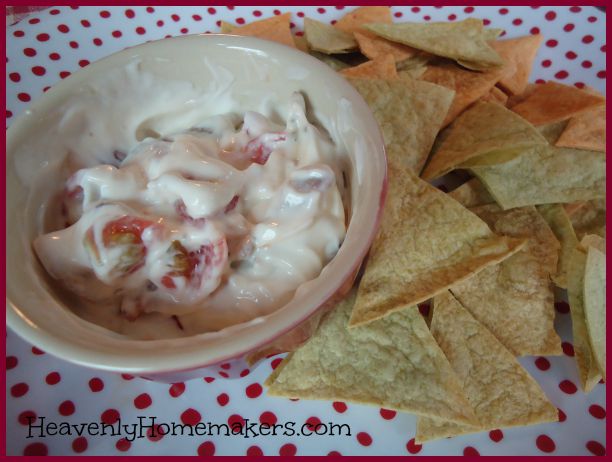
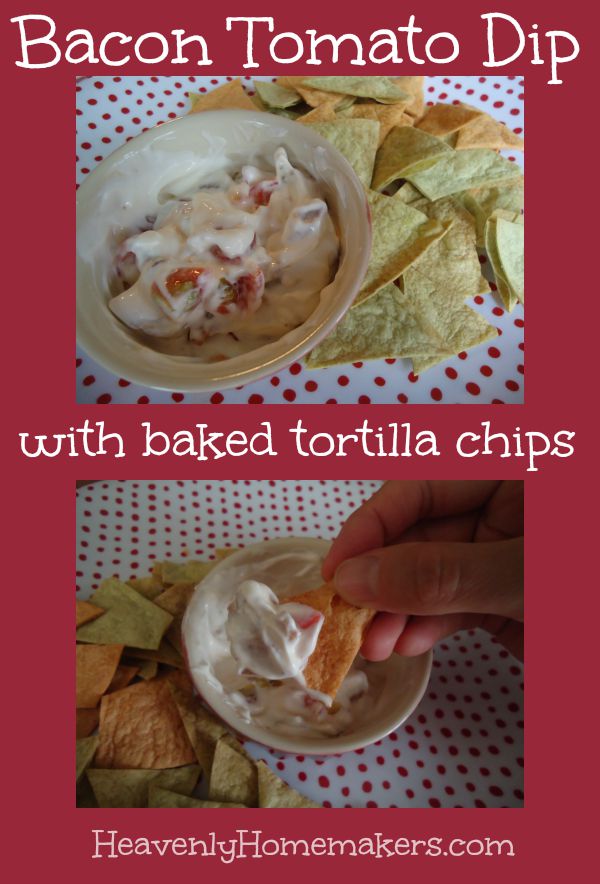
Bacon Tomato Dip. It is so yum.

Bacon Tomato Dip

When I first came upon a recipe like this one, it was called BLT Dip. This sounds delicious, but with one problem. The recipe included no L. There was only B and T.

(Translation: There was only bacon and tomato – no lettuce.)

I considered adding lettuce to the recipe to make it a true BLT dip, but I am quite sure the L would have gotten soggy. Nobody likes soggy L, am I right? Of course I’m right. There are books written about this. People know to run far, far away from soggy L and even limp L will raise eyebrows. So far be it for me to stir crispy L into this recipe and turn out a recipe with soggy or limp L. I love you all too much to put you through that. {wipes tear from eye}

So I played with the recipe and landed on a perfect BT Dip, but decided that BT Dip was a ridiculous name. Come everyone! Try this BT Dip! You will love it! “What a weirdo,” the people will say, “She forgets her vowels.” Then people will try to figure out which vowels and then if they didn’t want to already, they will really not want to try the dip.

Bat Dip, Bit Dip, But Dip (have mercy), Bot Dip… The people would be so busy trying to figure out what the name of the dip is really supposed to be that they would never actually look at the recipe and try the dip. This would be tragic (because this dip is terribly delicious).

I hope this gives you just a glimpse into how hard my life is. This situation has been crippling. Landing on a title kept me up night after painfully long night – so much so that I again considered adding soggy L to the dip just so I could move on with my life and effectively parent my children.

Then I just decided to turn the B and the T back into words. B=Bacon. T=Tomato. Bacon Tomato Dip. How clever.

There is nothing more to say except that you really must make this dip. And also the chips as detailed below because those make the dip many percentages better.

Bacon Tomato Dip (adapted from this recipe) Yum

5.0 from 1 reviews
Bacon Tomato Dip With Baked Tortilla Chips
 
Save Print
Author: Laura
Ingredients
  • 1 pound bacon
  • 1 cup mayonnaise (I prefer Hain Safflower Mayo)
  • 1 cup sour cream
  • 2 chopped tomatoes
Instructions
  1. Cut bacon into bit-sized pieces, cook, and drain.
  2. Stir cooked bacon into mayo and sour cream.
  3. Stir in chopped tomatoes just before serving.
3.4.3177

Serve with corn chips or homemade tortilla chips (details below).

Bacon Tomato Dip with Baked Tortilla Chips

Now let’s talk about making Baked Tortilla Chips. I did not even consider calling these BT Chips because I’d already been through so much trauma. But as you can see, B and T would have also worked for these chips. (B=Baked. T=Tortilla) Try to keep up.

How to Make Baked Tortilla Chips

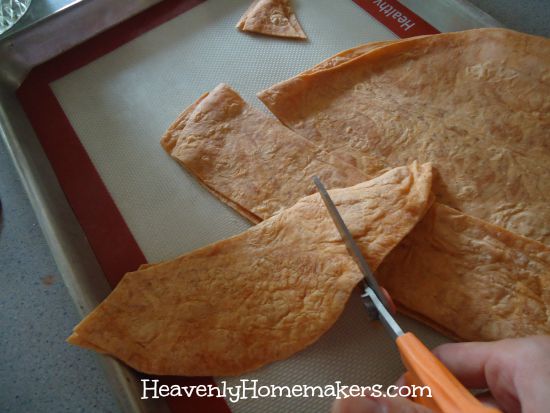
1. Cut your favorite tortillas into strips or triangles or shapeless objects of any sort. Do not name the objects. It makes for sleepless nights. (I usually make homemade tortillas, but Bountiful Baskets offered a nice variety pack and I grabbed it. This worked very well as it is very sad for me to go to the trouble of making tortillas only to cut them after I’ve rolled them. Naming recipes is hard enough. Do not make me also destroy my hand-rolled creations.)

baked chips4

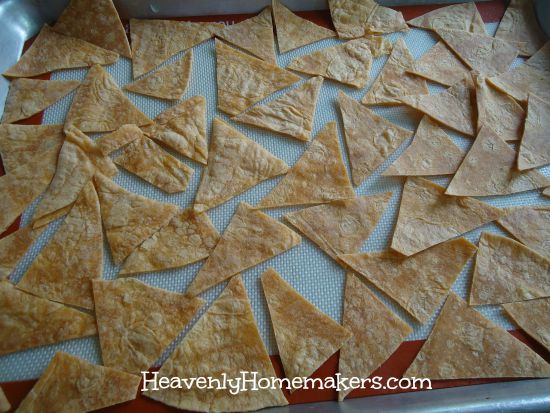
Lay the cut tortillas in a single layer on a baking sheet. Place them in a 350° oven for about 10-15 minutes or until the tortillas have become crispy.

baked chips3

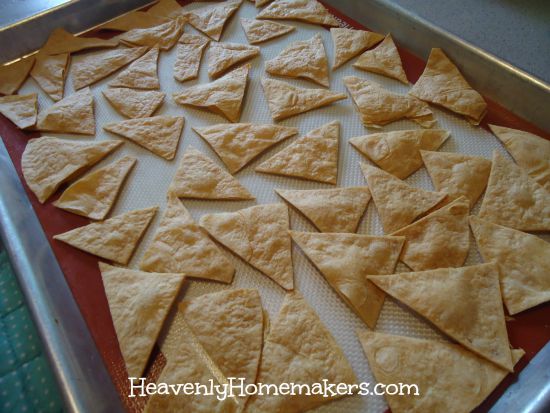
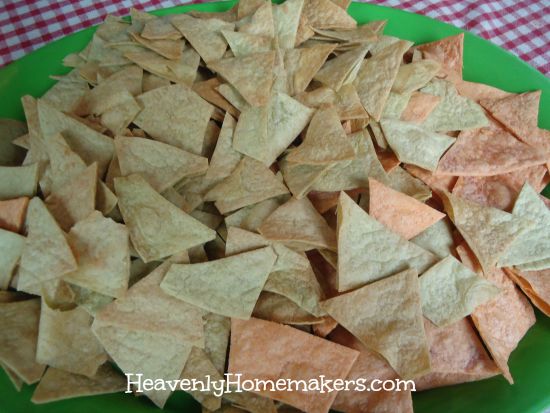
Notice that they puff up a bit as they get crispy. Delicious perfection.

baked chips2

Throw them all on a platter and serve them with Bacon Tomato Dip. You will love how delicious this combination is.

baked chips1

I can’t wait to hear how much you love this dip with your homemade chips!

Aren’t you proud of me for actually coming up with a dip that did not involve ground beef or cheese? And also for coming up with such a brilliant name for this new dip? May we all stand (neh, just sit) in amazement.

Heavenly Homemaker's Club Members: Access your homepage and all your fantastic resources here! Not a member yet? Please join us!

(No Flour) Monster Chocolate Chip Cookie Bars – The Heathier Way

August 25, 2015 by Laura 14 Comments

This post may contain affiliate links. For more information, please see our disclosure policy.

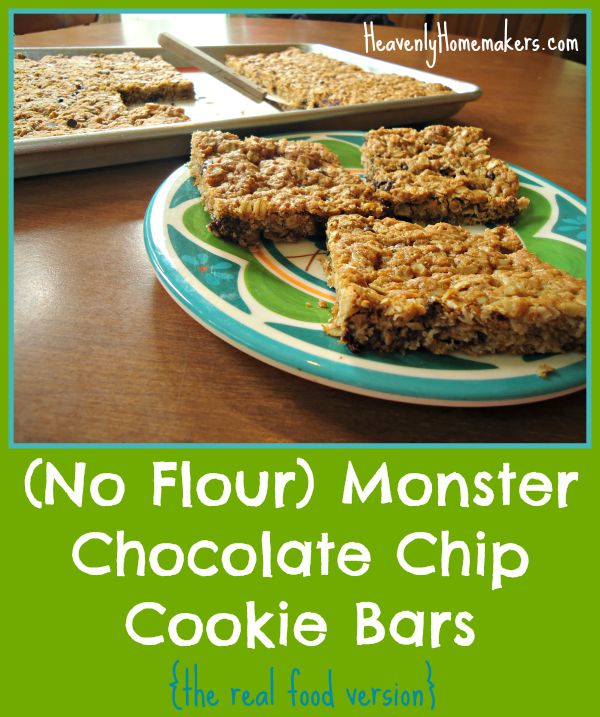
Monster Chocolate Chip Cookie Bars – come and get ’em!

Real Food Monster Cookie Bars

When I saw the original recipe for these bars here, what really jumped out at me was the “no flour” thing. Avoiding flour is always a nice option in recipes. I also noticed the “mini m&m” thing but decided that while those are fun and tasty, they are on the naughty list and not required to make these cookie bars good. Then I wondered if I could cut back on the 2 cups of sugar and the amount of chocolate chips.

Do I know how to ruin a good recipe, or what? 

Hey. I didn’t ruin a thing. I simply cut back on the sugar and cut out the corn syrup and 10 different food dyes. The cookie bars are still delicious, so says my family and several other people I have served these to who didn’t even know I’d healthified this recipe. It probably helps that these bars still have plenty of sugar in them.

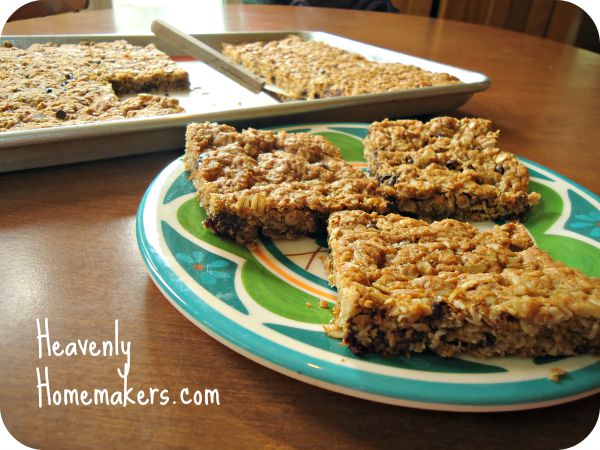
The oats and lack of flour create a really fun, chewy bar. I say, make these then wrap them individually and freeze them to grab out for lunch boxes or on-the-go snacks. This makes 24 good sized bars.

(No Flour) Monster Chocolate Chip Cookie BarsYum

(No Flour) Monster Chocolate Chip Cookie Bars - The Heathier Way
 
Save Print
Author: Laura
Serves: 24-36
Ingredients
  • 1 cup sucanat or brown sugar
  • ½ cup melted butter
  • 1½ cups creamy natural peanut butter (here's how to make it yourself)
  • 3 eggs
  • 1 teaspoon vanilla extract
  • 1 teaspoon baking soda
  • 1½ cups quick oats
  • 2½ cups rolled oats
  • ¾ cup mini chocolate chips
Instructions
  1. Cream sugar, butter, and peanut butter together until smooth.
  2. Add eggs, vanilla, and baking soda and mix well.
  3. Stir in oats until well combined.
  4. Fold in chocolate chips.
  5. Spread mixture into a cookie sheet lined by parchment paper.
  6. Bake in a 350° oven for 18-20 minutes or until lightly browned.
  7. Makes 24-36 cookie bars, depending on how large you cut them.
3.4.3177

No Flour Monster Chocolate Chip Cookies (the real food version)

Make these gluten free by using GF oats. Learn to make your own Quick Oats here.

Enjoy this very easy treat!

Heavenly Homemaker's Club Members: Access your homepage and all your fantastic resources here! Not a member yet? Please join us!

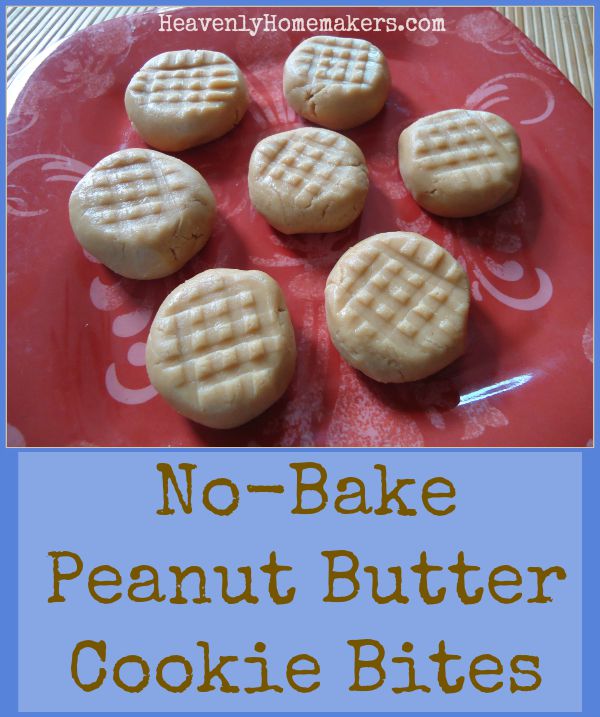
No-Bake Peanut Butter Cookie Bites

August 20, 2015 by Laura 8 Comments

This post may contain affiliate links. For more information, please see our disclosure policy.

Cookie bites? Eh. We like ’em okay. ;)

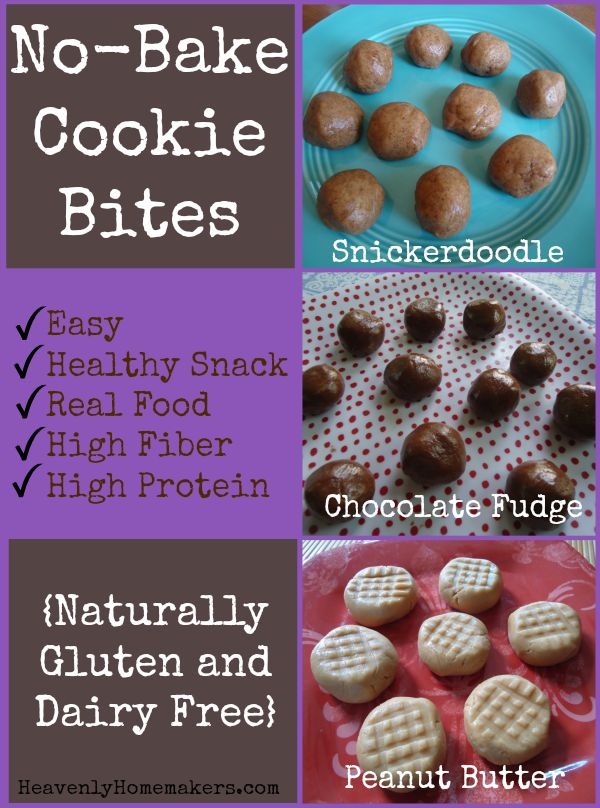
Because we all like healthy snacks and we absolutely love easy recipes – let us take a moment to review the previous no-bake cookie bite recipes shared here:

  • No-Bake Chocolate Fudge Cookie Bites
  • No-Bake Snickerdoodle Bites

One idea turned into another, and now we have No-Bake Peanut Butter Cookie Bites to add to the list!

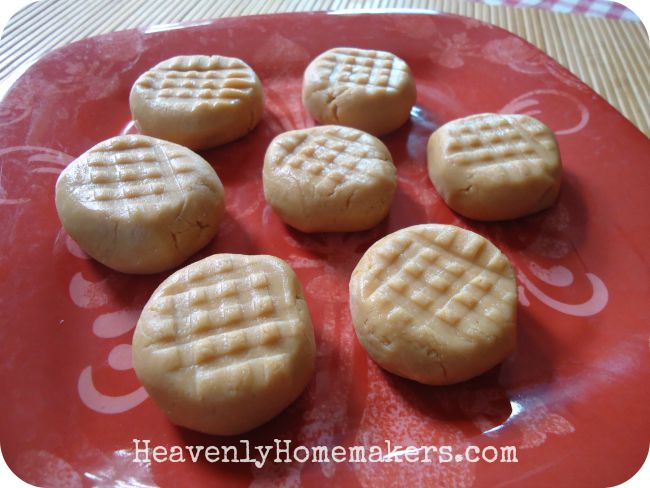
No-Bake Cookie Bites - Easy Recipes!

With a few ingredient tweaks, a Peanut Butter Cookie Bite came about. Of course, a peanut butter cookie bite must be gently pressed with a fork like the real deal, don’t you think? These taste so much like Peanut Butter Cookies, we couldn’t believe it. But instead of being an actual cookie full of sugar – they are a high protein, high fiber, low sugar snack. But hey, call it a cookie since it still tastes like one. Healthy treats are so exciting!

Peanut Butter Cookie Bites - No Bake!

No-Bake Peanut Butter Cookie Bites Yum

No-Bake Peanut Butter Cookie Bites
 
Save Print
Author: Laura
Ingredients
  • 1 cup natural creamy peanut butter
  • ¼ cup honey
  • 1 teaspoon vanilla extract
  • ½ cup coconut flour
Instructions
  1. Mix the ingredients together in a bowl until well combined.
  2. Roll the mixture into teaspoon-sized (or whatever sized) balls.
  3. Press down gently, criss-cross, with a fork.
  4. Refrigerate before serving.
3.4.3177

It really is that easy.

(Here are my homemade peanut butter instructions.)

No-Bake Peanut Butter Cookie Bites

Where to get Coconut Flour:

Many have asked about Coconut Flour. I order it from Tropical Traditions or Amazon. A little bit goes a long way, so don’t let the price-tag scare you. Coconut flour is naturally gluten free, high in fiber, and high in protein. I love it for its nutritional value!

Ways to enjoy these No-Bake Cookie Bites:

  • Packed in a lunch
  • As a snack/pick-me-up
  • Before or after a work-out
  • On the road during a trip
  • In a box, on a train, with a fox, in a tree (thank you, Sam I Am) – Do you really need any more reasons to love these? Eat them any where for any reason!

Lovin’ these No-Bake Cookie Bites!

Give me more cookie flavor ideas to play with!! What would you like to see here?

Heavenly Homemaker's Club Members: Access your homepage and all your fantastic resources here! Not a member yet? Please join us!

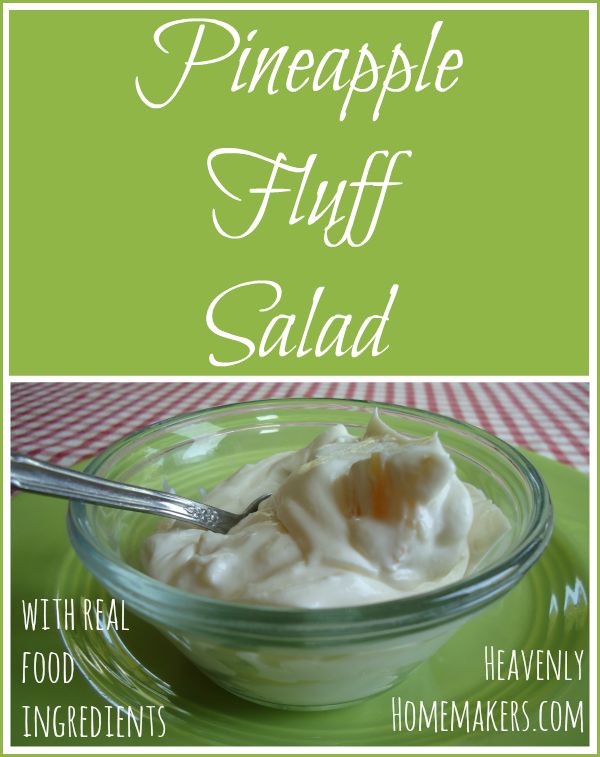
Pineapple Fluff Salad (All Real Food Ingredients!)

August 19, 2015 by Laura 16 Comments

This post may contain affiliate links. For more information, please see our disclosure policy.

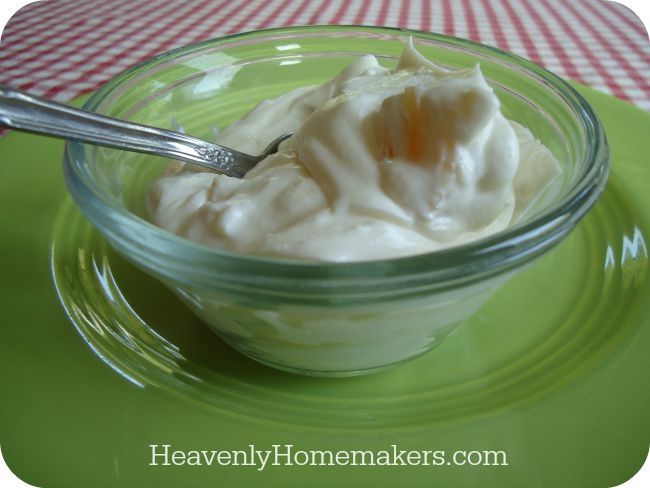
We can actually make Pineapple Fluff with real food!

Pineapple Fluff

While we were out at church camp this summer, one of the cooks made a huge bowl of “Green Fluff Salad.” Malachi, our 10 year old, helped himself to seconds and thirds – absolutely loving this salad.

Now I personally think that calling this a salad is kind of like calling margarine butter which no one should ever, ever do in my hearing because I will gag and then I will do the ugly cry on the spot. (Do not picture this.) A dish which contains green jello, cool whip, cream cheese, pineapple (yay fruit!), and mini-marshmallows is…I’m going to say…a dessert? Now if you like that variety of “salad,” more power to you. I understand these types of cravings because I still want an occasional Dorito even though I know better. But I just question the use of the word “salad” here and now back to the story.

Malachi loved the Green Fluff Salad. This is why, when I asked him a week later at home for a side dish suggestion to go with grilled steaks we’d be making, he perked up and said, “Oh Mom! We should make that Green Fluff stuff we had at camp!”

Before I go on, you need to know this: It was my birthday. We were talking about side dishes for my birthday dinner. Mine. Does my child not know me the way I thought my child knew me? Was he also going to buy me some margarine as a gift? I felt an ugly cry coming on.

Catching myself before an outburst because I am always so graceful in my parenting, I gently said, “Buddy, I don’t use those kind of ingredients. I’d rather make something with food we have on hand already.”

To which Malachi said calmly, “I know. I mean we can try to figure out how to make that salad the healthy way. Like you always do.”

Squeeze him. Now that’s a boy who knows how his mama thinks. I mean, I knew all along that’s what he meant. I never doubted for a minute. I knew he didn’t mean for me to go buy cool whip and marshmallows. C’mon now.

Pineapple Fluff Salad (I guess I’m still calling this a salad. I don’t know why.)Yum

Pineapple Fluff Salad (All Real Food Ingredients!)
 
Save Print
Author: Laura
Ingredients
  • 8 ounces softened cream cheese
  • 1 cup heavy whipping cream
  • 1 teaspoon vanilla extract
  • 2 Tablespoons lime juice
  • ¼ cup sugar or 3 Tablespoons real maple syrup or liquid stevia to taste
  • 14-ounce can of pineapple, drained (chunks, tidbits, or crushed works fine)
Instructions
  1. Open pineapple, drain, and save juice for drinking another time.
  2. Set pineapple aside.
  3. In a high-power blender mix cream cheese, whipping cream, vanilla, lime juice, and sweetener of choice until well combined and smooth.
  4. In a bowl, fold pineapple into the whipped mixture.
  5. Chill for at least one hour before serving.
3.4.3177

If you want this salad to be green, I’m sorry. Real food is only green if it comes out of the ground that way. Jello doesn’t grow in a garden. It’s okay though. I put this salad in a clear dish on top of a green plate and that kind of gives it the greenish look. I do what I can.

Pineapple Fluff Salad with Real Food Ingredients

Did Malachi like the results? Yes. He absolutely loved it. No jello needed. Lime juice did the trick, as did a tiny bit of sugar. I didn’t take the time to figure out a marshmallow substitute for this because I am not crazy, and whipping cream was an obvious real food substitute for cool whip. This kid received the “favorite kid in my kitchen” award (because none of my other kids were home) and I received the “nailed it” award on this recipe challenge. Fist bump, high five, happy dance.

pineapple fluff malachi
One might wonder, “Why is there a toilet paper tube behind Malachi?” What? Don’t you keep those on your countertop beside your fruit bowls? It’s soooo Heavenly Homemakerish. But for real, we are working on some projects for a great big new book coming out soon for you and your kids. It’s super exciting and on this very Pineapple Fluff making day, the project involved an empty tp tube. Nothing should surprise you about me anymore. (Update: Here’s the book!)

Are you familiar with Green Fluff Salad? Or other colors of fluff salad? Drop-kick those (but not literally because, eww) and make this amazing real food version.

Heavenly Homemaker's Club Members: Access your homepage and all your fantastic resources here! Not a member yet? Please join us!

How To Make Almond Butter

August 18, 2015 by Laura 44 Comments

This post may contain affiliate links. For more information, please see our disclosure policy.

Almond Butter recipe? Yeah, I’ve got an Almond Butter recipe. I think.

Confessions of a scatter-brained homemaker:

On Monday, I decided to try making a new variety of No-Bake Cookie Bites. I was out of Almond Butter, so I considered that it was probably as easy to make as Peanut Butter, which I make all the time. Heading to my computer to search for how to do it, I realized: I think I have done this before and maybe even already have a post written about it. So I searched my own website. Sure enough. I told us all how to make Almond Butter back in 2012.

This makes me wonder what else I’ve already taught us how to do that I don’t even remember. Maybe I’ve told us all how to save thousands of dollars or how to save hours of time. What else have I forgotten?!?

Well anyway. I am loving the No-Bake Cookie Bites so much that I will be actually using homemade Almond Butter more often, which will likely help me remember that I know how to make it. In case you also forgot that I have already taught us how to make this easy spread, I am re-posting the tutorial for us all here today. May we all remember and use these instructions often. May our brains be for us instead of against us. May we never forget when we walk into a room, what in the world we walked in to get.

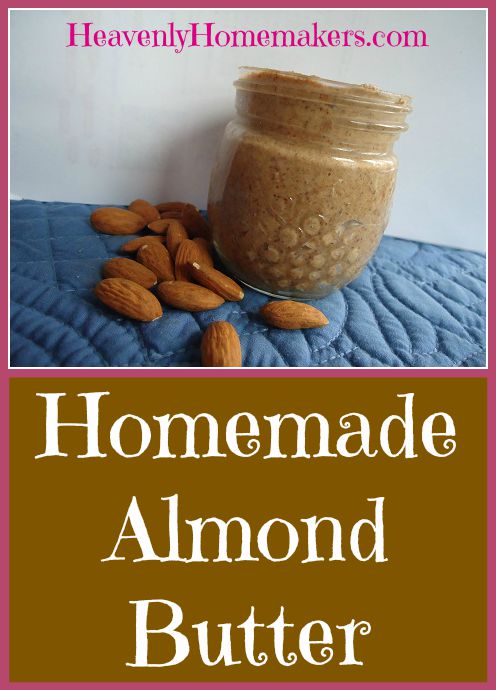
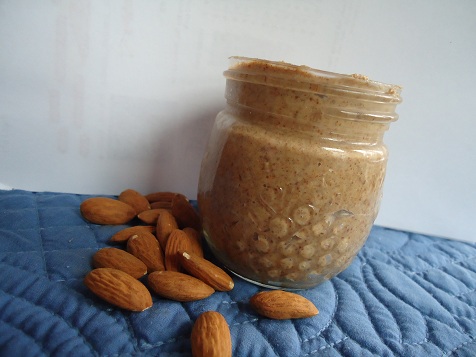
Homemade Almond Butter

Yum

So here we go, loud and clear so that we don’t forget:

Here’s How to Make Almond Butter!

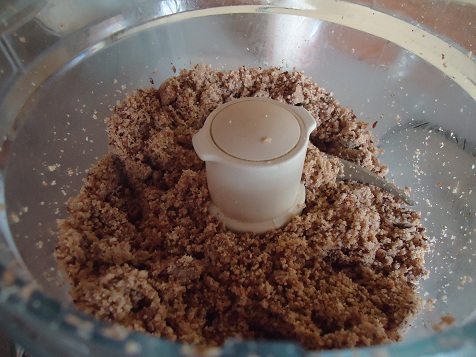
Step One: Pour 2 cups of almonds into a food processor. I have found that 2 cups of almonds creates one full cup of almond butter. I don’t recommend putting more than 2 cups of almonds into your food processor at one time. The process takes a while, and the more almonds you have, the longer it will take.

Step Two: Place lid on food processor and turn it on. Plugging it in is always a plus as well. This will be very loud at first, so warn your household.

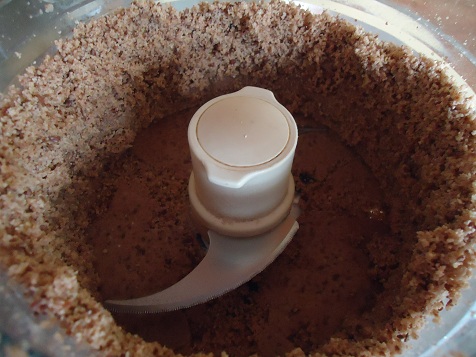
Step Three: After processing almonds for two to three minutes, use a spoon to scrape down the sides of your food processor and shift around the almonds.

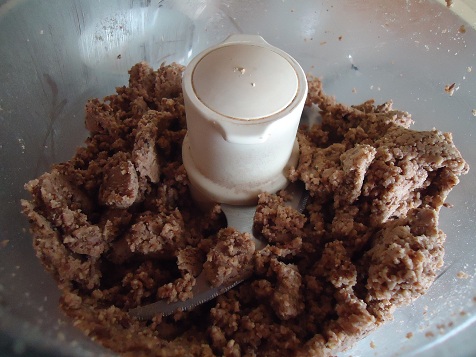
Step 4: Continue to process, but stop and scrape and stir almonds around from time to time to aid in the butter making process.

Step 5: You’re getting closer! Process, scrape, stir, and process some more. Continue until the almonds have become the almond butter you’ve always dreamed of. Because yes, we all do spend much of our time dreaming of perfect almond butter, do we not? (Not me, apparently, because I forgot the stuff existed.)

And there you go – lovely, smooth and creamy almond butter.

What other nut butters have you made? Did you remember that I’ve already told us all how to make this three years ago? I sure hope your brain works better than mine.

P.S. I order organic almonds from Braga Farms. They are a wonderful company to work with and offer high quality nuts. Almond Butter will stay fresh in the refrigerator for several weeks.

Heavenly Homemaker's Club Members: Access your homepage and all your fantastic resources here! Not a member yet? Please join us!
« Previous Page
Next Page »

Join Our Community!

 Facebook Twitter E-mail Instagram Pinterest

Popular Posts

~ Will All of the Real Moms Please Stand Up?
~ Easy! Stir-and-Pour Whole Wheat Bread
~ How to Make Gatorade
~ 31 Real Food Breakfast Ideas
~ Dear Teenage Girls...
~ When Mom Takes a Step Back
~ The Inexpensive Health Insurance We Love!
~ Let's Talk Real Food Grocery Budgets

Check out our latest posts!

  • Big Family Food and Fun: September 6-12, 2026
  • Big Family Food and Fun: August 30-September 5, 2026
  • Big Family Food and Fun: August 23-29, 2026
  • Big Family Food and Fun: August 16-22, 2026
  • Big Family Food and Fun: August 9-15, 2026
Home  ~  Simple Meals  ~  Club Membership  ~  Shop  ~  Privacy Policy  ~  Disclosure  ~ Contact

Copyright © 2026 · Beautiful Pro Theme on Genesis Framework · WordPress · Log in