Heavenly Homemakers

Encouraging women in homemaking, healthy eating and parenting

  • Home
    • About
    • FAQs
  • Recipes
    • Bread and Breakfast
    • Condiments
    • Dairy
    • Main Dishes
    • Side Dishes and Snacks
    • Desserts
    • Gluten Free
    • Instant Pot
    • Crock Pot
    • Heavenly Homemaker’s Weekly Menus
  • Homemaking
    • Real Food Sources
  • Store
  • Contact
    • Advertise
    • Disclosure
    • Privacy Policy
  • Simple Meals
  • Club Members!

Homemade White Chocolate Sauce

August 12, 2015 by Laura 9 Comments

This post may contain affiliate links. For more information, please see our disclosure policy.

Make Homemade White Chocolate Sauce!
White Chocolate Sauce Recipe

Gather ’round, friends. I have something to tell you.

We have been lied to. Every one of us. We’ve been told that cooking real food is hard. And not just real food – any food. We’ve been deceived into believing that most foods must be purchased pre-made.

Take, for example, the time a friend of mine made my recipe for Homemade Alfredo Sauce for a church get-together. Every adult was like, “This is delicious. You made this? By yourself? How did you do it? You are amazing!” and my friend was like, “Actually it took about ten minutes and very little effort and all I did was follow a recipe.” (Though I personally still think she should take credit for being amazing.)

C’mon now. Pretty much anything that comes in a box or a jar or a bottle at the store can be made at home with healthier ingredients – and most foods are actually pretty easy to make. (Why hello, Gatorade. I did not buy you. I made you myself.)

Join me in offering a big smack-down of these lies. You can do this real food thing. I’m here to help. (And I’m also here to give you a White Chocolate Sauce recipe. What are friends for?)

When I served this sauce along with homemade Hot Fudge Sauce and homemade Caramel Sauce in my Iced Coffee Bar, some of my friends were like, “Where did you get those sauces? Wait. You made them?” When I told them how I did it, they were shocked at how easy it sounded. Measure, heat, stir, done. It’s too easy.

So yes. You can make Hot Fudge Sauce all by yourself. You can also make Caramel Sauce all by yourself. And now you can make White Chocolate Sauce – all by yourself. It’s all too easy!!

(This is the part where I pipe in with just a little warning: While these sauce recipes are easy and made with all real food ingredients – they are still full of sugar. Don’t drink these sauces or decide that they are a great substitute for vegetables. Instead, use them for an occasional special treat. Okeedokee.)
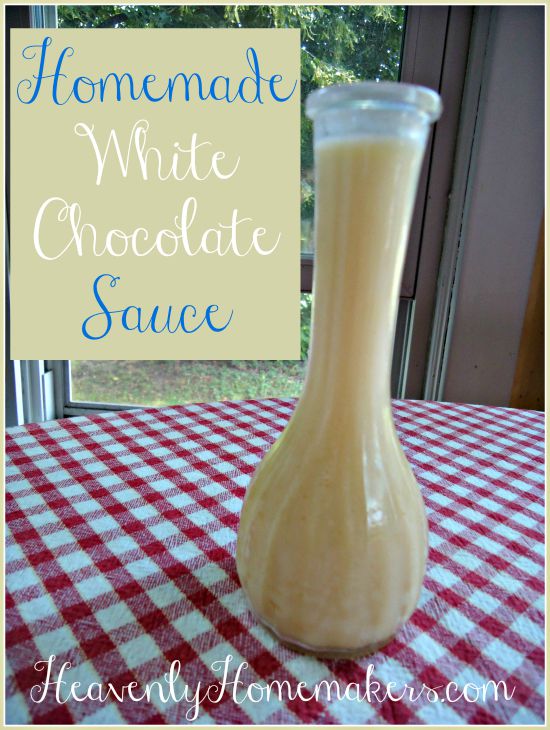
Homemade White Chocolate Sauce

Homemade White Chocolate SauceYum

5.0 from 2 reviews
Homemade White Chocolate Sauce
 
Save Print
Author: Laura
Ingredients
  • 1½ cups cocoa butter wafers
  • ¾ cup heavy whipping cream
  • ½ cup cane sugar (I use this sometimes when sucanat - which is brown - will change the color of the product too drastically)
  • 1 teaspoon vanilla extract
Instructions
  1. Stir cocoa butter wafers, cream, and sugar in a small saucepan over medium heat until wafers have melted and mixture is smooth.
  2. Remove from heat.
  3. Stir in vanilla.
  4. Serve warm.
3.4.3177

Links you might need: cocoa butter wafers and cane sugar

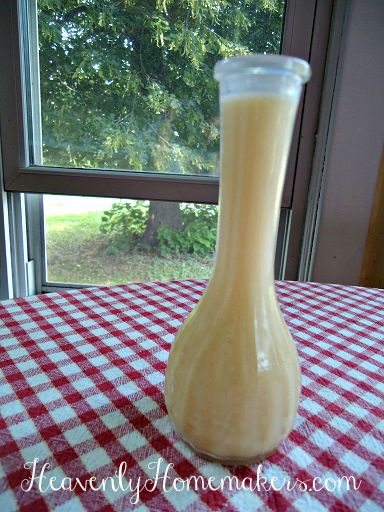
Note: The sauce hardens in the fridge, so I recommend storing leftovers in a wide mouth jar so you can actually enjoy the leftovers. Take a look at the picture of the container I put our white sauce in and ask me how much fun it was to try and get the leftovers out of that. It is so good for you to learn from my mistakes.

Another note: Cocoa butter wafers are different from white chocolate chips. White chocolate chips are actually made from cocoa butter and sugar. For this white chocolate sauce recipe, you’ll need just the straight cocoa butter. It’s not cheap. I have found some at Amazon and Mountain Rose Herbs (Amazon is cheapest right now because of free Prime shipping). But let’s just say that while this recipe is delicious, I will not be making this recipe often. Cha-ching. (This is probably a good time to put another plug in for way-less-expensive-per-pound vegetables. Okeedokee.)
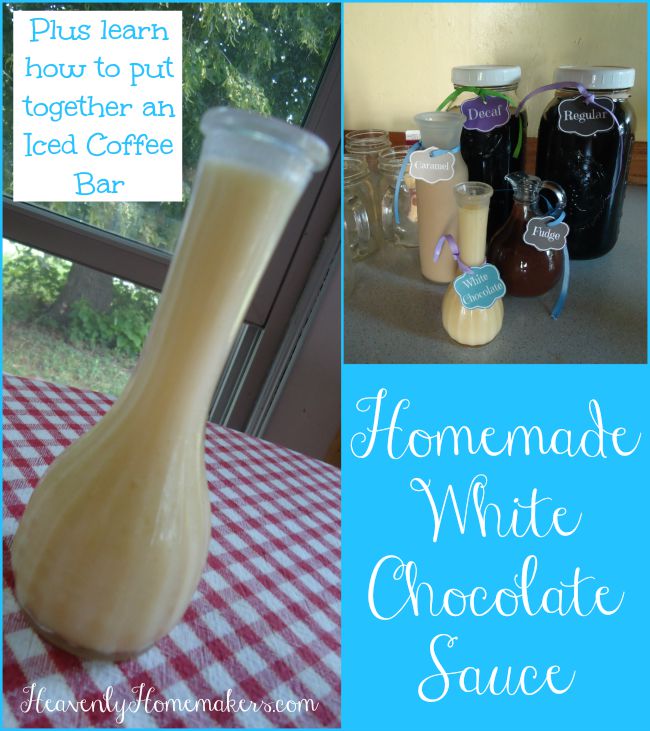
Homemade White Chocolate Sauce for Iced Coffee and Ice Cream

Enjoy this White Chocolate Sauce on ice cream, in your Iced Coffee Bar, in your hot coffee, in your hot chocolate…and what else?

This post contains affiliate links.

Heavenly Homemaker's Club Members: Access your homepage and all your fantastic resources here! Not a member yet? Please join us!

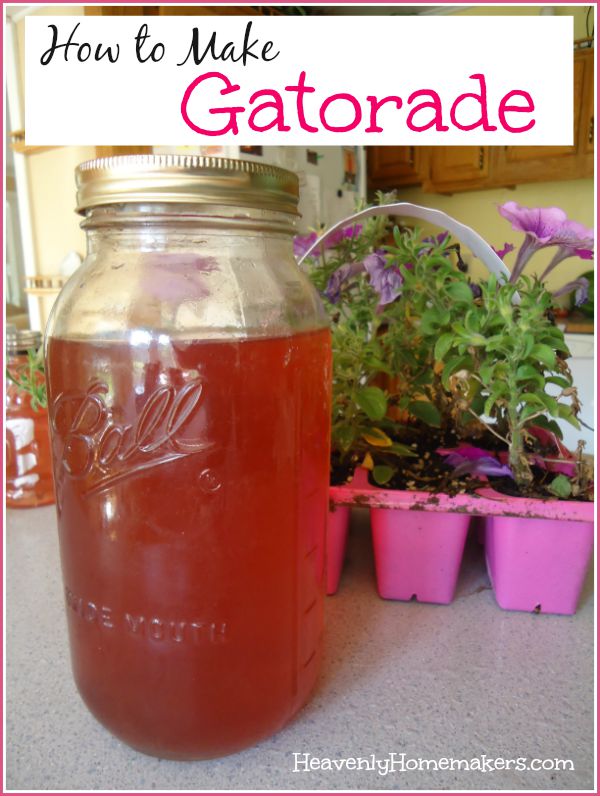
How to Make Gatorade

August 9, 2015 by Laura 74 Comments

This post may contain affiliate links. For more information, please see our disclosure policy.

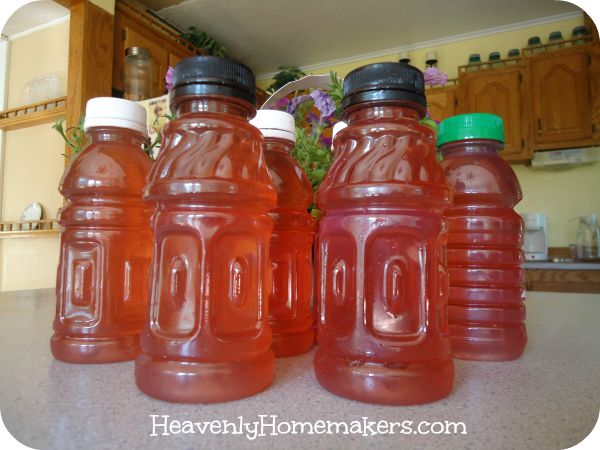
Homemade Gatorade!!!!!

Homemade Gatorade

Yum

The thing about me experimenting with an idea to try to come up with a healthy alternative is that I can get super excited about the result – but then immediately question, “Will this taste as good to other people as I think it tastes? Will others who are used to the ‘real version’ think this only tastes like a so-so ‘healthy version?'” These questions were especially tricky when making a Gatorade alternative because 1) I haven’t actually sipped on any Gatorade for several years so I couldn’t even remember what it was supposed to taste like and 2) the homemade version looked so cute in my recycled juice bottles that I was going to be super disappointed if my kids didn’t like it.

It’s all about the cute bottles. Am I right?

So there I was with my “I really need my men to love this Gatorade in cute bottles” conundrum. I had the bottles nicely chilled so that they were good and frosty on the outside, enhancing their cuteness and curb appeal. Hoping for the best, I drove the bottles across town to where my entire family was working on a roof.

When I arrived, they greeted me with phrases such as, “We are so hungry, what did you bring for lunch, I hope you brought cold drinks, we are so sweaty.”

This was a perfect time to say, “I actually brought some homemade Gatorade (in cute bottles, please like them) – so that should be perfect to replenish what you need after sweating so much.”

See, my family can talk about sweat right before eating lunch and it’s not a big deal. We are a family of men (except for me) and I’ve learned to live and breathe and talk all things gross. I only brought it up here because in all fairness, Gatorade truly does give a body some of what it needs – like sugar and salt (electrolytes) – to replenish after sweating. It’s just all the other junk in Gatorade I’m trying to avoid. But enough about sweat and high fructose corn syrup.

My pickiest kid – and also the one who loves junk food more than all the others – pulled out a bottle first. I held my breath. This would be the biggest test, because if this boy liked it, they should all like it. He took a sip, said “Hmm,” then took another sip. After considering the taste for a moment he said the best sentence of all, “If I didn’t know it was homemade, I would think it was real Gatorade.” Had he not been so sweaty, I would have kissed him.

Instead I shrugged and said calmly as if it didn’t really matter to me, “REALLY, FOR REAL?! YOU REALLY THINK SO? I WAS REALLY REALLY HOPING YOU’D LIKE IT!!!!” He just kept sipping, then also dug into the cooler for some lunch, because he is a boy and doesn’t understand the importance of the cute bottle.

So make this. Use it to quench the thirst and bless the bodies of all those around you who do sports or other activities in which they need replenishing and refreshment.

How to Make Gatorade

Homemade Gatorade (adapted from recipe at Deliciously Organic)

4.6 from 5 reviews
How to Make Gatorade
 
Save Print
Prep time
5 mins
Cook time
2 mins
Total time
7 mins
 
Author: Laura
Serves: 6 cups
Ingredients
  • 1 cup 100% juice
  • 2 Tablespoons honey
  • ¼ teaspoon sea salt (I use Redmond)
  • 6 cups cold water
Instructions
  1. In a saucepan stir juice, honey, and sea salt over medium heat until the honey and salt dissolve. Pour mixture into 6 cups of cold water.
  2. Shake to combine.
  3. Chill mixture in the fridge until ready to serve.
3.4.3177

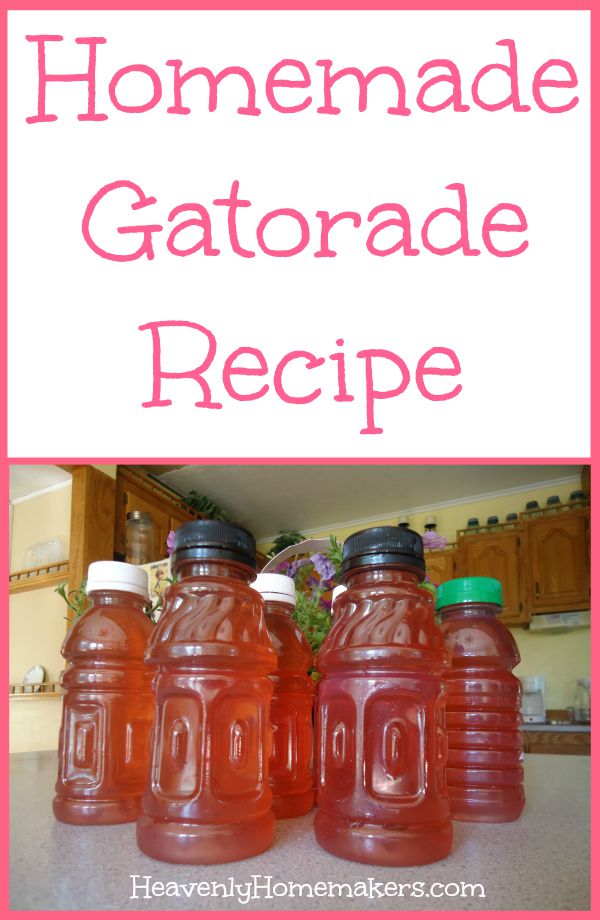
Homemade Gatorade Recipe

I’m not sure about the exact math on this recipe, but I would venture a guess that it takes about 50¢ to make this (almost a half gallon). 50¢ divided by five 10-ounce bottles is 10¢ per bottle. Store-bought Gatorade costs quite a bit more than that, plus it is full of ingredients our bodies don’t need.

That, along with the cute bottles, should make you eager to try this recipe.

So tell me? How excited are you about my cute bottles??! (And sure, does the recipe make you excited too?)

We love saving money on the good stuff!

Join the Homemaker’s Savings Club so I can let you know about the best prices and freebies I find each week! We’ll start you off with a FREE Money-Saving Cookbook just for signing up!

Top 10 Money Saving Recipes

Heavenly Homemaker's Club Members: Access your homepage and all your fantastic resources here! Not a member yet? Please join us!

How to Set Up an Iced Coffee Bar

August 5, 2015 by Laura 10 Comments

This post may contain affiliate links. For more information, please see our disclosure policy.
Need a party idea? Set up an Iced Coffee Bar!

Monday was my birthday. (Yay, 42!) Since most of my favorite peeps (aka three outa four of my boys) were still at church camp and thus not home to help me celebrate – we instead invited a few friends over. It was such a blessed time.

Not planned or appreciated is the fact that our grill chose to die at the very moment we were ready to begin cooking our meat (for 13 hungry people). I mean the grill didn’t just die. It also became very dead. So, so dead.

One of our friends who had just left her house to come over saved the day by bringing her grill (hi, can you come to my birthday get-together and if it’s not too much to ask can you load up and bring an entire grill when you come? k thanks.) So we ate a little bit late. It made for a longer celebration, and then the food tasted even better than if we’d eaten an hour and a half before during the regularly scheduled program. This is what memories are made of. And also this…

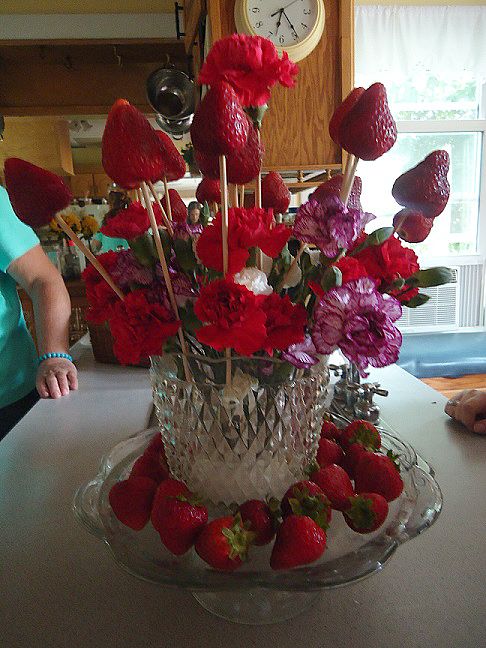
While the men were outside looking under the hood of the grill, and one of my friends was loading up her grill to bring over, and some other friends were outside throwing around a football, and some kids were in the lego room upstairs – this was happening in my kitchen:

birthday bouquet1

birthday bouquet2

I am loved and richly blessed by these dear people.

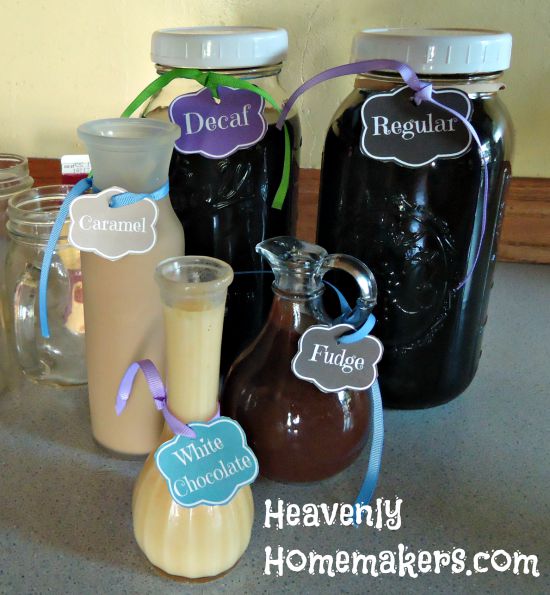
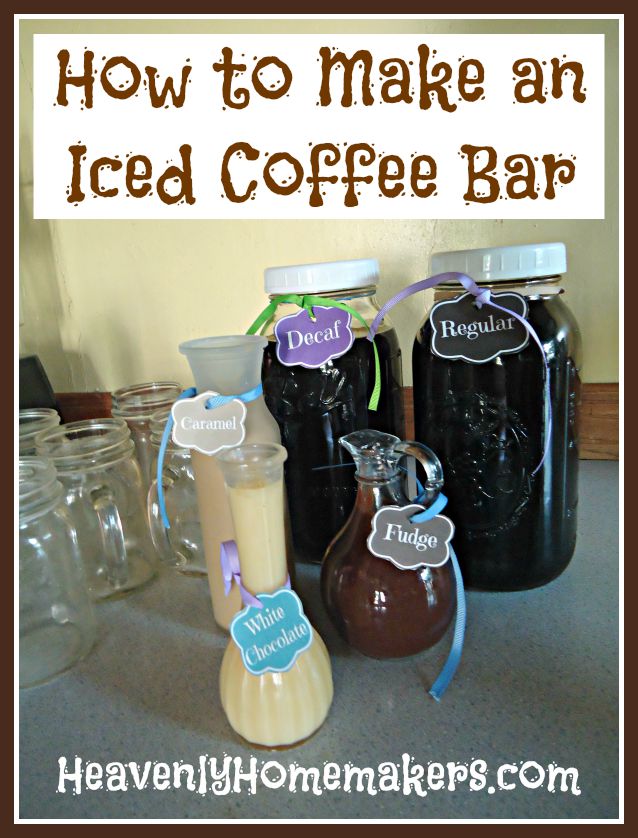
After we finally ate the most delicious dinner (grilled steak and chicken and amazing side dishes brought by friends), out came a brand new buffet I had been working on for a couple of days. Allow me to introduce you to the very wonderful Iced Coffee Bar. This idea came to me as I was thinking about my favorite foods and drinks while planning the get-together. What did I want for my birthday meal? Steak, for sure. And wouldn’t it be fun to serve iced coffee, thought I. One thing led to another until this:

Iced Coffee Bar

Yes, the White Chocolate and the Caramel are in vases.
What a great way to re-purpose those, don’t ya think?

I brewed/chilled coffee and made coffee ice cubes all day in preparation. I made sweet sauces. I had absolutely wayyyyy too much fun. And then during the party? Let me just say that you must do this sometime. It was a blast seeing what people put together. Some drinks got blended. Some used ice cream. Some mixed all three sauces. Some made fun of me for having to drink decaf. Hey, I wanted to sleep after my party, okay? Caffeine can’t happen after 5pm for this (very young) 42 year old.

How to Make an Iced Coffee Bar

Suggestions for options to include in your Iced Coffee Bar

  • Jars of chilled regular coffee
  • Jars of chilled decaf coffee
  • Regular and decaf coffee ice cubes
  • Cream
  • Half and Half
  • Homemade Hot Fudge (with a bit more cream in it to make it runnier)
  • Homemade Caramel Sauce (also with a bit more cream added)
  • Homemade White Chocolate Sauce (recipe coming soon!!)
  • Vanilla Ice Cream
  • Glasses
  • Straws
  • A blender for those who wanted frappes

Explain the options to your guests, then let them have at it.

It was so much fun to see what people came up with for their special drink. We all took turns building our concoction, then we all stood around sipping and saying “yum” over and over while talking and laughing. Bliss.

iced coffee

This Iced Coffee Bar is going to be my new go-to idea for special gatherings. Come winter, we’ll just switch it to a Hot Coffee Bar with fun fixin’s. Do this!!! It is so much fun!

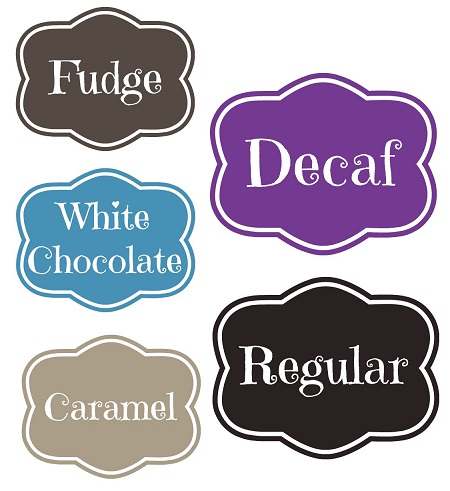
Want to borrow my Coffee Bar Labels? These made it easy for guests and added cuteness to the fun.

coffee bar labels

Download and Print These Free Coffee Bar Labels

What else can you think of to add to this Iced (or hot) Coffee Bar?

P.S. If you are in my local Bunco group, you are not allowed to use this idea until after I host, mmkay?

Heavenly Homemaker's Club Members: Access your homepage and all your fantastic resources here! Not a member yet? Please join us!

Frozen Oatmeal Cups – for a Quick, Hearty Breakfast

August 2, 2015 by Laura 17 Comments

This post may contain affiliate links. For more information, please see our disclosure policy.
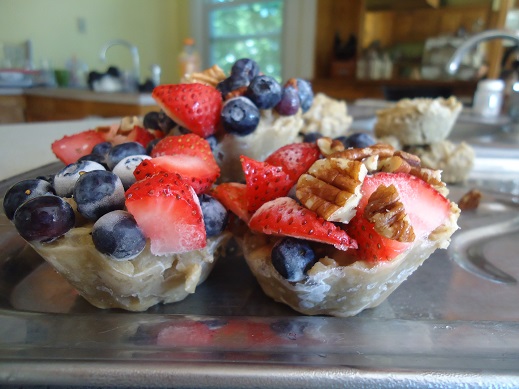
Seriously, Frozen Oatmeal Cups. Check this out.

frozen oatmeal8

Yum

Making oatmeal has got to be the most difficult thing to do ever. It’s definitely the most tedious breakfast food there is – requiring time, energy, thought, and absolute sweat-dripping labor over a stove for five entire minutes (because oatmeal won’t cook properly unless someone is staring at it in expectation). Life is hard. We should probably settle for pop-tarts. It’s the only way.

Don’t worry, friends. I’ve found a way to avoid performing this grueling task (and eating pop-tarts) in the mornings – and I’m here to share. I think we can all agree that the more we can avoid the challenge of putting water in a pot to boil, the better. Gather ’round, everyone. This tip will shave at least 1.4 minutes off your morning meal prep, so listen closely. Every 1.4 minutes counts.

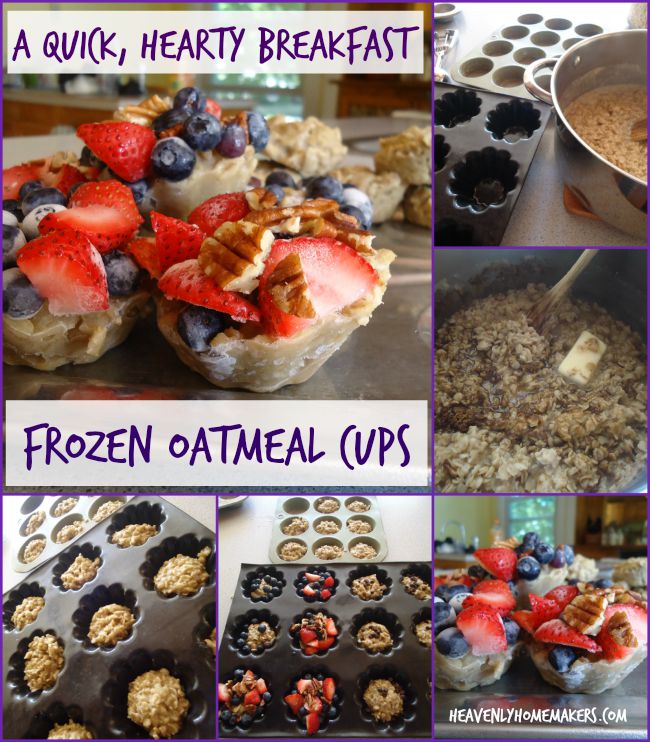
Here’s what you need to do: You need to cook up a double or triple batch of oatmeal (you can do it, we’re all in this together, persevere, I believe in you). Once the oatmeal is done, go ahead and feed some to your family. Here’s where it gets good: After your meal, freeze the leftovers in muffin cups, topped with whatever delicious toppings your family likes. Like this:

frozen oatmeal3

The result is easy-to-store cups of frozen oatmeal which are ready to pull out and re-heat at any given time – preferably on those mornings. You know the ones I’m talking about.

But seriously, in all seriousness, because I am always serious – this really is a lovely way to help your children help themselves on a busy morning, and it really does save a tiny bit of time because the cooking of the oatmeal has already been done.

Now, if you get a little bit burned out on oatmeal and you’re still struggling with the urge to buy a pre-made breakfast in a box that promises to save you time – I suggest you consider the possibility of frying an egg. If I can do it, you can do it. There are also apples – a brand new innovative idea for breakfast that I’ve heard are great to grab-and-go. Who knew?

Frozen Oatmeal Cups - a quick, hearty breakfast

The Specifics of Making Approximately 24 Frozen Oatmeal Cups

  1. Boil 6 cups of water.
  2. Stir in 3 cups of whole oats.
  3. Turn the heat down to simmer the oats/water for about 5 minutes, stirring occasionally.
  4. Remove from heat once the water has been absorbed and the oats are soft.
  5. Stir in 1-3 Tablespoons of butter and 1-4 Tablespoons of sweetener like honey or sucanat as desired.
  6. Scoop prepared oatmeal into muffin tins (no need to grease the tins).
  7. Top oatmeal cups with any variety of fruit, nuts, chocolate chips, etc.
  8. Place filled muffin pans in the freezer for 2-3 hours or until oatmeal is frozen solid.
  9. Pull frozen oatmeal out of the freezer and allow it to sit on the counter-top for about 10 minutes.
  10. Use a fork or spoon to gently pop the frozen oatmeal cups out of the tins.
  11. Place the frozen cups into a labeled freezer bag. Store in the freezer for up to three months.
  12. Re-heat by placing frozen oatmeal cup(s) in a small saucepan on medium heat until thawed and warm.

I love this idea (for so many reasons, as explained earlier) – but also because this allows for a variety of sizes of appetites. Little ones may just need one cup to fill them, whereas my sons would likely each pull out 2-4 to rewarm.

So now, go therefore and make yourself some frozen oatmeal cups. Your breakfast – and really, your entire life – is obviously going to be changed for the better because of this tip. Enjoy your extra 1.4 minutes of morning time. You are very, very welcome.

What do you think of this idea? I like the brainlessness of it. I like that the cooking is done so all that needs to be done is rewarm and serve. I love that my kids can do this themselves. Not every freezer meal is about saving time – sometimes it’s just about the comfort of having prepped food on hand for ease!

P.S. We also really love making Homemade Instant Oatmeal to have on hand.

Kudos to Cupcakes and Kale Chips where I first saw this fun idea!

Heavenly Homemaker's Club Members: Access your homepage and all your fantastic resources here! Not a member yet? Please join us!

No-Bake Chocolate Fudge Bites (Low Sugar, Gluten Free, Dairy Free)

July 28, 2015 by Laura 7 Comments

This post may contain affiliate links. For more information, please see our disclosure policy.

Happiness is found in No-Bake Chocolate Fudge Bites!

I always hesitate to put “Gluten Free” or “Dairy Free” in the title of a recipe. Why? Because some people see it and think, “I don’t need to eat gluten free (or dairy free) so I don’t need to look at this recipe.”

No wait! Come baaaaaaack! Do you eat apples? Strawberries? Chicken? Carrots? Then sometimes you eat gluten and dairy free. Right? Because that’s what those foods are, without even having to try.

There are soooo many foods that are naturally gluten and/or dairy free because God made a big variety of food to provide nourishment and balance. I wanted to put “GF” and “DF” in the title of this recipe so that the “GF” and “DF” people would know they could join this party. Everyone wins. Especially because this recipe involves chocolate. Amen and amen.

So gather around all you gluten free and dairy free and I can eat anything people. There are fudge bites to be had! These are cousins to No-Bake Snickerdoodle Bites (which are also GF and DF). Both of these snacks are awesome to have in the fridge for a quick pick-me-up.

Note: I noticed two things about this recipe when I tried them on my family:

  1. They were too sweet for me but my boys wished they were sweeter. Add or subtract that 1/4 cup honey amount as you wish.
  2. These tasted a thousand times better after they had been in the fridge an entire day. I don’t know why. Eat them right away if you wish, but chilling these in the fridge for over 24 hours makes these much fudgy-er and tastier.

No-Bake Chocolate Fudge BitesYum

5.0 from 1 reviews
No-Bake Chocolate Fudge Bites (Low Sugar, Gluten Free, Dairy Free)
 
Save Print
Author: Laura
Ingredients
  • 1 cup almond butter or peanut butter
  • ¼ cup honey (more if you prefer)
  • 1 teaspoon vanilla extract
  • 2 Tablespoons cocoa powder
  • ⅓ cup coconut flour
Instructions
  1. Mix the ingredients together in a bowl until well combined.
  2. Roll the mixture into teaspoon-sized (or whatever sized) balls.
  3. Refrigerate before serving.
3.4.3177

No-Bake Fudge Bites

Have you tried the No-Bake Snickerdoodle Bites yet? These No-Bake Bites are my favorite way to add coconut flour to our diet (which is rich in fiber, protein, and other great nutrients). It doesn’t hurt that they only take a few minutes and little effort to make. :)

~~~~~~~~~~~~~~~~~~~~~~~~~~~~~~~~

Heavenly Homemaker's Club Members: Access your homepage and all your fantastic resources here! Not a member yet? Please join us!

Easy Homemade Dill Pickles

July 9, 2015 by Laura 23 Comments

This post may contain affiliate links. For more information, please see our disclosure policy.

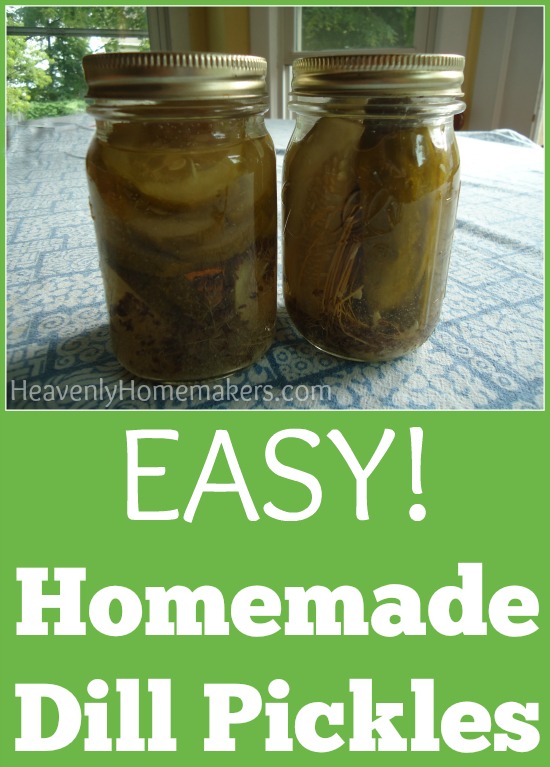
The perfect formula for making homemade dill pickles…

Last summer I had two friends: one with too many cucumbers and one with too much dill. This worked out very well for my family, seeing as I had too many empty jars and too many hungry children to feed who really like pickles. (Not to worry. I also had more than two friends.)

So I took the cast-off cucumbers and dill, and I searched online for how to make pickles. Some recipes seemed complicated and some included weird ingredients – so in true Laura “can’t we just keep this simple” fashion, I played with a mixture of all the ideas I found to see if I could make the pickle process easy.

Not only is this easy…it is toooooo easy. We’re talking: wash cucumbers, slice cucumbers, stuff them into a jar with a few other ingredients, water bath for 5 minutes. That easy.

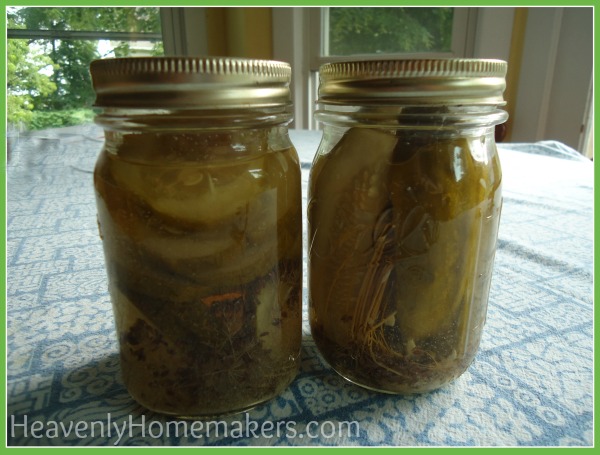
Homemade Dill Pickles

Easy as it was, I had to wonder: would the pickles taste good? Would they crunch like they were supposed to? It’s not like I had much money invested in them (thanks to my generous friends who supplied me with free cukes and dill), but I sure was hoping for a happy pickle experience. If successful, I knew this would be a wonderful food to be able to pull out of my pantry to quickly add to a meal.

Bingo! My family loves these. And they crunch like they are supposed to. No soggy pickles here.

Here’s the key to keeping the crunch in your pickle: Do not over water bath them. We’re not trying to kill the cukes. Just boil the jars long enough to get the lids to seal – about 5 minutes.

Now about the dill. Hey, what’s the big dill? (I’ve always wanted to say that. My life is now complete.) But about the dill. If you’re not sure what I’m referring to in the recipe when I say “1 Dill Flower” I’m talking about this:

So this is dill.

See how there are little tiny bunches of yellow plants all joined together into one giant – bigger than your hand – bunch of yellow plants? When I say “1 Dill Flower” I’m talking about the entire giant big huge bunch all attached to each other. I made this recipe up all by myself based on other recipes, so whose to say if I’m right? But my pickles turned out amazing, so I’m going to go with, “yep. I’m right.” Use an entire, big flower.

And now I want to read To Kill a Mockingbird for the 26th time. If you’ve read it, you know why. But seriously, who names their kid Dill? Or Scout for that matter. (Like for rill. What’s the dill? Okay now my life is complete.)

Easy Homemade Dill Pickles Yum

Easy Homemade Dill Pickles
 
Save Print
Author: Laura
Serves: 6 pints
Ingredients
  • About 12 cucumbers
  • Per jar:
  • 1 Dill Flower (a full, big one)
  • ½ teaspoon garlic powder or 1 minced clove of fresh garlic
  • Liquid mixture for 6 pint jars:
  • 2¼ cups white vinegar
  • 2¼ cups water
  • 3 Tablespoons sea salt
Instructions
  1. Wash and sterilize 6 pint-sized jars.
  2. Place the following into the bottom of each prepared jar:
  3. Dill Flower (a full, big one) plus ½ teaspoon garlic powder or 1 minced clove of fresh garlic
  4. Wash 12-ish medium-sized cucumbers, then cut them into spears or slices. Pack them into each jar. (I averaged about 2 cucumbers per pint jar.)
  5. Stir the vinegar, water, and sea salt together on the stove over medium heat for 1-2 minutes or until the salt dissolves. (Do not boil the mixture.)
  6. Pour the hot liquids into each jar, immersing the cucumbers, allowing ½ inch of space at the top.
  7. Secure lids and rings, then place in boiling water bath for 5 minutes.
  8. Remove jars and be sure they seal properly.
3.4.3177

Easy Homemade Dill Pickles

This is, by far, the easiest canning recipe I’ve ever tried. How about you? Have you tried making pickles? Are you a To Kill a Mockingbird fan?

P.S. Here’s my Sweet Pickle Relish recipe if you still have too many cucumbers. :)

Heavenly Homemaker's Club Members: Access your homepage and all your fantastic resources here! Not a member yet? Please join us!

Using Our Real Food “Velveeta” and Rotel to make Spicy Mac and Cheese

July 5, 2015 by Laura 8 Comments

This post may contain affiliate links. For more information, please see our disclosure policy.

Allow me to introduce you to one of the easiest meals and most delicious comfort foods around: Spicy Mac and Cheese.

Spicy Mac and Cheese

Yum

Remember the Real Food “Velveeta” and Rotel Dip recipe I posted a few days ago? You need to make that today. I’m only bossing you around because when it comes to that dip – I know best, I’m right, and that dip will change your life. It’s a proven fact.

Then here’s what you do: You either eat that dip with chips because that’s what we do with dip. Or – you boil 16 ounces of pasta, drain off the water, then stir this dip into your noodles for the most delicious Mac and Cheese with a kick. The most delicious.

My kids, my kids’ friends, all the adults -we all love this dish. I love that it’s super easy, flavorful – and all real food.

A little hint: Double the dip recipe. Eat it one day as a dip. Put the leftovers in the fridge. A day or two later, boil noodles and stir in the leftover sauce for an oh-so-easy meal to throw on the table. (With fruits and vegetables. This is a given.)

I used whole wheat noodles (my favorite kind) and I’m sure brown rice noodles would work great too.

Spicy Mac and Cheese Recipe

This Dip
16 ounces of your favorite pasta

Make the dip as directed. Boil and drain pasta according to package. Stir sauce into cooked and drained pasta. 

Spicy Mac and Cheese 3

Now go make the dip! Then watch as life as you know it improves for the better – one bite at a time.

Heavenly Homemaker's Club Members: Access your homepage and all your fantastic resources here! Not a member yet? Please join us!

Low Sugar Sunshine Cake

July 2, 2015 by Laura 8 Comments

This post may contain affiliate links. For more information, please see our disclosure policy.

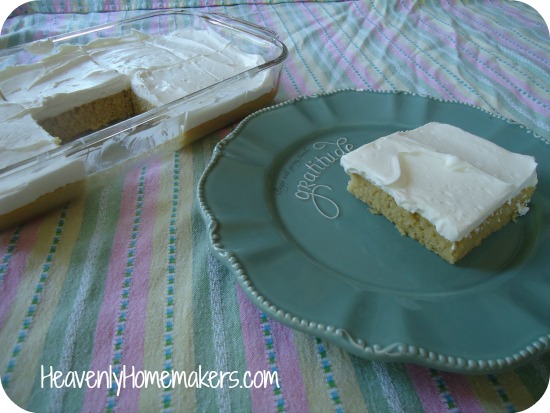
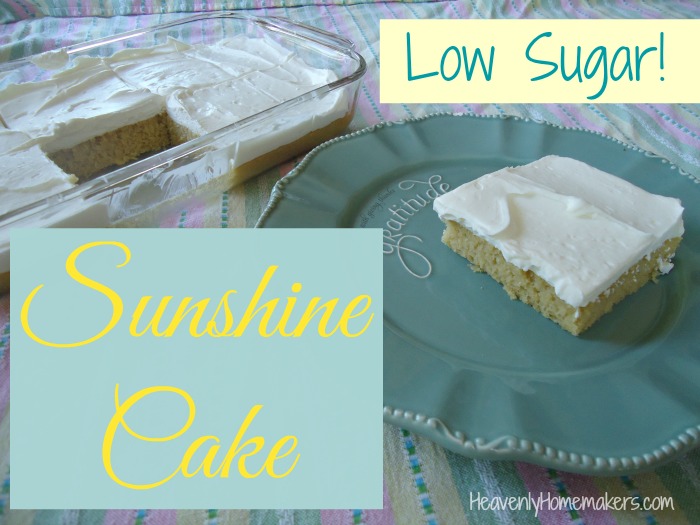
Of course I named this “sunshine cake.”

sunshine cake 12

I don’t know if you know this about me or not since I hardly ever mention it or at the very least I haven’t said it in the past five minutes – but here it is: I LOVE SUNSHINE!!! I have decided that I need large doses of vitamin D in order to avoid all kinds of conditions and disorders. Bring on the hot, bright, beautiful days of summer!

My love of sunshine along with my love for this cake led me to call this recipe Sunshine Cake. Indeed, that’s exactly what this tastes like: a delicious drop of sunshine.

What does sunshine taste like, you ask? Well, it tastes like this cake. Do I need to keep explaining this?

If you can possibly believe it, I think I like this cake even better than the Low Sugar Super Moist Chocolate Cake – and we all know that I love that cake almost as much as I love sunshine.

Just like the chocolate cake, two key players in this recipe are whole wheat pastry flour and sour cream. The pastry flour helps this cake remain light, and the sour cream keeps it moist. But let’s not forget the Cream Cheese Frosting. It goes without saying that Cream Cheese Frosting makes everything in life better. Even cloudy days with no sunshine.

Low Sugar Sunshine CakeYum

Low Sugar Sunshine Cake
 
Save Print
Author: Laura
Ingredients
  • 2⅔ cups whole wheat pastry flour
  • ½ cup sucanat or sugar
  • 2 teaspoons baking powder
  • 1 cup milk
  • ½ cup sour cream
  • ½ cup melted butter
  • 2 eggs
  • 1 teaspoon vanilla extract
Instructions
  1. Combine dry ingredients in a bowl.
  2. Add milk, sour cream, melted butter, eggs, and vanilla.
  3. Mix with beaters until smooth.
  4. Pour into a buttered 9x13 cake pan.
  5. Bake in a 350° oven for 25-30 minutes or until a toothpick inserted in the middle comes out clean.
3.4.3177

Stevia-Sweetened Cream Cheese Frosting

2 cups heavy whipping cream
2 Tablespoons softened butter
8 ounces softened cream cheese
1 teaspoon vanilla extract
Liquid stevia to taste (I use about 20 drops)

In a large bowl, whip cream until soft peaks form. Add softened butter, cream cheese, vanilla, and stevia – whipping until well combined and smooth. Spread over cooled cake. Store in refrigerator.

If you prefer, here’s a slightly sweeter but still not too sugary frosting option:

Maple Cream Cheese Frosting

8 ounces softened cream cheese
¼ cup softened butter
3-4 Tablespoons real maple syrup
1 teaspoon vanilla extract

With a hand mixer (or in your blender), whip together all ingredients until smooth. Spread over cooled cake.

Low Sugar Sunshine Cake

Tell me which Low Sugar recipes you’ve tried so far. Which are your favorite? Are you a chocolate or a vanilla kinda friend?

Heavenly Homemaker's Club Members: Access your homepage and all your fantastic resources here! Not a member yet? Please join us!

Make Pizza Boats on the Grill ~ Fast and Easy!

June 30, 2015 by Laura 4 Comments

This post may contain affiliate links. For more information, please see our disclosure policy.

Grilled pizza boats! Who knew!!?

Ever since I became a big girl and learned how to turn on our grill, a whole new world of summertime food opened up to me. I think I turned 38 that summer. I had always left certain tasks like that up to my husband – things like installing our window air conditioners, getting the oil changed in our car, and grilling meat.

Then one day I was like, dude it sure would be nice to get dinner cooked instead of waiting for Matt to get home and grill the meat. (The deep thoughts of a hungry 38 year old…)

So I prepared myself for a detailed lesson in propane and matches and safety and how to avoid setting the house on fire. Then Matt got home and showed me how to simultaneously turn a knob and push a button. Four seconds later, the grill was aflame.

Hmmm, thought I. I probably could have even learned that when I was as young as 37.

Don’t tease. Need I remind those of you who have been operating a grill since adolescence that some of us experienced trauma at age 17 which may or may not have involved a fire and the total destruction of a huge barn on my family’s property? Some of us have hated fire for a very, very long time. Some of us might have equated lighting a grill to lighting a barn on fire and watching it smolder for three to fourteen days. Some of us.

So now I’m 41 (and three quarters) and the grill is my best friend in the summertime. In my 3 years of grilling experience, I have not burned anything down – not our house, not someone else’s house, not even a barn.

Regarding food of many kinds: if I can grill it, I do. If I’ve never seen it grilled before, I try it. Anything to avoid turning on the oven on a hot day. Plus, grilled food is fun and special and it feels like a big deal to say, “we’re grilling chicken tonight” instead of simply saying, “we’re having chicken.” Right? Can’t you hear the difference?

So enter: Grilled Pizza Boats

Making pizza on the grill (the regular crust kind) is quite doable and very yummy. You can learn how to do that here. But that is a bit time sensitive and laborious (woe is me) so I rarely go to the trouble. Pizza Boats, however? Well this is absolutely too easy.

Make a Quick Meal of Pizza Boats - On the Grill!

How to Make a Pizza BoatYum

Slice a loaf of French or Italian bread in half the long way (you know, like a boat). Top each half with your favorite pizza goodies. Bake in a 350° oven or on the grill until the cheese is melted (about 10 minutes).

It’s as easy as that.

In fact, it’s one of the easiest meals there is. Slice the pizza boats and serve them with salad and fresh fruit.

And then I just have to say it: Be sure you turn off your grill. I refuse to be the one responsible for any other fires, large or small. I’ve met my quota.

What are your favorite foods to grill?

Heavenly Homemaker's Club Members: Access your homepage and all your fantastic resources here! Not a member yet? Please join us!

Real Food “Velveeta” and Rotel Recipe

June 28, 2015 by Laura 46 Comments

This post may contain affiliate links. For more information, please see our disclosure policy.

To be clear, this recipe does not include Velveeta as one can not use the words “real food” and “velveeta” in the same recipe and be telling the truth. In addition, this is not a recipe for Velveeta. I refuse to experiment to come up with a way to make a cheese product that has a shelf life.

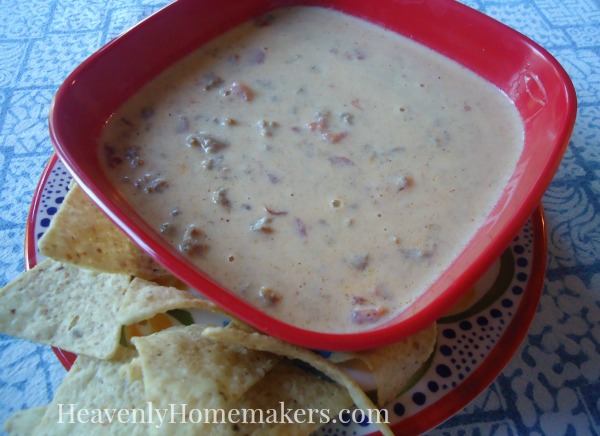
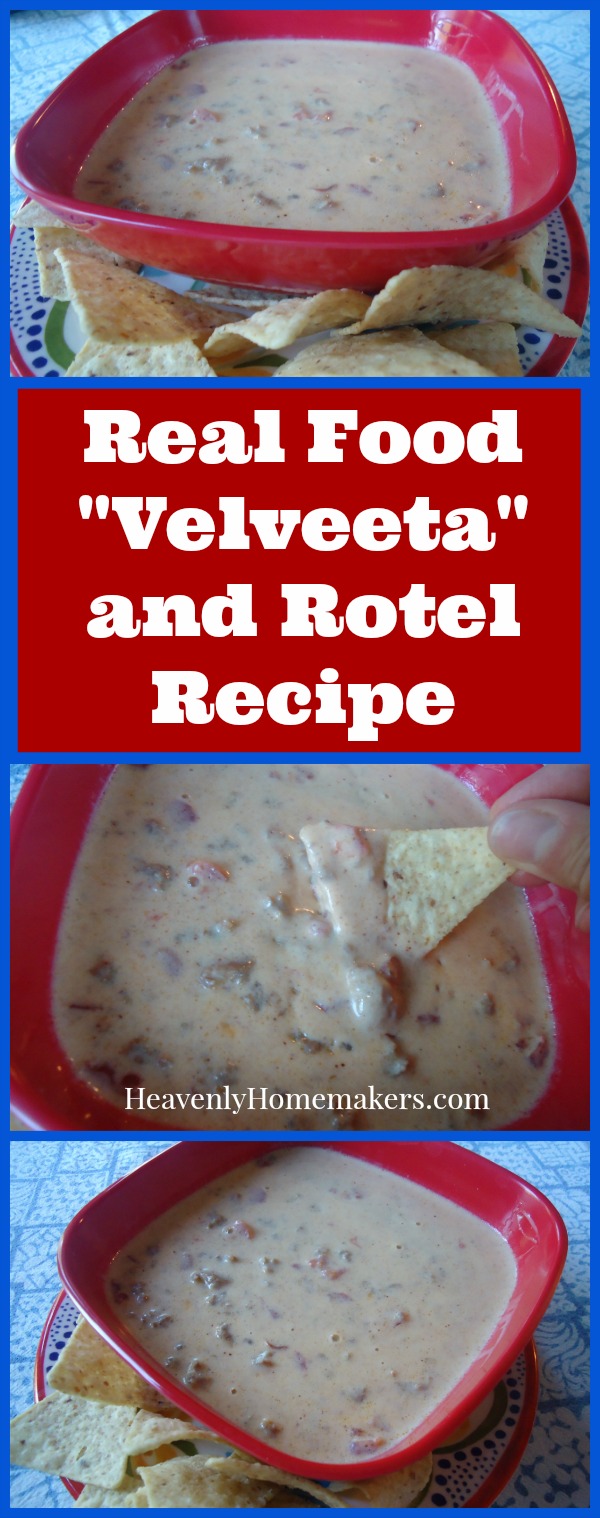
Real Food Velveeta and Rotel Dip

But. As many of you know, I have a ridiculous love for the completely nasty and absolutely delicious Velveeta Rotel Dip that I grew up on as a kid. You may remember that I wrote a love letter to Velveeta a few years ago and bid her farewell as I created a tasty dip to replace her. Sure enough, we make that dip frequently at our house as it is super easy, all real food, and absolutely yummy.

But. That recipe, as good as it is, is still not the same as the Velveeta Rotel Dip I crave. That is why (and I’m not proud of this) sometimes I put a $6 log of boxed cheese product (otherwise known as Velveeta) into my cart along with 2 cans of Rotel and I bring it home and I melt it together and I eat it even though it is terribly terrible and truthfully it doesn’t even taste as good to me as it used to because of that whole real food thing I’m into now which has made all bad foods taste like chemicals on a tortilla chip.

So what is my problem?

Problem? I don’t have a problem.

Okay fine. Whatever. I have a problem.

And also? When did fake cheese become so expensive? You’d think that would deter me from buying it. But as I said, I have a problem.

It was either time to begin a Velveeta support group or get back in the kitchen to try my hand at another dip recipe since I’ve only tried like seventeen other times and posted like five other cheese dip recipes through the years and may have to rename this website to cheesediprecipesforaddicts.com with the tag line “All Cheese Dip Recipes, All the Time.”

A support group was out of the question because it is my understanding that they don’t serve chip dip at those meetings. So here we are again, back in the kitchen for another attempt at a real food version of my beloved dip.

You guys. I think I nailed it this time. And I mean that with all the humility and sweetness possible, but hey guess what? I just made the best chip dip ever!!! 

So here’s how this dip becomes amazing. Two things:

  1. We must make a cheese sauce for this to work. This requires butter and corn starch and actual cheese. Relax. It’s not as hard as it sounds.
  2. We must use actual Rotel or an off brand of “diced tomatoes and green chilies. Salsa isn’t the same. Thankfully, Rotel is still a real food – read the ingredient label and rejoice.

Note: My wonderful grass-fed beef produces the perfect amount of fat so I never have to drain off grease. In order to make a sauce, one must have fat or grease to work with. That’s why my recipe includes butter. Depending on what meat you have, I recommend either skipping the butter (if your meat has some grease to work with) or draining the grease and adding the butter or using your grease with some butter. Just so you have about 4 Tablespoons of fat to work with, you’re golden.

Real Food “Velveeta” and Rotel Dip RecipeYum

5.0 from 2 reviews
Real Food "Velveeta" and Rotel Recipe
 
Save Print
Author: Laura
Serves: 6-8
Ingredients
  • 1 pound hamburger meat
  • 2-4 Tablespoons butter
  • 2 heaping Tablespoons corn starch
  • 1 cup water
  • 1 teaspoon chili powder
  • sea salt to taste
  • 2 cups heavy cream
  • 10-ounce can diced tomatoes with green chilies (Rotel)
  • 1-2 cups shredded cheddar or colby jack cheese
Instructions
  1. Brown the hamburger meat in a large pot.
  2. Add butter to the meat, melting it throughout the pot.
  3. Sprinkle in corn starch, coating the meat.
  4. Pour in water, chili powder, and salt.
  5. Turn heat up and stir until the mixture thickens.
  6. Add cream, continuing to stir as the mixture thickens. (This all happens quickly in my experience.) Stir in Rotel, heating for about 2 more minutes.
  7. Remove from heat.
  8. Add shredded cheese, stirring until the cheese has melted and the dip is smooth.
3.4.3177

If you don’t remove your sauce before adding cheese, your cheese will end up funky and not smooth and creamy. You’ve been warned, so don’t add your cheese while your pot is still on the stove, then email me and ask why your cheese got funky. Not that anyone would ever do that.

Real Food Velveeta and Rotel Recipe

If you need me, I’ll be in the kitchen eating another bowl of my homemade not velveeta but way better than velveeta because it’s real food Chip Dip.

Who wants to come join me? I need to know who loves this dip as much as me. Admit it. Join my support group – the one where there IS CHIP DIP AT THE MEETINGS because my support group meetings rock and we support one another by eating dip.

~~~~~~~~~~~~~~~~~~~~~~~~~~~~~~~~~~~~~~~~~~~~~~~~~~~~

It’s recipes like this Real Food Velveeta and Rotel that makes Simple Meals what it is. It offers you huge money and time savings. Not to mention you don’t have to think as hard every week about what to cook and what to buy.

Join the fun! Check out our amazing Simple Meals program!

You will love this!

728x90

Heavenly Homemaker's Club Members: Access your homepage and all your fantastic resources here! Not a member yet? Please join us!
« Previous Page
Next Page »

Join Our Community!

 Facebook Twitter E-mail Instagram Pinterest

Popular Posts

~ Will All of the Real Moms Please Stand Up?
~ Easy! Stir-and-Pour Whole Wheat Bread
~ How to Make Gatorade
~ 31 Real Food Breakfast Ideas
~ Dear Teenage Girls...
~ When Mom Takes a Step Back
~ The Inexpensive Health Insurance We Love!
~ Let's Talk Real Food Grocery Budgets

Check out our latest posts!

  • Big Family Food and Fun: September 6-12, 2026
  • Big Family Food and Fun: August 30-September 5, 2026
  • Big Family Food and Fun: August 23-29, 2026
  • Big Family Food and Fun: August 16-22, 2026
  • Big Family Food and Fun: August 9-15, 2026
Home  ~  Simple Meals  ~  Club Membership  ~  Shop  ~  Privacy Policy  ~  Disclosure  ~ Contact

Copyright © 2026 · Beautiful Pro Theme on Genesis Framework · WordPress · Log in