Heavenly Homemakers

Encouraging women in homemaking, healthy eating and parenting

  • Home
    • About
    • FAQs
  • Recipes
    • Bread and Breakfast
    • Condiments
    • Dairy
    • Main Dishes
    • Side Dishes and Snacks
    • Desserts
    • Gluten Free
    • Instant Pot
    • Crock Pot
    • Heavenly Homemaker’s Weekly Menus
  • Homemaking
    • Real Food Sources
  • Store
  • Contact
    • Advertise
    • Disclosure
    • Privacy Policy
  • Simple Meals
  • Club Members!

Low Sugar Carrot Cake With Maple Cream Cheese Frosting

May 8, 2015 by Laura 11 Comments

This post may contain affiliate links. For more information, please see our disclosure policy.

This Carrot Cake might be my family’s favorite low sugar treat so far!

I cut the sugar from the original recipe from 5 1/2 cups to just under 3/4 cups total. Not too shabby, eh? And just look at this plate of deliciousness!
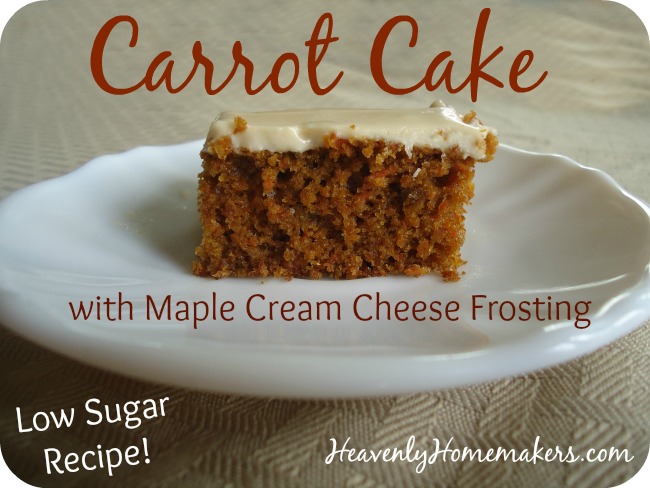
Low Sugar Carrot Cake with Maple Cream Cheese Frosting

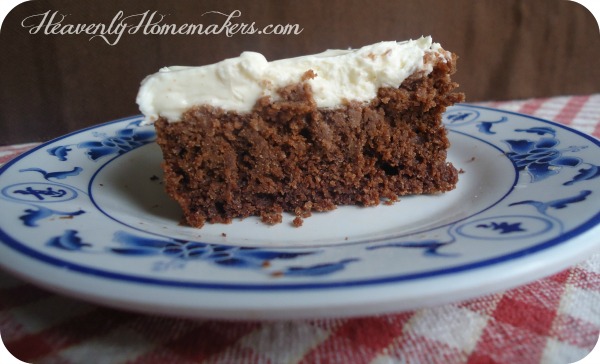
I personally like the Stevia Sweetened Cream Cheese Frosting recipe you’ll find with this Super Moist Chocolate Cake recipe. But my boys were asking if maybe I could make the frosting just a little bit sweeter this time. Why not? I simply added 3 Tablespoons of real maple syrup to the frosting and they LOVED it. How’s that for a healthier alternative to 4 cups of powdered sugar? Oh yes.

Low Sugar Carrot CakeYum

Low Sugar Carrot Cake With Maple Cream Cheese Frosting
 
Save Print
Author: Laura
Ingredients
  • 2 cups whole wheat pastry flour
  • ½ cup sucanat
  • 1 teaspoon baking powder
  • 1 teaspoon baking soda
  • 1 teaspoon cinnamon
  • 3 cups finely shredded carrot (about 6 carrots)
  • 1 cup melted coconut oil
  • 4 eggs
Instructions
  1. Stir together flour, sucanat, baking powder, baking soda, and cinnamon.
  2. Mix in shredded carrots, melted oil, and eggs.
  3. Pour batter into a buttered 9x13 inch baking dish.
  4. Bake in a 350° for 20-25 minutes or until a toothpick inserted in the middle of the cake comes out clean.
  5. Allow cake to cool completely before spreading on frosting.
3.4.3177

Maple Cream Cheese Frosting

8 ounces softened cream cheese
¼ cup softened butter
3-4 Tablespoons real maple syrup
1 teaspoon vanilla extract

With a hand mixer (or in your blender), whip together all ingredients until smooth. Spread over cooled cake.

Go forth and pin this recipe. Or print it and pin it to your shirt so you can make it this weekend. This is an order, or at the very least, it is a very sweet suggestion.

Looking for more Low Sugar Recipes?

  • Easy {Low} Sugar Cookies
  • Low Sugar Lemon Melt-Away Cookies
  • Low Sugar Almond Melt-Away Cookies
  • Low Sugar Orange Melt-Away Cookies
  • Low Sugar Lime Melt-Away Cookies
  • Low Sugar Strawberry Cheesecake Parfaits
  • Low Sugar Chocolate Fudge Cookies
  • Low Sugar Chocolate Cheesecake Parfaits
  • Low Sugar Pumpkin Cheesecake Cups
  • Low Sugar Sunshine Cake
  • Low Sugar Super Moist Chocolate Cake
  • Coconut Fudge Bars
  • Low Sugar Lemon Loaf
  • Low Sugar Oatmeal Cookies
  • Low Sugar Peanut Butter Cake with Peanut Butter Frosting
Heavenly Homemaker's Club Members: Access your homepage and all your fantastic resources here! Not a member yet? Please join us!

So You Wanted a Low Sugar Chocolate Frosting for your Low Sugar Chocolate Cake?

April 30, 2015 by Laura 4 Comments

This post may contain affiliate links. For more information, please see our disclosure policy.

When I shared this Low Sugar Super Moist Chocolate Cake recipe and told you that I’d adapted it from a Texas Sheet Cake recipe, several asked if I could come up with a low sugar chocolate frosting to go with it. I mean, the Cream Cheese Frosting is great, but sometimes we just need some chocolate with our chocolate, yes?

Low Sugar Super Moist Chocolate Cake

Creating a chocolate frosting for this cake was a little bit tricky. See, low sugar chocolate can turn out quite bitter if you’re not a dark chocolate fan (um, or even if you are). Plus, powdered sugar is typically what gives frosting its bulk. That’s why I’ve been using cream cheese frosting. The cream cheese and whipped cream provided the bulk, then the stevia provided the sweetness and we were good to go. (More about stevia here.)

Here’s what I learned through this trial and error process: Making chocolate frosting with stevia is not so good. Spread on top of the cake it was so-so, but wow, the bitterness had too much of a bite, even for me – the one who loves dark-dark chocolate.

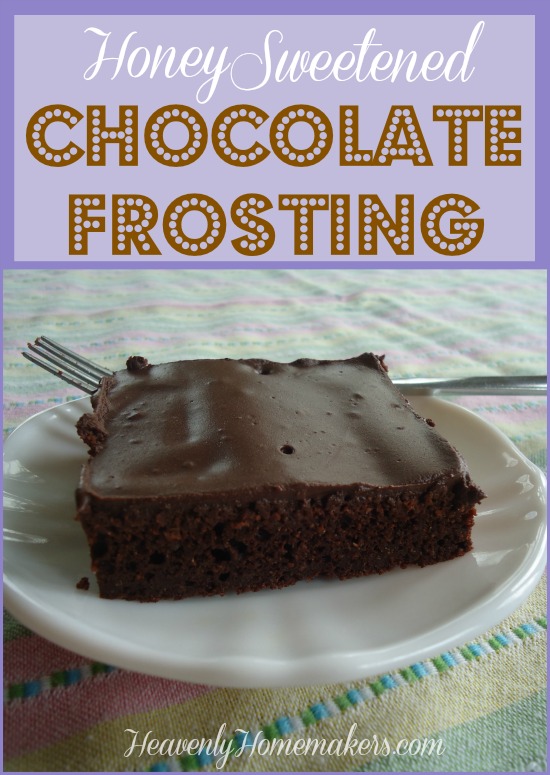
So here’s the solution I came up with: I used honey. This frosting is really more of a glaze, because there’s not much in it to make it thick and creamy. But a thin chocolate glaze on a chocolate cake like this? Just right.

Find the Super Moist Chocolate Cake recipe here.

Low Sugar Chocolate FrostingYum

1/2 cup butter
4 Tablespoons cocoa powder
2 Tablespoons milk
2-4 Tablespoons honey (sweeten this to your taste)
1 teaspoon vanilla extract

In a small saucepan combine butter, cocoa, milk, and honey. Cook and stir over low heat until ingredients are well combined and mixture begins to thicken slightly. Removed from heat. Stir in vanilla. Spread over cooled cake.

Honey Sweetened Chocolate Frosting

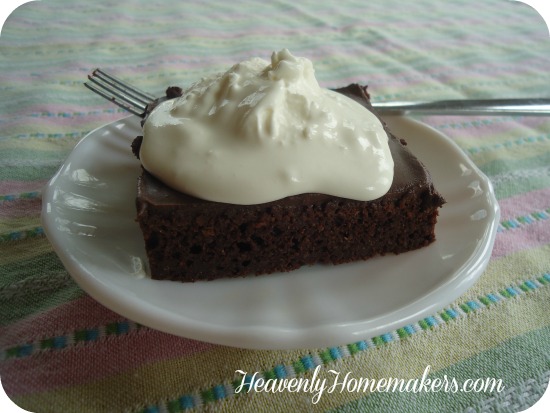
We really liked this cake with whipped cream on top. I simply whipped the cream, then added a few drops of stevia.

Low Sugar Chocolate Cake with Honey Sweetened Frosting

I continue to be fascinated by the fact that we can take so much of the sugar out of recipes and still turn out a delicious treat.

And guess what??!! Coming up next week…Low Sugar Carrot Cake with Maple Frosting recipe. YES!! I played with a recipe and my family loved it! I’ll get it typed up to share with you soon.

Do you have any low sugar treat requests for me to play with? I won’t make any promises on being able to create what you want, but I bet I’ll have fun trying. :)

Heavenly Homemaker's Club Members: Access your homepage and all your fantastic resources here! Not a member yet? Please join us!

Don’t Forget the Tuna

April 28, 2015 by Laura 25 Comments

This post may contain affiliate links. For more information, please see our disclosure policy.

This is probably the most exciting blog post you will ever read. Never mind all the insightful, scripture-filled, life-changing inspiration you might find online. I’m here to talk to you about tuna.

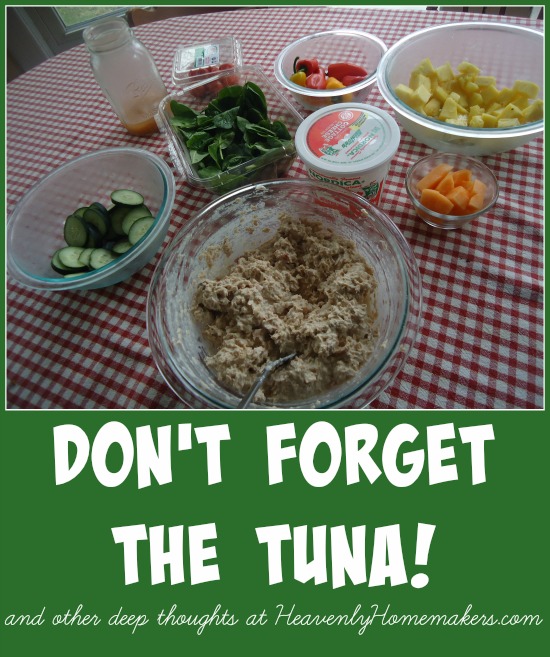
Don't Forget the Tuna and other deep thoughts

Yum

It’s an important topic and that’s all there is to it.

See, here’s the thing. You and I have busy schedules. Some of us love to spend time in the kitchen making nice meals for our families. Some of us don’t. Either way – we all want to be healthy and there are many days each week we need something quick to throw out on the table. For me, this need is most prevalent at lunchtime during our homeschool days. Shoot, right now it’s also very important at dinnertime when we’re running out the door to soccer games. You know what? I need simple meals three times a day, seven days a week. I just do. I’m sure you can relate.

I think this little convenience food can be overlooked as an easy meal option. So don’t forget the tuna. Remember the tuna.

Long live the tuna.

And now, the most frequently asked questions about this oft forgotten meat choice. Seriously, they are asked frequently. Like all the time. My email inbox is flooded with tuna talk. You have no idea.

How do you make your tuna salad?

I add Hain Safflower mayonnaise and homemade pickle relish. Usually I shake in a little salt. How much of each, you ask? Probably 2 Tablespoons of mayo and 2 teaspoons of relish per can of tuna.

How many cans do you go through in one meal?

Do you really want to know? This is the Coppinger family we’re talking about here. Our boys eat at least one can each. It’s alottatuna. (When I wrote that just now, I said it in an Arnold Schwarzenegger voice. Try it: It’s alottatuna. See? Is it just me, or can you just totally hear him say that? I am so weird.)

Where do you get your tuna?

There has been some tuna controversy through the years. Doesn’t tuna have too much mercury? Is it hurting the dolphins? Salted or unsalted? In oil or in water?

I’ve researched it. We don’t eat it every day, but I do feel okay eating and serving it every couple of weeks. I order cases of Yellow Fin Tuna from Natural Value. My understanding is that this variety has the lowest amount of mercury.

How do you serve your tuna salad?

I usually have my boys mix up a big bowl (yay for kids who can do this kind of work so that I can sit around talking like Arnold Schwarzenegger). Then we have it with crackers and whatever fruits and veggies we have in the fridge. It’s also great served on a bed of lettuce and a tomato slice. I like scooping tuna into a big bowl of mixed greens, chopped cucumbers, and diced tomatoes.

Or, if we’re really feeling creative (brace yourself for this one), we’ll spread some tuna salad on a slice of bread. We call them sandwiches. Incredible invention.

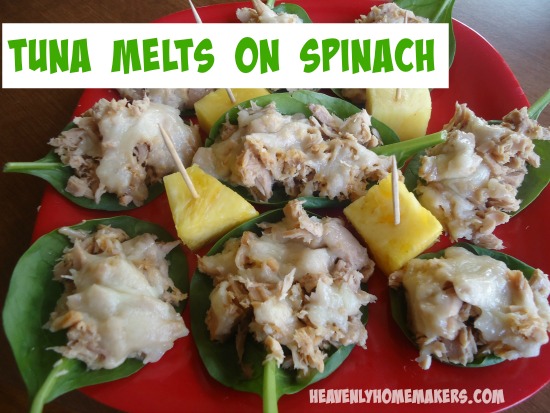
Don’t forget this wonderful idea: Tuna Melts on Spinach

Tuna Melts on Spinach

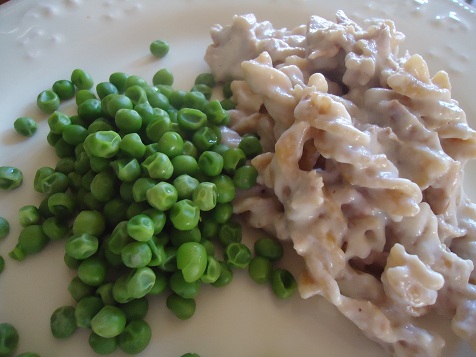
And also the ever wonderful real-food Tuna Casserole that makes for a very easy and fast meal:

Are you a tuna lover? What’s your favorite way to eat tuna? Join in the tuna talk!

Heavenly Homemaker's Club Members: Access your homepage and all your fantastic resources here! Not a member yet? Please join us!

Low Sugar {Real Food} Oatmeal Cookie Recipe

April 23, 2015 by Laura 6 Comments

This post may contain affiliate links. For more information, please see our disclosure policy.

Taking the Super Moist Chocolate Cake from 6 cups of sugar to just 1/2 cup of sugar worked great. I figured why not play with other cake and cookie recipes to make them lower in sugar? And all the people said, “Amen.”

Low Sugar Chocolate Cake

If you haven’t tried this Low Sugar Super Moist Chocolate Cake yet, I have to ask:
Why?
Go make this. For the love of chocolate, people.

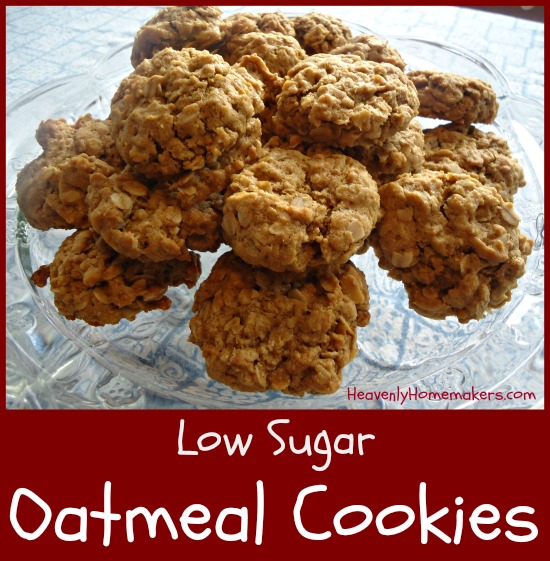
Now here’s another low-sugar treat I experimented with. I took my oatmeal cookie from 1 1/2 cups of sugar down to just 1/2 cup. I thought they were great. My kids ate them fine, but were sure to let me know that they would have been much better had I included chocolate chips.

Well duh. Everything is better with chocolate chips. But we’re going for low sugar here. So the boys suggested that maybe next time I could add chocolate chips to half the batch (for them) and leave the other half plain (for me). Apparently I’m the only one who needs to cut back on sugar and the boys still need plenty of it? And I’m not sure where Matt fits into this equation. Does Dad get any cookies, boys?

I’m sure they’d be happy to let me share my plain half with him. They are very nice.

Give these a try – with or without chocolate chips. Hey, you could even add raisins. Or dried cranberries.

Low Sugar Oatmeal CookiesYum

1 cup melted butter
1/2 cup sucanat
2 eggs
1/2 teaspoon baking soda
1/4 teaspoon sea salt
1 teaspoon vanilla extract
2 cups whole oats
1 1/2-2 cups whole wheat flour (I use freshly ground hard white wheat)

Stir together melted butter and sucanat. Add eggs, baking soda, salt, and vanilla. Stir in oats and flour until you reach desired cookie dough consistency. (If you’re using store-bought whole wheat flour, you may need less than 2 cups. Freshly ground may require the full 2 cups.)

Scoop cookie dough onto baking sheet leaving about 2 inches in between. Bake in a 350° oven for 10-12 minutes or until cookies are golden brown.

Low Sugar Oatmeal Cookies

These are great dipped in milk, and of course, I’ll be having a cup of coffee with my half of the cookies. Not that I’ll eat the entire half-batch at once. That would be a bit counter-productive, wouldn’t you say?

Are you a plain oatmeal cookie fan – or do you prefer them with raisins or chocolate chips?

Heavenly Homemaker's Club Members: Access your homepage and all your fantastic resources here! Not a member yet? Please join us!

Easy Dessert to WOW Your Guests: Build a Brownie Sundae Bar

April 14, 2015 by Laura 7 Comments

This post may contain affiliate links. For more information, please see our disclosure policy.

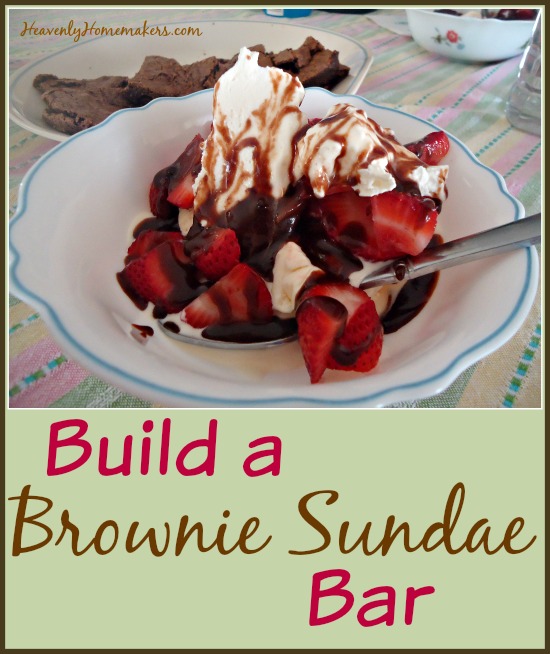
Need a fun but simple dessert? This Brownie Sundae Bar is the way to go!

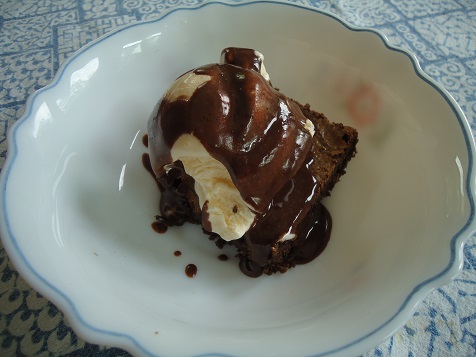
brownie_fudge_sundae

I didn’t have time to make a fancy dessert for our Easter guests two weeks ago. We’d been out of town, arriving home late the night before. Knowing this ahead of time, I’d bought ice cream. Boring and not very Eastery. I mean, it wasn’t even homemade. But…

Sunday morning before church, I baked some Brownies and sliced some strawberries. Those two items alone make a dessert pretty special. Once we arrived home from church, I made some Homemade Hot Fudge and whipped some cream. Thus (I like saying “thus”) – after we cleared the table of the wonderful (and also simple) Easter dinner, the boys helped me carry all the fun brownie bar goodies out to the table.

How to Set Up a Brownie Sundae Bar

Set out items like:

  • A Plate of Fresh Homemade Brownies
  • Store-bought Ice Cream (eh, ya can’t always make it homemade)
  • Homemade Hot Fudge
  • Sliced Strawberries
  • Freshly Whipped Cream
  • Nuts
  • Coconut
  • Other Fruit
  • Chocolate Chips

As each item appeared on the table, our guests (5 college students) gasped – especially when the hot fudge came out. It was like I had spent hours on a fancy dessert and presented them with a one-of-a-kind treat. Dude, it was just brownies and ice cream. But hey, when you put all these simple treats together, they really do make something special.

Build a Brownie Sundae Bar

Yum

So the moral of this story is this: If you need a special dessert for company, but you don’t have a lot of time, consider preparing a Brownie Sundae Bar. Your guests will love it and you will too. It’s simple but fancy and obviously delicious.

What else would you add to your Brownie Sundae Bar? 

P.S. This is not a low sugar dessert. ;)

Heavenly Homemaker's Club Members: Access your homepage and all your fantastic resources here! Not a member yet? Please join us!

Build a Simple Veggie Flower (Great for Showers and Holidays!)

April 9, 2015 by Laura 4 Comments

This post may contain affiliate links. For more information, please see our disclosure policy.

I just came across a picture on Pinterest showing me how to carve a swan out of a melon. I highly considered giving it a try for about negative .8 seconds – mostly because I knew for sure mine would turn out looking like a melon that fell out of my cart at the store and got ran over by a minivan.

Art and food? It’s not my thing. I think life’s too short to design owls out of kiwi, grapes, peaches, and blueberries when there are so many other important ways to spend time – like looking for lost shoes and sweeping up glass after a ball has been kicked through the kitchen (details not included). Also – I stink at art. Like, I draw a picture of a bunny and my kids say, “why did you draw a picture of our mailbox?”

But. Two weeks ago I saw a picture of veggies displayed in the shape of a flower and thought to myself: I can totally do that and I should do it for Easter. And so I did. It took less than 10 minutes (no joke) and people were like, “oh look it’s a flower.” Score one for me.

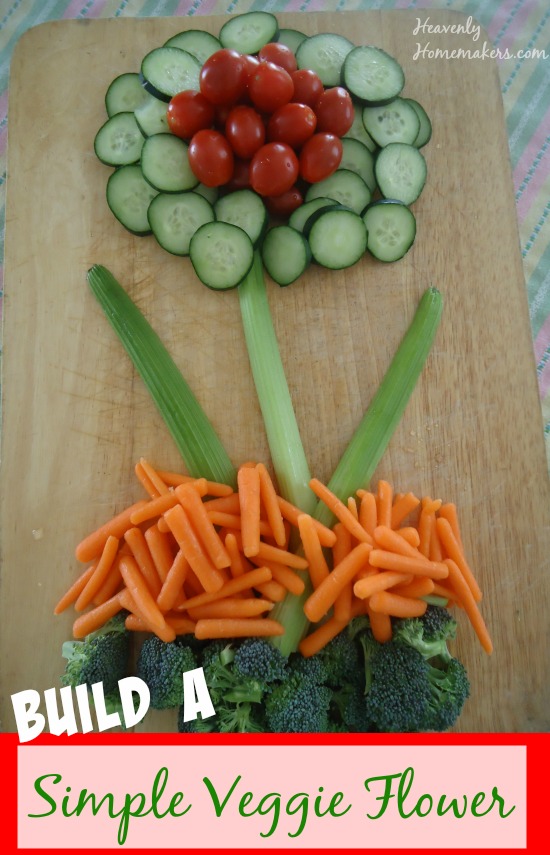
Build a Simple Veggie Flower

I think this is a great idea for a springtime wedding or baby shower, and it was definitely perfect for our Easter buffet. On a regular day, however? I will be throwing down the veggies and dip like my normal non-artist self.

What You Need to Build a Veggie FlowerYum

  • Broccoli
  • Baby Carrots
  • Celery
  • Cucumbers
  • Grape Tomatoes

Putting it all together is self explanatory – if you can do it I can do it. Just look at the picture above for the “how to.” Serve with these great dips:

  • Homemade Ranch Dressing

Ranch Dressing and Dip Mix

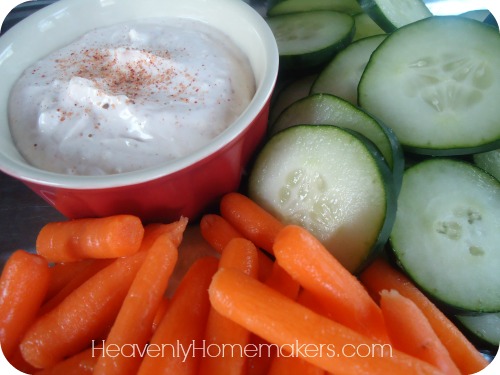
  • Easy Veggie Dip (Made With Homemade Seasoned Salt)

Easy Veggie Dip 1

Have you done much mixing of art and food? I draw the line at this veggie flower. :)

Heavenly Homemaker's Club Members: Access your homepage and all your fantastic resources here! Not a member yet? Please join us!

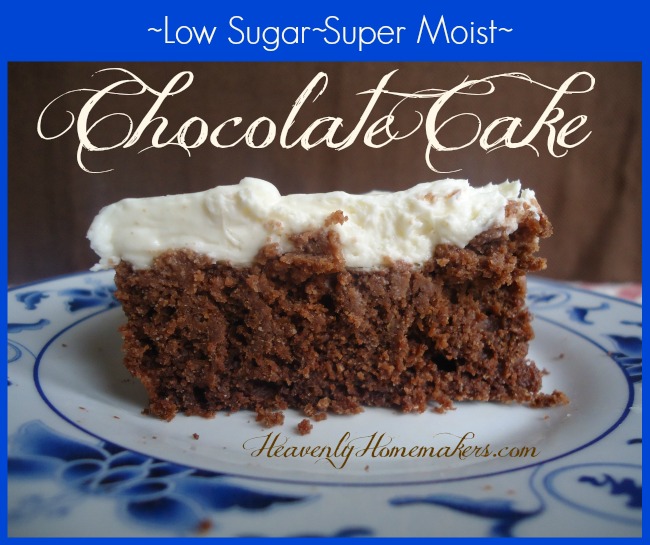
Low Sugar Super Moist Chocolate Cake (That Doesn’t Taste Low Sugar)

April 8, 2015 by Laura 43 Comments

This post may contain affiliate links. For more information, please see our disclosure policy.

There’s a chocolate cake recipe our family has been making for years. It’s one of our favorite of all cakes – mostly because it’s not dry like many homemade cakes can be.

Low Sugar Chocolate Cake

But – you know how my body won’t let me eat much sugar anymore? I mostly don’t even want it – but sometimes I just get a hankering for something chocolaty. That’s what inspired the invention of Chocolate Whipped Cream, Coconut Fudge Bars – and now this – a Low Sugar Chocolate Cake. I decided to try making our favorite chocolate Texas Sheet Cake recipe with less sugar to see how it would turn out.

You guys!!!!!! Why in the name of a diabetic coma do recipes (including many of mine) call for so much sugar???!?! Originally, this recipe includes 6 cups of sugar. SIX. That’s 2 cups in the cake and 4 cups in the frosting and none of us can possibly imagine that cutting out so much of the sugar would still produce a cake that actually tastes good.

Well neener, neener to all of us. I just recreated this cake to include a grand total of 1/2 cup of sugar. Yes, that is one-half cup. Total. Neener. 

I love this cake like nobody’s business. But what do I know? I’m the one who can no longer tolerate much sugar, so even the barely sweet stuff tastes quite sweet to me. The true test was serving this to my children. They still love their sugar (what kid doesn’t?) and they are used the “the regular way” we’ve always made the Texas Sheet Cake. Would they feel like the cake wasn’t sweet enough? I mean, going from 6 cups to just 1/2 cup of sugar – that’s a big drop.

Two things:

  1. Yes, they could tell.
  2. No, they didn’t care.

They ate the cake, they liked the cake, they had seconds on the cake (which was only allowed because of the low sugar content). This makes me think that we could likely drastically cut the sugar in most cake and cookie recipes and everyone would still enjoy the treats. Why yes I will be testing this theory. And I will share my results with you – one recipe at a time.

One thing to note: The brand of stevia you use in the frosting really does make a difference. Some stevia has a stronger, more bitter taste than others. My family prefers NuNaturals Alcohol-Free Stevia. It’s much less bitter. But no matter what brand you use – if you overdo it, the taste goes from sweet to bitter. A little goes a long way – don’t forget! (More info on stevia here.)

Low Sugar Super Moist Chocolate CakeYum

5.0 from 2 reviews
Low Sugar Super Moist Chocolate Cake (That Doesn't Taste Low Sugar)
 
Save Print
Author: Laura
Serves: 15
Ingredients
  • 1 cup melted coconut oil
  • 1 cup water
  • 4 Tablespoons unsweetened cocoa powder
  • 2 cups whole wheat pastry flour
  • ½ cup sucanat
  • dash of sea salt
  • 1 teaspoon baking soda
  • ½ cup sour cream
  • 2 eggs
Instructions
  1. In a large mixing bowl, stir together flour, sucanat, salt, and baking soda.
  2. Set aside. In a saucepan, bring oil, water, and cocoa to a boil.
  3. Pour liquid mixture into the bowl with the dry ingredient mixture.
  4. Stir well.
  5. Add sour cream and eggs, mixing well.
  6. Pour batter into a 9x13 inch baking pan.
  7. Bake in a 350° oven for 20-25 minutes or until a toothpick inserted in the middle comes out clean. Allow cake to cool completely before frosting.
3.4.3177

Stevia-Sweetened Cream Cheese Frosting

2 cups heavy whipping cream
2 Tablespoons softened butter
8 ounces softened cream cheese
1 teaspoon vanilla extract
Liquid stevia to taste (I use about 20 drops)

In a large bowl, whip cream until soft peaks form. Add softened butter, cream cheese, vanilla, and stevia – whipping until well combined and smooth. Spread over cooled cake. Store in refrigerator. Makes about 20 servings.

Low Sugar Super Moist Chocolate Cake

Part of what makes this cake so moist is the use of sour cream. It doesn’t hurt that we use an entire cup of coconut oil. Bring on the healthy fat! You can use regular whole wheat flour if you like, but whole wheat pastry flour (ground from soft white wheat berries) really helps make this cake less dense.

So here’s to this amazing Low Sugar Chocolate Cake. Now we can have our cake and eat it too and not even have a sugar crash afterward. Of course, we will also still be eating our veggies with this lovely side of chocolate. Amen and amen.

Have you tried cutting back on sugar in your diet? Have you found recipes to turn out successfully when you cut the sugar? 

Heavenly Homemaker's Club Members: Access your homepage and all your fantastic resources here! Not a member yet? Please join us!

Whole Wheat Stuffed Cheesy Bread

March 25, 2015 by Laura 14 Comments

This post may contain affiliate links. For more information, please see our disclosure policy.

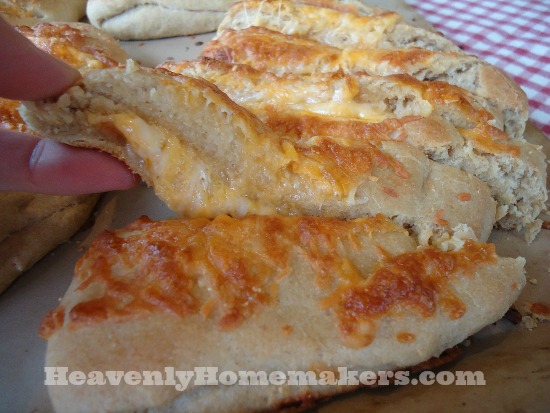
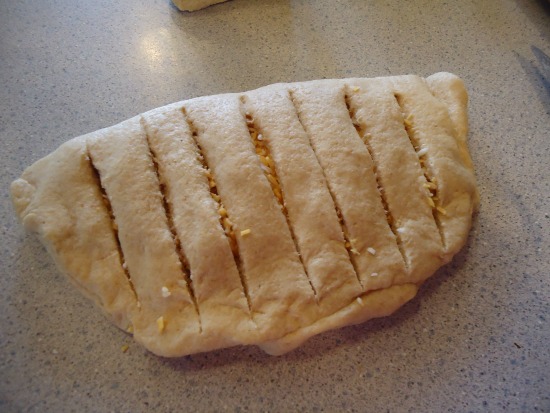
Homemade, soft, pull-apart bread stuffed full of melted cheesy deliciousness? Oh yes.

cheese bread11

What inspired this recipe, you ask? It was pure and total selfishness and that’s the truth.

See, I was serving salad as a main dish for our lunch. The salad was to include mixed greens and other veggies plus flavorful chunks of chicken, so I knew all my men would enjoy it. But I also knew that if I didn’t feed them something a little more substantial with their salad, I’d be hearing the “now what can I have to eat” question right about the time we finished putting salad bowls into the dishwasher.

See? It was selfishness.  I did not want to hear that question. I am over that question. That question makes all mothers want to run in unladylike fashion to the far corners of anywhere but the kitchen. Am I right? I am right.

So I searched online for a fun new kind of bread to go with our salads. The boys all thought I made the bread to treat them to something special. Don’t tell them otherwise. Yes boys. I was June Cleaver delighted to make you this special treat for lunch. (And also, I am very, very selfish and wanted to keep your bellies full until the next actual meal time so that I wouldn’t hear the question.)

Now that my confession is out of the way and you understand the heart behind the recipe, you too can be selfish and make this for your family. This might be the best selfish act you and I will ever commit.

Whole Wheat Stuffed Cheesy Bread (adapted from this recipe)Yum

Dough

1 teaspoon honey
3/4 cup warm water (about 110°)
2 1/4 teaspoons active dry yeast
2 Tablespoons melted butter or coconut oil
2 cups whole wheat flour (I use freshly ground flour from hard white wheat)
3/4 teaspoon sea salt

Cheese Filling

2 cups shredded cheese (I used Colby jack for this)
1 Tablespoon grated Parmesan cheese
1 teaspoon garlic powder
1/4 teaspoon sea salt

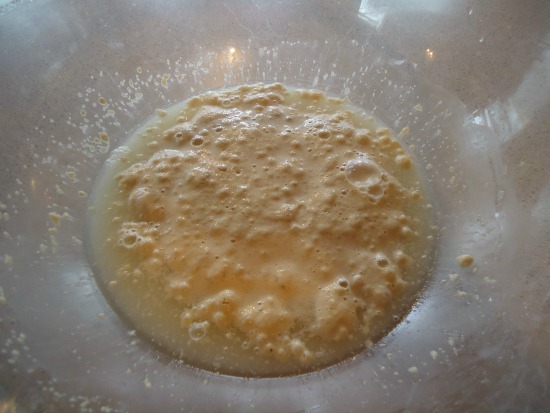
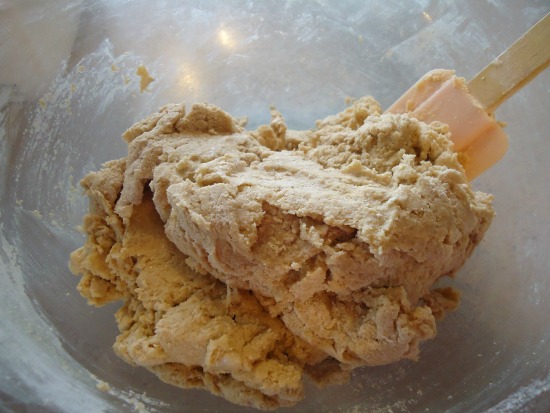
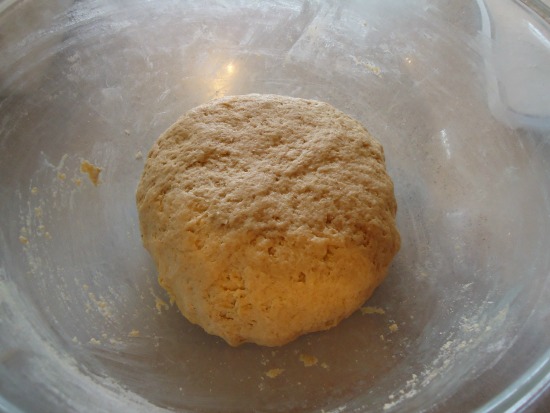
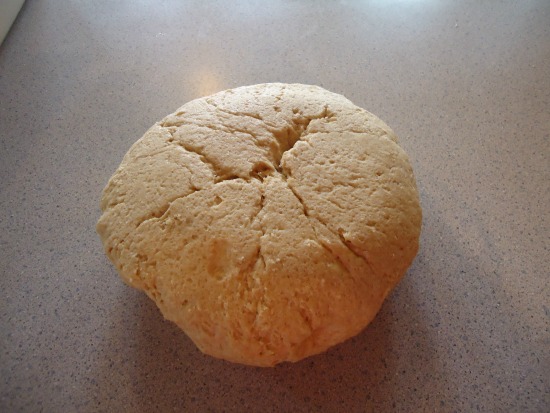
In a large mixing bowl, stir together honey, water, and yeast. Allow mixture to sit for about 10 minutes until it becomes foamy. Add melted butter (be sure it’s not too hot so it won’t kill the yeast). Stir in flour and salt until well combined. Knead dough on a floured surface for about 5 minutes. (Here’s a video showing you how to knead dough.)

Place dough back in bowl, cover, and allow dough to rest/rise for about one hour. Meanwhile, mix cheese filling ingredients in a bowl.

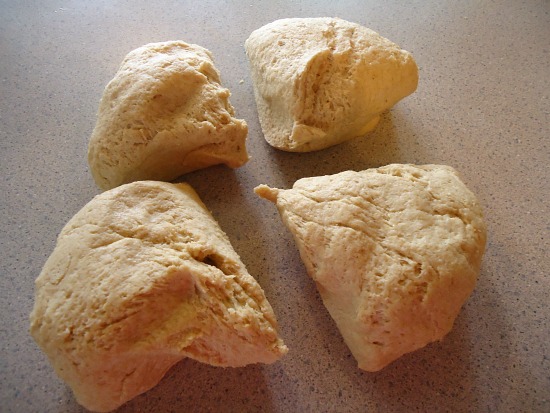
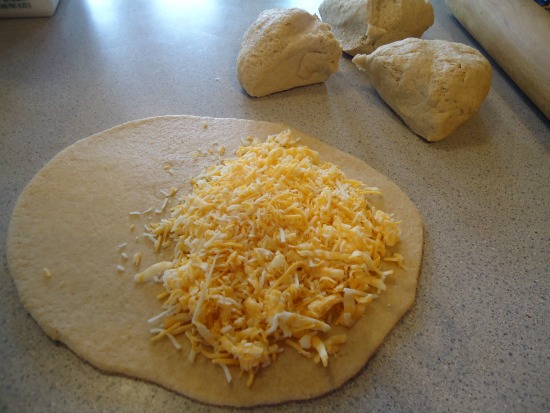
Heat oven to 450°. Divide dough in half. Roll each half into an 8″ square. Scoop about 1/2 cup cheese mixture onto one side of each square. Fold the dough over the cheese and press edges lightly together. Use a sharp knife to slice the dough into 6-8 one-inch strips, stopping just before the folded edge. Sprinkle remaining cheese evenly over the top of the prepared bread.

Bake for 12-15 minutes or until bread is golden brown. Serve right away. Makes 16 Cheesy Bread Sticks.

Note:  In the following pictures, you’ll notice that I doubled the recipe.
Instead of 2 cheesy breads, I made 4. I didn’t want to run out. Remember the selfishness.

cheese bread 1

cheese bread 2

cheese bread 3

cheese bread 4

cheese bread 5

cheese bread 6

cheese bread 7

cheese bread 8

cheese bread 10

And there you have it. A delicious act of selfishness. This was a perfect side with our salads. This bread also tastes great dipped in pizza sauce.

Whole Wheat Stuffed Cheesy Bread

Are you also tired of the question?

Heavenly Homemaker's Club Members: Access your homepage and all your fantastic resources here! Not a member yet? Please join us!

Garden Veggie Chicken Skillet Recipe {Quick, Easy, Healthy, and Delicious}

March 15, 2015 by Laura 10 Comments

This post may contain affiliate links. For more information, please see our disclosure policy.

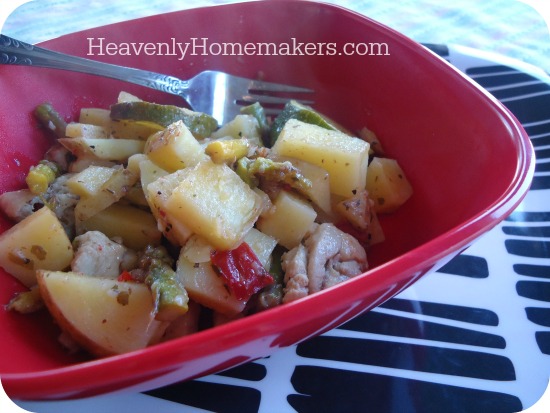
Garden Veggie Chicken Skillet 2

Several of you have commented that you would love more one-skillet-meal recipes. Tell you what – me too. I have very few recipes like that, especially those that fall under the healthy, real food, easy categories. So I tinkered last week and hoped my family would like what I came up with.

Did they like it?  Well, would I be posting it here if they didn’t? We were six for six on this one. Sweet! (Actually, it’s savory, but you get the point.)   So now I present to you a recipe which:

  • Takes only a few minutes to prepare
  • Takes only a few minutes to cook
  • Will help you stretch the meat, saving you money
  • Is full of tasty veggies
  • Is a complete meal in one dish
  • Tastes amazing (my family said so)

This recipe filled my large electric skillet, feeding six of us. If you have a smaller family, you may want to cut this recipe in half. Also, while this recipe covers all your nutritional bases, I still recommend serving this with a salad (more veggies!) and/or some fresh fruit.

Garden Veggie Chicken Skillet Recipe

Yum

5 medium potatoes, any variety, cut into small cubes
1 pound uncooked boneless chicken breasts or thighs, cut into small bites (I use thighs because they taste better to us)
4 cups chopped veggies – any variety or combination (zucchini, asparagus, sweet peppers, mushrooms, and onions recommended)
1/2 cup Italian dressing (I use my simple homemade Italian Dressing recipe)

Combine all ingredients in a large skillet. Stir dressing around to coat veggies, potatoes, and meat. Cover and cook over medium heat, stirring occasionally, for 12-20 minutes or until veggies are tender and meat is cooked thoroughly.

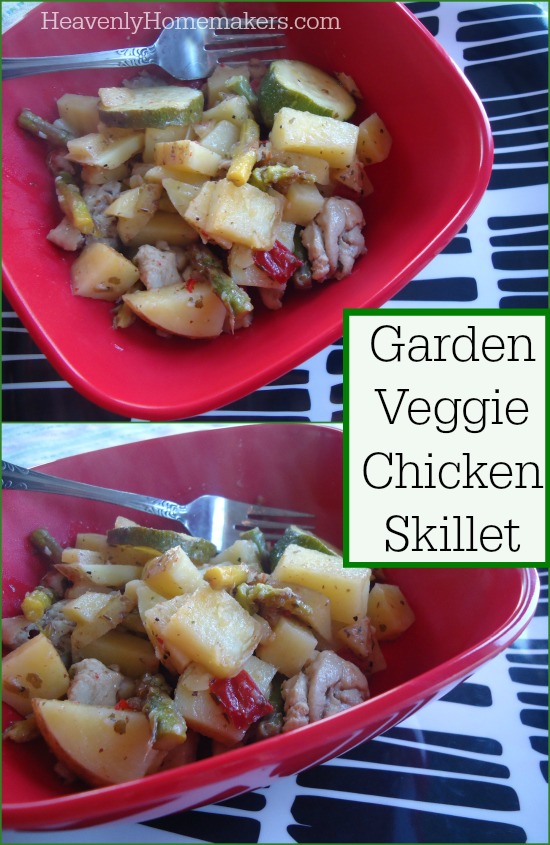
Garden Veggie Chicken Skillet

Garden Veggie Chicken Skillet Recipe {Quick, Easy, Healthy, and Delicious}
 
Save Print
Author: Laura
Ingredients
  • 5 medium potatoes, any variety, cut into small cubes
  • 1 pound uncooked boneless chicken breasts or thighs, cut into small bites (I use thighs because they taste better to us)
  • 4 cups chopped veggies - any variety or combination (zucchini, asparagus, sweet peppers, mushrooms, and onions recommended)
  • ½ cup Italian dressing (I use my simple homemade Italian Dressing recipe)
Instructions
  1. Combine all ingredients in a large skillet.
  2. Stir dressing around to coat veggies, potatoes, and meat.
  3. Cover and cook over medium heat, stirring occasionally, for 12-20 minutes or until veggies are tender and meat is cooked thoroughly.
3.4.3177

The Italian Dressing is the rock star in this recipe. It gives the meat and veggies awesome flavor, plus the oil in the dressing helps in the cooking process. Delicious and super simple!

 Think your family would like this meal?

Heavenly Homemaker's Club Members: Access your homepage and all your fantastic resources here! Not a member yet? Please join us!

Build a Fruit Salad Bar

March 12, 2015 by Laura 2 Comments

This post may contain affiliate links. For more information, please see our disclosure policy.

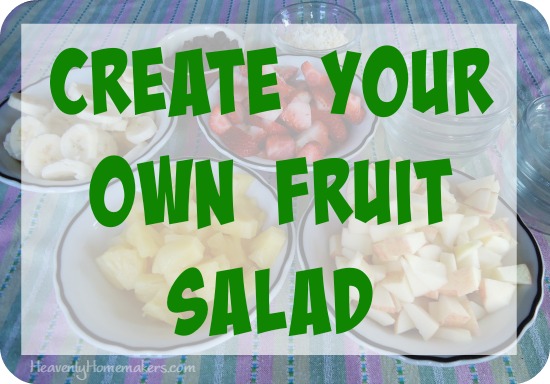
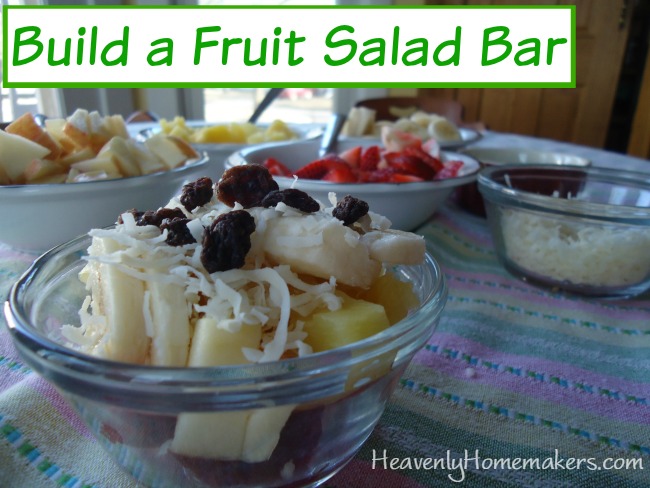
Create Your Own Fruit Salad

Yum

Sometimes fruits and veggies just need to be served in an exciting way to make them more appealing. That – and some people in my house just won’t eat bananas.  If there are bananas in the fruit salad, one of my kids will refuse the apples, strawberries, and pineapple too. “I’ll just put the bananas on the side,” thought I, as I prepared to make a fruit salad for dinner. But then I got the better idea to put everything “on the side” so each person could fill their bowl as they like. Fun!

As it turns out, I got all the boys involved in prepping a fruit. The result was a beautiful spread of choices that everyone was excited to dig into.

Build a Fruit Salad Bar

Justus (our 15 year old) built his salad and took this picture. Beautiful!

There’s nothing complicated about this:  Simply slice or chop whatever fruit you have on hand and set it out for people to pick from as they fill their bowl. Lay out shredded coconut, dried fruit, and nuts if you like. Real whipped cream or cottage cheese added to the spread wouldn’t hurt my feelings.

This was a perfect side dish with our pasta and mixed greens tonight. I’m thinking it would be fun to serve for breakfast some time soon, too!

What are your favorite fruits to add to a salad?

~~~~~~~~~~~~~~~~~~~~~~~~~~~~~~~

Quick Note!

I made a mistake on yesterday’s Visit Omaha giveaway post. Durham Museum IS NOT free. my bad  It’s the Joslyn Museum that’s free. I made the correction on the giveaway post, but wanted to make sure you got the update!

Heavenly Homemaker's Club Members: Access your homepage and all your fantastic resources here! Not a member yet? Please join us!
« Previous Page
Next Page »

Join Our Community!

 Facebook Twitter E-mail Instagram Pinterest

Popular Posts

~ Will All of the Real Moms Please Stand Up?
~ Easy! Stir-and-Pour Whole Wheat Bread
~ How to Make Gatorade
~ 31 Real Food Breakfast Ideas
~ Dear Teenage Girls...
~ When Mom Takes a Step Back
~ The Inexpensive Health Insurance We Love!
~ Let's Talk Real Food Grocery Budgets

Check out our latest posts!

  • Big Family Food and Fun: September 6-12, 2026
  • Big Family Food and Fun: August 30-September 5, 2026
  • Big Family Food and Fun: August 23-29, 2026
  • Big Family Food and Fun: August 16-22, 2026
  • Big Family Food and Fun: August 9-15, 2026
Home  ~  Simple Meals  ~  Club Membership  ~  Shop  ~  Privacy Policy  ~  Disclosure  ~ Contact

Copyright © 2026 · Beautiful Pro Theme on Genesis Framework · WordPress · Log in