Heavenly Homemakers

Encouraging women in homemaking, healthy eating and parenting

  • Home
    • About
    • FAQs
  • Recipes
    • Bread and Breakfast
    • Condiments
    • Dairy
    • Main Dishes
    • Side Dishes and Snacks
    • Desserts
    • Gluten Free
    • Instant Pot
    • Crock Pot
    • Heavenly Homemaker’s Weekly Menus
  • Homemaking
    • Real Food Sources
  • Store
  • Contact
    • Advertise
    • Disclosure
    • Privacy Policy
  • Simple Meals
  • Club Members!

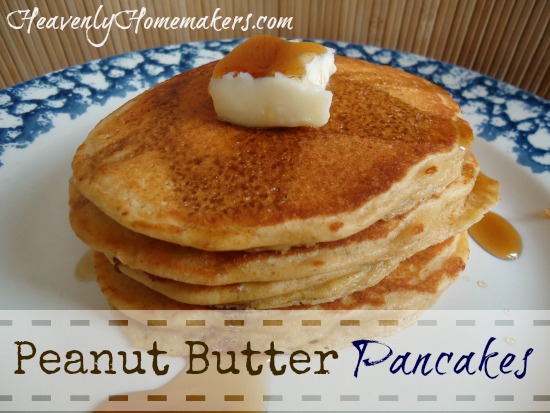
Whole Wheat Peanut Butter Pancakes (and My Peanut Butter Addiction Confession)

May 29, 2012 by Laura 77 Comments

This post may contain affiliate links. For more information, please see our disclosure policy.

Peanut Butter Pancakes? Oh yes.

I have no idea what my deal is lately, but during the past few weeks, I have become completely addicted to peanut butter. I can not seem to get enough. I want peanut butter in and on everything. Well, maybe not everything. I suppose spooning a dollop of peanut butter onto my taco salad or chicken fried steak would not be as tasty. But bread and pancakes and cookies – bring it on. I am, of course, okay with you giving me a little chocolate with my peanut butter. But you probably already figured that one out.

Over Memorial Day weekend, my dad’s wife made a delicious Peanut Butter Cake with Peanut Butter Frosting, which may have been one of the best desserts I’ve ever eaten. And I may have topped it with Homemade Butterfinger Ice Cream. Twice. (And yes I am a little sheepish to admit that.)  Remind me to get that cake recipe, because I think I need to adapt it and share it with you, don’t you think so?

Because I can’t come up with a better reason, I have decided that my peanut butter addiction is most likely because of all of the workouts I’ve been doing. Yes, walking and weight lifting make a person very hungry for peanut butter. I believe there is even some extensive research and scientific data to back up that statement. As a matter of fact, I even found and read an article recently which stated:  Be sure to drink plenty of water…and eat lots and oodles and gobs of peanut butter after exercise!!!

Okay, not really. Or if I did, I would surely have been the one writing it.

In all seriousness (if I can, in fact, write something in all seriousness), I truly do believe that the real reason I am loving peanut butter so much right now is because my body needs the extra protein to help me along in my fitness goals. Jen, my trainer friend, agrees with me, and tells me that in fact, I do definitely need extra protein now. She’s the expert, which makes me feel better about my peanut butter consumption so that I know that I am not completely nuts. Get it – nuts? (Oh brother.)  Anyway, I am definitely eating plenty of protein in the form of good meat, eggs, and yes…peanut butter.

(Now, what excuse can I come up with to justify eating chocolate do you suppose? Jen, do you have anything for me on that one?? Please?)

I went into all of that simply to let you know why I created a Peanut Butter Pancake recipe. It sounded like a great way to add protein to our breakfast, so I gave it a try. And, it made it possible for me to feed my addiction first thing in the morning. Yay for me. :)

Whole Wheat Peanut Butter PancakesYum

Whole Wheat Peanut Butter Pancakes (and My Peanut Butter Addiction Confession)
 
Save Print
Author: Laura
Ingredients
  • 2 cups whole wheat flour (I use freshly ground)
  • 1 teaspoon baking powder
  • ½ teaspoon sea salt
  • 5 Tablespoons butter
  • ½ cup natural peanut butter (I use homemade creamy peanut butter)
  • 2 cups milk
  • 2 eggs
Instructions
  1. Mix flour, baking powder, and sea salt. In a small sauce pan, melt butter and peanut butter together, stirring so that it won't scorch.
  2. Pour melted butter and peanut butter, along with the milk and eggs into the flour mixture.
  3. Whisk until well mixed.
  4. Cook the pancakes on a buttered griddle or skillet, flipping halfway through cooking.
  5. Serve with real maple syrup or your favorite pancake topping.
  6. Makes about 20 three inch pancakes.
3.4.3177

Peanut Butter Pancakes

Incredible with a glass of milk…

My apologies to all of you who have a peanut allergy and had an allergic reaction simply by reading this post that was so full of nutty information.

Are you a fan of peanut butter? Which do you like best, creamy or crunchy? Ever tried making homemade peanut butter? It is the best stuff ever!!!

Heavenly Homemaker's Club Members: Access your homepage and all your fantastic resources here! Not a member yet? Please join us!

How My Kids Adapted a Recipe to Make it Healthier, a Brownie Pudding Cake Recipe, and a “Teaching Your Kids to Cook” eBook Giveaway!

May 23, 2012 by Laura 216 Comments

This post may contain affiliate links. For more information, please see our disclosure policy.

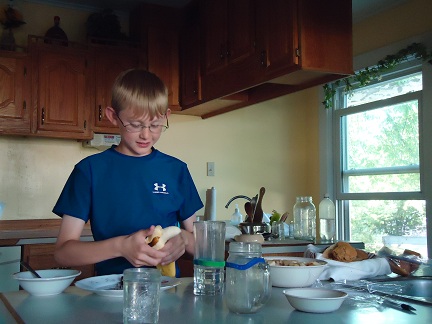
While I do the majority of the cooking at our house, simply because I love it so much, we have slowly but surely been training our boys to read recipes and put simple meals together. Remember how they cooked for me on Mother’s Day? Dad played a big role in that, but still, it was impressive to me (as I sat locked in my office listening and blogging the play-by-play of the action) to hear that our boys know where ingredients are, and how to figure out a brand new recipe.

Most impressive to me, however, is the fact that our boys have learned to adapt recipes to make them healthier. I really had no idea that I was inadvertently teaching them this skill as we’ve cooked together. But as our two middle boys (ages 10 and 12) dug through our Better Homes and Gardens cookbook one day recently and decided to make a Brownie Pudding Cake, I found myself preparing to walk them through how to exchange less healthy ingredients for those that we typically bake with.

To my surprise, my assistance was never needed. I heard them reading the recipe aloud, “1/4 cup sugar – okay, I’ll get out the sucanat.” and  “1 Tablespoon cooking oil…I think coconut oil would be the best one for this cake.”

I stayed out of the kitchen the entire time. They had it under control and knew just what to do. Might they still need my assistance at times while they are cooking? Of course. Not everything about “healthifying” a recipe is as easy as switching out sugar for sucanat, one for one. But it goes to show that if you talk through recipes while you’re cooking with your kids, they will learn an incredible amount, whether you realize it or not!

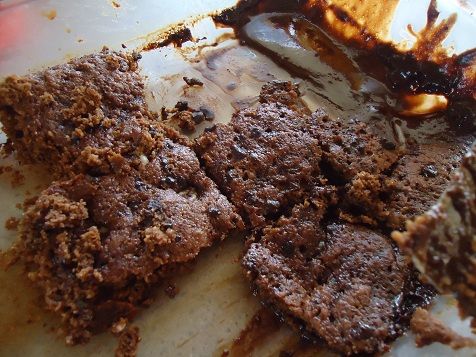
In case you’re interested, here is my boys’ version of a very tasty cake. They even got a picture…after we taste tested it. :)

Coppinger Boys’ Brownie Pudding CakeYum

1/2 cup whole wheat flour
1/4 cup sucanat
1 Tablespoon unsweetened cocoa powder
1 teaspoon baking powder
1/4 cup milk
1 Tablespoon melted coconut oil
1/2 teaspoon vanilla extract
1/3 cup sucanat
2 Tablespoons cocoa powder
3/4 cup boiling water

Stir together flour, 1/4 cup sucanat, 1 Tablespoon cocoa, and the baking powder. Add milk, oil and vanilla, stirring until smooth. Spread batter in a 1-quart baking dish. Combine 1/3 cup sucanat, and the remaining 2 Tablespoons of cocoa powder. Gradually stir in boiling water. Pour evenly over batter. Bake at 350° for about 30 minutes or until a toothpick inserted into the middle of the cake comes out clean. Serve warm. Makes 6 servings.

I’ve created a free downloadable Healthy Recipe Substitutions Chart
that you are welcome to print and keep in your kitchen.
Here is more information I’ve written on substituting healthy ingredients.

And now for the giveaway!

I’ve found that summer is a perfect time to give my kids more time and experience in the kitchen. Interested in joining me in this endeavor? (With your own kids, of course. My kids would probably love to come cook in your kitchen, but they’ll be too busy scrambling eggs and making muffins in mine. Sorry.)

Last summer, we finished and launched to new books:  Teaching Your Kids to Cook (written for the parent) and Learn to Cook (written for the student). We’re giving away one of each today (the downloadable version) as a way to encourage you to get your kids in the kitchen with you. And watch closely over the next few days. There may or may not be a sale on those books soon. :)

If you’re interested in winning one of these books, head over to the book description page and look them over. Come back here and leave a comment, letting us know which one would work best for your family. If you’d like extra entries for more chances to win, share this giveaway on Facebook, like me on Facebook, follow me on Pinterest, subscribe to my blog, and/or come mop my floors. I’d be happy to give you extra entries for any or all of the above. ;)

I’ll draw two random winners on Monday, May 28. Please watch for a post stating the winners as you will be responsible for contacting me if your name is chosen.

Heavenly Homemaker's Club Members: Access your homepage and all your fantastic resources here! Not a member yet? Please join us!

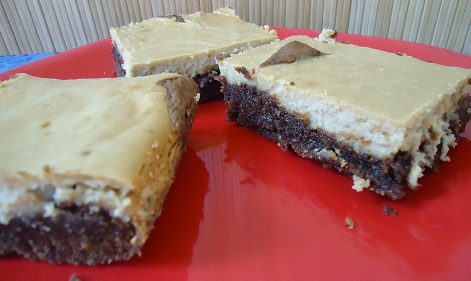
Healthier Cheesecake Brownies

April 24, 2012 by Laura 43 Comments

This post may contain affiliate links. For more information, please see our disclosure policy.

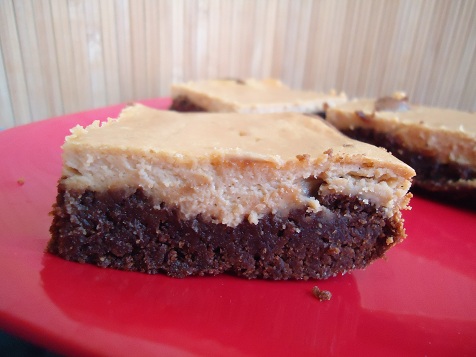
Warning: The following post is full of calories, sugar, and rich gooey chocolate. Reading this post will not result in any weight gain, neither will you have a sugar crash when you are finished looking at the pictures. However, baking and actually eating these Cheesecake Brownies in real life is a different story – especially if you struggle (like I do) with over-indulging in such things as cheesecake or brownies or a fantastically incredible combination of the two. These are made with healthier ingredients such as whole grain flour and unrefined sugar, but it’s not like these are made of green leafy vegetables. Oh how I wish. Therefore, I recommend that if you make these Cheesecake Brownies, you should plan to take them immediately to a potluck or otherwise heavily populated event where there are many servant-hearted people to help you consume them. Participating in a short time of “quality control” before taking them to an event is acceptable, as long as you don’t feel that you need to test the quality of the entire pan of goodies.

———————————–

Trust me, I am offering this warning from the botom of my sugar-loving heart. I am the girl who, when asked, “Which do you like best? Brownies…or Cheesecake?” I always answer with an definite and enthusiastic, “Yes!!!” I love them both, but put them together and that pan of Cheesecake Brownies and I could have a fine party, just the two of us. But I’m also working hard to get in shape and to eat a healthy diet. Cheescake Brownie binges and my running shoes just don’t go together.

In other words:  Share the love, people.

Cheesecake Brownies

Brownie LayerYum

1 cup melted butter
2 cups sucanat
2/3 cup cocoa powder
2 eggs
1 teaspoon vanilla extract
1 1/2 cups whole wheat flour

Cheesecake Layer

2 – 8 ounce packages of cream cheese, softened
2 eggs
1/2 cup sucanat
1/2 teaspoon vanilla extract

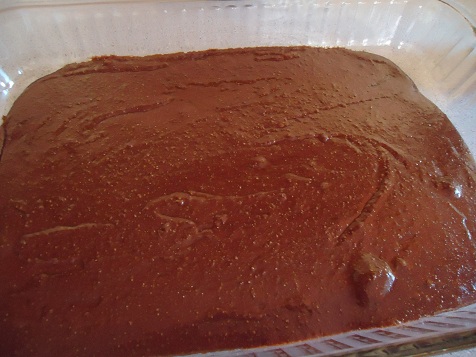
Mix together melted butter, sucanat, and cocoa powder. Add eggs and vanilla, stirring well. Mix in flour and stir until thoroughly mixed. Spread the brownie batter into a 9×13 inch baking dish and set aside.

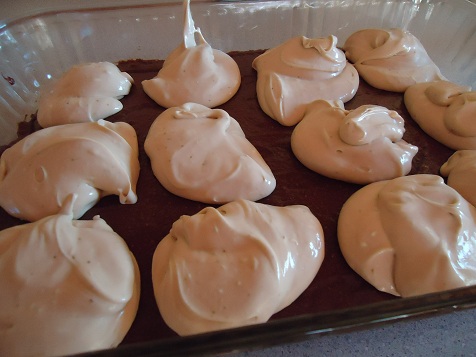
In a separate mixing bowl, cream together all cheesecake layer ingredients:  softened cream cheese, eggs, sucanat and vanilla. Once it is well mixed and creamy, spoon the mixure into about twelve “plops” over the top of the brownie batter.

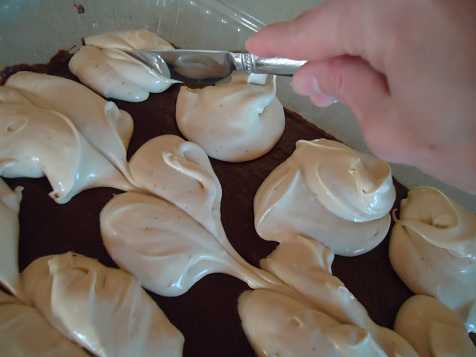
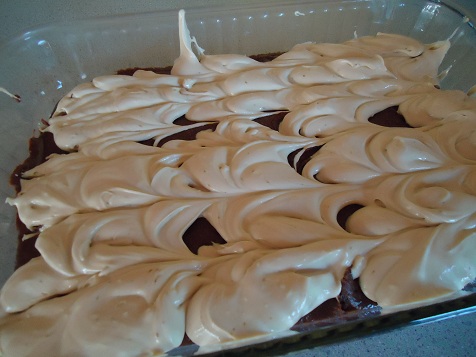
Use a butter knife to “cut” and swirl the cheesecake mixture through the brownie batter.

Try not to hyperventilate while you anticipate how good these will taste once they are baked. Good luck.

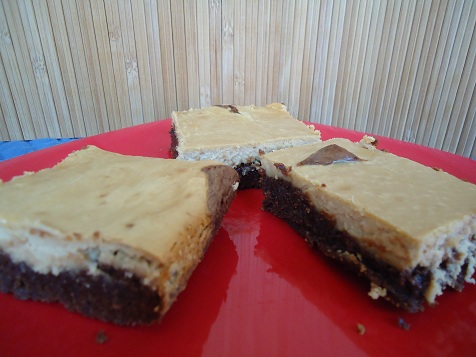
Bake in a 350° oven for 30-40 minutes or until a toothpick inserted in the middle comes out clean. Allow the Cheesecake Brownies to cool completely before slicing. Makes 24 servings.

I will say it again:  This recipe makes twenty-four servings. These cheesecake brownies are not to be consumed by you alone – not even in 24 different settings. Not even if you first ate a good dinner. These are to be shared. Do not forget this important information.


Oh, but when you do indulge in your Cheesecake Brownie, I give you full permission to thoroughly enjoy yourself. Savor each rich, chocolaty, cream cheesy bite of gooey goodness. Put your feet up, turn on some music, and make it an event. And if you think of it, call me. I like events that include brownies and cheesecake.

What would you answer to the question of:  “Which do you like best? Brownies…or cheesecake?” (“Yes” is an acceptable answer.)

Heavenly Homemaker's Club Members: Access your homepage and all your fantastic resources here! Not a member yet? Please join us!

Baked Oatmeal Cups (Bird’s Nests)

April 10, 2012 by Laura 111 Comments

This post may contain affiliate links. For more information, please see our disclosure policy.

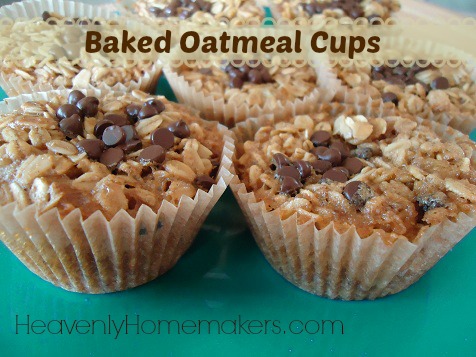
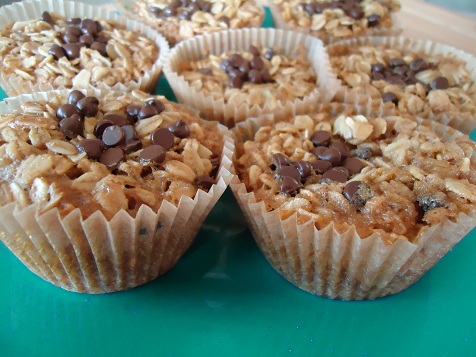
Baked Oatmeal Cups are perfect for a spring breakfast.

Baked_Oatmeal_Cups

My four boys are just about getting too old to appreciate anything cutesy I try to make with food.

When they get up in the morning, they bound into the kitchen, excited to see a big pile of bacon on a tray with a dozen scrambled eggs and mountain of pancakes. Does it really matter to them if I tried to arrange the food in such a way as to make the platter look pretty? Do they even care that I woke up extra early, and lovingly mustered all of my artistic ability to form the pancakes into the shape of the country of India? After all, we’ve all been enjoying our studies about William Carey and his missionary efforts there. Who wouldn’t have fun smearing butter all over Calcutta? I figured they’d be thrilled!

But no. They don’t care at all. They just want me to hurry up and pass them the maple syrup and while I’m at it, another slice of bacon.

I’m telling you, I am sooooo unappreciated around here. From now on, I think I’ll just flip some boring ol’ round pancakes straight off the griddle and onto their plates ten feet away. I’ll skip the serving platter. I won’t mess with a lovely presentation of fruit arranged on a plate in the shape of a clown face. They can just stuff their faces with “normal” food for all I care.

Hmmph.

Now that I’ve thrown a fit that is so becoming of a grown-up, I suppose I should now confess that my intentions and my artistic abilities are not even close to being able to pull off much of the above. I’ve never really attempted to make pancakes into the shape of India – or any other country for that matter. Incidentally, I did turn out the state of Texas once, but that was totally an accident and as usually happens when I have not gone out of my way one little bit, my boys were actually quite impressed.

“Whoa Mom! You made a Texas pancake! Can you make me a Maryland and an Idaho next?”

I obviously got right on that, but ended up instead with a lopsided gourd and another pancake that resembled the fuzz under my couch. I gave up at that point and figured they could chew the pancakes into the shapes of their requested states, because really, have you ever tried to pour Florida onto a griddle with a spoon?

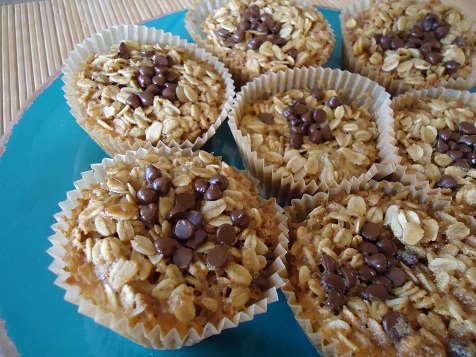
This leads me to the special breakfast I made recently in an effort to be cute. It is spring after all. Doesn’t the idea of eating a bird’s nest for breakfast sound simply delightful?

Okay fine. We can just call these Baked Oatmeal Cups. Either way, these are easy to throw together and are versatile enough to add variety and meet your family’s taste preferences.

Baked Oatmeal Cups (or Bird’s Nests if you’re feeling cute)Yum

5.0 from 1 reviews
Baked Oatmeal Cups (Bird's Nests)
 
Save Print
Author: Laura
Serves: 12
Ingredients
  • 2 cups rolled oats
  • ½ cup sucanat or honey
  • ½ teaspoon sea salt
  • 1 teaspoon baking powder
  • 2 eggs
  • ¾ cup milk
  • ⅓ cup melted butter
  • Topping choices: mini chocolate chips, raisins, other dried fruit, coconut flakes, apple chunks
Instructions
  1. Mix together oats, sucanat, salt and baking powder.
  2. Stir in eggs, milk, and melted butter.
  3. Scoop batter into 12 paper lined muffin cups.
  4. Sprinkle toppings of choice into the center of each cup.
  5. Bake in a 350° for about 30 minutes, or until the oats are golden brown.
3.4.3177

These are easier to eat with a fork, unless you like cleaning partial bird’s nests up off of your table and floor.

If you prefer, simply spread the mixture into a 9×9 inch baking pan. Bake in a 350° oven for 25-30 minutes.

Do you try to be cute when you cook and bake at your house? And how do those efforts go over for you? Ever tried to make India out of pancake batter?

Heavenly Homemaker's Club Members: Access your homepage and all your fantastic resources here! Not a member yet? Please join us!

Creamy Crock Pot Chicken and Rice

April 3, 2012 by Laura 129 Comments

This post may contain affiliate links. For more information, please see our disclosure policy.

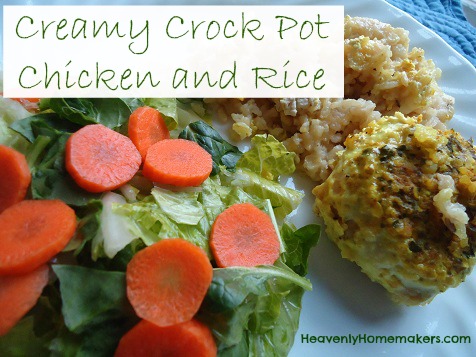
Hey, check it out! This is a chicken recipe AND a crock pot recipe! It’s as if the best of both worlds just came together for a lovely party, don’t you think? I mean, there is not much more exciting than combining the Week of the Chicken with a Crock Pot Recipes post, I’m pretty sure. (This makes it clearly obvious that I don’t get out much.)

And guess what else? Many of you have asked that I try to experiment and come up with some healthy alternatives to boxes of Rice-a-Roni – and I think this recipe might just meet that need for some of you. When it was all said and done, I thought this dish kind of looked and tasted rice-a-roni-ish. Try it and see what you think.

If you haven’t tried making my homemade Onion Soup Mix, I recommend throwing it together to use for this recipe. Store bought onion soup mixes typically have not-so-good for you ingredients in them that I avoid. The homemade mix is super easy and very inexpensive.

Creamy Crock Pot Chicken and RiceYum

2 cups brown rice (uncooked)
Sea salt
3 cups water or chicken broth
1 cup heavy cream
1-2 pounds boneless, skinless chicken breast
2 Tablespoons Onion Soup Mix

Place rice in the bottom of a crock pot, and sprinkle it generously with salt. Pour water or broth and cream over the rice. Cut chicken breasts into serving sized portions and place on top of the rice and liquid. Sprinkle Onion Soup Mix over the top.

Cook on a low setting for 4-5 hours. Serves 6-8.

Creamy Crock Pot Chicken and Rice

Heavenly Homemaker's Club Members: Access your homepage and all your fantastic resources here! Not a member yet? Please join us!

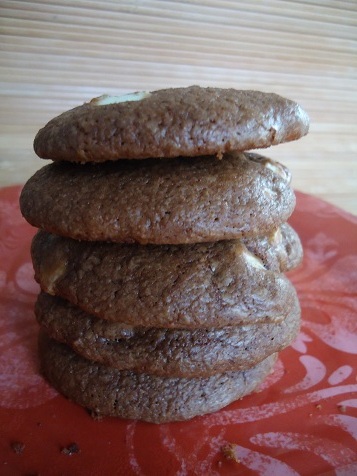
Whole Wheat Chocolate Crinkle Cookies

March 20, 2012 by Laura 26 Comments

This post may contain affiliate links. For more information, please see our disclosure policy.

Typically, I am a regular ol’ chocolate chip cookie girl. I began making chocolate chip cookies when I was about eight years old, and made them almost daily in the summer when we had hired hands helping us on the farm. I can make chocolate chip cookies in my sleep. I don’t have to even think about the ingredients or the measurements while I make chocolate chips cookies. And shucks, if I do say so myself, my chocolate chips cookies taste pretty good.

Lately though, my boys have been asking for something a little different. What!? They don’t want the same chocolate chip cookie over and over and over? C’mon. Change is hard for me. And if I really care to admit it – thinking is often hard for me as well. I’d rather make something that is a no-brainer, thank you very much. Don’t they understand?

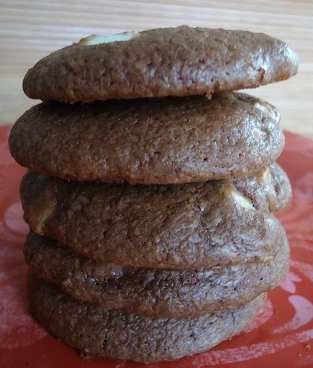
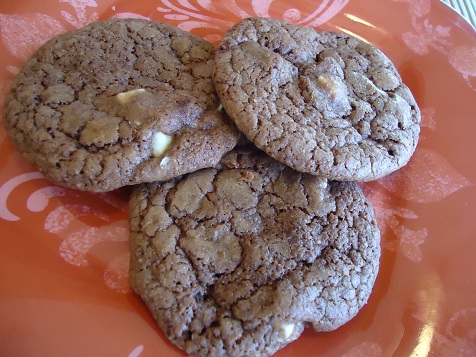
Okay, fine. A change of pace in the cookie department every now and then is nice. Which is why I played with a chocolate cookie recipe to make it healthier. We all loved the way it turned out. And if you throw some homemade white chocolate chips in these, you’ve got a fantastic “healthy-ish” cookie.

By the way, if you don’t feel like taking the time to make homemade white chocolate chips, I completely understand. Just know that regular store bought white chips typically have hydrogenated oils and corn syrup in them, which I recommend avoiding if at all possible. I did find some healthier white chips at Whole Foods a few months ago that were “clean”, and I noticed that VitaCost and Amazon had some too – so hey, all is not lost!

Whole Wheat Chocolate Crinkle CookiesYum

3 eggs
1/3 cup unsweetened cocoa powder
1 1/2 cups sucanat (or brown sugar)
1/2 cup  melted coconut oil (butter would also work)
1 teaspoon baking powder
1 teaspoon vanilla extract
2 cups whole wheat flour (I use freshly ground flour from hard white wheat.)
1 cup white chocolate chips (optional)

Whip together eggs, cocoa, and sucanat. Stir in melted coconut oil, baking powder, and vanilla. Mix in flour until a nice dough has formed. Fold in white chocolate chips. Spoon teaspoon sized balls of dough on to a cookie sheet, about 2 inches apart. Bake in a 350° for 8-10 minutes. Allow the cookies to sit on the cookie sheet for about five minutes before removing. Makes about 24 cookies.

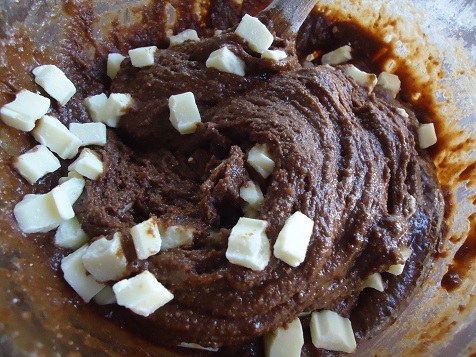
The dough just looked too yummy, so I had to take a picture. Kind of makes you want to reach into the computer with a spoon, doesn’t it?

These cookies are soft, sweet, and slightly coconutty if you use virgin coconut oil. (Use expeller pressed coconut oil of you don’t prefer a coconut flavor.)

What’s your favorite kind of cookie? Do you ever get into a cookie rut?

Heavenly Homemaker's Club Members: Access your homepage and all your fantastic resources here! Not a member yet? Please join us!

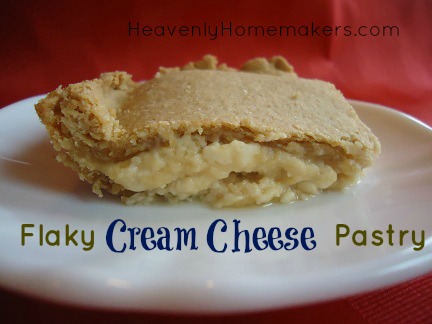
Flaky Cream Cheese Pastry – The Healthy Way

March 15, 2012 by Laura 94 Comments

This post may contain affiliate links. For more information, please see our disclosure policy.

Back in my former life – the one in which I innocently and cheerfully ate Chillsbury* dough from a can – I loved making a cream cheese pastry dish that always got rave reviews. It was simple. You spread a can of Whillsbury* crescent dough on the bottom of a pan, throw in some cream cheese filling, top it with another round of Gnillsbury* crescent dough, bake it, and eat. I loved that stuff, as did everyone else who ate it with me.

Gone are my days of eating biscuits or crescents from a can. Oh, and can I just pause to say this:  I do not miss that vulnerable and insecure feeling that always came from never knowing when the can would pop open and dough would ooze out. Maybe it is just me, but waiting for the biscuit can pop always put me slightly on edge. Yeah, it was probably just me. I have can-popping-biscuit-bursting-forth issues, I think.

Anyway, I had forgotten all about this delicious dish, which is crazy, because hello? It does have cream cheese in it. It occurred to me recently that the perfect replacement for Billsbury* crescent dough would surely be my go-to whole wheat yogurt dough. Why I hadn’t thought of using it to figure out a new Cream Cheese Pastry dish, I have no idea. But I finally thought of it, tried it, and here it is. My family devoured it for breakfast this morning, which means that next time, I have to double it for sure!

*name changed to protect the innocent guilty

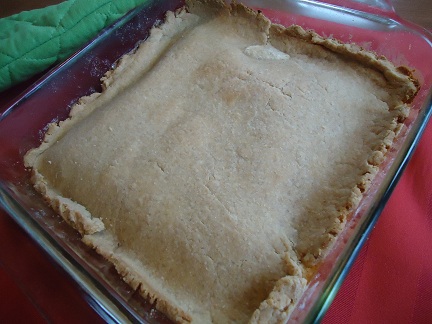
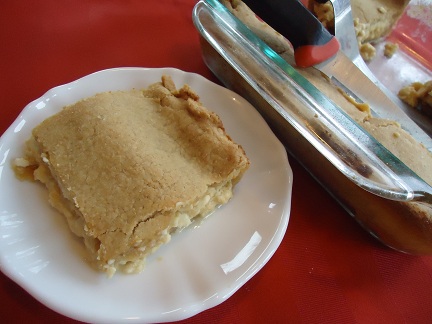
cream_cheese_pastry

Flaky Cream Cheese PastryYum

Dough:

1 3/4 cups whole wheat flour
1/2 teaspoon sea salt
1/2 cup melted butter
1/2 cup plain yogurt

Filling:

1 – 8 ounce package of cream cheese, softened
1 egg
1/2 cup real maple syrup (sugar, sucanat, or honey would work too)
1 teaspoon vanilla extract
1-2 Tablespoons lemon juice (optional)

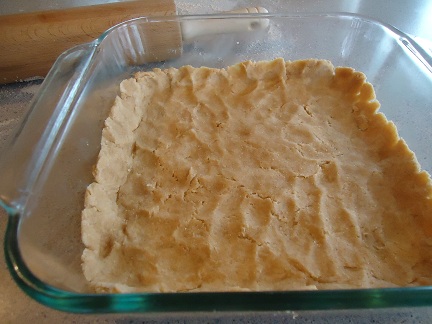
Mix together all four dough ingredients and knead lightly to form a nice ball. Divide in half. Press one half of the dough into an 8×8 inch baking dish.

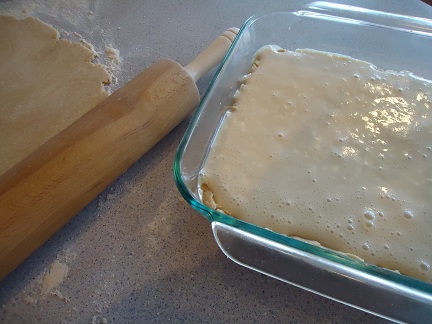
Whip together the cream cheese filling ingredients. Pour filling over the bottom crust.

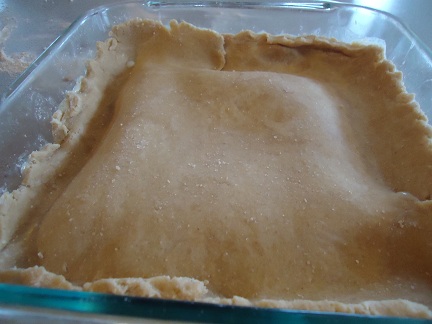
Roll the second half of the dough into a square and place it on top of the cream cheese filling.

Bake in a 350° oven for 30-40  minutes, or until crust is golden brown.

Allow pastry to cool slightly before slicing and serving.


Tell me – am I the only one here with can-popping-biscuit-bursting-forth issues? I’ll admit it right now, it makes me jumpy just thinking about it. ;)

Heavenly Homemaker's Club Members: Access your homepage and all your fantastic resources here! Not a member yet? Please join us!

Easy Tuna Casserole

March 7, 2012 by Laura 60 Comments

This post may contain affiliate links. For more information, please see our disclosure policy.

Once you try this Tuna Casserole recipe you’ll be asking, “Who needs Tuna Helper?” Although, for the record, I used to really like Tuna Helper and would buy it anytime I had coupons to purchase it at a great deal. I used to also really like Hamburger Helper – which is why I came up with this Cheeseburger Macaroni recipe to make myself feel like I was eating Hamburger Helper. Shock upon shock, my fix for Tuna Helper uses the same basic Creamy Mac and Cheese recipe, only instead of adding seasoned hamburger meat, I add tuna. See how fancy I am? (snore)

If you haven’t tried my trick for making Creamy Mac and Cheese – cooking the pasta in the milk – you really need to give it a try. We love this, and it really has made for some great recipe combos! (Cheeseburger Macaroni, Three Cheese Garlic Chicken Pasta, Baked Three Cheese Chicken Pasta, and yes, the very exciting Tuna Casserole.)

Easy Tuna CasseroleYum

Easy Tuna Casserole
 
Save Print
Author: Laura
Ingredients
  • 2½ cups whole wheat pasta (or brown rice pasta)
  • 3 cups whole milk
  • ½ teaspoon sea salt
  • 2 cans (6 ounces each) tuna, drained
  • 1 cup shredded cheese (optional)
Instructions
  1. Mix pasta, milk and salt in a large sauce pan.
  2. Cook over medium-high heat STIRRING ALMOST CONSTANTLY until the pasta is tender (10-15 minutes).
  3. Remove from heat.
  4. Add tuna and cheese, and stir until cheese is melted.
  5. Serve immediately.
3.4.3177

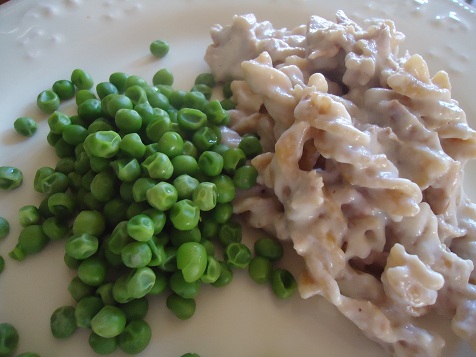
Easy Tuna Casserole

I’m not sure why, but I absolutely love tuna casserole served with frozen peas. Well, I cook the peas – I don’t serve them frozen. You knew that, right? Okay, just checking.

This Tuna Casserole is THE PERFECT go-to meal if you don’t have meat thawed for dinner or for the times you need something quick and wholesome. Easy as this is, it’s one of our family’s favorite meals!

Are you a fan of tuna? Do you like tuna casserole? Don’t you just love frozen peas? (The cooked kind, of course.)

Heavenly Homemaker's Club Members: Access your homepage and all your fantastic resources here! Not a member yet? Please join us!

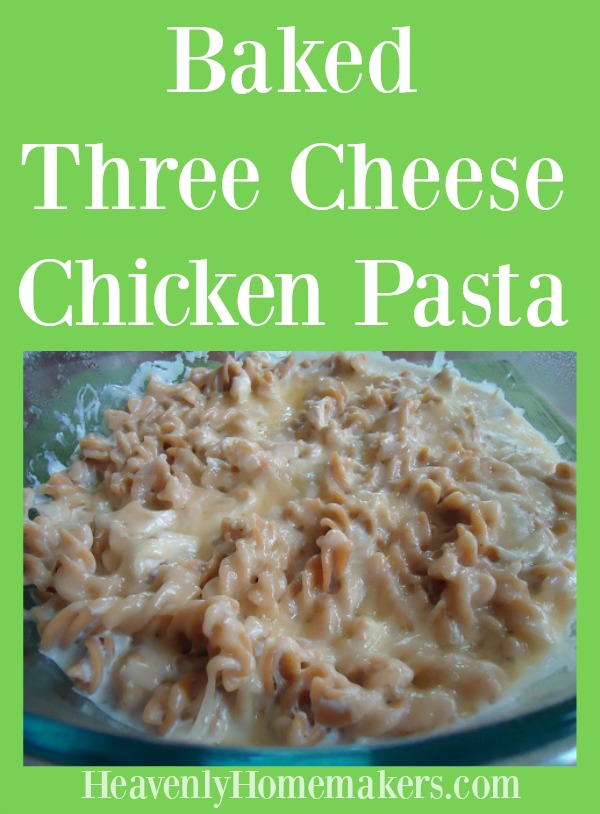
Baked Three Cheese Chicken Pasta – a Make Ahead Meal

February 21, 2012 by Laura 37 Comments

This post may contain affiliate links. For more information, please see our disclosure policy.

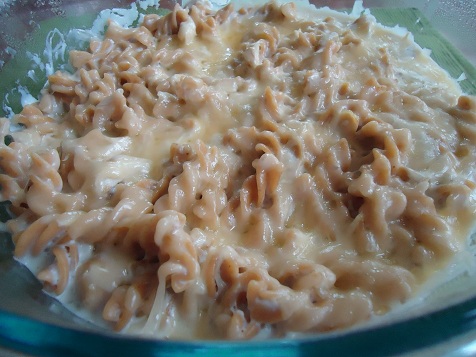
This might be the best chicken pasta dish you’ll ever eat.

The chicken was on its last leg.

Well actually, the chicken no longer had legs, as it had already fulfilled its glorious life purpose and had been cooked and made into a rich broth and good healthy meat for my family.

Regardless, legless though he was, the last little bit of cooked chicken in my fridge was indeed on its last leg. It needed to be eaten. It could no longer be left alone…neglected, unused, and unwanted.

(It would appear that, apparently, I felt the need to create some chicken drama when all I really needed to say was:  “I had leftover chicken- so I used it.” I can’t just be normal. What fun would that be?)

So the chicken – it was begging to be used. I needed a quick lunch for the family. But I needed to make the meal in the morning and have the capability to reheat it quickly at lunch time. Therefore, I decided to play with my Three Cheese Garlic Chicken Pasta recipe and make it into a “Make Ahead Meal“. The chicken and I are happy to report that my idea worked, and the meal was delicious.

Actually, the chicken has nothing at all to report because not only is he not on his last leg anymore, he is officially gone.

Why? Why do I say these things? I’m going to just give you the recipe already before I say anything else ridiculous about the chicken.

Baked Three Cheese Chicken PastaYum

Baked Three Cheese Chicken Pasta - a Make Ahead Meal
 
Save Print
Author: Laura
Serves: 6-8
Ingredients
  • 2 cups cooked chicken, cut into bite sized pieces
  • 2½ cups whole wheat pasta
  • 3 cups whole milk
  • ½ teaspoon garlic powder (add more if you like)
  • ½ teaspoon sea salt
  • ¼ cup grated parmesan cheese
  • 4 ounces softened cream cheese
  • 1-2 cups shredded cheddar cheese
Instructions
  1. In a large cooking pot, combine cooked chicken, uncooked pasta, milk, garlic powder, and sea salt.
  2. Cook and stir over medium-high heat until pasta is tender and the starch from the pasta has thickened the milk, creating a creamy sauce.
  3. Remove cooking pot from the heat.
  4. Stir in parmesan cheese and cream cheese until it is mixed throughout.
  5. Pour pasta mixture into a casserole dish. (A 9x13 inch pan works well, or any variety similar in size.)
  6. Sprinkle shredded cheese on top and bake in a 350° oven for about 15 minutes or until cheese is melted.
3.4.3177

If you make this ahead of time, you may need to adjust the baking time so that the casserole will be heated through and through. Also, you can freeze this dish! Simply thaw and bake in a 350° oven for 30-40 minutes.

Baked Three Cheese Chicken Pasta

All this talk about chickens and legs kind of has me hungry for fried chicken legs, which pretty much makes no sense – unless you are in my brain and then it does make sense. Oh people. Be glad you are not in my brain. It is not pretty.

So tell me, what do you do when your chicken is on its last leg? (Yes, I think I am actually talking about leftovers here.)

Heavenly Homemaker's Club Members: Access your homepage and all your fantastic resources here! Not a member yet? Please join us!

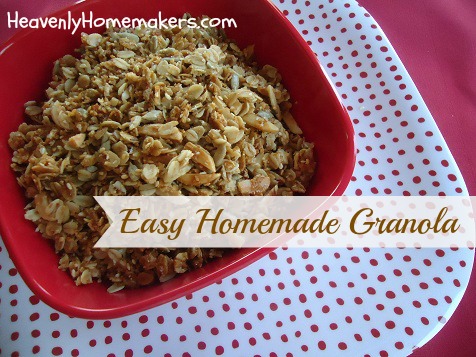
Easy Homemade Granola

February 15, 2012 by Laura 50 Comments

This post may contain affiliate links. For more information, please see our disclosure policy.

I didn’t really plan it this way, but what better way to follow up a post about not soaking grains than by giving you a recipe which includes unsoaked grains. Do with this what you wish. :)

This recipe works great as a snack or for a quick breakfast, especially if you’ve made it ahead of time. We like to put it in a bowl and add dried fruit and milk or cream. A friend of mine even adds applesauce to this granola for a sort of “apple crisp” taste. Her kids love it that way!

Easy Homemade GranolaYum

4 cups rolled oats
1 cup shredded, unsweetened coconut
1 cup slivered almonds
1 cup sunflower nuts
1/2 cup sesame seeds
3/4 cup honey
1 cup coconut oil

In a small sauce pan, melt together coconut oil and honey. Stir all remaining ingredients together in a large bowl. Drizzle on the honey/coconut oil mixture and stir well. Pour mixture onto a large, parchment paper lined baking sheet. Bake at 300° for 35 minutes, stirring after the first 20 minutes. Store granola in an air tight container.

granola_2

Are you granola eaters at your house?

Heavenly Homemaker's Club Members: Access your homepage and all your fantastic resources here! Not a member yet? Please join us!
« Previous Page
Next Page »

Join Our Community!

 Facebook Twitter E-mail Instagram Pinterest

Popular Posts

~ Will All of the Real Moms Please Stand Up?
~ Easy! Stir-and-Pour Whole Wheat Bread
~ How to Make Gatorade
~ 31 Real Food Breakfast Ideas
~ Dear Teenage Girls...
~ When Mom Takes a Step Back
~ The Inexpensive Health Insurance We Love!
~ Let's Talk Real Food Grocery Budgets

Check out our latest posts!

  • Big Family Food and Fun: September 6-12, 2026
  • Big Family Food and Fun: August 30-September 5, 2026
  • Big Family Food and Fun: August 23-29, 2026
  • Big Family Food and Fun: August 16-22, 2026
  • Big Family Food and Fun: August 9-15, 2026
Home  ~  Simple Meals  ~  Club Membership  ~  Shop  ~  Privacy Policy  ~  Disclosure  ~ Contact

Copyright © 2026 · Beautiful Pro Theme on Genesis Framework · WordPress · Log in