Heavenly Homemakers

Encouraging women in homemaking, healthy eating and parenting

  • Home
    • About
    • FAQs
  • Recipes
    • Bread and Breakfast
    • Condiments
    • Dairy
    • Main Dishes
    • Side Dishes and Snacks
    • Desserts
    • Gluten Free
    • Instant Pot
    • Crock Pot
    • Heavenly Homemaker’s Weekly Menus
  • Homemaking
    • Real Food Sources
  • Store
  • Contact
    • Advertise
    • Disclosure
    • Privacy Policy
  • Simple Meals
  • Club Members!

Coconut Flour Cheddar Drop Biscuits

July 13, 2011 by Laura 119 Comments

This post may contain affiliate links. For more information, please see our disclosure policy.


coconut_flour_cheddar_biscuits_2

At a recent youth event, my friend Lisa mentioned something about her Coconut Flour Cheese Biscuits. I immediately dropped my plate and fork, leaped over the couch to the other side of the room and tackled her onto the floor, begging her to please share her recipe.

Of course you know I’m kidding.

Her name is really Louanne.

Okay no, I’m kidding again.

Her name really is Lisa and when she mentioned her Coconut Flour Cheese Biscuits I didn’t actually drop anything or leap over anything or tackle her. I’m not that crazy.

Yes, kidding again. You all know I’m crazy.

But still, she was nice enough to give me her recipe without all the drama. The drama is what I felt inside when I heard that she had a new great coconut flour recipe to offer.

So here, without any shoulder shaking, leg grabbing or tearful pleading is my friend Lisa’s awesome recipe:

Coconut Flour Cheddar Drop BiscuitsYum

¼ cup coconut oil or butter, melted
1/3 cup sifted coconut flour
4 eggs
¼ teaspoon salt
¼ teaspoon onion powder
¼ teaspoon baking powder
½ cup sharp cheddar cheese, shredded

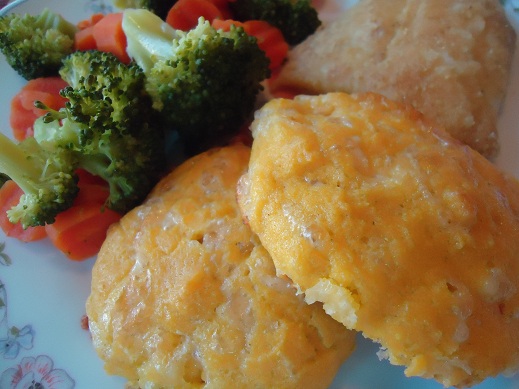
Blend together eggs, coconut oil or butter, salt, and onion powder. Combine coconut flour with baking powder and whisk into batter until there are no lumps. Fold in cheese. Drop batter by the spoonful onto a greased cookie sheet. Bake at 400 degrees for 15 minutes. For a cheesier biscuit increase cheese to ¾ cup.

This recipe makes about 10 biscuits.
coconut_flour_cheddar_biscuits_1

If you’re curious, here’s a post I wrote explaining more about why I love coconut flour. And also, one of my readers just let me know that this great deal for coconut flour is back up and running. How very thoughtful of them to re-stock five minutes before I posted this recipe. :)

Disclaimer:  No friends were harmed during the acquiring of this recipe.

Have you tried coconut flour yet? Do you love it?

Heavenly Homemaker's Club Members: Access your homepage and all your fantastic resources here! Not a member yet? Please join us!

Teaching Your Kids to Cook: Turkey Ranch Pinwheels

June 29, 2011 by Laura 35 Comments

This post may contain affiliate links. For more information, please see our disclosure policy.

As I mentioned a few days ago, we’re working hard at our house on a new curriculum/ebook called Teaching Your Kids to Cook. Just like Learn Your Letters, Learn to Serve, this has become a family project. I’m the one writing it, but all the kids get to be a part of putting this all together (and posing for pictures), which makes this task so much more fun!

Malachi (age 6) was eager to help me try a new “recipe” idea – one that requires no cooking – just a little bit of spreading, rolling and sprinkling. In the middle of summer, any recipe that requires “no cooking” is a winner, so we decided we’d give you a sneak peek into this recipe before the book is completed!

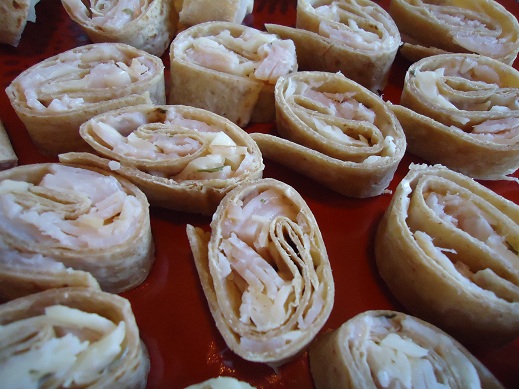
Turkey Ranch PinwheelsYum

4 Soft Whole Wheat Tortillas
3 Tablespoons Ranch Dressing (we make our own ranch dressing)
½ cup Turkey, cut into tiny pieces
½ cup Shredded Cheddar Cheese

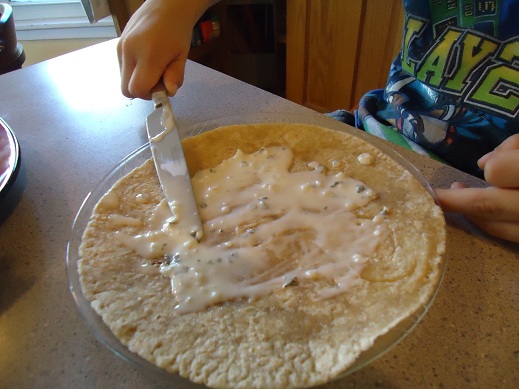
Spread Ranch Dressing on each tortilla.

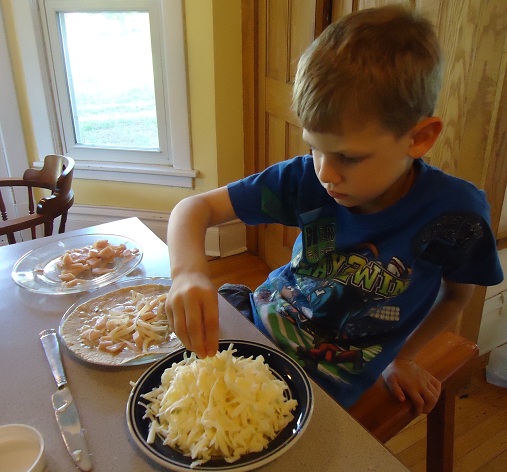
Sprinkle bits of cheese and turkey over the ranch covered tortilla.

See what a nice job Malachi did!

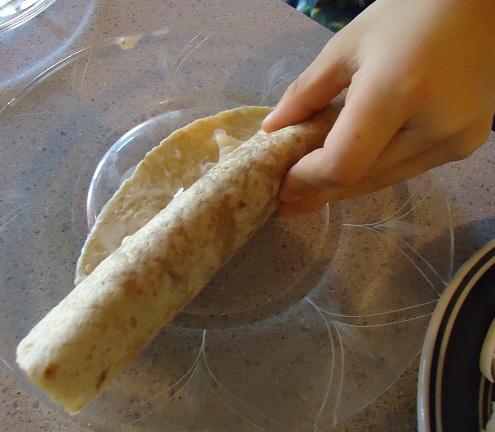
Roll the filled tortilla up as tightly as you can.

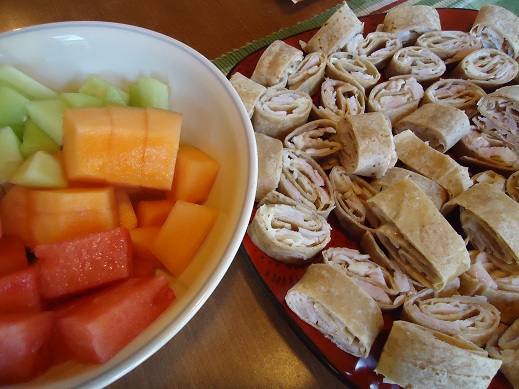
Let a grown up help cut the rolled tortilla into pinwheels:

Malachi was so excited that he “made dinner for our family” and he declared this to be the “awesomest dinner ever!” It’s true – these Turkey Ranch Pinwheels were super easy to put together, didn’t require a stove or an oven and Malachi (age 6) was able to do most of the work all by himself (okay, not really, but sort of). We devoured this entire plate – and we had made a triple batch!

Since we had been taking pictures of the entire process Malachi wondered, “Don’t you need a picture of me eating them, Mom?” Well sure. Just in case you aren’t sure what to do once you finish putting your Pinwheels together, here’s Malachi to show you:

Do your kids enjoy helping you in the kitchen? I know it’s usually easier (and less messy) to do the work yourself…how often do you pull the kids into the kitchen to help?

Update! The book is finished – find Teaching Your Kids to Cook and Learn to Cook books here!

Heavenly Homemaker's Club Members: Access your homepage and all your fantastic resources here! Not a member yet? Please join us!

Making Homemade Mayonnaise (is not my gift)

June 21, 2011 by Laura 71 Comments

This post may contain affiliate links. For more information, please see our disclosure policy.


Who knew making homemade mayonnaise for the Heavenly Homemakers Recipe Challenge would tempt me to say naughty words? I held myself back though, and merely gave dirty looks to the ingredients in my blender that were not even trying to become mayonnaise and through gritted teeth hissed, “Would you guys emulsify already!?!?!?”

It wouldn’t have been such a big deal, except that I attempted to make mayonnaise at least four times before I could accomplish “mayonnaise emulsification”. We went through a lot of olive oil in the process, and subsequently, a lot of tuna.

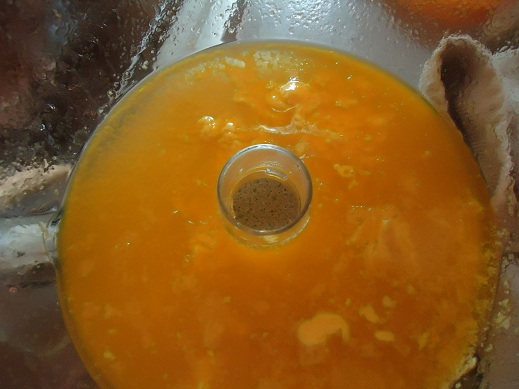
Why tuna? Well, I wasn’t going to waste all those ingredients every time I had mayonnaise emulsification failure. Instead, each time, I stirred the runny, stubborn ingredients into a few cans of tuna, added some of my home canned pickle relish and called it lunch. It worked, all but one time. Yes, there was one time I did have to throw the ingredients out. That was the time I was so determined to whip the ingredients long enough and hard enough to become mayonnaise that the ingredients got so hot inside my food processor that the eggs got cooked, causing scrambled eggs to float in my olive oil. Mmmm. Gross as it is, I just had to take a picture – because I’m weird like that:

A perfect example of what not to do.

Regarding a healthy mayonnaise recipe, I do have one to share with you, and I’m sure that after all my previous, inspirational statements, you’re all ready to jump right in and give this a go. Based on all my trial and error, I have a few tips I think you’ll find helpful.

  1. I believe that if I had an immersion blender, this process would work much better. But I don’t have one and I refuse to buy one just to make mayo. If you do have an immersion blender, save yourself some frustration and use it for this.
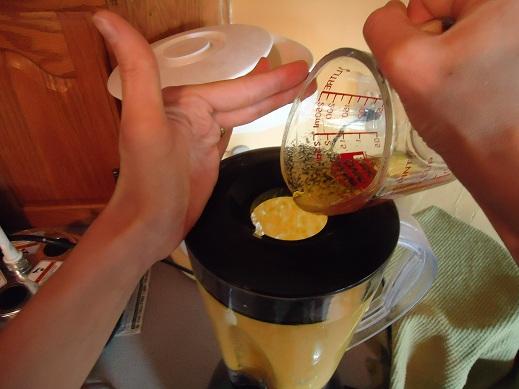
  2. Pour the oil into the running blender so slowly you think you might fall asleep while pouring. About the time you think you’re pouring slowly enough, slow down.  Slow dripping oil is key for making mayonnaise.
  3. Get your eggs at room temperature before starting this process. 

Homemade MayonnaiseYum

2 egg yolks
1/2 teaspoon sea salt
1 Tablespoon vinegar
1 teaspoon sucanat
1/2 cup olive oil

Place the egg yolks, salt, vinegar and sucanat into a blender and run on high speed for about a minute. S-l-o-w-l-y pour the oil in while the blender is running. I’m talking, let the oil drip into the running blender at a horridly boring pace. Just stand there, with the blender running, dripping oil for several minutes. Don’t get impatient or you’ll be making tuna.

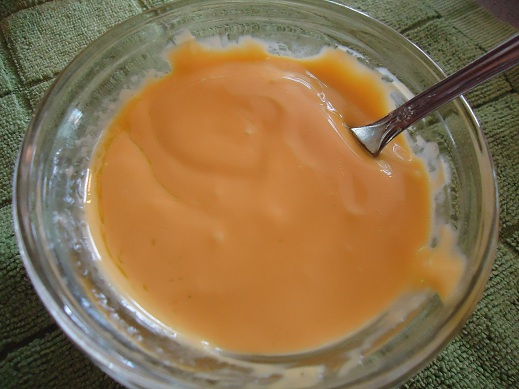
My mayo turned out very yellow in color because of our lovely free-range chicken eggs, which are rich with nutrients. 

This mayonnaise did taste very good, as well it should have after all the work it took to figure out how to make it. But I will never be known as the Mayonnaise Queen, nor will I ever be asked to speak at the Heart of Mayonnaise Convention. I’m also pretty sure I shouldn’t be your “I’m having trouble making mayonnaise” questions go-to gal. I do not believe making mayonnaise is my gift, nor do I wish to become a professional mayonnaise maker. 

But, I am pleased to say that I figured out a healthy mayonnaise recipe and now I can move on to try and conquer the remaining recipes in the Heavenly Homemakers Recipe Challenge.

Have you conquered mayonnaise before? What’s your favorite use for mayonnaise? Ever given your mayonnaise dirty looks?

Heavenly Homemaker's Club Members: Access your homepage and all your fantastic resources here! Not a member yet? Please join us!

Whole Wheat Blueberry Streusel Muffins (plus a little project announcement)

June 16, 2011 by Laura 50 Comments

This post may contain affiliate links. For more information, please see our disclosure policy.

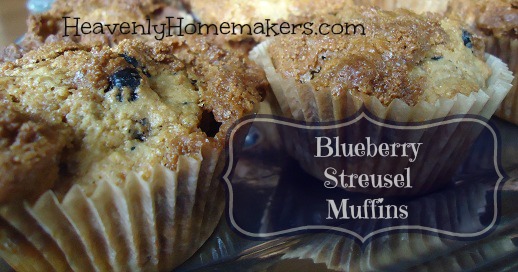
blueberry_streusel_muffin

A few months ago when I went to my friend Tracy’s Shelf Reliance party, I ordered a big can of freeze dried blueberries for an excellent price. I love having those blueberries on hand – and they work perfectly in these Blueberry Streusel Muffins.

Blueberry Streusel MuffinsYum

1 1/2 cups whole wheat flour (I use freshly ground hard or soft white wheat)
1/3 cup sucanat  (you can use brown sugar or honey if you prefer)
1/2 teaspoon baking powder
1/4 teaspoon sea salt
1 egg
1/4 cup melted butter or coconut oil
3/4 cup milk
3/4 cup blueberries, fresh, frozen or freeze dried

Mix dry ingredients together well. Add egg, butter and milk, stirring until all ingredients are mixed. Gently stir in blueberries. Scoop batter into 12 paper lined muffin tins. Sprinkle with Streusel Topping and bake in a 400° for 20 minutes.

Streusel Topping:

3 T. sucanat or brown sugar
1 T. butter, softened
2 T. chopped nuts (optional)

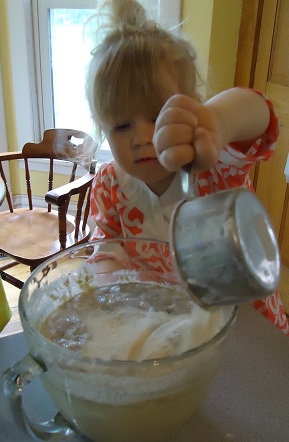
This is one of those easy recipes that your kids can help you make. I feel like it is super important for you to get your kids into the kitchen with you so that they can learn the basics of cooking.

In fact, you wanna know a little secret? I’m frantically working on a (big) new ebook/curriculum that guides you in depth through teaching your kids to cook. I hope to have this project finished in the next few weeks (months?) so that you can have it when the new school year begins – hopefully?! (UPDATE:  Here it is!)

Anyway – now you know. I’m not sure why I didn’t tell you earlier – it’s too much fun to keep a secret! I’m super excited about this and hope to create a resource that will be helpful to all. I’ve even “borrowed” some little girls to help make the book a little more well rounded. :)

This may be one of the most fun projects I’ve ever worked on – combining two of my favorite things in the world:  kids and cooking. Stay tuned for more information about this book as I get closer to finishing it. And if you hear me squealing at any time during the next few weeks, it’s because I really am having that much fun with this project.

Yeah, that little darling in the above picture is cute enough to make all of us squeal. ;)

Heavenly Homemaker's Club Members: Access your homepage and all your fantastic resources here! Not a member yet? Please join us!

Coconut Cupcakes (Dairy Free!)

June 1, 2011 by Laura 21 Comments

This post may contain affiliate links. For more information, please see our disclosure policy.

My adorable little nephew isn’t able to eat dairy, which means his (favorite) Aunt Laura had to do a little bit of experimenting before his visit last week. I came up with a very delicious and healthy Coconut Cupcake recipe that all of my kids loved! Coconut Milk is awesome stuff and works very well for baking. (I had purchased a case of Thai Kitchen Coconut Milk to experiment with and to have on hand.)  We don’t need to eat dairy free at our house, but I will be making these cupcakes again!

Coconut CupcakesYum

3 cups whole wheat flour
2 cups sucanat
1 Tablespoon baking powder
1 can (13. ounces) coconut milk
1/2 cup melted coconut oil
1 teaspoon vanilla extract
2 eggs

Mix all ingredients together with beaters. Spoon into 24 paper lined cupcake pans. Bake at 375° for about 25 minutes or until a toothpick inserted in the middle of the cupcakes comes out clean. Allow the cupcakes to cool completely before frosting.

Frosting

1/2 cup palm shortening (I buy palm shortening from Tropical Traditions or through Amazon.)
1/2 teaspoon vanilla extract
2 1/2 cups powdered sugar (I use organic, unbleached powdered sugar or I make powdered sugar myself with sucanat and a blender.)
1-2 tablespoons coconut milk
shredded coconut for garnish (optional)

By the way, this Coconut Milk also works great for making these pudding recipes and these whole wheat donuts. Yes, Aunt Laura does like to spoil her nieces and nephews, what can I say? Don’t worry. I also gave them protein and vegetables. :)

Ever done any cooking or baking with Coconut Milk? I’m excited to experiment more with this great product!

Heavenly Homemaker's Club Members: Access your homepage and all your fantastic resources here! Not a member yet? Please join us!

Healthy Homemade Ketchup (finally!)

May 25, 2011 by Laura 134 Comments

This post may contain affiliate links. For more information, please see our disclosure policy.

I think I’ve been working on a homemade ketchup recipe for about forty years. (I have actually not reached the age of forty yet, but I am rather fond of exaggerating and I feel like I’ve been experimenting with ketchup for like totally forever.)

It’s taken quite a bit of trial and error to find a recipe that we think tastes good. So many recipes just don’t quite taste ketchupy enough for me. This recipe I’ve finally settled on is one I found and adapted from Happy in Dole Valley. I’m happy to say that this is a very easy recipe to make. Tastes good…healthy…and easy. Yes, this is the kind of recipe I like to share with you.

During my experiments, one of the toughest challenges was to sweeten the ketchup in a way we liked. I didn’t want it too sweet, but it did need to be a little bit sweet – and not too tomato-ee. (I’d like to see the words ketchupy and tomato-ee become a part of the dictionary someday, wouldn’t you?)

I tried making ketchup with raw honey to sweeten it, and found that the taste was too strong. Regular ol’ sucanat (dehydrated cane sugar juice) is a little crunchy in this recipe, so I finally figured out a great way to sweeten our homemade ketchup:  Grind the sucanat in the blender like you’re making this healthier, unprocessed powdered sugar…then add it to your ketchup ingredients. Easy and perfect!

Healthy Homemade KetchupYum

Healthy Homemade Ketchup (finally!)
 
Save Print
Author: Laura
Ingredients
  • 7 ounces of tomato paste
  • ⅓ cup water
  • 2 Tablespoons vinegar (I used distilled coconut vinegar)
  • ¼ teaspoon onion powder
  • ¼ teaspoon garlic powder
  • ¼ teaspoon dry mustard
  • pinch of cinnamon
  • pinch of cloves
  • pinch of allspice
  • pinch of cayenne pepper
  • ¼ teaspoon sea salt
  • ⅛ cup sucanat
Instructions
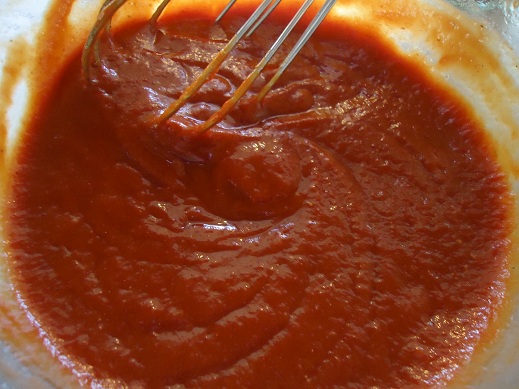
  1. Whisk ingredients together until mixed well and smooth.
3.4.3177

I’ve found that if you grind the sucanat in the blender to make it less “crunchy” it works better.

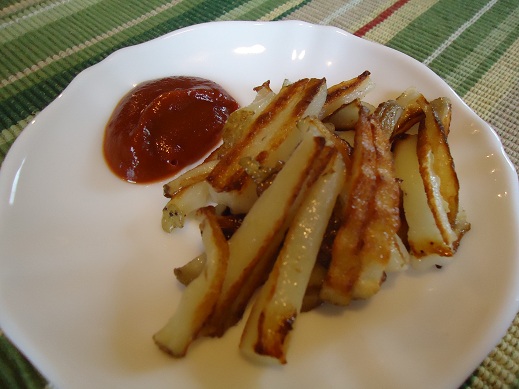
Make french fries, get them nice and crunchy, salt them well with sea salt and give me a call.

Defining “a pinch”: When a recipe calls for “a pinch” of something, I usually put in about 1/8 teaspoon – an amount you could “pinch” between your fingers if you were to reach into the spice jar and pull some out. I don’t really like putting my fingers in to pinch my spices. But you go right ahead if you want to.

The true test with our Homemade Ketchup Experiment:  Did the kids like it?

All of my kids love ketchup, but one particular son of mine eats ketchup on everything:  eggs, green beans, broccoli… He’s also my pickiest kid (which is why he eats ketchup to get his veggies down). I  hesitantly put this homemade ketchup on his plate with a nice helping of homemade fries. He ate it. He loved it. He said, “Is this the homemade ketchup?” and I said, “Yep” and he said, “Wow it’s really good!”

Score! We have a winner!

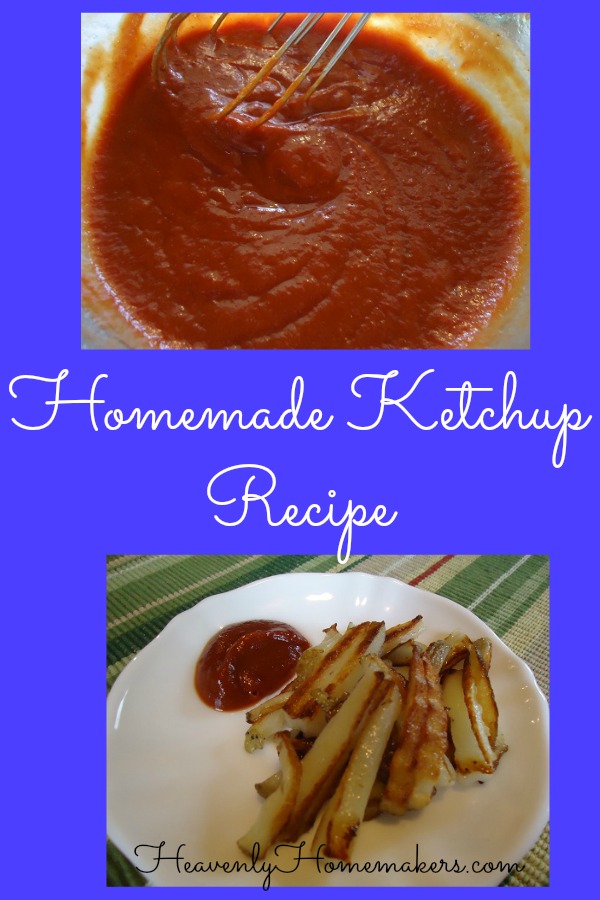
Homemade Ketchup Recipe

Now that I’ve conquered ketchup, I’ll move on to some of the other recipes on the Heavenly Homemakers Recipe Challenge list. I’ve gotta say, I’ve been working on mayonnaise and it is about to kill me. I can not get a homemade mayonnaise to thicken even a little bit and it’s beginning to make me mad. Those of you who make mayo…what in the world is the secret to getting the ingredients to actually thicken into mayo? Ketchup took me forever to figure out, and now the mayo.  I apparently have condiment issues.

Well anyway, what’s your favorite use for ketchup? Please tell me it isn’t green beans, like my son.

Heavenly Homemaker's Club Members: Access your homepage and all your fantastic resources here! Not a member yet? Please join us!

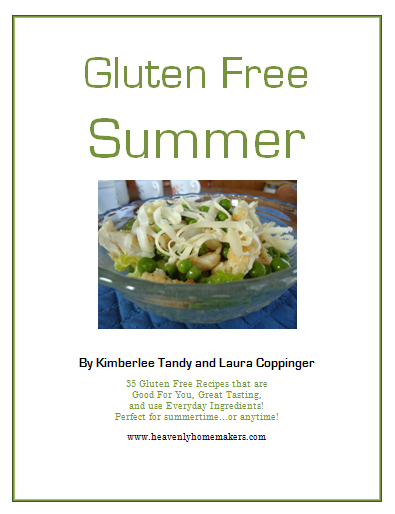
Announcing!!! Heavenly Homemakers new Gluten Free Summer eBook! (Plus a Giveaway)

May 6, 2011 by Laura 291 Comments

This post may contain affiliate links. For more information, please see our disclosure policy.

Yum

Okay, first…for all you NON-Gluten Free people out there – don’t stop reading this post before you even start reading!! (By the way, all of us who are “non-gluten-free”, shall we just call ourselves Gluten-Full?) 

Even if you can eat gluten, I think you still may be interested in this new ebook. Let me just say…there are Chocolate Mint Truffles involved. Who said truffle (and salad and dip) recipes were only for the Gluten Free among us? :)

The beauty of this newest ebook here at Heavenly Homemakers is that every single person can enjoy it and benefit from its tasty summertime recipes…but we wanted to make sure that all of you who need to eat a gluten free diet will know that all of these recipes are safe and healthy for you too!!

I’ve teamed up with my friend Kimberlee again, who is sweet, fun and also a gluten free recipe expert! She’s been feeding her family a gluten free diet for eight years and her kitchen is overflowing with excellent recipes. Because our Gluten Free and Good For You ebook was such a hit, I asked Kim to help us all out with her best tasting (and healthy) summertime dishes.

And again, just like with our Gluten Free and Good For You ebook, all of these recipes call for normal, everyday ingredients. I wanted to be sure these were recipes that could be used by everyone at anytime, so that none of us have to turn somersaults to find “special gluten free” ingredients many of us have never heard of. 

This way, even if you aren’t used to cooking gluten free foods exclusively, if you are hosting someone or feeding someone who requires a gluten free diet, you’ve got some great recipes that you know will be safe for them to eat! I love the idea of making hospitality toward our friends or family with this food sensitivity a simple possibility!

Gluten Free Summer will go on sale in the Heavenly Homemakers Shop next week, after my hunky editor (yes, that would be Matt) finishes going through it with a fine tooth comb.

In the meantime, we’ll be giving away three copies of Gluten Free Summer ebook. It contains 35 recipes for cool summertime salads, dips, lunches and suppers, beverages and treats…for the gluten free and the gluten full among us. :)

Want a chance to win a copy? Leave a comment here on this post for a chance to win! I’ll draw three random winners on Wednesday, May 11.

Heavenly Homemaker's Club Members: Access your homepage and all your fantastic resources here! Not a member yet? Please join us!

Healthier Cheese Dip – a Velveeta and Rotel Recipe Knock Off!

May 4, 2011 by Laura 143 Comments

This post may contain affiliate links. For more information, please see our disclosure policy.

Today, I have written a very heart felt letter to my friend, Velveeta. I hope you don’t mind that I shared it. It’s rather personal, so I hope no one feels embarrassed to read my inner-most thoughts. I’m sure that my friend Velveeta is a friend to some of you too. Truly, if I would have had a daughter, I would have named her Velveeta in honor of my friend.

Okay, totally not really. But still.

Dear Velveeta,

I dearly love you. I grew up eating you and some days, I really miss you. I often visit you in the store, just in case you miss me too. Have you seen me there, lingering by your shelves?

What exactly are you made of anyway? Wait – don’t tell me. I don’t want to know. Reading your label makes me queasy, but when I mix you with a can of rotel, I could gladly grab a bag of chips and eat half the bowl. You are delicious. You are comfort food. You are memories from my childhood. And for goodness sakes you taste incredible alongside a cold glass of Pepsi.

But you are “processed cheese food”. What in the world does that mean? No wait – really – don’t tell me. I don’t want to know. I just want to eat you in ignorance so that I won’t know the full effects of what something such as you can do to the insides of my body.

But alas, since my family began Our Healthy Eating Journey a few years ago, I chose to give you up. I have a new friend now that has a striking resemblance to you, but one that doesn’t make me feel so sick inside.

Those were some good times we had together – you, me and the Pepsi. Please know that I’ll hold the memory of you forever in my heart.

Insanely Yours,
Laura @ Heavenly Homemakers

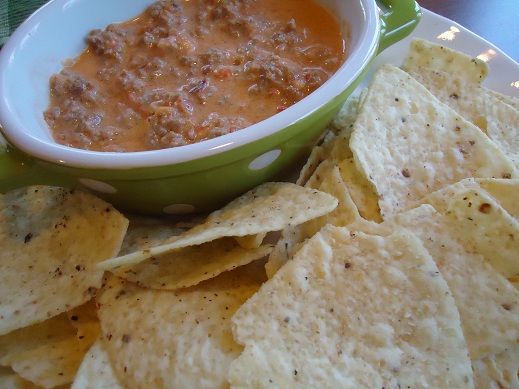
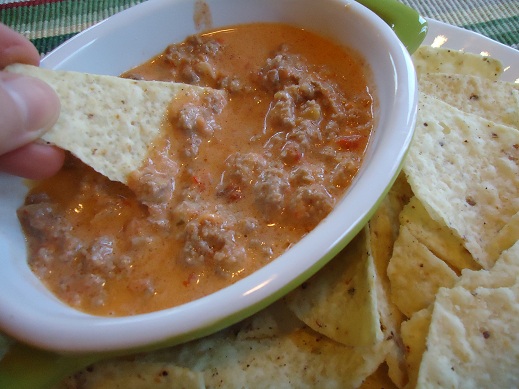
Well, now you know. Velveeta-Rotel chip dip and I go way back. I miss her. I love her. But there’s a new kid in town, one that is made from real food that I can trust not to turn my gut wrong-side-out. I’ve been tinkering with this dish for the past couple of years and my family loves it! It’s not quite as thick as the Velveeta-Rotel dip, but I would imagine that the ingredients that make that one thick are ingredients you and I don’t know how to pronounce. Just lean over the bowl when you eat this. A little dip running down the chin never hurt anyone.

Don’t leave me hanging. I must know if you are friends with Velveeta too. Do you love her with Rotel? And tell me, is Velveeta a lovely name, or what?

Again, totally not really.

Healthier Cheese Dip - a Velveeta and Rotel Recipe Knock Off!
 
Save Print
Prep time
5 mins
Cook time
5 mins
Total time
10 mins
 
Author: Laura
Recipe type: Snack
Cuisine: American
Serves: 4-6 servings
Ingredients
  • 1 pound ground hamburger meat (seasoned with Homemade Taco Seasoning if you like!)
  • 2 cups salsa
  • 1 cup cream
  • 1 cup shredded cheddar cheese
  • Organic Corn Chips
Instructions
  1. Brown hamburger meat and season if desired. Stir salsa and cream into the meat, stirring constantly while heating on medium heat for about three minutes. Remove mixture from heat and add shredded cheese. Stir until cheese is melted. Serve with Organic Corn Chips. (You can stir in ½ cup sour cream or 3 ounces cream cheese if you'd like.)
3.4.3177
Heavenly Homemaker's Club Members: Access your homepage and all your fantastic resources here! Not a member yet? Please join us!

Five Minutes to Cultured Dairy

April 27, 2011 by Laura 43 Comments

This post may contain affiliate links. For more information, please see our disclosure policy.

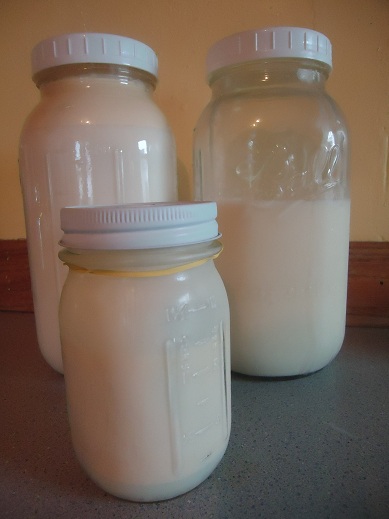
I’m out to prove that making your own cultured dairy products is neither intimidating nor difficult. Just yesterday, I made Buttermilk , Kefir and Sour Cream. This took me a total of five minutes. I did not break a sweat, not even when I was putting lids on jars.

Yum

I then started a batch of Yogurt . Yes, it was a big dairy day in my kitchen. Or rather, a big dairy eight minutes. Because that’s really how long it took to do all of this.

As soon as they are done culturing (which these products do all by themselves while I sleep, type, trip on legos or cut my fingernails), I’ll put them into the fridge.

Now, all of you stop thinking that you can’t make your own cultured dairy products and get started on this fun and healthy habit!! :)

Here’s a little Cultured Dairy question and answer time:

Is making your own cultured dairy products hard to do?  Did I or did I not just tell you that this isn’t hard? Okay then.

Can I use regular milk from the store to make these products?  Yep. I recommend drinking and using raw, organic, grass fed cow (or goat) milk to make these, but if that isn’t available to you, you can definitely use milk that you purchase from the store.

Do I have to trip on legos while my products are culturing?  No, in fact I recommend that you step over all legos and call your children in to pick them up before your feet get holes in them. I was just saying that to be funny, or something like that – and to prove that you don’t have to babysit your dairy products while they are culturing.

Why is there a rubber band on your sour cream jar?  I put a rubber band around my sour cream jar so that I’ll know at one quick glance into my fridge which jar is sour cream and which is regular cream. It’s quite helpful to know the difference. You’re welcome to use whatever color of rubber band you prefer. If you really think that sour cream deserves a red rubber band instead of a yellow one, knock yourself out.

What do you mean “knock yourself out”?  That is an expression that really just means “go for it”. To take that expression literally would just seem as though I were a big bully. Please, do not literally “knock yourself out”. Goodness.

Will I really have cultured dairy products in just five minutes like your title suggests?  The five minutes I was referring to was the time it takes for YOU to do any kind of work. It does take several hours for the dairy to become cultured after you’ve done your five minutes of work. Read the specific directions for each of the dairy products to know how long each item takes to become cultured. Here are the quick links:  Buttermilk , Kefir, Yogurt and Sour Cream.

Do you make your own cultured dairy products? Which ones are your favorite?

It’s here! Check out our amazing Simple Meals program!

728x90

Heavenly Homemaker's Club Members: Access your homepage and all your fantastic resources here! Not a member yet? Please join us!

Coconut Flour Banana Muffins

April 22, 2011 by Laura 98 Comments

This post may contain affiliate links. For more information, please see our disclosure policy.

I’ve been having so much fun playing with this Gluten Free/Dairy Free Muffin recipe! We’re on the home stretch of the Gluten Free Experiment we’ve been conducting at our house (more on that soon), but I guarantee you we’ll continue to make these muffins and all the fun variations I’m coming up with whether we’re gluten free or not. What a healthy little muffin (that just so happens to taste like cake).

Coconut flour is high in fiber, high in protein, making it a wonderful addition to your diet. I find coconut flour at Tropical Traditions or Amazon. I’m so in love with this stuff that I might just write a post all about it someday soon.

I don’t recommend substituting whole wheat flour in this recipe. Coconut flour and wheat flour are not created equal. If you want a Whole Wheat Banana Muffin recipe, check out this one! We love it!

Coconut Flour Banana MuffinsYum

1/2 cup Coconut Flour
1/4 teaspoon salt
1/2 teaspoon baking powder
6 eggs
4 Tablespoons Coconut Oil, melted
1/4 cup honey
2-3 ripe, mashed bananas
1/2 cup nuts (optional)

Mix all ingredients together, then pour batter into a well greased (or paper lined) muffin pan. Bake at 350 for 15-25 minutes. Makes 12 muffins.

coconut_flour_banana_muffins[1]

I never put nuts in muffins because 5 out of 6 of us don’t care for them in our baked goods. How ’bout you? Are you a nutty kind of person? (I really mean to ask if you like nuts in your muffins…not if you consider yourself to be nuts, but feel free to answer according to how you’re feeling today.)

Heavenly Homemaker's Club Members: Access your homepage and all your fantastic resources here! Not a member yet? Please join us!
« Previous Page
Next Page »

Join Our Community!

 Facebook Twitter E-mail Instagram Pinterest

Popular Posts

~ Will All of the Real Moms Please Stand Up?
~ Easy! Stir-and-Pour Whole Wheat Bread
~ How to Make Gatorade
~ 31 Real Food Breakfast Ideas
~ Dear Teenage Girls...
~ When Mom Takes a Step Back
~ The Inexpensive Health Insurance We Love!
~ Let's Talk Real Food Grocery Budgets

Check out our latest posts!

  • Big Family Food and Fun: September 6-12, 2026
  • Big Family Food and Fun: August 30-September 5, 2026
  • Big Family Food and Fun: August 23-29, 2026
  • Big Family Food and Fun: August 16-22, 2026
  • Big Family Food and Fun: August 9-15, 2026
Home  ~  Simple Meals  ~  Club Membership  ~  Shop  ~  Privacy Policy  ~  Disclosure  ~ Contact

Copyright © 2026 · Beautiful Pro Theme on Genesis Framework · WordPress · Log in