Heavenly Homemakers

Encouraging women in homemaking, healthy eating and parenting

  • Home
    • About
    • FAQs
  • Recipes
    • Bread and Breakfast
    • Condiments
    • Dairy
    • Main Dishes
    • Side Dishes and Snacks
    • Desserts
    • Gluten Free
    • Instant Pot
    • Crock Pot
    • Heavenly Homemaker’s Weekly Menus
  • Homemaking
    • Real Food Sources
  • Store
  • Contact
    • Advertise
    • Disclosure
    • Privacy Policy
  • Simple Meals
  • Club Members!

Make Your Own Powdered Sugar with Sucanat

October 26, 2010 by Laura 171 Comments

This post may contain affiliate links. For more information, please see our disclosure policy.

Yum

This little cooking tidbit makes me very excited! I believe I had heard this tip before, but until Theresa reminded me in a recent post comment, I had forgotten to try it.

Did you know that you can make your own unprocessed powdered sugar from sucanat?  Uh-huh, it’s true!!!

I have been using an organic, unbleached powdered sugar as a slightly healthier alternative to regular powdered sugar. At least it is organic and at least it has not been bleached. But still…there are not many nutrients left in this type.

But if you make your own powdered sugar from sucanat, you’ve got a much healthier powdered sugar. And would you like me to tell you how EASY it is to make powdered sugar?? Here, let me show you…

You need two things:  A Blender and Sucanat 
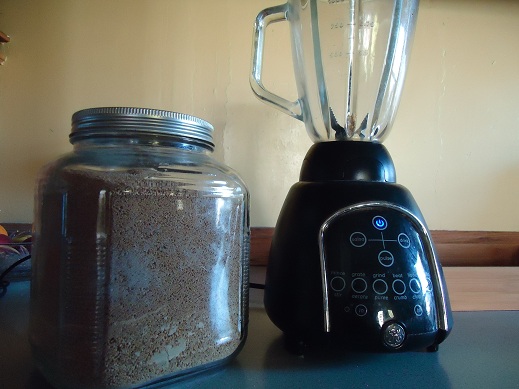
Put no more than two cups of sucanat in your blender at one time. I poured in four cups the first time I tried and it took forever to get it all “powdered”. Two cups at a time actually saves time, even if you need more than two cups of powdered sugar for a recipe.

Put the lid on your blender (always a good idea, right?). Blend up the sucanat for just a few seconds until it turns powdery.
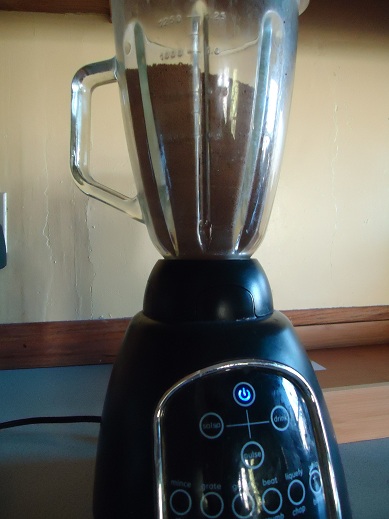
Check out what happens when you take the lid off the blender. They don’t call it powdered sugar for nothin’…
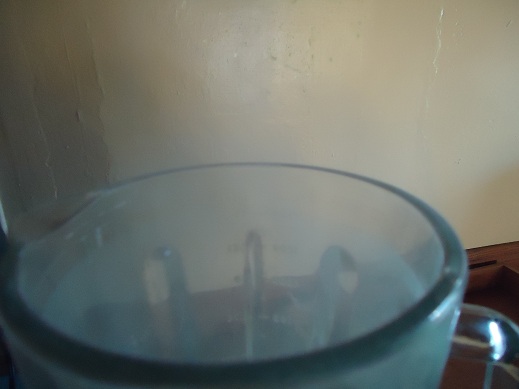
And there you have it…homemade powdered sugar from sucanat.
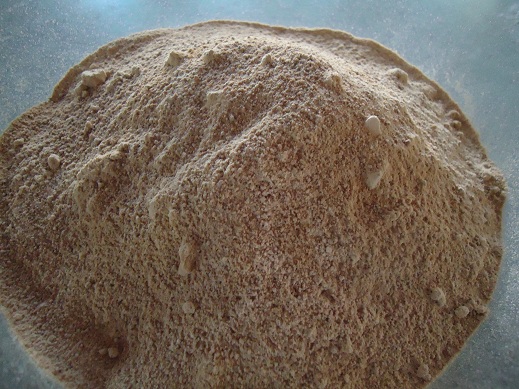
I have only used this powdered sugar to make a chocolate fudge frosting (and yes, I’ll be sharing the recipe). I would imagine it will work for other recipes, but I’m pretty sure the frosting won’t ever be the color white. :)  Wowza, I can not wait to experiment with more recipes using homemade powdered sugar. Look out everyone!

(Actually, the recipes may be few and far between. My family really doesn’t need to be eating that much sugar, even if it is healthier!)

So, what do ya think? What can we make with our homemade powdered sugar??? 
—————————————–

Find many of your Sucanat questions answered here!

Recipes we’ve created so far to use with your Sucanat Powdered Sugar…

  • Healthier Caramel Frosting
  • Chocolate Fudge Frosting
Heavenly Homemaker's Club Members: Access your homepage and all your fantastic resources here! Not a member yet? Please join us!

What to Do With Butternut Squash

October 26, 2010 by Laura 157 Comments

This post may contain affiliate links. For more information, please see our disclosure policy.

Yum

I did not grow up eating butternut squash (or any kind of squash for that matter). I hadn’t a clue what to do with one until a few years ago. They are, in fact, quite yummy. But here’s the most exciting thing about a butternut squash:

You can use a butternut squash to make a pumpkin pie. Or pumpkin bars. Or pumpkin pie pecan squares. Or just about any pumpkin treat.

It tastes exactly the same in a recipe and no one can tell a difference. 

Just for the record, I’m not trying to be deceitful by switching out the ingredients…just trying to use up what I have and I think it’s cool that these ingredients are interchangeable! I will say that using squash to make a “pumpkin pie” sounds a little silly because a squash is not a pumpkin…but calling it a squash pie just doesn’t even sound good. And so I will continue to use squash to make pumpkin pies and I will continue to call it a pumpkin pie and everyone will continue to eat it because it is so good.

But first, let’s talk about how to prepare a butternut squash. There are other ways to make pureed squash, but here’s the easiest way I’ve found:

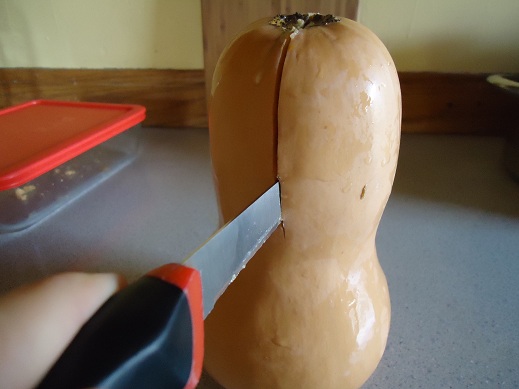
First, cut your gourd in half. Or close to half.  Mine usually end up being quite lop sided. 

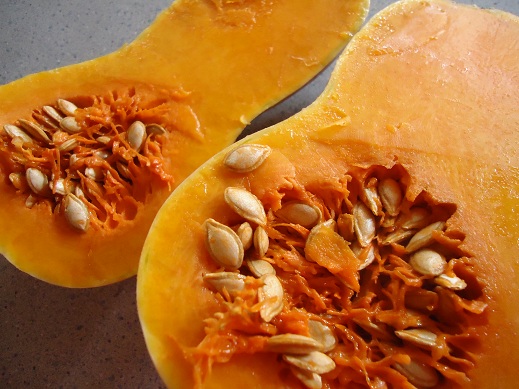
Use a wooden or a heavy duty metal spoon to scrape out the seeds and stringy stuff.

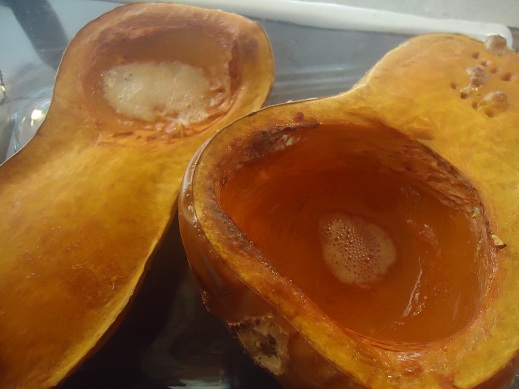
Place your squash face up in a baking dish and bake, uncovered for at least an hour at 350° or until your house smells squashy and you can poke a fork into your squash very easily. See, look at the fork pokes:

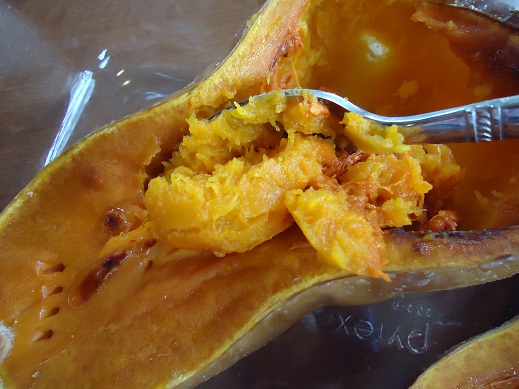
Use a spoon to scoop out all the soft, cooked squash. You can eat it just like it is…you can sprinkle sucanat on it, you can butter it, you can salt it. It’s very tasty eaten in these ways.

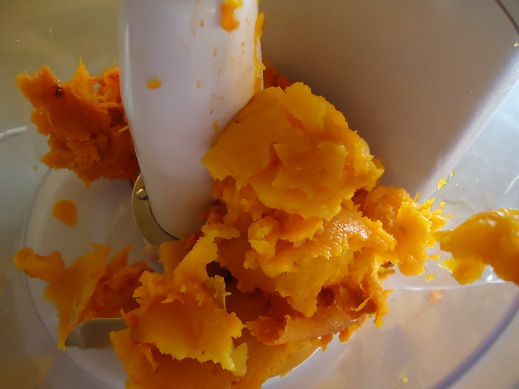
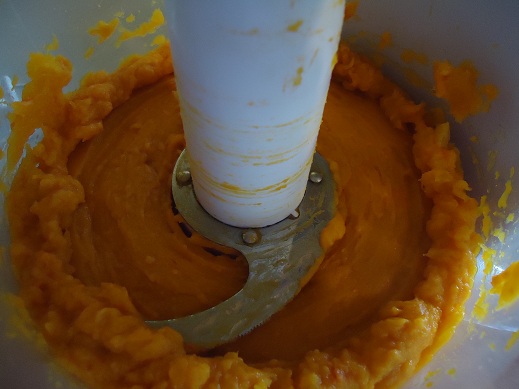
Or…you can puree it. Place all the scooped out cooked squash into a food processor or blender.

Process for just a few seconds until smooth.

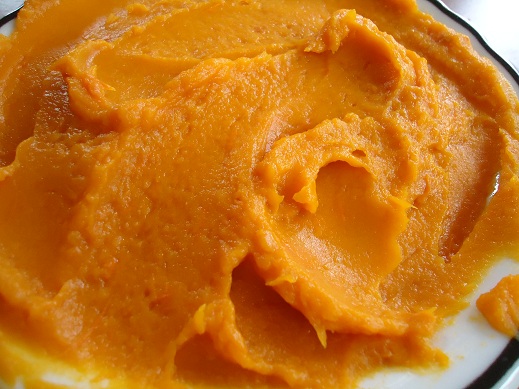
Look, pureed squash:

Now you can feed it to your baby, feed it to your grown ups…or you can make these Sweet Potato Streusel Muffins. Yep, not only can you make a Pumpkin Pie and other pumpkin treats with squash, you can make Sweet Potato Muffins. Is this getting confusing yet?

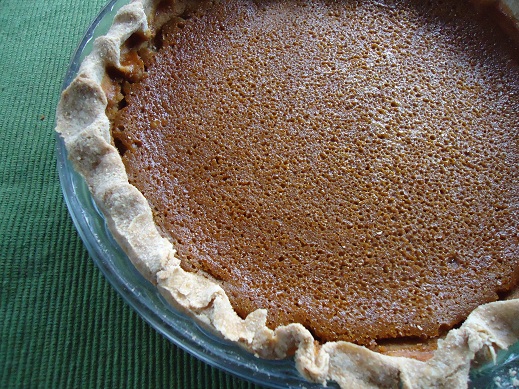
Just last week I made a delicious “Pumpkin Pie” with butternut squash. My father-in-law was still here at the time and he declared it the best pumpkin pie he’d ever had. In fact, he declared it the first pumpkin pie he’d ever LIKED. {grin}

Are you squash eaters at your house? How do you like your squash? Ever used squash to make something that calls for pumpkin or sweet potatoes?

Heavenly Homemaker's Club Members: Access your homepage and all your fantastic resources here! Not a member yet? Please join us!

Easy Italian Pasta Bake

October 26, 2010 by Laura 175 Comments

This post may contain affiliate links. For more information, please see our disclosure policy.

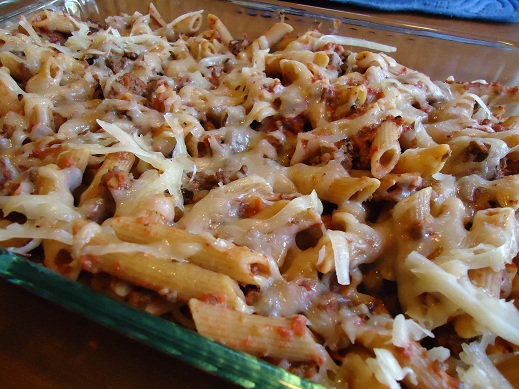
It almost seems silly to even call this a recipe. It’s basically a “cook some noodles in spaghetti sauce, add meat, top with cheese” kind of idea. Goulash in a casserole dish. Spaghetti with different noodles and turned into a casserole. Ah, but instead of letting you know all of that, I’ll act like it’s a fancy dish called…Italian Pasta Bake.

You’re impressed, aren’t you?

Ah well…simple recipes are what I do best. They’re what my family likes best and they’re easy to make. This recipe also freezes well and is easy to make for company.

Italian Pasta BakeYum

1 pound ground beef or turkey
1/4 cup chopped onion or 3 Tablespoons dry minced onion
4 cups tomato sauce
2 cups water
2 Tablespoons basil
1 Tablespoon oregano
1 teaspoon garlic powder or one clove fresh garlic
Sea salt to taste
10 ounces whole wheat pasta, any shape (we like bionature brand)
2 cups shredded cheese (we use white cheddar, but you can use mozzarella or any combination of your favorite cheeses)

Brown meat and onion together. Meanwhile, bring tomato sauce, water and herbs and spices to a boil. Stir in pasta and boil until tender. Do not drain. The pasta should have absorbed the liquid! Mix in cooked meat. Salt as desired. Spread mixture into a 9×13 casserole dish and top with cheese. Bake uncovered at 350° for 25 minutes or until cheese is melted and the casserole is heated through and through.

So, do you have a favorite pasta shape?  I think picking the shape of pasta for our dinner is kinda fun. Penne, Fusilli, Rotini, even good ol’ Elbow.

Ah the joy of picking pasta shapes. Am I the only one who thinks this is fun?

Grocery List

Heavenly Homemaker's Club Members: Access your homepage and all your fantastic resources here! Not a member yet? Please join us!

How To Cook Brown Rice

October 25, 2010 by Laura 177 Comments

This post may contain affiliate links. For more information, please see our disclosure policy.

How to Cook Brown Rice

Yum

Transitioning your family from white to brown food (rice, grain, sugar) can be a little bit difficult on the taste buds. When we’re used to the white stuff, the brown stuff may seem a little heavy at first. I know I’ve heard the opposite from some of you, but transitioning my family from white rice to brown was actually one of our easier transitions when we were on our healthy eating journey.

But first I had to learn how to cook the stuff.  Brown rice cooks a little differently than white rice. And it takes 45 minutes? Really?

One of the things I’ve learned throughout our healthy eating journey is that whole foods may take a little longer to prepare, but that doesn’t mean that they are more difficult to prepare. I just have to plan ahead just a little bit better. Yes, brown rice takes 45 minutes to cook. But do I actually have to watch the pot and babysit my rice? Absolutely not. Start the rice a cookin’, set a timer, walk away and come back 45 minutes later.

Long story short:  Cooking Brown Rice is SO Easy.

Here are the basics of Brown Rice Cooking:

  • Use exactly twice as much liquid as rice. (For instance, use 2 cups of water with 1 cup of rice.)
  • The rice will absorb all the liquid, so if you cook one cup of rice in two cups of water, once the rice is cooked, you will have two cups of cooked rice.
  • Don’t bother your rice while it’s cooking. It will get grumpy. (Actually it will get sticky, and you may get grumpy.)
  • Sea Salt is your friend. Rice is a little bland without it.
  • We LOVE our rice cooked in Chicken Broth. The broth gives the rice excellent flavor and has really helped us transition to the taste of brown rice!

Here’s how to cook brown rice:

  1. Begin by boiling your water or broth. Remember, use two cups of liquid for every one cup of rice.
  2. Once the liquid has come to a full boil, pour in the dry brown rice.
  3. Give the rice a stir. Turn down the burner to a simmering heat level.
  4. Cover the pot with a lid.
  5. Set a timer for 45 minutes.
  6. Do not stir the rice or even bother with looking at the rice until the timer goes off.
  7. Remove the rice from the heat.
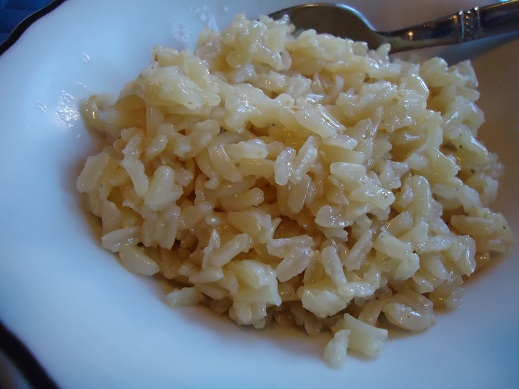
  8. Salt liberally, or mix your cooked rice into your desired recipe.

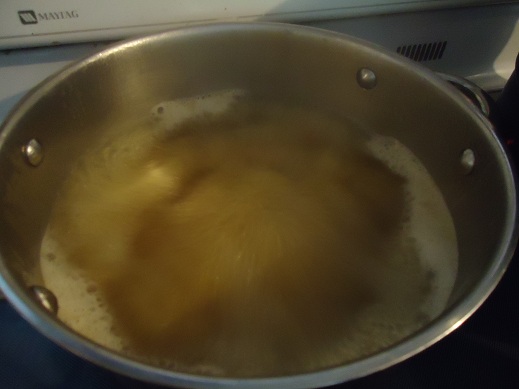
I took several pictures to create a tutorial for you, but in just about every picture, the steam from the pot fogged up my camera lense. It would have been a lovely tutorial.

See? Look at the wonderful boiling broth. With steam. This was the least foggy of all the pictures.
Don’t you just feel like you learned an awful lot by looking at it?

Sorry for the lack of tutorial photos. Really though, even without pictures to look at, I do believe you can easily cook brown rice. Then use it to make Rice and Veggie Stir Fry or Spanish Rice…or even add butter and salt and eat it plain!


Does your family like brown rice? How do you like to eat your rice?

Heavenly Homemaker's Club Members: Access your homepage and all your fantastic resources here! Not a member yet? Please join us!

Healthy(er) Rice Crispy Treats

October 24, 2010 by Laura 162 Comments

This post may contain affiliate links. For more information, please see our disclosure policy.

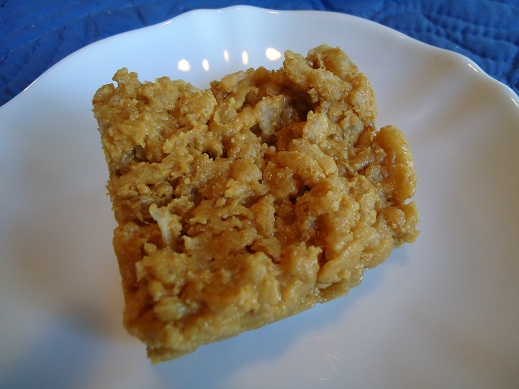
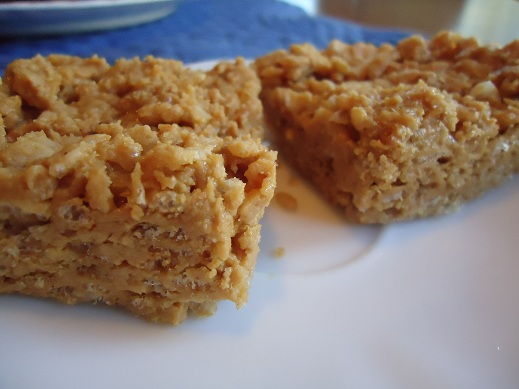
This is one of my favorite new recipes, so I chose to show you this one first in the Heavenly Homemakers Parade of Recipes and Cooking Tips!

I rarely buy cereal because it is expensive and no matter what kind you buy, it is generally not very good for you. However, occasionally I’ll buy a Mom’s Best or a Kashi variety. We all have “those mornings” when we just want to grab out a box (or two) of cereal and call it breakfast.

A couple of weeks ago, I was looking around on Amazon for organic cereal choices and was excited to find Erewhon Crispy Brown Rice Cereal for a very reasonable price and with ingredients I didn’t feel too bad about. I used my Swagbucks and ordered some.

Because this cereal is made with brown rice, it’s a little bit different from your “normal” Rice Krispie cereal, but since cereal is a special treat around here, we all like it just fine. Well, then…I got to thinking that it sure would be fun to make some sort of “rice crispy treat”. I miss Rice Krispie treats. They’re so easy and yummy.

While this recipe doesn’t taste entirely like a real Rice Krispie Treat, it does have the feel and crunch of one – plus they taste really, really good!! I still haven’t tried making homemade marshmallows, so I skipped that idea altogether and just used honey to sweeten and make the cereal “stick together”. All of us have declared this recipe to be quite tasty…and I, the mom, have declared it to be one of the easiest recipes ever. It takes about five minutes to throw these together!


Stay tuned to see what’s coming up next in our Parade of Healthy Recipes and Cooking Tips!!


Healthy(er) Rice Crispy Treats
 
Save Print
Prep time
10 mins
Total time
10 mins
 
Author: Laura
Recipe type: Dessert
Serves: 6-8
Ingredients
  • 1 cup peanut butter (creamy or crunchy)
  • ½ cup honey
  • ½ teaspoon vanilla extract
  • 3 cups Crispy Rice Cereal
Instructions
  1. In a saucepan, melt and stir the peanut butter and honey together. Remove from heat and add vanilla. Stir in Crispy Rice Cereal. Spread in a 9x9 inch pan and allow to cool.
  2. For fun, you could add 1/4 cup of mini chocolate chips as you're stirring in the cereal. We LOVE these soy free mini chocolate chips from Enjoy Life!
  3. I love that this recipe is gluten free, easy, fast, healthier and crunchy! This is SUCH a simple snack to throw together. I think I'll try to make some with Sunbutter for Malachi - I don't know why it wouldn't work!
3.4.3177

Heavenly Homemaker's Club Members: Access your homepage and all your fantastic resources here! Not a member yet? Please join us!

Chicken Noodle Soup – with homemade broth and noodles!

October 20, 2010 by Laura 28 Comments

This post may contain affiliate links. For more information, please see our disclosure policy.

You know how I sometimes almost forget to put the bananas in my banana bread? It probably goes without saying, but I think I may have issues, because sometimes I almost forget the chicken in my Chicken Noodle Soup. It’s an easy mistake, I think. (nod and smile)  I am usually so excited about the rich broth and the yummy homemade noodles that adding the cooked chicken sometimes slips my mind. Either that, or the Nerf bullets whizzing by my nose while I’m cooking temporarily distract me from the task at hand. At least the soup is still good without the chicken (as opposed to bananaless banana bread).

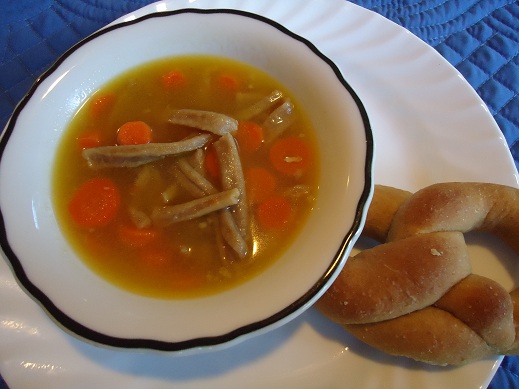
I love making Chicken Noodle Soup no matter what, but I really love the simplicity of it when I have both Chicken Broth and Whole Wheat Homemade Noodles already made…then all I have to do is put it all together into a quick soup. 

Chicken Noodle SoupYum

8 cups Chicken Broth
1 recipe of Whole Wheat Homemade Noodles
3 carrots
Sea salt
2 cups cooked chicken (optional, apparently)

Peel and chop carrots into bites. Place broth and carrots in a large cooking pot. Bring the broth and carrots to a boil. Boil for about five minutes, then add noodles and chicken (if you remember). Salt liberally. Place a lid on the pot and turn the burner down to simmer for about 15 minutes or until your noodles have cooked up fat and tender.

Chicken Noodle Soup tastes fantastic and comforting with a hot,
fresh
Whole Wheat Soft Pretzel (on a drizzly fall evening as you sit around the table with your family…)

In a pinch, I have skipped making Whole Wheat Homemade Noodles and just added about three cups of purchased whole wheat pasta to make this soup. It works great and is an awesome quick meal to throw together. (Remember to add chicken.)

You’re welcome to throw other veggies into your soup…whichever veggies your family would enjoy (or the ones you would like to forcefully insist that they eat). You’re also welcome to add herbs and spices beyond sea salt.

Do you make homemade chicken and noodles? What herbs and veggies do you use? Do you ever forget to add the chicken?

Print Grocery List

Heavenly Homemaker's Club Members: Access your homepage and all your fantastic resources here! Not a member yet? Please join us!

Whole Wheat Hot Dog Buns

October 17, 2010 by Laura 71 Comments

This post may contain affiliate links. For more information, please see our disclosure policy.

I’ve admitted it here before: I love me a good beef hot dog. Do I love them because they are so very good for us and so highly nutritious? I wish.  But, at least I’ve been able to find some from our local meat farmers that are better than regular dogs from the store. I also often buy Shelton Turkey Franks from Azure Standard.

I had perfected my whole wheat hamburger bun recipe, but never took the time to make the dough into hot dog buns. In the past when I’d tried to make hot dog buns (from other recipes), they turned out as big as a baseball bat and about that heavy. (We’ve already talked about how none of us want our buns to be heavy.)  This time, when I tried to make hot dog buns, I focused on making the buns small. The smaller the buns, the better…right? :)

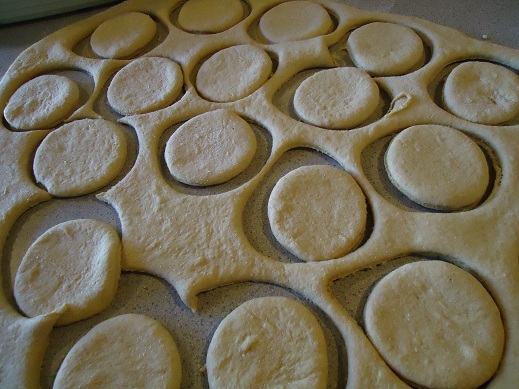
Using this whole wheat hamburger bun recipe, I rolled out the dough to about 1/4 inch thickness and cut the dough into circles using a wide mouth jar. A wide mouth jar isn’t going to make a very big circle, and you might think that the bun isn’t going to be big enough…but keep in mind that these rolls will rise and we do not want a bready bun. No indeed.

hotdog_buns_1

Yum

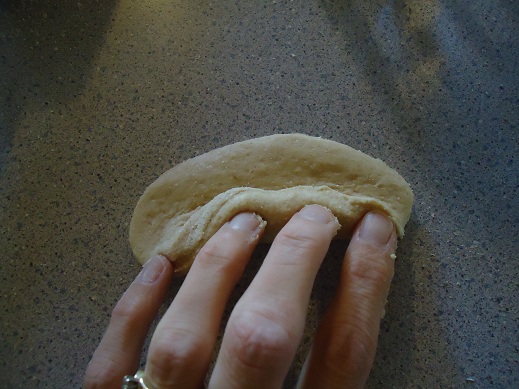
Take each circle and roll it up gently…

hot_dog_buns_3

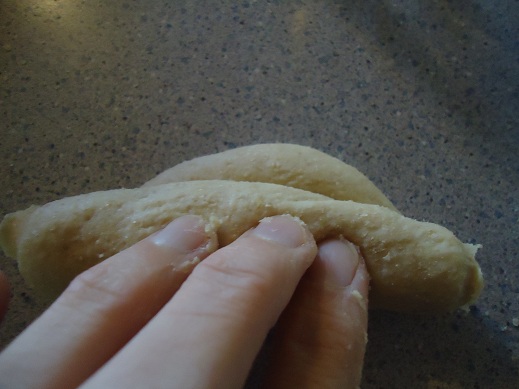
Almost finished…

hot_dog_buns_5

And…done. Look at the cute little unbaked hot dog bun. Kinda makes you wish you were a hot dog so you could lay down in there and take a nap, doesn’t it?

hot_dog_buns_2

Put all the cute little rolled buns in a baking dish. Allow them to rise for about 20 minutes.

hot_dog_buns_6

Bake the buns for about 25 minutes at 350°. If they aren’t golden brown, leave them in there just a little bit longer. I kinda think it would be fun to bake the hotdog right into the bun, but I haven’t tried it yet. And just for the record, I don’t really wish I was a hot dog, no matter how inviting these buns look.

hotdog_buns_7

Carefully slit the buns open at the top with a knife and pop in a cooked hotdog.

hotdog_buns_1

Add all your fixin’s and you’ve got a tasty hotdog on a bun that has just a little more substance than the airy ones we find at the store, but they aren’t so bready you feel like you’re eating all bun and no dog.

So what do ya think? Should I try baking the hot dog right into the bun to make a sort of “pig in a blanket”? I think my kids would enjoy that surprise. Although since these hot dogs are made from beef or turkey, can we still call it a “pig in a blanket”? Sometimes life just throws us these difficult questions, ya know?

So humor me will ya? Are you a hot dog lover or not? Am I the only weird one who really appreciates eating real, whole foods…but still likes the occasional hot dog?  :)

Heavenly Homemaker's Club Members: Access your homepage and all your fantastic resources here! Not a member yet? Please join us!

High Five Recipes: Roasted Italian Potatoes

October 10, 2010 by Laura 8 Comments

This post may contain affiliate links. For more information, please see our disclosure policy.

High Five Recipes 2

It’s been months since I posted a High Five Recipe, so just in case you’re new around here…let me introduce you to this special recipe feature we have going on. Are you ready?

It is a fact that there are lots and lots of healthy recipes you can make which only take five or less (healthy) ingredients! I’m talking about REAL INGREDIENTS too…not just “add a packet of this and stir in a can of that”.

Real ingredients, real easy recipes. I LOVE High Five Recipes! You can scroll through all of these posts to see the other High Five Recipes I’ve posted so far!

This Roasted Italian Potatoes recipe comes courtesy of my friend Anne. Remember last year when I put some of my homemade Italian Dressing Mix in her stocking? What, you don’t remember? Yes, my friend Anne and I exchange Christmas stockings. Grown-ups needs stockings too ya know. And because she and I love to live on the wild side, we put items in each others stockings that are incredibly outlandish like paper clips, pot scrubbers…and yes…Italian Dressing Mix.

Yes indeed, Anne and I create one great big rowdy party when we come together.

Anyhoo…after Anne tried the Italian Dressing Mix I had given her, she fell in love with it and keeps coming up with yummy things to make with it. She is out to prove that Italian Dressing goes way beyond tossed salad. See? Told ya she was a crazy one.

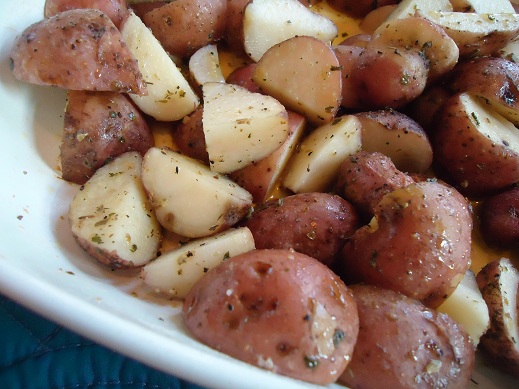
Roasted Italian PotatoesYum

3 pounds red potatoes, scrubbed (or dirty, whichever way you like ’em)
1 Tablespoon olive oil
2 teaspoons Italian dressing mix

Cut potatoes into bite sized pieces. Toss ingredients together in a bowl until the potatoes are covered with olive oil and dressing mix. Pour potatoes into a baking dish. Bake uncovered in a 350° oven for 20-30 minutes or until potatoes are tender. If you like, you can broil them for a few minutes at the end of their baking time to brown them up a bit.

Now, I am creatively thinking about what I should put in her stocking this year. Maybe some other great ingredient so she can come up with another high five recipe? Perhaps something to do with, I don’t know…chocolate???

Heavenly Homemaker's Club Members: Access your homepage and all your fantastic resources here! Not a member yet? Please join us!

Pancake and Sausage Muffins

October 3, 2010 by Laura 96 Comments

This post may contain affiliate links. For more information, please see our disclosure policy.

Pancake_Sausage_Muffins

Here’s what you need to know if you ever send me a recipe request:  I do get around to it eventually.  I don’t even remember WHO emailed this idea to me, but I do know that it was MONTHS ago. It went on my list…the long, long list of reader recipe requests, post ideas, questions to be answered. But see, lookie…here it is! I finally got a round tuit!

The original suggestion (from the reader who shall remain nameless, not in an effort to protect her privacy, but because I have misplaced the note with her name) was to use this Corn Dog Muffin idea, but do a breakfast Pancake – Sausage Muffin instead. Brilliant!!! After experimenting and making these last week and watching my family devour them in about five minutes, I did have to ask myself why I took so long trying this idea.

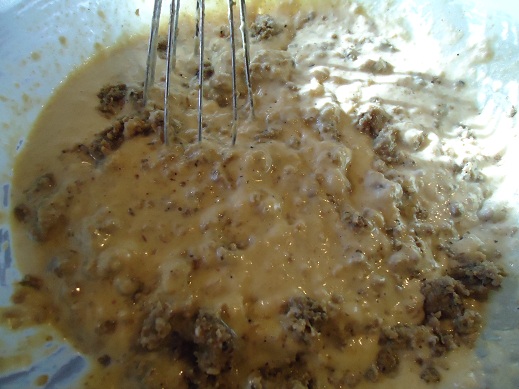
Now, we don’t do much pork at our house, but I do have this killer turkey sausage recipe . I make it up in big quadrupal (or more!) batches, cook  it up, then freeze it until we’re ready to eat it. Having cooked turkey sausage on hand for recipes like this one is a huge life saver!! So easy! If you choose, you could use sausage links instead, making the muffins like these Corn Dog Muffins. Instead, I just stirred cooked turkey sausage right into the batter:

Pancake-Sausage MuffinsYum

2 cups whole wheat flour
1 teaspoon baking powder
1/2 teaspoon sea salt
1 1/2 cups milk or buttermilk
2 eggs
1/3 cup melted butter
1/2 pound cooked turkey sausage (or nine sausage links, cut in half)
Real grade B maple syrup

Mix dry ingredients together. Add milk or buttermilk, eggs and melted butter. Stir in browned turkey sausage.

Pour batter into 18 buttered muffin tins. (I don’t recommend paper muffin liners for this as it will stick.)  Bake at 350° for 15-20 minutes or until the muffins are lightly browned. Serve with a lovely drizzle of maple syrup!

This is a great recipe to bake up ahead of time, freeze, then pull out and rewarm in the oven or toaster oven at breakfast time!

Now, don’t wait months to try this like I did. This recipe is SO easy and my whole family LOVED them!! You can never have too many easy breakfast recipes!

Heavenly Homemaker's Club Members: Access your homepage and all your fantastic resources here! Not a member yet? Please join us!

Healthy Fruit Crisp

September 28, 2010 by Laura 96 Comments

This post may contain affiliate links. For more information, please see our disclosure policy.

I think that making a fruit crisp is one of the easiest desserts to make. But that may be because of a little short-cut I like to take.  Hey, I’m all for making special treats and doing it the lazy easy way.

Here’s my trick:  You know how a fruit crisp has a “crumb topping”? All the recipes I’ve seen say to “add all the dry ingredients together” then “cut in the butter until the mixture resembles course crumbs”. I am REALLY not a fan of “cutting in the butter” in any recipe. It takes extra effort and makes an extra mess and now that I am all grown up and not in Home-Ec class anymore, I have become a butter cutter inner rebel. I believe we should all take a stand against things we feel strongly about. And so, I hereby stand firm on my belief and I refuse to cut in butter.

I hope you can still respect me after that confession. If you still choose to cut in your butter, we can still be friends.

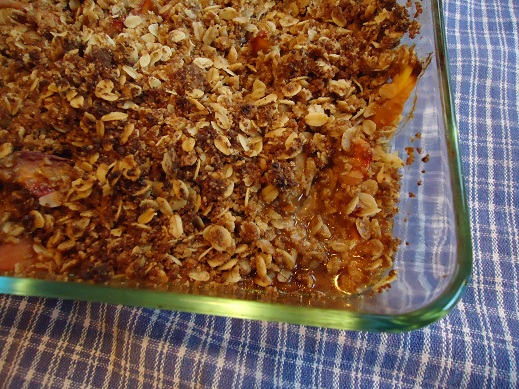
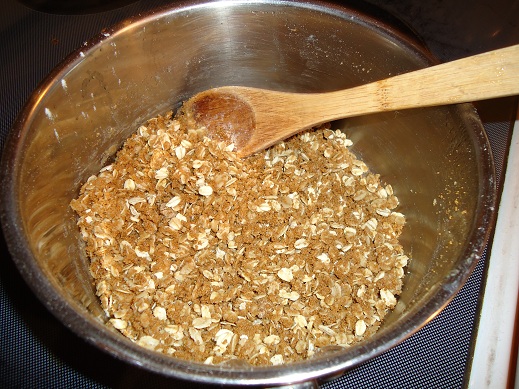
As a replacement (aka lazy) option to cutting the butter into the dry ingredients in a fruit crisp, I have chosen to simply MELT the butter and stir it into the oat and flour mixture. I KNOW. And check it out…I have still made crumbs:

I love this fruit crisp recipe because you can use any fruit you want. This time, I made peach fruit crisp because it just so happens that I got to go pick some lovely peaches at my friend Kim’s house. Depending on the kind of fruit you use, you may want to add more sucanat (sugar), but I’ll leave that up to you!

Healthy Fruit CrispYum

5 cups sliced fruit (apples, peaches, pears, cherries, blueberries or a combination of all)
2 Tablespoons sucanat or brown sugar

Stir the fruit together with the sucanat and place in a small baking dish (8×8 inch).

Make your Crumb Topping…

1/2 cup rolled oats
1/3 cup sucanat or brown sugar
1/4 cup whole wheat flour
1/4 teaspoon cinnamon (optional)
1/4 cup butter (MELTED, for Pete’s sake)
1/4 cup chopped nuts or coconut flakes (also optional)

Mix together oats, sucanat, flour and cinnamon. Stir in melted butter and joy upon joy, it creates crumbs with little to no effort. Add nuts or coconut flakes.

Sprinkle crumb topping over fruit. Bake in a 375° for 30-35 minutes or until fruit is tender and topping is golden brown.

Easy_Fruit_Crisp

If you’ve made and canned Apple Pie Filling, just dump it into your baking dish, sprinkle on your crumb topping and bake. SO easy!

I just have to know…are you a butter cutter inner, or a butter cutter inner rebel like me? Never thought about it before? Yeah, I figured I was the weird one with butter cutter inner issues.

Heavenly Homemaker's Club Members: Access your homepage and all your fantastic resources here! Not a member yet? Please join us!
« Previous Page
Next Page »

Join Our Community!

 Facebook Twitter E-mail Instagram Pinterest

Popular Posts

~ Will All of the Real Moms Please Stand Up?
~ Easy! Stir-and-Pour Whole Wheat Bread
~ How to Make Gatorade
~ 31 Real Food Breakfast Ideas
~ Dear Teenage Girls...
~ When Mom Takes a Step Back
~ The Inexpensive Health Insurance We Love!
~ Let's Talk Real Food Grocery Budgets

Check out our latest posts!

  • Big Family Food and Fun: September 6-12, 2026
  • Big Family Food and Fun: August 30-September 5, 2026
  • Big Family Food and Fun: August 23-29, 2026
  • Big Family Food and Fun: August 16-22, 2026
  • Big Family Food and Fun: August 9-15, 2026
Home  ~  Simple Meals  ~  Club Membership  ~  Shop  ~  Privacy Policy  ~  Disclosure  ~ Contact

Copyright © 2026 · Beautiful Pro Theme on Genesis Framework · WordPress · Log in