Heavenly Homemakers

Encouraging women in homemaking, healthy eating and parenting

  • Home
    • About
    • FAQs
  • Recipes
    • Bread and Breakfast
    • Condiments
    • Dairy
    • Main Dishes
    • Side Dishes and Snacks
    • Desserts
    • Gluten Free
    • Instant Pot
    • Crock Pot
    • Heavenly Homemaker’s Weekly Menus
  • Homemaking
    • Real Food Sources
  • Store
  • Contact
    • Advertise
    • Disclosure
    • Privacy Policy
  • Simple Meals
  • Club Members!

Homemade Pistachio Pudding

September 14, 2010 by Laura 31 Comments

This post may contain affiliate links. For more information, please see our disclosure policy.

Well, I’m not sure when I last ate a bowl of pistachio pudding (before today). It’s been a decade probably since I last had some, but I guarantee you that the only pistachio pudding I’ve ever had (before today) came out of a little box, was instant and sported the brand name that starts with a “j” and rhymes with wello.
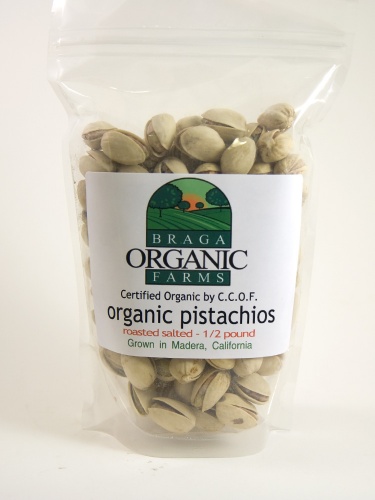
A few weeks ago I got a great box from Braga Organic Farms full of organic nuts, nut butter and trail mix. I’ve been saving their pistachios JUST to make this pudding! I’ve never made pistachio pudding before and while it wasn’t hard to make…it also wasn’t a “throw it in the pan, mix it up and you’re done” kind of recipe.

Oh. My. But it was so worth the little extra effort it took to make. The taste of Homemade Pistachio Pudding is NOT even comparable to the powdery mix of um….bello pudding.

I found a recipe on Cooks.com, but then adapted it to make it a little easier and a little healthier. I’m having this for breakfast tomorrow, oh yes I am.

Homemade Pistachio PuddingYum

1/3 cup pistachios
2 Tablespoons real grade b maple syrup
2 cups milk
1/3 cup real grade b maple syrup
2 Tablespoons corn starch or arrowroot powder
dash of sea salt
2 egg yolks
1/2 cup pistachios (crushed)
1 Tablespoon butter
1/2 teaspoon vanilla extract

Get the family busy shelling pistachios… :)

Objects in picture are smaller than they appear.
WOW do those look like giant pistachios, or is it just me?

Just to make life easier, get your two egg yolks beat up in a bowl. Set the bowl by the stove ready and waiting for later. This is going to come in very handy in a few minutes.

Make a “pistachio paste” by running the 1/3 cup of pistachios through a food processor for a minute or two until they are like crumbs. No wait, not until they are like crumbs. Until they are crumbs.
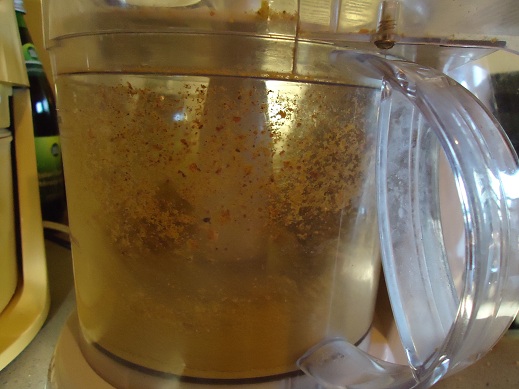
 

Mix the pistachio crumbs with 2 Tablespoons of real grade b maple syrup to make a paste.
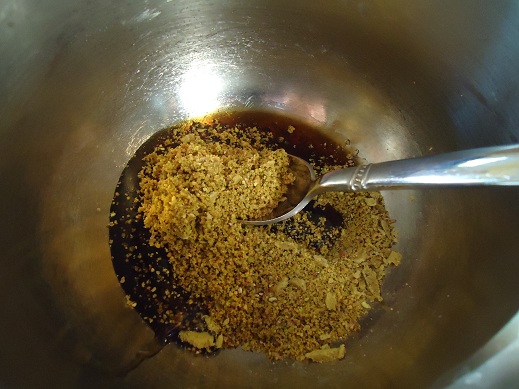
 You will want to dip your finger in the bowl of pistachio paste – but don’t! Hold yourself back. This yummy concoction is for the pudding. Be strong.
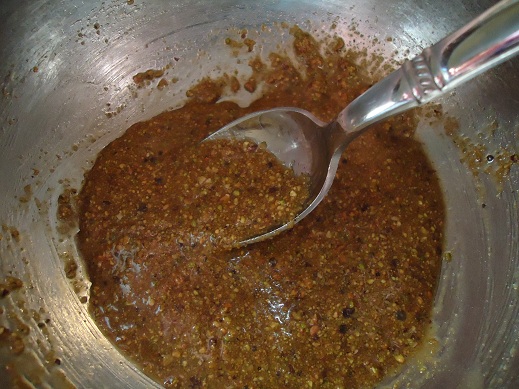
Use a whisk to stir your “pistachio paste” into the milk (in a saucepan). Heat the milk mixture on medium heat, stirring with a whisk for about a minute.
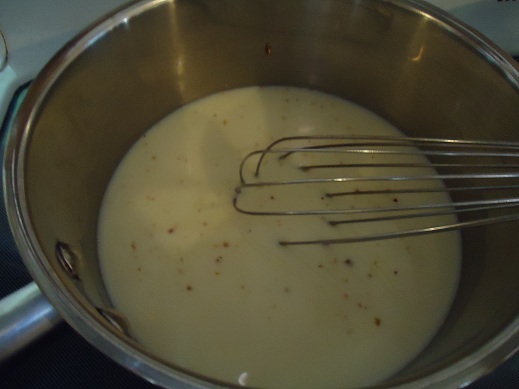


Stir in 1/3 cup real grade b maple syrup, 2 Tablespoons corn starch or arrowroot powder and a dash of sea salt. Continue to stir over medium heat until the mixture thickens.
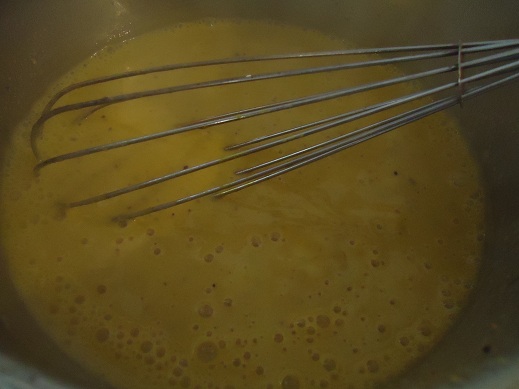
Once the mixture is thick and bubbly, remove it from the heat. Spoon out 4 Tablespoons of the milk mixture into the waiting bowl of egg yolks (told ya it would be handy to have that done ahead of time).

Stir it around and mix it up well (this keeps the eggs from getting funky in the big pan of hot pudding).
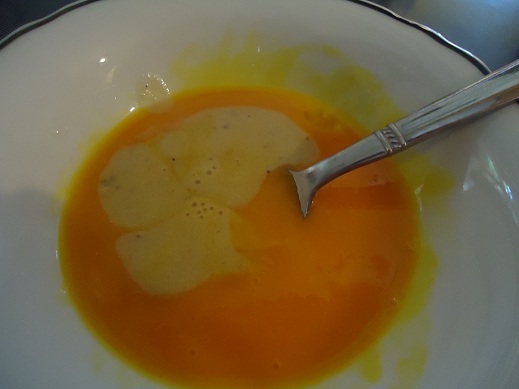
 

Pour the egg mixture into the pan with the rest of the pudding mixture and stir over medium heat for one minute.
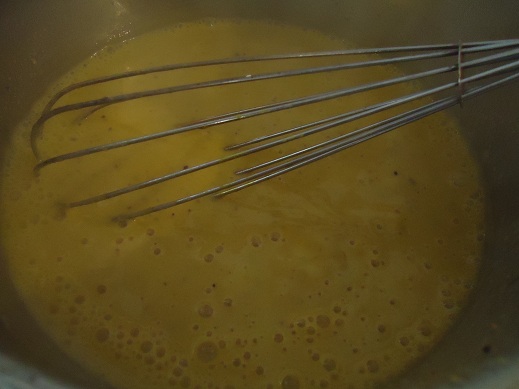
 

Remove the pudding from the heat and stir in 1/2 cup crushed pistachios, 1 Tablespoon butter and 1/2 teaspoon vanilla extract.
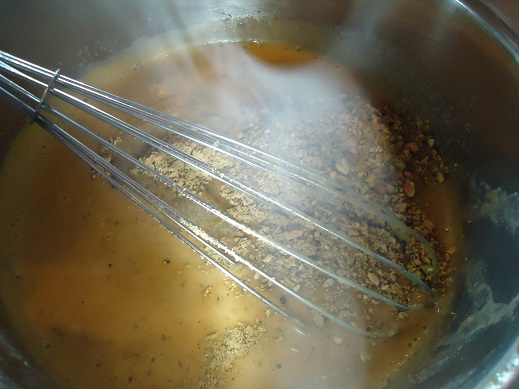
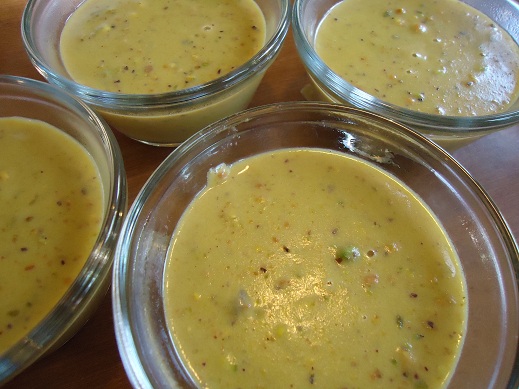
Pour into serving bowls (6 servings).

Eat the pudding while it’s warm if you just can’t wait (like somebody I know). Or put the pudding in the fridge to chill for a couple of hours.
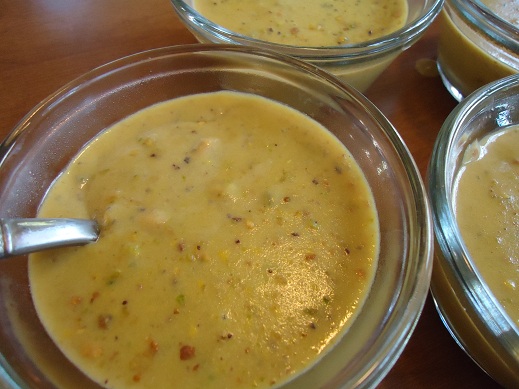
 

Sure, it’s kind of a funky color, but what do you expect when you mix brown maple syrup with yellow egg yolks and green pistachios? The taste is fantastic…I will be needing to order more pistachios soon!

I’m very excited to share that we’ve recently teamed up with Braga Organic Farms to work out a nice discount for you, the (lovely, talented, delightful, sweet…) Heavenly Homemaker Readers. If you place an order and use the code home, you’ll receive 10% off. We’ve loved working with Braga Organic Farms and think it’s super cool that they are a family-owned farm/business located in Madera, California…right outside the town where Matt grew up! No wonder their nuts taste so good!

And no, I didn’t just mean to say that my husband is a nut. Although he did choose to marry me…


Heavenly Homemaker's Club Members: Access your homepage and all your fantastic resources here! Not a member yet? Please join us!

Homemade French Dressing

August 22, 2010 by Laura 38 Comments

This post may contain affiliate links. For more information, please see our disclosure policy.

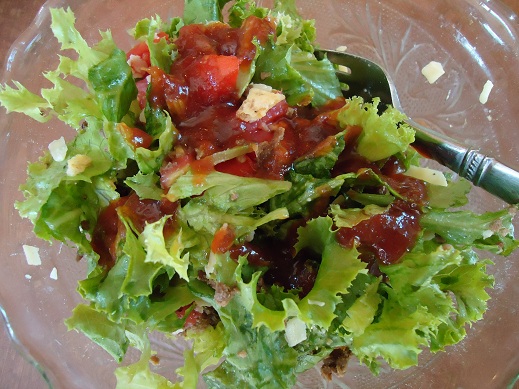
I figured out a French Dressing recipe that includes only real food ingredients and avoids high fructose corn syrup! It also means I can enjoy Taco Salad the way I used to – again without the high fructose corn syrup. Mmm, real food. I love revisiting my favorites and eating them in a healthier way!

french_dressing_2

Back in the day when I didn’t know what high fructose corn syrup was or understand that it was bad for us…I used to make a killer taco salad with Catalina Salad Dressing. Man that stuff tasted good!

I’d mix up a big bowl of lettuce, taco seasoned meat, shredded cheese, chopped tomatoes, chili beans, crunched up tortilla chips – and toss it all with Catalina. Such a perfect summer supper (or dinner, or whatever).

After a little experimenting, I came up with a yummy homemade French salad dressing that tastes even better than the store bought ever tasted! It’s so easy to put together, it’s inexpensive to make, and it tastes wonderful in my taco salad! It’s a blast from the past, only better.

Homemade French DressingYum

Homemade French Dressing
 
Save Print
Author: Laura
Ingredients
  • ¾ cup ketchup
  • 2 Tablespoons sucanat (you can substitute brown sugar if you want)
  • ½ cup olive oil
  • ¼ cup red wine vinegar
  • ½ teaspoon garlic powder
  • ¼ teaspoon liquid smoke
  • 1 Tablespoon ground celery seed
Instructions
  1. Put all ingredients directly into a pint sized jar.
  2. Put the lid on and shake it well.
  3. Refrigerate.
3.4.3177

I recommend Muir Glen Organic ketchup because guess what? It doesn’t include high fructose corn syrup.

Easy Taco Salad with homemade French Dressing

Remember that you can also find recipes for homemade Ranch Salad Dressing, Italian Salad Dressing and Thousand Island Salad Dressing in the Condiments Page of my recipe section!

And also…if that’s just too much salad for ya…you can find a recipe for Chocolate Caramel Truffles on the Desserts Page. I’m always willing to accommodate. ;)

Heavenly Homemaker's Club Members: Access your homepage and all your fantastic resources here! Not a member yet? Please join us!

Homemade Ice Cream Sandwiches

August 18, 2010 by Laura 21 Comments

This post may contain affiliate links. For more information, please see our disclosure policy.

When I mentioned that I was making homemade ice cream sandwiches for the YC ladies soccer team, several of you said, “You ARE going to share your recipe aren’t you?!”

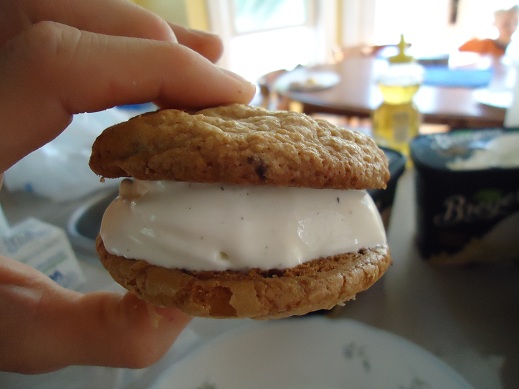
Uh yeah. Who am I to hold back on a recipe that includes cookies and ice cream? That would just be mean. Although this isn’t really a recipe exactly.  I just put ice cream between two cookies and called it a sandwich. I didn’t even make the homemade ice cream this time. I needed to make 40 of these and I was making homemade ice cream for the team another day…so this time it was Breyers to the rescue!

First off, I baked TWO double batches of these chocolate chip cookies. I used a Pampered Chef medium sized scoop so that my cookies would mostly, sort of turn out uniform in size. You must make sure your cookies are completely cooled for obvious ice cream sliding avoidance purposes. In fact, I made mine ahead and froze them. Then they were nice and cold and ready for ice cream.

Here’s the Homemade Ice Cream Sandwich math:

~A double batch of chocolate chip cookies made about 40 big cookies, which was enough for 20 ice cream sandwiches. Therefore I needed TWO double batches of chocolate chip cookies to make 40 ice cream sandwiches. I suppose that would be a quadruple batch, wouldn’t it?
~One container of Breyers Ice Cream was enough for thirty ice cream sandwiches.

I let the ice cream soften just a bit on my counter top. By “just a bit” I mean I have  no idea exactly how long I left it there. I brought it home from the store and put a few other groceries away and helped one of the kids on a math problem then got out supplies to make the sandwiches then started some meat cooking on the stove then washed my hands and finally started putting the sandwiches together. Yeah, about that long. The ice cream was then nice and soft for scooping, but not yet running all over my counter and down into my silverware drawer.

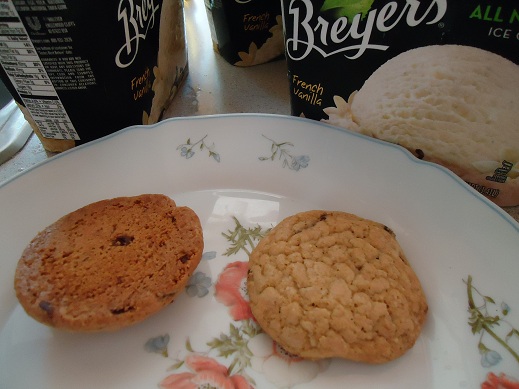
Once your ice cream is soft – but not too soft, good luck with that – pick two cookies that look pretty similar in size.

ice_cream_sandwich_1

Yum

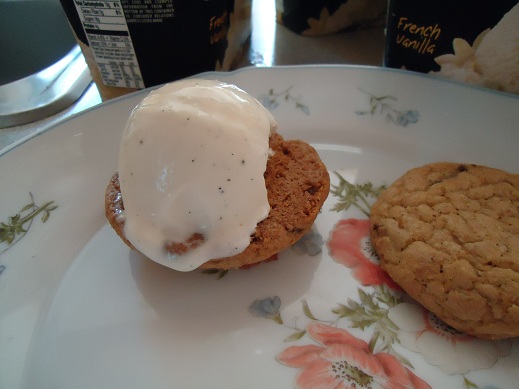
Place a scoop of ice cream onto one of the cookies. If you get some on your fingers you are not allowed to lick it off. You are making these to share with other people right? Work hard to avoid the temptation to lick your ice creamy fingers. It will not be easy. But you can do it. If I can do it, you can do it. Believe me. Because it was lunch time and I hadn’t eaten yet.

ice_cream_sandwich_2

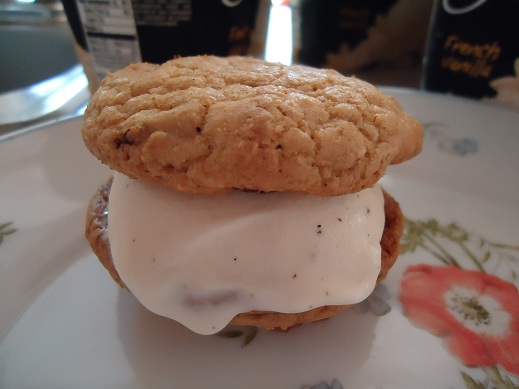
Place the second cookie on top of the ice cream which is on top of the first cookie. Squish it down just a little bit. But not too much. If you squish too much the ice cream will ooze all out of the sides of the sandwich and wow will you have a mess. So don’t blame me if you squish too hard. I warned you to do slight squishing.

ice_cream_sandwich_3

Hold up the pretty ice cream sandwich and show all family members and friends who are around and wish to see it. And then tell them that sorry, they can’t eat it yet.

ice_cream_sandwich_4

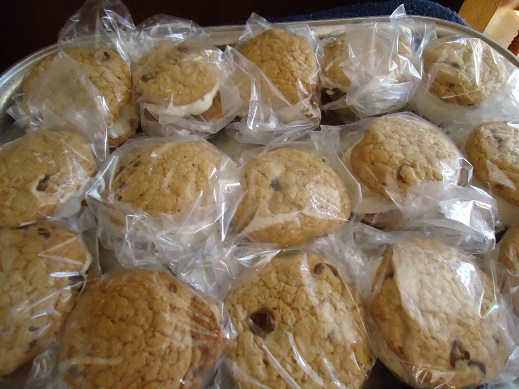
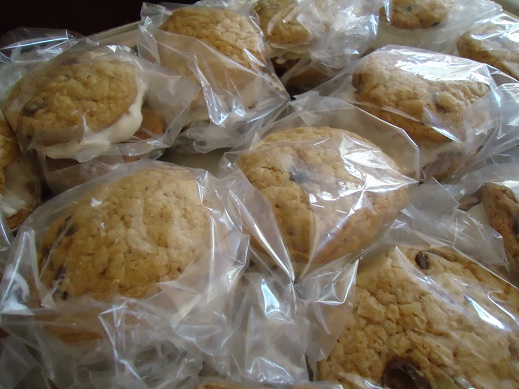
Place each ice cream sandwich in a little fold top sandwich bag. Who knew those were really for ice cream sandwiches and not just ham and turkey?

ice_cream_sandwich_6

Place all the wrapped sandwiches on a pan in the freezer for at least two hours or for however long you need to keep them there. Or for however long you can keep them there as these are rather tasty and people will want to take them out of the freezer and eat them.

ice_cream_sandwich_7

When you are eating your very own ice cream sandwich, you are then allowed to do all the squishing of the ice cream you would like to do. You are also then allowed to lick your fingers…and the ice cream that may or may not be running all the way down your arm toward your elbow.

Go ahead, see if you can lick your elbow.

You tried it just now didn’t you?

For the record, I am not quite able to reach my elbow to lick it. I will need to catch the running ice cream before it reaches my elbow. You?

No, not my elbow…yours. You may NOT lick my elbow.

Lick your own elbow…if you can.

Can you?

Yeah, explain this one to your family.

“Mama, why are you sitting at the computer trying to lick your elbow?”

“Just getting ready to make Ice Cream Sandwiches, Dear.”

Heavenly Homemaker's Club Members: Access your homepage and all your fantastic resources here! Not a member yet? Please join us!

Healthy Strawberry Shortcake

June 10, 2010 by Laura 67 Comments

This post may contain affiliate links. For more information, please see our disclosure policy.

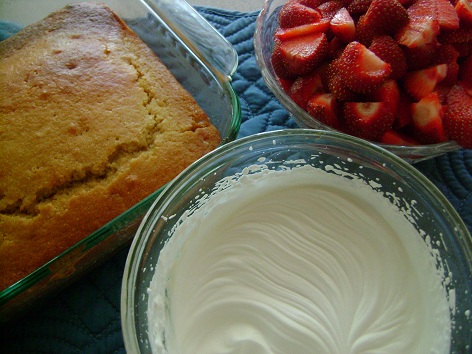
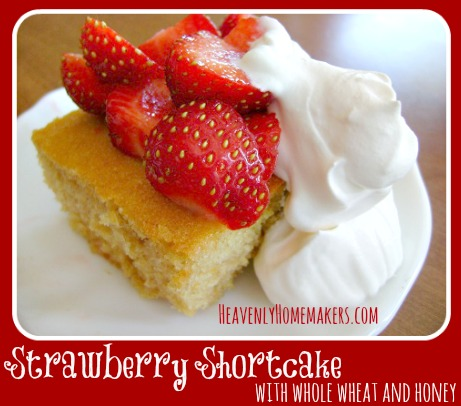
When fresh strawberries are in season, nothing much tastes better than Strawberry Shortcake. This variation of Strawberry Shortcake is lightly sweetened with honey and made with whole wheat flour. We had the entire cake eaten up in just a few minutes!

strawberry_shortcake_2

Yum

 Strawberry Shortcake

1 1/3 cups whole wheat flour (I use freshly ground whole wheat)
1 teaspoon baking powder
2 eggs
1/2 cup honey
1/3 cup oil (I use coconut oil)
1 teaspoon vanilla extract
1/2 cup milk

4-5 cups of fresh, sliced strawberries
Whipped cream (fresh cream whipped to form soft peaks, with a bit of stevia added for sweetness)

Mix together flour and baking powder. Add in eggs, honey, oil, vanilla and milk. Stir well (or mix well with hand mixer). Pour into a well buttered 8×8 inch baking pan. Bake at 350° for 20-25 minutes.

Allow cake to cool completely. Top with fresh strawberries and whipped cream. (9 servings)

Strawberry Shortcake with Whole Wheat and Honey

If you’d like more ideas for what to do with all the fresh strawberries that are in season right now, you may want to take a look at this fun recipe list!

Heavenly Homemaker's Club Members: Access your homepage and all your fantastic resources here! Not a member yet? Please join us!

Sloppy Cornbread Muffins

May 26, 2010 by Laura 38 Comments

This post may contain affiliate links. For more information, please see our disclosure policy.

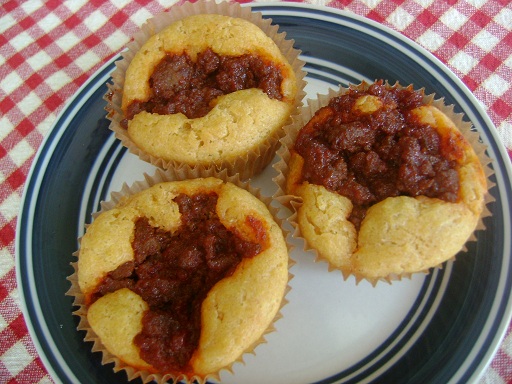
sloppy_corn_muffins_4

Yum

I’ve decided that I love sloppy joes more than any 36 year old mama ought to love sloppy joes. (Sloppy joes aren’t just kid food, right?)  I’m a little crazy when it comes to my hamburger meat. I like it a lot. Bring on the beef.

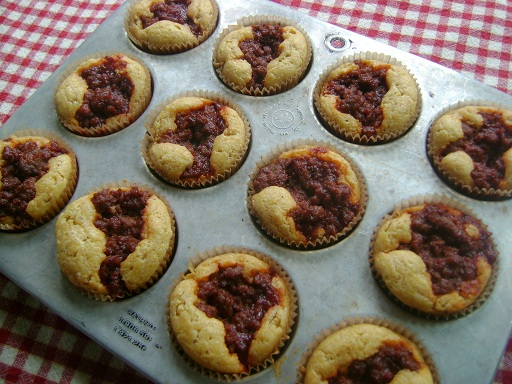
As you may recall, this Sloppy Cornbread is a very fun way to eat Sloppy Joes without buns. Over the weekend I experimented making the Sloppy Cornbread into muffins….and YUM!

To make Sloppy Cornbread Muffins you will need:

1 recipe of Cornbread
1/4 recipe of Sloppy Joes (which is 1/2 pound of meat)

which will make 12 Sloppy Cornbread Muffins 

These freeze and reheat very well…which means you may want to use:

a double batch of Cornbread
1/2 recipe of Sloppy Joes (which is one pound of meat)

which will make 24 Sloppy Cornbread Muffins

Is this getting confusing? If you make up the full Sloppy Joe recipe, you could just make some of it into Sloppy Cornbread Muffins, then freeze the remaining Sloppy Joes mixure. Or, you could just bring it over to me and I’ll get a fork and eat it right out of the pan.

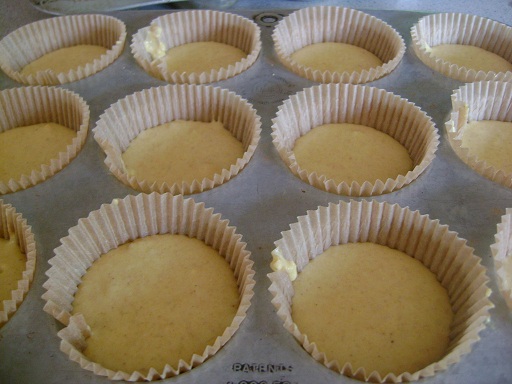
sloppycornmuffins

First fill your muffin cups half full (or half empty depending on the kind of day you’re having) with cornbread batter.

The muffins do tend to stick a little to paper muffin liners…so you may have better success just buttering each muffin cup very well.

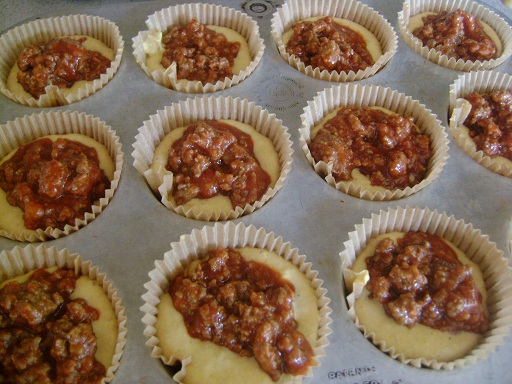
sloppycornmuffins2

 Spoon about a Tablespoon or two of Sloppy Joe meat into each muffin cup.

Bake in a 400° oven for 20 minutes.

sloppycornmuffins3

So, what kind of day are you having? Would your muffin cups be half empty…or half full?

Heavenly Homemaker's Club Members: Access your homepage and all your fantastic resources here! Not a member yet? Please join us!

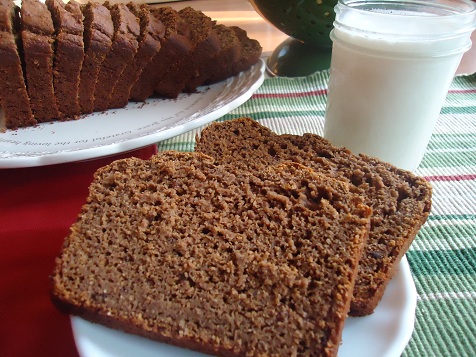
Whole Wheat Banana Bread and Muffins

May 19, 2010 by Laura 107 Comments

This post may contain affiliate links. For more information, please see our disclosure policy.

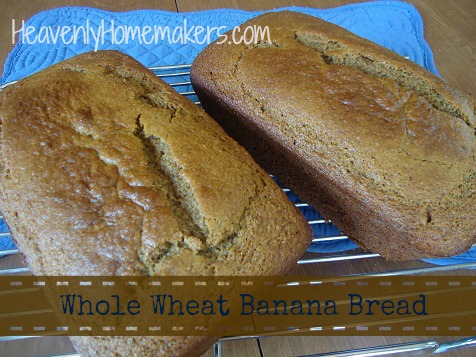
banana_bread

Did I ever tell you about the time I almost forgot to put the bananas into my banana bread?

I have these finer moments in my kitchen from time to time. They mostly happen while I’m trying to cook and talk simultaneously. If I’m talking on the phone while mixing up a recipe, I tend to leave out key ingredients. Or add the same ingredient twice.  It’s ridiculous.  I think it’s crazy that I can usually multi-task quite well…but I can barely have a conversation with someone while I cook. Duh. Just be glad I type these posts after I’m finished cooking. Otherwise, these recipes would just be plain scary.

And so, because I care too much not to share, here’s a handy baking tip:  When making Banana Bread or Muffins, be sure to add the bananas. The final product tastes much better this way. I’m nothing if not helpful.

Whole Wheat Banana Bread and MuffinsYum

1 3/4 cups whole wheat flour (I use freshly ground flour from hard white wheat)
1 teaspoon baking powder
1/2 teaspoon baking soda
1/4 teaspoon sea salt
1 cup mashed over-ripe bananas (about 2-3 bananas)
1/3 cup honey
1/4 cup melted butter
2 eggs

Stir together flour, baking powder, baking soda and salt. In a separate bowl, mash bananas, or puree them in a blender. Mix mashed bananas, honey, melted butter and eggs into flour mixture.

For Bread:  Spread batter into a well buttered bread pan. Bake in a 350° oven for 50-60 minutes or until a toothpick inserted into the middle comes out clean.

For Muffins:  Spoon batter into 12 buttered or paper lined muffin tins. Bake in a 400° oven for 20 minutes.

Speaking of finer moments in my kitchen…did I ever tell you about the time I made a lovely lasagna ahead of time so that I would be all ready for my company that night? Because, you see, it’s great to be prepared when you’re having company. Oh, and it also helps to get the lasagna out of the fridge and BAKE IT at dinner time. Being prepared doesn’t help at all if you don’t actually bake your lasagna. Yeah, dinner was a little late that night.

Heavenly Homemaker's Club Members: Access your homepage and all your fantastic resources here! Not a member yet? Please join us!

Healthy Celebrations: Double Lemon Cupcakes (a guest post!)

May 11, 2010 by Laura 13 Comments

This post may contain affiliate links. For more information, please see our disclosure policy.

healthy_celebrations_med

Yum

Please join me in welcoming Holly, who is guest posting today to share her awesome Double Lemon Cupcake recipe with us! I can’t wait to give these a try!
—————————————————–

Hello Heavenly Homemakers readers! My name is Holly. I am a Christian, a military wife and momma to an 18 month old son, and I am really excited to be sharing a recipe (or three) with you. The past year I have been learning about traditional foods; I have reinvented how I shop, cook, eat, and feel about food. The most recent milestone in this journey was birthday cake. Remember when Laura asked us to choose between chocolate and vanilla? Well, to celebrate my 24th birthday I chose option C.  

I wanted  a birthday dessert that satisfied my emotional desire for cake, but also fulfilled my sensible need to eat wholesomely. I knew that if I did not satisfy both halves I would be left either feeling like a whole wheat martyr or a big sugar-filled failure. Yuck. Blessedly, I found a happy medium with these  sweet and tangy cupcakes. 

lemon_cupcakes_6

Let me just say that I am normally very relaxed baker, I never sift. I fudge the temperatures and can be lazy with the mixing. But for this recipe, if I say sift I do mean sift. The same goes for temperatures and times. It may seem fussy for some of you, but the results are rewarding. 

Double Lemon Cupcakes


3 c whole wheat flour
1 tbsp baking powder
½  tsp sea salt
1 c butter, room temperature
1 c orange blossom honey
4 large eggs, room temperature
the zest of 3 lemons (I recommend organic because you are consuming the peel), plus 2 tbsp lemon juice
1 tsp vanilla extract
1 c buttermilk 

Preheat oven to 325° F. Butter and flour the inside of two round cake pans or two dozen muffin tins. Zest the lemons (just the yellow part, try to avoid the white pith because it is bitter), you want this to be very fine. Sift the dry ingredients together and set aside. Add the lemon juice to the buttermilk. 

Cream the butter and the honey until they are nice and fluffy. Add the eggs one at a time, until well mixed in. Add the zest and vanilla. Add the flour and buttermilk in three parts. Beat until just combined. Pour the batter into the prepped pans and bake until golden brown and they pass the toothpick test, 30-35 minutes for a cake, 25 minutes for cupcakes. 

lemon_cupcakes_2

While the cakes are baking, mix up a nice batch of… 
Lemon Curd   

8 large egg yolks
Finely grated zest of 2 lemons
½  c plus 2 tbsp lemon juice (about 3-4 lemons)
½ c orange blossom honey
teeny pinch of salt, about 1/8 tsp
¾ c unsalted butter (10 tbsp or 1 ¼ sticks) cold, cut in pieces  

Wisk together all ingredients except butter and salt in a medium saucepan. Cook over medium-high heat, stirring constantly with a wooden spoon. When the mixture registers 160° F on an instant-read thermometer and is thick enough to coat the back of the spoon, remove from heat. This should take about 8-10 minutes. If you don’t have a thermometer, just do what I did and use good quality eggs. 

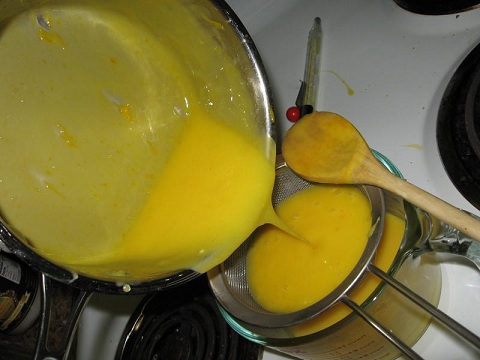
Remove pan from heat and add salt and butter, one piece at a time, stirring until smooth after each addition. Strain through a sieve. It is normal for small bits of cooked egg to strain out, don’t worry you did it right. :) Cover this with plastic wrap and let it cool in the fridge at least one hour.

lemon_cupcakes_3  

Fill your cupcakes with lemon curd. You can use a pastry bag and large tip, or poke a hole with the wrong end of a wooden spoon and use a plastic baggie with a corner snipped off. Spread extra curd on top of the cupcake. If you’re making a cake, spread the lemon curd between the two layers. Then whip up your frosting. 

Soft and Fluffy Frosting

8 egg whites
¾ c orange blossom honey
1 tsp vanilla extract. 

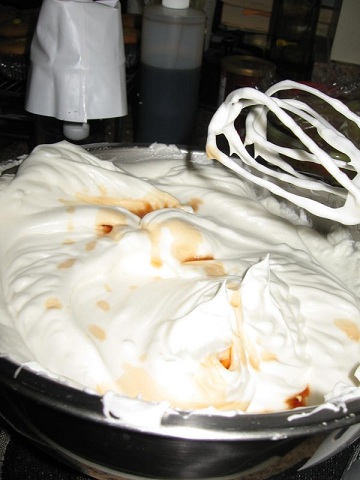
Combine egg whites and honey in a large heat-proof mixing bowl (or the bowl for your stand mixer if you have one and it’s heat-proof) set over a pan of simmering water. Wisk rapidly for two minutes  Make sure your water does not boil! You will end up with scrambled egg frosting and it will be gross. Cook this until it reaches 160° F on an instant-read thermometer (or if like me you don’t have one, use good eggs and cook for two minutes). Remove from the heat and beat on your mixer’s highest speed for  until soft and fluffy, about 7-9 minutes. Beat in the vanilla. Use this frosting immediately. 

lemon_cupcakes_4

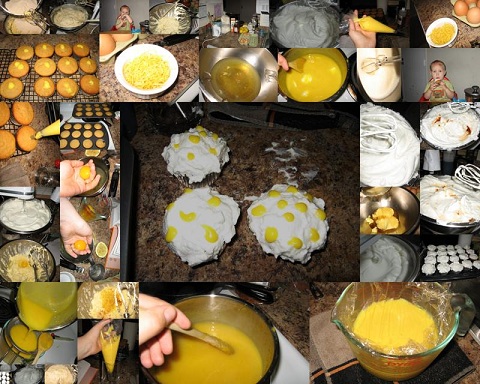
I used (some of the) leftover curd to decorate the tops of some of the cupcakes. Or you could eat it with a spoon and not tell anyone there were leftovers. I won’t look. 

lemon_cupcakes

Thanks Laura for letting me share my recipes with you and your readers!

Holly wanted me to be sure to let you know that the curd will keep in the fridge about 3 days, but it is best served in the first 24-36 hours, and the frosting should be used immediately after it’s made, because it will start to deflate after a few hours. It’s still edible for several days, but the quality goes down after 6-8 hours.
——————————————————-

This post is linked to Works for me Wednesday.

Heavenly Homemaker's Club Members: Access your homepage and all your fantastic resources here! Not a member yet? Please join us!

Make Your Own Frozen Hashbrowns

April 27, 2010 by Laura 311 Comments

This post may contain affiliate links. For more information, please see our disclosure policy.

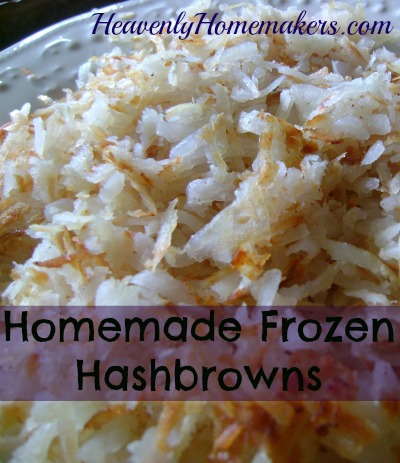
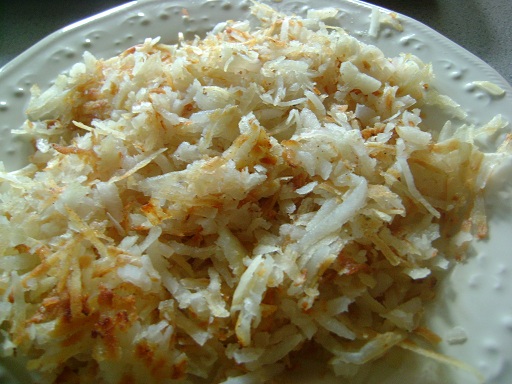
It’s remarkably easy to make your own frozen hashbrowns!

Homemade_Frozen_Hashbrowns

Yum

I’ve always had a hard time making good homemade hashbrowns. When my friend Brenda shared this little trick with me…I gave it a try and it WORKS!

Not only does this make delicious homemade hashbrowns, it is a great way to use up an abundance of potatoes before they start sprouting. Remember how I got 50 pounds for such a good price last week? I plan on putting up several pounds of them into the freezer in hashbrown form. That way, I’ve preserved some of my good organic potatoes, plus I’ve got EASY hashbrowns ready to pull out and cook up for breakfast or dinner anytime I need them!

Oh, and can you say “inexpensive”? Yes, I thought you could. These hashbrowns are so inexpensive, especially when you’ve taken advantage of a good deal on potatoes. So let’s get started, shall we?

How to Make Frozen Hashbrowns

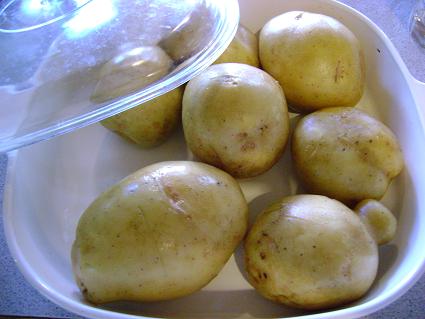
First, scrub your potatoes…as many as you want.

bakedpotatoessm

Bake the potatoes. I avoid using aluminum foil if at all possible in baking, so I always just place my scrubbed potatoes into a covered dish and bake them for about 1 1/2 hours at 350°. Be sure to stab each potato with a knife before baking so you don’t have a massive potato explosion in your oven. Unless you want a massive potato explosion in your oven. Then feel free to leave them unstabbed.

hashbrowns7sm

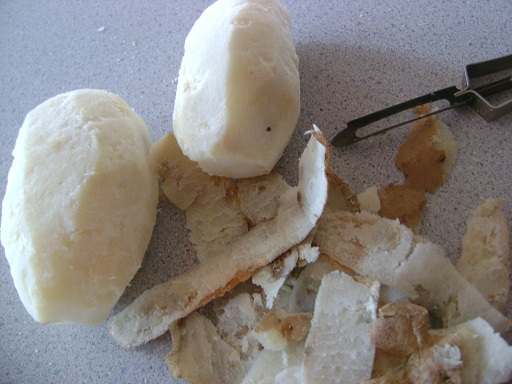
Allow your baked potatoes to cool. Peel the potatoes.

hashbrowns8sm

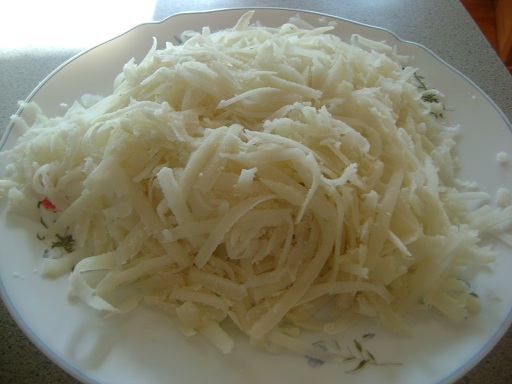
Shred your potatoes with a cheese grater. They shred very easily because they are soft after baking.

hashbrowns1sm

See how lovely?

At this point, you can either cook them, or freeze them. To freeze them, lay them flat on a parchment paper lined cookie sheet. Put the cookie sheet into the freezer for a couple of hours or until the potatoes are frozen, then transfer them into freezer bags to cook up when you’re ready. Oh so convenient!

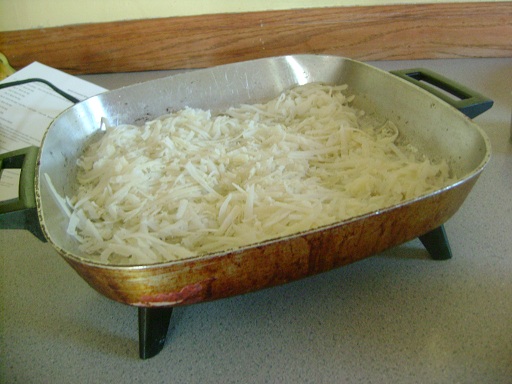
hashbrowns2sm

I usually cook my hashbrowns in my electric skillet or in a cast iron skillet on the stove.
I use a generous amount of butter, because I love the flavor butter gives my taters.
I also use quite a bit of sea salt or onion salt.

If the hashbrowns are frozen, you can cook them the same way as if they were not frozen…it will just take a few more minutes.

Cook them on one side for 4-5 minutes, then turn. Try not to turn them too much so they don’t get mushy. Cook until the potatoes are golden brown and slightly crispy.

hashbrowns3sm

Yum, yum, yum! Ever since I discovered this hashbrown making trick…we have the most delicious hashbrowns. Before, I had simply shredded a raw potato, then tried to fry it. I always ended up with a mushy mess. Blech.  The trick:  Bake the potatoes first. It works so well! PLUS, the baked potato does not turn brown and ugly like a raw potato does once you shred it.

You can use this same trick to make and freeze diced potatoes or potato chunks. Fry those up in butter and you’ve got some wonderful fried potatoes!


Heavenly Homemaker's Club Members: Access your homepage and all your fantastic resources here! Not a member yet? Please join us!

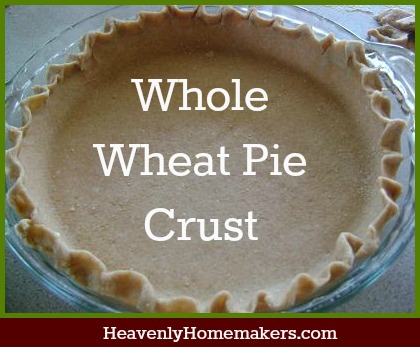
Whole Wheat Pie Crust

April 20, 2010 by Laura 247 Comments

This post may contain affiliate links. For more information, please see our disclosure policy.

Making pie crusts has never come easy to me. In fact, if you recall…I put out an all call many months ago and used YOUR recipes to put together the free ebook, For the Love of Pie!

Since that time, I have discovered a delicious and healthy way to make whole wheat pie crust! I am SO excited!

The secret ingredient is Tropical Traditions Palm Shortening. We all know to stay away from regular shortening (like crisco) right? I’ve tried making pie crusts with butter, and that works too (especially in these Mini Apple Pies). But, since I tried using Palm Shortening from Tropical Traditions, I feel like my days of frustration with pie crust may be over. When I tried making a whole wheat crust with Palm Shortening, it formed perfectly. It rolled out like a dream. I could be heard shouting out Whooops and Woohoos from my kitchen for miles around. I’m telling you, this from the lady who never could make a pie crust.

Here’s how you make the crust…

Whole Wheat Pie CrustYum

1 1/4 cup whole wheat flour
1/4 teaspoon sea salt
1/3 cup Palm Shortening (or butter)
4-5 Tablespoons cold water

I found this recipe to work best in my food processor. If you don’t have a food processor, you can cut the shortening into the flour with a pastry blender.

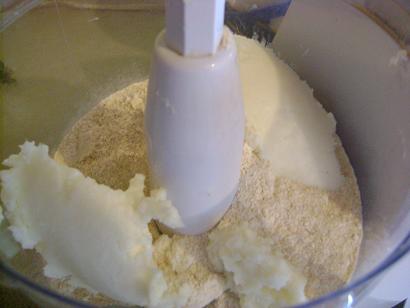
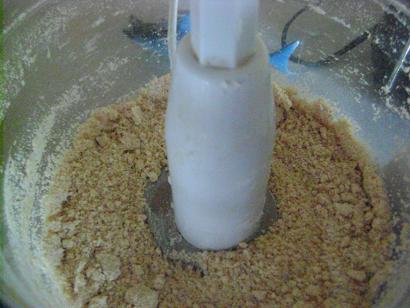
Place flour, salt and shortening in food processor. Blend until shortening is cut throughout the flour and the mixture resembles crumbs.

pie_crus_palm_shortening_three_sm

Admire the crumbs…

pie_crust_palm_shortening_8sm

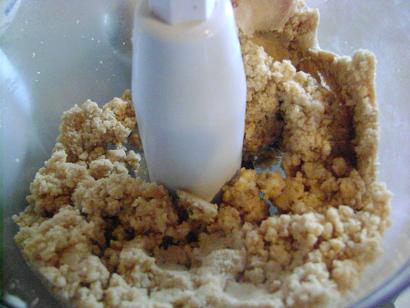
Begin adding water and processing (or stirring). If your dough looks like this, it doesn’t have enough water in it yet…

pie_crust_palm_shortening_five_sm

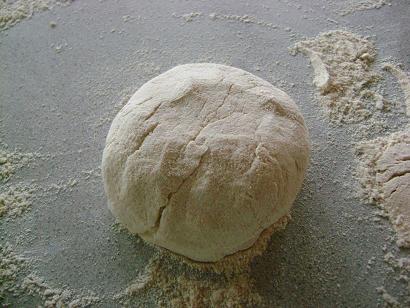
Add little bits of water until your dough will form a nice round ball.

pie_crust_palm_shortening_sm9

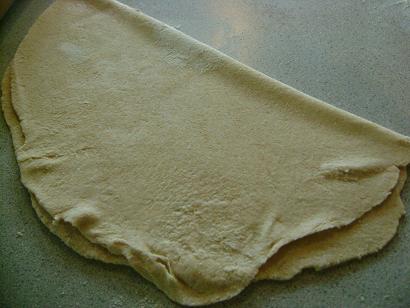
Roll out your dough  on a well floured surface. Fold it in half.

pie_crust_palm_shortening_10sm

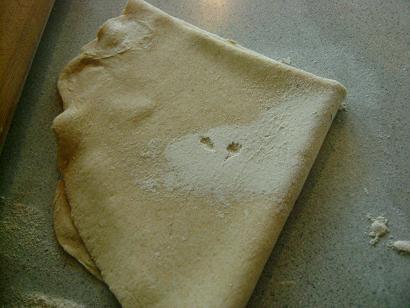
Then fold it in half again.

pie_crust_palm_shortening_11sm

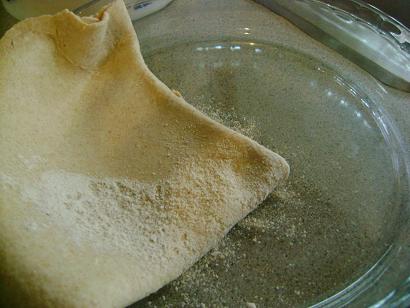
Place your dough in your pie dish with the folded corner in the center.

pie_crust_palm_shortening_12sm

Unfold the dough, shape it into the dish and make the edges pretty.

Whole Wheat Pie Crust

Here’s a little video tutorial I made that will maybe (hopefully) give you an idea about how I shape my pie crust. There are all kinds of different ways to make it pretty…this is just the way my grandma taught me.

Poke your dough a few times with a fork to keep it from poofing up in the oven.

Bake at 450° for 10-12 minutes or until the crust is golden brown.

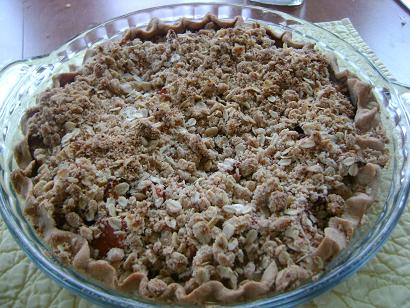
Mmmm…pretty dutch apple pie! (I just used this Mini Apple Pie filling and crumb topping recipe with the crust for this pie…in case you feel like you must try it right NOW!)  I must say, a glass of milk helps this pie go down real nice.

apple_pie_palm_shortening_sm


Heavenly Homemaker's Club Members: Access your homepage and all your fantastic resources here! Not a member yet? Please join us!

Chocolate Chocolate Chip Muffins

April 15, 2010 by Laura 118 Comments

This post may contain affiliate links. For more information, please see our disclosure policy.

I’m not sure if you are a chocolate lover like I am, but any recipe that has the words chocolate and chocolate written side by side makes me very happy and excited.

Chocolate_Chocolate_Chip_Muffins

My biggest hint on this recipe is to use sour cream instead of milk. (The recipe lists either one.) Sour cream makes these super moist.

This recipe is a definite family favorite. They taste amazing with a glass of milk or a cup of coffee!

Chocolate Chocolate Chip MuffinsYum

1 1/2 cups whole wheat flour
1/3 cup sucanat
1/4 cup cocoa powder
1/2 teaspoon sea salt
1/2 teaspoon baking powder
1/4 cup melted coconut oil or butter
2/3 cup milk or sour cream
1 egg
1/4 cup chocolate chips (I recommend these organic chips without soy lecithin)

Stir together dry ingredients. Mix in coconut oil, milk and egg. Fold in chocolate chips. Scoop into 9-12 paper lined muffin tins. Bake at 400° for 20  minutes. Makes about 9 muffins. (I double the recipe for my family of six.)

5.0 from 1 reviews
Chocolate Chocolate Chip Muffins
 
Save Print
Prep time
10 mins
Cook time
20 mins
Total time
30 mins
 
Author: Laura
Serves: 9 muffins
Ingredients
  • 1½ cups whole wheat flour
  • ⅓ cup sucanat
  • ¼ cup cocoa powder
  • ½ teaspoon sea salt
  • ½ teaspoon baking powder
  • ¼ cup melted coconut oil or butter
  • ⅔ cup milk or sour cream
  • 1 egg
  • ¼ cup chocolate chips
Instructions
  1. Stir together dry ingredients.
  2. Mix in coconut oil, milk and egg.
  3. Fold in chocolate chips.
  4. Scoop into 9-12 paper lined muffin tins.
  5. Bake at 400° for 20 minutes.
3.4.3177

If you have some good quality coconut oil, I highly recommend using it in this recipe. The coconut flavor with the chocolate is SO GOOD.

How about Chocolate Chip Bread?

Don’t mind if I do. Indeed, you can also make this recipe into a quick bread instead of muffins. Just spread the batter into a buttered loaf pan and bake at 350° for 50 minutes! Get all the details here.

chocolate_pumpkin_bread_2


Heavenly Homemaker's Club Members: Access your homepage and all your fantastic resources here! Not a member yet? Please join us!
« Previous Page
Next Page »

Join Our Community!

 Facebook Twitter E-mail Instagram Pinterest

Popular Posts

~ Will All of the Real Moms Please Stand Up?
~ Easy! Stir-and-Pour Whole Wheat Bread
~ How to Make Gatorade
~ 31 Real Food Breakfast Ideas
~ Dear Teenage Girls...
~ When Mom Takes a Step Back
~ The Inexpensive Health Insurance We Love!
~ Let's Talk Real Food Grocery Budgets

Check out our latest posts!

  • Big Family Food and Fun: September 6-12, 2026
  • Big Family Food and Fun: August 30-September 5, 2026
  • Big Family Food and Fun: August 23-29, 2026
  • Big Family Food and Fun: August 16-22, 2026
  • Big Family Food and Fun: August 9-15, 2026
Home  ~  Simple Meals  ~  Club Membership  ~  Shop  ~  Privacy Policy  ~  Disclosure  ~ Contact

Copyright © 2026 · Beautiful Pro Theme on Genesis Framework · WordPress · Log in