Heavenly Homemakers

Encouraging women in homemaking, healthy eating and parenting

  • Home
    • About
    • FAQs
  • Recipes
    • Bread and Breakfast
    • Condiments
    • Dairy
    • Main Dishes
    • Side Dishes and Snacks
    • Desserts
    • Gluten Free
    • Instant Pot
    • Crock Pot
    • Heavenly Homemaker’s Weekly Menus
  • Homemaking
    • Real Food Sources
  • Store
  • Contact
    • Advertise
    • Disclosure
    • Privacy Policy
  • Simple Meals
  • Club Members!

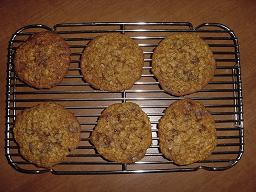
Giant Breakfast Cookies

October 29, 2008 by Laura Leave a Comment

This post may contain affiliate links. For more information, please see our disclosure policy.

Yum

1 cup butter, melted
¾ cup honey
2 eggs
1 t. salt
1 t. cinnamon
1 t. baking soda
1 t. vanilla
½ cup buttermilk
2 cups whole wheat flour
2 cups whole rolled oats
1 cup raisins or chocolate chips


Mix butter, honey, eggs, salt, cinnamon, soda, vanilla and buttermilk. Stir in flour and oats. Fold in raisins or chocolate chips. Scoop heaping tablespoons of dough onto a cookie sheet. Bake at 350 degrees for 15-20 minutes. Allow cookies to cool 3-4 minutes on cookie sheet before removing cookies to cool on a wire rack.

To soak the grain in these cookies before baking (in order to help them to digest better):

Melt and cool butter. In a glass bowl, stir together flour, oats, butter and cultured buttermilk. Add a bit more buttermilk than the 1/2 cup the recipe calls for if the grains are not all moistened. Cover and let the grains soak overnight. Stir in the remaining ingredients in the morning and bake as directed.


Heavenly Homemaker's Club Members: Access your homepage and all your fantastic resources here! Not a member yet? Please join us!

Cornbread and Cornbread Muffins

October 29, 2008 by Laura 44 Comments

This post may contain affiliate links. For more information, please see our disclosure policy.

Cornbread_Muffins

Yum

Cornbread Muffins

1 cup cornmeal
1 cup whole wheat flour
1 teaspoon baking powder
1 teaspoon salt
2 eggs
2 Tablespoon honey
¼ cup melted butter
1 cup buttermilk

Stir together dry ingredients. Add eggs, honey, butter and buttermilk. Stir until just mixed. Spoon batter into 12 muffin baking cups. Bake at 400 degrees for 20 minutes.

For Cornbread, spread batter into a buttered 9×9 inch baking pan. Bake at 400 degrees for 20 minutes.

Heavenly Homemaker's Club Members: Access your homepage and all your fantastic resources here! Not a member yet? Please join us!

But I Don’t LIKE Sweet Potatoes

October 28, 2008 by Laura 47 Comments

This post may contain affiliate links. For more information, please see our disclosure policy.

Don’t like sweet potatoes? Then might I suggest you try these Sweet Potato Streusel Muffins?

Sweet_Potato_Muffins

Sweet Potato Streusel MuffinsYum

2 cups whole wheat flour
2 teaspoons baking powder
1 teaspoon nutmeg
1/2 teaspoon sea salt
1/2 cup honey
1/4 cup raisins (optional)
1 egg
1 cup mashed sweet potato*
1/2 cup milk
3 Tablespoons melted butter

Topping:

3 Tablespoons sucanat (dehydrated cane sugar juice) or brown sugar
1 Tablespoon butter, softened
2 Tablespoons chopped nuts (optional)

Combine flour, baking powder, salt and nutmeg in a bowl. Add honey, raisins, eggs, sweet potato, milk and butter. Stir until just mixed. Scoop into 15 paper lined muffin cups.

In a small bowl, combine topping ingredients. Sprinkle evenly over each muffin. Bake at 400° for 15-20 minutes.

*To make mashed sweet potatoes:
Scrub two medium sweet potatoes. Stab them each with a knife, then place them in a glass baking dish. Cover and bake for 1 hour or until the potato is very tender. Allow potatoes to cool a few minutes, then carefully peel them. Mash the potatoes with a fork or potato masher.

You’ve gotta love a recipe that makes your house smell like everything your house is supposed to smell like in the fall! And, a recipe that helps you get sweet potatoes into your kids. And, a recipe that makes something simple that tastes so good!!

Heavenly Homemaker's Club Members: Access your homepage and all your fantastic resources here! Not a member yet? Please join us!

Can You Spell…Y.U.M.M.Y.?

October 20, 2008 by Laura 16 Comments

This post may contain affiliate links. For more information, please see our disclosure policy.

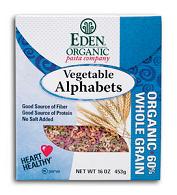
Last month, I decided to order this vegetable alphabet pasta from Azure Standard. It was on sale and looked like something fun for lunch. I decided to do a product review of it for you!

alphabetsoup4sm.JPG

Not only is this pasta fun…it is also healthy and yummy! (Hear the enthusiasm. See the raised eyebrows and cheesy grin.)  They are not expensive (when you’re talking about organic vegetable pasta that is)…and they were VERY easy to make. We got TWO meals out of this little box of Vegetable Alphabets. I NEVER get two meals out of one box of pasta.

Here’s how we enjoyed this Vegetable Alphabet Pasta:

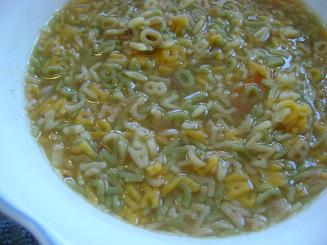
Alphabet SoupYum

1 pound beef soup bones
1 small onion
3 carrots
10 cups water
sea salt
1 box vegetable alphabet pasta

Boil beef soup bones, onions and carrots and water all morning (at least three hours) in a pot to make broth. Remove bones from broth. Pour in the pasta and sprinkled in quite a bit of sea salt. Boil the pasta in the broth for about 10 minutes, then lunch is served!

Print Grocery List

alphabetsoupsm.JPG

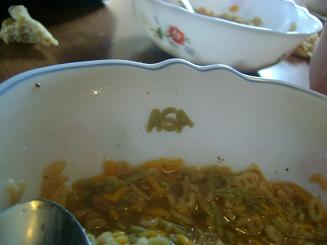
The kids loved it! Here’s one meal I actually allowed them to play with their food. If you look real close at the picture below, you’ll see that Asa stuck his name on the edge of the bowl.

alphabetsoup2sm.JPG

The best part of this meal? I decided to surprise the kids with my homemade pretzels made into letters too!! It was one word filled lunch!

alphabetpretzelssm.JPG
You’ve gotta love a personalized pretzel.

Elias was trying out my camera while I made the pretzels. So here we have the Headless Homemaker…

makingpretzelssm.JPG

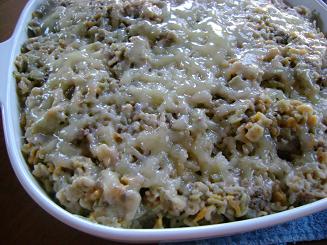
We filled up on the Alphabet Soup at lunch…then I used the leftovers to make this Alphabet Casserole:

Alphabet Casserole

3 cups alphabet pasta cooked in beef broth (most of the broth should be absorbed in the pasta)
1 pound ground beef, browned with onion
1 cup sour cream
sea salt to taste
1 cup shredded cheddar cheese

Stir together the pasta, meat and sour cream. Salt generously. Spread into a casserole dish. Sprinkle cheese on top. Bake uncovered in a 350 degree oven for 20 minutes or until bubbly.

alphabetcasserolesm.JPG

Both the soup and the casserole were very yummy! (Um, if I do say so myself.)

And, I’m not totally sure about this…but I think we were all just a little smarter after we ate these meals. At least our vocabulary was enhanced.

Really. (Absolutely.) (Without a Doubt.) (Enormously.)

;)

Heavenly Homemaker's Club Members: Access your homepage and all your fantastic resources here! Not a member yet? Please join us!

Mom is Great! She Gives Us Breakfast Cake!

October 14, 2008 by Laura 165 Comments

This post may contain affiliate links. For more information, please see our disclosure policy.

breakfast_cake_3


You know that song right? Dad is great, he gives us chocolate cake!  It’s an old Bill Cosby comedy thing. Matt sings this song everytime I make this for breakfast! Anyway…

This is a super easy breakfast that can be made ahead of time…or made fresh the morning you plan to eat it. I adapted my Giant Breakfast Cookie recipe to make this cake, and it’s moist and yummy. Especially with a glass of milk!

“Mom is Great”  Breakfast Cake (yes, I humbly named it myself)Yum

1 cup butter, melted and cooled
3/4 cup buttermilk
2 cups whole wheat flour
2 cups whole rolled oats
¾ cup honey
2 eggs
1 t. sea salt
1 t. baking soda
1 t. vanilla
1 cup raisins, chocolate chips or other dried fruit

Stir together butter, buttermilk, flour and oats in a glass bowl. Stir in honey, eggs, salt, baking soda and vanilla. Fold in raisins, chocolate chips or dried fruit. Pour into a buttered 9×9 inch baking pan. Bake at 350 degrees for 30-40 minutes or until toothpick inserted in the middle comes out clean.

breakfast_cake

Serve warm…serve cold…it’s good either way. Cut into squares and wrapped in plastic wrap, this is a great portable breakfast or snack too!

Who wouldn’t want cake for breakfast? Just watch, your family will be singing to you too if you serve this! “Mom is great! She gives us breakfast cake!”

Hehe…think we should tell ’em it’s good for them?

Heavenly Homemaker's Club Members: Access your homepage and all your fantastic resources here! Not a member yet? Please join us!

Awesome Easy Tomato Soup

September 15, 2008 by Laura 112 Comments

This post may contain affiliate links. For more information, please see our disclosure policy.

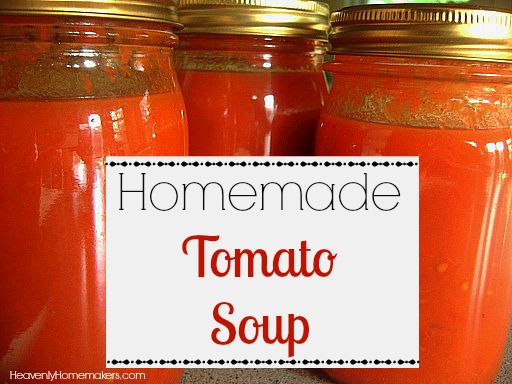
Homemade Tomato Soup

It’s almost that time of year again… The time when we can warm up at lunch with a grilled cheese sandwich and a bowl of tomato soup!

I LOVE this recipe that was given to me by my friend Anne…who got it from her friend Anne. (Yeah, like that’s not ever confusing.)  Along with canning lots of tomato sauce and tomato juice and salsa, I love canning several jars of Anne’s tomato soup for the winter! (Wait, which Anne is that?)

Most of the tomato soup you’ll find at the store will have high fructose corn syrup or sugar in it…

This recipe has no sugar…which is amazing because it tastes so yummy and sweet! Once when Matt was eating some, he asked at least three times, “This really doesn’t have any sugar in it?” :)

Homemade Tomato SoupYum

5 pounds chopped tomatoes
1 cup chopped onion
3 Tablespoon butter
1 1/2 teaspoon sea salt

Put everything in a big pot and cook it for about 3 hours. Then, put it into your blender and blend until smooth. Freeze it, or can it following these canning methods (25 minutes in the water bath).

I love having recipes like this that are so simple to make and healthy for my family!

Heavenly Homemaker's Club Members: Access your homepage and all your fantastic resources here! Not a member yet? Please join us!

Great Lunch Idea! Black Bean Salsa

August 26, 2008 by Laura 36 Comments

This post may contain affiliate links. For more information, please see our disclosure policy.

When you’re trying to eat a healthy diet, figuring out exciting lunches can be a challenge. And if you are trying to pack a healthy lunch to take to school or work, it can be even more of a challenge. This yummy Black Bean Salsa is delicious, good for you, and super easy to put together.

Pack it up “to go” with some blue corn chips, some fruit and a Peanut Butter Honey Bar, and you’ve got a great lunch that’s easy to take anywhere.

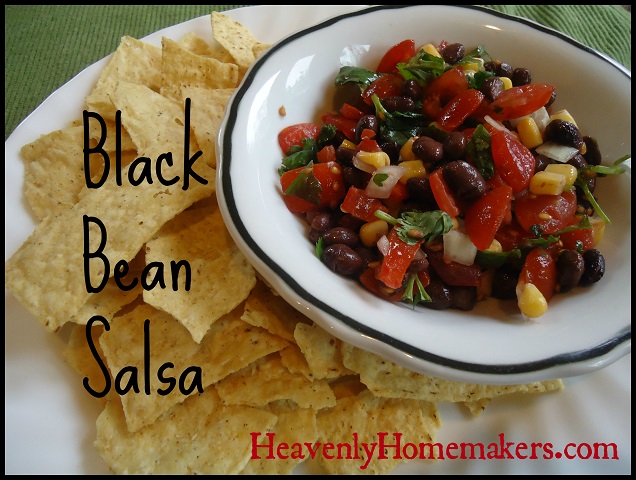
Black Bean SalsaYum

Great Lunch Idea! Black Bean Salsa
 
Save Print
Author: Laura
Serves: 6-8
Ingredients
  • 1 cup dried black beans
  • 5 tomatoes, diced
  • 1 small onion, chopped fine
  • 1 cup frozen corn, steamed and cooled
  • ¼ cup chopped cilantro
Instructions
  1. Soak beans in water overnight.
  2. Drain and cover with fresh water in saucepan.
  3. Bring to a boil, then simmer for 45 minutes.
  4. Drain.
  5. In large bowl, mix together beans, tomatoes, onion, corn and cilantro.
  6. Stir together.
  7. Store in refrigerator.
  8. Serve with corn chips or baked tortilla chips.
3.4.3177

black_bean_salsa_2

Make this salsa even easier by using canned black beans and canned corn…then all you have to do is quickly throw all the ingredients into a bowl and stir!

Mmmmm…I LOVE this stuff!

Need more “to go” lunch ideas?

The Make-Ahead Lunch Box

Look through all the recipes listed in our Make-Ahead Lunch Box series. Lunch can be so much more than a sandwich and carrot stick! All of the ideas will work great to make ahead, then pull out to pack for a lunch.

  • Cream Cheese BLT Sandwiches
  • Zucchini Carrot Bread
  • Hot Chocolate Souffle
  • Lazy Dogs
  • Taco Quesadillas
  • Bbq Beef and Cheese Hot Pockets
  • Coconut Fudge Bars
  • Bacon, Egg, and Avocado Salad
  • Raspberry Lemon Cream Cups
  • Nectarine Cream Cups
  • Ham and Cheese Pasta Salad
  • Whole Wheat Pizza Swirls
  • Taco Corn Fritters
  • Taco Salad
  • Turkey Ranch Pinwheels
  • Snowflake Quesadillas
  • Salmon Patties
  • Pasta Salad Bar
  • Pigs in a Blanket
  • Easy Cheesy Bean Dip
  • Chicken Salad
  • Black Bean Salsa
  • Black Bean Taco Salad
  • BLT Wraps
  • Calzones
  • Chewy Granola Bars
  • Cranberry Nut Trail Mix
Heavenly Homemaker's Club Members: Access your homepage and all your fantastic resources here! Not a member yet? Please join us!

Healthy Treat for Today: Yummy Lemonade…or Limeade

July 28, 2008 by Laura 9 Comments

This post may contain affiliate links. For more information, please see our disclosure policy.

We mostly drink water and milk at our house. Sometimes when we have company though, I feel kind of boring with the drink choices I have to offer.

At one point I realized…why, I have LOTS of drink choices! 

Would you like your water cold…or room temp? Filtered, or not filtered? In a mug or in a glass? Ice or no ice? Crushed ice or cubed? Would you like a straw? What color of straw would you like? 

By the time I get through all of my questions, my guests feel like they are at a five star restaurant that caters to their every need. (Or something like that.)

Occasionally though…it’s fun to treat the kids (or company) to something special and exciting. And when I really think about it, our blender works overtime making yummy smoothies, slushies and milkshakes. 

Here’s the lemonade I make every once in a while for a refreshing change of pace. Or…I use limes instead of lemons to make limeade. Or…I use lemons and limes and make lemon-limeade. (Ice or no ice? Crushed or…)

Refreshing Lemonade or Limeade

8 cups cold water
4 lemons or 4 limes or 2 of each
1/4-1/2 cup real grade b organic maple syrup

1. Put the 8 cups of water into a pitcher
2. Slice the lemons and/or limes in half. Squeeze the juice into the pitcher of water.
3. Add maple syrup.
4. Refrigerate.

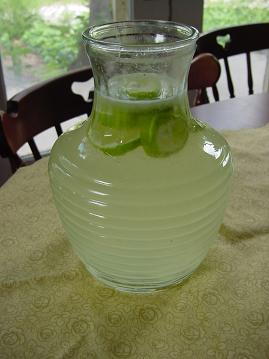
lemonadesm.JPG

This will make you pucker…but it’s so yummy on a hot summer day!

Sometime soon I’ll share some of the recipes for the milkshakes I like to make! Our blender has been working overtime this summer on these healthy treats!


Heavenly Homemaker's Club Members: Access your homepage and all your fantastic resources here! Not a member yet? Please join us!

Swiss Steak Trivia

July 21, 2008 by Laura 14 Comments

This post may contain affiliate links. For more information, please see our disclosure policy.

Here’s a quick and yummy Swiss Steak recipe for you…perfect to make with the great fresh vegetables you can find in your garden or farmers market!

It’s not like I have oodles of spare time on my hands…but I just had to take the time to wonder…

Why is Swiss Steak called Swiss Steak? 

Did it originate in Switzerland? Do I need to dress like I’m from Switzerland when I’m preparing this dish? Must I learn to speak a new language in order to serve Swiss Steak? 

These very important questions came to mind as I stood cooking our most recent Swiss Steak…so I googled it. Because I knew that as soon as I posted this recipe, I’d be swarmed with emails from all of you, full of questions such as these. I just couldn’t leave you hanging with so many unanswered questions. Hey, I’m here for you.

Get this! According to Wikipedia…Swiss Steak does not come from Switzerland at all. (Which is a huge relief because I am not a good student of foreign language.)

Swiss Steak is named Swiss Steak because the meat has undergone a process called “Swissing” in order to make it tender. 

I’ve never “swissed” my meat before…nor do I remember learning to “swiss” my meat in Home Economics in high school. Imagine that…I’ve gone all these years without ever “swissing”. 

Apparently I purchase my meat already “swissed” in the form of “Cube Steak”. How about that? I never knew that the cube steak in my freezer had been “swissed”. I’m willing to bet that some of you have some steak in your freezer that has been “swissed”. Eh? Am I right?!

Now that you have all the background information you could possibly ever need (and oh so much more) about Swiss Steak…here is my recipe. (Take heart…the recipe is VERY SIMPLE compared to all of the swissing detail you just received.)

Swiss SteakYum

1 1/2 lb. cube steaks or minute steaks
4 T. whole wheat flour or unbleached white flour
2 T. palm kernel oil
2 cups chopped tomatoes
2 T. water
1 small onion, cut up into rings
½ cup chopped carrot
½ t. thyme

Coat meat in flour and cook in hot oil until lightly browned on both sides. Add tomatoes, water, onion, carrots and thyme. Salt and pepper to taste. Bring to a boil, reduce heat, cover and simmer on low heat for 1 hour or until meat and vegetables are tender.

Serve over noodles or rice.

swisssteaksm.JPG

Enjoy the Swiss Steak…and all of the information about “swissing” that you can now use during important moments such as awkward silences or while completing crossword puzzles (five letter word for the process of tenderizing meat).

You’ll thank me later for this.

:)

Grocery List

Heavenly Homemaker's Club Members: Access your homepage and all your fantastic resources here! Not a member yet? Please join us!

Could It Be Possible for us to LIKE Coleslaw?!

July 14, 2008 by Laura 19 Comments

This post may contain affiliate links. For more information, please see our disclosure policy.

I have never liked coleslaw. Ever.

And believe it or not…neither has Matt, my easy to please husband who eats everything.

But for some reason a few months ago, I had a cabbage that I needed to do something with…so I experimented making coleslaw.

And I REALLY liked it. A LOT!!

When Matt got home for lunch that day, I was telling him that I had made coleslaw and that I was so excited about it! He kinda gave me a lopsided smile and looked at me like, “Seriously? You made coleslaw? And you want me to eat it?!” 

But of course since he’s so nice, he did eat it. And guess what? He liked it too. 

So it seems that I have come up with a coleslaw recipe that we both like and will eat. We find it refreshing and great to eat with sloppy joes, hamburgers or BBQ chicken. 

Creamy ColeslawYum

½ medium sized cabbage
2 carrots
1 cup mayonnaise (I use Hain Safflower mayo)
2 T. red wine vinegar
1 T. honey
1 T. minced onion
sea salt, to taste

Place cabbage and carrots into food processor. Shred together. Pour cabbage and carrots into a mixing bowl. Set aside. In a small bowl, mix mayonnaise, vinegar, honey, minced onion and salt. Add mayonnaise mixture to cabbage and carrots. Stir until well combined and creamy.

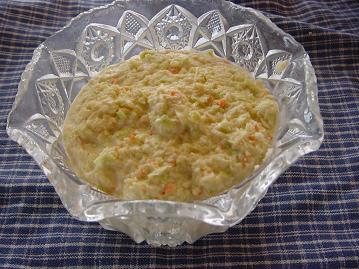
coleslawsm1.JPG

I hope that even if you don’t like coleslaw…you’ll give this recipe a try! It’s a really yummy way to eat more raw veggies! (And if Matt and I like it and eat it…that’s really saying something!)

Visit Tammy’s Recipes for more great kitchen tips!

Heavenly Homemaker's Club Members: Access your homepage and all your fantastic resources here! Not a member yet? Please join us!
« Previous Page
Next Page »

Join Our Community!

 Facebook Twitter E-mail Instagram Pinterest

Popular Posts

~ Will All of the Real Moms Please Stand Up?
~ Easy! Stir-and-Pour Whole Wheat Bread
~ How to Make Gatorade
~ 31 Real Food Breakfast Ideas
~ Dear Teenage Girls...
~ When Mom Takes a Step Back
~ The Inexpensive Health Insurance We Love!
~ Let's Talk Real Food Grocery Budgets

Check out our latest posts!

  • Big Family Food and Fun: September 6-12, 2026
  • Big Family Food and Fun: August 30-September 5, 2026
  • Big Family Food and Fun: August 23-29, 2026
  • Big Family Food and Fun: August 16-22, 2026
  • Big Family Food and Fun: August 9-15, 2026
Home  ~  Simple Meals  ~  Club Membership  ~  Shop  ~  Privacy Policy  ~  Disclosure  ~ Contact

Copyright © 2026 · Beautiful Pro Theme on Genesis Framework · WordPress · Log in