Heavenly Homemakers

Encouraging women in homemaking, healthy eating and parenting

  • Home
    • About
    • FAQs
  • Recipes
    • Bread and Breakfast
    • Condiments
    • Dairy
    • Main Dishes
    • Side Dishes and Snacks
    • Desserts
    • Gluten Free
    • Instant Pot
    • Crock Pot
    • Heavenly Homemaker’s Weekly Menus
  • Homemaking
    • Real Food Sources
  • Store
  • Contact
    • Advertise
    • Disclosure
    • Privacy Policy
  • Simple Meals
  • Club Members!

Make Ahead Meals: Cheesy Beef and Rice

April 14, 2008 by Laura 63 Comments

This post may contain affiliate links. For more information, please see our disclosure policy.

On a day when there’s lots of activity (um…that would be every day), it’s so nice to have a meal like Cheesy Beef and Rice prepared in the freezer ready to pull out and bake. Quickly toss a salad and warm up a veggie, and your meal is made!

Over the next several weeks, while I continue to post new breakfast ideas, and great ways to eat lots of fruits and veggies – I’ll also be posting some great recipes that you can make up ahead of time and put into the freezer to have on hand for busy evenings. 

To start us off, here’s a super easy recipe to put together. There’s nothing fancy about this dish, but it’s tasty just the same. This Cheesy Beef and Rice has been a long time family favorite of ours!
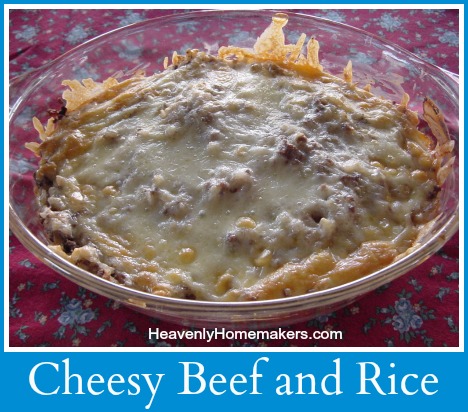
Cheesy Beef and Rice

Cheesy Beef and RiceYum

Make Ahead Meals: Cheesy Beef and Rice
 
Save Print
Author: Laura
Serves: 4-6
Ingredients
  • 1½ cups long grain brown rice
  • 1 pound ground beef
  • 3 Tablespoons minced onion, or fresh chopped onion
  • ½ teaspoon garlic powder
  • sea salt, to taste
  • 1½ cups sour cream
  • ⅓ cup milk
  • 1 cup shredded cheddar cheese
Instructions
  1. Boil three cups of water.
  2. Stir in rice.
  3. Cover and simmer for 45 minutes.
  4. Brown ground beef with onion and garlic powder.
  5. Mix with rice and salt well.
  6. Stir in sour cream and milk.
  7. Spread into a casserole dish.
  8. Sprinkle cheese on top. Cover well and freeze.
  9. Bake in a 350° oven for 45 minutes, or until bubbly.
  10. Or, place frozen casserole, covered with foil, into a cold oven.
  11. Turn oven on to 250°, baking for about 2 hours or until casserole is heated through and through.
3.4.3177

I hope you’ll keep coming back to read more recipes of dishes that you can make ahead of time and put into the freezer! In the meantime, I encourage you to look through all of the Make-Ahead Meals we’ve shared through the years. So much time saved!

Heavenly Homemaker's Club Members: Access your homepage and all your fantastic resources here! Not a member yet? Please join us!

Eat More Fruits and Veggies: Very Berry Brownie Cups

April 14, 2008 by Laura 9 Comments

This post may contain affiliate links. For more information, please see our disclosure policy.

Many of you are aware that there is a Eat More Fruits and Veggies Challenge going on around here. If you haven’t heard of this…check it out here. 

I had confessed in this post that sometimes I just really want to choose the brownie…instead of the fruit or veggie. (I’m talking really, really want to choose the brownie…)

So then Marie suggested, “Hey, make your brownies with applesauce, then you’ll get fruit and a brownie!”

And I said, “Yeah, but then I’d have to eat the whole pan of brownies in order to get a full serving in.” (which, I could do…)

And then it was suggested to throw in a couple of strawberries with the brownie too… ‘Cause, you know…strawberries and chocolate together…that’s always yummy…

(I LOVED all of your comments on this post…can you tell?! I was cracking up all day.) (Um, while I chewed on my carrot sticks, of course…)

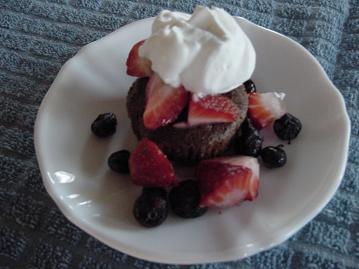
So, here it is folks…inspired by you…the Very Berry Brownie Cup. 

verberrybrowniesm.JPG

Very Berry Brownie CupsYum

1/2 cup unsweetened applesauce
1 cup rapadura (dehydrated cane sugar juice)
1/4 cup cocoa powder
1 egg
1 t. vanilla
3/4 cup whole wheat flour
fresh blueberries and strawberries
3/4 cup heavy whipping cream
3-4 drop stevia
1/4 t. vanilla

Stir together the applesauce, rapadura and cocoa powder. Add egg and vanilla. Mix in the flour. Pour batter into 10 paper lined muffin cups. Bake in a 350 degree oven for 20 minutes.

Whip the cream with beaters until soft peaks form. Add the stevia and vanilla and whip again just to mix.

Serve brownie cups piled with strawberries and blueberries, and topped with whipped cream.

I’ve just gotta say, that eating chocolate truly is a great way to make your home a haven…don’t you think? ‘Cause chocolate makes Mama happy…and a happy mama makes for a happy haven.

Oh, and of course, that means I’m eating fruit too…which is of course is the real point of this post…

;)

Heavenly Homemaker's Club Members: Access your homepage and all your fantastic resources here! Not a member yet? Please join us!

Eat More Fruits and Veggies: Fruit and Yogurt Delight

April 10, 2008 by Laura 11 Comments

This post may contain affiliate links. For more information, please see our disclosure policy.

I couldn’t decide if this went better in the “Eat More Fruits and Veggies” category, or the “Here are some great breakfast ideas for you” category. Because really, it fits into both. What a deal!!

This is super simple to make and so, so yummy. Actually, it’s just delightful – which is why I just had to give it this cheesy name:  “Fruit and Yogurt Delight.” I know, it sounds like something you’d get at the Mayberry Drug Store and share with Opie or something. Bet he’d think that’d be swell.

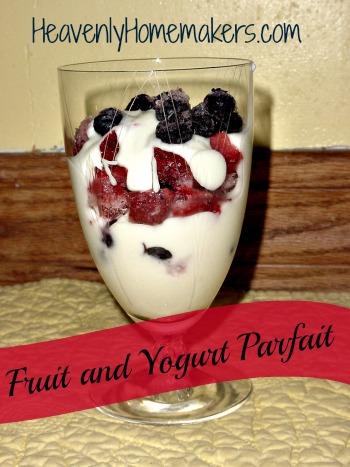
But, take a look at this, and you tell me – does that not look delightful?!

Fruit_and_Yogurt_Parfait

Yum

So, Fruit and Yogurt Delight, the recipe:

2 cups plain yogurt (yes, plain – see below for soapbox.)
4-8 drops of stevia, or 1-2 Tablespoons real maple syrup
1/4 teaspoon vanilla
1/2 cup each of fresh or frozen strawberries and blueberries

Mix yogurt, stevia or maple syrup and vanilla. Layer yogurt and fruit in a dish, thus making it delightful to eat, and delightful to look at.

Here’s my delightful little taste tester:

fruityogurtdelight2sm.JPG

Here’s my promised yogurt soapbox:

I get so frustrated because SO MANY things in the store are advertised as being SO good for us but really it’s not (oh, don’t get me started). But one of my biggest frustrations is yogurt. It’s supposedly like the greatest health food according to almost everyone who says that it is. It’s full of high fructose corn syrup and artificial colors and artificial flavors. OR if it’s the “no sugar added” kind, it has fake junk in it to make it sweet.

I could go on and on. (But I won’t – today.)

So, if you get the plain yogurt (or make your own) and add some yummy (and REAL) things to it, it’s just well, delightful!

Go give this a try!

Be sure to keep coming back for more yummy and healthy recipes. (And I promise to come up with names that are a little less June Cleaver next time…)

Heavenly Homemaker's Club Members: Access your homepage and all your fantastic resources here! Not a member yet? Please join us!

Eat More Fruits and Veggies: Chicken Veggie Quesadillas

April 7, 2008 by Laura 22 Comments

This post may contain affiliate links. For more information, please see our disclosure policy.

Continuing on the quest to eat more fruits and veggies…I came up with this recipe.

And OH MY! You MUST try these! 

When you eat them…just know that they are a little messy and drippy…

But you’ll get to enjoy licking your fingers and slurping up all the good stuff off of your plate and savoring the flavor.

(Or, if you want to…use a napkin…but really..that is not nearly as fun.)

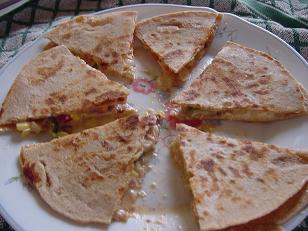
There’s a bit of everything in these:  sweet, spicy, crunchy, creamy, meaty and cheesy. 

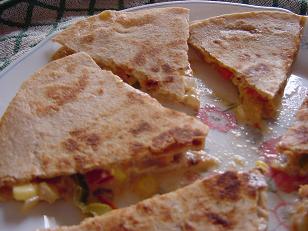
veggiequesadilla1sm.JPG

Chicken Veggie QuesadillasYum

1/3 cup chopped red bell pepper
2 T. chopped onion
1/4 cup chopped sweet green chili pepper
2 T. olive oil
3/4 cup corn
1 cup cooked chicken, cut into bites
1 medium tomato, cut into bite sized pieces
3/4 cup grated cheddar cheese
3/4 cup sour cream
1/2 t. chili powder (more or less according to your taste)
10 whole wheat tortillas

Saute peppers and onions in olive oil for 3-4 minutes. In a medium mixing bowl stir together corn, chicken, grated cheese, tomatoes, sour cream and chili powder. Fold in sauted veggies. 

In a skillet, lay down one tortilla. Spread filling onto tortilla and top with a second tortilla. Cook over medium low heat for about one minute on each side, or until filling is warm and tortillas are slightly crispy. Continue until all tortillas are filled.

Cut into wedges with pizza cutter.
veggiequesadilla3sm.JPG

Now, go make these chicken veggie quesadillas, grab a napkin (or not), and dig in!

Grocery List

Heavenly Homemaker's Club Members: Access your homepage and all your fantastic resources here! Not a member yet? Please join us!

Special Breakfast: Whole Wheat Waffles with Blueberry Syrup

April 7, 2008 by Laura 60 Comments

This post may contain affiliate links. For more information, please see our disclosure policy.

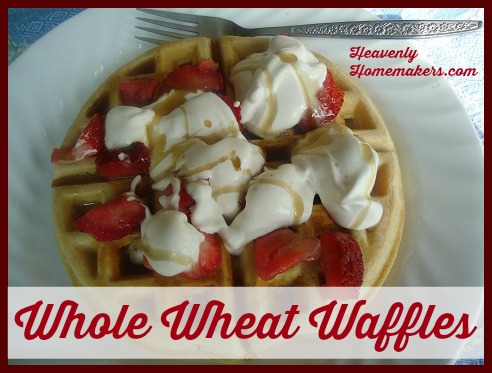
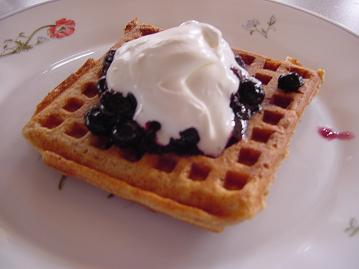
Pretty sure this picture right here is going to make us all want to make waffles very, very soon. Does a treat get any more delectable?

Whole Wheat Waffles

Waffles are one of our favorite breakfast foods – especially when we top them with strawberries, blueberries, and/or whipped cream. This is a great meal to feed company who is at your house for breakfast. They are so easy to make, but taste like a great treat!

My kids now call these “Super Mama Waffles.” If I was going to have a food named after me, I can’t think of one better than waffles. I’m pretty sure it’s the fruit and whipped cream that make these waffles super.

Keep these waffles in mind for dinner as well. And…we’ve even made big batches to feed college kids after church on Sundays for a fun lunch!

blueberrywaffle2sm.JPG

Whole Wheat Waffles

Special Breakfast: Whole Wheat Waffles with Blueberry Syrup
 
Save Print
Author: Laura
Serves: 5 servings
Ingredients
  • 1¾ cup whole wheat flour
  • 1 teaspoon baking powder
  • ½ teaspoon sea salt
  • 2 eggs
  • ¼ cup coconut oil
  • 1½ cup milk
Instructions
  1. Whisk all ingredients together.
  2. Cook batter in a waffle iron until golden brown,
3.5.3251

I usually double this recipe and freeze the leftovers to be popped into the toaster another day!

Blueberry SyrupYum

2 cups fresh or frozen blueberries
1/4 cup rapadura or sucanat (dehydrated cane sugar juice)

Stir ingredients together in a saucepan over medium heat for about 10 minutes until blueberries become a little mushy and syrupy. Serve over pancakes or waffles.

Whipped Cream

1/2 cup heavy whipping cream
drop of vanilla
2 drops of stevia

Whip cream in a bowl until soft peaks form. Add vanilla and stevia and whip just a bit more.

Serve Blueberry syrup and whipped cream over waffles. Delicious!

Add protein to this meal by serving with scrambled eggs, ham, sausage, and/or bacon.

Confession: We now have two waffle irons. Our friends offered us theirs when they moved away, and we decided that would help make the process of feeding the masses so much faster. Indeed, we can now make twice the waffles at one time that we once could when we only had one waffle maker. See how good I am at math?

What are your favorite ways to serve waffles? You’ll want to be sure to check out our delicious recipes for Raspberry Syrup and Peach Syrup also. It is so easy to use whatever extra fruit you have on hand to make deliciously healthy syrups that end up being a fantastic treat!

Heavenly Homemaker's Club Members: Access your homepage and all your fantastic resources here! Not a member yet? Please join us!

Eat More Fruits and Veggies: Baked Potato with Broccoli Cheese Sauce

April 4, 2008 by Laura 12 Comments

This post may contain affiliate links. For more information, please see our disclosure policy.

All week long I’ve been playing around and experimenting with fun new ways to eat more veggies!

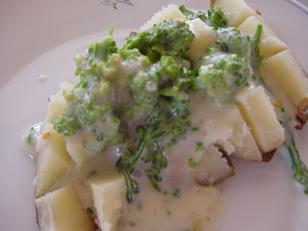
For lunch today, I made Baked Potatoes with Broccoli Cheese Sauce…and we all liked them!!

And that means that I need to share the recipe with you…because you will surely like them too!!

broccolipotatosm.JPG

Baked Potatoes with Broccoli Cheese SauceYum

6 baked potatoes
2 T. butter
1 T. minced onion
2 T. arrowroot powder
1 1/2 cups whole milk
sea salt, to taste
1 1/2 cups fresh or frozen broccoli
1/2 cup grated cheddar cheese

When your potatoes are almost finished baking, begin making your broccoli cheese sauce.

In a medium sauce pan, stir butter and minced onion around on medium heat until the butter is melted. Stir in arrowroot powder. Turn heat up, and pour in milk…stirring constantly. Shake in some salt, depending on your taste. Continue to stir until the mixture thickens. Turn heat down to low. Add broccoli and cook and stir for about 3-4 minutes. Stir in grated cheese. When the cheese is melted, your sauce is ready! Cut potatoes open on a plate and pour broccoli cheese sauce all over it. Yum!

Give these a try! They were perfect for lunch…and simple to make too!

Hey, what isn’t good with a cheese sauce drizzled all over it?!

Heavenly Homemaker's Club Members: Access your homepage and all your fantastic resources here! Not a member yet? Please join us!

A Great Fruit and Veggie Breakfast!

March 31, 2008 by Laura 9 Comments

This post may contain affiliate links. For more information, please see our disclosure policy.

Who knew veggies at breakfast could be SO yummy?!

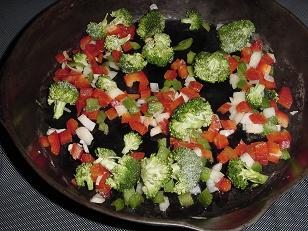
Yesterday, I wanted to get a good start to my day with the Eat More Fruits and Veggies Challenge, so I whipped out the broccoli at breakfast!

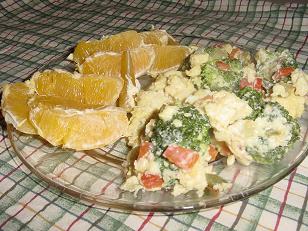
I sauted onion, red and green peppers and broccoli in olive oil for a few minutes…then scrambled eggs into the veggies with salt.

veggieeggs1sm1.JPG

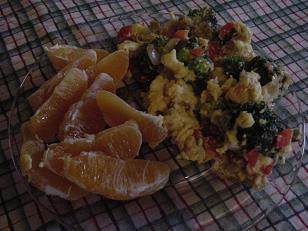
 Then I peeled myself an orange…and WOW!! 

I could not stop saying..”MMMmmm!!” while I was eating it! It had wonderful flavor…and the sweet, juicy orange with it was so refreshing!

veggieeggs3sm.JPG

My husband and I both LOVED this dish…and the kids might have liked it…if we would have saved them some! We finished the entire skillet before they even had a chance!

Here’s the recipe:

Veggie Egg ScrambleYum

3 T olive oil
1/4 cup chopped green pepper
1/4 cup chopped red pepper
2 T chopped onion
3/4 cup broccoli
5 eggs
sea salt

Saute the peppers, onions and broccoli in olive oil for 3-5 minutes until veggies are tender crisp. Beat eggs in a bowl. Pour eggs into skillet. Salt to taste. Scramble eggs with the veggies until the eggs are done. Serve with fresh fruit.

Give this dish a try sometime for breakfast (or dinner!). 

Do you need to be eating more fruits and veggies?! Come on over and join our Eat More Fruits and Veggies Challenge!

Read more kitchen tips here!

Heavenly Homemaker's Club Members: Access your homepage and all your fantastic resources here! Not a member yet? Please join us!

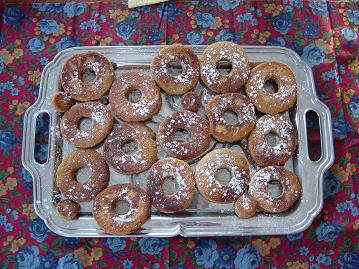
Healthy Treat for Today: Whole Wheat Donuts

March 18, 2008 by Laura 97 Comments

This post may contain affiliate links. For more information, please see our disclosure policy.


My dad…whom my boys call, Papa, is famous around here for buying us donuts when he comes to town. It’s become a big deal…one that the boys won’t let Papa forget about. (“Hi Papa…did you bring us donuts?…oh, and we’re also glad you’re here…”)

One Saturday morning…I decided to make homemade (and healthier) donuts for the family. I got up early…ground wheat into flour…mixed up the dough, rolled them out, fried them up…and made a special hot fudge sauce to drizzle over them. I put them on a pretty platter…poured glasses of fresh milk…and called the boys down for breakfast.

I cheerfully and excitedly greeted them with flour on my face and my hair all frazzled from all the work of making these fresh off the stove donuts…

And my three year old lit up and said, “Oh!! Did Papa make us DONUTS?!”

Huh. I go to all this trouble…and Papa gets all the credit. 

sigh  :)

Well, they liked my donuts just as much Papa’s…and I loved that these were a pretty healthy treat!

(Papa really got a big kick out of that story, of course..)

I hope you’ll get a big kick out of this recipe!

Whole Wheat Cake Donuts (or should I call them, “Papa’s Special”?)!Yum

3 ¼ cup whole wheat flour
2 t. baking powder
½ t. cinnamon
¼ t. salt
¼ t. nutmeg
2/3 cup rapadura (dehydrated cane sugar juice) or sucanat
2 eggs
1 t. vanilla
2/3 cup milk
1/4 cup melted butter
Oil for frying (I use palm shortening or coconut oil)

Mix dry ingredients in a large mixing bowl. Stir in eggs, vanilla, milk and melted butter. Knead dough a few minutes to make sure all ingredients are mixed thoroughly.
On a floured surface, roll dough to ½ inch thickness. Cut with donut cutter, or biscuit cutter. Heat oil in skillet or electric skillet…enough to cover the bottom of the skillet about ¼ inch. Place donuts into the hot oil to fry for 2-3 minutes on each side. Remove from skillet and place on a paper towel lined plate. Sprinkle a mixture of rapadura and cinnamon, or sprinkle organic powdered sugar over the hot donuts. 

donutssm1.JPG

Yum! Anytime I want a special breakfast treat for my family…these donuts work for me!

Heavenly Homemaker's Club Members: Access your homepage and all your fantastic resources here! Not a member yet? Please join us!

Kids in the Kitchen, pt. 5: Monkey Bread and Monkey Business

March 14, 2008 by Laura 19 Comments

This post may contain affiliate links. For more information, please see our disclosure policy.

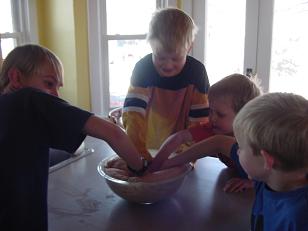
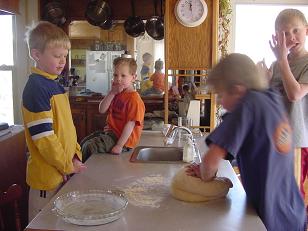
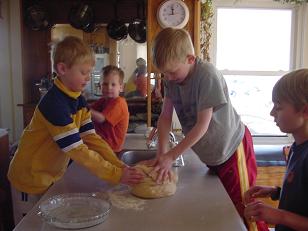
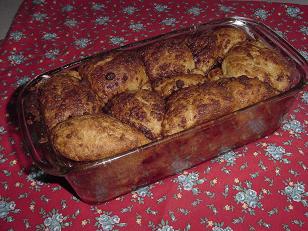
Yesterday I mentioned making monkey bread with all four of my monkeys in the kitchen. While there were times of craziness when we were putting this together – really, really we did have fun! (All of us…even me.)

Monkey Bread Tutorial 2

Yum

I wanted to share this recipe with you, as it is a healthy (uses only whole wheat flour and  unprocessed sugars), yummy treat that is fun to make with your kids. It does take a bit of time to make, but you do it in stages, and the time spent is worth it!

I simply used my Honey Whole Wheat Bread recipe, but instead of forming loaves as normal, we made it into this wonderful, sweet cinnamon pull apart bread for our breakfast.

How to Make Whole Wheat Monkey Bread

Kids in the Kitchen, pt. 5: Monkey Bread and Monkey Business
 
Save Print
Author: Laura
Ingredients
  • 6 cups whole wheat flour, divided
  • 1 ¾ cups warm water, divided
  • ⅓ cup honey
  • 1 package yeast (2¼ teaspoons)
  • 1 teaspoon sea salt
  • 3 T. melted butter
Instructions
  1. Mix 3 cups of whole wheat flour with 1 ½ cups of warm water in a large glass bowl. Allow this to sit for about 30 minutes. This will break down the gluten and help the bread to rise better.
  2. Meanwhile, in a small bowl mix together ¼ cup water, yeast and honey. Allow this to sit for about 10 minutes, or until the yeast is activated and mixture becomes bubbly.
  3. Add salt, melted butter and yeast mixture to the flour and water mixture. Gradually add the remaining three cups of flour and stir well.
  4. As the dough becomes harder to stir, pour it out onto a clean counter and begin to knead the dough. Add a little flour if needed to keep it from sticking. Knead the dough for 5-10 minutes.
  5. Place the ball of dough back into the bowl and cover it with a cloth. Allow the dough to rise for one hour, or until it has doubled in size.
  6. Using a floured hand, pull the dough out of the bowl onto the counter. Knead for just a minute or two until the air bubbles are gone.
  7. Melt one stick of butter.
  8. In a medium bowl, mix together 1 cup rapadura and 3 t. cinnamon.
  9. Pull off small fits of dough and roll them around in your hands to form a ball.
  10. Dip the ball of dough into the melted butter, then roll it around in the cinnamon/rapadura mixture.
  11. Place the covered ball into a buttered bread pan or angel food cake pan.
  12. Continue to dip bits of dough in butter and cinnamon/rapadura. Fill pan ½ full. You should be able to make two pans.
  13. Allow the dough to rise for about 30 minutes.
  14. Bake in a 350 degree oven for 45 minutes.
3.4.3177

Here are a few picture highlights of our Monkey Business:

boysbreaddough7sm.JPG
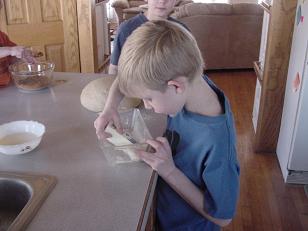
Once the dough had risen and needed to be punched down…EVERYONE wanted to be a part of that. I mean – it’s permission to punch something. What little boy doesn’t want THAT?!

boysbreaddough2sm.JPG

Asa got to knead the dough, and I’m not sure what Justus and Malachi are licking off their fingers there…flour? Okay you two – wash your hands…again.

boysbreaddough1sm.JPG

boysbreaddough8sm.JPG

Not to be outdone by the biggest brother, Justus and Elias needed to knead too.
Asa got the butter melting on the stove.

boysbreaddough10sm.JPG

Justus smeared butter all over the bread pans.

boysbreaddough9sm.JPG

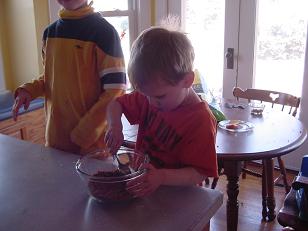
Malachi stirred up the rapadura and cinnamon mixture.

boysbreaddough15sm.JPG

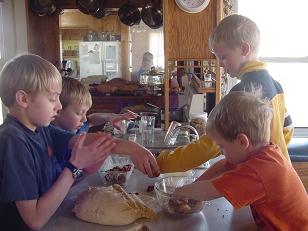
And then EVERYONE got to pull off balls of dough and do the fun rolling and dipping and making ooey-gooey bread part.

monkeybread1sm.JPG

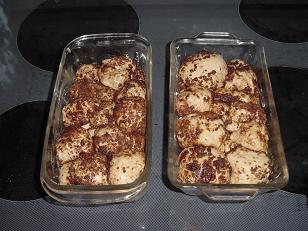
Ah, the beautiful loaves, rising and almost ready to go into the oven.

monkeybread4sm.JPG
Monkey bread!! Can’t you just smell it?!

The next morning, I rewarmed it a little and we had it with milk for breakfast. When the boys woke up smelling it, they jumped out of bed and ran downstairs.

All the way down the stairs, I was hearing monkey noises, “Ooo Ooo…Aah…Aah..” in high pitched tones and looked over to see four monkeys making their way into the kitchen. And that is how my monkey bread morning began.

(At least they didn’t start picking bugs off of each other and eating them. My monkey’s are slightly tamer than that.)

Heavenly Homemaker's Club Members: Access your homepage and all your fantastic resources here! Not a member yet? Please join us!

Healthy Treat For Today: Strawberry Jelly Roll

March 7, 2008 by Laura 4 Comments

This post may contain affiliate links. For more information, please see our disclosure policy.

Today, I asked Elias what we should make for our healthy treat…

He said, “Something with strawberries!! Some kind of cake!!”

Since strawberries aren’t in season yet…and I couldn’t really come up with any good ideas for a cake using frozen strawberries…

We came up with the idea to make a Strawberry Jelly Roll.

I’ve actually never made a jelly roll before…

Um, because, they’ve intimidated me.

 I admit it. I have Jellyrollaphobia. 

I’m usually a mix-up-a-cake-and-throw-it -into-the-pan kind of a girl. The idea of whipping my egg whites and folding in my flour mixture…blah, blah, blah…

And then rolling the cake thingy and spreading the filling, and rolling it back up without the thing breaking apart all over the place really scared me…

Jellyrollaphobia.

But today, everyone…

Today, I have overcome my fear of the Jelly Roll.

I have learned that Jelly Rolls are nothing to be afraid of.

This was very easy to make…and not at all scary.

Strawberry Jelly RollYum

1/2 cup whole wheat flour
1/2 t. baking powder
4 eggs yolks
1/2 t. vanilla
1/3 cup rapadura
4 egg whites
1/2 cup rapadura
Strawberry Jelly – the kind made with only fruit, of course

Stir together flour and baking powder. Set aside. In another bowl, beat egg yolks and vanilla and 1/3 cup rapadura. And in another bowl, beat egg whites until soft peaks form. Add 1/2 cup rapadura to the egg whites and beat some more until hard peaks form. 

Then, fold the egg yolk/vanilla mixture into the egg whites. Next, fold the flour mixture into the egg whites. 

Spread the batter onto a buttered piece of parchment paper lining a cookie sheet. Bake it for 12-15 minutes at 375 degrees. The cake should “spring back” if you gently touch it in the middle.

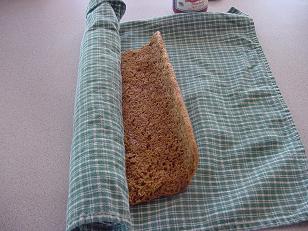
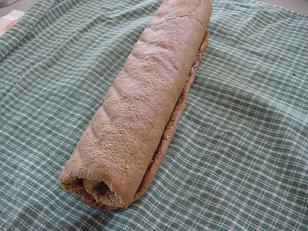
Immediately pull the cake off of the parchment paper and lay it onto a tea towel. Roll it up in the towel. Allow it to cool completely.

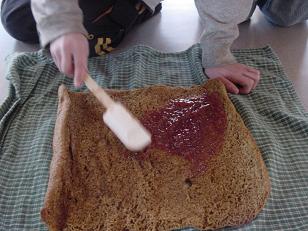
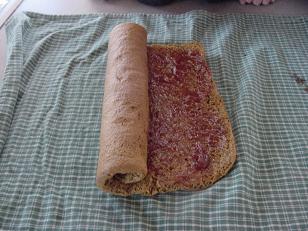
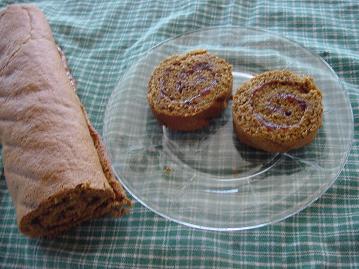
Unroll it, spread jelly all over it, and roll it back up.
jellyroll5sm.JPG

jellyroll4sm.JPG

jellyroll3sm.JPG

jellyroll2sm.JPG

Done.

Slice it, eat it, share it, exclaim over it, be amazed by it.

jellyroll1sm1.JPG

We all really liked this treat.

And I will definitely make it again sometime.

I’ll probably even play with it and make different fun variations to the Jelly Roll.

Pumpkin Roll, Chocolate Roll, Cream Cheese something or other Roll, Chocolate-Pumpkin-Cream Cheese-something or other Roll…

I am a Jellyrollaphobic no more.

Heavenly Homemaker's Club Members: Access your homepage and all your fantastic resources here! Not a member yet? Please join us!
« Previous Page
Next Page »

Join Our Community!

 Facebook Twitter E-mail Instagram Pinterest

Popular Posts

~ Will All of the Real Moms Please Stand Up?
~ Easy! Stir-and-Pour Whole Wheat Bread
~ How to Make Gatorade
~ 31 Real Food Breakfast Ideas
~ Dear Teenage Girls...
~ When Mom Takes a Step Back
~ The Inexpensive Health Insurance We Love!
~ Let's Talk Real Food Grocery Budgets

Check out our latest posts!

  • Big Family Food and Fun: September 6-12, 2026
  • Big Family Food and Fun: August 30-September 5, 2026
  • Big Family Food and Fun: August 23-29, 2026
  • Big Family Food and Fun: August 16-22, 2026
  • Big Family Food and Fun: August 9-15, 2026
Home  ~  Simple Meals  ~  Club Membership  ~  Shop  ~  Privacy Policy  ~  Disclosure  ~ Contact

Copyright © 2026 · Beautiful Pro Theme on Genesis Framework · WordPress · Log in