Heavenly Homemakers

Encouraging women in homemaking, healthy eating and parenting

  • Home
    • About
    • FAQs
  • Recipes
    • Bread and Breakfast
    • Condiments
    • Dairy
    • Main Dishes
    • Side Dishes and Snacks
    • Desserts
    • Gluten Free
    • Instant Pot
    • Crock Pot
    • Heavenly Homemaker’s Weekly Menus
  • Homemaking
    • Real Food Sources
  • Store
  • Contact
    • Advertise
    • Disclosure
    • Privacy Policy
  • Simple Meals
  • Club Members!

Peanut Butter Chocolate Crunch Cups – 4 Ingredients

February 19, 2020 by Laura Leave a Comment

This post may contain affiliate links which won’t change your price but will share some commission.

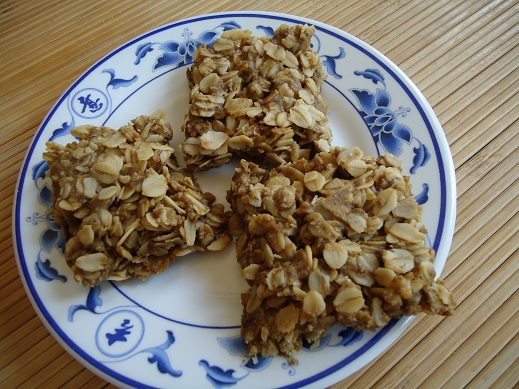
These Chocolate Peanut Butter Crunch Cups are practically begging for you to make them!

With college students joining us for lunch, I was searching the internet for ways to treat them, and I had rice krispie cereal that I needed to use up. All the recipes called for marshmallows, of course. But hey, I don’t keep those in my pantry regularly, much to my kids’ dismay.

Therefore, after wading through all of the marshmallow-y options, I finally found this winner! I tweaked it just a bit, and that is how these Peanut Butter Chocolate Crunch Cups were born.

These are incredibly easy and they were a hit with the college students! Who needs marshmallows?! (Well, they are helpful if you’re making smores…) But for rice krispie cereal treats, it’s amazing that we can do other fun things and use more wholesome ingredients to make treats!

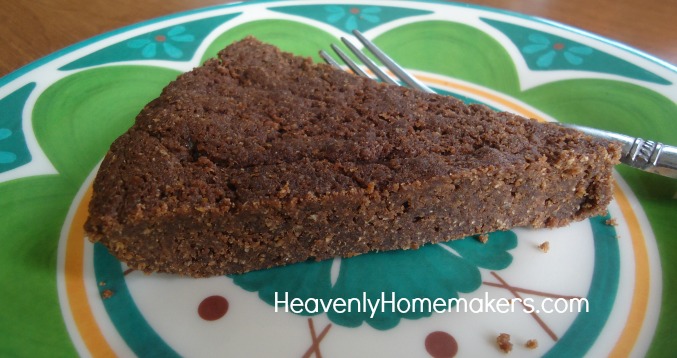
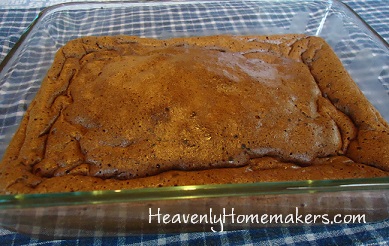
Speaking of “other fun things” – I highly encourage that you also put these 4-Ingredient Chocolate Crunch Bars on your list of awesome rice krispie treats to make. These are hugely popular when I serve them to guests! It’s worth noting that the ingredient list in that recipe and in this one are very similar, making life easier. They just turn out two different and fun treats!

Peanut Butter Chocolate Crunch CupsYum

Peanut Butter Chocolate Crunch Cups - 4 Ingredients
 
Save Print
Author: Laura
Serves: 12
Ingredients
  • 1 cup Natural Peanut Butter
  • 4 Tablespoons Honey
  • 2½ cups Crisp Rice Cereal
  • 1½ cups any variety Chocolate Chips
Instructions
  1. In a saucepan, stir peanut butter and honey together over low heat until melted.
  2. Remove from heat and stir in rice crispy cereal.
  3. Press mixture into 12 muffin cups. (I recommend silicone cups to make them easy to remove.)
  4. Melt chocolate chips on the stovetop, stirring until melted and smooth.
  5. Spoon and spread melted chocolate over each peanut butter crispy cup.
  6. Refrigerate for at least an hour until chocolate has hardened.
  7. Remove cups and serve!
  8. Store Peanut Butter Chocolate Crispy Cups in an air tight container.
3.5.3229


Heavenly Homemaker's Club Members: Access your homepage and all your fantastic resources here! Not a member yet? Please join us!

How to Make Easy Fruit Cobbler

September 24, 2019 by Laura Leave a Comment

This post may contain affiliate links which won’t change your price but will share some commission.

Hopefully, we’ve all been taking advantage of summer and fall to pick and preserve all the fresh fruit we can get our hands on. Now let’s learn about how to make Easy Fruit Cobbler!

Almost 12 years into sharing recipes here with you, I am shocked that I have yet to post our favorite fruit cobbler recipe! This is, hands down, Matt’s favorite dessert. And who am I kidding? Sometimes we make it and eat it for breakfast. It’s fruit and bread, am I right?

What fruits work best for Easy Fruit CobblerYum

In our experience, with the exception of melons and citrus, just about any fruits will work. Our favorites are:

  • Peach (our favorite, favorite!)
  • Strawberry
  • Raspberry
  • Blueberry
  • Boysenberry (Matt’s favorite since he grew up in California – but we don’t have access to these berries in Nebraska!)
  • Blackberry
  • Apple
  • Pear
  • Cherry

You can buy fresh or frozen fruit at the store or farmer’s market to use in these cobblers. Our favorite and most economical option is to use whatever fruit we’ve been blessed to pick and preserve. We grab peaches or berries that we’ve frozen during the summer and quickly make an Easy Fruit Cobbler to enjoy!

Use as much or as little sugar as you prefer. Through the years, I’ve cut the sugar content down in this recipe (so we can eat it for breakfast, you know?). And of course, I use freshly ground wheat flour. So our cobblers are made with whole grains, healthy fats, and amazing fruit!

~~~~~~~~~~~~~~~~~~~~~~~~~~~~~~~~~~~~~~~~~~~~~~~~~~~~~~

 —- > Want to know more about grinding fresh flour and using whole grains? Read these posts! <—–

~~~~~~~~~~~~~~~~~~~~~~~~~~~~~~~~~~~~~~~~~~~~~~~~~~~~~~

I love that using whole grains in dessert and treat recipes takes them up a notch on the healthy scale! Yes, these are still sweet treats to be eaten in moderation. But when we cut down the sugar content, use whole grains, and use all wholesome, real food ingredients – we’ve got ourselves a dessert that is actually nourishing!

Easy Fruit Cobbler

How to Make Easy Fruit Cobbler
 
Save Print
Author: Laura
Serves: 4-6
Ingredients
  • TOPPING:
  • 1 cup whole grain flour (I use freshly ground soft white wheat)
  • 2 Tablespoons brown sugar or sucanat
  • ½ teaspoon baking powder
  • ¼ cup melted butter
  • 1 egg
  • 3 Tablespoons milk
  • FRUIT:
  • 6 cups fresh or frozen fruit, washed and sliced if needed
  • ¼-1/2 cup brown sugar or sucanat, depending on your taste
Instructions
  1. In a medium saucepan, cook fruit and sugar until soft and syrupy.
  2. Pour fruit mixture into a 9x9 inch baking dish.
  3. Mix together topping ingredients, beginning with dry ingredients first.
  4. Add melted butter, egg, and milk until well combined.
  5. Spoon mounds of topping over the fruit filling in the baking dish.
  6. Bake in a 400 degree oven for 20-25 minutes or until cobbler is bubbly and topping is golden brown.
  7. Serve as-is, or topped with ice cream or milk
3.5.3229

If you prefer a crunchy topping instead of a cake topping, try this awesome Fruit Crisp Recipe instead!

Heavenly Homemaker's Club Members: Access your homepage and all your fantastic resources here! Not a member yet? Please join us!

Rich Dark Chocolate Fudge Brownies (Low Sugar!)

April 14, 2016 by Laura 13 Comments

This post may contain affiliate links which won’t change your price but will share some commission.

These Dark Chocolate Fudge Brownies are low in sugar. Can you believe it?

Low Sugar Fudge Brownie

Sugar became my enemy about the time I turned 39. I feel absolutely awful – for hours or even days – if I eat sugary treats. Therefore I haven’t been able to eat a regular brownie for about three years.

Avoiding desserts hasn’t been hard for me because a cookie is not even worth a migraine. Sometimes just the smell of sweets turns my stomach, thinking of how terrible I’ll feel if I eat them. So will power? That has nothing to do with my “I’ll pass on the dessert, thanks.” Sweets literally make me sick. I really do not want them.

You know this is saying something since I’m the one who used to eat sugar with my sugar and wash it down with a fizzy glass full of sugar (and then have seconds).

Perhaps I consumed a lifetime quota of sugar by the time I was 39. More likely I think this is a result of some major cleansing and heavy metal detox I’ve been doing with my natural doctor during the past few years. My body is at a point of only wanting the good stuff. Okay then. This is probably the best side effect ever.

Having said all that, I do really appreciate a treat that is lightly sweetened. My body can handle these in moderation, and experimenting with recipes to drastically cut the sugar has been really fun. As you know from reading any of my recent low-sugar recipes – I’m learning that treats and dessert really do taste wonderful even when the sugar content has been cut in a huge way.

This, of course, has been greatly beneficial for our entire family (and now for yours!). I’ve wanted for so long to cut down on our sugar intake. It’s just hard since sugar tastes so doggone good.

Thorough research has taught me that high quality fats like coconut oil, butter, and palm oil are not our enemy when it comes to good health. SUGAR IS THE ENEMY. I should probably write an entire post about this. (Oh wait. I just did.) But go read it later because, my friends, I have a Low Sugar Brownie Recipe and I’m not afraid to eat it. This is my most exciting discovery in all my low-sugar recipe experimentation. We can cut the sugar in brownies!!!!

Someone hold me back. Not from eating too many. Just from SCREAMING TOO LOUDLY. This is just exciting. You’ll be screaming too. I support your decision to scream. (Outside. While we’re inside we use our inside voices.)

Rich Dark Chocolate Fudge BrowniesYum

5.0 from 1 reviews
Rich Dark Chocolate Fudge Brownies (Low Sugar!)
 
Save Print
Author: Laura
Serves: 12-15
Ingredients
  • 1 cup melted butter
  • ⅓ cup unsweetened cocoa powder
  • ½ cup sucanat or brown sugar (I use just under ½ cup, actually)
  • 2 eggs
  • 1 teaspoon vanilla extract
  • 1¼ cups whole wheat pastry flour
Instructions
  1. Mix together melted butter, cocoa, and sugar.
  2. Add eggs and vanilla, stirring well.
  3. Mix in flour until well combined.
  4. Spread into a 9x9 inch baking dish or a 9 inch pie dish.
  5. Bake in a 350° oven for 20 minutes.
  6. Allow brownies to cool before cutting them (good luck).
3.4.3177

Dark Chocolate Fudge Brownies {Low Sugar}

These bake up a little different from “full sugar” brownies. You may notice that the butter sizzles on the top of these while they’re baking. Don’t worry a bit. Take them out of the oven after 20 minutes of baking and let them sit for a few minutes. The butter settles in and turns your brownies fudgy and moist.

Because the sugar is cut down in this recipe, you’ll find that these taste more like dark chocolate. All of my kids ate them without complaint because these are still plenty sweet. (But not so sweet that I can’t have a small piece, so yay!)

Onward we go, testing out more low sugar recipes! How fun is this?!

Heavenly Homemaker's Club Members: Access your homepage and all your fantastic resources here! Not a member yet? Please join us!

Sugar Cookies ~ the Whole Wheat, Low Sugar, Super Delicious Way

September 3, 2015 by Laura 15 Comments

This post may contain affiliate links which won’t change your price but will share some commission.

Easy (Low) Sugar Cookies

I tinkered with my old sugar cookie recipe and cut the sugar from 1 1/2 cups down to just 1/2 cup. I personally think it could be cut even more, but that’s because I am weird about sweetness levels now. I’m the one who thinks coffee is sweet when it has only cream stirred into it. It looks so creamy delicious, and I say things like “mmm it is so sweet and good” while I’m sipping it, so my people keep trying it thinking that maybe this time I really mean it. I mean, I do mean it – why would I lie? It’s sweet. But then they take a sip and they make faces and say, “Eww that is so not sweet, what are you even talking about?” This is how I never have to share my coffee.

Now sharing these cookies is a different story. Everyone loves these lightly sweetened jewels. The butter makes them flaky good. This will be my new go-to sugar cookie recipe at all holidays, special events, and uneventful Wednesdays when the mood strikes.

Note about the sugar: Most of the time I use sucanat because it is sugar with some nutrients left behind. For occasional recipes when I’d like to avoid the product turning out too dark brown, I pull out some organic raw sugar. It’s only barely better than white sugar, but we’re going light on the sugar here so I don’t throw a fit about this.


Sugar Cookies the Healthier WayYum

4.0 from 1 reviews
Sugar Cookies ~ the Whole Wheat, Low Sugar, Super Delicious Way
 
Save Print
Author: Laura
Serves: 20-30
Ingredients
  • 1 cup melted butter
  • ½ cup sucanat or raw sugar
  • 2 eggs
  • 1 teaspoon vanilla extract
  • 1 teaspoon baking powder
  • 3½ cups of whole wheat flour (give or take)
Instructions
  1. Stir together melted butter and sugar.
  2. Add eggs, vanilla, and baking powder.
  3. Stir in flour until a solid ball of dough forms.
  4. Cover the bowl and place it in the refrigerator to chill for about an hour.
  5. Roll chilled dough on a well-floured surface and thin or thick as you like.
  6. Cut with cookie cutters and place them about a half inch apart on a baking sheet.
  7. Bake in a 350° oven for about 12 minutes or until cookies are lightly browned.
  8. Makes 20-30 cookies depending on the thickness and size.
3.4.3177


sugar cookies 4

Notice the little round piece of squished circle dough, ready to be baked along with the pumpkin-shaped cookies. It is a part of the “No Cookie Left Behind” program. It’s what you do when your remaining dough isn’t big enough to shape.

Frost these cookies if you like, but then they fall out of the Low Sugar category. We find these to be perfect as they are, and some of us love to eat them with our coffee that is sweetened only with cream.

It’s almost cookie rolling, cutting, and baking season – so I can’t wait to hear what you think about these! (We’re on our third batch already. I may have failed to mention to my kids that I cut down the sugar in this recipe. Do not tell.)

Heavenly Homemaker's Club Members: Access your homepage and all your fantastic resources here! Not a member yet? Please join us!

Chocolate Cheesecake Dessert

February 3, 2015 by Laura 14 Comments

This post may contain affiliate links which won’t change your price but will share some commission.

Not that you have to wait until Valentine’s Day to make this, but just in case you’re starting to think about hearts and chocolate and treats with the ones you love – I thought you might be interested in this recipe. You should probably make one now, then another early next week, then another on Valentine’s Day. Or would that be considered cheesecake overkill? (Is there such a thing?)

Remember this Chocolate Cheesecake Pie recipe I shared about this time last year? Here’s another similar idea using stevia to lightly sweeten. I also used my Shortbread recipe for the crust this time since I’ve discovered what a great, buttery crust it makes. It does not get any easier than this! (Here are Pumpkin Pie Bars with shortbread crust and Pumpkin Cheesecake with the same crust. Told you I love it.)

chocolate cheesecake
Easy Chocolate Cheesecake DessertYum

2 8-ounce packages cream cheese, softened
1/2 cup cocoa powder
1 teaspoon vanilla extract
Liquid stevia to taste (I use 30-40 drops)
2 cups heavy whipping cream
Baked and cooled Shortbread Crust

Cream together softened cream cheese, cocoa powder, vanilla, and stevia. Set aside. Whip cream until soft peaks form. Fold in cream cheese mixture until smooth. (I actually throw all ingredients together in my BlendTec and let it do all the work of whipping and blending at the same time.)  Spread mixture over cooled Shortbread Crust. Cover and chill for about two hours until set. Makes about 18 servings.

Easy Chocolate Cheesecake Dessert

Heavenly Homemaker's Club Members: Access your homepage and all your fantastic resources here! Not a member yet? Please join us!

Hot Chocolate Souffle ~ A Recipe That Just So Happens To Naturally Be Grain Free and Dairy Free

October 2, 2014 by Laura 9 Comments

This post may contain affiliate links which won’t change your price but will share some commission.

hot chocolate souffle 2

Elias, our 12 year old, is my cookbook buddy. Just like me, he enjoys looking through new recipes, getting food ideas, looking at the food pictures. He’s my right hand man when it comes to finding new recipe ideas to play with.

During our past few trips to the library, Elias and I have picked up different cookbooks to look through and get ideas from. This Hot Chocolate Soufflé is one he found recently. He liked the look of the dessert and figured we could adapt it with our healthier ingredients pretty easily. Obviously, he cares so much about using healthier ingredients, just like all normal 12 year old boys. Ha. Haha. Ha. Ha.  Well, at least he knows his mom cares, and he sort of understands why. Really, all he was concerned about was that this recipe looked like a yummy chocolate dessert. What else matters, right?

Here’s what’s fun about this Hot Chocolate Soufflé recipe:

  • It’s very easy to make
  • It only has 4 ingredients
  • It can be made for those who need to avoid gluten and/or dairy

Hot Chocolate SouffléYum

1/2 cup dark chocolate chips
1/3 cup sucanat powdered sugar
5 eggs, separated
pinch of sea salt

Separate eggs – whites and yolks – into two separate bowls. Stir sucanat powdered sugar into the egg yolks until smooth. In a small saucepan, melt the chocolate, stirring constantly and removing from heat immediately after chocolate has melted. Stir melted chocolate into egg yolks and sucanat mixture. Beat egg whites and sea salt until stiff peaks form. Fold chocolate mixture into the egg whites until barely mixed. Pour mixture into a 8×8 inch baking pan. Bake in a 400° oven for about 15 minutes or until done through and through.

Grain Free, Dairy Free Hot Chocolate Souffle

These would be great for your Make-Ahead Lunch Box. Also, I looked into where you can purchase allergy free dark chocolate chips. Here’s what I found:

    Do you like looking through cookbooks and recipes? (Hope so – this site is full of ’em!)

    This post contains affiliate links.

Heavenly Homemaker's Club Members: Access your homepage and all your fantastic resources here! Not a member yet? Please join us!

7-Minute Strawberry Ice Cream ~ Dairy Free Option

June 25, 2014 by Laura 14 Comments

This post may contain affiliate links which won’t change your price but will share some commission.

Healthy food always takes a long time to make, right? Not at my house.  Healthy food always tastes like “health food,” right? Oh, for real.  Healthy food always costs a lot of money, right? Not if I can help it. 

Most of the guests I feed at my house don’t even suspect that I’m serving them healthy food. In fact, I fed this simple Strawberry Ice Cream to someone last week, and all he knew was that I was handing him a dish full of homemade ice cream. All he knew was that it tasted delicious, he loved it, and he asked for seconds. He was impressed that I had “taken the time” to actually make homemade ice cream. He had no idea it was made in 7 little minutes. He had no idea the dessert didn’t have any added sugar (I used stevia). He had no idea the health benefits of what he was eating. He just thought he was eating really good ice cream. Boom.  Score one for healthy food that doesn’t appear to be health food.

Yes, from start to finish, this ice cream just takes about seven minutes to make. No ice cream freezer necessary – all you need is a strong blender or food processor. By the way – those seven minutes it takes to make this treat? Well, it’s not like it takes 7 minutes of work on my part. I just put the ingredients into the food processor and walk away. God bless the person who invented food processors so that I can check email while I’m making ice cream.

7-Minute Strawberry Ice CreamYum

4 cups (give or take) frozen strawberries
1 can (13.5 ounces) chilled coconut milk or 1 1/2 cups whole milk
1 teaspoon vanilla extract
10 drops liquid stevia or 1 Tablespoon real maple syrup or 1 Tablespoon honey

Blend all ingredients together in a food processor or blender until smooth and creamy. Serve right away. Makes 4-8 servings.

7-Minute Dairy Free Strawberry Ice Cream

Have you tried the Cool Pineapple Cream Dessert recipe yet? This is pretty much the same recipe, except for the obvious switch from pineapple to strawberries. I found that when using pineapple, I didn’t need to add anything else to sweeten the treat. Strawberries are a little more tart, so adding a tiny bit of stevia made this perfect.

Next I plan to make this treat using frozen peaches. Then maybe frozen blueberries. Then frozen raspberries.

Health food? You can keep your rice cakes. I’m having ice cream.

What’s your favorite “healthy food” to serve that doesn’t appear to be health food?

Heavenly Homemaker's Club Members: Access your homepage and all your fantastic resources here! Not a member yet? Please join us!

Caramel Oatmeal Bars {High Five Recipe}

July 24, 2013 by Laura 37 Comments

This post may contain affiliate links which won’t change your price but will share some commission.

celebrating_40

I wanted to include a recipe or two in my Celebrating 40 festivities. But how was I supposed to do that when everything about the celebration has to do with the number 40? I don’t have any recipes with 40 ingredients (you’re welcome).

I decided that the exact opposite of a recipe with 40 ingredients is a recipe with only 5 ingredients. Sort of. So I am including this High Five Recipe in my celebration. It’s one of the easiest and quickest you’ll ever make.

Caramel Oatmeal BarsYum

1 cup butter, melted
1 1/3 cups sucanat
1/2 teaspoon sea salt
1 teaspoon baking powder
3 1/2 cups rolled oats

Stir all five ingredients together. Press mixture into a 9×13 inch baking dish. Bake at 350° for 10 minutes until ingredients have melted together and become lightly brown. Cut into bars while hot.

caramel_oatmeal_bars

Beyond eating these bars as is, we have also discovered that crumbling one onto a bowl of vanilla ice cream is incredibly delicious.

Need more High Five Recipes? (high quality recipes, five ingredients or less)  Find lots and lots of them here!

Heavenly Homemaker's Club Members: Access your homepage and all your fantastic resources here! Not a member yet? Please join us!

Red(less) Velvet Cake

February 12, 2013 by Laura 38 Comments

This post may contain affiliate links which won’t change your price but will share some commission.


Have a recipe you’d like me to try and make over?
Submit your recipes on this Real Food Recipe Makeover Submission Page.

Looking for a special treat for Valentine’s Day? How about a Red Velvet Cake? Without the red. While the red food coloring is pretty, it doesn’t add anything to the cake (except for freakish fake color that I don’t really want in my gut).

This cake experiment became a treat that is super moist and delicious, with a mild chocolate flavor. And hey, if you squint and look through pretend red colored glasses, the light brown color of this cake really does have a reddish tint. It’s true. Can you see it? 

velvet_cake_1

Red(less) Velvet CakeYum

1 cup butter
1/2 cup cocoa powder
4 Tablespoons water
2 1/2 cups whole wheat flour (I recommend using flour made from hard or soft white wheat)
1/2 cup organic cornstarch
1 1/2 teaspoons baking powder
1 1/2 cups sucanat, made into “powdered sugar”
3 eggs
1 cup buttermilk
1 teaspoon vanilla
Cream Cheese Frosting

Place butter, water, and cocoa powder in a small saucepan. Cook over low heat until butter is melted and ingredients are well combined. In a large mixing bowl stir together flour, cornstarch, baking powder, and powdered sucanat. Pour in butter mixture, and the eggs, buttermilk, and vanilla. Beat the ingredients together until smooth.

Pour batter into two well-buttered 9 inch round cake pans. Bake in a 375° oven for 25-30 minutes or until a toothpick inserted in the middle comes out clean. Be careful not to overbake these cakes or they will become dry. Allow cakes to cool for a few minutes, then carefully turn them out onto two separate plates. Allow them to cool completely.

Frost with Cream Cheese Frosting, beginning with a layer in the middle of the cakes, then on the top and around the sides.

velvet_cake_2

See how pretty?

velvet_cake_3

See the red?

velvet_cake_5

 Okay, fine. It really is red(less). But it is crazy delicous. :)

Heavenly Homemaker's Club Members: Access your homepage and all your fantastic resources here! Not a member yet? Please join us!

Join Our Community!

 Facebook Twitter RSS E-mail Instagram Pinterest

Popular Posts

~ Will All of the Real Moms Please Stand Up?
~ Easy! Stir-and-Pour Whole Wheat Bread
~ How to Make Gatorade
~ 31 Real Food Breakfast Ideas
~ Dear Teenage Girls...
~ When Mom Takes a Step Back
~ The Inexpensive Health Insurance We Love!
~ Let's Talk Real Food Grocery Budgets

Check out our latest posts!

  • Make an Amazing Costco Salmon Meal for just $2.20/person
  • Easy Way to Make Freezer Food (Without Trying)
  • Bake Strawberry Shortcake in the Crock Pot
  • How to Get Dinner on the Table Fast!
  • Our $0.99 Per Plate Costco Meal!
Home  ~  Simple Meals  ~  Club Membership  ~  Shop  ~  Privacy Policy  ~  Disclosure  ~ Contact

Copyright © 2022 · Beautiful Pro Theme on Genesis Framework · WordPress · Log in