Heavenly Homemakers

Encouraging women in homemaking, healthy eating and parenting

  • Home
    • About
    • FAQs
  • Recipes
    • Bread and Breakfast
    • Condiments
    • Dairy
    • Main Dishes
    • Side Dishes and Snacks
    • Desserts
    • Gluten Free
    • Instant Pot
    • Crock Pot
    • Heavenly Homemaker’s Weekly Menus
  • Homemaking
    • Real Food Sources
  • Store
  • Contact
    • Advertise
    • Disclosure
    • Privacy Policy
  • Simple Meals
  • Club Members!

How to Make Refrigerator Cookie Dough – Save Money and Use Healthier Ingredients

September 15, 2015 by Laura 14 Comments

This post may contain affiliate links. For more information, please see our disclosure policy.

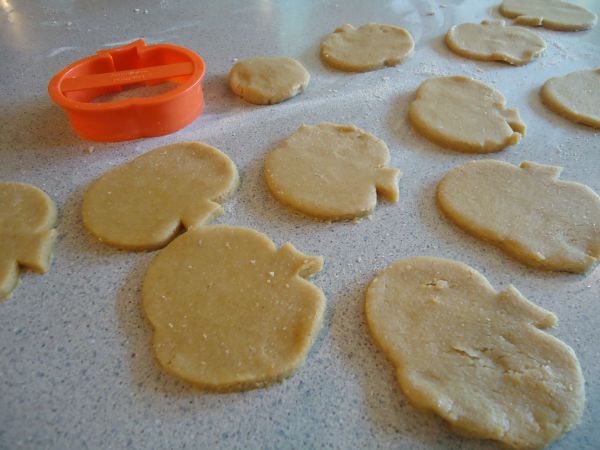
This idea was born out of pure laziness. I was hungry for my Easy {Low} Sugar Cookies, but the idea of chilling the dough, and rolling out the cookie dough, then cutting out the dough…oh it was all just too much.

I don’t want to knead bread dough, I don’t want to roll out sugar cookies…has it really come to this? (Yes.) So here is what I did to save myself some effort and time:

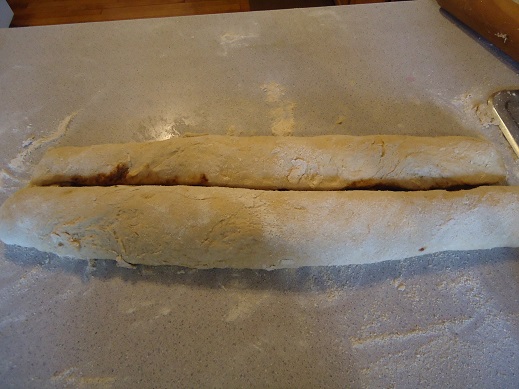
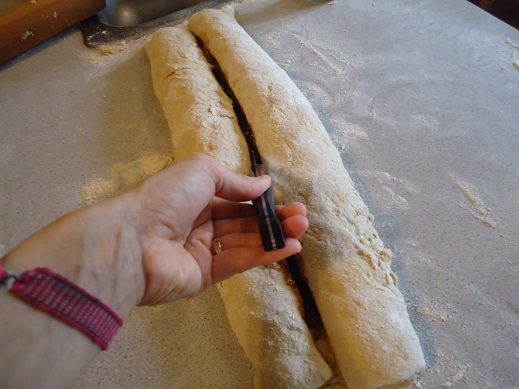
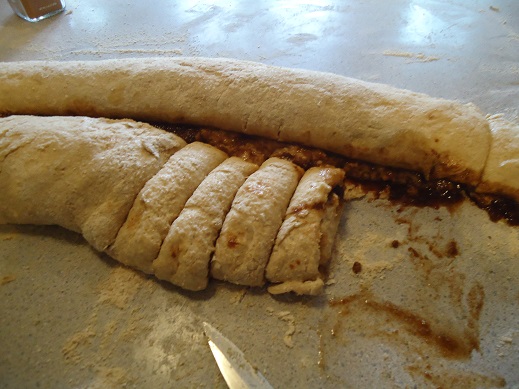
I mixed the dough. I took half of the dough and I rolled it up in parchment paper – just like a tube of dough you would buy at the store, except that mine didn’t have a Pillsbury Dough Boy pictured on the side. I stuck the tube in the fridge. It worked so well, I did the same with the other half of the dough. It was too easy. An hour later, I sliced my cookie dough tubes. I baked my slices (just as the recipe states). I rejoiced that I had avoided the difficult task of using a rolling pin. I ate a cookie.

Sugar Cookie Collage

Just a reminder that these cookies are very low in sugar – kind of like a sweet, buttery biscuit. We don’t miss the extra sugar because they are so delicious just as they are. If you were wanting to try the Easy {Low} Sugar Cookies recipe but balked at the idea of rolling and cutting and getting flour down the front of your shirt – just roll the dough into a tube. You will feel so Betty Crocker-ish, perhaps a little Martha Stewart-y, but mostly you will break in to a Heavenly Homemaker dance. Do not ask me to show you what this looks like. 

One thing has led to another with cookie dough tubes in my kitchen. These are all the other important facts you need to know:

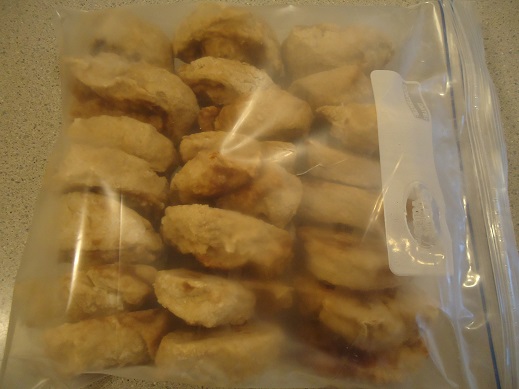
These Cookie Dough Tubes freeze well.Yum

These are so easy and fun to make, that I found that it made sense to make several batches to freeze to have on hand for all the cookie emergencies. To do this, simply place the parchment paper-wrapped dough into freezer bags, label, and freeze. Thaw in the fridge, if you think ahead better than I do. Otherwise, set the frozen dough tube on the counter-top for about 15 minutes, then slice and bake (according to the time and temp as directed in the cookie recipe). Yes, it’s that easy.

These Cookie Dough Tubes cost much less than what you can buy at the store.

I did the math, because I was curious and thought maybe you would be too.

One recipe of sugar cookie dough cost me roughly $2.60. This was using high quality ingredients, most of them organic. I get two tubes of dough out of one batch, each making about 18 cookies. This breaks down to $1.31 for one tube of cookie dough! Take that, Dough Boy! (I’m sorry. That wasn’t nice. You are adorable. You just aren’t good for us. And you are expensive. This is not your fault, because you are imaginary.)

These Cookie Dough Tubes aren’t limited to just sugar cookies.

Obviously, you can use this same idea to make other varieties of cookie dough. Chocolate chip works very, very well.

Chocolate Chip Cookie Collage

Need the recipes? But of course!

Whole Wheat Chocolate Chip Cookies

Easy {Low} Sugar Cookies

I haven’t tried yet, but I’m very sure this idea will work with:

Whole Wheat Chocolate Crinkle Cookies

Christmas Spice Cookies

How to Make Refrigerator Cookie Dough

Have you tried this idea before? What other varieties of cookies should we try with this idea?

Heavenly Homemaker's Club Members: Access your homepage and all your fantastic resources here! Not a member yet? Please join us!

How to Freeze Apple Pie Filling – Easy!

September 14, 2015 by Laura 12 Comments

This post may contain affiliate links. For more information, please see our disclosure policy.

When it comes to making and preserving Apple Pie Filling, you have a few choices. You can can it (can can, can you do the can can, can you…). You can freeze it, which I will describe here today. Or (and this is by far the most novel idea of them all) you can put the filling directly into a pie crust and bake it immediately.

apples

It all comes down to how much freezer space you have, how much pantry space you have, if you love canning produce, if you have plenty of jars, or if you really just want to eat an apple pie after dinner on this very day.

But really most of it comes down to apples. You can’t do any of this if you don’t have apples.

So…do you have apples? I have apples. This year I decided that the easiest way for me to preserve Apple Pie Filling is to freeze it.

If you want to can apple pie filling so that you can store it in your pantry, you can learn how to do that here. You should know that I break out in a sweat every single time I type the word p-a-n-t-r-y. I re-read it four hundred and eighty times to make sure I didn’t leave out the “r” because that would bring a whole new unintended meaning to my sentence.

apple_pie_filling_5

Here’s how to freeze apple pie filling:

1. Wash, core, and slice apples into a large bowl. I leave the peeling on. (Once again I sweat and make sure I added the “l” to p-e-e-l-i-n-g.)
2. Stir in 1/4 cup sucanat or brown sugar plus 1 teaspoon cinnamon per every 5-6 apples.
3. Transfer mixture to quart-sized freezer bags, 3-4 cups of apple pie filling per bag.
4. Label the bag and freeze it for up to a year.

How to Freeze Apple Pie Filling

When you’re ready to make an apple pie, simply thaw and dump the contents into an unbaked pie crust, then proceed as you normally would to make an apple pie. Here’s my Whole Wheat Pie Crust recipe. Even easier, use the filling to make an Apple Crisp or a Salted Caramel Apple Crisp.

It’s wonderful having prepared apple pie filling in your freezer, and yes, even in your pantrrrrrrry.

How’s your apple supply? Have you been able to get your hands on plenty of good apples this year? 

Heavenly Homemaker's Club Members: Access your homepage and all your fantastic resources here! Not a member yet? Please join us!

Easy No-Knead Whole Wheat Cinnamon Rolls For the Freezer ~ With Honey’d Orange Glaze!

September 13, 2015 by Laura 13 Comments

This post may contain affiliate links. For more information, please see our disclosure policy.

No-knead breads are THE WAY to go.

Cinnamon Roll with Orange Glaze

I’m not sure that my dearly missed, hard working grandma would be too pleased with me about this – but I’ve decided that kneading bread dough just isn’t my favorite thing. I mean, I’ll do it if I have to. But I’d rather stir ingredients, smile at the pile of dough (you know, for encouragement), then walk away.

This is how I found myself experimenting with my Whole Wheat Cinnamon Roll recipe. I had all the ingredients mixed together, but then I was like, “Really? Do I really have to knead this now? That just sounds soooo hard and time consuming.” (Really, Grandma. I know you lived through the Great Depression and fed nine children three meals a day from scratch with food that you grew or raised on your farm, that you worked from sun-up to sun-down in your teeny-tiny kitchen, and the only time you rested was to watch Judge Wapner after you turned 80. But do try to understand what I’m up against here.)

I figured that at the very worst, I’d have little hard cinnamon roll hockey pucks we could dunk in milk. So I did it. I walked away from my dough without kneading it.

It looked like this when I covered it up:

cin rolls 10

An hour later, it looked like this:

cin rolls2

Did it work, or did it work? 

Thus, my Whole Wheat Cinnamon Roll recipe is being turned into a No-Knead Whole Wheat Cinnamon Roll recipe because our lives are too full from all the hard work it takes to think about Grandma scrubbing all of the manure-crusted clothes on a wash-board.

What you see here is absolutely not a picture of me kneading the dough. It is simply me working a little flour into the dough after it rose so that I could roll it out without it sticking to the countertop.

cin rolls3

After I rolled it out, I spread melted butter over it and sprinkled a little sucanat and cinnamon over it.

cin rolls4

Then (like a boss) I rolled both ends until they met in the middle and separated the rolled dough with a knife. (Start on the outside, top and bottom, and roll them into the middle.)

cin rolls5

cin rolls6

I then proceeded to cut individual rolls, making a huge mess in the process.

cin rolls7

My rolls went on a pan in a most unattractive way because I leave perfectionism up to the perfectionists. Do not poke fun. They can’t help how they look.

cin rolls8

I froze the dough rolls on the pan, then transferred the frozen rolls to a freezer bag for another day. I will use them when I am busy not having to pluck a chicken for our dinner.

cin rolls9

No-Knead Whole Wheat Cinnamon Rolls – for the freezer (or for directly into the oven)

Easy No-Knead Whole Wheat Cinnamon Rolls For the Freezer ~ With Honey'd Orange Glaze!
 
Save Print
Author: Laura
Serves: 15-18
Ingredients
  • 1 cup warm (but not hot!) water
  • 2 Tablespoons yeast (active dry)
  • 2 teaspoons honey
  • 2½ cups milk
  • ½ cup butter
  • ½ cup honey
  • 4 teaspoons sea salt
  • 7-8 cups whole wheat flour (I use freshly ground hard white wheat)
Instructions
  1. In a large bowl, mush the yeast and 2 teaspoons honey together with the warm water and set aside. It will begin to form bubbles soon.
  2. In the meantime, stir together milk, butter, ½ cup honey, and sea salt on the stove until the butter has melted and the mixture has reached 120°.
  3. If the temp exceeds this, allow it to cool before moving on.
  4. Pour the milk mixture into the bubbly yeast mixture and stir.
  5. Mix in flour, two cups at a time until a nice dough has formed.
  6. Do not knead. (There is no need.)
  7. Cover the dough and allow it to rise for at least one hour, or until you remember that you were making rolls.
  8. Prepare the innards:
  9. Ingredients for the “innards” of your cinnamon rolls: ½ cup melted butter, ½ cup sucanat or brown sugar, and ½ Tablespoon ground cinnamon
  10. On a well-floured surface, roll the dough to about ¼ inch thickness.
  11. Spread melted butter over the rolled dough.
  12. Sprinkle with sucanat, then cinnamon.
  13. Roll up the dough from the outsides of the "dough circle" as pictured above.
  14. Cut apart the two rolled lengths, then cut the dough into ½ inch thick rolls.
  15. Place the rolls side-by-side on a baking pan.
  16. Allow them to rest/rise for about 20 minutes, then bake the rolls in a 350° oven for about 25 minutes or until they are golden brown.
  17. Glaze and serve!
3.4.3177

Honey’d Orange GlazeYum

2 teaspoons orange juice concentrate
1/4 cup heavy cream
2 Tablespoons honey

Whisk ingredients together on the stove until smooth. Drizzle over baked cinnamon rolls.

To Freeze and Bake:

Place the prepared rolls about a 1/2 inch apart on a baking sheet. Freeze for about two hours, then transfer them to a freezer bag. Store in the freezer for up to two months.

To bake, place the desired number of frozen rolls on a baking pan. Cover and refrigerate overnight. (In the winter, I leave them on the countertop overnight.) Place the rolls into a cold oven, then turn the oven on to 350°. Bake as directed above, adding a few minutes of additional time as needed.

Easy No-Knead Whole Wheat Cinnamon Rolls for the Freezer with Honey'd Orange Glaze

These are deliciously easy, and mostly low in sugar! They kind of resemble those frozen orange rolls you can buy in the freezer section – except that these have a little bit of nutritional value and not nearly as much sugar, so we can all rejoice.

Are you a perfectionist? Did my frozen roll picture cause you to cringe? I’m just a “get the job done and move on” kind of girl…which basically means that I am a mess when I cook.

Heavenly Homemaker's Club Members: Access your homepage and all your fantastic resources here! Not a member yet? Please join us!

Are Essential Oils a Fad?

September 10, 2015 by Laura 18 Comments

This post may contain affiliate links. For more information, please see our disclosure policy.

Let’s talk. Are Essential Oils a fad?

Essential Oils - Fad

Chevron decor, tatoos, and skinny jeans – plus a bunch of stuff I’m not aware of because I just don’t keep up very well. Those are kind of fads, right? I mean, chevron is the way to decorate right now – but in a few years we’ll all be sick of it just like we got sick of our peach and teal southwestern wallpaper of the 80’s (raise your hand if you remember this delightful decorating era).

We went from flared jeans to skinny jeans – as if we all sorely missed our pant legs and want to now hug them close. I’m not opposed to tatoos, but I do wonder if people might eventually get tired of looking at the very same thing on their arm for 60 straight years. This is why I didn’t decorate my new bathroom in chevron – because I’d get tired of it eventually. Clearly there is a direct connection in my logic between chevron, bathrooms, and tatoos. It all makes sense.

And then there are diets. I’d love to think that the “low fat” trend is on its way out. I mean, it is if I have anything to do with it. Eat real food fats like butter and coconut oil! Balance this with other real foods! You have nothing to be afraid of! There, I’m doing my part. (Yes, you’ll still fit into your skinny jeans.)

So let’s talk about Essential Oils. They are all the rage. Are they a fad? Or are they the real deal?

It’s easy to discover a product and declare it to be the be all and end all. The product that cures everything. The thing that heals what ails you and cleans your toilets too. Got naughty toddlers? There’s an oil for that. Feeling sluggish? There’s an oil for that. Need to sleep better? Oil!

Are Essential Oils a Fad

Is it for real? This is what I think:

1. Essential Oils aren’t new. We just think they are.

They were the first medicine. There are 188 references to oils in the Bible. Oils were found in King Tut’s tomb. Oils have been around for a very long time, but I certainly never heard of them until just a few years ago. That’s why it seems like they are the latest thing. Perhaps there’s a lot of hype going along with oils now because they seem new to so many of us. But they aren’t new – and I don’t believe they are a fad. I guess to some people they might be – as in they’ll get excited about them for a while, then brush them aside when something else comes along. But I plan on using them forever (she says, as she takes a whiff of peppermint oil).

2. Oils work. I can attest to this.

They’ve helped our family with countless issues. Our family has experienced their work many times over. (That was me, being very vague and non-specific because the FDA doesn’t allow me to say much more.) :)

3. Oils are easy. I love this.

I do not have to run my kids to the doctor every time they have an ailment. Essential oils are a perfect remedy to try first. I love having them in my cabinet so that we can often experience immediate relief when we begin to feel yucky. At the very least, they give temporary relief as our bodies do their job to fight off sickness. And there’s no “wait four hours before using again” like conventional medicines. Need to rub some on fifteen minutes after the first application? No problem.

4. Oils are not the be all and end all. Nothing is. Okay, well – Jesus is. C’mon now.

This summer our 13 year old, Elias, got his shoulder yanked out of its socket at church camp. Unfortunately, we didn’t know that was the problem at first. He just said his “shoulder hurt.” (He is a man of few words.) I oiled him just as Asa always does when he has a sports injury. Whereas Asa usually finds relief immediately, the oils didn’t even take the edge off Elias’ pain. I tried other oils. Nothin’. That’s when I finally looked at Elias head on and saw that his arm and shoulder looked funny (and by funny, I mean so not funny). Off to the chiropractor we went, where his shoulder was put back in place (also not funny). Oils are great, but they couldn’t put Elias’ shoulder back in its socket. There are doctors for this.

What are your thoughts?

I’d love to hear your experiences with Essential Oils! Do you use them? In what ways have they worked for you? Which ones are your favorites?

Heavenly Homemaker's Club Members: Access your homepage and all your fantastic resources here! Not a member yet? Please join us!

Easy (Make-Ahead) Baked Potato and Bacon Casserole

September 9, 2015 by Laura 15 Comments

This post may contain affiliate links. For more information, please see our disclosure policy.

It’s a Potato and Bacon Casserole. Life is good.

Bacon Baked Potato Casserole

This is so easy we can hardly call it a recipe. I’m pretty sure my family will be having this every other week for the rest of our lives for the following reasons:

  1. Bacon. Of course. And also, cheese.
  2. We can slather it with Spicy Ranch Dressing, which tastes so good I believe I shall become addicted to it.
  3. I can make several of these casseroles at once and freeze them for later, making this easy meal even easier.

This “casserole” is basically baked potatoes cut up in a dish with bacon and cheese all over it. I’m sorry that I can’t make it more complicated for all of you who would rather spend many more minutes sauteing, braising, and broiling. This time, you’ll have to get your steeping and zesting fix elsewhere.

Everyone else: I lovingly suggest that you go scrub some potatoes. You’re having this for dinner tonight.

Baked Potato and Bacon CasseroleYum

Easy (Make-Ahead) Baked Potato and Bacon Casserole
 
Save Print
8 medium-sized potatoes (any variety) 1 pound bacon 2 cups shredded cheddar or colby jack cheese Sour cream, chives, and/or Spicy Ranch Dressing for topping
Author: Laura
Ingredients
  • 8 medium-sized potatoes (any variety)
  • 1 pound bacon
  • 2 cups shredded cheddar or colby jack cheese
  • Sour cream, chives, and/or Spicy Ranch Dressing for topping
Instructions
  1. Scrub and bake potatoes by putting them into a covered dish in a 350° oven for 1½ hours.
  2. In the meantime, cut bacon into bite-sized pieces and cook thoroughly on the stove-top.
  3. Cut baked potatoes into chunks, spreading them out into a 9x13" baking dish.
  4. Sprinkle cooked bacon over the potatoes.
  5. Top with shredded cheese.
  6. Bake in a 350° oven for about 10 minutes or until the cheese has melted.
3.4.3177

Offer sour cream, chives, and/or Spicy Ranch Dressing to complete this main course. Serve with a salad and another fruit or veggie. It is too easy. Makes 6-8 servings.

Baked Potato Bacon Casserole

To Freeze This Dish: 

Make it as directed above. Allow it to cool completely. Cover and label. Put it in the freezer.

To Reheat and Serve This Dish:

This is my favorite trick. Get the casserole out of the freezer. Cover the frozen dish with foil (somebody needs to invent a 9×13 glass cover for my pyrex dishes). Put the frozen casserole into a COLD oven. Turn the oven on to 250° allowing it to heat up along with the casserole. After one hour, turn the oven up to 350° and bake for one more hour or until the casserole is thawed, heated through, and looks like wonderful cheesy deliciousness.

Let us all add this recipe to our “Reasons to Make Extra Baked Potatoes When We’re Making Baked Potatoes Anyway” list.

7 Ways to Use Baked Potatoes

Switch out the bacon in this casserole for other cooked meats. Switch out the regular potatoes for sweet potatoes. Just whatever you do, try it with the Spicy Ranch Dressing. Ah-mazing.

Heavenly Homemaker's Club Members: Access your homepage and all your fantastic resources here! Not a member yet? Please join us!

Just Take the Next Step

September 7, 2015 by Laura 32 Comments

This post may contain affiliate links. For more information, please see our disclosure policy.

Just take the next step.

I shall begin by boring you to death with a history lesson. Yes, the history of me. (Someone thinks highly of oneself, doesn’t someone?)

1. I was born in 1973. Blah, blah, blah childhood memories, middle school drama, high school graduation, college life, tall blond soccer player catches my eye. Nobody needs to hear all the in between stuff about burning barns and stealing candy bars.

2. Matt and I got married in 1994. After a few months he said, “Do you think maybe we could try another vegetable besides canned green beans?” Another vegetable? I’d only read about them in books. I gave steamed broccoli a try. It was so-so.

3. Baby boy #1 was born in 1997. Baby boy #2 came in 2000. I became a coupon queen, buying poptarts and spaghettios for next to nothing. Baby boy #3 came in 2002. Baby boy #4 was born in 2004. Life was a blur. Sometimes we all shared a peach. I’d only ever had the canned kind before. Did you know these actually grow on trees? (Peaches. Not baby boys.)

4. Life took a dramatic turn when Baby Boy #4 was two months old and broke out in eczema from head to toe. One doctor visit, some cortizone and a steroid later – he looked great! Two days after the medicine wore off, he was back to where we started. We had a decision to make. Keep baby on steroids, or no? Even with our zero knowledge of natural alternatives, we just couldn’t choose for our tiny little baby to be on either of these medications.

5. We began to learn about clean eating, clean cleaning (wha?), natural doctors who get to the root of a problem, vitamins, chiropractic, and the evils of margarine. The information overwhelmed my mommy brain, but I desperately wanted my baby to be healthy. Therefore…

6. I freaked out on everyone and tried to change everything at once. Out with the poison (non-organic everything) and in with the soaked grains, fermented vegetables, and kombucha. My family loved all of these abrupt changes and speak so fondly of this time in our lives. {bangs forehead with palm}

7. Months later, Baby boy #4 is still miserable. I’m going crazy. We all hate my sourdough. I get mad at all of America and the government and pharmaceutical companies. I drink Pepsi for breakfast, lunch, snack, and dinner because it makes perfect sense to avoid conventional apples but down a liter of Pepsi every day.

8. None of us can live with Psycho Mom – not even (especially not) me. I decide to try a few baby steps instead of taking 817 giant leaps at once. Everyone let out a sigh of relief.

9. We continue to learn more about how to help Baby boy #4, who, as it turns out, has kidney and liver issues. We learn that eczema is not a skin issue, but a gut issue. We brace ourselves for the long haul (and we pray like never before). We don’t sleep much. The Pepsi tries to help keep me awake.

10. I learn that food isn’t something to be feared. I learn that food is nourishment. This makes so much sense. I learn that food is still fun. We buy a grass-fed cow (of the frozen variety).

11. I drink Pepsi with my grass fed cow.

12. We start getting fresh raw milk from local farming friends. It is yummy (unless it is the first few weeks of Spring when it tastes like drinking fresh grass, and then we make a lot of milkshakes).

annesfarm2sm.JPG

13. I keep getting sick because of my asthma. My natural doctor tells me to stop drinking Pepsi. I stick my (imaginary) tongue out at my doctor. She writes “No more Pepsi” on a prescription pad. I put the paper on the fridge at home. I sadly put down my two liter. I begin to grieve Pepsi. I decide that I have to do this. I want to be healthy, and I need to take care of my four baby boys. I pray for strength and sniff my friend’s Pepsi cans when I get a chance. I have compassionate friends.

14. Years go by. Canola oil and margarine are exchanged for Coconut oil and butter. I slowly begin putting new fruits and veggies into our cart (and sometimes they are not even organic because I learned to do what I could with what I had and let God take care of us).

15. It is 2012 and after  7 years of the journey, I still love sugar. I justify my sweet tooth knowing that I’m eating it in the form of honey, real maple syrup, and sucanat – and hey, at least it’s not Pepsi. My body is like, “Whatever. It’s all sugar to me. Bring it.” My migraine headaches get worse. I add exercise to my healthy lifestyle choices. I eat brownies after I work out.

16. I hate migraines and I discover a new natural doctor in a nearby city. She helps me begin to detox all my previous 39 years of…we’ll just call it “stuff.” I feel crummy sometimes because detox is not glamorous. Then I start to feel better. Then sometimes worse. And then a little bit better. I add even more fruits and veggies to my diet, because I am starting to love and crave them so very much.

17. My detoxing body can’t handle sugary foods. Feeling sick after eating a cookie helps break my sugar addiction. I can take no credit for this.

18. I continue to go (and take our family to) our natural doctor. We continue to learn more. Baby boy #4 is now ten years old and has skin that is so soft none of us (even his teenage brothers) can keep ourselves from touching his silky cheeks.

malachi_age_9

I’ve been on this journey for ten and a half years. The journey never ends, friends, because every day we all have to make choices and work to care for the bodies we’ve been given. I wanted to share that timeline with you as encouragement for you on your healthy living journey.

Do you want to make healthy changes in your life, but you feel afraid? Are you feeling like you should change everything at once? Are you overwhelmed?

Take a deep breath and…

Just take the next step.

Let me tell you something profound (oh, just humor me):

The healthier you get, the healthier you will get.

See? Profound.

But it is true, because in my experience – one healthy step leads to another. Once you’ve tackled one healthy change, then your body is ready for another healthy change (with no specific one-size-fits-all-plan). After that, you will be confident to do the next thing. Your body will begin to crave healthiness. It is a natural response to being awakened to the good stuff.

So start with one thing – and it doesn’t even have to be the one thing someone else is choosing. It needs to be your next thing. Maybe you can take a walk a few times each week. Maybe you can get rid of margarine and get butter instead (please do this). Maybe you can focus on drinking more water to stay hydrated. Maybe you can discover a new fruit you love.

Whatever you decide to do, just take one step. And then another.

I will continue to strive, but I will never reach perfection and my kids will sometimes still eat Twizzlers at youth group. But each step I have taken toward better health has led me to the next one.

It’s good to look back on ten years and see how God has brought us to this point. You will (and already) have a story too.

So one step. Which one can you take next?

Heavenly Homemaker's Club Members: Access your homepage and all your fantastic resources here! Not a member yet? Please join us!

Spicy Ranch Dressing

September 6, 2015 by Laura 11 Comments

This post may contain affiliate links. For more information, please see our disclosure policy.

I just met something wonderful called Spicy Ranch Dressing.

spicy ranch dressing 1

Remember when I went to the Women of Faith conference with my girlfriends and got super silly? It may have been in part because of the meal we ate across the street from the arena before the event. Yes. I blame it on the specialty pizza. It was that good.

Who knew you could put thin slices of red potato on a pizza and turn out something amazing? The pizza had some sort of red-ish sauce drizzled all over it, and that very sauce is what made that pizza taste so good. Well, that and the bacon. Everything is better with bacon.

Of course I came home determined to replicate the sauce. Every potato needs that sauce, whether it’s on a pizza or not. So I looked it up on the restaurant website. It described the pizza blah, blah, blah “with spicy ranch dressing.” Bingo.

So I played. The result is too easy. Make this and forever drizzle it over your baked potatoes, your chicken, and sure – even your pizza.

Spicy Ranch DressingYum

Spicy Ranch Dressing
 
Save Print
Author: Laura
Ingredients
  • 1 cup homemade ranch dressing (because it is good for you and delicious)
  • 1-3 Tablespoons of your favorite hot sauce like Tabasco, Cholula, or Sriracha
  • 1 teaspoon chili powder
  • 1 teaspoon cumin
Instructions
  1. Mix together, and enjoy.
3.4.3177

See how easy that was? You’ll need my homemade ranch dressing recipe.

Want it to be spicier? Add more hot sauce, chili powder, or cumin. Want it to be less hot? Cut down the hot sauce, chili powder, or cumin. Really, it isn’t difficult.

Spicy Ranch Dressing

Later this week, I will share a fun new Baked Potato Casserole I came up with to use with this Spicy Ranch Dressing. You will love how simple it is. And yep, there’s bacon on it. (And all the husbands everywhere said, “Yes. Keep reading that one lady’s blog – the one who gives you recipes that use bacon.”)

Give me more ideas besides potatoes, chicken, and pizza for this dressing. Think it would taste good on a salad? (Yes.) Ooh, maybe with Sweet Potato Fries. Oh my goodness, yes. What else??

Heavenly Homemaker's Club Members: Access your homepage and all your fantastic resources here! Not a member yet? Please join us!

New ~ You Can Receive a (Free) Once-a-Week Newsletter!

September 5, 2015 by Laura 15 Comments

This post may contain affiliate links. For more information, please see our disclosure policy.

How about a weekly newsletter? Yes!!

Fun news for all of you who are screaming, “Ugh! My inbox! Somebody do something!”

I’m finally getting around to doing something. And there are freebies involved. 

How my free newsletter works:

Every day when I post something new here on my blog, the content goes out in a free email newsletter the very next morning. This works great for people who prefer to read content via email or who simply don’t want to miss a post.

Then there are the people who don’t want to miss a post but don’t like having their inbox overflowing all the time. This creates a conundrum (my new favorite word). 

So finally, we (as in, my tech guy did all the work and I said “thank you”) have set up an option which will allow you to receive all of our posts in one single newsletter each week (still free!). Subscribers will receive this each Monday afternoon. It will include all of the blog posts I’ve written during the previous week. All the info – less email clutter!

Keep in mind that every once in a while I post a deal or freebie that is time sensitive – so reading just once each week means you might miss out. If that is the case, and I feel it is important enough, I will send out a brief “special newsletter” to keep you in the know. I predict that will happen like…four times a year. I think this will be a great option for those of you who prefer one big newsletter instead of six daily newsletters.

Obviously, you can still just visit my blog directly any time you want. Read the content, search the archives, look for recipes – it’s all there just waiting for you.

If you are currently subscribed and receive my daily newsletter, and you decide you’d rather switch over and instead receive the Once-a-Week Newsletter, simply subscribe to the new Once-a-Week system and you will be removed from the daily newsletter automatically. If anything wonky happens, let me know!

So how about those freebies?

Well, there are two. All subscribers receive this free eBook along with a fun set of inspirational cards to download and use as you wish.

breakfast_e-book cover_sm

Free Gift to Subscribers

Get these freebies by subscribing to our free Daily Newsletter here.

OR get these freebies by subscribing to our free Once-a-Week Newsletter here.

Any questions? Let me know!

Heavenly Homemaker's Club Members: Access your homepage and all your fantastic resources here! Not a member yet? Please join us!

Why I Love My Readers and Do You Ever Wonder What My Blogging Life Looks Like?

September 4, 2015 by Laura 33 Comments

This post may contain affiliate links. For more information, please see our disclosure policy.

I thought it might be fun to share the inner-workings of my blogging life to let you know some of what goes on beyond the words you see on the screen when you pull up HeavenlyHomemakers.com or receive my newsletter.

My blogging life

First, let me tell you how much I enjoy the community here. As in – put a hundred exclamation marks behind that sentence because I really, really enjoy this community. (!!!!!) You all are sweet, smart, funny, well c’mon. You put up with me and you say nice things like “thank you” and “I love your recipes.” On days when my kids are like, “You’re making that again?” and you know, just in general when I get grunts for answers because sometimes boys just don’t have any words – hearing your words is musical-icious. (Also, you are so supportive when I make up words.)

Are you ever curious about the back-end of this blog and about what it’s like to be a full time blogger? This post will attempt to answer that in about 1,800 words. For the record, this one took me about 3 1/2 hours to write (not all in one sitting).

Here’s a picture of the screen I look at while I’m working. Yes, I always have forty-million or twenty windows open at one time. That’s because I’m doing research on different websites, editing pictures in PicMonkey, clicking over to check/answer email, clicking over to Facebook to post something, and etc, etc. I need a lot of windows open at once.

screen blogging2

So there’s that. That’s what a post looks like while I am writing it. I write, edit, upload pictures, categorize posts, update my sidebar, and do dozens of other blogging tasks in software called “WordPress.” When I hit that blue button on the right which says “Publish,” that’s when you see my post on the front end of HeavenlyHomemakers.com.

How long does it take to write a blog post?

Well, that just depends. I would say it takes anywhere from 1 to 4 hours of writing/editing time to complete a post, but usually somewhere in the middle. Some posts take longer to word correctly and I change gears several times, praying throughout. Some posts flow easily. Sometimes I encounter 18 interruptions while I’m trying to write three sentences. This makes me so happy that I yell, “Please family, keep coming into my office to ask me questions while I’m writing because I love it so much!”

When do I write and work on all the other blogging stuff?

I’m trying to practice a better “wear one hat at a time” system this year. If I try to hop back and forth between homemaking and homeschooling and writing and emailing and phone calls and cooking and running the kids to piano lessons – I kind of get overwhelmed (read: grouchy and unproductive, but mostly grouchy). This school year I am being intentional about leaving blog work for the afternoons on weekdays, if possible. This means that most of the morning, I only wear my mom/homemaker/homeschool teacher hat, leaving my blogger hat to rest in my office chair until after lunch. This is working soooo much better than my past “just grab a hat and put it on top of your other hat and hope you complete a sentence and put lunch on the table” system.

Now I will say that part of my homemaking tasks in the morning do often include trying new recipes and taking pictures to use in my writing work later. That’s a huge perk to what I do here – I get to feed my family as part of my work. That’s about the only kind of work-overlap that works well. Trying to write and parent or answer emails and homeschool is just too difficult for me.

Right after lunch, I hit my office. I have accomplished much (hopefully) in my home all morning, so now I can focus on writing and all the other blog stuff.

Saturday I am in my office as much as possible between family life and ball games – trying to catch up on blog work I got behind on during the weekdays. If I can, while my kids are chilling on Sunday afternoons, I can usually get some solid writing time in. This is my favorite time to write – on a quiet Sunday afternoon.

One weekday each week (usually Tuesdays) I am practicing a Sabbath rest. That’s the day I take a break from almost all of my work, from cooking to blogging. This is so necessary and good.

What else is there to do for the blog besides write?

Beyond writing during my work time, I spend time editing pictures and creating “Pinterest friendly” images on PicMonkey. I upload those into my blog posts as I write. I also spend quite a bit of time emailing readers, answering questions, and trouble shooting eBook purchases. I email other bloggers I’m working with on projects. I reply to potential advertisers letting them know of my review/giveaway policies.

I do paperwork and accounting to keep track of my income and expenses for tax purposes. I jot down new post ideas. I organize and schedule posts in a way I feel will be most interesting to you. I correspond with my tech guy if there’s anything I need him to do or fix on my site or newsletter. I work on eBook projects. I have a weekly column in our local paper, so I tweak something I’ve written on my blog to make it work for a newspaper. All together, my work usually takes 30-40 hours each week.

What is this income and expenses stuff of which you speak?

When I first started this blog, it was basically free to run. This site has grown in every way (yay, Heavenly Homemakers community!) so that it now takes several hundred dollars every month to keep it up and running. My monthly costs include paying for a dedicated server to house this website (it’s kind of like paying rent for cyberspace), paying for my subscriber newsletter service that gets sent out every day, paying paypal fees for every eBook transaction, and paying for internet (gotta love that tax write off). I pay someone to help answer emails (because I can’t keep up by myself) and someone to help with Pinterest and Facebook marketing. Those are my regular monthly payments. Every few months I pay my tech support guy to do all the stuff that makes my eyes cross. There are some yearly subscription payments also, like for PicMonkey and GraphicStock.

Thankfully, this site also makes an income to cover these expenses. The ads on my sidebar accrue income each time someone visits my site. I did the math, and the amount-per-reader is so tiny it made me wish I’d never opened my calculator. But you know what – it does add up, so advertising money is a huge help with my site expenses and to help pay for the time I put into this work.

Obviously, I make money when I sell my own products in my shop. I also share deals I come across online – which is a win-win because we all get a good deal if it’s something we need, and I make a small cut on the purchase amount.

To be honest (which is a phrase I never say because I’m always honest so why would I say that?). But the truth is, even though I really love what I do here, I couldn’t/wouldn’t do it if I didn’t make some money while I was at it. Fun as it is, this can be hard work and it is time consuming. It would be like working a full time job for free. No one can keep that up for long.

How do you support the work here at Heavenly Homemakers?

1. You show support just by being here.

It never costs you anything to visit my site. I love this. My blog and newsletter are free to you – all the time. When you come, my advertising software sees you (not with eyes, just with cookies…um, it just means my site gets a hit and my advertiser pays me a percentage of a penny for your visit). So keep visiting! That benefits my work here! And…without you, there would be no Heavenly Homemakers community. That is worth so much to me.

2. When you share our posts and recipes on Facebook, Pinterest, etc.

When you share or pin posts, that means other people have a chance to click over and join this community. Thank you for doing this!

3. When you buy my eBooks or click through my links to make a purchase anytime I share something you need/want/like.

If it’s something I love and use, I will share it with you. I typically wait until that particular something is on sale. Then it’s even better because we can buy what we need and save a buck or twelve, all without leaving the house. For no extra cost to you, but simply because you clicked and purchased something you need/want/like through my special heavenlyhomemaker link – I’ll get a little cut from the purchase. It’s how some companies market and advertise, so it’s a win/win/win.

A note about the deals or posts I share that don’t interest you

There are a lot of you – and while we are a fantabulous community, we are all unique. Some of you are retired, some of you are teenagers, and the rest of you are somewhere in between. I am not going to hit a home-run with all of you each time I share a recipe or a deal or a spiritual reflection. It’s like walking into a store (except not really, but just work with me here) and picking and choosing what you need and what you like and what works for you.

Do you go through coconut oil like water? You love the deals I share for that. Allergic to coconuts? Well, shucks. Love whole wheat recipes? I’ve got ’em. Have to eat gluten free? Eh well, the whole wheat recipes aren’t helpful to you at all. Love what works for you (and maybe give it a Facebook or Pinterest share!) and skip what doesn’t work for you. We can all still be friends.

So how about you?

Have you ever written or do you currently write and maintain a blog? How much time have you found that it takes to do it well? Do you love it?

~~~~~~~~~~~~~~~~~~~~~~~~~~~~~~

This posts includes affiliate links. (I’ll always disclose that on posts so you know if I’m making a potential commission on anything mentioned.)

Heavenly Homemaker's Club Members: Access your homepage and all your fantastic resources here! Not a member yet? Please join us!

Sugar Cookies ~ the Whole Wheat, Low Sugar, Super Delicious Way

September 3, 2015 by Laura 15 Comments

This post may contain affiliate links. For more information, please see our disclosure policy.

Easy (Low) Sugar Cookies

I tinkered with my old sugar cookie recipe and cut the sugar from 1 1/2 cups down to just 1/2 cup. I personally think it could be cut even more, but that’s because I am weird about sweetness levels now. I’m the one who thinks coffee is sweet when it has only cream stirred into it. It looks so creamy delicious, and I say things like “mmm it is so sweet and good” while I’m sipping it, so my people keep trying it thinking that maybe this time I really mean it. I mean, I do mean it – why would I lie? It’s sweet. But then they take a sip and they make faces and say, “Eww that is so not sweet, what are you even talking about?” This is how I never have to share my coffee.

Now sharing these cookies is a different story. Everyone loves these lightly sweetened jewels. The butter makes them flaky good. This will be my new go-to sugar cookie recipe at all holidays, special events, and uneventful Wednesdays when the mood strikes.

Note about the sugar: Most of the time I use sucanat because it is sugar with some nutrients left behind. For occasional recipes when I’d like to avoid the product turning out too dark brown, I pull out some organic raw sugar. It’s only barely better than white sugar, but we’re going light on the sugar here so I don’t throw a fit about this.


Sugar Cookies the Healthier WayYum

4.0 from 1 reviews
Sugar Cookies ~ the Whole Wheat, Low Sugar, Super Delicious Way
 
Save Print
Author: Laura
Serves: 20-30
Ingredients
  • 1 cup melted butter
  • ½ cup sucanat or raw sugar
  • 2 eggs
  • 1 teaspoon vanilla extract
  • 1 teaspoon baking powder
  • 3½ cups of whole wheat flour (give or take)
Instructions
  1. Stir together melted butter and sugar.
  2. Add eggs, vanilla, and baking powder.
  3. Stir in flour until a solid ball of dough forms.
  4. Cover the bowl and place it in the refrigerator to chill for about an hour.
  5. Roll chilled dough on a well-floured surface and thin or thick as you like.
  6. Cut with cookie cutters and place them about a half inch apart on a baking sheet.
  7. Bake in a 350° oven for about 12 minutes or until cookies are lightly browned.
  8. Makes 20-30 cookies depending on the thickness and size.
3.4.3177


sugar cookies 4

Notice the little round piece of squished circle dough, ready to be baked along with the pumpkin-shaped cookies. It is a part of the “No Cookie Left Behind” program. It’s what you do when your remaining dough isn’t big enough to shape.

Frost these cookies if you like, but then they fall out of the Low Sugar category. We find these to be perfect as they are, and some of us love to eat them with our coffee that is sweetened only with cream.

It’s almost cookie rolling, cutting, and baking season – so I can’t wait to hear what you think about these! (We’re on our third batch already. I may have failed to mention to my kids that I cut down the sugar in this recipe. Do not tell.)

Heavenly Homemaker's Club Members: Access your homepage and all your fantastic resources here! Not a member yet? Please join us!
« Previous Page
Next Page »

Join Our Community!

 Facebook Twitter E-mail Instagram Pinterest

Popular Posts

~ Will All of the Real Moms Please Stand Up?
~ Easy! Stir-and-Pour Whole Wheat Bread
~ How to Make Gatorade
~ 31 Real Food Breakfast Ideas
~ Dear Teenage Girls...
~ When Mom Takes a Step Back
~ The Inexpensive Health Insurance We Love!
~ Let's Talk Real Food Grocery Budgets

Check out our latest posts!

  • Big Family Food and Fun: May 31-June 6, 2026
  • Big Family Food and Fun: May 24-30, 2026
  • Free 7-Day Summer Menu Plan
  • Big Family Food and Fun: May 17-23, 2026
  • Easy Side Dishes for Summer
Home  ~  Simple Meals  ~  Club Membership  ~  Shop  ~  Privacy Policy  ~  Disclosure  ~ Contact

Copyright © 2026 · Beautiful Pro Theme on Genesis Framework · WordPress · Log in