Why is it, do you suppose, that while I was making pretzels yesterday I had a sudden urge to grab a shoe and a cottage cheese container?

<shudder>
Encouraging women in homemaking, healthy eating and parenting
Why is it, do you suppose, that while I was making pretzels yesterday I had a sudden urge to grab a shoe and a cottage cheese container?
<shudder>
 Heavenly Homemaker's Club Members: Access your homepage and all your fantastic resources here! Not a member yet? Please join us!
Continuing on from yesterday’s post about Cutting a Boys’ Hair Like a Pro, please welcome again Cheryl from Moms in Need of Mercy as she guests posts more about cutting little boys’ hair with clippers!
————————————————————-
As moms in need of mercy in all walks of life, when we can find ways of doing things ourselves instead of paying someone else to do them for us, we can save lots of money. Replacing a $10 haircut a month with one at home will save $120 dollars a year–and that’s just for one son. How’s that for inspiring!
When we talk about cutting our sons’ hair ourselves, I find clippers less intimidating and more forgiving than scissors. Stick the guard on (I use a longer one for the top and front, a shorter one for the back and sides), slide it carefully through the hair, blend with scissors, voila–you have a fairly decent haircut. But since my friend Liz is the trained cosmetologist and I am just the amateur, let’s go with what she says when it comes to clipper cuts!
Whereas with a scissor cut, you start with damp hair; with a clipper cut, the hair needs to be perfectly dry.
In Liz’s professional opinion, using a guard higher than a number four (or a half-inch) is just about worthless. She says the clippers will miss so many hairs that you might as well just use your scissors and follow those angles that we talked about in yesterday’s post.
So plug those clippers in, and let’s get to work!


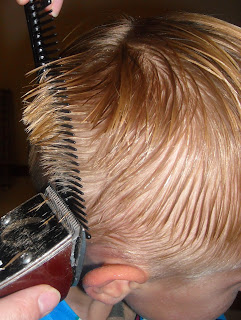
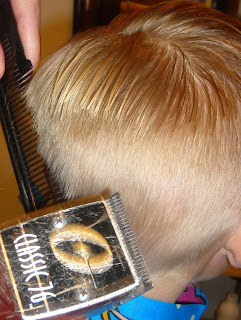
So we work around the head this way and wind up with that “dog at the groomer’s” look. Wonderful, isn’t it? Depending on how your son is behaving that day, you could stop there, or do the right thing and finish it. :) Making everything even is the art and science of blending, which comes later.


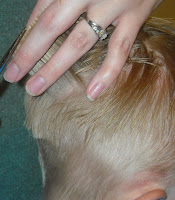
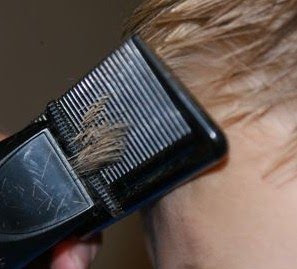
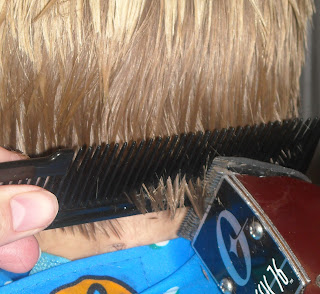
The next step is to blend the sides and back by pulling the hair straight out and cutting it parallel to the shape of the head, as the pictures below illustrate.





 Heavenly Homemaker's Club Members: Access your homepage and all your fantastic resources here! Not a member yet? Please join us!
Ready to learn how to cut a boys’ hair like a pro?
Remember how I promised to show you how I give my boys’ haircuts…and then just at the moment I had my long-haired boys all lined up for haircuts and pictures…my camera batteries died? While we’re waiting for my boys’ hair to grow back for the photo op, Cheryl from Moms in Need of Mercy offered to guest post on this subject for us! And she got her PROFESSIONAL cosmetologist to help us out!
——————————————————–
When thinking about giving your son a haircut, do you:
a) shudder at the thought of what it might look like if you did it yourself,
b) reach for your scissors with a glint in your eye,
c) reach for your phone to make an appointment for him,
d) wish you knew more of what you were doing, so you weren’t just “winging” it (come to think of it, he kind of looks like he has wings when you’re done)
Haircuts, even for boys, are expensive. As often as their hair grows, this adds up to some serious cash. And while there are a number of cool boys haircuts to choose from at the barbershop, if you know how to cut your son’s hair at home, and you know how to do it right, both of you will be pleased.
If you’ve ever wanted professional lessons on how to cut his hair by yourself, my friend Liz–a licensed cosmetologist–agreed to show me (and you) the tricks of the trade. Normally, these lessons would cost you a partial cosmetology school tuition, but we are bringing them to you free! Now go pour yourself an ice water on me, and let’s get to work!

As you can see from the above picture, cutting hair successfully is all about the angles. To begin, you may want to start with the neckline. (Liz thought that beginners may want to start at the top. This way, you can set the top length as your guide and blend down from it, rather than having to cut everything again if it doesn’t blend properly when you get to the top last).
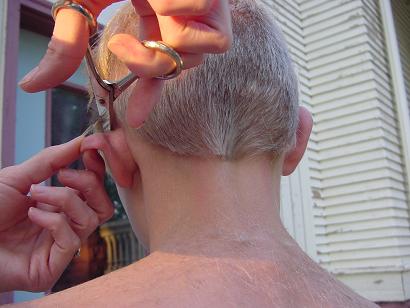
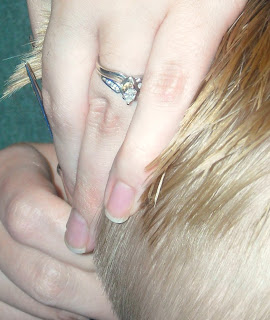
But let’s say you start at the neckline. Working on the back of the head, starting from the area of the top of the ear down, use your water bottle ($1 at the Dollar Store/Walmart/Target) to spray the hair down and cut at a 45-degree angle, slanting toward the neckline. You will hold the hair according to this angle and cut along your fingers, as you can see in these pictures.


Once you have worked your way across the back of the head, you can use your scissors to carefully go straight across to form the base of the neckline. As you can see Liz demonstrating, you want to make sure to hold the hair down firmly so you cut it evenly.
Liz says if you are right or left-eye dominant, it could make your haircut slant. So when you finish the neckline, get eye level with it and check that it does not slant. If it does, correct it!





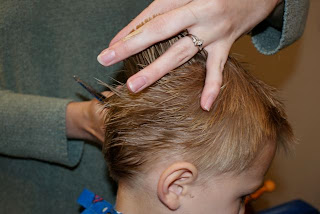
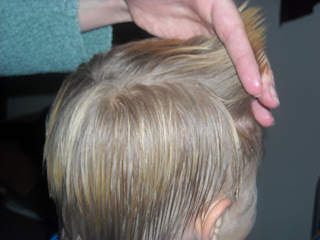
Just as your child’s patience has about reached its limit, you will reach the top. Reassure him that you’re almost done and you’ll give him a reward for sitting so nicely (or not so nicely!) when you’re finished. Take the hair from the center of the top of the head, lift it up, and cut it straight across. If the very front of the forehead looks too choppy when you’re done, you can point-cut it. This is where you will use the point of your scissors to cut small points in the hairline (you don’t want it to look like candy-corn) :)

If your son has cowlicks at the top of their head (mine do), you can leave the hair longer here to compensate. The extra weight will help prevent it from sticking straight up and you can work the look into several cute little boy hairstyles. To accomplish this, you will want to angle the hair slightly toward the front.

Now you’re just about done! The only thing left is to check the cut to make sure it’s even. You should be able to run your fingers through the hair, pull up various sections, and have the lengths line up evenly (angling in places, but with no long hairs jutting out). It should be well blended. Correct any mistakes you find, and try again in another 3-4 weeks, depending on how quickly your son’s hair grows!

Subscribe for FREE to Heavenly Homemakers so you won’t miss all the new Simple Recipes and ideas we share to save you money!
Heavenly Homemaker's Club Members: Access your homepage and all your fantastic resources here! Not a member yet? Please join us!
Every year that we’ve lived here in this college town, we’ve loved getting to know the YC students. We’ve often offered students to do their laundry at our house, come do homework here, hang out with us, eat home cooked meals.
Some have taken us up on our offer, but none of them have just made our family their family…and our home their home away from home.
Until this year. Woohoo!
This year we have a young dating couple who has really believed that we WANT them to hang out at our house as much as they would like to! They do their laundry here, work on homework, join us for meals, play with our kids. We love how they are showing our boys what a healthy, Christian dating relationship can look like. (Not that our boys have a clue that there are girls out there and that girls are CUTE…but they’ll figure it out soon enough and we love that they are seeing such a good example.) We are very honored to have them in our home.

Often when they call to see if it’s a good day for them to do laundry, they ask if Matt and I would like to go on a date while they are here to keep the kids. Blessings all around!
Last week during the college fall break they were able to join us for several meals since the cafeteria wasn’t open. It was great! Then on Sunday, they insisted on cooking for us! So nice!
I’m so grateful that God has put Adam and BryAnna in our lives and pray that we are as much a blessing to them as they are to us!
—————————————————————
What are you thankful for this Gratituesday? Write about it on your blog, then come link up with us here. If you don’t have a blog, be sure to leave a comment letting us know what you’re thankful for!
Heavenly Homemaker's Club Members: Access your homepage and all your fantastic resources here! Not a member yet? Please join us!I have a few different things to share, which is turning this menu plan post into a random post. Wow…starting the week off with a bang, aren’t we? :)
First, I know a lot of you have been waiting to hear how our Potato Container Garden experience went. I was SO excited to dump out the container last week and see how many (hundreds of) pounds of potatoes we grew in that one little space. I KNOW this idea works because I’ve read many testimonies from people who say that it does. But ours? Nope. We got enough potatoes for about a meal and a half. Such a bummer! We will try again next year.
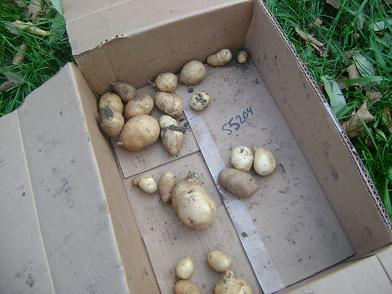
Feel free to feel sorry for me if you want to and say things like, “Awww, Laura…after you worked so hard…that’s all the potatoes you got? Bless your heart.” And then I will nod pitifully at you.
On a much happier note, we planted lots of potatoes elsewhere, so we still have tons of potatoes for the year! We will not be potato-less. Not even close. :)
Second, last week my oven broke. Wanna know how I discovered that it was broken?
I put a chicken and some veggies in a roaster, stuck it in the oven, turned it on, then left for soccer games. Came home at 7:15 from soccer games hungry, cold and ready to eat a hot dinner…and found a raw chicken and hard vegetables in the oven. :( I quickly made my “fall back meal” of salmon patties, creamy mac and cheese and peas…and put the chicken and veggies in the crock pot for the next day!
It was just the heating element and Matt was able to get it fixed for me three days later…but that was three days without my oven. SO if any of last week’s meals look a lot like this week’s meals…it’s because I couldn’t bake last week and I had to change my meal plan!
Third, well…I have a LOT of extra things going on right now in my home that I’m trying to get organized for (details coming later), and so I feel a bit short on time to write out a detailed menu for this week. THIS WEEK, I’m just going to “jot down” meal suggestions for me to reference through the week because I don’t have time right now to organize it all. A random post deserves a random menu, right?
Breakfasts: Sweet potato streusel muffins, scrambled eggs, whole wheat waffles, homemade whole wheat donuts, smoothies, peanut butter honey toast, chocolate chip muffins
Lunches or Dinners: Sweet beans and hot dogs, Alphabet soup with homemade soft pretzels, Chicken and noodles, Lamb burgers, Spaghetti, BBQ chicken with ranch potato wedges, Meatloaf, Grilled cheese sandwiches, Sourdough pancakes, Taco potatoes, Chicken enchiladas, Deer steak
(Meals will be served with lots of fruits and veggies…yada, yada.)
Oh, and Tuesday night I’m feeding the YC Women’s soccer team a lasagna dinner. Ever since I fed them the first week of practice back in August, they’ve been asking for my lasanga again. How sweet are they?
Bless YOUR heart if you kept up with these ramblings. Thanks for allowing me some crazy, unorganized writing this time. I’ll try to write normal posts this week. We’ll talk more about grain mills, have a giveaway, talk about Christmas budgets, Gratituesday, and hopefully little boys hair cuts!!!
——————————————–
Visit Organizing Junkie for more menu planning inspiration!
Heavenly Homemaker's Club Members: Access your homepage and all your fantastic resources here! Not a member yet? Please join us!Saturday, October 17 is the final day for the Holiday Hospitality E-book special sale in the Shop!
Here’s an email I received from Janna after she purchased these e-books earlier this week:
Laura –
I have spent many years trying to follow various holiday organizational plans ( I am sorely lacking in organization skills and motivation) only to fail badly in my attempts. I just purchased your package, and I have to tell you that I have discovered what was missing in trying to follow the other plans. It was JESUS! I know it seems too obvious, but I was not motivated because all of the plans focused on presents and decorating. The way you have included scriptures, prayer ideas, and general suggestions (along with manageable tasks) has made the difference for me.
Thank you,
Janna
That’s the kind of email that makes my day! Thank’s Janna for letting me share what you had to say!
If you haven’t purchased Heavenly Homemaker’s Guide to Holiday Hospitality and/or Heavenly Homemaker’s Guide to Holiday Hospitality for Kids and you want to grab them at a great sale price, you have until 11:59 Saturday night!
Heavenly Homemaker’s Guide to Holiday Hospitality…$5.00
~
Heavenly Homemaker’s Guide to Holiday Hospitality for Kids…$5.00
~
Holiday Hospitality E-book Package (includes BOTH e-books!)…$8.00
Heavenly Homemaker's Club Members: Access your homepage and all your fantastic resources here! Not a member yet? Please join us!I’ve been grinding my own flour for about four years now and I absolutely LOVE, LOVE, LOVE it!! I can’t say enough good about freshly ground whole grain flour. The taste is NOTHING like store bought whole wheat flour. The freshness is unbeatable. Because it is fresh, the nutritional value is much higher. I love my grain mill!
If you do a lot of baking and you want to bake with whole grains…I very much recommend saving up for a grain mill. (I sold baked goods at our farmer’s market one year to pay for mine!)
Here’s the investment payoff I calculated:
I have a Nutrimill, which cost me about $250…
I buy organic hard white wheat berries, 50 pounds for about $33.00, which lasts me about two months. I make all of our bread, tortillas, muffins, rolls, pretzels, crackers, cookies, cakes…everything that requires flour.
If I were to go to the store and buy the amount of bread and tortillas our family of six needs in two months, my rough calculating tells me that I would spend about $56.00. JUST ON BREAD AND TORTILLAS. That doesn’t include all the muffins and other grain products I make with my $33.00 bag of grain in two months.
AND…the products I bake are a bajillion (scientifically proven :) ) times healthier than what I can buy at the store.
Looking at those figures…it would seem that my grain mill paid for itself in about 10 months…although it’s really much less than that because again, my figures only included the cost of bread and tortillas and I get MANY MORE baked goods out of my bag of grain than just those (plus I was being conservative in my calculations).
So, I would say my grain mill paid for itself in about six months…and the savings just keep on keeping on! In fact, while I had my calculator out I figured out that I’ve saved approximately $552 in four years by grinding my own flour and baking whole grain food from scratch for my family. THAT was exciting to calculate!
There now. Would you like me to write a letter to your husbands, convincing them to buy you a grain mill for Christmas? I’d do it. :)
This post begins a short little series on Grain Mills and grinding and baking with whole grain flour. Coming up I’ll share about:
Heavenly Homemaker's Club Members: Access your homepage and all your fantastic resources here! Not a member yet? Please join us!Ever since I wrote this post about our homeschool schedule and promised to do a “Day in the Life” post…I’ve been TRYING to take pictures of a day in our life.
Wow…I didn’t realize how tricky that job would be. The days of our lives are um…eventful. Especially during soccer season. I had a hard time taking a picture journal of one entire day.
Long story short…I couldn’t make it happen. SO…instead I decided to use all the pictures I’ve taken in the past several days of our lives to give you a feel for what our days look like. You’ll see that they really don’t look very much like this schedule…ever. That’s okay…that’s the beauty of homeschooling and being flexible and letting go of the idea that everything will be blissful and perfect and charming when you are a parent. (That was me doing a little self talk…telling myself that it’s okay to let some things go and realize that not everything will be blissful and perfect and charming as I parent my children.)
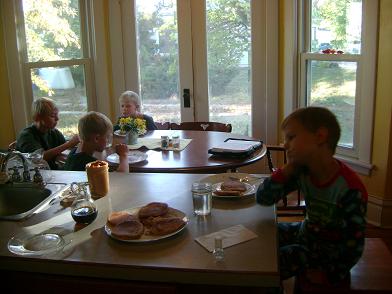
Here are all the boys eating pancakes for breakfast. Even though our days can look quite different when it comes to the schedule…we always work to make time for our Breakfast/Bible Reading time.

After breakfast we try to do some of our “together” work. On Mondays and Wednesdays this is usually the time we work on our Geography Packets. On this particular day, the boys were learning more about the natural resources in each state. Guess what? Nebraska produces a lot of corn. Bet you never knew that, huh? :)
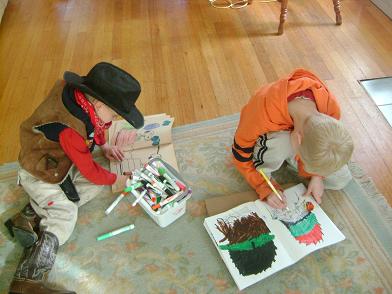
I let the boys choose a quiet activity while I read History to them. Of course…the day I took this picutre they decided to color. Probably because I had mentioned in this post that my boys almost NEVER sit quietly and color. Had to prove me wrong, didn’t they?

Next, the boys work on some of their individual work. Here, Elias is working on his handwriting. This can take anywhere from five to twenty mintues. Five if I don’t remind him that the point of working in a handwriting book is to LEARN TO WRITE NEATLY. Twenty if he uses his handwriting book to learn to write neatly. ehem
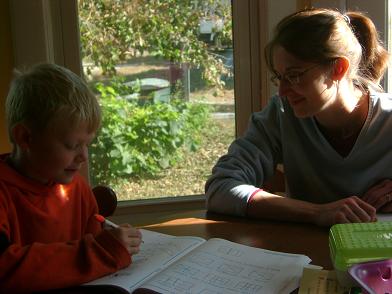
Elias (2nd grade) usually needs help with his math…so here we are working on it. A special thanks to photographer Justus. And I suppose after looking at this picture it’s apparent that I don’t usually take the time to do anything with my hair on a typical school day? Yeah, it’s not in the schedule.
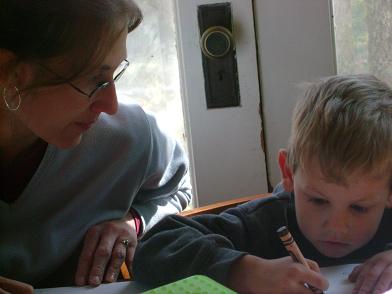
I actually got some Pre-K time with Malachi on this day. I sort of sat in the middle between Elias and Malachi and worked with both of them at the same time.

Asa hides out in an upstairs bedroom to work on his math. We found that it cuts his math time in half if he’s alone in an upstairs room vs. if he’s down in the kitchen where there are always lots of distractions.
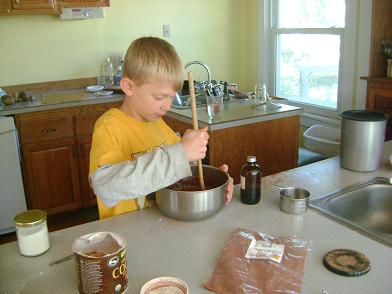
One day after Justus finished his independent work…he mixed up cookies for a post-season soccer party he was to have with his team. The party wasn’t until the weekend, but we talked about how busy our upcoming weekend was going to be and decided to make them mid-week and freeze them. MAYBE he’s learning to plan ahead? Maybe.
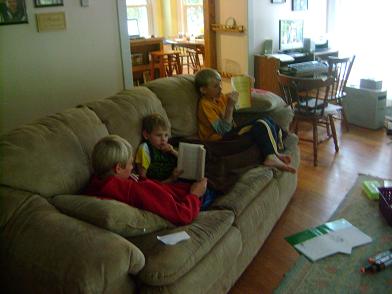
Sometime in the afternoon everyone sits down for reading time. From the quality of this picture…it kind of looks like I make everyone read in the dark, doesn’t it?

Elias was sitting across the room and I couldn’t get all of the readers in one picture. This cutie is going to town with chapter books this year!
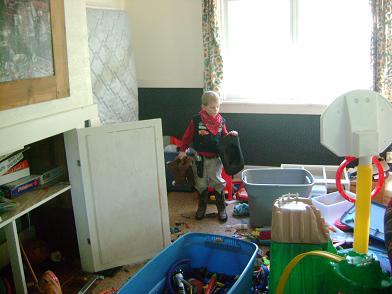
By the time school was over one of the days last week, Malachi had managed to empty the contents of two (or three) toy bins. Here he is (ever so cheerfully) picking up 300 toys. sigh
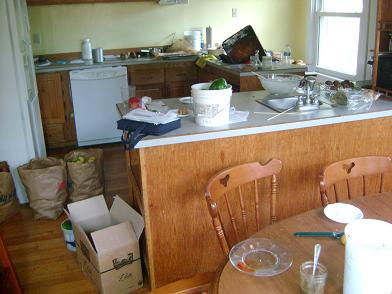
I think this picture sums up our days quite nicely. I took this last Wednesday right before I tried to cook dinner in this mess. It was our last 70 degree day before we knew it was going to get cold. SO…I left the dishes and the rest of our school work and all afternoon we worked outside to pull in all of our peppers and tomatoes and okra and potatoes. Oh, and we went and picked apples at someone’s farm too. After working for HOURS outside, then bringing it all in…here’s what the kitchen looked like. Shew!
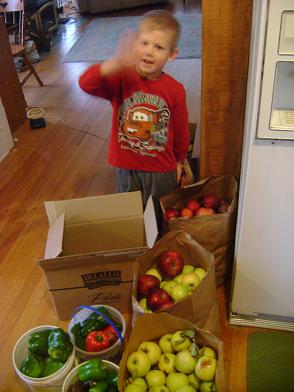
This picture with Malachi and the produce is much cuter than the whole messy kitchen picture. See…that box there is tomatoes. We picked three bags of apples…three buckets of peppers. Somehow the potatoes didn’t make it into the pic. Just when I thought I was done canning for the year…woohoo more applesauce and salsa! :)
Some of you have asked how long our school day takes. Every day is different. Sometimes reading History takes ten minutes…sometimes it takes an hour. Usually we are finished by 2:30 or so (if we start about 9ish). That’s with taking a lunch break and a short play break. Often it depends on how focused the boys are on their independent work.
And there you have it. A day (or so) in our lives. Although there were lots of things I didn’t show you like lunch and dinner and evening and cleaning up and answering the phone and going to soccer games and sliding down the stairs on sleeping bags…
Really, you should all just come for a visit.
Heavenly Homemaker's Club Members: Access your homepage and all your fantastic resources here! Not a member yet? Please join us!Okay, so let’s talk sundries. I kind of like that word, don’t you? Sunnnndreeees. It’s one of those words that I never use in actual conversations…but I kind of think I might start. “Oh my, I do believe I’m running out of sundries. Perhaps I should order various and sundry items…”
Many of you have asked if I make my own soaps, etc and what kind I use. While I realize that making my own detergents and soaps would save a little money, it has not reached the top of my list yet…although it is on my list. Lindsay at Passionate Homemaking has several good recipes you may be interested in if you want to make your own laundry detergent and deodorant. I think it’s awesome, but I just haven’t made the time to figure it all out yet. With the exception of inventing my own dusting solution (one part water added to four parts old rag), I’ll continue at this point to purchase the brands of soaps and lotions that I trust.
I check the EWG website to see if a product is safe and non-toxic. Also, if it comes from Tropical Traditions…I completely trust it. Their products are always pure and safe.
All of the soaps and lotions I buy are unscented and without dyes. Our littlest guy, Malachi, can not tolerate any kind of scent or dye with his eczema and strong scents really irritate my asthma.
Here’s a list I came up with of sundries in my home:

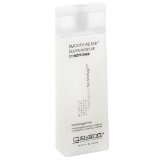

What are your favorite sundries? Isn’t it fun to say sundries?
Heavenly Homemaker's Club Members: Access your homepage and all your fantastic resources here! Not a member yet? Please join us!Sometimes I get grumpy. Just ask my kids.
I get grumpy when I have too much to do. Too many messes. Too many deadlines. Too many responsibilities. Too many.
I struggle every day against letting my circumstances determine my mood. Lately I’ve been trying to focus on what makes me grumpy and to put a STOP to it.
Here’s what I realized: I complain too much about having too much and too many.
SO…as I was sorting through EIGHT huge rubbermaids of hand-me-downs and figuring out what warm clothes fit which boy this year…I was starting to feel discouraged and overwhelmed.
And then I realized: LAURA! You’re complaining about having SO MANY FREE CLOTHES you hardly know what to do with yourself! Listen to yourself!! STOP it!
It seems that the things I complain about the most are the things I love the most. I LOVE my children…even if they do make messes. I can’t even express how happy I am to have four loud boys around to make messes!!!
I love all this garden produce that takes me hours to preserve. I REALLY love it in the winter when all I have to do is grab a jar out of the pantry, open it and eat it! I love hand-me-downs. I love all the emails I get! I love having people around me that need me. I love being a homemaker. I’d rather be at home doing mountains of dishes and laundry than anywhere else in the world!
So, I’m working on recognizing the times my heart turns sinful and wants to complain and whine about the blessings around me. That really is what I’m doing when I complain about everything around me…complaining about TOO MANY BLESSINGS.
Today…I choose to be thankful for “too many”. Too many is really, really good.
—————————————————–
What are you grateful for this Gratituesday? Write about it on your blog, then link up here so we can all come read about how God is working in your life! If you don’t have a blog, please be sure to leave a comment letting us know what you’re grateful for!
Heavenly Homemaker's Club Members: Access your homepage and all your fantastic resources here! Not a member yet? Please join us!