Heavenly Homemakers

Encouraging women in homemaking, healthy eating and parenting

  • Home
    • About
    • FAQs
  • Recipes
    • Bread and Breakfast
    • Condiments
    • Dairy
    • Main Dishes
    • Side Dishes and Snacks
    • Desserts
    • Gluten Free
    • Instant Pot
    • Crock Pot
    • Heavenly Homemaker’s Weekly Menus
  • Homemaking
    • Real Food Sources
  • Store
  • Contact
    • Advertise
    • Disclosure
    • Privacy Policy
  • Simple Meals
  • Club Members!

How to Easily Add Fruits and Veggies to Your Meal

January 14, 2015 by Laura 9 Comments

This post may contain affiliate links. For more information, please see our disclosure policy.

It’s not hard, it’s not hard, stop making it hard, I’m telling you – it’s not hard.  It’s also quite easy.

I used to just serve one fruit or vegetable with each meal (if that). This might have been enough for our nutritional needs, as long as we were getting some fruits or veggies at snack time too. But when all was said and done, I think my family was only getting 1-3 servings of fruits or veggies each day. That is just not enough.  Our bodies need more – more variety of nutrients, and a larger quantity too.

Putting a big variety of fruits and vegetables on the table with each meal is something I’ve been improving on through the past few years. I hope you’ll join me in this endeavor. It isn’t nearly as difficult as I used to believe it was. In fact, I’m learning that fruits and vegetables are probably the easiest food there is to make and serve. Truly!

Below you’ll see an example of a meal I made recently. Notice the simplicity. Also notice that I rarely put our food in serving dishes – we just eat them right out of the cookware. :)

Easily Add Fruits and Veggies to Your Meal

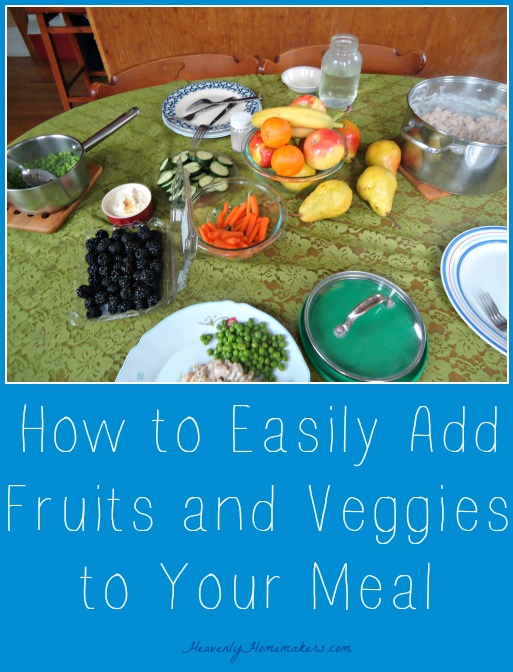
See the big pot of Tuna Casserole? Easy as that was to make, it was the most time consuming meal item I prepared. All the fruits and veggies on the side were a piece of cake. Actually, they were fruits and veggies, not cake, but you know what I mean.

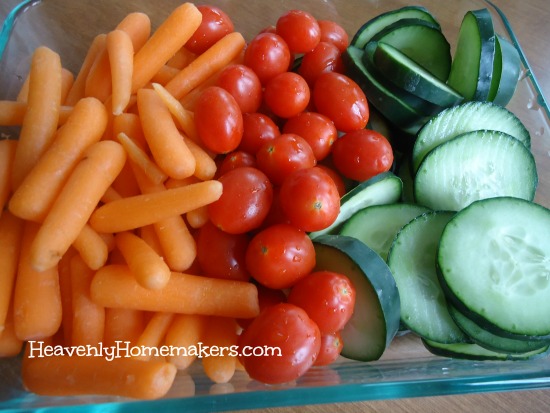
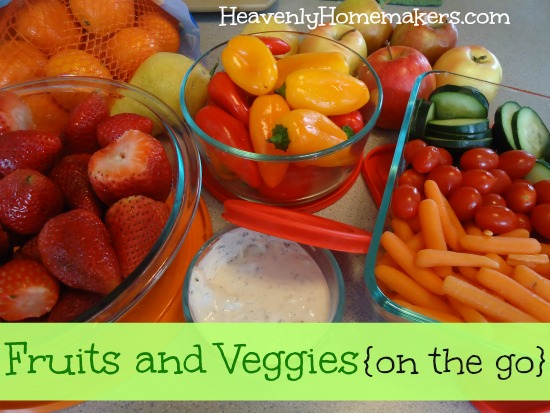
To go with the tuna casserole, I cooked some frozen peas (which took about 3 minutes), washed blackberries, sliced a cucumber, and opened a bag of petite baby carrots. That made a total of four super easy fruit and veggie side dishes that we enjoyed. The apples, bananas, pears, and clementines you see in the weren’t actually for our meal. Those just sit out on the table as a center piece and for all of us to grab for snacks as needed.

This practice of setting out several different lightly cooked and raw fruits and vegetables to go with our main dish has become the norm around here. Once you get into the habit, it really is easy. Actually, I’ve found that it’s even been a fun challenge to see how many different kinds of fruits and veggies I can put on the table with each meal!

groceries 2014

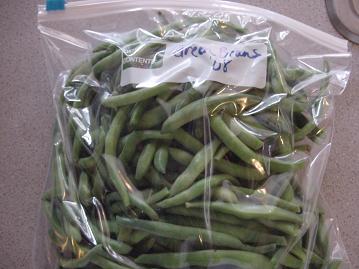
This is a typical grocery shopping haul for the week, plus I have many fruits and vegetables in the freezer.

An added benefit of setting out a wide variety, beyond the obvious fact that we are getting a great bounty of nutrients with all the different types of goodies out there is this:  If one of our boys doesn’t love all the types of fruits and vegetables I set out, they will at least like 2 or 3. I do it this way on purpose so that everyone will have something they love. While we don’t all fill our plates with every single item, we do fill our plates with what we like…which means there is no fighting at the table to get my kids to eat their veggies. Hallelujah!

And one more thing. Crunching and chewing on these fruits and vegetables as side dishes has been filling up my boys’ hollow legs. If I covered my table with a bunch of grains and carbs, they’d certainly fill up on those, but would not be gaining as much nourishment. We still eat plenty of grains around here (especially at breakfast), but I’ve found that we’re feeling better by trading heavy amounts of bread for larger quantities of fruits and vegetables.

And another one more thing. If fruits and vegetables is what you serve, that is what your family will learn to eat. If you don’t serve them, they won’t eat them.

Okay, one last one more thing. I still have to push a couple of my kids to fill up on fruits and vegetables. It is getting easier, but just like most kids –  mine would rather have a donut with a side of potato chips. Keep encouraging, keep serving, keep providing – the love of fruits and vegetables will come.

How’s it going at your house? Have you found easy ways to add fruits and vegetables to your table?

Heavenly Homemaker's Club Members: Access your homepage and all your fantastic resources here! Not a member yet? Please join us!

Easy Veggie Dip (With Homemade Seasoned Salt)

December 4, 2014 by Laura 1 Comment

This post may contain affiliate links. For more information, please see our disclosure policy.

It’s been exactly 21 hours and 4 minutes since I posted the Homemade Seasoned Salt recipe, so I’m assuming all of you have some mixed up and ready by now? Perfect. You’ll be needing it for this Veggie Dip recipe. You have cucumbers and carrots on hand, right? Perfect.

Easy Veggie Dip 1

One of the recipe cards that we made to go with your Seasoned Salt gift package shares this Easy Veggie Dip idea. Right after mixing up my first batch of seasoned salt, I made some Perfect Potato Wedges (a recipe also found on the free recipe card printable) and some of this Easy Veggie Dip. It was so….well, easy. The only way I can get my family (including the mother – that’s me) to eat cucumbers is if I supply dip. Typically, I go for ranch. But cucumbers with this Easy Veggie Dip is delicious. Even my hubby, who doesn’t really dig cucumbers, was enjoying the combo. Yay – another great way to eat veggies!

Easy Veggie DipYum

Easy Veggie Dip (With Homemade Seasoned Salt)
 
Save Print
Author: Laura
Ingredients
  • 1 Tablespoon dried minced onion
  • 2 cups sour cream
  • 2 Tablespoons real mayonnaise (I use Hain safflower mayo)
  • Seasoned Salt to taste
Instructions
  1. In a bowl, mix together minced onion, sour cream, and mayonnaise. Add Seasoned Salt until mixture changes color (it should become a light peach color), tasting as you go for desired flavor. Chill for at least one hour before serving. Serve as a dip with assorted raw vegetables.
3.4.3177

You’ll find our Seasoned Salt recipe here, along with this recipe (and 3 others) on cute printable recipe cards. This makes a great gift! This dip is great for holiday parties, or simply as a way to get your family to eat vegetables (like cucumbers!) any day of the week. <—- I’m looking at you Coppinger Clan.

Can’t wait to hear how you like this Seasoned Salt and the recipes to go with it!

Easy Veggie Dip with homemade Seasoned Salt

Heavenly Homemaker's Club Members: Access your homepage and all your fantastic resources here! Not a member yet? Please join us!

Simple Pumpkin Pancakes

November 21, 2014 by Laura 7 Comments

This post may contain affiliate links. For more information, please see our disclosure policy.

It might be apparent to you at this point that I am on a big pumpkin kick right now. First Pumpkin Breakfast Cake, then Pumpkin Cheesecake, now Simple Pumpkin Pancakes. It’s just one more way to add vegetables to our table, plus it’s delicious – so why not? That, and I have oodles of pumpkin puree at my house right now, so I’m making everything I can think of. My family rejoices.

It is important to note that I often use butternut squash in many of the pumpkin recipes I am making. Pumpkin and butternut squash are interchangeable in recipes. Many a pumpkin pie at my house is actually butternut squash pie, but don’t tell.

Want to know how to easily cook a pumpkin (or butternut squash)? Cooking them whole is the easiest way I’ve found to cook them to make puree. Once pureed, I use it right away or freeze it until I need it. Awesome, nutritious goodness!

These Pumpkin Pancakes stir together in just a few minutes and taste fantastic. Veggies for breakfast…woot!

Simple Pumpkin PancakesYum

1 1/2 cups whole wheat flour (I use freshly ground hard white wheat)
1 teaspoon baking powder
1/4 teaspoon sea salt
1 teaspoon ground cinnamon
2 eggs
1 cup pumpkin puree
1 1/4 cups milk
1/4 cup melted butter

Whisk ingredients together until smooth. Cook on a hot, buttered griddle, flipping once the pancake becomes bubbly on the first side. Serve with applesauce or real maple syrup. Makes about ten 3-inch pancakes.

Simple Pumpkin Pancakes

Other pumpkin (or butternut squash) recipes you’ll find here:

  • Pumpkin Chocolate Chip Bread
  • Pumpkin Chocolate Chip Muffins
  • Pumpkin Donuts
  • Warm Pumpkin Custard
  • Multi-Grain Pumpkin Waffles and Pancakes
  • Pumpkin Chocolate Chip Cake
  • Pumpkin Pecan Pie Squares
  • Pumpkin Pie
  • Pumpkin Breakfast Cake
  • Pumpkin Cheesecake

What’s your favorite way to use pumpkin (or butternut squash)?

Heavenly Homemaker's Club Members: Access your homepage and all your fantastic resources here! Not a member yet? Please join us!

How to Cook Spaghetti Squash

October 21, 2014 by Laura 24 Comments

This post may contain affiliate links. For more information, please see our disclosure policy.

If you’ve never tried Spaghetti Squash, I highly recommend you add this to your veggie eating repertoire.

For the record, I don’t think I can pull off correctly pronouncing the word repertoire. I just thought that sentence sounded better than me simply stating, “Yo. You should totally eat Spaghetti Squash.”

We were blessed with several fantastic spaghetti squash in our garden this summer and fall. I’m not sure there’s a better meal than home grown spaghetti squash, served with sauce made from home grown tomatoes. It’s delicious! Plus, practically free. Plus, super healthy. It’s merveilleux! ( I can’t pronounce that either, but it means “wonderful” in French. In other words: YUM.)

How to Cook Spaghetti Squash

1. Rinse outside of the squash.
2. Poke squash with a knife or fork 3-4 times.
3. Place squash in a baking dish, uncovered.
4. Bake in a 350° for 45-60 minutes or until squash is tender.
5. Cut squash in half to open.
6. Pull out seeds and discard.
7. Use a fork to pull “spaghetti” away from the inside of the rind. (This is the fun part!)
8. Serve cooked spaghetti squash as is, or serve with your favorite red or white sauce.

How to Cook Spaghetti Squash

Beyond Spaghetti Sauce, we love this squash with Alfredo Sauce and Italian Cream Cheese Chicken.

Are you a fan of Spaghetti Squash, or is this something you’ve not yet added to your veggie repertoire? What’s your favorite way to serve Spaghetti Squash? Can you pronounce the word repertoire?

Heavenly Homemaker's Club Members: Access your homepage and all your fantastic resources here! Not a member yet? Please join us!

Fresh Peach Milkshakes

September 7, 2014 by Laura 11 Comments

This post may contain affiliate links. For more information, please see our disclosure policy.

It’s story time, children. Please sit down, criss-cross-applesauce, and listen quietly.

Once upon a time, there was a lady who got a new blender. It wasn’t just any blender. It was the blender of all blenders, the Blend-Tec blender that she’d been waiting patiently to purchase.

She was super excited to make a peach milkshake with the fresh peaches she had in her kitchen, and figured that reading all the fine print in the “blender handbook” would be a waste of time. “How hard can it be?” she thought, “It’s just a blender.”

And so, the uninformed lady proceeded to fill the blender to the top with delicious whole milk, slices of fresh peach, maple syrup, and vanilla. With excitement, she placed the lid on the blender and pushed the on button.

Before the lady could say “one Mississippi” the force within the blender sent the lid shooting right off the top. With a shout that sounded something like, “Aaoourrhheeeewwryeeeoo!” the lady quickly smacked the off button. But no matter. Peach milkshake had been sent to the ceiling, to the floor, to the stack of mail beside the blender, to the casseroles sitting on the countertop, to the side of the refrigerator, to surfaces she found three days later, and I think it goes without saying, to the clothes, arms, legs, shoes, and hair of the befuddled lady.

She stood, quite shocked and motionless, for approximately 8 Mississippi’s, before calling in her 12 year old son. With a chuckle, said 12 year old brought in the camera, as moments such as this should be documented and preserved forever in ones memory and computer picture file.

peach milkshakes 1

This picture does not do the situation justice.
“The lady” was covered, the rug was covered, everything was covered. 

Thus lunch-time was delayed, and the kitchen got a much needed scrubbing. The lady soon smelled sour from being drenched with dairy product, and even though she changed her clothes before going to a soccer game, was surprised to find flecks of dried peach stuck to her knees and ankles during half time.

The moral of the story: Read the directions, do not overfill your blender, and do not be surprised to find crusty milkshake residue four feet away on the front of the silverware drawer next Friday.

The end.

~~~~~~~~~~~~~~~~~~~~~~~~~~~~

Everybody hungry for a Peach Milkshake now? Below you’ll find a recipe, which only makes about 2 servings. Trying to make 6 servings at once, no matter how large your blender, is a bad, bad, bad idea. I’m still not quite over it.

Fresh Peach MilkshakesYum

2 cups whole milk
2 fresh peaches, sliced
1 Tablespoon real maple syrup
1/2 teaspoon vanilla extract

Place ingredients in a blender, making sure the blender is only half-full, trust me on this one. Place lid on the blender, plug it in, and give it a whirl until ingredients are well blended.

Fresh Peach Milkshake

Make this milkshake at your own risk.

Heavenly Homemaker's Club Members: Access your homepage and all your fantastic resources here! Not a member yet? Please join us!

Putting up Green Beans for Winter

July 27, 2014 by Laura 34 Comments

This post may contain affiliate links. For more information, please see our disclosure policy.

This was originally posted in 2008. This is evident in the fact that Justus and Elias are only 8 and 6 in the picture below. They are now 14 and 12. Time flies – and little boys become teenagers. The green bean freezer method is still the same, however. Since we have been harvesting many the past few weeks, I thought it would be fun to re-post this tutorial. :)

How to Freeze Fresh Green Beans

After posting about how I put up corn for winter, many of you asked about green beans. I just happen to be in the middle of crazy green bean season. So…here you go!!

beans5sm.JPG

After picking our beans, I usually get my boys on “bean snapping duty” right away. (They never complain about this job. I think it’s because they are given permission to “break things”….what do you think?)  They snap off the ends and put the green beans into a colander. As soon as the colander is full I wash the beans to try to get as much “garden” (my nice way of saying bugs and dirt) off.

It is my understanding that in order to maintain as much green bean nutrition as possible, it is best to only snap the ends off the bean…not to snap the bean into pieces. It makes sense that if you snap the green bean into three pieces, when you cook the bean, more of the nutrients will be washed away in the water. But if it’s a whole bean…more of the nutrients stay inside the bean. (And you can have “My green bean is longer than your green bean” competitions while you eat dinner.)

beans1sm1.JPG

After washing the green beans, I then put them into a pot of boiling water. This blanching process stops their aging process. (No, you can not blanche people in order to stop their aging process.)

beans2sm1.JPG

After about two minutes in the boiling water, the green beans are a brighter green…and they go back into the colander where they are given a cold, cold shower. This process stops the cooking process that the blanching part started.

beans3sm1.JPG

After the green beans are cooled from the cold water shower, I then spread them out onto a dry towel. I use another towel to pat over the top of them to help dry them off more. If your beans are too wet when you put them into a freezer bag, you’ll have ice form around your beans. (You don’t want ice to form around your beans.)

beans4sm1.JPG

And then, I put my beans into a gallon freezer bag and label it. And into the freezer it goes. I know some people prefer to can their green beans. I don’t can them for two reasons:

1. Freezing them maintains more of the green bean’s nutrition.
2. I’m incredibly afraid of my pressure cooker. (When I got my mom’s pressure cooker, it didn’t have a manual with it. I have no idea how to use it properly.)  I do not need to cause an explosion in my kitchen.

So there you go! As I begin to can and freeze my tomatoes and fruit for the winter, I’ll be sure to show you those processes too! (Yeah, because those don’t require a pressure cooker, just a hot water bath…and I’m not so afraid of those.)

Heavenly Homemaker's Club Members: Access your homepage and all your fantastic resources here! Not a member yet? Please join us!

It Takes 47 Seconds To Prepare Broccoli For the Steamer…

June 3, 2014 by Laura 10 Comments

This post may contain affiliate links. For more information, please see our disclosure policy.

It’s true. It takes 47 seconds to prepare broccoli for the steamer.

I know this because I timed myself preparing broccoli to be steamed. Why are you looking at me like that? You would do something this geeky too if you heard people say, “making healthy food takes too long to make” as much as I do. I figure, I can keep saying, “does not, huh-uh, does not” or I can actually time myself making healthy food and prove people wrong with a stop watch.

Preparing Broccoli Only Takes 47 Seconds

Yeah, I’m a weirdo.

The good news? Timing myself preparing broccoli didn’t take long because preparing broccoli doesn’t take long. Okay then. Plus my 12 year old thought it was fun to use his stop watch to time me prepping broccoli. He only asked twice, “Wait, why are we doing this?”

I felt this information was worth documenting as sometimes even I don’t feel like I have the time to make healthy food. Sometimes I feel that it would take less effort and time to slap down something less than stellar from the freezer section of the store. Sometimes I don’t want to go to the trouble to put something nourishing on the table. Me. The one who knows the truth that healthy eating doesn’t take extra energy or time. Me, the one who has already proved this truth many times over. Me, the one who loves to cook.

Now that you and I have learned the 47 second truth, neither of us can fall back on “I just don’t have the energy to make anything healthy tonight.” Even if we are compromising by putting something on the table that is less than stellar (hey, I do it sometimes too when I’m in a pinch or when we just want a fun treat). That’s fine. Throw down a take-and-bake pizza or whatever. Just take the additional 47 seconds to steam broccoli or make a salad to go with the meal.

If you really want to save time and energy, prep your broccoli ahead of time, put it in a baggie, then dump it in your steamer at dinner time. Like this:

Get Your Broccoli Ready to Steam Quickly

Once you’ve done that, you can pull it out of the fridge and take the remaining 8 seconds of the 47 seconds total broccoli prep time to pour it into your steamer and turn on the burner. Seriously people. It takes more energy to do all the math on this than it does to actually just go prepare the broccoli.

If you’re wondering the specifics of my 47 second broccoli preparation process, it is as follows:

  1. Get out pot, run water into the pot, place it on the stove.
  2. Set the metal steamer into the pot of water.
  3. Get the broccoli out of the fridge.
  4. Wash the broccoli under running water.
  5. Cut the broccoli off the stem directly into the steamer on the stove.
  6. Put the lid on the pot , turn on the burner, and walk away.

Boom. 47 seconds.

Not that you haven’t already thought of this, but using frozen broccoli is just as good for you and takes even less time. (Skip steps 4 and 5 above. Pour frozen broccoli directly into steamer. You’re welcome.)

I believe we can all agree that preparing broccoli (or other veggies) is incredibly fast and easy and none of us has any excuse to not make them, serve them, and eat them. Now how many of you are going to get out the stop watch tonight as you make your vegetables?

Heavenly Homemaker's Club Members: Access your homepage and all your fantastic resources here! Not a member yet? Please join us!

Green Machine Milkshakes

March 14, 2014 by Laura 12 Comments

This post may contain affiliate links. For more information, please see our disclosure policy.

Need something fun and green to feed your family on St. Patrick’s Day – but hoping to avoid green food coloring? I’d encourage a tossed salad with spinach and other fresh greens, cucumbers, and zucchini – but I’m guessing your family might not think any of those foods are cute or festive.

Instead, I’m recommending an avocado. Am I the life of the party, or what?

Green Machine Milkshakes

Yum

These milkshakes are smooth, rich, and creamy. So what makes these green? Maybe you weren’t listening. I told you already. It’s avocados. Welcome to my way cool party. (We’ll end the evening by shelling some peas and shredding cabbage for slaw.)  Rock on.

I personally love these green milkshakes. My family can’t decide if they agree with me or not. Is it because they know these have avocado in them, so psychologically, they think they taste weird? I’m not sure. I really can’t tell these milkshakes are made with avocados. To me, they just taste like a smooth and creamy, lightly sweetened milkshake. What my kids don’t drink, I will, so it’s all good. They can just stick with Asa’s awesome guac for their avocado intake.

Green Machine Milkshakes

3 ripe avocados, halved and pitted
3 cups whole milk
4-5 Tablespoons maple syrup
1 teaspoon vanilla extract

Blend all ingredients in a blender until smooth. Serve right away. Makes 5-6 cups.

If this recipe isn’t exciting enough for you, might I suggest roasting some asparagus and steaming an artichoke? I believe it goes without saying that this is going to be the most fun and memorable St. Patty’s Day ever.

Heavenly Homemaker's Club Members: Access your homepage and all your fantastic resources here! Not a member yet? Please join us!

Cheesy Cauliflower Cakes

March 12, 2014 by Laura 28 Comments

This post may contain affiliate links. For more information, please see our disclosure policy.

If it looks like a cheesy hashbrown and tastes like a cheesy hashbrown, it must be a cheesy hashbrown, right? Right. Unless it’s actually cheesy cauliflower cakes.

cauliflower cakes 2

Hey, I wasn’t trying to trick my family. Really, I wasn’t. I was planning to be completely up front and honest about the platter of cauliflower on the table. Is it my fault they just assumed I’d fried up some hashbrowns? And would you believe, when I told them that in fact, there were no potatoes in these – only cauliflower – some of my boys didn’t even believe me? Then my pickiest boy helped himself to seconds. Who am I to argue?

I’ll admit that as hard as I’ve tried, cauliflower is still not at the top of my favorite vegetables list. We all eat it steamed or roasted, but our reactions are usually something like “eh” when it comes to eating cauliflower fixed in those ways. When I found this cauliflower cake recipe and decided to play with it, I was hoping it would at least be just a little better than “eh.” To my surprise, I found myself unable to stop nibbling as I was cooking these for our dinner. These are way, way better than “eh.” I mean, my pickiest boy ate seconds. That is worth stating twice.

I believe these will be a part of our normal veggie rotation. Not only are they tasty, they’re quite easy to put together.

Cheesy Cauliflower Cakes (adapted from this recipe)Yum

Cheesy Cauliflower Cakes
 
Save Print
Author: Laura
Ingredients
  • 1 head cauliflower
  • 2 large eggs
  • ¾ cup shredded cheddar or Colby jack cheese
  • 2 Tablespoons dried minced onions
  • ½ teaspoon sea salt
  • Palm shortening or expeller pressed coconut oil for frying
Instructions
  1. Cut cauliflower into florets.
  2. Boil for about 10 minutes or until tender.
  3. Drain.
  4. Mash with a potato masher. (I found that this created what looked like shredded potatoes.)
  5. Stir in eggs, shredded cheese, minced onions, and salt until well combined.
  6. Melt 1-2 Tablespoons of palm shortening or coconut oil in a skillet.
  7. Scoop 2 Tablespoons of mixture into the melted oil, pressing down into a cake.
  8. Fry over medium heat until brown and crispy - about 2 minutes on each side.
  9. Serve right away.
  10. Makes 12-15 cakes.
  11. (To save time, you can skip forming these into cakes and simply fry them up in a skillet in a big batch like you would do with hashbrowns. )
3.4.3177

Cheesy Cauliflower Cakes

Even if you don’t like cauliflower, you’ve got to try these. Pretend they’re hashbrowns if it helps. It worked for us!

Heavenly Homemaker's Club Members: Access your homepage and all your fantastic resources here! Not a member yet? Please join us!

Easy Fruits and Veggies On the Go

March 11, 2014 by Laura 10 Comments

This post may contain affiliate links. For more information, please see our disclosure policy.

Last weekend, we headed out of state to a weekend-long basketball tournament for our boys. It was two and a half days full of hotel continental breakfasts, fast food, and other treats. Weekends like that can be a lot of fun. At the same time, we knew our stomachs would start to rebel after a meal or two of white flour, white sugar, and grease. In an effort to give us some good nutrition in the midst of ice cream cones and burgers, I packed as many colorful fruits and vegetables as I could.

While I was getting it prepared the morning we were to leave, it occurred to me how pretty it all was. Out came the camera.  After all, I had plenty of time for food photography in the midst of laundry, packing, and making last minute preparations, right?

Fruits and Veggies On the Go 2

I made good use of my Pyrex dishes with lids. These travel well, and keep fruits and vegetables from getting squished. They all stack nicely together in a cooler, and keep the food fresh. I simply stuck a few ice packs in and around the food containers, and it all stayed chilled and nice all weekend long.

My encouragement to you with this post is to think outside the box a little bit as you pack fruits and veggies for travel. Before just a year or two ago, I didn’t really think beyond packing apples and carrots. Those got old after a while. Then I started noticing what other families had packed to eat during games. Oh, there are so many great options!

For this round of travel, beyond apples and clementines, we washed, prepared, and packed 2 pounds of strawberries to munch on, grape tomatoes, sliced cucumbers and ranch dip, and sweet peppers. We also had a few applesauce and peach cups packed with spoons.

Fruits and Veggies On the Go

While we enjoyed our fair share of restaurant food, we were able to counter it with nutrient-filled food too. This was especially important, we felt, for our boys who were playing hard and sweating all weekend long. They needed energy and nourishment!

Here’s a list I created so you can get some fruits-and-veggies-on-the-go ideas at a quick glance:

  • Apples
  • Oranges or Clementines
  • Pears
  • Grapes
  • Cherries
  • Blueberries
  • Raspberries
  • Strawberries
  • Sweet Peppers
  • Grape or Cherry Tomatoes
  • Carrots
  • Celery
  • Cucumber Slices
  • Applesauce Cups
  • Peaches, Pears, Mixed Fruit Cups in 100% Juice
  • Fruit Leather

I would add bananas to the list, but have found that they get squishy quickly while being carried in bags from car to gym. What fruits and vegetables would you add to this list?

Heavenly Homemaker's Club Members: Access your homepage and all your fantastic resources here! Not a member yet? Please join us!
« Previous Page
Next Page »

Join Our Community!

 Facebook Twitter E-mail Instagram Pinterest

Popular Posts

~ Will All of the Real Moms Please Stand Up?
~ Easy! Stir-and-Pour Whole Wheat Bread
~ How to Make Gatorade
~ 31 Real Food Breakfast Ideas
~ Dear Teenage Girls...
~ When Mom Takes a Step Back
~ The Inexpensive Health Insurance We Love!
~ Let's Talk Real Food Grocery Budgets

Check out our latest posts!

  • Big Family Food and Fun: May 31-June 6, 2026
  • Big Family Food and Fun: May 24-30, 2026
  • Free 7-Day Summer Menu Plan
  • Big Family Food and Fun: May 17-23, 2026
  • Easy Side Dishes for Summer
Home  ~  Simple Meals  ~  Club Membership  ~  Shop  ~  Privacy Policy  ~  Disclosure  ~ Contact

Copyright © 2026 · Beautiful Pro Theme on Genesis Framework · WordPress · Log in