Heavenly Homemakers

Encouraging women in homemaking, healthy eating and parenting

  • Home
    • About
    • FAQs
  • Recipes
    • Bread and Breakfast
    • Condiments
    • Dairy
    • Main Dishes
    • Side Dishes and Snacks
    • Desserts
    • Gluten Free
    • Instant Pot
    • Crock Pot
    • Heavenly Homemaker’s Weekly Menus
  • Homemaking
    • Real Food Sources
  • Store
  • Contact
    • Advertise
    • Disclosure
    • Privacy Policy
  • Simple Meals
  • Club Members!

What to Do With All the Strawberries in Your Kitchen

June 21, 2009 by Laura 15 Comments

This post may contain affiliate links. For more information, please see our disclosure policy.

We’ve been blessed with tons and tons of fresh strawberries this summer!!! Some of you have been asking what I do with all of them. 

pickingstrawberries4sm2.JPG

Yum

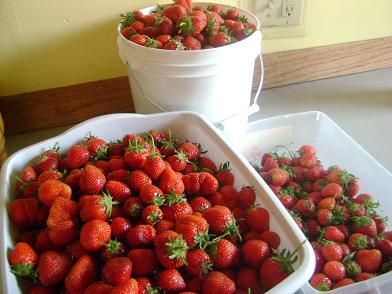
This was what we picked the first time. 
We went back three more times!!

First…we eat as many fresh ones as we can. There are only a few weeks during the year that we can do this, so we’re not holding back!

Second, I’ve been flash freezing them (shew, I think I’m almost done now!). I have enough in my freezer now to last me the year (at least)!

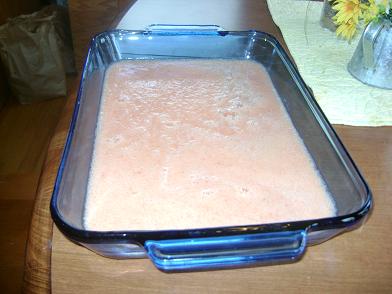
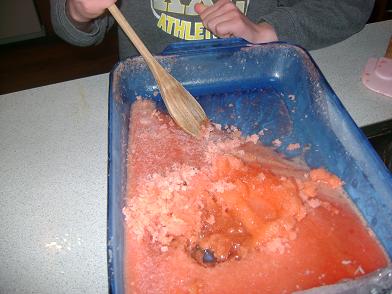
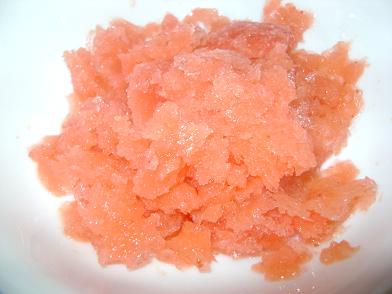
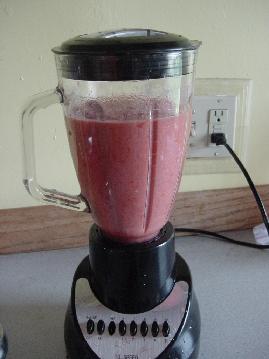
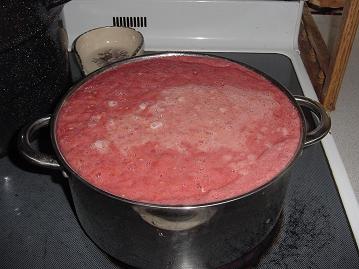
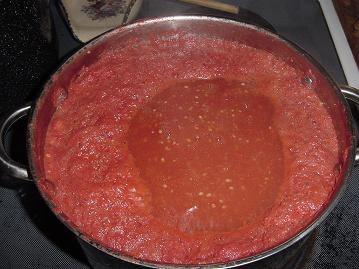
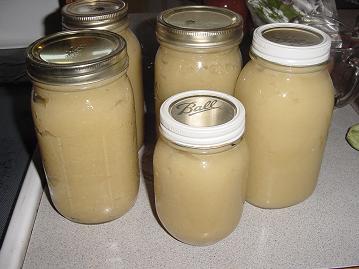
Third, I cooked some of them down and made a “strawberry spread” of sorts. I didn’t want to add sugar or pectin to make a jam, so I just experimented with straight strawberries. It’s a little tart…but we like it on toast just fine. I only made one small batch of this, because we really just like strawberries fresh or frozen better!

Now…here’s a list of all the other yummy things I like to make with fresh or frozen strawberries…

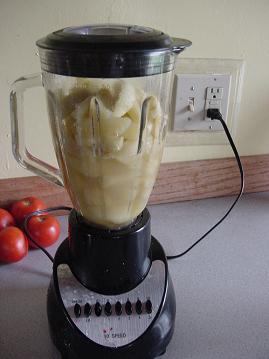
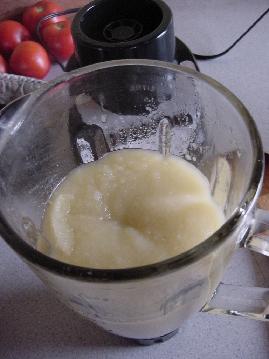
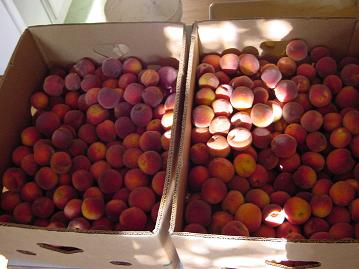
  • Strawberry-peach slushies (our favorite way to eat the strawberries!)
  • Strawberry-kefir smoothies
  • Strawberry yogurt
  • Strawberry-yogurt fruit dip
  • Strawberry cheesecake
  • Strawberry shortcake
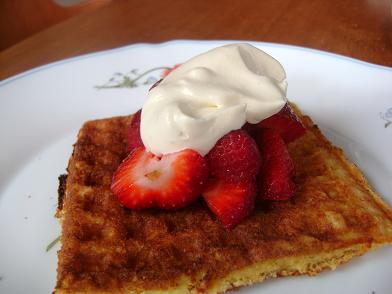
  • Strawberries on whole wheat waffles

strawberrywafflessm.JPG

  • Strawberry milkshake
  • Strawberries and cream (either whipped or just poured over the berries!)
  • Fruit salad
  • Strawberry bread (several of you have requested this recipe…I actually don’t have a recipe because my friend made it for us and brought it over. I’ll try to get it for you! And for me!)
  • Strawberry ice cream (just crush strawberries in a blender and add to ice cream mix)
  • Strawberry rhubarb pie (a great recipe in the FREE pie ebook!)

What am I forgetting here? What are some of your favorite ways to eat strawberries?! Besides just…you know…eating them.
———————————–

This post is linked to Tammy’s Recipes.

Heavenly Homemaker's Club Members: Access your homepage and all your fantastic resources here! Not a member yet? Please join us!

High Five Recipes: Justus’ Shaved Ice

May 14, 2009 by Laura 15 Comments

This post may contain affiliate links. For more information, please see our disclosure policy.


High Five Recipes 2

Yum

I’m not sure how often I’ve emphasized to you how much Justus (my nine year old) LOVES cooking. He wants to be a “restaurant worker” someday…he calls himself a chef (I am sometimes privileged to be his assistant)…and he really just can’t get enough of the kitchen. He LOVES it.

justuscookingmay09sm.JPG

Of course I love it too. While the other boys mostly love to cook so that they can lick a beater, Justus truly loves everything there is about cooking.

He got a new cookbook for Christmas and has been waiting for a warm day to make the shaved ice recipe he found in it. We adapted it to make it healthier (ah yes, I’m teaching him how to change a recipe already!) and here’s what he came up with:

Justus’ Shaved Ice

1 cup fresh or frozen peach slices
1 cup fresh or frozen raspberries
1 1/2 cups warm water
1/4 cup orange juice
1/4 cup honey

If your fruit is frozen, place it in a bowl with warm water (not the water mentioned in the above list of ingredients) for about fifteen minutes to thaw. Drain.

Put fruit, water, orange juice and honey into a blender or food processor. Blend until smooth. Poor mixture into a 9×13 inch baking dish. Cover with plastic wrap and freeze for about 6 hours.

justusshavedice2sm.JPG

Remove from freezer and allow it to sit on the counter about ten minutes. Use a large wooden spoon to “shave” icy mixture into serving bowls.

justusshavedice3sm.JPG

justusshavedicesm.JPG

The “bummer” about this recipe is that we had to wait for SIX whole hours before we could eat it. Not much instant gratification there! However, it was worth the wait!

All the boys (and the parents) loved this treat! It was super refreshing on a hot afternoon.

And, of course, it’s a wonderful recipe to help you get another great serving of fruit. (Are you taking the challenge?!)

Any other recipes you’d like Justus to come up with for us?!

Heavenly Homemaker's Club Members: Access your homepage and all your fantastic resources here! Not a member yet? Please join us!

C’mon Little Tomatoes…Hang in There With Us

October 21, 2008 by Laura 26 Comments

This post may contain affiliate links. For more information, please see our disclosure policy.

It’s funny kinda. 

When I’m knee deep in tomatoes and making jar after jar (after jar) of tomato sauce and tomato juice and salsa and tomato soup…I get to a point where I don’t really want to even look at another tomato for a long, long time.

Then, as the tomato growing season comes to an end…I begin to feel a little sad that we won’t be able to eat a good fresh tomato for several more months. It is now that time of year. We just pulled our last red tomatoes out of the garden. :(

But…we’re not quite willing to give those good tomatoes up yet. Matt heard about a way to possibly make them last a little longer. 

He pulled out the healthiest of our plants…the ones that had quite a few nice green tomatoes on them….and he hung them upside down in our storage room. Apparently, the nutrients in the plant are supposed to go down into the tomatoes and keep them strong and they’ll eventually turn red and be delicious. Maybe?

Hey, it’s worth a try. Now my storage room smells like dirt in a garden. Now that’s not something everyone can brag about.

hangingtomatoessm.JPG

Another thing we’re gonna try…

Our friend Brenda has an uncle (who has a cousin who has a neighbor who has a dentist who has a florist…)

Just kidding. Our friend Brenda has an uncle who wraps his green tomatoes up in newspaper and they eventually turn red and are very tasty. She told us that her uncle has yummy tomatoes even up until Christmas time! (To which Matt asked, “And do they also still have fruit flies at Christmas time?”)  (We’re a little tired of fruit flies around here can you tell?)

Fruit flies or not, we’re going to lovingly wrap up some green tomatoes in newspaper. Because what do we have to lose? 

I’ll be sure to let you know how our little tomato experiments go! 

Have any of you tried any of these things (or anything else) to make your tomatoes last a little longer? Do you think we might be crazy for trying this? 
—————————————————-

Visit Rocks in my Dryer for more Works for me Wednesday tips!

Heavenly Homemaker's Club Members: Access your homepage and all your fantastic resources here! Not a member yet? Please join us!

The Kitchen Overflowing With Fruit Whips Out Some Homemade Fruit Leather

September 22, 2008 by Laura 43 Comments

This post may contain affiliate links. For more information, please see our disclosure policy.

When you look at an apple tree and see that it is loaded with fruit…it’s all so very pretty and exciting. So you begin to pick the apples and load your boxes…and it gets even more pretty and exciting. And then you go overboard because all of it is all so pretty and exciting that you just can’t stop picking.

And then, you go home with all of your apples, and someone else calls you on the phone and asks if you want some more apples. And you say, sure, because you just hate to turn away good (free) food. So then, you have even more apples.

And then someone else calls you (in the same day) and asks if you want some peaches. Like FOUR banana boxes full of peaches. And you get really excited (forgetting briefly about all of the apples) and say, yes, you’d love to have all those peaches. (And then you share some of the peaches because really, four banana boxes full? Have you seen a banana box?)

And then you get started in your kitchen making applesauce and canning and freezing peaches…and you keep working until everything, including your children, begin to look like either an apple or a peach. Sad, but true.

You decide that you’re kind of tired of doing the very same things with your fruit, so you try to make some fruit leather. And it works, and it’s yummy. Everything and everyone around you still looks like an apple or a peach…but at least now, you have another kind of snack stored away in your pantry for the winter. Hooray!

Homemade_Fruit_Leather

Here’s what you would do…

Apple Fruit Leather

1. Make applesauce as shown here.
2. Put a piece of buttered parchment paper on a cookie sheet and spread the applesauce about 1/8 inch thickness on the cookie sheet.

fruitleather1sm.JPG

3. Put it into a 170 degree oven for somewhere between 10-18 hours or longer, depending on your oven. Your fruit leather will be done with it is no longer wet….just sticky and leathery.

You can add some kind of sweetener to it or maybe some cinnamon or nutmeg if you’d like…I just left mine plain and it is sweet and yummy as can be!

Peach Fruit Leather (So Easy!!!)

1. Wash peaches
2. Cut them off of their pit and throw them, skin and all, into the blender.
3. Add a shot of water and puree them until there are no chunks.
4. Spread it onto a piece of buttered parchment paper on a cookie sheet, about 1/8 inch thick.

fruitleather5sm.JPG

5. Put it into a 170 degree oven for somewhere between 10-18 hours or longer,  depending on your oven. Your fruit leather will be done with it is no longer wet….just sticky and leathery.

***A few things to note about making the fruit leather.

*While you are making it you might think that it is taking FOREVER. And you’d be right. It does. Be patient.
*My fruit leather didn’t dry evenly in my oven…so sometimes I would cut off the sections that were dry (so that they wouldn’t get overdone), and stick the rest back in the oven. This meant I had some weird shaped fruit leather, but I was going to cut it all up to store it anyway, so it didn’t matter.
*I loved it that I could put this in the oven in the late evening, then I could go to sleep and have it be all done, or almost done, when I got up in the morning!

I let us all have a sample taste….then I put it into a jar and into the pantry (should be stored in a cool, dark place). Right now we have so many fresh fruits available to us that I’m sort of hoarding the food I’m preserving. I’ll pull out the fruit leather on some wintery day when fresh fruit is not so abundant! THEN it’ll really be a treat!

fruitleather7sm.JPG

Okay, I’m off to go start peeling more apples… :)

Heavenly Homemaker's Club Members: Access your homepage and all your fantastic resources here! Not a member yet? Please join us!

Awesome Easy Tomato Soup

September 15, 2008 by Laura 111 Comments

This post may contain affiliate links. For more information, please see our disclosure policy.

Homemade Tomato Soup

It’s almost that time of year again… The time when we can warm up at lunch with a grilled cheese sandwich and a bowl of tomato soup!

I LOVE this recipe that was given to me by my friend Anne…who got it from her friend Anne. (Yeah, like that’s not ever confusing.)  Along with canning lots of tomato sauce and tomato juice and salsa, I love canning several jars of Anne’s tomato soup for the winter! (Wait, which Anne is that?)

Most of the tomato soup you’ll find at the store will have high fructose corn syrup or sugar in it…

This recipe has no sugar…which is amazing because it tastes so yummy and sweet! Once when Matt was eating some, he asked at least three times, “This really doesn’t have any sugar in it?” :)

Homemade Tomato SoupYum

5 pounds chopped tomatoes
1 cup chopped onion
3 Tablespoon butter
1 1/2 teaspoon sea salt

Put everything in a big pot and cook it for about 3 hours. Then, put it into your blender and blend until smooth. Freeze it, or can it following these canning methods (25 minutes in the water bath).

I love having recipes like this that are so simple to make and healthy for my family!

Heavenly Homemaker's Club Members: Access your homepage and all your fantastic resources here! Not a member yet? Please join us!

Canning Tomato Juice and Tomato Sauce

September 11, 2008 by Laura 165 Comments

This post may contain affiliate links. For more information, please see our disclosure policy.

Okay, we’ve covered the basics of canning…freezing corn…freezing green beans…canning and freezing peaches…making and canning applesauce…

Now lets talk about tomatoes!

Last year, I planted 40…yes FORTY tomato plants. On purpose. Because I’m crazy.

I ended up having SO MANY tomatoes, that by the end of the summer, I had canned almost two years worth of tomato sauce, tomato juice and tomato soup. And, I still had tomatoes! I was begging people to please come pick my tomatoes and take them far, far away from my house. 

While canning that many tomatoes was a wonderful thing…I still hadn’t fully recovered from it when it came time to plant tomatoes this year. Therefore, I only planted 20 tomato plants this spring. *cough*

The good thing is…I never have to buy any tomato juice, sauce or soup. Ever. And the home-canned stuff is SO GOOD!!!

Here’s the way I make tomato juice and tomato sauce…

tomatosauce1sm.JPG
First, you start with bunches and bunches of pretty tomatoes, like these. You can take the skins off and the seeds out if you want to…I pretty much just WASH them. I leave the skin on and and the seeds in…mostly because I’m just too lazy to do otherwise. My family doesn’t know the difference, and you can’t really even tell that the seeds and skin are still there. At all. 

tomatosauce3sm.JPG
Next, I cut the tomatoes into fourths and put them into my blender.

tomatosauce2sm.JPG
The tomatoes are then blended up until they are liquid. 
(Mmm, tomato smoothie anyone?)

tomatosauce4sm.JPG
After I blend up my tomatoes, they go into a big pot. Obviously this pot was not quite big enough! Filling your pot this full will just about guarantee that your pot will boil over and spill all over your stovetop creating a cooked on tomato mess. (Picture of the boiled over mess not available…because I scooped some out before it boiled over, thank you very much.)

tomatosauce5sm.JPG
Next, I boil my tomatoes, uncovered, stirring occasionally. After a while it begins to look like this. Once that bubbly froth is just about all gone from the top (about an hour and a half or so after beginning the boiling process), you have made tomato juice, and you’re able to go ahead with the hot water bath process of canning tomato juice. 

tomatosauce6sm.JPG
But, if you want tomato sauce, continue to let it boil for another hour or so. You’ll know your tomato sauce is done “saucing” when most of the watery liquid has evaporated. If you continue to cook it at this point, you will have tomato paste…which is fine…if you want tomato paste.

Can your tomato sauce for 25-30 minutes following the hot water bath instructions here.

Then, you will have tomato juice for yummy veggie soups and such…and tomato sauce for sloppy joes, pizza sauce, spaghetti sauce, enchilada sauce…and whatever else you use tomato sauce for. (If you want to, you can add your herbs and spices into the sauce while your making it so that you’ve got your spaghetti and pizza sauce already put together in your jars!)

I have a wonderful recipe for tomato soup that I’ll be sure to share soon! 
Yumm-eeee!

Heavenly Homemaker's Club Members: Access your homepage and all your fantastic resources here! Not a member yet? Please join us!

How to Make and Can Applesauce

September 5, 2008 by Laura 75 Comments

This post may contain affiliate links. For more information, please see our disclosure policy.

***UPDATE***

I no longer peel my apples, nor do I slice them. I simply wash them, core them, cook them as described below, then run them through my Blendtec Blender. It is much healthier and saves so much time to do it this way! And the applesauce is delicious. That’s always nice. :)

~~~~~~~~~~~~~~~~~~~~~~~~~~~~~

One of the best “fall smells” I can think of is applesauce cooking on the stove. It is SO YUMMY!!!

Here’s a step by step of the easiest way I’ve found to make applesauce. (But be sure to read Canning 101 first if you’re unfamiliar with the basic steps of canning safely!)

applesauce1sm.JPG
I slice my apples like this, then peel each slice.
I find this to be much easier than peeling the whole apple first and then slicing it.

applesauce2sm.JPG
As I slice and peel, I put my apples into a big pot. At the bottom of my pot is 5 cups of water and 3 teaspoons of ascorbic acid (powdered vitamin C).

applesauce3sm.JPG
As I continue to add apples, I stir them into the water/ascorbic acid frequently so that the apples are all coated with the mixture and are much less likely to turn brown.

applesauce4sm.JPG
Once I have my pot 3/4 full of apples, I put it on the stove…

applesauce5sm.JPG
and bring it to a boil, then simmer it (uncovered)
for about 30 minutes or until the apples are tender.

applesauce8sm.JPG
Then, I spoon the tender apples with some of the liquid into my blender (I highly recommend the Blendtec now)
and blend it all up until it is smooth.

applesauce9sm.JPG
Isn’t it pretty!!! Next, I pour the applesauce
into sterilized jars with a wide mouth funnel.

applesauce13sm.JPG
I hot water bath my jars for about 25 minutes.

applesauce11sm.JPG

And like always, after I pull them out of the hot water, I set them on my counter for several hours (or days) so that I can admire them and feel happy about my applesauce. Ahh…..beautiful!

This post contains affiliate links.

Heavenly Homemaker's Club Members: Access your homepage and all your fantastic resources here! Not a member yet? Please join us!

Freezing and Canning Peaches for Winter

September 1, 2008 by Laura 142 Comments

This post may contain affiliate links. For more information, please see our disclosure policy.

I mentioned that over the weekend I received millions and millions (okay, maybe not millions) of peaches from a lady in town. I’ve been busy preserving them for winter and thought I’d walk through the steps with you.

Please note:  These peaches were so awesome and juicy, and since there were so many of them, I felt that none of us needed to hold back on how many we ate. So, as I was standing in my kitchen peeling and slicing peaches, and  peach juice was running down my arms…I was also biting into peaches as I worked, because I just couldn’t resist. Therefore, I also had peach juice running down my chin. But with peach juice all over my hands and running down my arms, it’s not like I could do much about my chin, you know? Not one of my finer moments.

Thought you might like to picture that.

peaches7sm.JPG

If you remember, I was given four boxes of peaches. (I did share a few with some friends.)

peaches5sm.JPG

In the past, I’ve always peeled my peaches with a knife…and that’s been fine. But I had so many peaches this time, I went ahead and tried this method of peeling, and whoa was it a time saver! Just put your peaches into boiling water for about 30 seconds…pull them out…

peaches2sm.JPG

And those skins just peel right off!! It was awesome. Except for when they didn’t peel right off, which happened with a few of them for some reason. (Just thought I’d tell you that so that if not all of them peel right off for you, you’ll know that you aren’t the only one!) 

(You don’t have to peel your peaches if you’re going to freeze them. They’ll be more nutritious if you leave the peelings on, and it will save so much time too!) 

freezingpeachessm.JPG

To freeze peaches, just peel, slice and lay the peach slices on a cookie sheet lined with parchment paper. Put the pan into the freezer until the peaches are frozen, about two hours. (Or longer if you forget they’re in there.)  Then put them into a freezer bag and you’ve got great peaches for smoothies and slushies!! And cobblers and crisps! (If you feel like skipping this step and simply just putting your peach slices directly into a pan without freezing them individually like this first, you can…but you’ll end up with one big gallon sized frozen peach-sicle, and you may be very frustrated when you want only part of the rock hard peach-sicle for a smoothie. Just so ya know.)

Now…to can peaches…this is what I do. There are other ways to do it…this is just the way I do it! Please be sure to go back and read Canning 101 for the canning basics!

peaches3sm.JPG

I make a honey/water solution on my stove…which is 2 T. honey to every 5 cups of water. Heat it on the stove and let it sit warm while you prepare your peaches.

Sterilize your jars.

peaches1sm.JPG

Take out a hot jar and put in about 1/16 teaspoon of ascorbic acid to keep your peaches pretty. Just dump it into the bottom of the jar. (Some people use lemon juice)

ascorbicacidsm.JPG

Ascorbic acid is powdered vitamin C. I get mine at a health food store.

peaches4sm.JPG

Fill the jar with sliced peaches. Then, use a funnel to pour your honey/water into the jar, to about a half inch from the top. Place a sterilized lid and ring onto the full jar.

applesauce13sm.JPG

Now it’s time to give your full jars a hot water bath to seal the lids. Put your full jars into the water. Once the water is boiling,  boil the jars for about 25 minutes. (And yes, this is actually a picture of applesauce jars boiling…I forgot to take a picture of the peaches boiling and I’m too tired to go can more peaches just so that I can go take a picture of the jars boiling.)

Oh, and boil your jars with the lid on the water bath pot…I just took off the lid for the picture. :)

peaches6sm.JPG

After the jars have boiled for 25 minutes, take them out with tongs…or better yet, this cool gripping tool made especially for jars and hot water baths. Then you get to listen for the caps to seal. I can’t think of a way to blog the way it sounds…but after all your hard work, it sure is a cool sound to hear them seal! (Thhhhp!) (Or something like that!)  You can be sure they sealed if you can push down on the top and it is down firm. It takes anywhere from 1 second to 30 minutes for the lid to seal after you’ve taken it out of the water. 

Then, just leave your canned peaches out on the counter for a few hours or several days so that you can admire them and smile and feel happy every time you walk into the kitchen and see them. (Okay, that’s what I like to do anyway.)  (Because I’m weird like that.)

Heavenly Homemaker's Club Members: Access your homepage and all your fantastic resources here! Not a member yet? Please join us!

Canning 101

September 1, 2008 by Laura 86 Comments

This post may contain affiliate links. For more information, please see our disclosure policy.

Just in case you may be unfamiliar with the beautiful art of canning fruits and veggies…I thought I’d do this post to explain some of the basics. Then later, I can post about the specifics!

Here are some of the basic supplies you will need in order to can food. Some of these supplies are not entirely neccessary…just really, really helpful. Some of these supplies are entirely neccessary.

canning1014sm.JPG
If you are planning on canning fruits or veggies, you will need jars. 
(Oh, how I love jars!)  I like having both quart and pint sized…
and my favorites are the wide mouth jars.

canning1015sm.JPG
You’ll also need lids and rings. The rings you can re-use year after year,
but in order to have your lid seal, you must use new ones each year.

canning1012sm.JPG
This handy dandy tool is a magnetic wand, which I use to retrieve lids
and rings out of hot sterilizing water. (See below)  I love this tool!!

canning101sm.JPG
This tool helps me grip the jars as I pull them out of the hot water bath. 
Since I’ve had this tool, I have broken fewer jars and burned myself less often. 
I SO recommend one of these.

canning1016sm.JPG
This wide mouth funnel is a lifesaver when you’re trying to get
your produce into the jar without making a big mess. 

canning1013sm.JPG
A water bath pot is pretty neccessary…
if you’re planning to seal your jars in a water bath. 

Okay…next…

Here are a few things you need to know if you don’t want to die from botulism…

*Using the hot water bath system to seal your jars is only safe if you’re canning something acidic. Otherwise, food must be sealed in a pressure cooker. Food that I know of to be safe to can in a hot water bath:  tomatoes, apples, peaches, pears. If you aren’t for sure what’s safe…please look it up to be sure before you use a hot water bath to seal your lids!

*You need to sterilize your jars, lids and rings before you put food into them. All I do is put my clean jars upside down into a shallow pan of boiling water for a couple of minutes.

applesauce7sm.JPG

applesauce10sm.JPG
I do the same with my lids and rings.

applesauce12sm1.JPG
See, this is where that magnetic wand comes in very handy!

*When you put your jars full of yummy fruits or veggies into the hot water bath, I recommend putting them in before you start to boil the water. If your water is already boiling hot, you run the risk of breaking your jars and losing all of the work you put into filling. So, put your jars into the pot of water, then turn it on to begin to get hot. Once it finally starts to boil, then start your timer for the recommended boiling time.

Okay…this will all make more sense with my other posts about canning specific fruits and veggies. But…that gives you the basic information you’ll need so that those posts will make sense. Or maybe none of it makes any sense and you’d rather just come over and watch. (Watch, nothin’. I’d hand over a knife and some apples and tell you to get busy.)  :)

Stay tuned…canning peaches and applesauce coming soon!
————————————————-

Find more kitchen tips on Tammy’s Recipes.

Heavenly Homemaker's Club Members: Access your homepage and all your fantastic resources here! Not a member yet? Please join us!

I LOVE This Time of Year!!!

August 20, 2008 by Laura 8 Comments

This post may contain affiliate links. For more information, please see our disclosure policy.

All day yesterday I was singing the song in my head, “It’s the most wonderful time…of the year…” (And now you’ll be singing it too…sorry.)

But it just really is one of the most wonderful times of the year, when so many yummy fruits and veggies are ready for harvest. We LOVE it!!

One of our favorite things to do this time of year is to take a trip to “Ms. Madge’s house” where we get to pick apples and pears. She always thanks us for taking so many apples and pears off of her hands. Um, you’re welcome. Oh, how I love being able to “serve” others this way… :)

applepicking4sm.JPG
Asa picking apples…

applepicking5sm.JPG
Elias picking apples…

applepicking2sm.JPG
Unknown boy picking apples… (Just kidding, it’s Justus)

applepicking3sm.JPG
Malachi helping Ms. Madge pick pears

applepicking1sm.JPG
There are two more boxes just like this one! Woohoo!

pickingpeaches1sm.JPG
Then we came home and picked peaches off of our own tree!

pickingpeaches3sm.JPG

pickingpeaches2sm.JPG

pickingtomatoes1sm.JPG
And tomatoes and peppers out of our garden…

pickingtomatoes2sm.JPG
Looks like it’s time for some salsa!!

And…based on all the pictures you’ve seen here…it looks like you’ll be seeing some upcoming posts on how to can applesauce, peaches, pears and tomato sauce!! Guess I’d better get busy in the kitchen!

Wanna come over and help?!

Heavenly Homemaker's Club Members: Access your homepage and all your fantastic resources here! Not a member yet? Please join us!
« Previous Page
Next Page »

Join Our Community!

 Facebook Twitter E-mail Instagram Pinterest

Popular Posts

~ Will All of the Real Moms Please Stand Up?
~ Easy! Stir-and-Pour Whole Wheat Bread
~ How to Make Gatorade
~ 31 Real Food Breakfast Ideas
~ Dear Teenage Girls...
~ When Mom Takes a Step Back
~ The Inexpensive Health Insurance We Love!
~ Let's Talk Real Food Grocery Budgets

Check out our latest posts!

  • Big Family Food and Fun: May 31-June 6, 2026
  • Big Family Food and Fun: May 24-30, 2026
  • Free 7-Day Summer Menu Plan
  • Big Family Food and Fun: May 17-23, 2026
  • Easy Side Dishes for Summer
Home  ~  Simple Meals  ~  Club Membership  ~  Shop  ~  Privacy Policy  ~  Disclosure  ~ Contact

Copyright © 2026 · Beautiful Pro Theme on Genesis Framework · WordPress · Log in