Heavenly Homemakers

Encouraging women in homemaking, healthy eating and parenting

  • Home
    • About
    • FAQs
  • Recipes
    • Bread and Breakfast
    • Condiments
    • Dairy
    • Main Dishes
    • Side Dishes and Snacks
    • Desserts
    • Gluten Free
    • Instant Pot
    • Crock Pot
    • Heavenly Homemaker’s Weekly Menus
  • Homemaking
    • Real Food Sources
  • Store
  • Contact
    • Advertise
    • Disclosure
    • Privacy Policy
  • Simple Meals
  • Club Members!

Low Sugar Pumpkin Cheesecake Cups

November 24, 2015 by Laura 4 Comments

This post may contain affiliate links. For more information, please see our disclosure policy.

Pumpkin Cheesecake Bites

In preparation for Thanksgiving Day, I made a big Turkey, Cheesy Mashed Potatoes, Gravy, Stuffing Muffins, Green Bean Casseroles, Sweet Potatoes, Cranberry Sauce, Pineapple Fluff Salad , Pumpkin Pies, Pecan Pie Bites, Whipped Cream, and Apple Pies. I know what you’re thinking. You’re thinking the same thing I’m thinking. There may not be enough food! What will we do if we run out of food?

So I made more food. Just in case, you know?

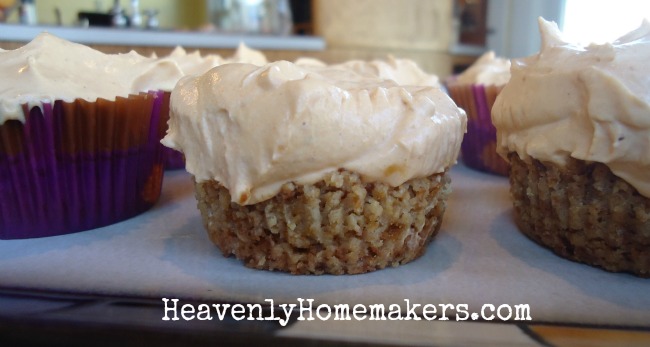
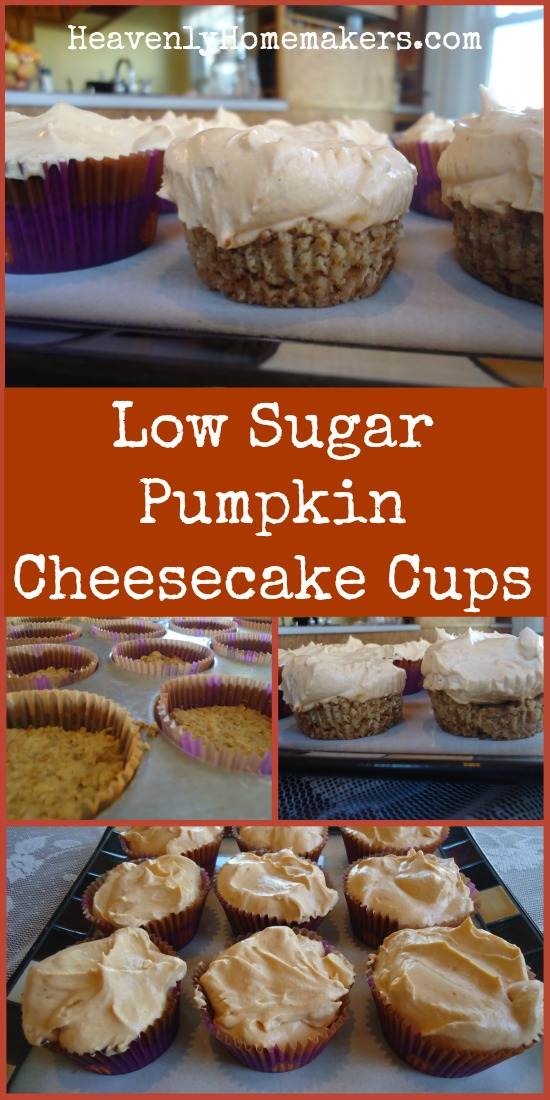
Actually, I’m not worried about having enough food. But looking over that list, there is a definite shortage of cheesecake. It also occurred to me that I might enjoy a low sugar dessert on Thanksgiving day. That is why I took my Low Sugar Pumpkin Cheesecake recipe and adapted it to make fun these Pumpkin Cheesecake Cups.

We can all sleep better now knowing that along with the other 26 dishes on the Thanksgiving buffet, there will also be low sugar cheesecake. I’m not sure the day would have been complete otherwise.

Low Sugar Pumpkin Cheesecake Cups

Yum

Low Sugar Pumpkin Cheesecake Cups
 
Save Print
Author: Laura
Serves: 24
Ingredients
  • Shortbread Crust:
  • 3 cups whole wheat flour (I use freshly ground hard white wheat for this)
  • ½ cup sucanat (or brown sugar if you prefer)
  • 1½ cups melted butter
  • Pumpkin Cheesecake Filling:
  • 2 8-ounce packages softened cream cheese
  • 1½ cups heavy whipping cream
  • 2 cups pureed pumpkin
  • 1½ teaspoons ground cinnamon
  • ½ teaspoon ground nutmeg
  • ½ teaspoon ground cloves
  • Real maple syrup or liquid stevia to taste (I used 4 droppers full of stevia)
Instructions
  1. Make crust by stirring flour and sucanat together in a bowl.
  2. Add melted butter, combining well.
  3. Press mixture into 24 paper-lined muffin cups.
  4. Bake in a 350° oven for 10-15 minutes or until golden brown.
  5. Allow crust to cool completely.
  6. Blend all pumpkin cheesecake filling ingredients together until smooth.
  7. Scoop into prepared shortbread crust cups.
  8. Spread until smooth.
  9. Chill in refrigerator for at least two hours before serving.
3.4.3177

I found it fun to use fall-colored muffin cup liners for the occasion. Come Christmastime, I’ll use red and green. :)

Low Sugar Pumpkin Cheesecake Cups

I made the filling with stevia and was concerned that others might not like them as a result. But since the shortbread crust has a little sucanat and is so buttery and yummy, that balances the taste out for others. As for me, I think they are perfectly sweetened. In fact, I’m having to hold back to save the majority of these for Thanksgiving day. After all, there would be a definite void on the table if there were only 26 food choices and no cheesecake whatsoever.

Here’s to a wonderful holiday weekend! Happy Thanksgiving!

Heavenly Homemaker's Club Members: Access your homepage and all your fantastic resources here! Not a member yet? Please join us!

{Low Sugar} Lemon Melt-Away Cookies

October 29, 2015 by Laura 10 Comments

This post may contain affiliate links. For more information, please see our disclosure policy.

I’m almost embarrassed to admit to you how many batches of Easy {Low Sugar} Cookies our family has eaten since I posted the recipe in September. We all declare these to be the best “why would we ever need more sugar in these cookies” cookies. They are incredibly delicious just as they are. I make them often. You should too.

Easy {Low Sugar} Cookies

Low Sugar Lemon Melt-away Cookies

Yum

I’ve long since stopped rolling and cutting when I make those cookies. After all – if life is too short to knead bread dough, it’s certainly too short to get out a rolling pin and cookie cutters. (Although I will be rolling and cutting for the holidays because there are laws enforcing the making of cookies into the shape of trees and stars and candy canes at Christmastime.) Instead of rolling and cutting in the non-holiday season though, I’ve been either freezing and slicing or simply dropping and squooshing (as detailed below).

Every time during the past few weeks I’ve made the drop and squoosh sugar cookies, Malachi walks by and says, “Man, I always think these are some kind of lemon cookies. Mom, you should make these into lemon cookies.”

Either my kids are related to me, or they just naturally get inspired with, “great recipe. now let’s tweak it.” Some of my best recipe ideas come from the brains of my boys. Need I remind you of the Pineapple Fluff Salad? Or the 5-Minute Stove-Top Granola? Now, allow me to introduce you to {Low Sugar} Lemon Melt-Away Cookies.

Lemon Melt-Away Cookies

I simply added 2 Tablespoons of lemon juice to my Easy {Low Sugar} Cookies recipe and voila: {Low Sugar} Lemon Melt-Away Cookies. If we loved the regular version, we love the lemon version even more. I used the drop and squoosh technique, which is the method all the professionals use. To squoosh is a real thing. I definitely did not make up the term five minutes ago. All the famous chefs squoosh. Squooshing is a well-known culinary term just like saute, dredge, and braise. (Though it might be used more often by cooks who say “slap it down into a pan,” “toss in a little of that,” and “throw it down on the table.” Still. Professional.)

Simply put, to squoosh is to press down lightly on a ball of cookie dough with the bottom of a drinking glass. Dip the glass into a small amount of sugar if necessary to keep it from sticking. Drop a scoopful of dough, squoosh it down with the bottom of a glass. Drop, squoosh, drop, squoosh. Or, to be more efficient: drop, drop, drop, drop, drop (x24) – squoosh, squoosh, squoosh, squoosh (and so on).

It looks something like this:

squoosh

It must please you so much to be taught these professional terms so that you can impress everyone around you as you cook and bake. “What are you doing?” a friend will ask. “Oh, I’m just squooshing my cookies,” you’ll reply. Then your friend will nod in quiet appreciation at both your skill and your knowledge. They will also enjoy eating your cookies.

Now I shall give you the Low Sugar Lemon Melt-Away Cookie recipe that will have you squooshing in no time.

{Low Sugar} Lemon Melt-Away Cookies
 
Save Print
Author: Laura
Serves: 24-30
Ingredients
  • 1 cup melted butter
  • ½ cup sucanat or raw sugar
  • 2 Tablespoons lemon juice
  • 2 eggs
  • 1 teaspoon vanilla extract
  • 1 teaspoon baking powder
  • 3 cups of whole wheat pastry flour (give or take)
Instructions
  1. Stir together melted butter and sugar.
  2. Add lemon juice, eggs, vanilla, and baking powder.
  3. Stir in flour until a solid ball of dough forms.
  4. Drop teaspoon-sized balls of dough onto a cookie sheet, about an inch apart.
  5. Squoosh the dough down gently with the bottom of a glass.
  6. Bake in a 350° oven for 10-12 minutes or until cookies are lightly browned.
3.4.3177

Low Sugar Lemon Melt-Away Cookies ~ Easy!

It’s time to start squooshing, friends. Is this a skill you’ve already mastered, or is this one a new one for you? Let the squooshing begin.

Heavenly Homemaker's Club Members: Access your homepage and all your fantastic resources here! Not a member yet? Please join us!

Sugar Cookies ~ the Whole Wheat, Low Sugar, Super Delicious Way

September 3, 2015 by Laura 15 Comments

This post may contain affiliate links. For more information, please see our disclosure policy.

Easy (Low) Sugar Cookies

I tinkered with my old sugar cookie recipe and cut the sugar from 1 1/2 cups down to just 1/2 cup. I personally think it could be cut even more, but that’s because I am weird about sweetness levels now. I’m the one who thinks coffee is sweet when it has only cream stirred into it. It looks so creamy delicious, and I say things like “mmm it is so sweet and good” while I’m sipping it, so my people keep trying it thinking that maybe this time I really mean it. I mean, I do mean it – why would I lie? It’s sweet. But then they take a sip and they make faces and say, “Eww that is so not sweet, what are you even talking about?” This is how I never have to share my coffee.

Now sharing these cookies is a different story. Everyone loves these lightly sweetened jewels. The butter makes them flaky good. This will be my new go-to sugar cookie recipe at all holidays, special events, and uneventful Wednesdays when the mood strikes.

Note about the sugar: Most of the time I use sucanat because it is sugar with some nutrients left behind. For occasional recipes when I’d like to avoid the product turning out too dark brown, I pull out some organic raw sugar. It’s only barely better than white sugar, but we’re going light on the sugar here so I don’t throw a fit about this.


Sugar Cookies the Healthier WayYum

4.0 from 1 reviews
Sugar Cookies ~ the Whole Wheat, Low Sugar, Super Delicious Way
 
Save Print
Author: Laura
Serves: 20-30
Ingredients
  • 1 cup melted butter
  • ½ cup sucanat or raw sugar
  • 2 eggs
  • 1 teaspoon vanilla extract
  • 1 teaspoon baking powder
  • 3½ cups of whole wheat flour (give or take)
Instructions
  1. Stir together melted butter and sugar.
  2. Add eggs, vanilla, and baking powder.
  3. Stir in flour until a solid ball of dough forms.
  4. Cover the bowl and place it in the refrigerator to chill for about an hour.
  5. Roll chilled dough on a well-floured surface and thin or thick as you like.
  6. Cut with cookie cutters and place them about a half inch apart on a baking sheet.
  7. Bake in a 350° oven for about 12 minutes or until cookies are lightly browned.
  8. Makes 20-30 cookies depending on the thickness and size.
3.4.3177


sugar cookies 4

Notice the little round piece of squished circle dough, ready to be baked along with the pumpkin-shaped cookies. It is a part of the “No Cookie Left Behind” program. It’s what you do when your remaining dough isn’t big enough to shape.

Frost these cookies if you like, but then they fall out of the Low Sugar category. We find these to be perfect as they are, and some of us love to eat them with our coffee that is sweetened only with cream.

It’s almost cookie rolling, cutting, and baking season – so I can’t wait to hear what you think about these! (We’re on our third batch already. I may have failed to mention to my kids that I cut down the sugar in this recipe. Do not tell.)

Heavenly Homemaker's Club Members: Access your homepage and all your fantastic resources here! Not a member yet? Please join us!

No-Bake Peanut Butter Cookie Bites

August 20, 2015 by Laura 8 Comments

This post may contain affiliate links. For more information, please see our disclosure policy.

Cookie bites? Eh. We like ’em okay. ;)

Because we all like healthy snacks and we absolutely love easy recipes – let us take a moment to review the previous no-bake cookie bite recipes shared here:

  • No-Bake Chocolate Fudge Cookie Bites
  • No-Bake Snickerdoodle Bites

One idea turned into another, and now we have No-Bake Peanut Butter Cookie Bites to add to the list!

No-Bake Cookie Bites - Easy Recipes!

With a few ingredient tweaks, a Peanut Butter Cookie Bite came about. Of course, a peanut butter cookie bite must be gently pressed with a fork like the real deal, don’t you think? These taste so much like Peanut Butter Cookies, we couldn’t believe it. But instead of being an actual cookie full of sugar – they are a high protein, high fiber, low sugar snack. But hey, call it a cookie since it still tastes like one. Healthy treats are so exciting!

Peanut Butter Cookie Bites - No Bake!

No-Bake Peanut Butter Cookie Bites Yum

No-Bake Peanut Butter Cookie Bites
 
Save Print
Author: Laura
Ingredients
  • 1 cup natural creamy peanut butter
  • ¼ cup honey
  • 1 teaspoon vanilla extract
  • ½ cup coconut flour
Instructions
  1. Mix the ingredients together in a bowl until well combined.
  2. Roll the mixture into teaspoon-sized (or whatever sized) balls.
  3. Press down gently, criss-cross, with a fork.
  4. Refrigerate before serving.
3.4.3177

It really is that easy.

(Here are my homemade peanut butter instructions.)

No-Bake Peanut Butter Cookie Bites

Where to get Coconut Flour:

Many have asked about Coconut Flour. I order it from Tropical Traditions or Amazon. A little bit goes a long way, so don’t let the price-tag scare you. Coconut flour is naturally gluten free, high in fiber, and high in protein. I love it for its nutritional value!

Ways to enjoy these No-Bake Cookie Bites:

  • Packed in a lunch
  • As a snack/pick-me-up
  • Before or after a work-out
  • On the road during a trip
  • In a box, on a train, with a fox, in a tree (thank you, Sam I Am) – Do you really need any more reasons to love these? Eat them any where for any reason!

Lovin’ these No-Bake Cookie Bites!

Give me more cookie flavor ideas to play with!! What would you like to see here?

Heavenly Homemaker's Club Members: Access your homepage and all your fantastic resources here! Not a member yet? Please join us!

No-Bake Chocolate Fudge Bites (Low Sugar, Gluten Free, Dairy Free)

July 28, 2015 by Laura 7 Comments

This post may contain affiliate links. For more information, please see our disclosure policy.

Happiness is found in No-Bake Chocolate Fudge Bites!

I always hesitate to put “Gluten Free” or “Dairy Free” in the title of a recipe. Why? Because some people see it and think, “I don’t need to eat gluten free (or dairy free) so I don’t need to look at this recipe.”

No wait! Come baaaaaaack! Do you eat apples? Strawberries? Chicken? Carrots? Then sometimes you eat gluten and dairy free. Right? Because that’s what those foods are, without even having to try.

There are soooo many foods that are naturally gluten and/or dairy free because God made a big variety of food to provide nourishment and balance. I wanted to put “GF” and “DF” in the title of this recipe so that the “GF” and “DF” people would know they could join this party. Everyone wins. Especially because this recipe involves chocolate. Amen and amen.

So gather around all you gluten free and dairy free and I can eat anything people. There are fudge bites to be had! These are cousins to No-Bake Snickerdoodle Bites (which are also GF and DF). Both of these snacks are awesome to have in the fridge for a quick pick-me-up.

Note: I noticed two things about this recipe when I tried them on my family:

  1. They were too sweet for me but my boys wished they were sweeter. Add or subtract that 1/4 cup honey amount as you wish.
  2. These tasted a thousand times better after they had been in the fridge an entire day. I don’t know why. Eat them right away if you wish, but chilling these in the fridge for over 24 hours makes these much fudgy-er and tastier.

No-Bake Chocolate Fudge BitesYum

5.0 from 1 reviews
No-Bake Chocolate Fudge Bites (Low Sugar, Gluten Free, Dairy Free)
 
Save Print
Author: Laura
Ingredients
  • 1 cup almond butter or peanut butter
  • ¼ cup honey (more if you prefer)
  • 1 teaspoon vanilla extract
  • 2 Tablespoons cocoa powder
  • ⅓ cup coconut flour
Instructions
  1. Mix the ingredients together in a bowl until well combined.
  2. Roll the mixture into teaspoon-sized (or whatever sized) balls.
  3. Refrigerate before serving.
3.4.3177

No-Bake Fudge Bites

Have you tried the No-Bake Snickerdoodle Bites yet? These No-Bake Bites are my favorite way to add coconut flour to our diet (which is rich in fiber, protein, and other great nutrients). It doesn’t hurt that they only take a few minutes and little effort to make. :)

~~~~~~~~~~~~~~~~~~~~~~~~~~~~~~~~

Heavenly Homemaker's Club Members: Access your homepage and all your fantastic resources here! Not a member yet? Please join us!

Low Sugar Sunshine Cake

July 2, 2015 by Laura 8 Comments

This post may contain affiliate links. For more information, please see our disclosure policy.

Of course I named this “sunshine cake.”

sunshine cake 12

I don’t know if you know this about me or not since I hardly ever mention it or at the very least I haven’t said it in the past five minutes – but here it is: I LOVE SUNSHINE!!! I have decided that I need large doses of vitamin D in order to avoid all kinds of conditions and disorders. Bring on the hot, bright, beautiful days of summer!

My love of sunshine along with my love for this cake led me to call this recipe Sunshine Cake. Indeed, that’s exactly what this tastes like: a delicious drop of sunshine.

What does sunshine taste like, you ask? Well, it tastes like this cake. Do I need to keep explaining this?

If you can possibly believe it, I think I like this cake even better than the Low Sugar Super Moist Chocolate Cake – and we all know that I love that cake almost as much as I love sunshine.

Just like the chocolate cake, two key players in this recipe are whole wheat pastry flour and sour cream. The pastry flour helps this cake remain light, and the sour cream keeps it moist. But let’s not forget the Cream Cheese Frosting. It goes without saying that Cream Cheese Frosting makes everything in life better. Even cloudy days with no sunshine.

Low Sugar Sunshine CakeYum

Low Sugar Sunshine Cake
 
Save Print
Author: Laura
Ingredients
  • 2⅔ cups whole wheat pastry flour
  • ½ cup sucanat or sugar
  • 2 teaspoons baking powder
  • 1 cup milk
  • ½ cup sour cream
  • ½ cup melted butter
  • 2 eggs
  • 1 teaspoon vanilla extract
Instructions
  1. Combine dry ingredients in a bowl.
  2. Add milk, sour cream, melted butter, eggs, and vanilla.
  3. Mix with beaters until smooth.
  4. Pour into a buttered 9x13 cake pan.
  5. Bake in a 350° oven for 25-30 minutes or until a toothpick inserted in the middle comes out clean.
3.4.3177

Stevia-Sweetened Cream Cheese Frosting

2 cups heavy whipping cream
2 Tablespoons softened butter
8 ounces softened cream cheese
1 teaspoon vanilla extract
Liquid stevia to taste (I use about 20 drops)

In a large bowl, whip cream until soft peaks form. Add softened butter, cream cheese, vanilla, and stevia – whipping until well combined and smooth. Spread over cooled cake. Store in refrigerator.

If you prefer, here’s a slightly sweeter but still not too sugary frosting option:

Maple Cream Cheese Frosting

8 ounces softened cream cheese
¼ cup softened butter
3-4 Tablespoons real maple syrup
1 teaspoon vanilla extract

With a hand mixer (or in your blender), whip together all ingredients until smooth. Spread over cooled cake.

Low Sugar Sunshine Cake

Tell me which Low Sugar recipes you’ve tried so far. Which are your favorite? Are you a chocolate or a vanilla kinda friend?

Heavenly Homemaker's Club Members: Access your homepage and all your fantastic resources here! Not a member yet? Please join us!

No-Bake Snickerdoodle Bites – A Quick and Easy Low Sugar Treat

June 24, 2015 by Laura 14 Comments

This post may contain affiliate links. For more information, please see our disclosure policy.

I’ve been making a treat similar to this recipe for several years (found over at TheNourishingHome.com). I’ve tweaked it here and there…then sort of forgotten all about this great treat. Last week I decided I needed a lightly sweetened snack. Not salty. Not desserty. Not meaty. Just something filling and lightly sweetened. These Snickerdoodle Bites are perfect.

snickerdoodle bites2

I’ve kept these Snickerdoodle Bites in my fridge, grabbing one in the afternoon when I need a little something to get me through until dinner. Because these are made with coconut flour, they are filling and nourishing. And did I mention that they are lightly sweetened to perfection? Like, if they were produced in mass and put into a box, the box would definitely say, “Lightly sweetened…to perfection.” Yep, that’s what it would say.

No-Bake Snickerdoodle BitesYum

No-Bake Snickerdoodle Bites - A Quick and Easy Low Sugar Treat
 
Save Print
Author: Laura
Ingredients
  • 1 cup creamy almond butter or peanut butter (almond butter is my fav for these)
  • ¼ cup honey
  • 1 teaspoon vanilla extract
  • 1 teaspoon ground cinnamon
  • ½ cup coconut flour
Instructions
  1. Mix the ingredients together in a bowl until well combined.
  2. Roll the mixture into teaspoon-sized (or whatever sized) balls.
  3. Refrigerate before serving - or just start eating because who can wait?
3.4.3177

Do feel free to add more honey if you prefer – although then these might be slightly more than lightly sweetened, thus ruining my description. But I’ll never know, so it won’t matter, and truly – we want these to be perfectly sweetened for your family’s delight.

No-Bake Snickerdoodle Bites - a quick and easy low sugar treat

Coconut flour is naturally gluten free – a great option for those of you who must avoid gluten. Our family doesn’t not need to avoid gluten – however we like coconut flour because it is so rich in nutrients! “Coconut flour is the fiber from coconut meat after most of the oil has been extracted to make coconut oil.” (source: Tropical Traditions) Adding protein and fiber to our (lightly sweetened) snacks? Yes please!

Where do I get coconut flour? I either order it from Tropical Traditions or Amazon. (Right now, this coconut flour at Amazon is a wonderful price!) Here are some of my other coconut flour recipes:

  • Coconut Flour Cheddar Drop Biscuits
  • Coconut Flour Muffins
  • Coconut Flour Banana Muffins
  • Coconut Flour Brownies

But right now, these lightly sweetened No-Bake Snickerdoodle Bites are my favorite coconut flour recipe. It’s probably because they only take 5 minutes to prepare and don’t require baking. And also because they are lightly sweetened to perfection.

Are you a fan of coconut flour? How do you use it at your house? 

This post includes affiliate links

Heavenly Homemaker's Club Members: Access your homepage and all your fantastic resources here! Not a member yet? Please join us!

Make Orange Creamsicle Ice Cream – No Ice Cream Freezer Required

June 18, 2015 by Laura 2 Comments

This post may contain affiliate links. For more information, please see our disclosure policy.

Orange Ice Cream

Knock, knock.

Who’s there?

Orange.

Orange who?

Orange you glad I didn’t bore you with the ridiculous banana knock-knock joke your three year old thinks is funny every time he tells it over and over? Between my four boys, I heard that joke 45,000 times. It was so hilarious every single time, of course. If you don’t know which joke I’m talking about, I am very, very jealous and and also very happy for you. Look it up if you must, but I’m warning you: do not tell your three year old.

All jokes aside, orange you excited to try this recipe? You should be! It’s very refreshing – and super easy. No need to dig out the ice cream maker and rock salt. You do need a high power blender, however. I invested in a BlendTec about a year ago, and I’m not sure how Ma Ingalls and I ever lived without it. That thing is a power horse and makes my kitchen life so much easier. I probably use it three times every day – no exaggeration.

But speaking of exaggeration, check out this orange:

orange ice cream 1

I got two of these giants in my Bountiful Basket order last week. As you can see, this one was so huge, I could barely hold it in my hand. This recipe calls for two medium-sized oranges. The above orange does not qualify as “medium-sized.” He is an over-achiever and we are so proud. I used about 1 1/2 of this size orange for this recipe. And really, this recipe isn’t rocket science because I don’t know what rocket science is and also because this recipe is flexible in its ingredient quantities. Just freeze some orange wedges and throw them in a blender with the other stuff and it makes a really great treat.

Knock, knock.

Just kidding.

Alrighty, here is the very easy recipe, which I found here and tweaked only slightly. Thank you for the great idea, SuperHealthyKids.com!

Low Sugar Orange Ice CreamYum

2 cups whole milk or coconut milk
2 medium-sized oranges
3 Tablespoons maple syrup or 20 drops liquid stevia
1 teaspoon vanilla extract

Peel oranges and divide them into sections. Lay them flat on a cookie sheet. Place them in the freezer for about two hours or until they are frozen solid.

Put half the frozen orange segments into a high power blender. Add milk and blend until smooth. Add remaining oranges, maple syrup or stevia, and vanilla. Continue blending until smooth.

Pour mixture into a 9×13 inch dish. Place in the freezer for 1-2 hours before serving. (If it is in the freezer longer than 1-2 hours, remove from freezer a few minutes before serving to make scooping easier.

Orange Ice Cream with dairy free option!

Do you have a BlendTec or other high power blender (like Vitamix)? What all do you do with it? Isn’t it great?!

 Some of the links in this post are affiliate links.
Heavenly Homemaker's Club Members: Access your homepage and all your fantastic resources here! Not a member yet? Please join us!

Low Sugar Chocolate Peanut Butter Cake

June 10, 2015 by Laura 13 Comments

This post may contain affiliate links. For more information, please see our disclosure policy.

chocolate peanut butter cake 2

Happiness is taking part of one recipe and part of another recipe and putting them together to make Chocolate Peanut Butter Cake recipe. Happiness is having your cake and eating it too because of the low sugar content. Happiness is a cup of coffee with this cake. Really, this whole post and all that is included is really very happy.

Unless you can’t have dairy or gluten or nuts. Then this post really just stinks.

But for the wheaty, milky, nutty (you know who you are) people out there, we shall enjoy this cake on behalf of our dairy free, gluten free, and nut free friends. We’ll feel just a little bit bad that you can’t eat this with us, but we trust that you can take this idea and run with it. You’re good at adapting, right?

So Chocolate Peanut Butter Cake. This is amazing, and it only has 1/2 cup of sugar in it so if you want to eat it for breakfast, by all means, do it.

Here’s what I did:

I made this Chocolate Cake. When it cooled, I topped it with this Peanut Butter Cream Frosting. Everyone at our house loved this cake! (except for Malachi, who hates peanut butter – what is the matter with this child?)

Now, you can also bake this Peanut Butter Cake and top it with this Honey Sweetened, Low Sugar Chocolate Frosting for a variation of Chocolate Peanut Butter Cake. Again, happiness is taking part of one recipe and putting it with part of another recipe. (This concept does not apply to everything. Do not mix and match my Alfredo Sauce with Pasta recipe with Apple Butter or Barbeque Sauce. I should not have to explain this.)

Low Sugar Chocolate CakeYum

1 cup melted coconut oil
1 cup water
4 Tablespoons unsweetened cocoa powder
2 cups whole wheat pastry flour
1/2 cup sucanat
dash of sea salt
1 teaspoon baking soda
1/2 cup sour cream
2 eggs

In a large mixing bowl, stir together flour, sucanat, salt, and baking soda. Set aside. In a saucepan, bring oil, water, and cocoa to a boil. Pour liquid mixture into the bowl with the dry ingredient mixture. Stir well. Add sour cream and eggs, mixing well. Pour batter into a 9×13 inch baking pan. Bake in a 350° oven for 20-25 minutes or until a toothpick inserted in the middle comes out clean. Allow cake to cool completely before frosting.

Peanut Butter Cream Frosting

1/4 cup butter, softened
1/2 cup natural peanut butter, softened
8 ounces cream cheese, softened
1/2 cup heavy whipping cream
1 teaspoon vanilla extract
Liquid stevia

Whip together all ingredients until thick and smooth, sweetening with stevia to taste. Spread over cooled cake.

Low Sugar Chocolate Peanut Butter Cake

Mixing and matching rocks. Who’s a fan of chocolate and peanut butter? What’s the weirdest food combination you like to eat? I have no idea why I’m asking that.

Heavenly Homemaker's Club Members: Access your homepage and all your fantastic resources here! Not a member yet? Please join us!

Low Sugar Almond Fudge Bars

May 31, 2015 by Laura 15 Comments

This post may contain affiliate links. For more information, please see our disclosure policy.

Low Sugar Almond Fudge Bars

almond butter fudge bars 1

I hadn’t spoken to my friend Emily in weeks. This is not because we aren’t getting along (because, grown adults, hello?). This is because I was in the thick of finishing a tough semester with my kids and preparing for graduation for our oldest, not to mention we had to finish our bathroom remodel before all the grad company came (and try to squeeze in this thing called blogging). Emily, as well as many of my dear friends, recognized that if I happened to have any spare time on my hands I should use it to take a shower or scrub the crusted bits of leafy greens off the bottom of my crisper drawer – not answer emails, talk on the phone, or answer questions in the church foyer.

But here and there, I would get a meaningful email or card from Emily. She would start it by saying something like “don’t answer this right now” or “I’m praying for you” because she knew. She knew. (Oh, look at me, tearing up just a little.)

Well one such email – actually – I think it was a quick holler across the church foyer conversation went something like this:

Emily: You know your Coconut Fudge Bars? I really like them but it would also be fun to figure out how to make them a little less peanutty. I wonder if almond butter would work?

Laura: {blank stare}

Emily: Carry on. Maybe I’ll play with it and get back to you.

It’s actually amazing that I remember that conversation at all. God bless all my friends who put up with me during this school year. I am not even kidding. (And all of them nodded in unison as if to say, “Really. She is not even kidding.”)

Not many days after that conversation, I got this email from Emily with the subject line, “Stop the presses!” Here’s what she said,

Okay, you really don’t have to stop anything but I was really excited about this. I felt like it was my DUTY to test out the coconut fudge bar recipe using almond butter instead of peanut butter. Technically I’ve only licked the spoon so far but oh my goodness, it is so good! It really does taste a little like a crunchy almond joy, but more grown up since it’s not too overly sweet. Can’t wait to have one after lunch!

How great is it that she did my recipe experimenting for me? Our family tried the almond butter fudge bar idea on a morning I hadn’t made anything for breakfast and we needed to eat quickly. I mixed these up and found that Emily was very right. These are awesome!

Almond Fudge BarsYum

Low Sugar Almond Fudge Bars
 
Save Print
Author: Laura
Ingredients
  • ½ cup almond butter
  • ¼ cup honey
  • ¼ cup coconut oil (or another oil of your choice)
  • ½ cup cocoa powder
  • 1½ cup rolled oats
  • 1 cup unsweetened coconut flakes
Instructions
  1. In a medium sized saucepan, melt together almond butter, honey, coconut oil, and cocoa.
  2. Remove from heat and stir in oats and coconut flakes.
  3. Spread mixture into a 9×9 inch pan.
  4. Chill for 2 hours before serving.
  5. Makes 8-16 bars, depending on how big/small you cut them.
3.4.3177

Honey Sweetened Almond Fudge Bars

Hooray for great friends, hooray for a snack/breakfast/treat that can be made in about five minutes, and hooray…just hooray.

How excited are you over this almond butter version of Coconut Fudge Bars? Leave a comment to tell Emily “thank you,” because I can take no credit for this (except for the fact that she’s my friend, which is, of course really because of God, so be sure to tell Him “thank you” as well.)

Heavenly Homemaker's Club Members: Access your homepage and all your fantastic resources here! Not a member yet? Please join us!
« Previous Page
Next Page »

Join Our Community!

 Facebook Twitter E-mail Instagram Pinterest

Popular Posts

~ Will All of the Real Moms Please Stand Up?
~ Easy! Stir-and-Pour Whole Wheat Bread
~ How to Make Gatorade
~ 31 Real Food Breakfast Ideas
~ Dear Teenage Girls...
~ When Mom Takes a Step Back
~ The Inexpensive Health Insurance We Love!
~ Let's Talk Real Food Grocery Budgets

Check out our latest posts!

  • Big Family Food and Fun: May 10-16, 2026
  • Big Family Food and Fun: May 3-9, 2026
  • Help Your Kids Become Independent in the Kitchen!
  • Big Family Food and Fun: April 26-May 2, 2026
  • Big Family Food and Fun: April 19-25, 2026
Home  ~  Simple Meals  ~  Club Membership  ~  Shop  ~  Privacy Policy  ~  Disclosure  ~ Contact

Copyright © 2026 · Beautiful Pro Theme on Genesis Framework · WordPress · Log in