Heavenly Homemakers

Encouraging women in homemaking, healthy eating and parenting

  • Home
    • About
    • FAQs
  • Recipes
    • Bread and Breakfast
    • Condiments
    • Dairy
    • Main Dishes
    • Side Dishes and Snacks
    • Desserts
    • Gluten Free
    • Instant Pot
    • Crock Pot
    • Heavenly Homemaker’s Weekly Menus
  • Homemaking
    • Real Food Sources
  • Store
  • Contact
    • Advertise
    • Disclosure
    • Privacy Policy
  • Simple Meals
  • Club Members!

Creamy Salsa Enchiladas – Freezer Cooking Week One

April 1, 2014 by Laura 9 Comments

This post may contain affiliate links. For more information, please see our disclosure policy.

How’s the freezer cooking challenge going for you at this point? Hopefully you’ve got your groceries purchased, browned your hamburger meat, and put together your first casseroles:

  • Cheesy Beef and Rice
  • Bacon Cheeseburger Casserole (recipe in {Healthy} Make-Ahead Meals and Snacks eBook)

If you haven’t checked all this off the list at this point, no problem. Feel free to jump in on the challenge at any time!

Today, we’ll continue on with the next phase of our freezer cooking for this week. Get ready to make Creamy Salsa Enchilada Casserole (recipe in Let’s Do This! eCourse, Lesson 2). Or if you prefer, you can make the Cheesy Salsa Enchiladas version of this recipe.

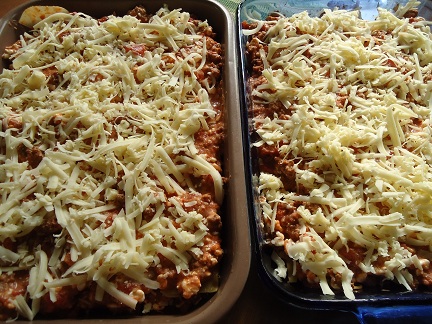
If you already have your meat browned, this is going to be a very easy day for you! Simply scoop out two pounds worth of cooked meat, stir in salsa, sour cream, and spices – and put your casseroles together according to directions. You can cover and label one casserole to put into the freezer. Then, plan to serve the remaining casserole for dinner tonight along with some yummy fruit and veggie sides!

creamy salsa enchiladas 2

We actually already ate both of the Creamy Salsa Enchilada Casseroles I made when guests came over on Sunday after church. Freezer cooking is meant to be shared, right? This made for a super simple meal for company.
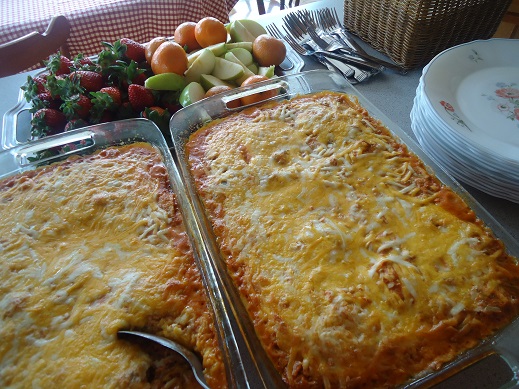
creamy salsa enchiladas

A note about cooking your frozen casseroles when you need them:  My favorite way to cook a frozen casserole is to put it directly into a cold oven in its frozen state, turn the oven on to 250° and let the casserole thaw/cook for about three hours. So easy!

Okay, head on into your kitchen to get these casseroles made. Stay tuned for one more freezer cooking assignment coming up this week. Here’s the run-down of our remaining plans. Then next week we’ll focus on Chicken Recipes!

Just a reminder, Let’s Do This! eCourse and {Healthy} Make-Ahead Meals and Snacks eBook are discounted to just $5 for the whole package.

Heavenly Homemaker's Club Members: Access your homepage and all your fantastic resources here! Not a member yet? Please join us!

Cheesy Beef and Rice and Bacon Cheeseburger Casserole ~ Freezer Cooking Week One

March 30, 2014 by Laura 12 Comments

This post may contain affiliate links. For more information, please see our disclosure policy.

Here’s hoping you got all your grocery shopping done for this challenge. If not, you can certainly join this challenge at any time!

Did you brown 8 pounds of hamburger in preparation for the freezer cooking? How long did it take?

Wait.  You didn’t time yourself cooking the hamburger meat? It’s possible that you aren’t as much of a food geek as I am. Be thankful.  I just get a kick out of knowing how much time it saves to double – or octuple, as the case may be in this beefy situation – in order to get ahead.

Today, we’re going to make both Cheesy Beef and Rice and Bacon Cheeseburger Casserole.

  • Cheesy Beef and Rice
  • Bacon Cheeseburger Casserole (recipe in {Healthy} Make-Ahead Meals and Snacks eBook)

Why are we making both recipes in one day? Because they both call for rice. It makes sense, then, to cook up all the rice we need for both recipes, then divide it up and make our four casseroles. Oh the efficiency. Oh the productivity. Oh the smell of bacon…

Yeah, by the way, prepare yourself for the fact that your family will likely get excited about eating bacon once they smell it cooking today. If you weren’t planning to serve the Bacon Cheeseburger Casserole tonight, you may need to change your plan to accommodate all the bacon sniffers and the sad I can’t believe you’re making bacon and we can’t eat it faces in your home.

So let’s get started. 

I’m assuming you’ve already cooked your meat. If not, well – cook your meat. Because we’re making four casseroles today, you’ll need four pounds of cooked hamburger.

Now, begin by getting the rice cooking since that’s what takes the longest. The beauty of this: while your rice cooks, you can do 45 minutes of other work or play. Unless, of course, you want to stand at the stove watching your rice get plump and tender.  snore

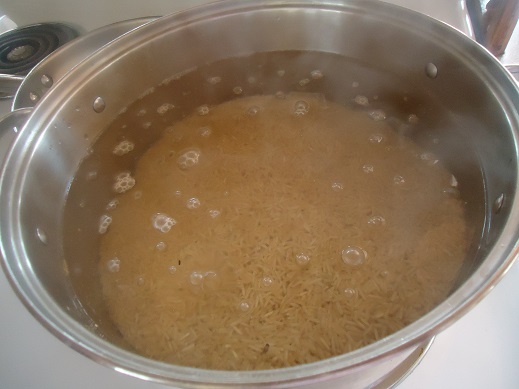
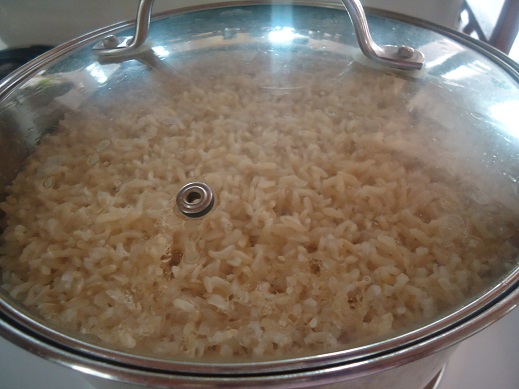
We need 5 cups of brown rice for these four casseroles, so measure out 10 cups of water and bring it to a boil. Stir in 5 cups of rice, turn down your burner to simmer, cover the pot, then walk away. Here are more detailed instructions on cooking brown rice.

beef freezer cooking 1

There it is. It can cook all by itself and will actually turn to mush if you stir it.
So put the lid on, set a timer, and walk away. 

In the meantime, you can cut your bacon into bite-sized pieces and get it cooking. You can also get out your casserole dishes, set out your other needed ingredients, and trim your fingernails – though not all at the same time or all in the same place.

beef freezer cooking 2

Once your rice and bacon are finished cooking, divide the rice according to the recipes. Stir in remaining ingredients to create your four casseroles. I found that it was easiest to use two huge bowls – one for each recipe. Then I divided the contents of the bowl into two casserole dishes for each recipe.

beef freezer cooking 4

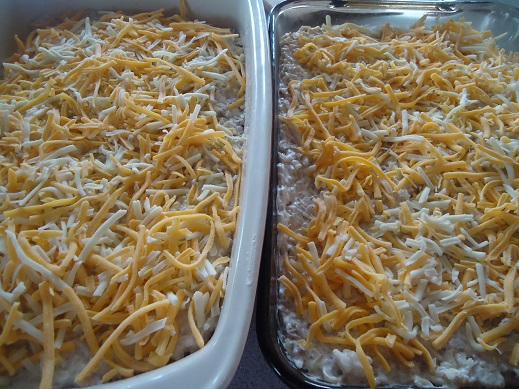
Cheesy Beef and Rice x2

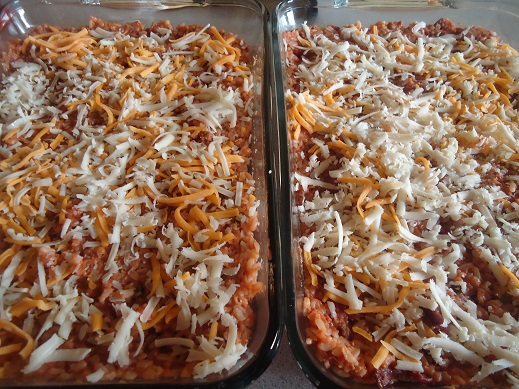
You might notice that since I was making so many cheesy casseroles this week, I cheated and bought a big bag of pre-shredded Colby jack cheese. I know.  There are healthier options, and I always recommend the healthier options. But it’s still cheese, right? At least I didn’t purchase a pre-shredded Snicker bar (which doesn’t even make sense, but I was trying to divert your attention away from my orange cheese).

beef freezer cooking 5

Bacon Cheeseburger Casserole x2

I actually made these four casseroles over the weekend so that I could get ahead a little bit on putting together these challenge posts. How lovely it was to put a Cheesy Beef and Rice plus a Bacon Cheeseburger Casserole into the freezer. I then put one Cheesy Beef and Rice into the oven too cook and serve for dinner, and put the additional Bacon Cheeseburger Casserole into the fridge to serve another day this week. One big mess, four great meals!

beef freezer cooking 7

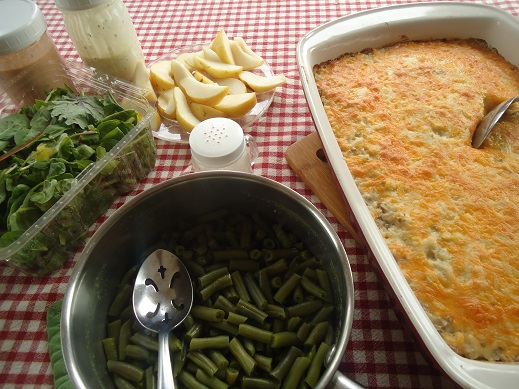
See how easy it was to set out delicious and healthy veggie and fruit side dishes with this Cheesy Beef and Rice? I cooked some frozen green beans, set out a package of mixed greens along with some homemade dressings that were already made and in the fridge, sliced a couple of pears, and called in the family. Except for about one serving of greens, this entire spread was gone in about a half hour.

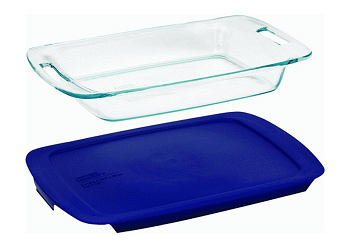
Need more Pyrex? I found a 9×13 dish with lid for just $11.79 with free shipping if you have Amazon Prime. If you order today, it would arrive in two days, which works out great for this challenge!

pyrex 5

Be sure to leave a comment letting us know how you’re coming in this challenge!

Just a reminder, Let’s Do This! eCourse and {Healthy} Make-Ahead Meals and Snacks eBook are discounted to just $5 for the whole package.
Heavenly Homemaker's Club Members: Access your homepage and all your fantastic resources here! Not a member yet? Please join us!

The Plan ~ Getting Ready For Freezer Cooking, Week One

March 28, 2014 by Laura 24 Comments

This post may contain affiliate links. For more information, please see our disclosure policy.

350x350_Challenge

I hope you’re planning to join me for Week One of our newest Freezer Cooking Challenge! I figured if I needed to spend some time getting ahead, you might too. Why not cook together, right?

For Week One, we’ll be focusing on beef recipes. If I’m going to brown one pound of hamburger meat, I might as well brown eight or ten. I still just dirty up one pot, and the time I save overall is amazing. So, we’ll be browning 8 pounds of meat at once, then we’ll put together 8 meals with the meat we prepared.

We’ll do this over the course of a week – so really, the time it takes each day to do the work is very minimal. I’ll walk you through all the steps! Here’s what is on my list to prepare during the upcoming week. My idea is to make two of each casserole listed below – one for our evening meal, and an additional one for the freezer. So easy! (All of these recipes can be made gluten free if you use GF pasta and corn tortillas.)

  • Cheesy Beef and Rice – catch the details in this post
  • Bacon Cheeseburger Casserole (recipe in {Healthy} Make-Ahead Meals and Snacks eBook) – catch the details in this post
  • Cheesy Beef and Pasta Casserole (recipe in {Healthy} Make-Ahead Meals and Snacks eBook) – view details here
  • Creamy Salsa Enchiladas (recipe in Let’s Do This! eCourse, Lesson 2) or if you prefer, you can make the Cheesy Salsa Enchiladas version of this recipe – catch the details in this post

Don’t want to make them all? No problem. Want to make three of each? Okay. This needs to benefit you, not cause you stress – so you just grab hold of whatever part of this challenge works for you and drop kick the rest. The grocery list below assumes you’ll be making two of each casserole. You can adjust it accordingly.

What you’ll need:

  • 5-6 Casserole Dishes (I use 9×13 inch Pyrex Dishes with lids)
  • 8 pounds hamburger meat
  • 1 pound bacon
  • 16 ounces pasta (I use whole wheat)
  • 5 cups brown rice
  • 5 cups sour cream (40 ounces)
  • 4 cups salsa (32 ounces)
  • 4 cups tomato sauce (32 ounces)
  • 2 eight-ounce cream cheese packages
  • 1/2 cup dry minced onion
  • 14 cups shredded cheese (4-ounces equals one cup; you’ll need approximately 56 ounces – less is fine if you would like to save money by skimping on the cheese)
  • 12 whole wheat tortillas (homemade tortillas are awesome)
  • 1 cup ketchup
  • 2 cans black olives
  • 2/3 cup milk

Be sure you have:

  • mustard
  • chili powder
  • sea salt
  • pepper
  • garlic powder

I’ve created a downloadable and printable grocery list for you here:  Freezer Cooking Grocery List ~ Week One

Be sure to add plenty of fruits, vegetables, and salad items to your list to go with your casseroles!

Here are your first assignments:

  1. Pick up all needed items at the grocery store.
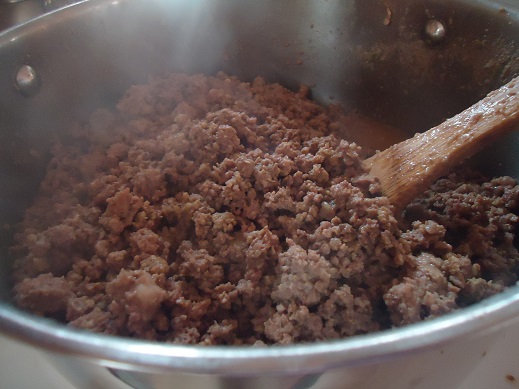
  2. Brown 8 pounds of ground beef, along with about a half cup of minced onion.

Once your meat has been cooked, let it cool, then put it into the fridge to be worked with later. You can divide it into 4 equal(ish) sized portions if you would like, just to make it easier later. I personally just put my whole pot into the fridge and will scoop out 1/4 of the contents each time I need it.

beef freezer cooking 3
You’re welcome to put together recipes as your own pace, of course. But for the sake of those who want to do this freezer cooking in stages, I plan to break all tasks down into small chunks so that it will be doable for all who only have a few minutes to spend on this at one time.

On Monday, we’ll continue on by putting together our first round of casseroles. Don’t forget, Let’s Do This! eCourse and {Healthy} Make-Ahead Meals and Snacks eBook are discounted to just $5 for the whole package.
Hope your freezer cooking prep time goes well! Let me know how these first assignments go for you.

Heavenly Homemaker's Club Members: Access your homepage and all your fantastic resources here! Not a member yet? Please join us!

You. Me. Freezer Cooking. Let’s Do This! {Take the Challenge}

March 28, 2014 by Laura 13 Comments

This post may contain affiliate links. For more information, please see our disclosure policy.

350x350_Challenge

I am in freezer cooking mode for two reasons:

1. I’m out of prepared food in the freezer. All my pyrex dishes are empty and forlorn. They sit stacked and weepy in my cabinet.
2. Spring soccer season is starting, which means that our evenings and weekends will be full, and my cooking time will be very limited. I need food that is healthy, hearty, and ready to put into the oven with no effort.

I want you to join me! Think of it:  Together we cook and get ahead. We all save money. We all save time. We all drop kick the stress that comes with busy evenings, full weekends, and hungry families.

The best news:

As we do this, not only will we be making food for our freezers, we’ll be practicing the Cook Once, Eat Twice (or More) method. This means we’ll be making two of everything – one to eat the day we make it, the other for our freezer. You’ll be making tonight’s dinner (something you need to do anyway), and an additional dinner for another day. See how efficient we’ll be?

Is freezer cooking intimidating to you?  Do you have trouble being motivated to get ahead in the kitchen? No problem. I’m going to walk you through this process during the next few weeks.

Don’t have time for freezer cooking or getting ahead?  Not to worry. We’re not going to spend hours at a time on this. We’re going to break this down into small tasks. You’ll be amazed at all you can do to get ahead when you just do a little bit at a time. That means that even if you have a house full of little ones, even if you work outside the home, even if you really don’t see how you can fit anything else into your day – you can make this work.

I’m excited to walk you through this freezer cooking thing! And I believe we all know how excited I am to use my Pyrex.

I reserve the right to change my plan once I get going with this and hit it hard in the kitchen, but here’s what I’m looking at for the next few weeks of freezer cooking.

Week One ~ Filling the Freezer With Beef Dishes
Week Two ~ Filling the Freezer With Chicken Dishes
Week Three ~ Filling the Freezer With Breakfast Items
Week Four ~ Filling the Freezer With Meatless Meals

See, it just makes sense to focus on one “food group” at a time. If I’m going to brown one pound of hamburger meat, I might as well brown eight or ten. It saves loads of time and energy! That’s why we’ll focus on beef recipes during Week One. And so on.

All of the recipes we’ll use are family friendly, and use basic, real food ingredients. I will choose recipes that are either on my site or in our Let’s Do This! eCourse or {Healthy} Make-Ahead Meals and Snacks eBook. The eCourse and eBook have so many of our favorite recipes, plus many of you already have access to them. Still don’t have Let’s Do This! eCourse or {Healthy} Make-Ahead Meals and Snacks eBook? I just knocked to price down to $5 total for both. A steal of a deal! They are resources you’ll use over and over.

I will provide you with grocery lists and check lists. I will walk you through each step so that you can easily and efficiently feed your family each day, all while you fill the freezer too!

Tonight, I’ll post our plan for Week One so that you can learn all of the specifics and prepare yourself for the challenge. Ready to get ahead in the kitchen?!

Heavenly Homemaker's Club Members: Access your homepage and all your fantastic resources here! Not a member yet? Please join us!

Make-Ahead Healthy Snack Recipes

November 21, 2013 by Laura 8 Comments

This post may contain affiliate links. For more information, please see our disclosure policy.

350x350_Challenge

It’s official. Our 16 year old is taller than his dad. That means Asa is measuring at 6’3″ as of yesterday. His legs are longer than his bed. His feet are bigger than his shoes. The bottoms of his jeans only reach his ankles for two weeks. His eyes are as big as his stomach. And it’s a good thing I love to cook.

Should I mention that our 13 year old is almost looking me directly in the eyes, our 11 year old isn’t far behind, and our 8-almost-9 year old must be going through a growth spurt? I promise that he ate six bowls of Easy Noodle Stir Fry in one sitting last week.

So let’s see. Did I need this Getting Ahead Snack Challenge? Why yes, I did. Somehow, I’ve got to stay ahead of these appetites. Have I actually gotten ahead during the past few weeks? Eh, only a little bit. We mostly eat snacks as quickly as I make them. But at least I’ve discovered some great, new, healthy snack recipes to fall back on. We are having so much fun with these new ideas!

I decided to compile all of the new Healthy Snack Recipe ideas here for us as we conclude this Getting Ahead {Snacks} Challenge. All of these recipes can be made ahead of time. They are delicious, low in sugar, hearty, and easy to make.

~  Homemade Soft Pretzel Bites

pretzel_bites

~  Easy Homemade Nacho Cheese Pretzel Dip

nacho_cheese_pretzel_dip_1

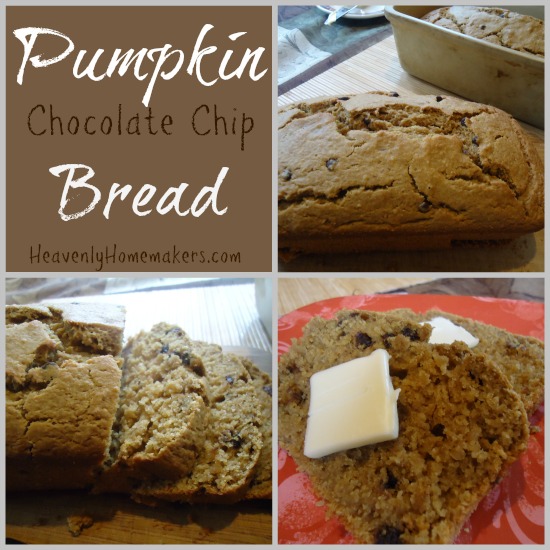
~ Pumpkin Chocolate Chip Bread

Pumpkin Chocolate Chip Bread

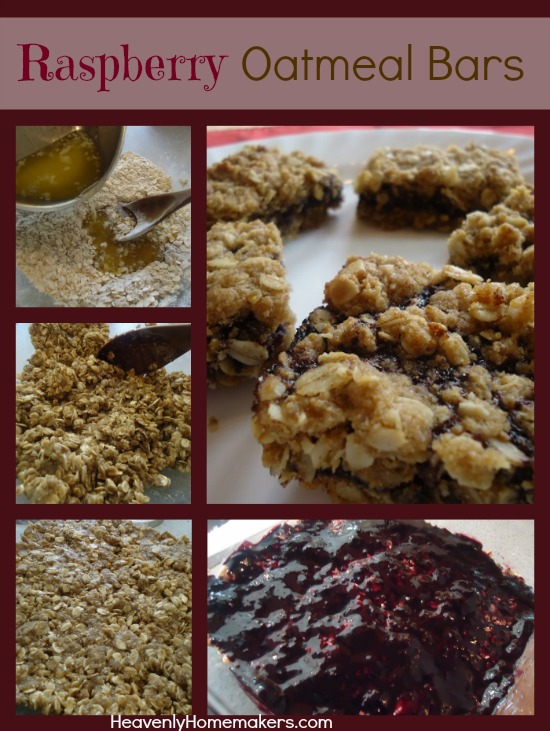
~ Raspberry Oatmeal Bars

Or, if you want to change it up, follow that recipe but make Mix and Match Bars!

Raspberry Oatmeal Bars 11

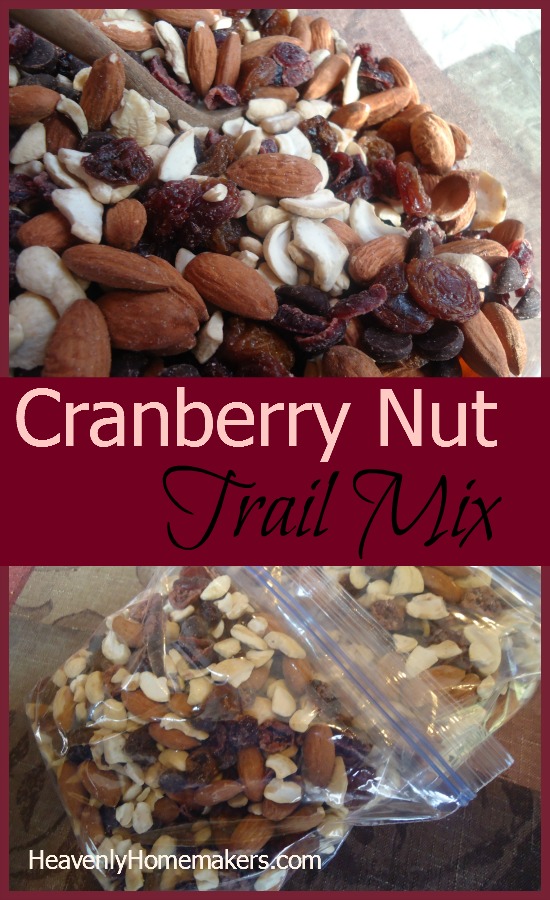
~  Cranberry Nut Trail Mix

Cranberry Nut Trail Mix

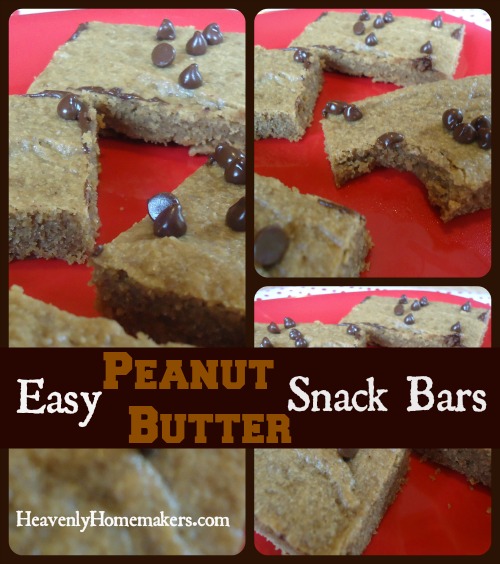
~  Easy Peanut Butter Snack Bars

peanut butter snack bars

~  Cream Cheese Pumpkin Muffins

Cream Cheese Pumpkin Muffins
Did you try any of these recipes? Which are your favorites? Do you have any other fun, healthy Make-Ahead Snack Recipes to share?


Heavenly Homemaker's Club Members: Access your homepage and all your fantastic resources here! Not a member yet? Please join us!

Cranberry Nut Trail Mix

November 7, 2013 by Laura 4 Comments

This post may contain affiliate links. For more information, please see our disclosure policy.

This healthy, make-ahead snack is kind of a no-brainer, and not really a recipe at all. But it’s still worth mentioning as we focus on getting ahead with healthy snacks. Why? Because there’s chocolate in it. Obviously.  And also because it’s easy and good for you and all that other stuff.

Last week, I mixed up a big bowl of Cranberry Nut Trail Mix with items we had on hand. Then, I scooped it into individual grab-and-go baggies. Don’t like the dried fruit and nut options I mention below? No biggie – just use what you have and what you like. No matter what, you’ll be putting together a healthy snack. (Unless you add candy corns or m&ms, c’mon.)

And have you purchased bagged trail mix? Talk about pricey! They can’t help but be. Ingredients like nuts and dried fruit can be expensive. Therefore, I’ve decided that I don’t need to pay someone to stir my ingredients and put them into a bag for me. I can do that myself thankyouverymuch and save some bucks while I’m at it. (I buy my nuts in bulk at Braga Farms.)

Cranberry Nut Trail Mix

So here you go – Cranberry Nut Trail Mix, the recipe. Which isn’t a recipe. Far be it for me to tell you how nutty you should be on any given day.

Cranberry Nut Trail MixYum

Almonds
Cashews
Dried Cranberries
Golden Raisins
Dark Chocolate Chips

Stir any combination of the ingredients together in a bowl. Store in an airtight container (like a jar!), or scoop mixture into individual baggies for grab-and-go snacks.

What other trail mix combinations do you like?

Heavenly Homemaker's Club Members: Access your homepage and all your fantastic resources here! Not a member yet? Please join us!

Homemade Soft Pretzel Bites Recipe

November 5, 2013 by Laura 31 Comments

This post may contain affiliate links. For more information, please see our disclosure policy.

How’s the Getting Ahead {Snacks} Challenge going for you? I’m having a blast in the kitchen, but I can’t say I’m really getting ahead. We’re eating the food as fast as I make it. And by we, I mean my four boys. Okay fine, except for the Raspberry Oatmeal Bars. I took care of those very well without much help. {grins sheepishly}

You are going to love today’s idea! This one really did help me get ahead. I turned out so many pretzel bites, we ate on them all day, then I was able to stash some in the freezer too. This recipe is more time consuming than the other easy snack recipes I’ve shared. But trust me, these are worth the extra work! I didn’t stop and count how many pretzel bites this recipe makes (for obvious sanity reasons), but I would say this recipe would fill a two gallon ziplock bag and then some. Yep! You’ll get ahead with this recipe for sure!

pretzel_bites

Yum

Homemade Soft Pretzel Bites (Adapted from my Soft Pretzel Recipe)

1 cup water
2 Tablespoons yeast
2 teaspoons honey
2 1/2 cups milk
1 stick butter
1/2 cup honey
4 teaspoons sea salt
8 cups whole wheat flour (more or less as necessary)
butter
salt

In a large bowl, mix 1 cup warm water, yeast, and 2 teaspoons of honey. Stir this together and allow it to sit. Meanwhile, heat butter, milk, 1/2 cup honey, and salt in a medium saucepan on the stove until mixture has reached 120°. Stir contents in saucepan into the yeast mixture. Begin adding flour, two cups at a time until a nice dough has formed. Knead for 3-4 minutes. Place dough in bowl, cover, and allow it to rise for 1-2 hours.

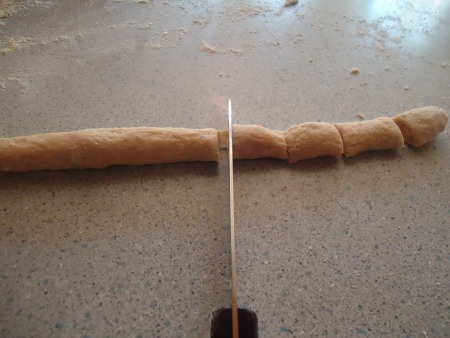
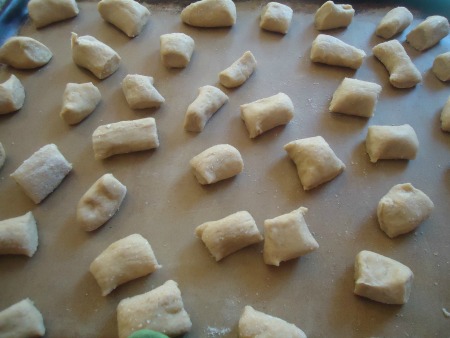
On a well floured surface, roll fistful sized balls of dough into “snakes.” Cut into one inch bites.

pretzel_bites_1

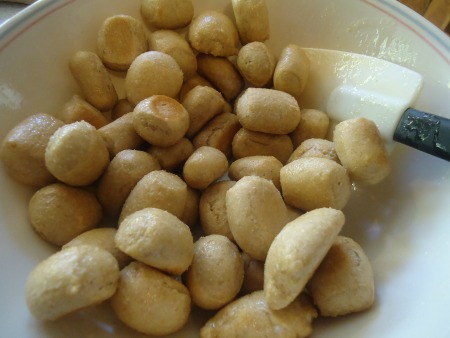
Place on a baking sheet or stone. No need to allow for rising time, but if they sit there a while, that’s okay too. Bake in a 350° oven for 15-20 minutes or until golden brown.

pretzel_bites_3
Place baked pretzel bites in a bowl, drizzle on some melted butter, toss until coated, then sprinkle sea salt and toss again. Serve warm, serve cold, or cool and freeze the bites in a freezer bag for up to three months. Thaw and reheat in the oven.
pretzel_bites_2
I experimented with a Nacho Cheese Dip for these pretzel bites. Check it out here!

pretzel_bites_4

 Give me more dipping ideas for these soft pretzel bites!!

Heavenly Homemaker's Club Members: Access your homepage and all your fantastic resources here! Not a member yet? Please join us!

Easy Peanut Butter Snack Bars

November 3, 2013 by Laura 22 Comments

This post may contain affiliate links. For more information, please see our disclosure policy.

Here’s another super easy snack recipe to help us along in the Getting Ahead {Snacks} Challenge. These were a huge hit at our house – and so easy that I can definitely make these frequently!

peanut butter snack bars

Easy Peanut Butter Snack BarsYum

Easy Peanut Butter Snack Bars
 
Save Print
Author: Laura
Serves: 20
Ingredients
  • 1 cup natural peanut butter (I use homemade creamy peanut butter)
  • ½ cup butter
  • ⅔ cup sucanat or brown sugar
  • 3 eggs
  • 1 teaspoon vanilla extract
  • ½ teaspoon sea salt
  • 1 cup whole grain flour
  • ¼ cup chocolate chips (optional)
Instructions
  1. In a small saucepan, melt together peanut butter and butter.
  2. Pour mixture into a medium-sized bowl and stir in sucanat until creamy.
  3. Add eggs, vanilla, and salt, stirring well.
  4. Mix in flour until well combined.
  5. Spread mixture into a 9x13 inch baking dish.
  6. Bake in a 350° oven for about 25 minutes.
  7. Remove from oven and sprinkle chocolate chips on top if desired.
  8. Cut into about 20 bars.
3.5.3251


To freeze:  Allow bars to cool completely. Wrap them individually to keep the bars moist. Place wrapped bars in a freezer bag and freeze for up to 3 months. Thaw for at least one hour before serving.

These make for great grab-and-go snacks!

Heavenly Homemaker's Club Members: Access your homepage and all your fantastic resources here! Not a member yet? Please join us!

Raspberry Oatmeal Bars

October 31, 2013 by Laura 76 Comments

This post may contain affiliate links. For more information, please see our disclosure policy.

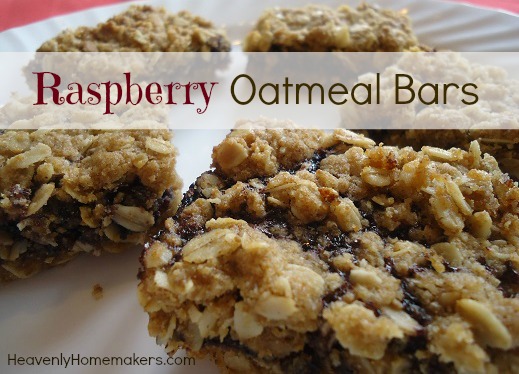
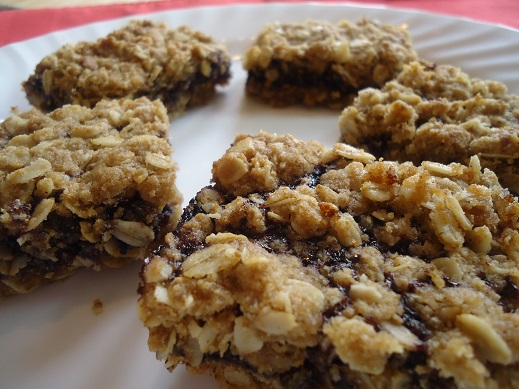
Raspberry Oatmeal Bars are pretty much amazing.

Raspberry Oatmeal Bars 11

Yum

I’m on a mission to create new healthy snack recipes so that my boys will have some great options on hand. But here’s what happened after I made these Raspberry Oatmeal Bars:  I dug into them while I was in the kitchen by myself and loved them so much that I forgot to call in the kids. Then when I realized I was like, “Eh, the kids can have a piece of cheese.” And then I kept eating the bars. Great mom moment, huh? :)

This may be one of the best snack recipes ever, hands down. The kids thought so too, once I remembered to share.

Raspberry Oatmeal Bars

Raspberry Oatmeal Bars
 
Save Print
Author: Laura
Ingredients
  • 1½ cups whole wheat flour
  • 1½ cups rolled oats
  • ½ cup sucanat
  • ½ teaspoon baking powder
  • ¼ teaspoon sea salt
  • 1 cup melted butter
  • ½ cup raspberry jam (100% fruit)
Instructions
  1. Mix together flour, oats, sucanat, baking powder, and salt.
  2. Stir in melted butter until the mixture resembles crumbs.
  3. Press half of the mixture into an 8x8 inch baking pan.
  4. Spread jam over the top.
  5. Sprinkle remaining oat mixture on top of the jam layer, pressing down to cover.
  6. Bake in a 350° oven for 30 minutes or until lightly browned.
3.4.3177

Raspberry Oatmeal Bars 12

You can definitely change these up by using a different variety of jelly or jam. I think apricot would be awesome in these, or strawberry, or peach…

If they last long enough, you can freeze them: Allow them to cool completely, then wrap individually for a quick grab and go snack. Place individually wrapped bars in a large freezer bag and store in the freezer for up to two months.

Here are some pictures to show more specifically how to put these bars together. They are really so easy!

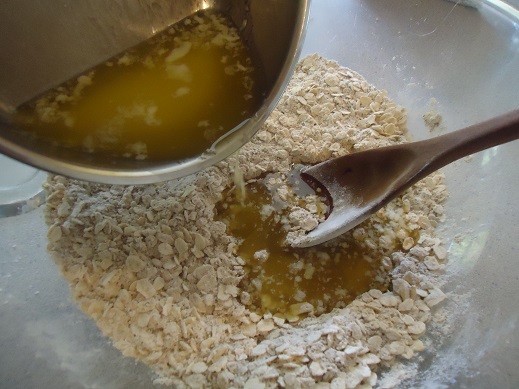
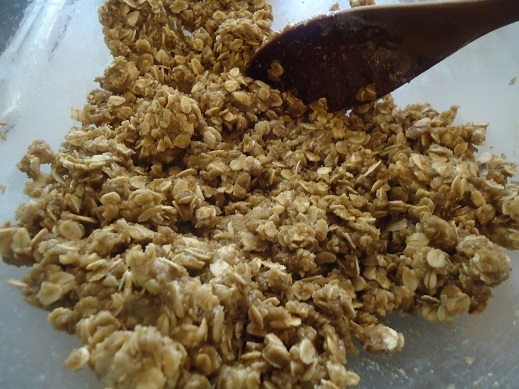
First,  mix together the dry ingredients. Then pour in the melted butter.

raspberry-bars_1

 Stir until the mixture resembles buttery crumbs.
raspberry_bars_2

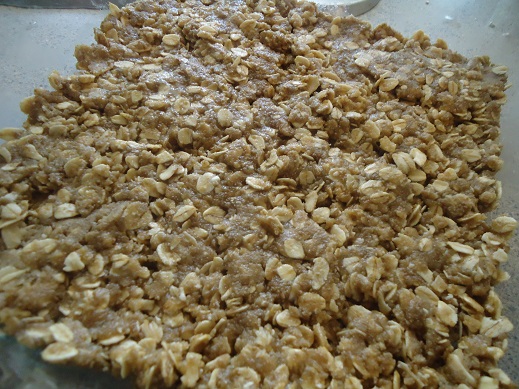
Press half of the crumbs into an 8×8 inch baking dish.

raspberry_bars_3
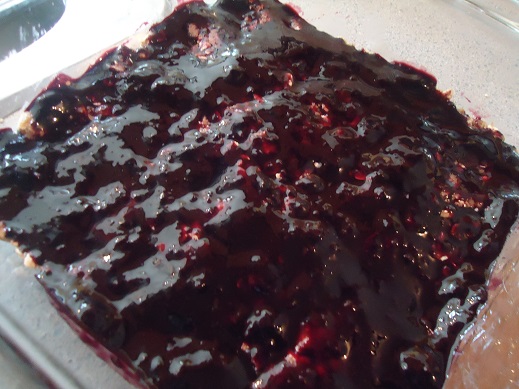
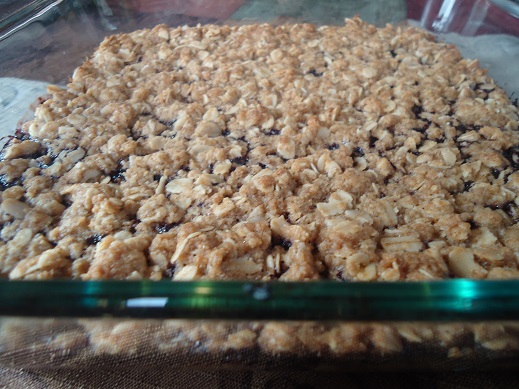
Spread the jam over the first layer of oat mixture. Spoon the remaining oat mixture over the jam and press down to cover.
raspberry_bars_4

Bake in a 350° oven for about 30 minutes. Cut them while they are warm, or allow them to cool first.

raspberry_bars_7

Try to remember to share them with others.

raspberry_bars_8

Not only will I be making these frequently for snacks in the future, I think they will be wonderful for breakfast. And I’ll even try to remember to serve them to my children. ;)

Heavenly Homemaker's Club Members: Access your homepage and all your fantastic resources here! Not a member yet? Please join us!

Let’s Do This! Join the Getting Ahead {Snacks} Challenge

October 27, 2013 by Laura 13 Comments

This post may contain affiliate links. For more information, please see our disclosure policy.

350x350_Challenge

It’s been a few weeks since I threw out a challenge for all of us. With the holiday season coming soon, I thought we could all use a little practice getting ahead in the kitchen. And not that it’s all about me, but I am feeling a little short in the snacks department at my house. So for this challenge, I decided that we would focus on getting ahead with nourishing snacks.

The Let’s Do This! eCourse has an entire lesson devoted to getting ahead with snacks. Why? Because snacks are a must for many of us, and having healthy options on hand and ready to grab means that we are making better choices for ourselves and for our families. Otherwise, when we get hungry in the middle of an afternoon, we may be likely to cave in and grab a handful of chocolate chips. Not that you or I have ever done that in a moment of weakness. Mmmmhmmm.

Soooo, healthy snacks. I’m really hoping you’ll share some fresh new ideas with me! Here is a list of options I regularly give my kids, but they would definitely welcome something new. I’ve been experimenting, looking all over the internet for new recipes, and am counting on you to give me some ideas and inspiration.  No pressure.  I’ll just be waiting by my computer with my apron on and my mixing bowls in my lap…

My goal by the end of next week is to have several fun and healthy snack options prepared for my family – and to have a great new list of healthy (make-ahead) snack ideas compiled to share with you. In the meantime, there will be new healthy snack recipes coming your way – so be on the look-out. Join the Getting Ahead {Snack} Challenge!

Who’s with me?! Let’s Do This!

Heavenly Homemaker's Club Members: Access your homepage and all your fantastic resources here! Not a member yet? Please join us!
« Previous Page
Next Page »

Join Our Community!

 Facebook Twitter E-mail Instagram Pinterest

Popular Posts

~ Will All of the Real Moms Please Stand Up?
~ Easy! Stir-and-Pour Whole Wheat Bread
~ How to Make Gatorade
~ 31 Real Food Breakfast Ideas
~ Dear Teenage Girls...
~ When Mom Takes a Step Back
~ The Inexpensive Health Insurance We Love!
~ Let's Talk Real Food Grocery Budgets

Check out our latest posts!

  • Big Family Food and Fun: May 17-23, 2026
  • Easy Side Dishes for Summer
  • Big Family Food and Fun: May 10-16, 2026
  • Big Family Food and Fun: May 3-9, 2026
  • Help Your Kids Become Independent in the Kitchen!
Home  ~  Simple Meals  ~  Club Membership  ~  Shop  ~  Privacy Policy  ~  Disclosure  ~ Contact

Copyright © 2026 · Beautiful Pro Theme on Genesis Framework · WordPress · Log in