Heavenly Homemakers

Encouraging women in homemaking, healthy eating and parenting

  • Home
    • About
    • FAQs
  • Recipes
    • Bread and Breakfast
    • Condiments
    • Dairy
    • Main Dishes
    • Side Dishes and Snacks
    • Desserts
    • Gluten Free
    • Instant Pot
    • Crock Pot
    • Heavenly Homemaker’s Weekly Menus
  • Homemaking
    • Real Food Sources
  • Store
  • Contact
    • Advertise
    • Disclosure
    • Privacy Policy
  • Simple Meals
  • Club Members!

Whole Wheat Blueberry Streusel Muffins (plus a little project announcement)

June 16, 2011 by Laura 50 Comments

This post may contain affiliate links. For more information, please see our disclosure policy.

blueberry_streusel_muffin

A few months ago when I went to my friend Tracy’s Shelf Reliance party, I ordered a big can of freeze dried blueberries for an excellent price. I love having those blueberries on hand – and they work perfectly in these Blueberry Streusel Muffins.

Blueberry Streusel MuffinsYum

1 1/2 cups whole wheat flour (I use freshly ground hard or soft white wheat)
1/3 cup sucanat  (you can use brown sugar or honey if you prefer)
1/2 teaspoon baking powder
1/4 teaspoon sea salt
1 egg
1/4 cup melted butter or coconut oil
3/4 cup milk
3/4 cup blueberries, fresh, frozen or freeze dried

Mix dry ingredients together well. Add egg, butter and milk, stirring until all ingredients are mixed. Gently stir in blueberries. Scoop batter into 12 paper lined muffin tins. Sprinkle with Streusel Topping and bake in a 400° for 20 minutes.

Streusel Topping:

3 T. sucanat or brown sugar
1 T. butter, softened
2 T. chopped nuts (optional)

This is one of those easy recipes that your kids can help you make. I feel like it is super important for you to get your kids into the kitchen with you so that they can learn the basics of cooking.

In fact, you wanna know a little secret? I’m frantically working on a (big) new ebook/curriculum that guides you in depth through teaching your kids to cook. I hope to have this project finished in the next few weeks (months?) so that you can have it when the new school year begins – hopefully?! (UPDATE:  Here it is!)

Anyway – now you know. I’m not sure why I didn’t tell you earlier – it’s too much fun to keep a secret! I’m super excited about this and hope to create a resource that will be helpful to all. I’ve even “borrowed” some little girls to help make the book a little more well rounded. :)

This may be one of the most fun projects I’ve ever worked on – combining two of my favorite things in the world:  kids and cooking. Stay tuned for more information about this book as I get closer to finishing it. And if you hear me squealing at any time during the next few weeks, it’s because I really am having that much fun with this project.

Yeah, that little darling in the above picture is cute enough to make all of us squeal. ;)

Heavenly Homemaker's Club Members: Access your homepage and all your fantastic resources here! Not a member yet? Please join us!

Coconut Cupcakes (Dairy Free!)

June 1, 2011 by Laura 21 Comments

This post may contain affiliate links. For more information, please see our disclosure policy.

My adorable little nephew isn’t able to eat dairy, which means his (favorite) Aunt Laura had to do a little bit of experimenting before his visit last week. I came up with a very delicious and healthy Coconut Cupcake recipe that all of my kids loved! Coconut Milk is awesome stuff and works very well for baking. (I had purchased a case of Thai Kitchen Coconut Milk to experiment with and to have on hand.)  We don’t need to eat dairy free at our house, but I will be making these cupcakes again!

Coconut CupcakesYum

3 cups whole wheat flour
2 cups sucanat
1 Tablespoon baking powder
1 can (13. ounces) coconut milk
1/2 cup melted coconut oil
1 teaspoon vanilla extract
2 eggs

Mix all ingredients together with beaters. Spoon into 24 paper lined cupcake pans. Bake at 375° for about 25 minutes or until a toothpick inserted in the middle of the cupcakes comes out clean. Allow the cupcakes to cool completely before frosting.

Frosting

1/2 cup palm shortening (I buy palm shortening from Tropical Traditions or through Amazon.)
1/2 teaspoon vanilla extract
2 1/2 cups powdered sugar (I use organic, unbleached powdered sugar or I make powdered sugar myself with sucanat and a blender.)
1-2 tablespoons coconut milk
shredded coconut for garnish (optional)

By the way, this Coconut Milk also works great for making these pudding recipes and these whole wheat donuts. Yes, Aunt Laura does like to spoil her nieces and nephews, what can I say? Don’t worry. I also gave them protein and vegetables. :)

Ever done any cooking or baking with Coconut Milk? I’m excited to experiment more with this great product!

Heavenly Homemaker's Club Members: Access your homepage and all your fantastic resources here! Not a member yet? Please join us!

Healthy Homemade Ketchup (finally!)

May 25, 2011 by Laura 134 Comments

This post may contain affiliate links. For more information, please see our disclosure policy.

I think I’ve been working on a homemade ketchup recipe for about forty years. (I have actually not reached the age of forty yet, but I am rather fond of exaggerating and I feel like I’ve been experimenting with ketchup for like totally forever.)

It’s taken quite a bit of trial and error to find a recipe that we think tastes good. So many recipes just don’t quite taste ketchupy enough for me. This recipe I’ve finally settled on is one I found and adapted from Happy in Dole Valley. I’m happy to say that this is a very easy recipe to make. Tastes good…healthy…and easy. Yes, this is the kind of recipe I like to share with you.

During my experiments, one of the toughest challenges was to sweeten the ketchup in a way we liked. I didn’t want it too sweet, but it did need to be a little bit sweet – and not too tomato-ee. (I’d like to see the words ketchupy and tomato-ee become a part of the dictionary someday, wouldn’t you?)

I tried making ketchup with raw honey to sweeten it, and found that the taste was too strong. Regular ol’ sucanat (dehydrated cane sugar juice) is a little crunchy in this recipe, so I finally figured out a great way to sweeten our homemade ketchup:  Grind the sucanat in the blender like you’re making this healthier, unprocessed powdered sugar…then add it to your ketchup ingredients. Easy and perfect!

Healthy Homemade KetchupYum

Healthy Homemade Ketchup (finally!)
 
Save Print
Author: Laura
Ingredients
  • 7 ounces of tomato paste
  • ⅓ cup water
  • 2 Tablespoons vinegar (I used distilled coconut vinegar)
  • ¼ teaspoon onion powder
  • ¼ teaspoon garlic powder
  • ¼ teaspoon dry mustard
  • pinch of cinnamon
  • pinch of cloves
  • pinch of allspice
  • pinch of cayenne pepper
  • ¼ teaspoon sea salt
  • ⅛ cup sucanat
Instructions
  1. Whisk ingredients together until mixed well and smooth.
3.4.3177

I’ve found that if you grind the sucanat in the blender to make it less “crunchy” it works better.

Make french fries, get them nice and crunchy, salt them well with sea salt and give me a call.

Defining “a pinch”: When a recipe calls for “a pinch” of something, I usually put in about 1/8 teaspoon – an amount you could “pinch” between your fingers if you were to reach into the spice jar and pull some out. I don’t really like putting my fingers in to pinch my spices. But you go right ahead if you want to.

The true test with our Homemade Ketchup Experiment:  Did the kids like it?

All of my kids love ketchup, but one particular son of mine eats ketchup on everything:  eggs, green beans, broccoli… He’s also my pickiest kid (which is why he eats ketchup to get his veggies down). I  hesitantly put this homemade ketchup on his plate with a nice helping of homemade fries. He ate it. He loved it. He said, “Is this the homemade ketchup?” and I said, “Yep” and he said, “Wow it’s really good!”

Score! We have a winner!

Homemade Ketchup Recipe

Now that I’ve conquered ketchup, I’ll move on to some of the other recipes on the Heavenly Homemakers Recipe Challenge list. I’ve gotta say, I’ve been working on mayonnaise and it is about to kill me. I can not get a homemade mayonnaise to thicken even a little bit and it’s beginning to make me mad. Those of you who make mayo…what in the world is the secret to getting the ingredients to actually thicken into mayo? Ketchup took me forever to figure out, and now the mayo.  I apparently have condiment issues.

Well anyway, what’s your favorite use for ketchup? Please tell me it isn’t green beans, like my son.

Heavenly Homemaker's Club Members: Access your homepage and all your fantastic resources here! Not a member yet? Please join us!

Healthier Cheese Dip – a Velveeta and Rotel Recipe Knock Off!

May 4, 2011 by Laura 143 Comments

This post may contain affiliate links. For more information, please see our disclosure policy.

Today, I have written a very heart felt letter to my friend, Velveeta. I hope you don’t mind that I shared it. It’s rather personal, so I hope no one feels embarrassed to read my inner-most thoughts. I’m sure that my friend Velveeta is a friend to some of you too. Truly, if I would have had a daughter, I would have named her Velveeta in honor of my friend.

Okay, totally not really. But still.

Dear Velveeta,

I dearly love you. I grew up eating you and some days, I really miss you. I often visit you in the store, just in case you miss me too. Have you seen me there, lingering by your shelves?

What exactly are you made of anyway? Wait – don’t tell me. I don’t want to know. Reading your label makes me queasy, but when I mix you with a can of rotel, I could gladly grab a bag of chips and eat half the bowl. You are delicious. You are comfort food. You are memories from my childhood. And for goodness sakes you taste incredible alongside a cold glass of Pepsi.

But you are “processed cheese food”. What in the world does that mean? No wait – really – don’t tell me. I don’t want to know. I just want to eat you in ignorance so that I won’t know the full effects of what something such as you can do to the insides of my body.

But alas, since my family began Our Healthy Eating Journey a few years ago, I chose to give you up. I have a new friend now that has a striking resemblance to you, but one that doesn’t make me feel so sick inside.

Those were some good times we had together – you, me and the Pepsi. Please know that I’ll hold the memory of you forever in my heart.

Insanely Yours,
Laura @ Heavenly Homemakers

Well, now you know. Velveeta-Rotel chip dip and I go way back. I miss her. I love her. But there’s a new kid in town, one that is made from real food that I can trust not to turn my gut wrong-side-out. I’ve been tinkering with this dish for the past couple of years and my family loves it! It’s not quite as thick as the Velveeta-Rotel dip, but I would imagine that the ingredients that make that one thick are ingredients you and I don’t know how to pronounce. Just lean over the bowl when you eat this. A little dip running down the chin never hurt anyone.

Don’t leave me hanging. I must know if you are friends with Velveeta too. Do you love her with Rotel? And tell me, is Velveeta a lovely name, or what?

Again, totally not really.

Healthier Cheese Dip - a Velveeta and Rotel Recipe Knock Off!
 
Save Print
Prep time
5 mins
Cook time
5 mins
Total time
10 mins
 
Author: Laura
Recipe type: Snack
Cuisine: American
Serves: 4-6 servings
Ingredients
  • 1 pound ground hamburger meat (seasoned with Homemade Taco Seasoning if you like!)
  • 2 cups salsa
  • 1 cup cream
  • 1 cup shredded cheddar cheese
  • Organic Corn Chips
Instructions
  1. Brown hamburger meat and season if desired. Stir salsa and cream into the meat, stirring constantly while heating on medium heat for about three minutes. Remove mixture from heat and add shredded cheese. Stir until cheese is melted. Serve with Organic Corn Chips. (You can stir in ½ cup sour cream or 3 ounces cream cheese if you'd like.)
3.4.3177
Heavenly Homemaker's Club Members: Access your homepage and all your fantastic resources here! Not a member yet? Please join us!

Coconut Flour Banana Muffins

April 22, 2011 by Laura 98 Comments

This post may contain affiliate links. For more information, please see our disclosure policy.

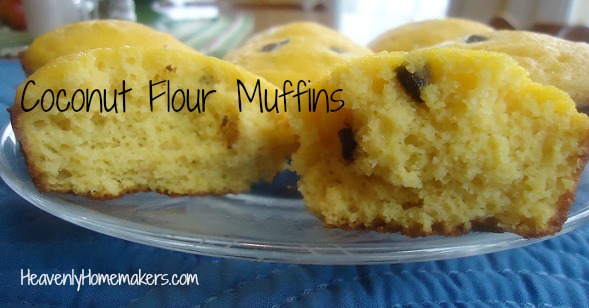
I’ve been having so much fun playing with this Gluten Free/Dairy Free Muffin recipe! We’re on the home stretch of the Gluten Free Experiment we’ve been conducting at our house (more on that soon), but I guarantee you we’ll continue to make these muffins and all the fun variations I’m coming up with whether we’re gluten free or not. What a healthy little muffin (that just so happens to taste like cake).

Coconut flour is high in fiber, high in protein, making it a wonderful addition to your diet. I find coconut flour at Tropical Traditions or Amazon. I’m so in love with this stuff that I might just write a post all about it someday soon.

I don’t recommend substituting whole wheat flour in this recipe. Coconut flour and wheat flour are not created equal. If you want a Whole Wheat Banana Muffin recipe, check out this one! We love it!

Coconut Flour Banana MuffinsYum

1/2 cup Coconut Flour
1/4 teaspoon salt
1/2 teaspoon baking powder
6 eggs
4 Tablespoons Coconut Oil, melted
1/4 cup honey
2-3 ripe, mashed bananas
1/2 cup nuts (optional)

Mix all ingredients together, then pour batter into a well greased (or paper lined) muffin pan. Bake at 350 for 15-25 minutes. Makes 12 muffins.

coconut_flour_banana_muffins[1]

I never put nuts in muffins because 5 out of 6 of us don’t care for them in our baked goods. How ’bout you? Are you a nutty kind of person? (I really mean to ask if you like nuts in your muffins…not if you consider yourself to be nuts, but feel free to answer according to how you’re feeling today.)

Heavenly Homemaker's Club Members: Access your homepage and all your fantastic resources here! Not a member yet? Please join us!

Mini Crustless Breakfast Quiches

April 12, 2011 by Laura 160 Comments

This post may contain affiliate links. For more information, please see our disclosure policy.

crustless_quiche
You know how I mentioned that we go through a lot of eggs at our house? Six dozen last week to be exact.  This week I was able to get my hands on 11 dozen farm fresh eggs and I am so very excited. It’s obviously the simple things in life that make me happy…proven by the fact that having 11 dozen eggs available this week for my cooking pleasure has made me almost giddy.

What do we do with all those eggs you ask?  Well, there are six of us, five are male and four of those five male people can’t seem to get enough food right now. We also have extra people eating at our house quite often, so our six turns into eight or more on just about any given day. I bake a lot, so I stir them into whatever I’m baking. We easily go through an entire dozen for breakfast if I’m making scrambled eggs or a casserole, and more than a dozen if I make crepes. These Coconut Flour Muffins are incredible…and they take up quite a few eggs. And, I often put eggs in our smoothies or “milkshakes” for added protein and nutrients. (Again, let me reinforce that we ONLY eat them raw if they are organic, free range, farm fresh…otherwise I’m afraid of them.)

If I have lots of eggs available to me, I go for it and I don’t hold back! Eggs are brain food.  I pay between $2.00 and $2.50 for a dozen farm fresh eggs, depending on my source. For the quality of eggs I’m getting, I consider this to be a great price. So even though we go through a lot of eggs…what an economical source of nutrition!!! How else can I feed my family an entire meal for just over $2.00??? (Okay, yes, they eat fruit and stuff with their eggs…you see my point though, right?)

If you haven’t tried our Easy Breakfast Casserole, please go get yourself some eggs and try it. It’s the simplest little breakfast casserole I’ve ever made and my family eatsthe whole pan. Actually…they don’t eat the pan. Hungry boys though they are, they do have their limits.

I  have now adapted the Easy Breakfast Casserole recipe to become an easy, make-ahead Mini Crustless Breakfast Quiche recipe. You can make these and serve them fresh, or you can bake them the night before and re-warm them in the oven the next morning for breakfast. You can even bake them and freeze them to have available for future grab and go meals. You can make them for lunch or brunch. These little quiches are super versatile!

Mini Crustless Breakfast QuicheYum

12 eggs
3/4 cup heavy cream
1/4 teaspoon sea salt
1  cup shredded cheese (I use white cheddar, but you can use whatever cheese you want!)

Begin your quiches by whisking together the eggs, cream, salt and cheese in a large mixing bowl. Sprinkle in any “add in” ingredients you wish (a total of 1 cup of add-ins). Stir them around with a fork. Scoop mixture into 24 well buttered regular sized muffin tins. Bake in a 350° oven for 20-30 minutes, or until the middle of each quiche doesn’t jiggle.

Add In Ideas:

Cooked sausage (I have a wonderful recipe for turkey sausage here.)
Chopped ham
Chopped and cooked bacon
Leftover baked potatoes, cut into chunks or shredded into hashbrowns
Sauteed veggies
Raw spinach
Cooked chicken
Taco seasoned meat

Obviously, you can cut this recipe in half to make 12 regular sized muffins sized quiches!

Mini_Quiches_2

I’m curious, just because I’m fairly certain some of you might be shocked about our egg consumption…how many eggs does your family go through in a week?

Heavenly Homemaker's Club Members: Access your homepage and all your fantastic resources here! Not a member yet? Please join us!

Gluten Free Recipe Parade Link-Up!

April 7, 2011 by Laura 81 Comments

This post may contain affiliate links. For more information, please see our disclosure policy.

Yum

Wow, has it been a fun and busy week! I’ve loved sharing these new recipes with you, and I can’t wait to read all the great recipes YOU are going to share!!

Here’s a quick link re-cap of all the Gluten Free Recipes shared in this week’s parade:

  • Teriyaki Chicken and Veggies
  • Homemade “Larabars”
  • Peanut Butter Honey Balls
  • Coconut Flour Muffins
  • Gluten Free Pasta
  • Mock Frozen Yogurt
  • Taco Corn Fritters

And don’t forget about the great Stainless Steel Bakeware Giveaway from Paula’s Bread and the wonderful Food Giveaway from Tropical Traditions! Keep in mind that any comment left on ANY post with the Gluten Free Recipe Parade button (pictured at the top of this post) will be entered into a drawing for one of five $10 gift certificates to the Heavenly Homemakers Shop!

Now it’s your turn!!! Please share your recipes that are healthy and free of gluten.  This includes any recipe that does not call for wheat, barley or rye. If it calls for oats, we’ll just know that we need to use gluten free oats, right?!

If you have a blog, link up your recipes below, using the Mr. Linky feature. Please kindly make mention on your blog post that your recipe is linked to the “Gluten Free Recipe Parade at Heavenly Homemakers”…linking back to this post. You are welcome to link up more than one recipe. It is a parade after all!

If you don’t have a blog, please share your Gluten Free Recipes in the comments section of this post.

Let’s all bless each other and be blessed with new and wonderful recipes!

Heavenly Homemaker's Club Members: Access your homepage and all your fantastic resources here! Not a member yet? Please join us!

Teriyaki Chicken and Veggies

April 7, 2011 by Laura 91 Comments

This post may contain affiliate links. For more information, please see our disclosure policy.

 I think I’d make this dish every other day if my family would let me get away with it. It is the perfect combination of flavors and I LOVE IT. It’s great because you can use leftover chicken if you have it, any veggies you have on hand…and if you have fresh pineapple? Well, be still my heart.

Yum

I don’t have an exact recipe for this dish. It’s more of a “throw food together” kind of dish, depending on what you have on hand. Then, make some brown rice and whip up some Teriyaki Sauce to pour on and you’ve got a great meal! So, forgive me for not putting exact measurements on this “recipe”. Just make enough for your family!

Here’s what you need:

  • Chicken – You can use leftover chicken (from cooking a whole chicken) and just stir it into the veggies, or you can brown up some chicken breasts or tenderloins
  • Chopped veggies (zucchini, carrots, sweet peppers, corn, peas, green beans or any others you would like) stir fried in olive oil
  • Chopped pineapple (fresh or canned), optional
  • Cooked brown rice
  • Teriyaki Sauce (This sauce is only gluten free if it is made with Gluten Free Soy Sauce!!! I recommend Organic Tamari Soy Sauce from OliveNation)

Here’s what to do:

Get your brown rice cooking. (I have easy directions for cooking brown rice here.)  Mix up Teriyaki Sauce and have it ready to go when chicken and veggies are done.

Chop up your veggies and stir them around in a skillet over medium heat with olive oil until they are tender. If your chicken needs to be cooked, throw that in too. (See what a fancy cook I am?)  :)  If you want, you can season your veggies and chicken with garlic.

Toss pineapple into the veggies to cook for just a few minutes.

Serve rice, veggies, pineapple and chicken with Teriyaki Sauce poured over the top!

Teriyaki Chicken and Vegetables

What veggies would you throw in to create this meal?  I know my menu plan said something different, but I think I’m making this tonight anyway. :)

Heavenly Homemaker's Club Members: Access your homepage and all your fantastic resources here! Not a member yet? Please join us!

Gluten Free – Dairy Free Muffins

April 5, 2011 by Laura 216 Comments

This post may contain affiliate links. For more information, please see our disclosure policy.

I think this is the recipe I’m most excited about from all my gluten free recipe experimenting last week!!! Cher left this recipe in the comments section in my Gluten Free Experiment post and since I had all the ingredients on hand, I gave them a try. (Cher, I’d like to give you a BIG hug!!!)

Coconut_Flour_Muffin

Upon first glance, it seems that there would be too much liquid in these, making for a really runny batter. But nope…it’s just right. I mixed them up, baked them, then held my breath:  Would my kids like them? They smelled good…they looked good…but would they taste good?

Oh. My. Muffin.

EVERY boy in my house scarfed these up…my pickiest son exclaiming, “Mom! These taste like CAKE!”

It’s only been a week, but I think I’ve made three batches of these already. We all love them.

Gluten Free – Dairy Free MuffinsYum

Gluten Free - Dairy Free Muffins
 
Save Print
Author: Laura
Serves: 12
Ingredients
  • 6 eggs
  • 4 Tablespoons Coconut Oil
  • ½ cup honey
  • ¼ teaspoon salt
  • ½ cup Coconut Flour
  • ½ teaspoon baking powder
  • Add-In Ideas:
  • ¼ cup chocolate chips
  • ½ cup fresh berries
  • ¼ cup chopped, dried fruit
Instructions
  1. Mix all ingredients together, throw in an add-in if you'd like, then pour batter into a well greased muffin pan.
  2. Bake at 350 for 15-17 min.
3.4.3177

By themselves, these muffins are awesome…but with chocolate chips. Oh my!

With both Coconut Oil and Coconut Flour in these, you would think they would have an overpowering coconut flavor. You can taste a bit of coconuty-goodness, but it’s not strong. Read this post explaining about the differences in coconut oils – try expeller pressed coconut oil if you don’t like the taste of coconut!

So where can you get Coconut Flour? I usually get mine from Tropical Traditions, but just saw this great pack of Coconut Flour at Amazon and decided to snatch it up. I think we’ll be making a lot of these muffins in the future…whether we remain gluten free or not. What an EXCELLENT little healthy muffin!!!

Have you ever baked with Coconut Flour? I’m hoping to figure out more Coconut Flour recipes. It’s super good for you! What add-in ideas can you think of for these muffins?

Heavenly Homemaker's Club Members: Access your homepage and all your fantastic resources here! Not a member yet? Please join us!

Mock Frozen Yogurt

April 4, 2011 by Laura 110 Comments

This post may contain affiliate links. For more information, please see our disclosure policy.

High Five Recipes 2

Yum

Can I now offer you the perfect little side dish to go with your Taco Corn Fritters? This Mock Frozen Yogurt is so very easy and really, really tasty too.

I have no idea why I felt the need to say that. It really is sort of a “duh” statement because if I didn’t feel like it was tasty, would I actually post the recipe on my blog? How would that look…”I don’t really like eating this dish, but I thought I’d post it for you anyway so you could be grossed-out along with me. Feel free to stink up your kitchen and tell your kids that the Heavenly Homemaker made you do it. Be sure to come back and share your gag stories.” I would never do that. And yet I still felt the need to point out that the recipe tastes good. Duh.

So yeah, this recipe is really tasty! You should try it sometime! Anyway…

My favorite thing about this recipe is that it works great as a side dish or snack, but is also sweet enough to be a dessert. And in case I failed to mention it, this Mock Frozen Yogurt is really quite tasty. :)

Mock Frozen Yogurt

3 cups any varieties of frozen fruit (I used blueberries, peaches and strawberries)
1 1/2 cups plain yogurt
1/4 cup grade B real maple syrup
1/2 teaspoon vanilla extract

Place frozen fruit in a food processor.

Add plain yogurt, vanilla and maple syrup.

Blend until all ingredients are well mixed. Easy as that!

Serve right away as a side dish, snack or dessert! I LOVE it when desserts are this healthy!!

And there you go. Come back for more tasty (and gluten free!) recipes all week long!

What are your favorite frozen fruits to use in treats??

Heavenly Homemaker's Club Members: Access your homepage and all your fantastic resources here! Not a member yet? Please join us!
« Previous Page
Next Page »

Join Our Community!

 Facebook Twitter E-mail Instagram Pinterest

Popular Posts

~ Will All of the Real Moms Please Stand Up?
~ Easy! Stir-and-Pour Whole Wheat Bread
~ How to Make Gatorade
~ 31 Real Food Breakfast Ideas
~ Dear Teenage Girls...
~ When Mom Takes a Step Back
~ The Inexpensive Health Insurance We Love!
~ Let's Talk Real Food Grocery Budgets

Check out our latest posts!

  • Big Family Food and Fun: May 31-June 6, 2026
  • Big Family Food and Fun: May 24-30, 2026
  • Free 7-Day Summer Menu Plan
  • Big Family Food and Fun: May 17-23, 2026
  • Easy Side Dishes for Summer
Home  ~  Simple Meals  ~  Club Membership  ~  Shop  ~  Privacy Policy  ~  Disclosure  ~ Contact

Copyright © 2026 · Beautiful Pro Theme on Genesis Framework · WordPress · Log in