Heavenly Homemakers

Encouraging women in homemaking, healthy eating and parenting

  • Home
    • About
    • FAQs
  • Recipes
    • Bread and Breakfast
    • Condiments
    • Dairy
    • Main Dishes
    • Side Dishes and Snacks
    • Desserts
    • Gluten Free
    • Instant Pot
    • Crock Pot
    • Heavenly Homemaker’s Weekly Menus
  • Homemaking
    • Real Food Sources
  • Store
  • Contact
    • Advertise
    • Disclosure
    • Privacy Policy
  • Simple Meals
  • Club Members!

Real Food “Velveeta” and Rotel Recipe

June 28, 2015 by Laura 46 Comments

This post may contain affiliate links. For more information, please see our disclosure policy.

To be clear, this recipe does not include Velveeta as one can not use the words “real food” and “velveeta” in the same recipe and be telling the truth. In addition, this is not a recipe for Velveeta. I refuse to experiment to come up with a way to make a cheese product that has a shelf life.

Real Food Velveeta and Rotel Dip

But. As many of you know, I have a ridiculous love for the completely nasty and absolutely delicious Velveeta Rotel Dip that I grew up on as a kid. You may remember that I wrote a love letter to Velveeta a few years ago and bid her farewell as I created a tasty dip to replace her. Sure enough, we make that dip frequently at our house as it is super easy, all real food, and absolutely yummy.

But. That recipe, as good as it is, is still not the same as the Velveeta Rotel Dip I crave. That is why (and I’m not proud of this) sometimes I put a $6 log of boxed cheese product (otherwise known as Velveeta) into my cart along with 2 cans of Rotel and I bring it home and I melt it together and I eat it even though it is terribly terrible and truthfully it doesn’t even taste as good to me as it used to because of that whole real food thing I’m into now which has made all bad foods taste like chemicals on a tortilla chip.

So what is my problem?

Problem? I don’t have a problem.

Okay fine. Whatever. I have a problem.

And also? When did fake cheese become so expensive? You’d think that would deter me from buying it. But as I said, I have a problem.

It was either time to begin a Velveeta support group or get back in the kitchen to try my hand at another dip recipe since I’ve only tried like seventeen other times and posted like five other cheese dip recipes through the years and may have to rename this website to cheesediprecipesforaddicts.com with the tag line “All Cheese Dip Recipes, All the Time.”

A support group was out of the question because it is my understanding that they don’t serve chip dip at those meetings. So here we are again, back in the kitchen for another attempt at a real food version of my beloved dip.

You guys. I think I nailed it this time. And I mean that with all the humility and sweetness possible, but hey guess what? I just made the best chip dip ever!!! 

So here’s how this dip becomes amazing. Two things:

  1. We must make a cheese sauce for this to work. This requires butter and corn starch and actual cheese. Relax. It’s not as hard as it sounds.
  2. We must use actual Rotel or an off brand of “diced tomatoes and green chilies. Salsa isn’t the same. Thankfully, Rotel is still a real food – read the ingredient label and rejoice.

Note: My wonderful grass-fed beef produces the perfect amount of fat so I never have to drain off grease. In order to make a sauce, one must have fat or grease to work with. That’s why my recipe includes butter. Depending on what meat you have, I recommend either skipping the butter (if your meat has some grease to work with) or draining the grease and adding the butter or using your grease with some butter. Just so you have about 4 Tablespoons of fat to work with, you’re golden.

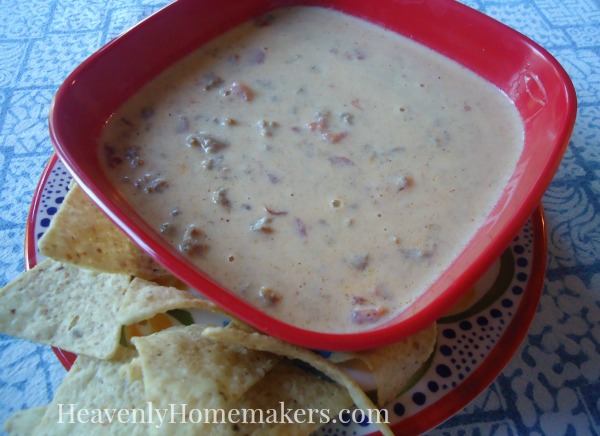
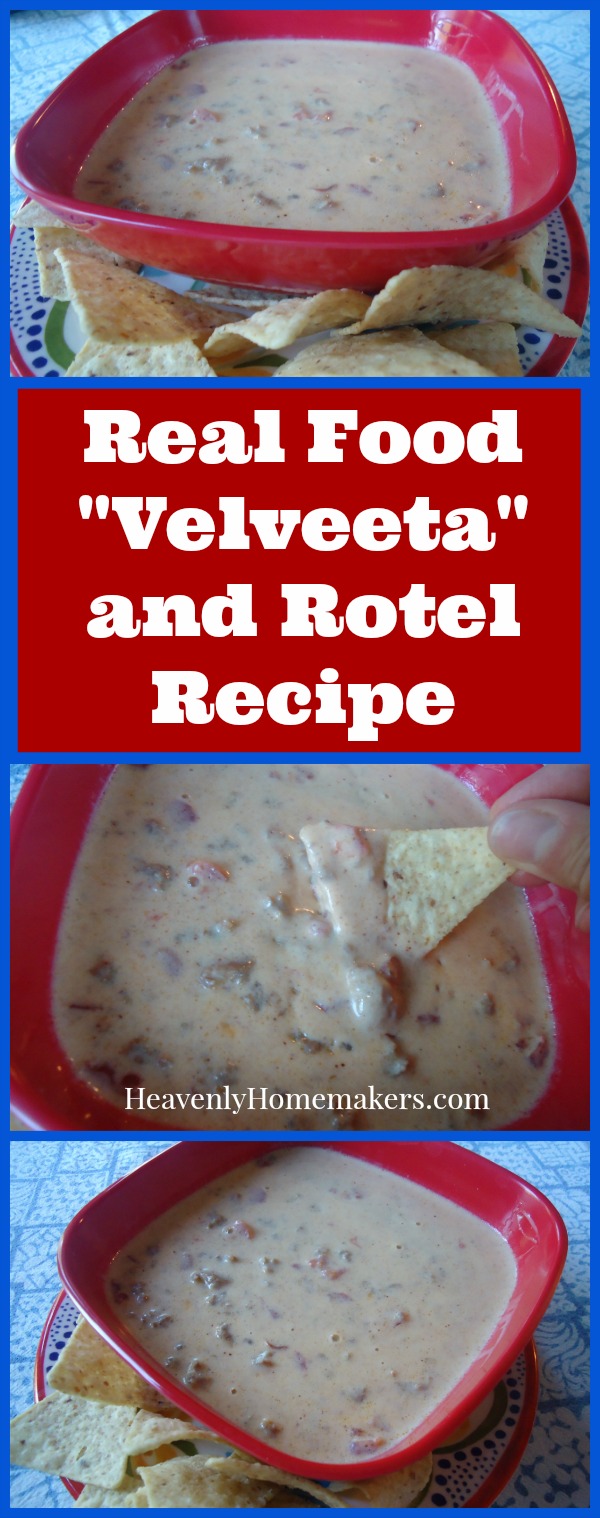
Real Food “Velveeta” and Rotel Dip RecipeYum

5.0 from 2 reviews
Real Food "Velveeta" and Rotel Recipe
 
Save Print
Author: Laura
Serves: 6-8
Ingredients
  • 1 pound hamburger meat
  • 2-4 Tablespoons butter
  • 2 heaping Tablespoons corn starch
  • 1 cup water
  • 1 teaspoon chili powder
  • sea salt to taste
  • 2 cups heavy cream
  • 10-ounce can diced tomatoes with green chilies (Rotel)
  • 1-2 cups shredded cheddar or colby jack cheese
Instructions
  1. Brown the hamburger meat in a large pot.
  2. Add butter to the meat, melting it throughout the pot.
  3. Sprinkle in corn starch, coating the meat.
  4. Pour in water, chili powder, and salt.
  5. Turn heat up and stir until the mixture thickens.
  6. Add cream, continuing to stir as the mixture thickens. (This all happens quickly in my experience.) Stir in Rotel, heating for about 2 more minutes.
  7. Remove from heat.
  8. Add shredded cheese, stirring until the cheese has melted and the dip is smooth.
3.4.3177

If you don’t remove your sauce before adding cheese, your cheese will end up funky and not smooth and creamy. You’ve been warned, so don’t add your cheese while your pot is still on the stove, then email me and ask why your cheese got funky. Not that anyone would ever do that.

Real Food Velveeta and Rotel Recipe

If you need me, I’ll be in the kitchen eating another bowl of my homemade not velveeta but way better than velveeta because it’s real food Chip Dip.

Who wants to come join me? I need to know who loves this dip as much as me. Admit it. Join my support group – the one where there IS CHIP DIP AT THE MEETINGS because my support group meetings rock and we support one another by eating dip.

~~~~~~~~~~~~~~~~~~~~~~~~~~~~~~~~~~~~~~~~~~~~~~~~~~~~

It’s recipes like this Real Food Velveeta and Rotel that makes Simple Meals what it is. It offers you huge money and time savings. Not to mention you don’t have to think as hard every week about what to cook and what to buy.

Join the fun! Check out our amazing Simple Meals program!

You will love this!

728x90

Heavenly Homemaker's Club Members: Access your homepage and all your fantastic resources here! Not a member yet? Please join us!

No-Bake Snickerdoodle Bites – A Quick and Easy Low Sugar Treat

June 24, 2015 by Laura 14 Comments

This post may contain affiliate links. For more information, please see our disclosure policy.

I’ve been making a treat similar to this recipe for several years (found over at TheNourishingHome.com). I’ve tweaked it here and there…then sort of forgotten all about this great treat. Last week I decided I needed a lightly sweetened snack. Not salty. Not desserty. Not meaty. Just something filling and lightly sweetened. These Snickerdoodle Bites are perfect.

snickerdoodle bites2

I’ve kept these Snickerdoodle Bites in my fridge, grabbing one in the afternoon when I need a little something to get me through until dinner. Because these are made with coconut flour, they are filling and nourishing. And did I mention that they are lightly sweetened to perfection? Like, if they were produced in mass and put into a box, the box would definitely say, “Lightly sweetened…to perfection.” Yep, that’s what it would say.

No-Bake Snickerdoodle BitesYum

No-Bake Snickerdoodle Bites - A Quick and Easy Low Sugar Treat
 
Save Print
Author: Laura
Ingredients
  • 1 cup creamy almond butter or peanut butter (almond butter is my fav for these)
  • ¼ cup honey
  • 1 teaspoon vanilla extract
  • 1 teaspoon ground cinnamon
  • ½ cup coconut flour
Instructions
  1. Mix the ingredients together in a bowl until well combined.
  2. Roll the mixture into teaspoon-sized (or whatever sized) balls.
  3. Refrigerate before serving - or just start eating because who can wait?
3.4.3177

Do feel free to add more honey if you prefer – although then these might be slightly more than lightly sweetened, thus ruining my description. But I’ll never know, so it won’t matter, and truly – we want these to be perfectly sweetened for your family’s delight.

No-Bake Snickerdoodle Bites - a quick and easy low sugar treat

Coconut flour is naturally gluten free – a great option for those of you who must avoid gluten. Our family doesn’t not need to avoid gluten – however we like coconut flour because it is so rich in nutrients! “Coconut flour is the fiber from coconut meat after most of the oil has been extracted to make coconut oil.” (source: Tropical Traditions) Adding protein and fiber to our (lightly sweetened) snacks? Yes please!

Where do I get coconut flour? I either order it from Tropical Traditions or Amazon. (Right now, this coconut flour at Amazon is a wonderful price!) Here are some of my other coconut flour recipes:

  • Coconut Flour Cheddar Drop Biscuits
  • Coconut Flour Muffins
  • Coconut Flour Banana Muffins
  • Coconut Flour Brownies

But right now, these lightly sweetened No-Bake Snickerdoodle Bites are my favorite coconut flour recipe. It’s probably because they only take 5 minutes to prepare and don’t require baking. And also because they are lightly sweetened to perfection.

Are you a fan of coconut flour? How do you use it at your house? 

This post includes affiliate links

Heavenly Homemaker's Club Members: Access your homepage and all your fantastic resources here! Not a member yet? Please join us!

Low Sugar Strawberry Cheesecake Parfait (With a “To-Go” Option)

May 29, 2015 by Laura 25 Comments

This post may contain affiliate links. For more information, please see our disclosure policy.

Low Sugar Strawberry Cheesecake Parfait

Low Sugar Strawberry Cheesecake Parfait 1

There is only one requirement for making this recipe: All parties – including the makers and the recipients – must lick the bowl, dish, cup, spoon, and spatula when preparing, serving, and partaking in each Strawberry Cheesecake Parfait. Lickage (oh, it’s totally a word) is not an option. Failure to lick said bowl, dish, cup, spoon, and spatula will result in…you know, the missing out of the enjoyment of every last taste of goodness. It would be devastating, and friends don’t let friends not lick delicious creaminess out of the bowl. This is how you know how much I love you. I insist on the lickage (pronounced lick-uj). You can thank me later.

You know what is so amazing to me about recipe creation? It is that with just a couple of little tiny tweaks, one recipe becomes another – with very little thought or effort. Case in point: I basically took my Low Sugar Cheesecake filling, tweaked the measurements just a little bit, and spooned it into bowls with layers of sliced strawberries. Really. I’m not as smart as you didn’t think I was. It’s simply a matter of changing things up, of taking one idea and forming another, and also of being way too lazy to bake a cheesecake crust.

It’s also a matter of…fresh strawberries are amazing.

If that’s not motivation enough for you to go to the kitchen immediately to make these, then I should let you know that these little parfaits can be put together in a very short amount of time, they have very little sugar, and they are seriously bowl/dish/cup/spoon/spatula lickin’ good.

Low Sugar Strawberry Cheesecake Parfait (serves 6-8)Yum

5.0 from 2 reviews
Low Sugar Strawberry Cheesecake Parfait (With a "To-Go" Option)
 
Save Print
Author: Laura
Ingredients
  • 2½ cups heavy whipping cream
  • 8 ounces softened cream cheese
  • 1 teaspoon vanilla extract
  • 1 Tablespoon real maple syrup
  • Liquid stevia to taste (I use about 20 drops) (Use a few Tablespoons of sugar if you prefer.)
  • 1 -2 pounds fresh, sliced strawberries
Instructions
  1. Place all ingredients (minus the strawberries) into a blender.
  2. Whip until smooth and creamy.
  3. Spoon mixture into bowls or cups - layering them with sliced strawberries.
3.4.3177

Lick the blender. Lick the spoons. Lick the spatula that you will use to get every last little bit of goodness out of the blender.

Lick your lips, lick your chin, lick your fingers. That oughta do it.

Low Sugar Strawberry Cheesecake Parfait

And guess what else? I learned that these Strawberry Cheesecake Parfaits are perfect for a treat-to-go! Simply layer the parfait in 8-ounce jars, cover with a lid, and take them with you. (Pack a spoon though, because while licking is good, it is rather difficult to be that good of a licker.)

Low Sugar Strawberry Cheesecake Parfait - To Go!

Feeling more like a blueberry, a blackberry, a raspberry, or a peach? By all means, switch out the strawberries with any or all of the above. See, the choice of fruit is optional. It’s the lickage that is a requirement.

Go therefore and begin fighting over which family member gets to lick the spatula.

Heavenly Homemaker's Club Members: Access your homepage and all your fantastic resources here! Not a member yet? Please join us!

Build a Simple Veggie Flower (Great for Showers and Holidays!)

April 9, 2015 by Laura 4 Comments

This post may contain affiliate links. For more information, please see our disclosure policy.

I just came across a picture on Pinterest showing me how to carve a swan out of a melon. I highly considered giving it a try for about negative .8 seconds – mostly because I knew for sure mine would turn out looking like a melon that fell out of my cart at the store and got ran over by a minivan.

Art and food? It’s not my thing. I think life’s too short to design owls out of kiwi, grapes, peaches, and blueberries when there are so many other important ways to spend time – like looking for lost shoes and sweeping up glass after a ball has been kicked through the kitchen (details not included). Also – I stink at art. Like, I draw a picture of a bunny and my kids say, “why did you draw a picture of our mailbox?”

But. Two weeks ago I saw a picture of veggies displayed in the shape of a flower and thought to myself: I can totally do that and I should do it for Easter. And so I did. It took less than 10 minutes (no joke) and people were like, “oh look it’s a flower.” Score one for me.

Build a Simple Veggie Flower

I think this is a great idea for a springtime wedding or baby shower, and it was definitely perfect for our Easter buffet. On a regular day, however? I will be throwing down the veggies and dip like my normal non-artist self.

What You Need to Build a Veggie FlowerYum

  • Broccoli
  • Baby Carrots
  • Celery
  • Cucumbers
  • Grape Tomatoes

Putting it all together is self explanatory – if you can do it I can do it. Just look at the picture above for the “how to.” Serve with these great dips:

  • Homemade Ranch Dressing

Ranch Dressing and Dip Mix

  • Easy Veggie Dip (Made With Homemade Seasoned Salt)

Easy Veggie Dip 1

Have you done much mixing of art and food? I draw the line at this veggie flower. :)

Heavenly Homemaker's Club Members: Access your homepage and all your fantastic resources here! Not a member yet? Please join us!

Build a Fruit Salad Bar

March 12, 2015 by Laura 2 Comments

This post may contain affiliate links. For more information, please see our disclosure policy.

Create Your Own Fruit Salad

Yum

Sometimes fruits and veggies just need to be served in an exciting way to make them more appealing. That – and some people in my house just won’t eat bananas.  If there are bananas in the fruit salad, one of my kids will refuse the apples, strawberries, and pineapple too. “I’ll just put the bananas on the side,” thought I, as I prepared to make a fruit salad for dinner. But then I got the better idea to put everything “on the side” so each person could fill their bowl as they like. Fun!

As it turns out, I got all the boys involved in prepping a fruit. The result was a beautiful spread of choices that everyone was excited to dig into.

Build a Fruit Salad Bar

Justus (our 15 year old) built his salad and took this picture. Beautiful!

There’s nothing complicated about this:  Simply slice or chop whatever fruit you have on hand and set it out for people to pick from as they fill their bowl. Lay out shredded coconut, dried fruit, and nuts if you like. Real whipped cream or cottage cheese added to the spread wouldn’t hurt my feelings.

This was a perfect side dish with our pasta and mixed greens tonight. I’m thinking it would be fun to serve for breakfast some time soon, too!

What are your favorite fruits to add to a salad?

~~~~~~~~~~~~~~~~~~~~~~~~~~~~~~~

Quick Note!

I made a mistake on yesterday’s Visit Omaha giveaway post. Durham Museum IS NOT free. my bad  It’s the Joslyn Museum that’s free. I made the correction on the giveaway post, but wanted to make sure you got the update!

Heavenly Homemaker's Club Members: Access your homepage and all your fantastic resources here! Not a member yet? Please join us!

Honey Peanut Bars ~ Like a Healthy Payday Candy Bar

January 22, 2015 by Laura 25 Comments

This post may contain affiliate links. For more information, please see our disclosure policy.

Ladies and um, other Ladies (although surely there is a gentleman or three around here too):  We have a winner! Honey Peanut Bars it is!

Thanks to all who put in their vote as to which of the new healthy snack recipes from our upcoming eBook we should reveal early. It was a pretty close call on several. I put Malachi to work making tally marks as votes came in (a great school project for him). He had a lot of fun with it…

counting votes

Here’s how my afternoon sounded:

“Pizza Muffins are in the lead. They’re going to win for sure!”
“Mom! Peanut Bars have a ton of votes. They caught up to Pizza Muffins.”
“I think Oyster Crackers are going to pull ahead!”
“It’s back to the Peanut Bars. Why is everyone choosing that one?”

Yeah, Malachi doesn’t like peanuts. ;)

When it was all said and done, the Honey Peanut Bars won by several votes. Not to worry though. Our 227 Healthy Snacks eBook is almost finished. Then you’ll have access to all the recipes forever! (Our goal is to have the book ready for you by Sunday night.)

I mixed up a batch of these Honey Peanut Bars tonight again, just because they sounded good. Our older boys will probably finish them all off once they get home from basketball practice. What a perfect post-workout/bedtime snack for them. (With apples and cheese and whatever else they get out because…do I really need to explain?)

You should be excited to know that it only took about five minutes for me to mix these up tonight. Their simplicity is of the many reasons I love them. :)

Honey Peanut BarsYum

Honey Peanut Bars ~ Like a Healthy Payday Candy Bar
 
Save Print
Author: Laura
Serves: 8-10
Ingredients
  • 1¼ cup roasted, unsalted peanuts
  • ¼ cup roasted, unsalted almonds
  • ⅓ cup honey
  • 3 Tablespoons natural creamy peanut butter
  • ⅛ teaspoon sea salt
Instructions
  1. In a small saucepan stir honey, peanut butter, and salt together over low heat until well combined. Remove from heat.
  2. Stir in peanuts and almonds.
  3. Spread mixture into an 8x8 inch pan.
  4. Chill for 2 hours.
  5. Cut into bars.
3.4.3177

Honey Peanut Bars - Better Than a Payday

Told you they were easy to make! Go grab your simple ingredients and get busy on these bars. You will love them as much as we do (well, everyone but Malachi).

Grab your copy of 227 Healthy Snacks which includes this recipe and 226 more recipes and snack ideas that are super delicious!

227 Healthy Snacks 2

Heavenly Homemaker's Club Members: Access your homepage and all your fantastic resources here! Not a member yet? Please join us!

Low Sugar Peanut Butter Cake with Peanut Butter Cream Frosting

January 9, 2015 by Laura 24 Comments

This post may contain affiliate links. For more information, please see our disclosure policy.

Hallelujah, this peanut butter cake has less sugar than most breakfast muffins! This isn’t difficult, of course, because who decided it was a good idea to stir a bunch of sugar, corn syrup, and white flour together and call it “breakfast?” My apologies to all the donuts, poptarts, and poofy-puffs out there who just got their feelings hurt. It’s really not your fault.

Peanut Butter Cake

Indeed, not only do I serve this for desserts or snacks, I have been known to serve it for breakfast.

Now I know what you’re thinking. “This girl makes cake for breakfast all the time!” Okay fine. You caught me. (Other breakfast cake recipes: My Original Breakfast Cake and Pumpkin Breakfast Cake)

We do quite a few breakfast cakes around here, and I keep inventing more ideas. This is because breakfast cakes are easy and filling. My current favorite way to make breakfast is to bake a cake the night before, frost it with stevia sweetened frosting, then wake up to a ready-made meal. Pull out applesauce and fresh berries, and breakfast is served.

Here’s a little known secret about muffin and quick bread recipes: The batter can usually be spread into a 9×13 inch pan and baked into a cake. If you sub out white flour with whole wheat, replace the large amount of white sugar for a smaller amount of sucanat or honey, you have yourself a delicious and fun breakfast.

Serve meat or eggs with your cake if you need additional protein to start your day. Always serve fruit with your breakfast. (Sometimes I’m bossy.)

Low Sugar Peanut Butter CakeYum

5.0 from 1 reviews
Low Sugar Peanut Butter Cake with Peanut Butter Cream Frosting
 
Save Print
Author: Laura
Ingredients
  • ¼ cup butter
  • ¼ cup peanut butter
  • ½ cup sucanat
  • 2 eggs
  • 1 cup buttermilk
  • ½ teaspoon baking soda
  • ½ teaspoon baking powder
  • 1 teaspoon vanilla extract
  • 1½ cups whole wheat flour
Instructions
  1. In a small saucepan, melt together the butter and peanut butter.
  2. Stir melted mixture into the sucanat.
  3. Add eggs, buttermilk, baking soda, baking powder, and vanilla.
  4. Mix well, then stir in flour and mix until smooth.
  5. Pour batter into a 9x13 inch baking dish.
  6. Bake in a 350° oven for about 25 minutes or until a toothpick inserted in the middle comes out clean.
  7. Allow cake to cool before frosting.
3.4.3177

Peanut Butter Cream Frosting

1/4 cup butter, softened
1/2 cup natural peanut butter, softened
8 ounces cream cheese, softened
1/2 cup heavy whipping cream
1 teaspoon vanilla extract
Liquid stevia

Whip together all ingredients until thick and smooth, sweetening with stevia to taste. Spread over cooled cake.

Low Sugar Peanut Butter Cake with Peanut Butter Cream Frosting

Before anyone else can say it, I’m going to. “Did you see how much fat is in that frosting?!?!”

Mm-hmm. If it isn’t obvious to you by now by reading posts from this butter and coconut oil loving girl, it should be very clear to you how important I believe it is to eat plenty of healthy, real fats. Our brains need fat to thrive! (Why yes I have researched this for hours and hours.) It just so happens I’m nourishing my brain by eating this cake with a thick layer of frosting.

The low amount of sugar in this cake (which I cut into 24 pieces, by the way) combined with whole grains and healthy fats makes for a very nourishing treat. In case you’re wondering, the reason I use cream cheese and cream in my stevia sweetened frosting recipes is because when whipped together, those cream products provide bulk (taking the place of three cups of powdered sugar). Also – it’s cream cheese and cream! Does life get any yummier?

So there you go. If you haven’t served cake for breakfast yet, do this. Tell your kids I said, “You’re welcome.”

What’s your breakfast cake status? Tried it yet?

Heavenly Homemaker's Club Members: Access your homepage and all your fantastic resources here! Not a member yet? Please join us!

Hawaiian Fruit Salad

December 21, 2014 by Laura 43 Comments

This post may contain affiliate links. For more information, please see our disclosure policy.

XmasBrunch2011

This salad is super easy to make and super refreshing to eat. It is perfect for our Christmas Brunch!

Hawaiian Fruit SaladYum

Mix together three cups combination of any of the following:

Fresh or canned pineapple chunks or tidbits
Canned mandarin oranges or fresh clementines
Sliced bananas
Coconut flakes

Stir in:

1 cup sour cream
1 teaspoon vanilla extract

Mix well and serve. See how easy that is?!

Hawaiian Fruit Salad

Be sure to leave a comment on this post for a chance to win one of five $10 gift certificates to our Heavenly Homemakers Shop!

Heavenly Homemaker's Club Members: Access your homepage and all your fantastic resources here! Not a member yet? Please join us!

Cheesy Vegetable Casserole

December 20, 2014 by Laura 45 Comments

This post may contain affiliate links. For more information, please see our disclosure policy.

This Cheesy Vegetable Casserole makes it possible to help your entire family enjoy veggies!

XmasBrunch2011

This recipe is versatile so you can add your family’s favorite veggies – or be creative so you can learn to eat new ones. The mixture of all these ingredients makes any vegetable taste great!

Cheesy Vegetable CasseroleYum

Cheesy Vegetable Casserole
 
Save Print
Author: Laura
Ingredients
  • 2 pounds fresh variety of vegetables of your choice (broccoli, cauliflower, carrots, green beans, zucchini, or asparagus all work well)
  • ¼ cup chopped onion
  • ¼ cup melted butter
  • ½ cup mayonnaise (I use Hain Safflower)
  • 1 cup sour cream
  • 1  ½ cups shredded cheese (cheddar or Colby jack work well)
  • ½ teaspoon sea salt
  • ¼ teaspoon ground pepper
  • ¼ teaspoon garlic powder
Instructions
  1. Chop vegetables into bite-sized pieces.
  2. Stir all ingredients together in a large bowl.
  3. Pour into a 2-quart baking dish.
  4. Bake, uncovered, for 45-60 minutes in a 350° oven.
3.4.3177

Cheesy Veggie Casserole

This recipe is perfect to add to your holiday brunch table. Here are some dishes I recommend serving with your Cheesy Vegetable Casserole for brunch:

  • Angeled Eggs
  • Bacon Tomato Dip with Baked Tortilla Chips
  • Fruit Salad
  • Honey Peanut Bars
  • Hot Spinach and Artichoke Dip
  • Nectarine Cream Cups
  • No-Bake Chocolate Fudge Bites
  • No-Bake Peanut Butter Cookie Bites
  • No-Bake Snickerdoodle Bites
  • Pineapple Fluff Salad
  • Ranch Cheese Ball
  • Beef Summer Sausage
  • Barbecue Brisket
  • Crock Pot Barbecue Chicken Breasts
  • Turkey Ranch Pinwheels

The thing about brunches is that you’re wide open to serving just about anything – from main dish to side dish to breakfast dish to dessert. That’s what makes them fun. Putting this Cheesy Vegetable Casserole on the table – even with other breakfast type foods like muffins and sausage – really adds something special. And let’s not forget that it means your putting veggies on the table. With cheese. Veggies with cheese are always a hit!

What are your favorite dishes to add to a brunch table?

Check out DHGate for their fun kitchen gadgets!

Heavenly Homemaker's Club Members: Access your homepage and all your fantastic resources here! Not a member yet? Please join us!

Easy Peppermint Milkshakes

December 11, 2014 by Laura 4 Comments

This post may contain affiliate links. For more information, please see our disclosure policy.

It’s easy, filling, healthy, and delicious – a perfect treat anytime, but especially during the Christmas season. Serve a Peppermint Milkshake for a perfect side dish or snack!

Easy Peppermint MilkshakesYum

2 cups milk
1 Tablespoon real maple syrup
¼ teaspoon peppermint extract

Blend and serve!

We always add organic, farm-fresh raw eggs to our milkshakes for added nutrition. I believe this simple recipe would work great with coconut milk as well. :)

Easy Peppermint Milkshake

Heavenly Homemaker's Club Members: Access your homepage and all your fantastic resources here! Not a member yet? Please join us!
« Previous Page
Next Page »

Join Our Community!

 Facebook Twitter E-mail Instagram Pinterest

Popular Posts

~ Will All of the Real Moms Please Stand Up?
~ Easy! Stir-and-Pour Whole Wheat Bread
~ How to Make Gatorade
~ 31 Real Food Breakfast Ideas
~ Dear Teenage Girls...
~ When Mom Takes a Step Back
~ The Inexpensive Health Insurance We Love!
~ Let's Talk Real Food Grocery Budgets

Check out our latest posts!

  • Big Family Food and Fun: May 31-June 6, 2026
  • Big Family Food and Fun: May 24-30, 2026
  • Free 7-Day Summer Menu Plan
  • Big Family Food and Fun: May 17-23, 2026
  • Easy Side Dishes for Summer
Home  ~  Simple Meals  ~  Club Membership  ~  Shop  ~  Privacy Policy  ~  Disclosure  ~ Contact

Copyright © 2026 · Beautiful Pro Theme on Genesis Framework · WordPress · Log in